COG Armor - Gears of War 3 - Foam Build

DRG

Active Member
Been lurking here for awhile and enjoying everyone's else's work, so I figured I'd join in on the fun. I've posted this elsewhere, but figured why not here as well. I've been working on a foam build of the COG armor from Gears of War 3. It was my first attempt at using EVA foam, so I made a few mistakes along the way, but I'm pretty happy with how it turned out and I'm looking forward to using it again.


Instead of focusing on a specific character, I wanted to be an amalgram of some pieces I liked from different armor sets. This sort of fits in the tradition of the game, where they were mixing and matching armor as the war went on. I just decided I'm some COG soldier you was never seen in the game... maybe one of the COG tags found along the way?
I based the chest armor on the standard 'COG Gear/Golden Gear' armor (almost the same as Baird's, but with differences in coloring).
examples.jpg


In the beginning I couldn't find the standard anti-fatigue foam where I live, but browsing through the clearance section at Walmart I found a bunch of these on clearance.


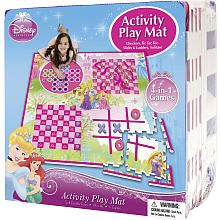
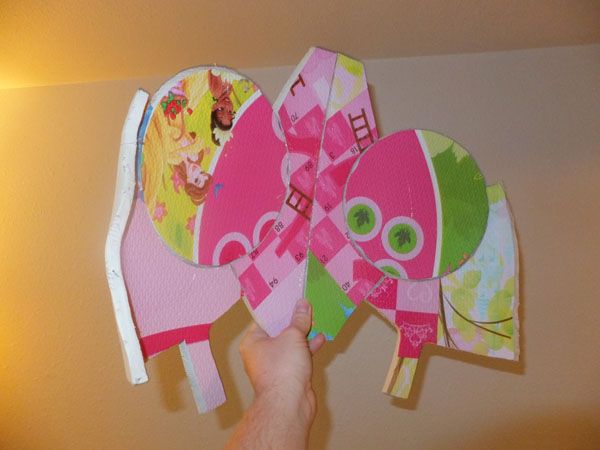
They're smaller than the big sheets (about a square foot of usable area on each piece), but I got 6 sets of them for 5 bucks a pack and with 14 sheets per pack it's still a really good deal for EVA foam. But they make the inside of my armor look like this:


Since I couldn't find a workable 'foam' pep file for what I was doing, I mostly had to design things from scratch but I did use pep files to help build rough paper and posterboard mockups for sizing/scaling purposes.

Chest


DSCF1006.jpgDSCF1124.jpgDSCF1238.jpgDSCF1523.jpg
I sort of messed up in leaving enough room for the LEDs in my design. I made it work, but it was tough.
DSCF1533.jpgDSCF1535.jpgDSCF1544.jpgDSCF1557.jpg


Some party favors and foam darts from the dollar store to recreate some of the hinge details.

DSCF1648.jpg


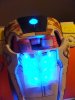
You can see where I stashed the battery holder for the back lighting.
DSCF1645.jpg


As difficult as the back was to wire, I REALLY had a hard time getting the shoulder lights in place.
DSCF1662.jpgDSCF1681.jpg

Made some little battery holder pockets inside the suit.
DSCF1701.jpg


DSCF1698.jpgDSCF1699.jpg
 

Attachments

  • DSCF1538.jpg
    DSCF1538.jpg
    70.6 KB · Views: 894
Boots

I built my boots around a pair of $10 Wal-Mart EVA clogs. I did the frame-over-shoe thing on a previous Lego costume and it annoyed me having the boots 'float' over my feet.

I started by building a 'wraparound' piece.
DSCF1740.JPGDSCF1743.JPG

And glued it around the clog.
DSCF1744.JPGDSCF1745.JPG

I build the base around this (and also reinforced it inside).
DSCF1751.JPGDSCF1784.JPG

Started the upper boot
DSCF1778.JPGDSCF1783.JPG

For anyone with knowledge of the different COG armor looks, I wanted the Clayton Carmine style boots but in the COG Gear color scheme.

DSCF2111.JPGDSCF2148.JPG

This is close to completion... I added more detail later.
DSCF2167.JPG
 
Belt

A few reference shots.
belt.jpg

I edited this piece a bit, some for practical reasons, others for time. I lost a pouch from each side... my waist just isn't as big as these guys. After a few tests I also decided to drop the hip pad things. Also, my pouches are missing a few adornments.

The front:
DSCF2197.JPG

Back plate closeup:
DSCF2200.JPG

It connects together with a clip from a dollar store dog collar.

DSCF2908.JPG

Basic belt plastidipped. I added all the pouches and other attachments later.
DSCF2205.JPG

For the pouches, I did them a bit differently than I did the boot bags since I wanted these to be functional. I started with a thinner piece of craft foam (still strong enough to hold items). I wanted a final product that's somewhat 'flexible' with a canvas ammo bag might be, plus if I went with the thick stuff I would have have to make the pouches twice as big to account for the extra internal depth.

DSCF2214.JPG

I created a 'form' (the white/pink piece) out of thicker foam and build around this with thinner foam for each pouch. This helped in hot gluing the thing together and retaining the shape. Once I had the shape I pulled the form out.

DSCF2212.JPG

Using duck cloth to cover.
DSCF2213.JPG

'Leather' straps.
DSCF2227.JPGDSCF2228.JPGDSCF2230.JPG

The pouches all seal with some magnetic clasp things that are for purses.

DSCF2918.JPG

The belt in-game has this canister sort of thing on one side. I think it's the grenade. Since I'm wearing this to a party I wanted to repurpose this as a beer bottle holder/koozy. I added a removable topper so it would look more screen-accurate for pics as well, but it popped off in half the pics. Oh well.

DSCF2231.JPGDSCF2242.JPG

Finished* belt from the front: (* Minus the canister top)

DSCF2910.JPG

Belt from the back:

DSCF2915.JPG

Bracers

Here's one of the arm bracers. Technically, the bracers I'm referencing don't have rivets in them, but they just looked really strange when I did it without them.

DSCF2907.JPG
 
Lancer

I decided I wanted to build a Lancer from scratch out of foam. I basically started with a side view lineart drawing of the gun. I decided it needed to be 5 layers deep of the standard thickness floor mat foam (which I finally found) since the princess mats are only 11"x11" or so and I wanted the outside pieces to be continuous with no obvious seam. In Photoshop I duplicated this layer 3 times, shown here:

lancer-layers.jpg

Basically the plan was to sandwich 5 layers together, with a single 'core' layer in the center, an 'inner' layer on either side of that, and the 'outer' layers outside those.

Here is the raw result, not yet glued together.

DSCF2248.JPG

Here is my trigger in place. It doesn't do anything, but it is spring loaded and fun.

DSCF2845.JPG

Here are lights in place. Sadly I have no pics of the mess of wire canals inside this thing, probably because it was just a pain to stuff them all in in first place that once I got the thing closed I glued it all shut.

DSCF2836.JPG

All together, here's the top view to see the layers.

DSCF2848.JPG

A shot of the battery compartment. Finished shots later. Also, I had to use some foam putty filler to smooth out the top, since somewhere in the pattern cutting-tracing-foam cutting process the pieces were slightly misaligned. This made my cover pieces lumpy so I tore them off and had to smooth the surface down.

DSCF2858.JPG

Started detailing the chainsaw part.

DSCF2839.JPG

Fine detail of the forend cover.

DSCF2852.JPG

I added the clip holder bar thing after the fact.

DSCF2870.JPG

With most of the detail layers applied, various heights of foam plus a few other things here and there. Light covers are off at this point because I was smart this time and plastidipped/spray painted those pieces separately to glue them on later, allowing me to paint them fully without masking issues.

DSCF2882.JPG

Plastidip time!
DSCF2892.JPG]

After a basic silver and black paint.

DSCF2916.JPG

The side handle they use to hold the saw in 'chainsaw position'. I used a cheap little hinge because this was sort of an 'if I have time' add-on for me. It's probably the flimsiest part of the gun when opened, but I figured I'll only extend it out a few times for pics. I put little magnets in place to hold it against the gun when not in use.

DSCF2924.JPGDSCF2948.JPG

Now I wanted this bloody. I some prefer them 'clean' and I thought this over. But for me, it's a chainsaw and this is for Halloween, right? Plus I figured it would hide a few imperfections in my saw blades.

The problem I have with many blood aplications (including the official replica) is that it looks like red paint. I wanted this to have that sort of translucent, shimmery wet gory look. I also wanted it to be permanent and not something that would smear off or be sticky (like corn syrup blood). What I ended up doing was mixing Mod Podge with red food coloring and slathered it on the blades. I also spritzed some store-bought fake blood (the kind that dries nicely) on there to add a bit of a spatter effect. The Mod Podge dried perfectly into a nice shimmery shell, although I had to go over a few spots with a red magic marker because it dried a bit 'pinkish' here and there.

DSCF2937.JPGDSCF2939.JPGDSCF2942.JPGDSCF2946.JPG

Completed shots, with lights on.

DSCF2970.JPGDSCF2976.JPGDSCF2977.JPGDSCF2978.JPGDSCF2981.JPG

And the finished battery compartment.

DSCF2983.JPG
 
Finished pics in costume

579068_10151684125775754_75518925_n.jpg996662_10151684125680754_652678552_n.jpg1381323_10151684125630754_338765121_n.jpg1385103_10151684125315754_1641028123_n.jpg564512_10151684125575754_1969240509_n.jpg

The goggles are a pair of GloSpex modded to fit prescription lens inside. I detached the GloSpex power/control box from the GloSpex arms and replaced the arms with a 'leather' strap. The look I was going for was something in between Baird's goggles and Griffin's shades.
 
Ha, yeah I agree. I was going to cover it up but I just thought it added something to the whole endeavor. :)
 
*Marcus Fenix Active Reload Version!* - "NIIIICEEE!!!!!"

Obviously I love GoW hence my name but when I joined on here Judgment was the newest version of it.
Im looking at this on mobile and I must say, this is truly amazing.
Never liked Bairds armor in gow3 his gow1 outfit was waaay better.
In the future when im done making this silicone mask project im working oGoW'd like to make Marcus's Classic Armor from GoW3 (I feel like that one is his best for refrences and detail compared to others. Im still waiting for gow4 to add his classic outfit lol)

And again amazing details and work-
(I hope I can get some help from you in the future)
 
This thread is more than 6 years old.

Your message may be considered spam for the following reasons:

  1. This thread hasn't been active in some time. A new post in this thread might not contribute constructively to this discussion after so long.
If you wish to reply despite these issues, check the box below before replying.
Be aware that malicious compliance may result in more severe penalties.
Back
Top