Helmet and costume build - first Pep ever!

Gscadam

New Member
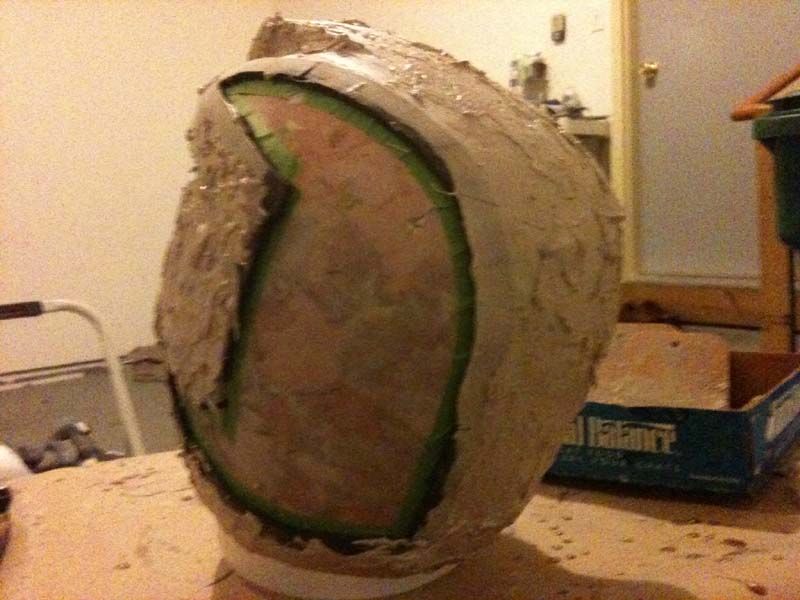
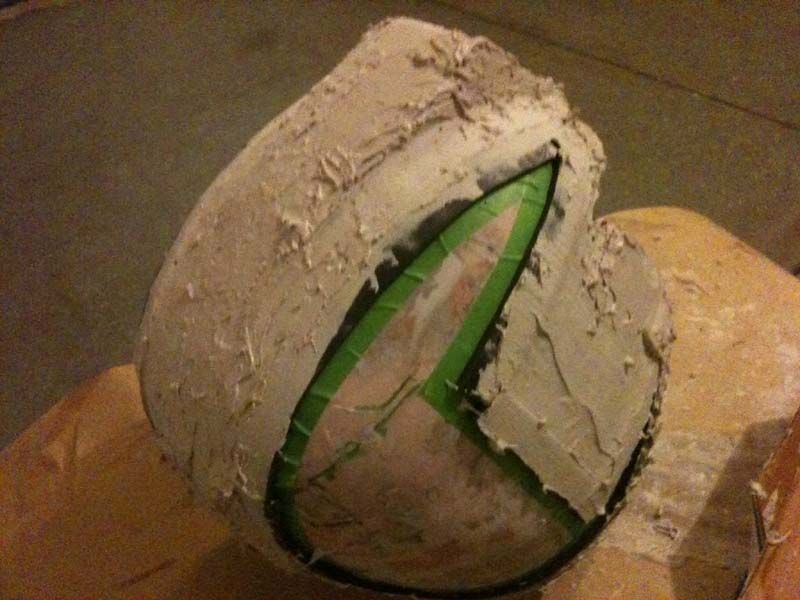
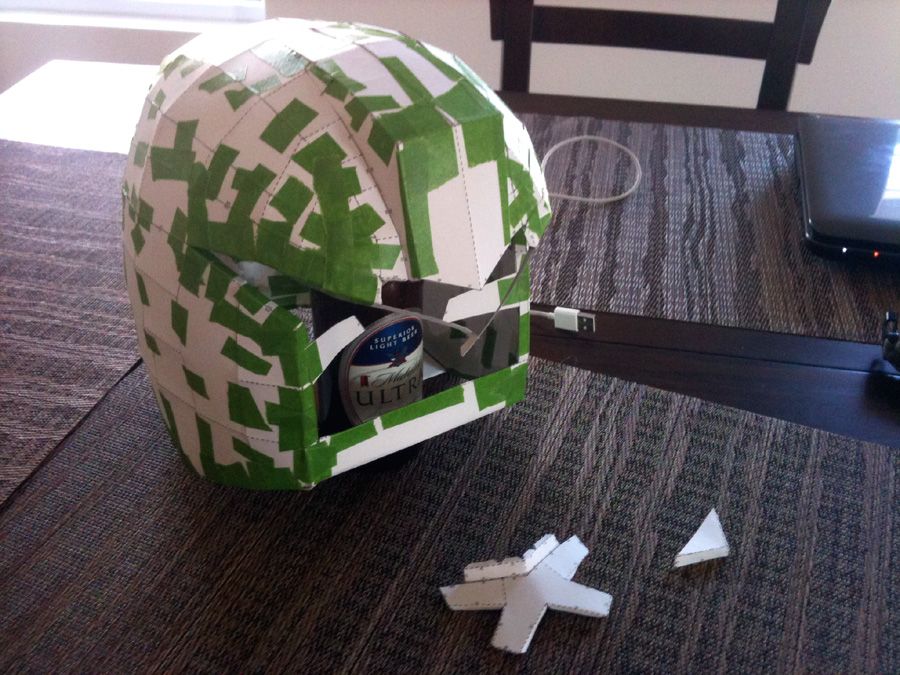
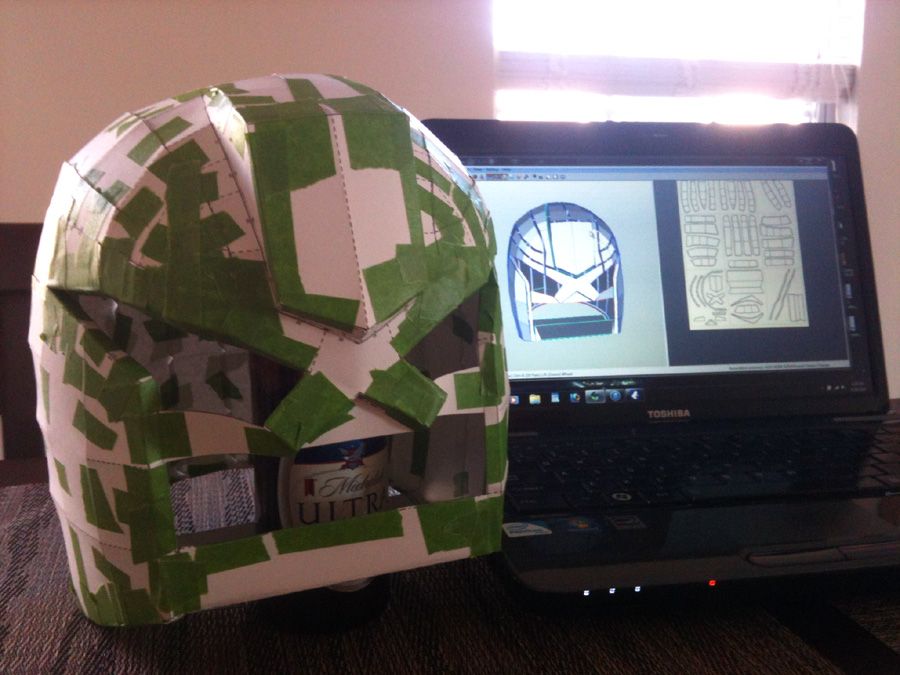
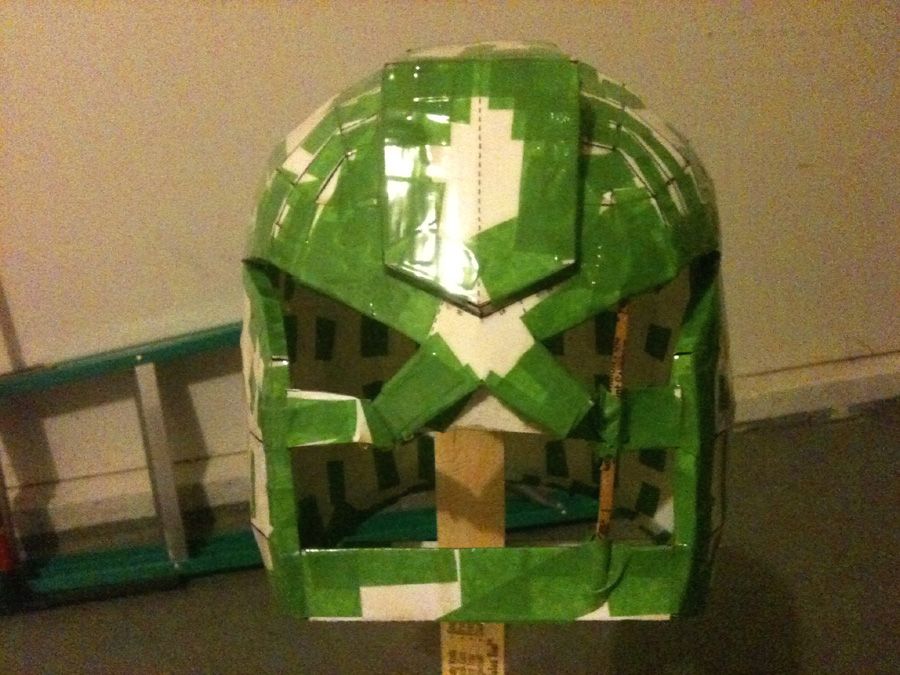
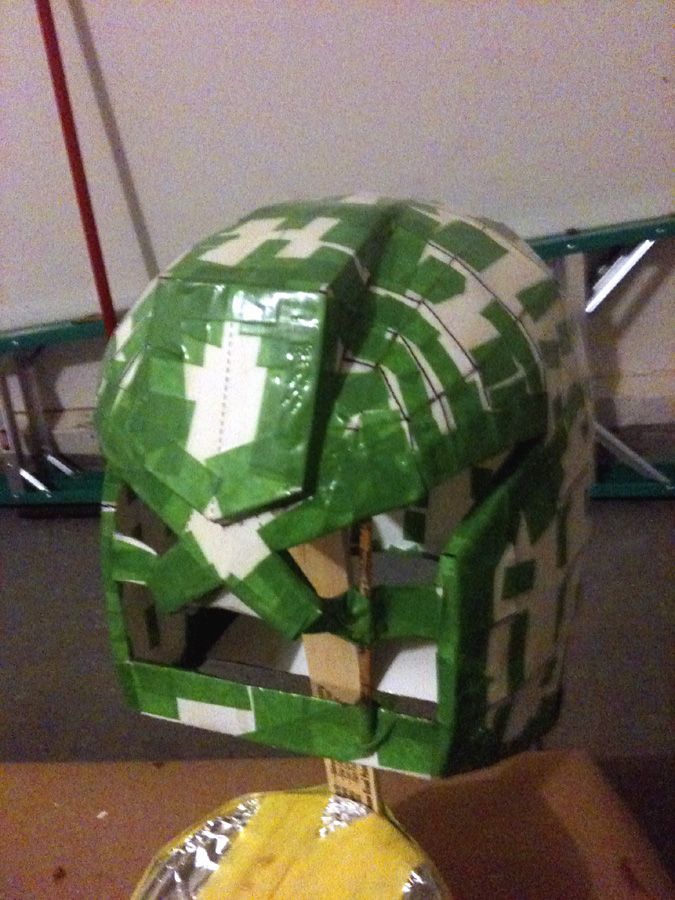
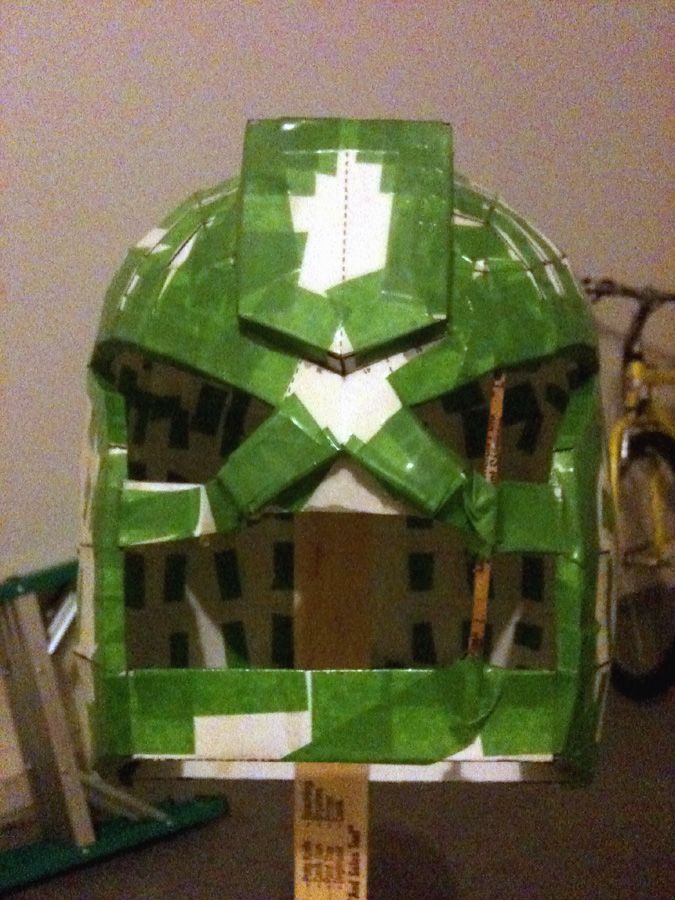
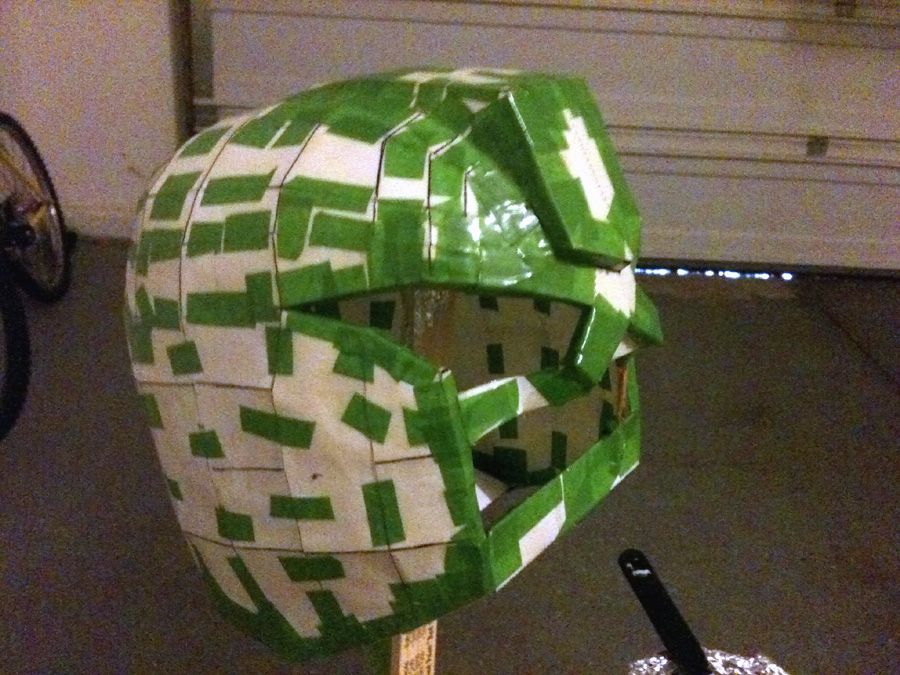
I've never attempted anything like this before, this is all a first for me! Been lurking for a bit, but having been inspired by some of the sweet lids and homemade armors, I'm building a Dredd helmet from the Blaxmyth pep file. Seeing as I didn't have a clue on what I was doing, I printed out and assembled an A4 sized (and then scaled to fit) copy, which is a fit without any padding but will eventually be cut and extended. I printed out the proper Letter sized version and did not do any scaling, cut and assembled, and it seems to be great!


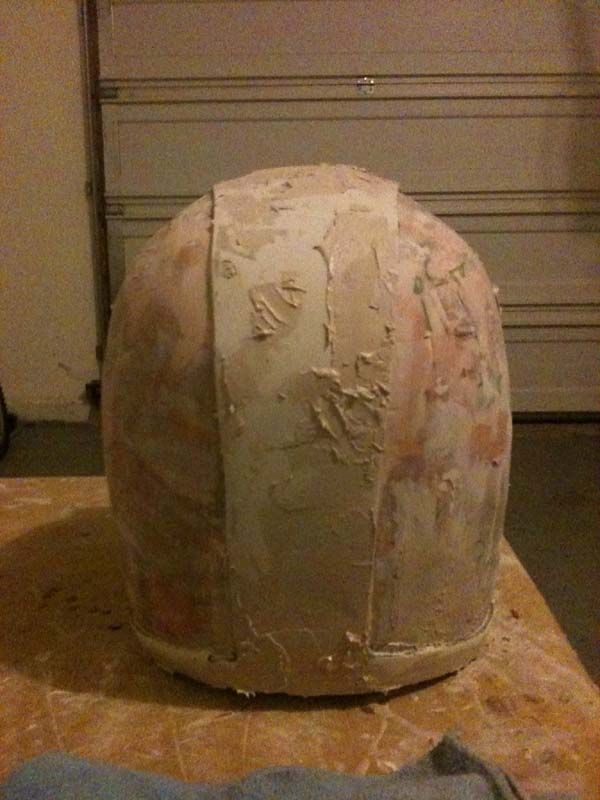
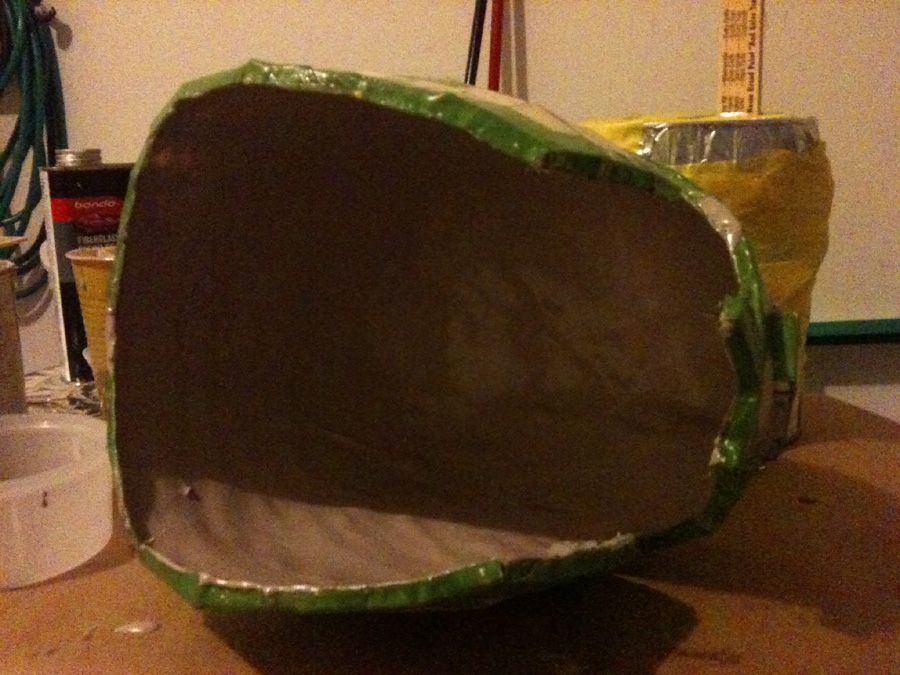
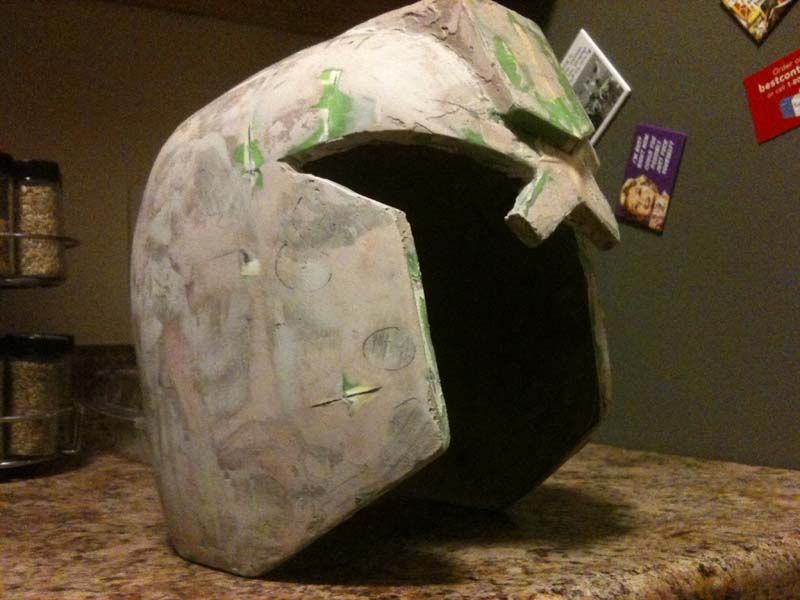
Assembly, yes I used tape, I was impatient and did not want to wait to source proper glue. After assembly I did brush the pep with a Elmers glue mixture (just a little water) to harden it up a tad. This is probably unnecessary and did cause some edges to come up on the tape.

Helmet_Pep_001_zpsb1a769d8.jpg


Helmet_Pep_002_zpsde9335a7.jpg


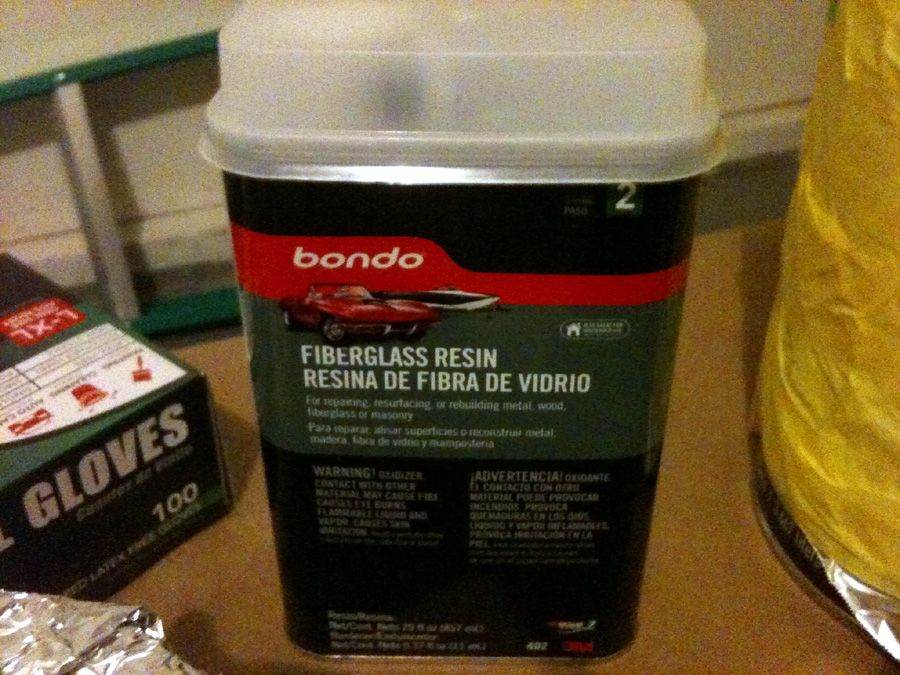
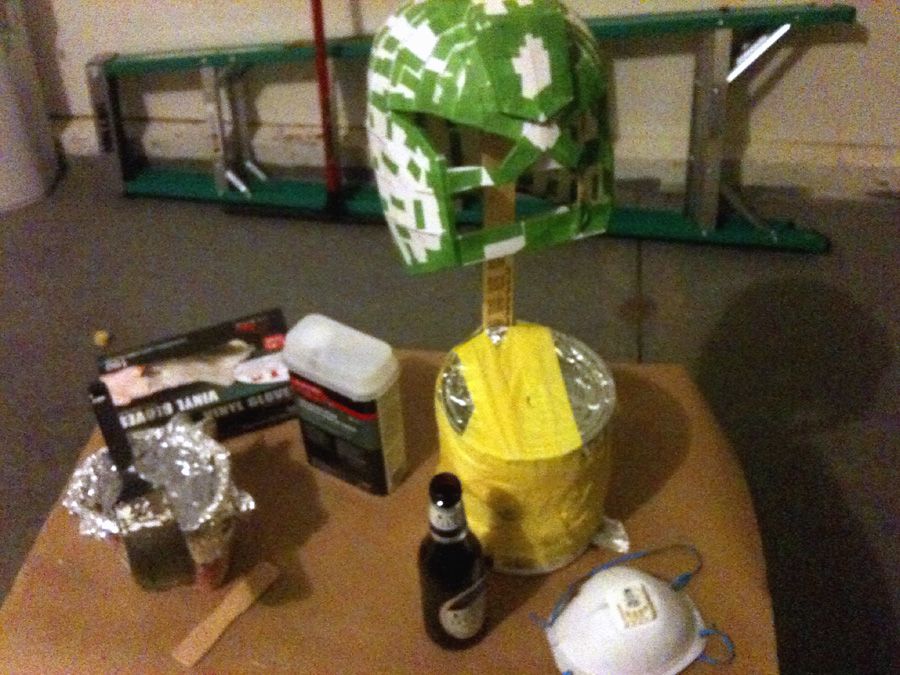
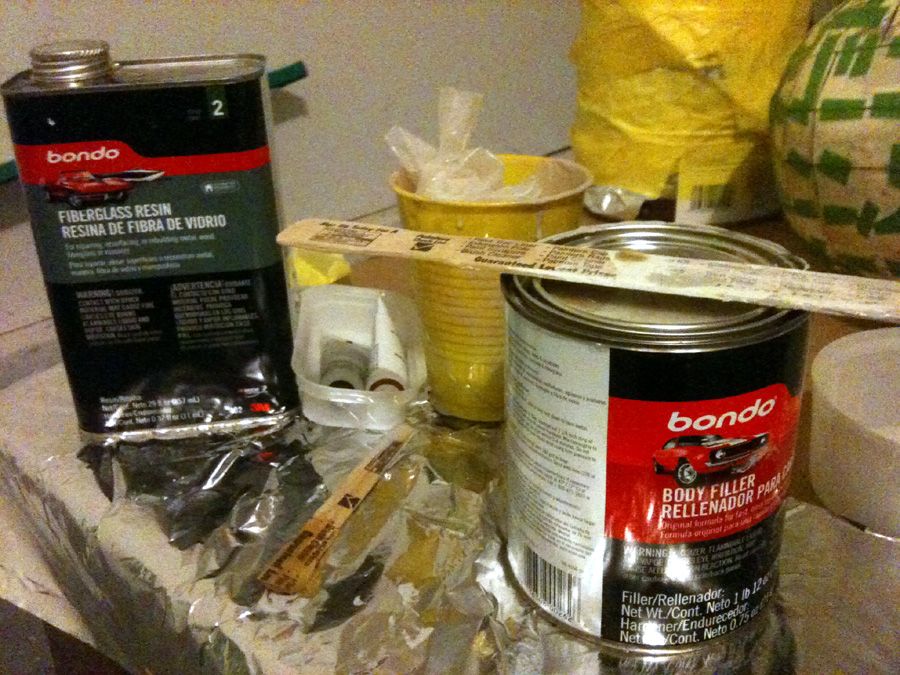
Had time to hit Walmart on my way home from work, grabbed some resin.

Helmet_Pep_Resin_002_zps28a0aee8.jpg


Workstation (my garage, door open for fumes)

Helmet_Pep_Resin_001_zps09d8f85d.jpg


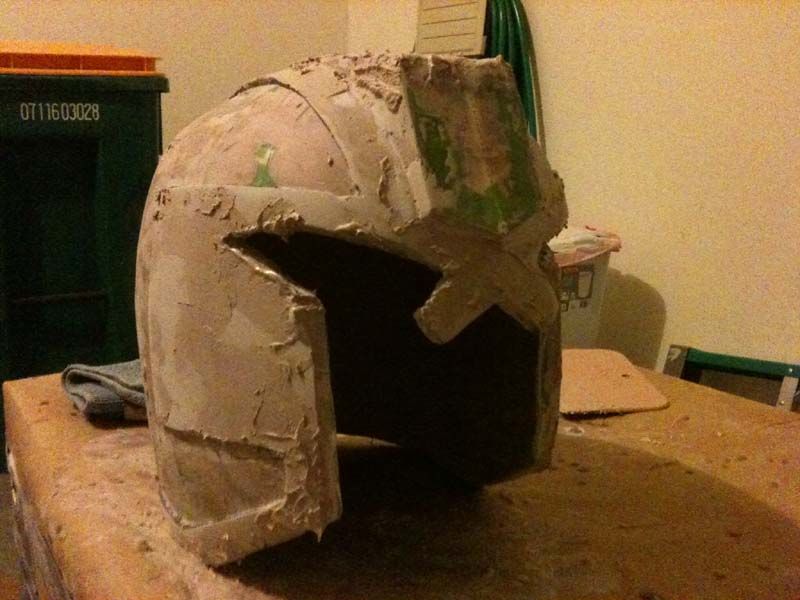
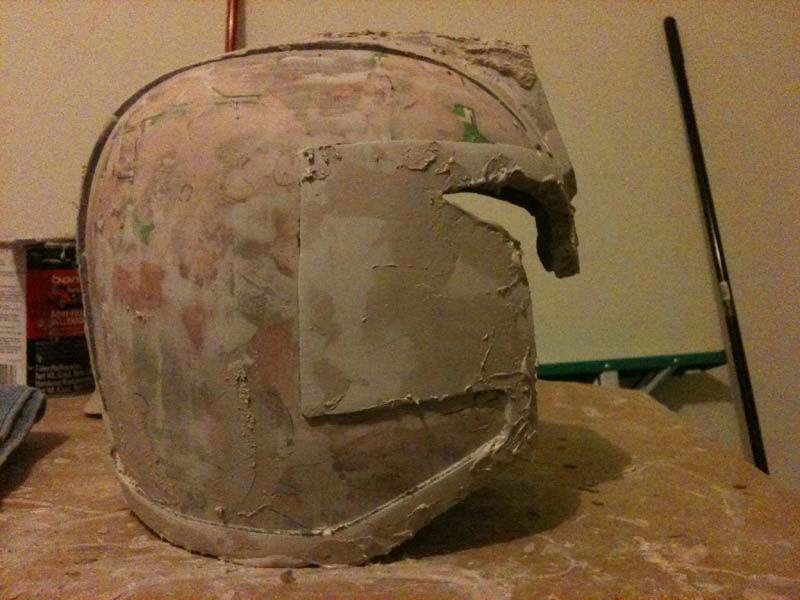
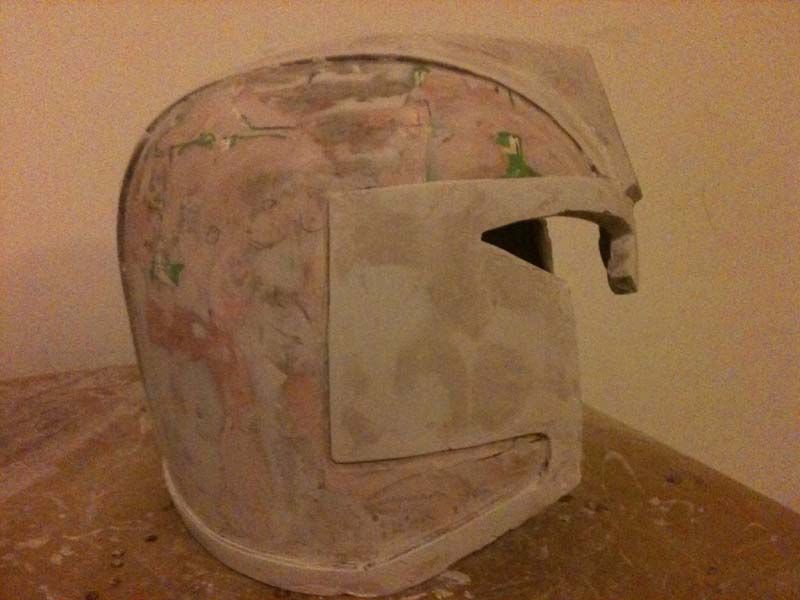
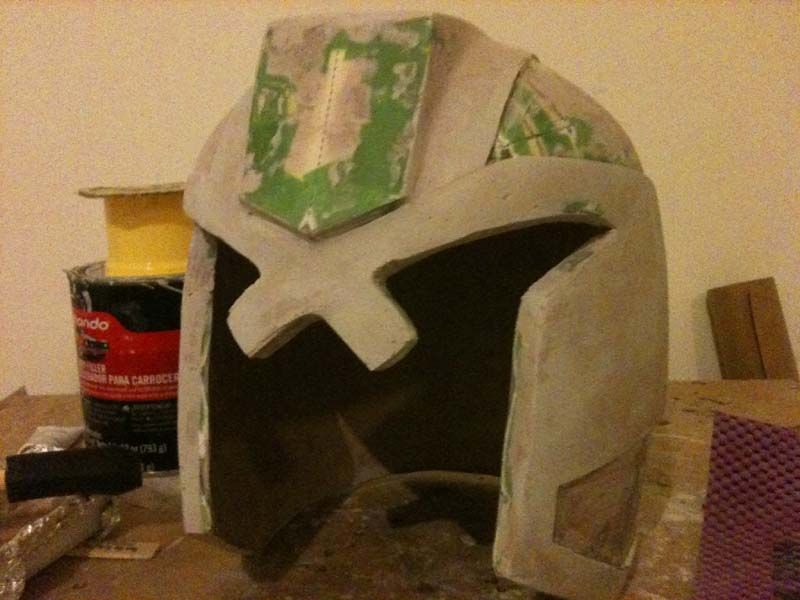
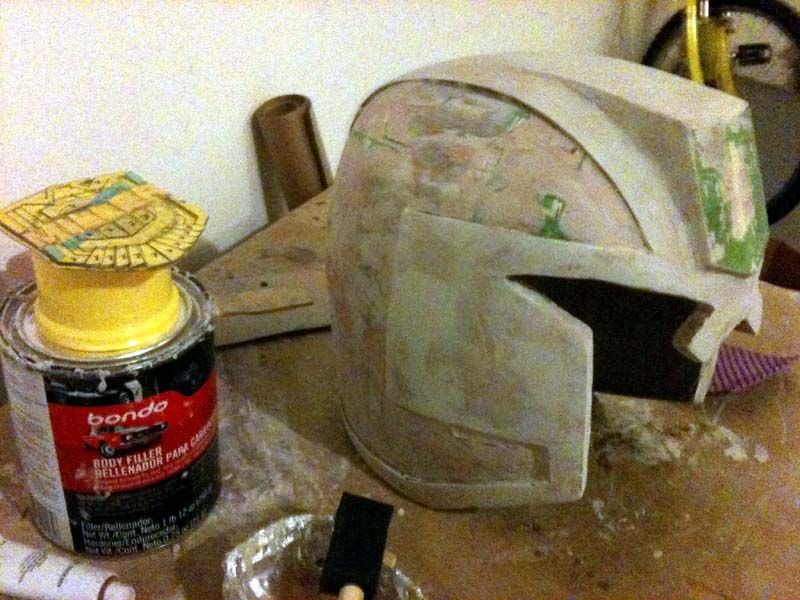
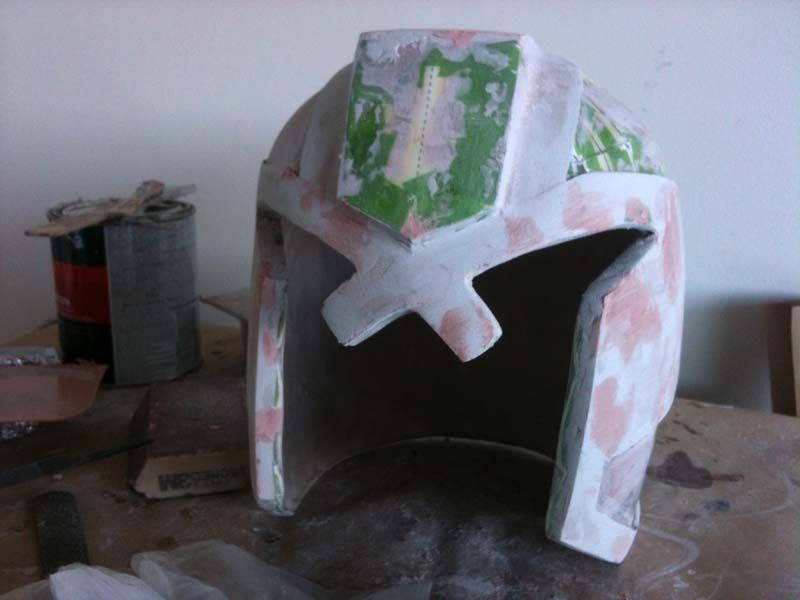
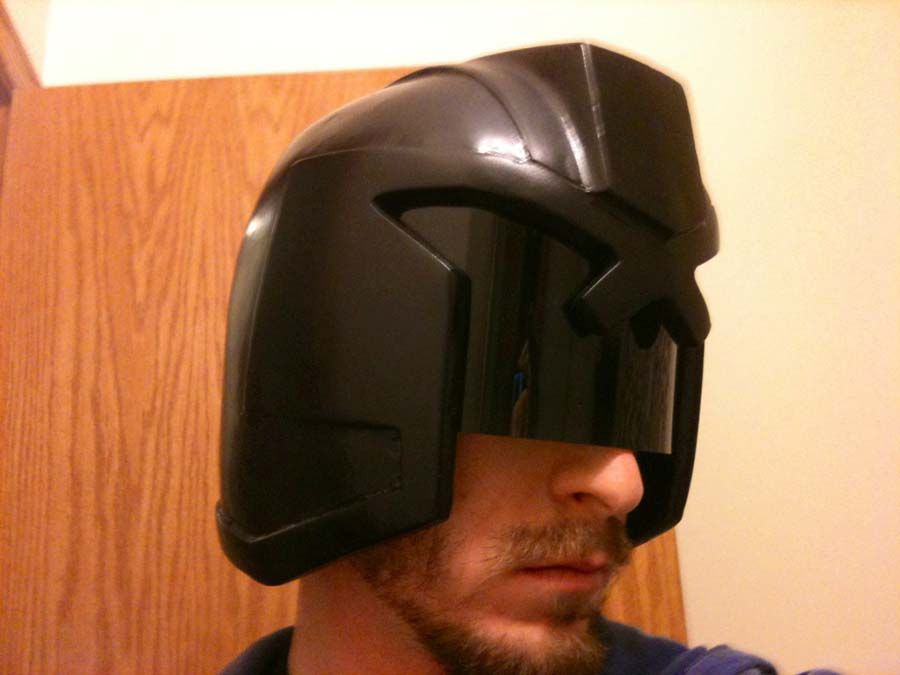
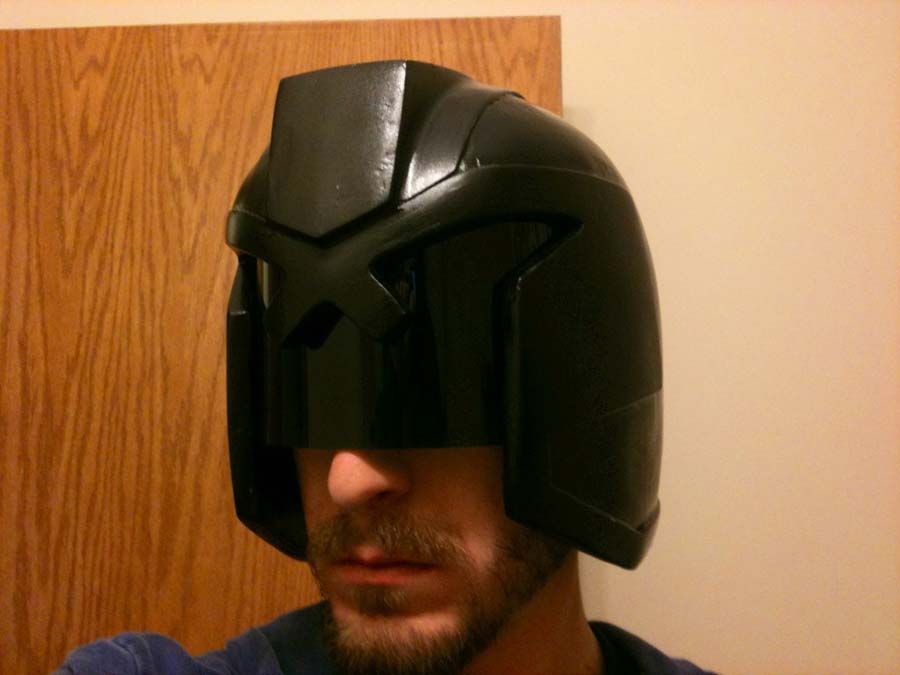
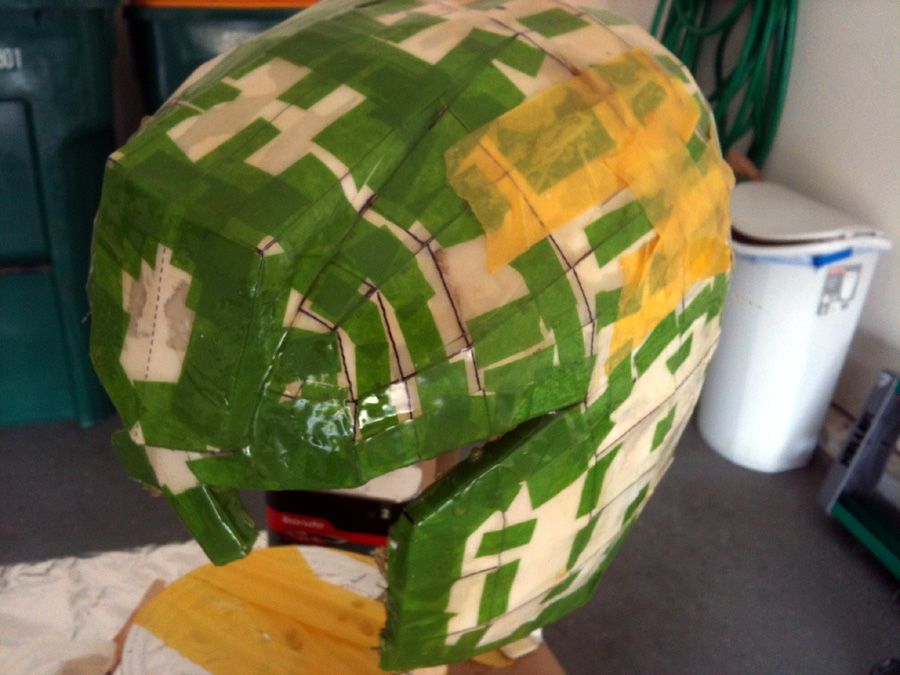
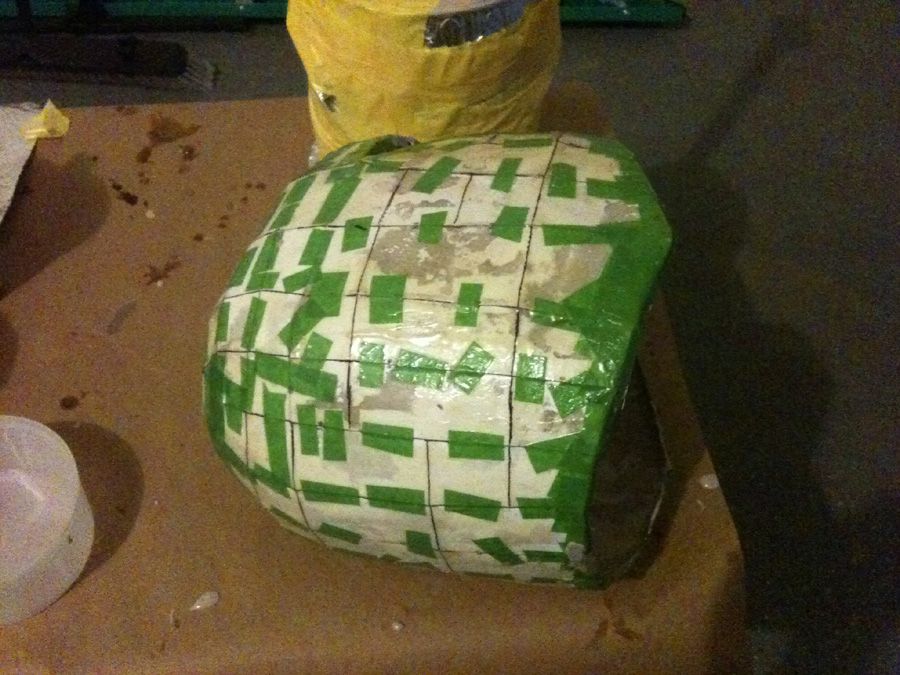
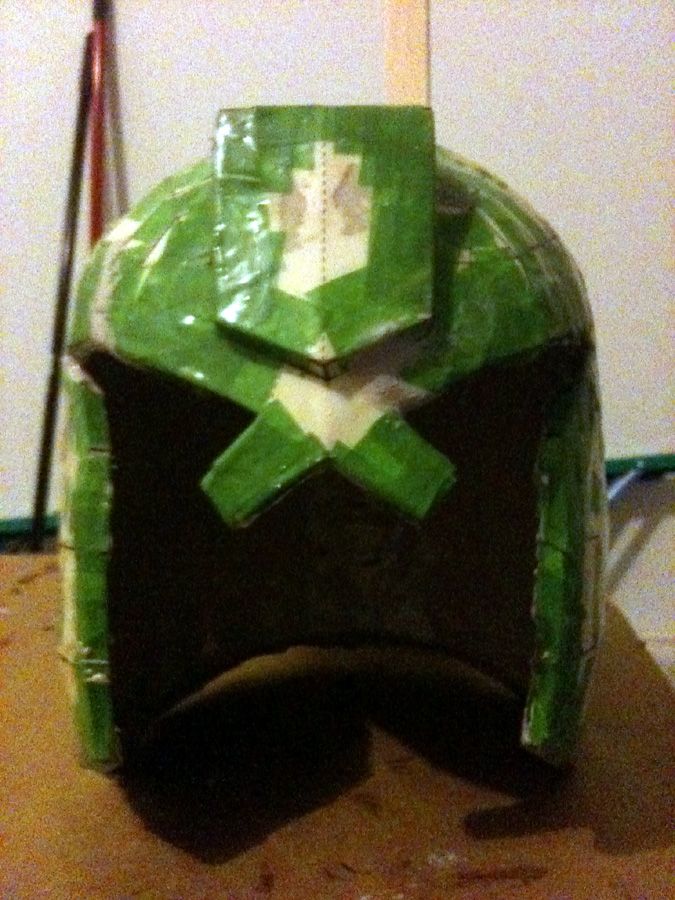
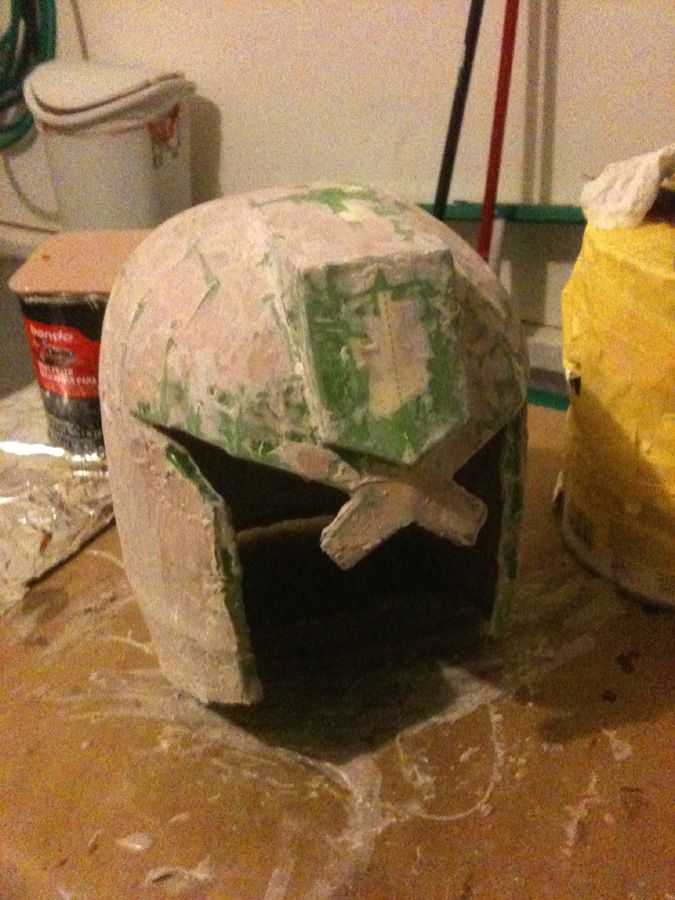
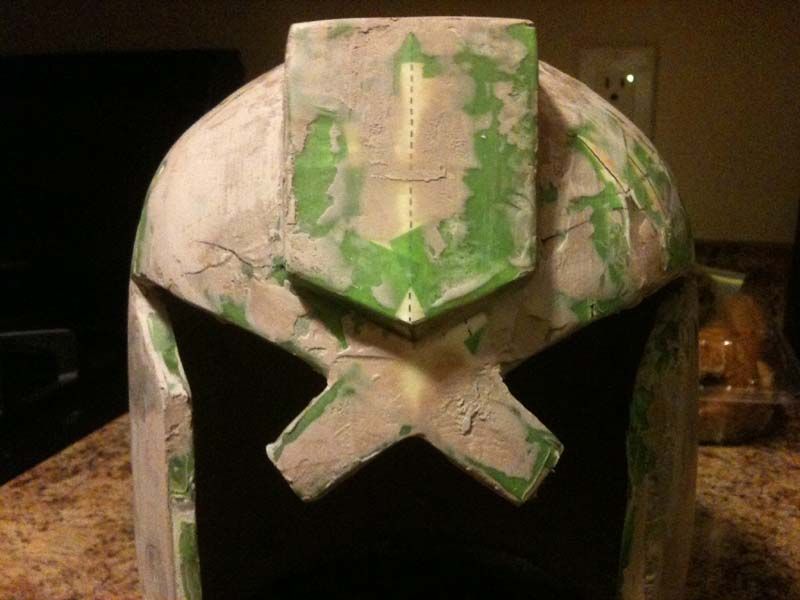
After my first coat of resin, I'm pretty pleased with the shape thus far. 1 more coat tonight on the outside, then I'll hit the inside and lay some fiberglass sheeting for strength. Bondo soon enough!

Helmet_Pep_Resin_003_zps4c10c9a5.jpg


Helmet_Pep_Resin_004_zps9a8e516c.jpg


Helmet_Pep_Resin_005_zps31e11638.jpg


Helmet_Pep_Resin_006_zpsd64844f6.jpg


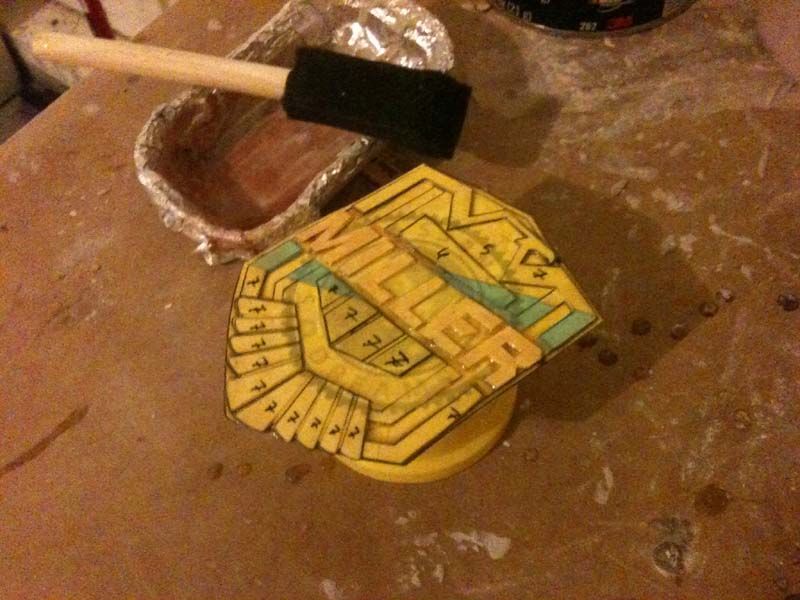
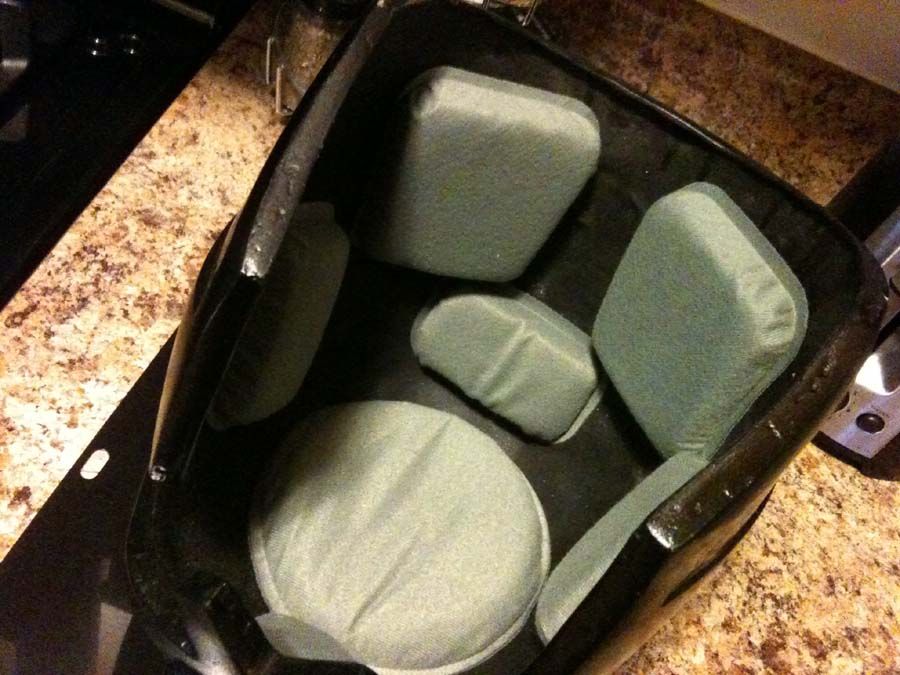
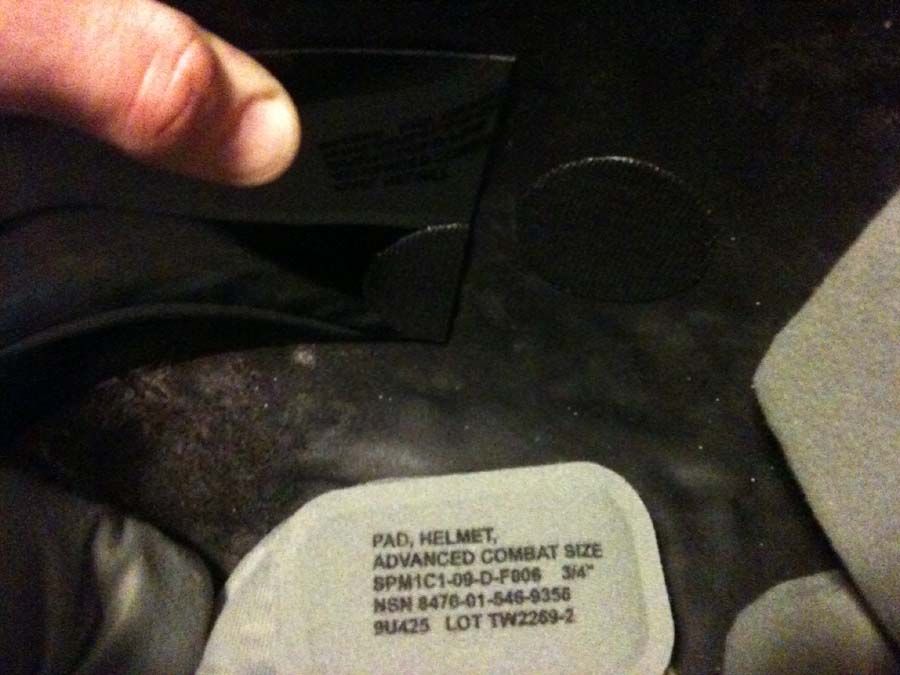
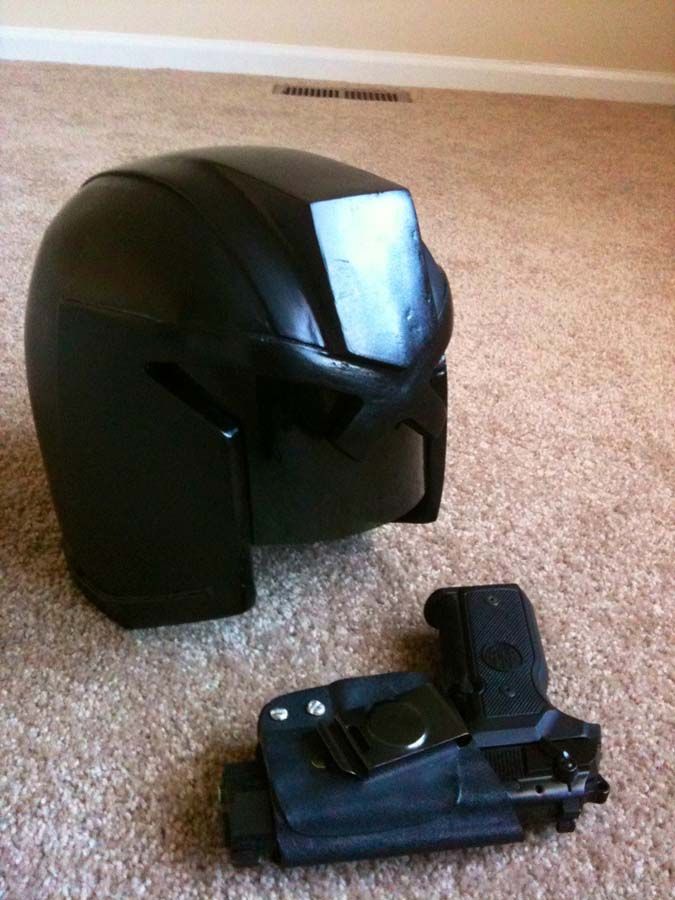
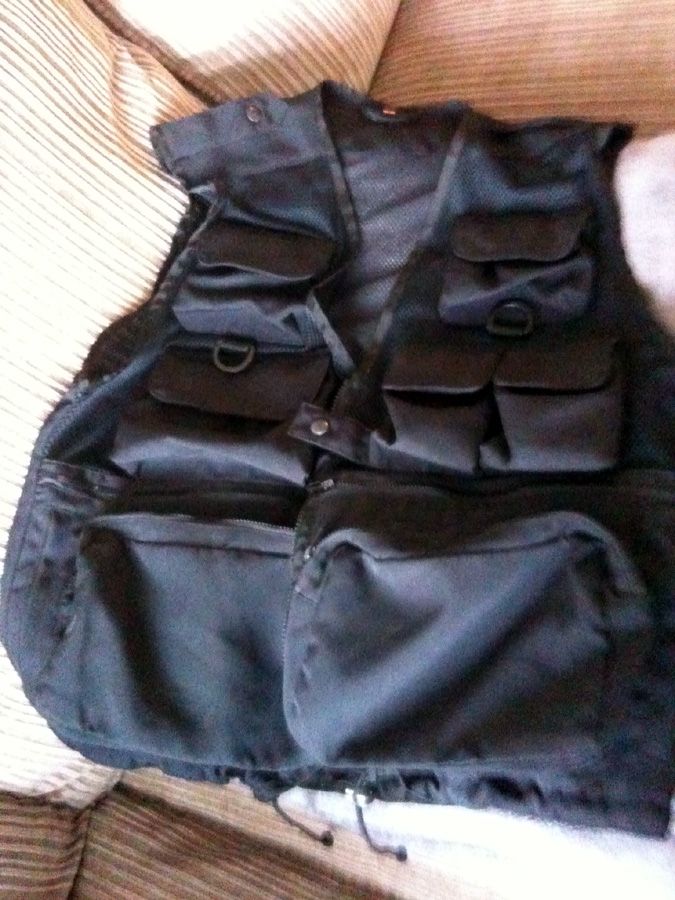
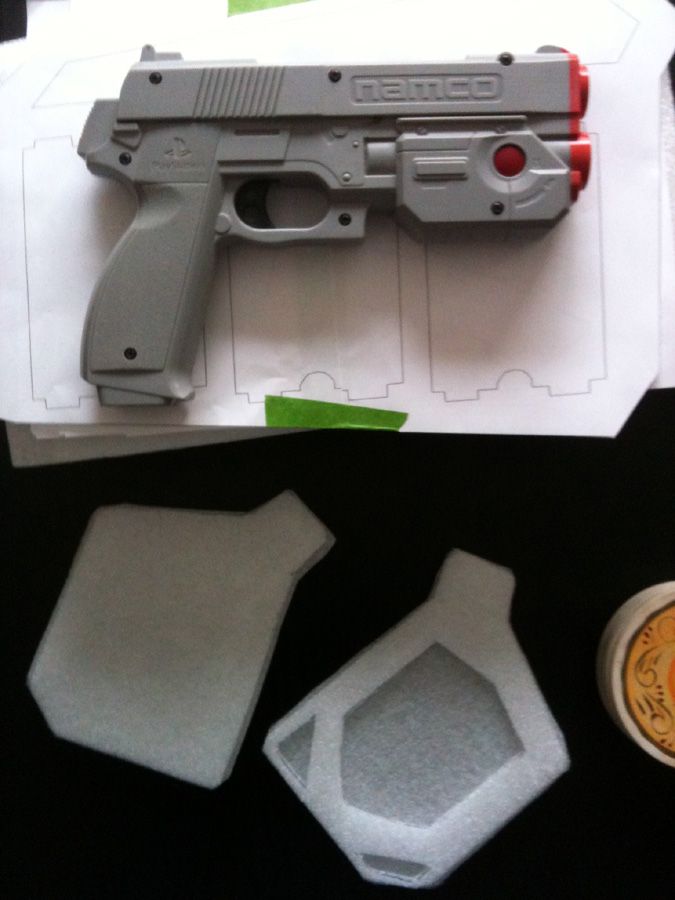
I have ordered a cheapo ($50 shipped) leather jacket off of fleabay and have an older Swat/tactical vest that will be perfect (I think anyway) to affix panels to for armor. I have foam sheets that I plan to seal and paint, I might need to get another type of foam but these were free so they get first crack. Also I am bidding on a Nerf Retaliator on Ebay as well, if it falls thru another trip to Walmart will be in order.


Tips or comments are welcome, I am a total newbie here. Cheers! :cool
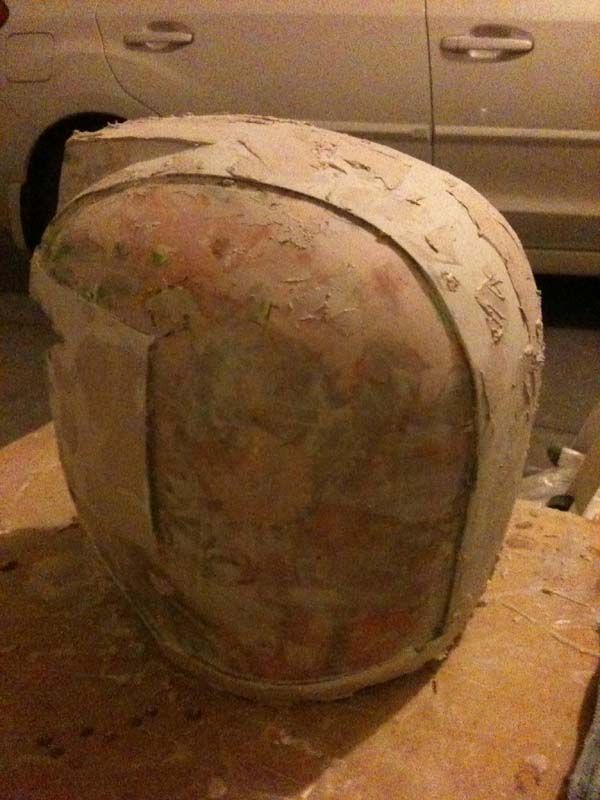
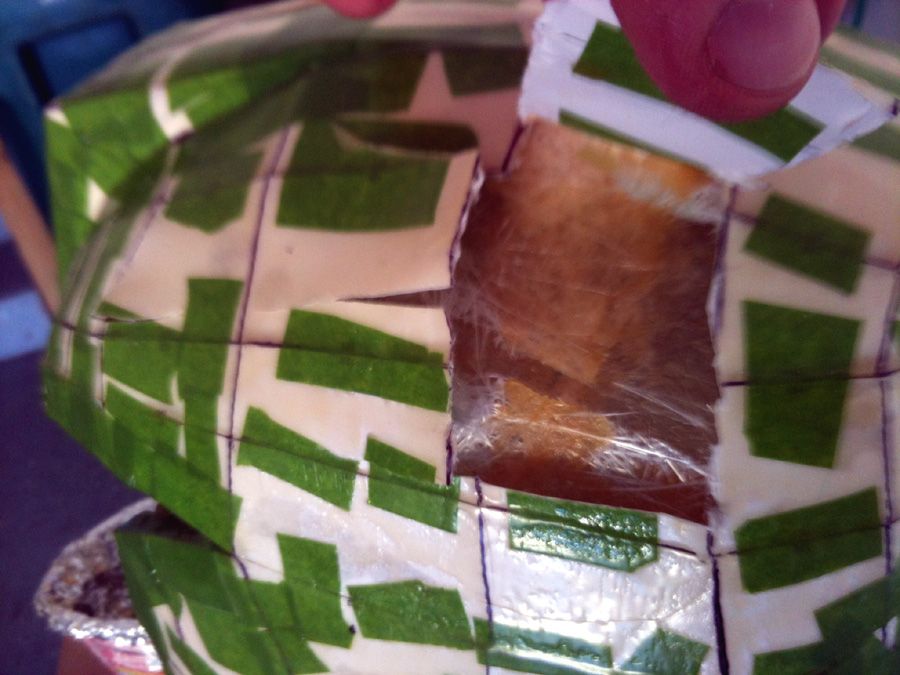
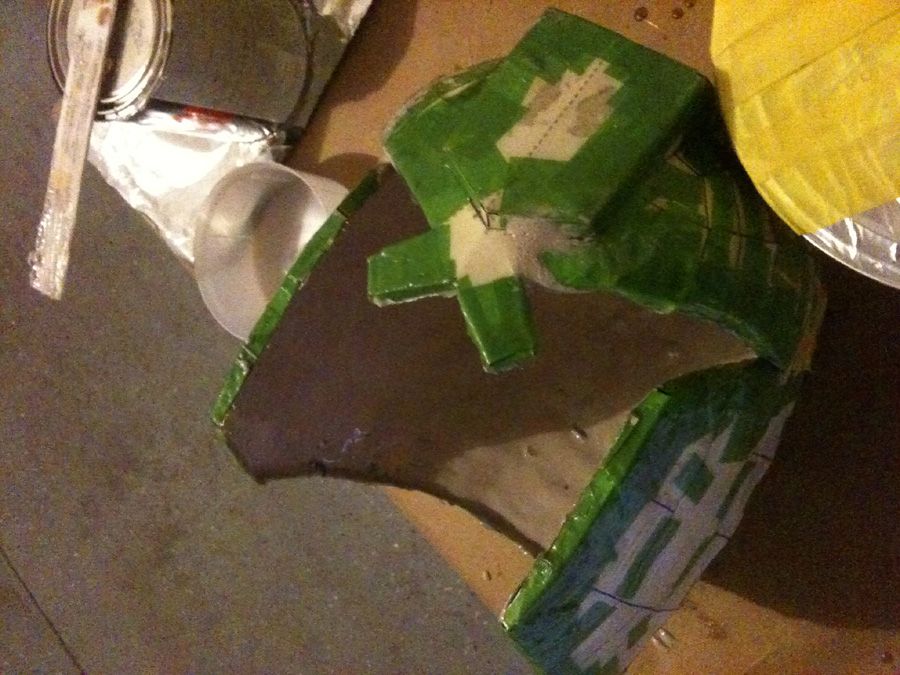
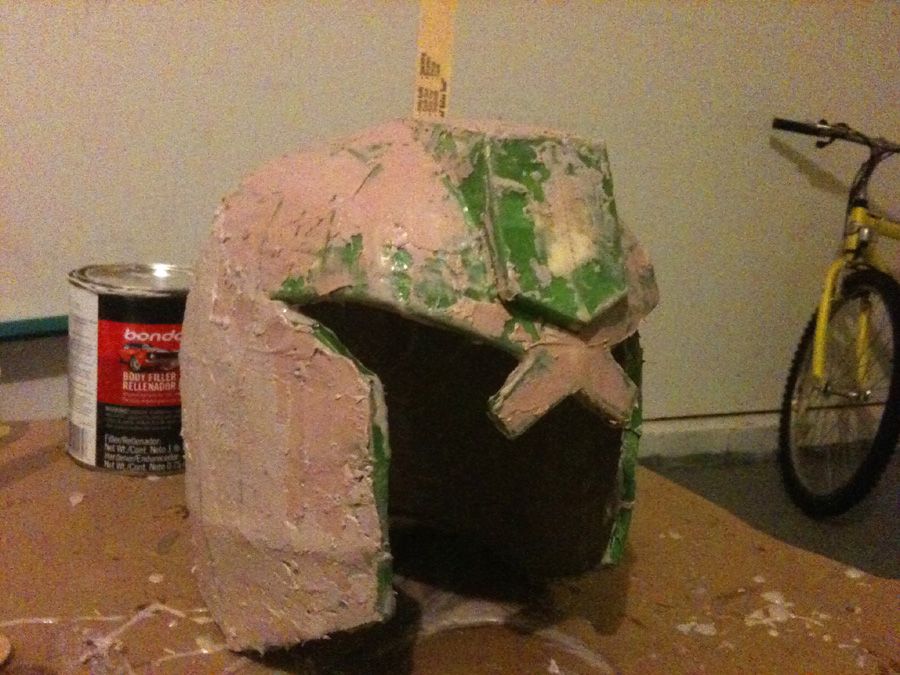
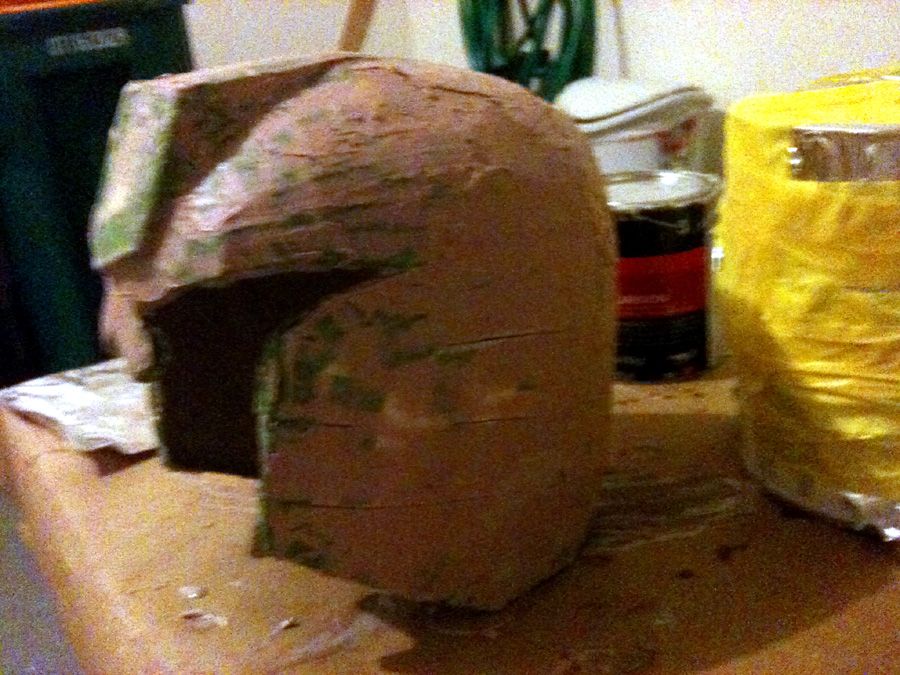
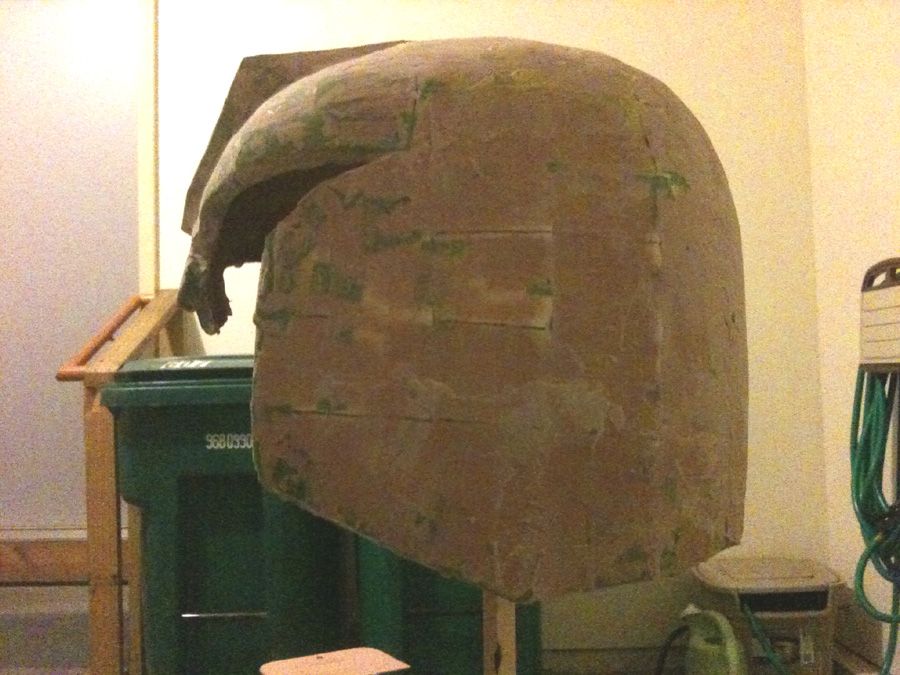
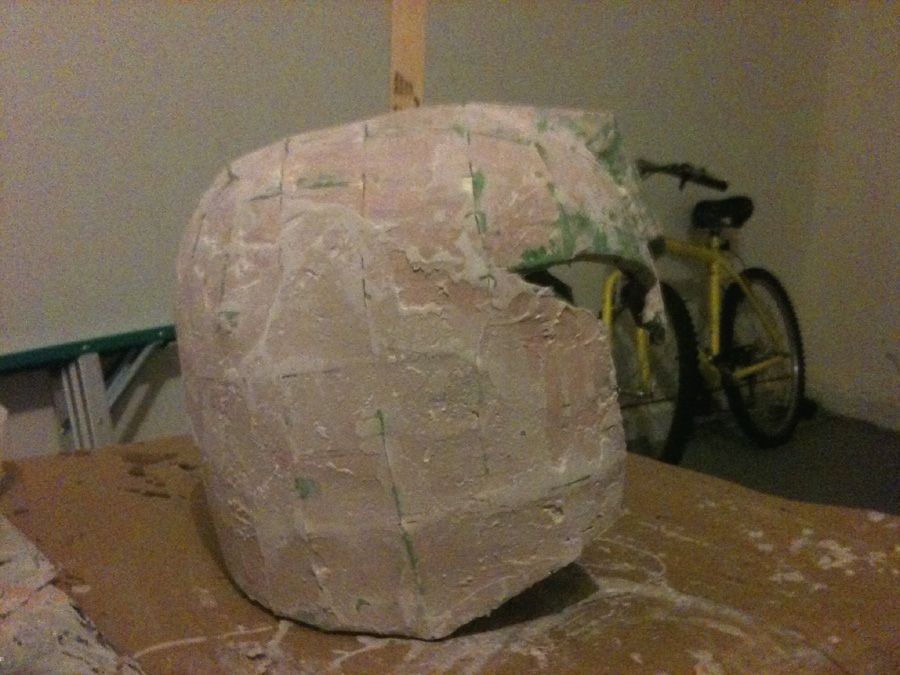
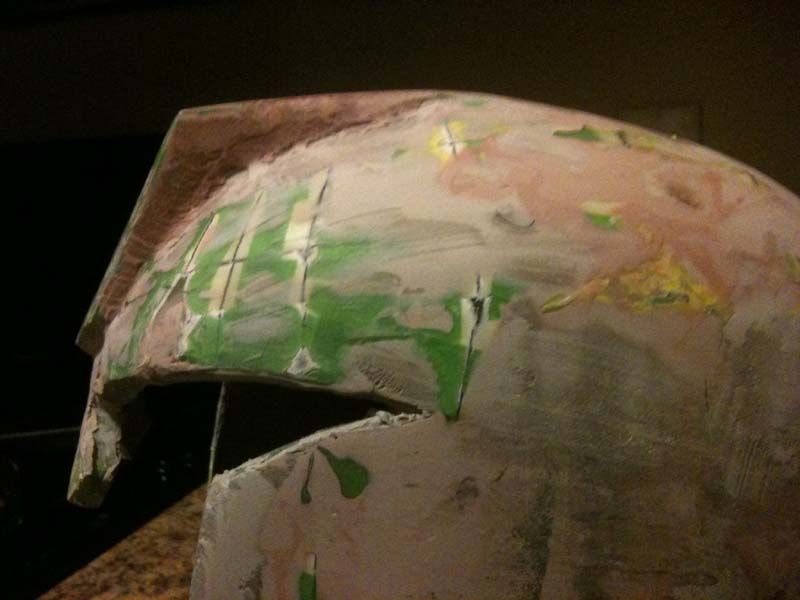
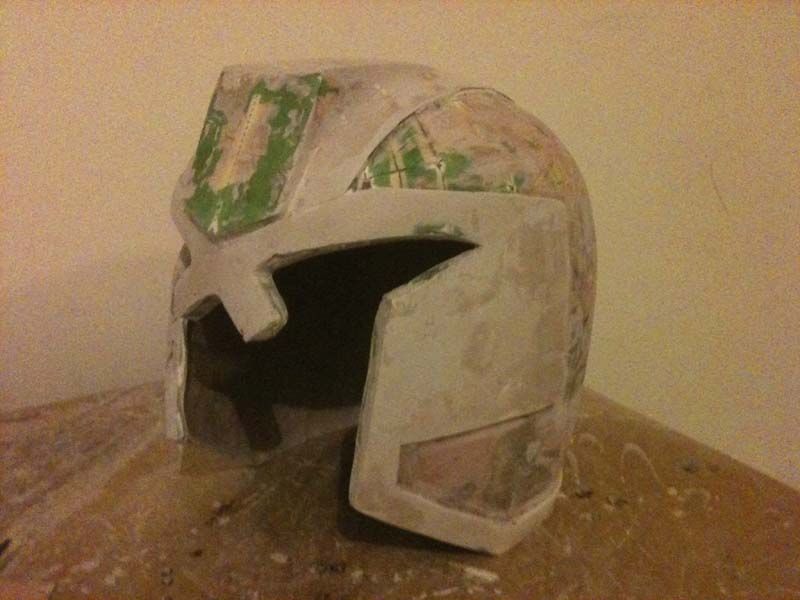
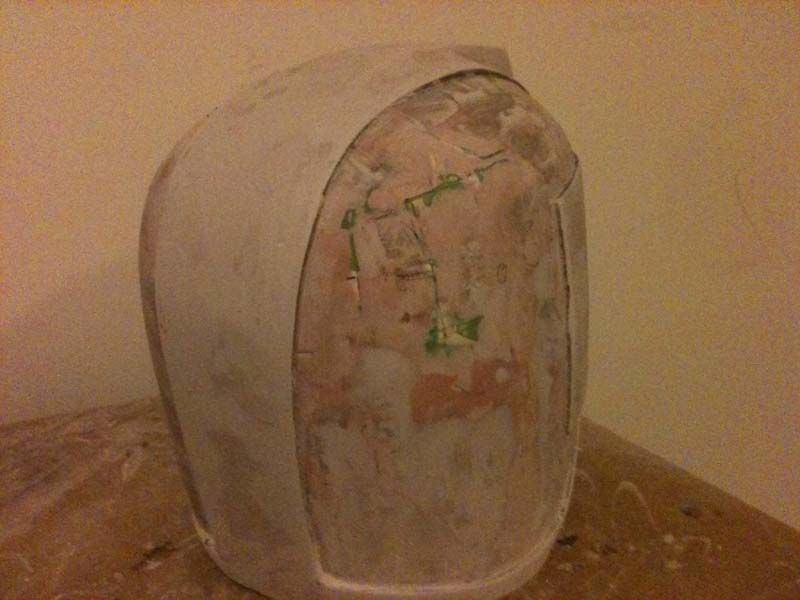
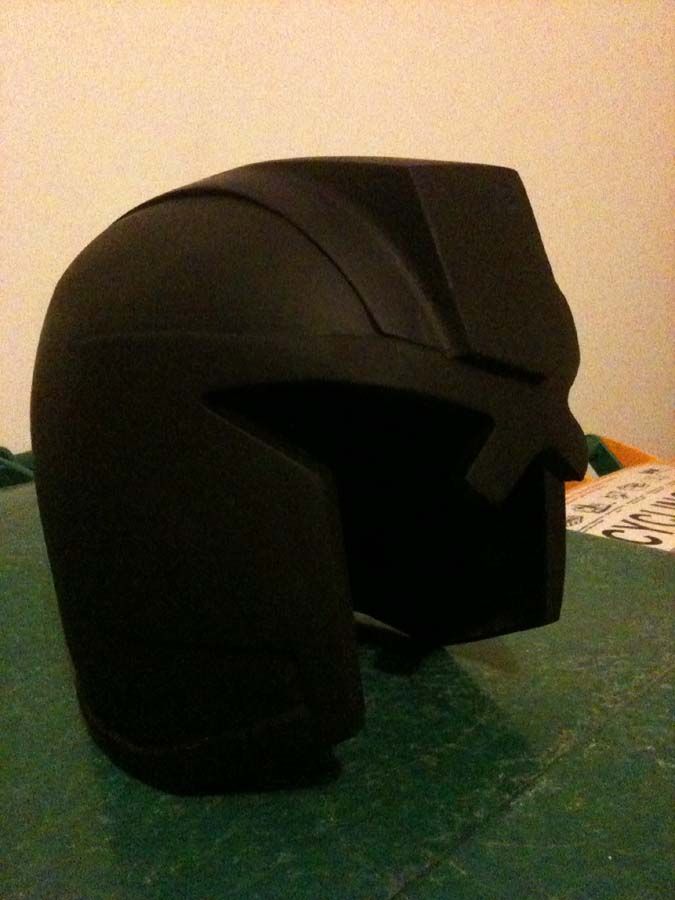
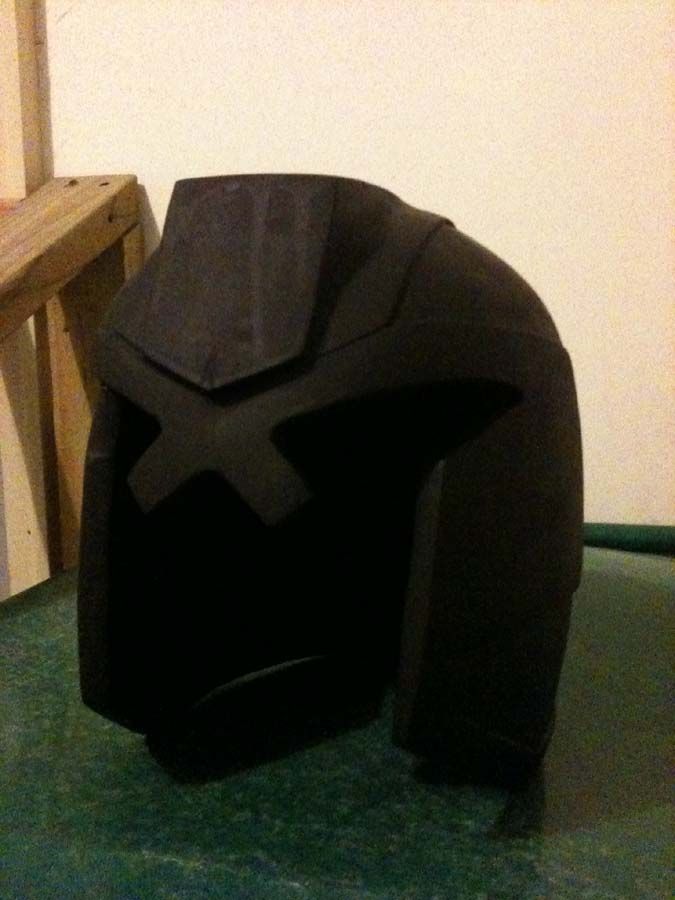
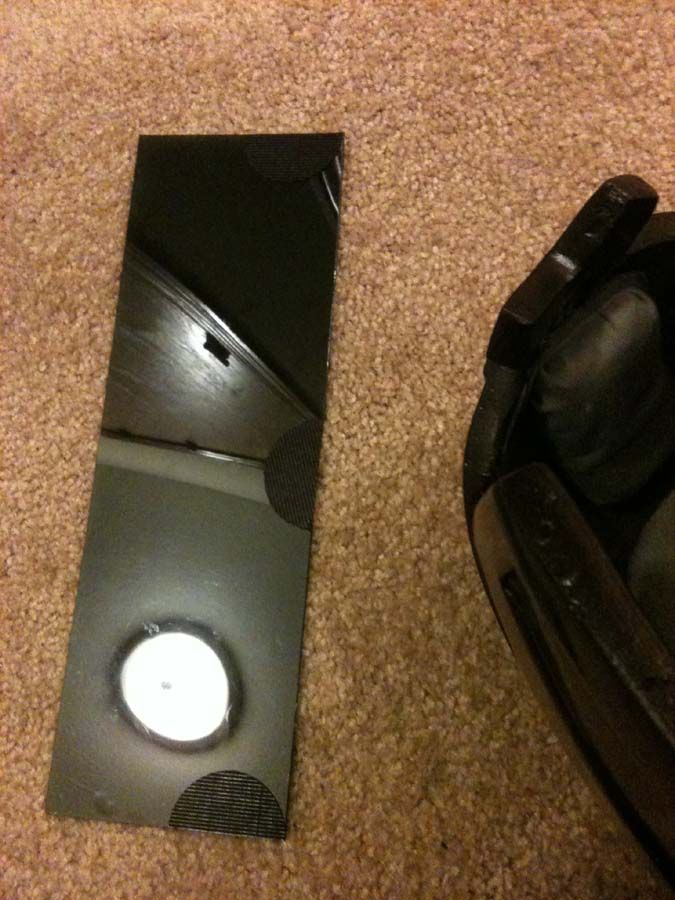
 
I was hoping to have more pics, got my second coat of exterior resin laid, yesterday morning I laid fiberglass on the inside however its been rainy and humid so it has not cured completely yet. I have a fan blowing on it to help out, probably won't be cured by tonight enough to lay a couple more 'glass strips so I'll have to wait until tomorrow. Was hoping to get to the bondo stage this weekend but that might have to hold out until Monday-Tuesday.
 
Keep up the good work, I am sanding sanding sanding mine at the moment.

Thanks man, I can't wait to get to the sanding and painting stage! Despite some snags this is a fun project.


When I got home Saturday night I found it mostly cured, however in 2 spots I must not have applied enough resin to my 'glass sheets as the 'glass was not adhered to the pep. This is a learning experience for me, I thought I was clever in trying to skip a step. In retrospect, I should have done a coat of resin on the inside before doing the glass & resin coat, or soaked the glass strips in resin before applying to the inner pep.

I cut an opening in the 2 spots, and with a small syringe injected resin into the glass, and in the worst spot I show below, I cut an additional square of glass and properly resined into the void. I taped the flaps back down and did one more coat of exterior resin and I'm satisfied with my repair. Everything is now solid.

HelmetVoidRepair1_zpsab291fb6.jpg


HelmetVoidRepair2_zps60b29943.jpg


I'm thinking about trying my hand with a Rondo mix, slushing a couple coats around the inside for some more strength.


This build will not be a screen-accurate nor specifically comic one, I have to replace the turbo in my boosted Subaru in the near future so I should try to not spend any more monies on this unless necessary (I guess 130k miles of 18psi on the stock turbo will wear it out lol)


Here is the vest I'm working with, probably can't see the mesh base but I have started removing the pockets in front, should come out satisfactorily I think..

Vestbeforemodding_zpscc4167eb.jpg


In keeping with the low-cost theme, I will be using an old PS1 lightgun for my Lawgiver, closer to the Stallone version but I'm confident it will turn out "close enough":

PS1gunandarmorpatterns_zps3c440c40.jpg
 
Last edited:
When I got home Saturday night I found it mostly cured, however in 2 spots I must not have applied enough resin to my 'glass sheets as the 'glass was not adhered to the pep.

I had the same problem on mine. Seems to me that the sheets come away from the pep where there are sharp corners or you get an air bubble under the sheet when you are laying it down.

my process was to spray in some spray-glue, sticj the sheets to that, then to brush in a bunch of resin, enough to really soak the sheets. Pretty messy, and I got threads from the glass-sheets stuck to EVERYTHING in a 3 meter radius of my helm. May try a different method on my next piece.

I just dremelled out the fiberglass over the airpockets and filled with some resin like you did.

I'm thinking about trying my hand with a Rondo mix, slushing a couple coats around the inside for some more strength.

I also did this, just one coat inside. Not only strength, but i found it made the inside smoother as it covers those rough edges from the fiberglass.

EDIT: I cant see your pics at the moment, I think my Work have blocked photobucket. Will take a look when i get home as I'm enjoying following your progress.
 
More pics, now RONDO and Bondo time!

Appreciate the encouragement! I scoured every photo spread I could find before starting this so I hope this one helps others as well!


Well, last night was RONDO TIME! Went super easy. I did 2 coats on the inside; I used about equal parts of Resin to Bondo (about 2 inches of each in a plastic cup) and both hardeners (about 1.5 inches of Bondo hardener and 30 drops of Resin hardener) per coat, nice milkshake consistency, leveled pretty nicely. I may do one more coat of Rondo on the inside if I have enough Bondo left at the end, its plenty strong right now but I will be shaping the one side of the helm face (left side if you're wearing it) as you can see it is more curved in than the right side.


RONDO_001_zps0fe24633.jpg


RONDO_002_zps67c959e7.jpg


RONDO_003_zps6dbc30b7.jpg


RONDO_004_zpsfaa7ac04.jpg


RONDO_005_zps33ca9df1.jpg


This morning I started with adding some Bondo to the outside, I will get to sanding tonight if time allows.


BondoTime_001_zps60d27868.jpg


BondoTime_002_zps0037304d.jpg


BondoTime_003_zps0b2530e4.jpg
 
Last edited:
Now I'm not an expert (my following comments are based on reading other threads to educate myself), but i would suggest being careful how many coats of Rondo you use inside. With all that Rondo and with the Bondo on the outside, your helm may become pretty heavy and uncomfortable to wear.

Unless you are going to cast it, then I guess it does not matter.
 
sand sand sand drink sand sand

looking good so far sir !

Thank you!


@ Uridium, yeah I think I'll be fine with my 2 coats of Rondo, its solid and has a good heft to it, plus there is the single layer of glass too so I imagine it'll be fine. No casting, I just want to do a nice enough job that I'll have a cool piece for a good long time. The added bondo has added its own heft so this thing will be solid.


I took a bunch of pics but really nothing ground breaking going on. My repaired area is great, the helmet is really coming together, I just need to get more sanding in. Shaping and smoothing those eyelines and trying to get all the angles straight away. I got a little heavy with the bondo in some spots... oops.

I should have some good time to commit after work so we'll see where I end up.


Sanding1_zps9c7205cf.jpg


Sanding3_zpscf112cbd.jpg


Sanding4_zpsd1a42dfb.jpg
 
Last edited:
A little better everyday.. this sanding sucks lol but it is what it is. Got some foam camper tape from Napa so after some more spot filling I can work on adding the raised sections (foam tape as a dam for bondo)

Eyes are a little better everytime, I have a sheet of visor material user The martin linked in his build thread (great thread!!) and will be cutting and fitting soonish. I'm filling the inside of the helm with a little more around the eyes to give a smoother attachment point (thinking velcro at this point)


10-15_001_zps3424f9d0-1-1.jpg


10-15_002_zps609dc1de.jpg


10-15_003_zps1f91eb55.jpg


Because beer made me do it:


10-15_004_zpscd6f8e12.jpg
 
Damn, that sucks. I had to assemble 2x pepakura helms as I messed with the scale on the first one (and printed the wrong format, oops) Resin was a-ok on the tape when I resin'ed. My problem was my poor fiberglassing on the inside, I should have resin'ed and then glassed instead of combining steps. Learn from my mistake, either do it right with glass or just do Rondo (very happy with my Rondo coats).


Got my lines for the raised sections all taped out with foam tape this morning, I will be attempting some bondo action later if I can swing some time. This is going to be a rush for Halloween, I know it. :-/


My chest and ab armor sections are all cut and glued with some white Elmer's, need to do shoulders and back armor. I was thinking of spraying the whole pieces with a black rubber product and bam, armor sections for my vest. Anyone have any experience with spray rubber products?
 
Fiberglassing is tough, especially when you don't know how to fiberglass that well. :unsure

Rondo would have been a great idea, i'll have to give it shot, although it will still have to be fiberglassed to give it strength.
I'm rushing for halloween too! I've had to make several mad dashes to the Harbor Freight Tools store ,to buy more eva foam ($7.99/roll) from them , plus 2 plastic visors (~$5.00) to use for my helmet. I still have a bit of work ahead.

In terms of rubber, in the past, I've used 3 to 4 sprayed layers of Plastidip (find it at home depot/lowes/ace), let it dry completely overnight, then sprayed 2 to 3 layers of Dupli-Color Adhesion Promoter (makes primer/paint stick to foam, find it at NAPA auto parts) on top of that (10mins to dry) then immediatley sprayed primer on it, waited that to dry, then spray paint.

If adhesion promoter is not your thing, you can go the cheap route and buy a gallon of elmers school glue or wood glue at Home Depot, mix a little water in there, slather , dry, prime and paint it.

If you can't find plastidip, or just want an alternative to the brain-cell killing fumes, you can use Rust-Oleum Leak Seal BLACK Rubber Spray (Home Depot) spray 3 to 4 layers of that on your foam). Pretty much same thing, though might cost a little more.

**one thing I forgot to mention, I made an Ironman MK3 suit that burnt and tore up after I finished it, I used 4 spray cans of Plastidip, 3 spray cans of Adhesion Promoter, and 3 spray cans of primer. Due to the vast amount of foam, I used the noted amount of these products. However, because the Dredd suit won't require as much, I'm sure you can get away with 2 spray cans of Plastidip/leakseal, and 2 cans of adhesion promoter.
 
Last edited:
Foam tape lines - fun fun fun!

Another sanding-rich weekend, looking pretty good! Grabbed some sandable black primer and rubber sealant/leakseal @ my local Menards yesterday, both I get to play with soon!


Foam tape (masking tape underneath for easier removal):

1_zps29c5e55d.jpg


2_zps61eb01e0.jpg


Peeled the tape off while still a little tacky, the lines came out pretty good:

3_zpsb21f534d.jpg


4_zpse1f86876.jpg


5_zps77304a9e.jpg


6_zpsaa62322c.jpg


7_zps1c0fb269.jpg
 
Sanding ho! Mo pics.

Busted out the orbital sander and took down my raised area, sand sand fill sand sand. Cleaning up the eyes as well.

download1_zps79ea9436.jpg


download2_zps89861030.jpg


download3_zps1dc563f6.jpg


Assembled my badge, resin'd it while I was waiting for bondo touch ups to cure:

badge3_zpsaaebb56b.jpg


I'm happy with how we're looking:

download4_zpscf8d4c7b.jpg


download5_zps36ead871.jpg


download6_zps7b29ca51.jpg
 
Busy couple of days! Got her all smoothed out, got some Rustoleum 2x spray primer yesterday morning:


Primed_zps19d885f5.jpg


So I primed before work, sanded with fine steel wool when I got home, found and repaired ANOTHER(!!!) air pocket I found (small one, thank goodness)
Filled low spots, primed, steel wool, primed again this morning. Any other nicks or imperfections are now going to be designated as battle-damage, I am soooo done sanding bondo!
 
Last edited:
Keep up the good work Gscadam, I am following behind you, about to add 2mm foam for my raised parts.

I will post some pics when I get the chance.
 
Good job man! I'm a day or two behind everyone else. I just finished repairing all the fiberglass air bubbles on my dredd helmet. Tomorrow will be bondo time, as I have finish gluing my foam costume and cutting.
 
Very nice build! Love the badge - great idea.

Thanks for posting all of the work in progress pics - very inspiring and instructional. :thumbsup
 
Thank you everyone! This is a blast. Working through the learning curve and all, the resources from this site have been the best and really not made it too bad an ordeal. I'm a bit of a perfectionist so the little things will bother me, at least I have a better grasp if I want to make another one in the future!


I always enjoy a good pic thread.. so here we go.


A couple coats of primer, I got a little happy with the 2x Rustoleum, probably 3x coats after sanding most of the first off.


Primer4_zps393f88d5.jpg


Primer2_zps4ac0f7c5.jpg


For my black paint, I am using an enamel I have some experience using, Mercury/Mercruiser Phantom Black, it is a tough paint used for painting boat outdrives/sterndrives, I figured I had a spare can so what the heck. Looking good, I rubbed down with some steel wool to remove some light runs and will be giving one more quick blast tonight/tomorrow, but I got my helmet padding in today and want to play with that and my visor.

Primer3_zpsa1f86639.jpg


Helmet padding and visor material are the same recommended in user The martin's thread.

visor1_zpsdc7acd3e.jpg


visor2_zpsd010dd41.jpg


Made a quick template with printer paper, scored the visor sheet with a razor knife and then cut with kitchen shears. I test fit my cut visor with some extra velcro circles from the padding kit and it works very well in fact, I may leave this setup. Pieces in each corner and center hold it in, so it is a non-permanent but sturdy solution. I even have enough material left over for another visor!

visor4_zps7dd71a86.jpg


visor3_zps4eb359aa.jpg


So that said, I took some selfies:

selfie1_zps2a79126f.jpg


Selfie2_zpsddb841a5.jpg


Because I can:

BadassLawgiver_zpse86725d3.jpg


Picking up a red paint tomorrow, need to get a gold, I do have silver paint for weathering.


Happy weekend everybody! :cheers
 
Last edited:
This thread is more than 8 years old.

Your message may be considered spam for the following reasons:

  1. This thread hasn't been active in some time. A new post in this thread might not contribute constructively to this discussion after so long.
If you wish to reply despite these issues, check the box below before replying.
Be aware that malicious compliance may result in more severe penalties.
Back
Top