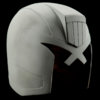
How are you cleaning up your helmet?

Art Andrews

Community Owner
Community Staff
I have a Noden helmet here that I am starting cleanup and prep work on. I have trimmed off the flashing (overground in one spot where the drum sander slipped), and am now going around the raised trim of the helmet and trying to clean it up ever so slightly without going crazy with it. I have been doing this by using a small jewler's file, and just running it along the edges, until they are a bit more uniform in depth and definition. It is VERY easy to overdo this and the create a significant depth where there shouldn't be. Still, I am not sure this is the most effective way in which to handle this. I'd be interested in hearing if others are doing this same cleanup and if so, how is it being done?

noden-dredd-helmet-cleanup-1.jpg
 
A little bit further along. I am now done with the initial filing work and have now switched to 320 grit paper to try to even out the troughs I have gouged out along the edges of the raised trim. As you can see, there is some heavy sanding marks in the original casting that I will be working out as well. Just going to take a little time. In the end, the difference between this helmet and an untouched Noden should be slight, but here at the RPF, "slight" is often significant.

noden-dredd-helmet-cleanup-2.jpg
 
Made a bit more progress. Added some physical damage to the helmet. Wanted to keep it relatively subtle but still have it be noticeable after the final painting is completed. Not sure that I love all of it.. but it is getting there. One thing I did notice that is disturbing me a bit, is that the dome is VERY thick and when I cut into it, it started to weep... Uncured resin is never a good thing and can ruin a piece like this. Sitting it outside with the hope that anything still uncured will dry up.

noden-dredd-helmet-cleanup-3.jpg noden-dredd-helmet-cleanup-3a.jpg
 
Love the work so far. I am waiting on my jewelry files to come in so I can get to where you are. Love the damage, any on the other side?
 
Love the work so far. I am waiting on my jewelry files to come in so I can get to where you are. Love the damage, any on the other side?

Yeah... but I am actually filling some of it back in. Less is definitely more and on the originals there is only a little physical damage and a LOT of paint scuffs, so I am trying to be careful. I am not going to do much more until I figure out this resin issue. If this resin won't cure... this helmet will be a total loss.
 
I have dealt with that resin issue before. In my experience only temps around 150 degrees help but the cause has to do with old resin and it combining with large amounts of water in the air. Humidity is both paint and resins enemy's. I blame where houses that store the materials in hot temps for long periods and then sell them. Even the best resin is only good for around 6-8 months if fresh. I am sure it will dry up for you and be fine.
 
The interesting thing about putting together a kit like this that originates from actual production, is you can either "make it your own," try to do it how the propmakers did for filming, or leave it alone in a sense that all the quirks and "flaws" sculpted into it are left as-is for the most part to retain that it came from production (just like some purists for a wonky stormtrooper helmet hate perfectly symmetrical TK helmets)

I found myself doing the similar thing with the JBR I picked up. I did used needle files to clean up the edges and help make some of the lines "pop," but for the most part, I left it as is for the sake of the origins. One thing I did leave alone was the front "X," as the JBR's are still soft on the corners while the others are pointy. This again, was to retain the origins.

Actually, at least for my build up, there really wasn't a whole lot of clean up required. The most I did was clean up the bottom/visor rims as well as the inside of them. I needed thin it out to make it more like the screen used helmets, so what I did was after initial dremel use, I took like a 30-something number grit sandpaper and dry sanded it to get it down to where I needed it to be, then hit it with 120, then about 300 and finally a 600. It may not be the "proper" way to progress the sanding but it worked out really well.


1002810_10200497827384041_355819320_n.jpg

972145_10200504686635518_1866564244_n.jpg

999006_10200504686195507_589999265_n.jpg

First being before I trimmed it down...
 
I also own a JBR helmet and I used both a Dremel and a band file to do the clean-up. For anyone not familiar, a band file is a 1/2 " wide belt sander about 12" long, in a continuous loop, powered by an AC motor. Because it is flat for all it's length, except the tip, it does not have a tendency to gouge like a small drum on a Dremel. It also can be used for sculpting broad areas when you use a delicate touch. I think I paid about $30 for it and I couldn't live without it. Unlike Art (different strokes) I enhanced the raised areas by adding a light,1/32", fillet along the raised area edges to give sharper definition. About the uncured sticky areas, while no guarantee is made, you can try using straight resin catalyst over the area. There is a product called "surface curing agent" which is under $7, carried by Tapp Plastics, that is meant to be used by mixing into the resin before adding catalyst, (which it is too late in this case) but also may be worth trying on the surface goo. Time and carefully applied heat may help, as mentioned, but none of us wants to wait for that. Good luck. By the way, not to demean others efforts, but unless you are finishing a high gloss item, which seems not to be the case with the Dredd helmets, you are wasting sandpaper and elbow grease on this one because if you are using a rattle can and multiple coats of paint, primer, silver, red and black paints, the spray pattern alone will cover all but heavy scratches. I seldom go finer than 200 grit and then prime and lightly sand the primer again with 200 before final top coats. If you plan on aging the helmet later, why make it look like the hood of a fine car so you can trash it later? Just one guys method.:)
 
So... good news. Left it out in the sun a couple of days and not seeing any more weeping. Hoping beyond hope that we got it. Time will tell.

noden-dredd-cleanup-5.jpg

There were several weird lumps that I found that I can't see in any other helmets, so I went back and cleaned them up and also cleaned up my clean up of all the edges (basically trying to hide the fact that I sharpened them). Did one final sanding and another primer coat and here is where we are at.

From here, I want to do several more things:

  • Square off all the outside edges
  • Thin out as much of the resin as I can (there has to be close to a pound of unnecessary resin in the casting)
  • Clean up badge recesses
  • One final sanding (320 grit)

By the way, not to demean others efforts, but unless you are finishing a high gloss item, which seems not to be the case with the Dredd helmets, you are wasting sandpaper and elbow grease on this one because if you are using a rattle can and multiple coats of paint, primer, silver, red and black paints, the spray pattern alone will cover all but heavy scratches. I seldom go finer than 200 grit and then prime and lightly sand the primer again with 200 before final top coats. If you plan on aging the helmet later, why make it look like the hood of a fine car so you can trash it later? Just one guys method.:)

You are probably right but I have never taken a minimalist method. I definitely plan to "trash" my helmet, but I guess I want to trash it my way and while I am not necessarily interested in starting with a mirror finish, I do want to make sure the helmet is starting where I want it to and then I can break it down as I see fit. Also, I tend to go back and take a LOT of primer off. This casting in particular had some pretty deep sanding marks in it and between sandings and filler primer, I have removed those (as you don't see anything like that on the final helmets). Where I initially plan to get sloppy is the paint. I plan to pain the whole helmet black, beat the helmet up just a bit, and then apply the red over the damaged black (you can see this on the originals). That way the red has some damage under it. While that isn't logical, that is how some of the helmets look to me, so that is what I am going for. From there, I'll beat of the red some and them add a bit of black wash to the red as well as to any gouges.
 
It is probably hard to tell through all the primer coats, but I went in and cleaned up the shield today. It was incredibly hard because the lines were so fine. I ultimately had to use a razor blade to clean them and then "saw" into them with sandpaper turned on its edge.

I am actually pretty happy with where it is at now!

noden-dredd-cleanup-6.jpg

Also spent about half an hour thinning down the inside of the helmet, but too my great dismay, only ended up taking about 2 oz out of the helmet. Just need to go back in not and clean up the edges of the eyes and I think we will be ready for the first coat of paint!

I am actually very concerned about how to paint the badge itself. I have seen a number of them painted and am not thrilled with most of the results. Anyone have any suggestions?
 
It is probably hard to tell through all the primer coats, but I went in and cleaned up the shield today. It was incredibly hard because the lines were so fine. I ultimately had to use a razor blade to clean them and then "saw" into them with sandpaper turned on its edge.

I am actually pretty happy with where it is at now!

View attachment 222778

Also spent about half an hour thinning down the inside of the helmet, but too my great dismay, only ended up taking about 2 oz out of the helmet. Just need to go back in not and clean up the edges of the eyes and I think we will be ready for the first coat of paint!

I am actually very concerned about how to paint the badge itself. I have seen a number of them painted and am not thrilled with most of the results. Anyone have any suggestions?

I'd say for the badge to get a more realistic shine, to try and find a good matching Rub and Buff paint. I actually think I picked up an "antique" bronze which I was planning to use for my Rocketeer helmet. It's the only paint I feel would give you the best appearance of real metal over a spray
 
I am actually very concerned about how to paint the badge itself. I have seen a number of them painted and am not thrilled with most of the results. Anyone have any suggestions?

I'm guessing Rub & Buff is going to be the best thing you can do. Is the badge a separate piece on that kit or molded in? I also can't remember if it's actually from an original or if it is a reproduction.
 
I'm guessing Rub & Buff is going to be the best thing you can do. Is the badge a separate piece on that kit or molded in? I also can't remember if it's actually from an original or if it is a reproduction.

It is molded in... :( If it were separate, this would be a lot easier!
 
Bummer :(

Unfortunately, short of grinding it out and replacing it, I don't see anything you're going to be happy with. Rub & Buff is probably the best bet.
 
Well I don't think it would honestly be that difficult, Yea, it's attached, but you'll just have to be much more careful for masking. When I did my Jango Fett commissions that weren't cold cast, the best method was to paint the blues first, mask it off and then apply the rub and buff. It's a small area of the helmet and I think it can be done well with some patience. Just don't remove the masking tape for a few days let alone handle/touch the badge area for awhile.

Honestly, I don't think you'll find better results unless you get it professionally plated someplace.
 
I'm just thinking of his obsessiveness... the originals were cold cast. Neither R&B nor plating is going to look just like that. Plating will be too shiny and R&B just looks... different. I can't quite describe it. I think the R&B will be the closest match though by far.

If it was my helmet, I'd scratch build a new badge, make one in cold cast, then carve out what's there and replace it.

Steve did mention that he was planning on doing a "V2" which would have a cold cast badge. If anything, you can probably contact JBR and acquire one of his, since they are supposed to be scaled almost the same, seeing as the JBR helmet was originally a cut down Noden helmet
 
This thread is more than 10 years old.

Your message may be considered spam for the following reasons:

  1. This thread hasn't been active in some time. A new post in this thread might not contribute constructively to this discussion after so long.
If you wish to reply despite these issues, check the box below before replying.
Be aware that malicious compliance may result in more severe penalties.
Back
Top