This is something I've been working on for the past couple of weeks. It's been good because I've learned quite a bit about different things during the build.
To start off I bought all of the necessary kits for the build, as well as the hemispheres from Plastruct, and some 0.02" styrene.
Rather than buy multiples of the kits, I decided to mold and cast the extra parts I would need. This became a bit more of a challenge than I first expected. The first mold I created, appeared fine, but then noticed some air bubbles on the tips of some of the parts, even though I knew I was getting all of the air out of the resin in those places. It was at this time I realized the mold itself had trapped air in these places. I decided to invest in some equipment to do pressure casting since 1) I needed to redo the mold and 2) because some of the parts were rather difficult to cast and I figured the pressure casting should make it simpler. I was right.
So once I had redone my molds (poured the molds under pressure as well) and pulled my first parts, I was very pleased, made life much simpler.
So several pulls later I had all the parts I needed to get building.
Let me divert for a minute and mention there's several build threads with about all the info you need to complete the remote, so I'm going to skip all of that and speak on a couple of things I noticed during my build which simplified the process.
The first thing came about when I started to draw my lines on the hemispheres at 45 degree angles. Reading through some of the threads I noticed several references to templates on a page Brundelfly had created. However, this page doesn't appear to be up anymore, so I figured I was on my own. When looking at my hemispheres I immediately noticed 4 half circles on the bottom which would serve as guides for half of the lines, so that was good. Went ahead and drew them, then started measuring for the other 4 lines that would bisect the first 4. I simply took the circumference of a 6" circles and divided it out. When measuring, I noticed four more marks that were just on the outside of the hemispheres. Flipped them around and found that I had all 8 marks already there from out friends at Plastruct, so no need to do any of those measurements.
Here's a couple shots of the marks, somewhat difficult to see, but with the hemispheres in front of you, should be easy to locate.


So the build continued, glued some of the parts on and I got to the circles around the wheels. I had vacuum formed the styrene, so it laid on the sphere easily, but then I tried to decide on the best way to glue them on, while keep them aligned. I could glue them on, then cut out the centers or cut them out before gluing and then carefully align them. As fast as the superglue I was using was adhering the parts, I knew the second option was no good. I had concerns over the first cause I usually slip with the knife and scratch up things that shouldn't be. I decided on a variation of the second method. I cut the centers out, but reattached them with some Scotch tape. Then I used a single piece of tape to position and hold the rings in place. This allowed me to simply flip the entire ring back, apply the glue, flip it back in place, waiting a few seconds, remove the tape (which also remove the cut out sections), and it was just right. Only had to take care not to get glue on the cutouts.


From that point it was simple matter of continuing the glue parts on, glue the halves together, prime/paint, etc.
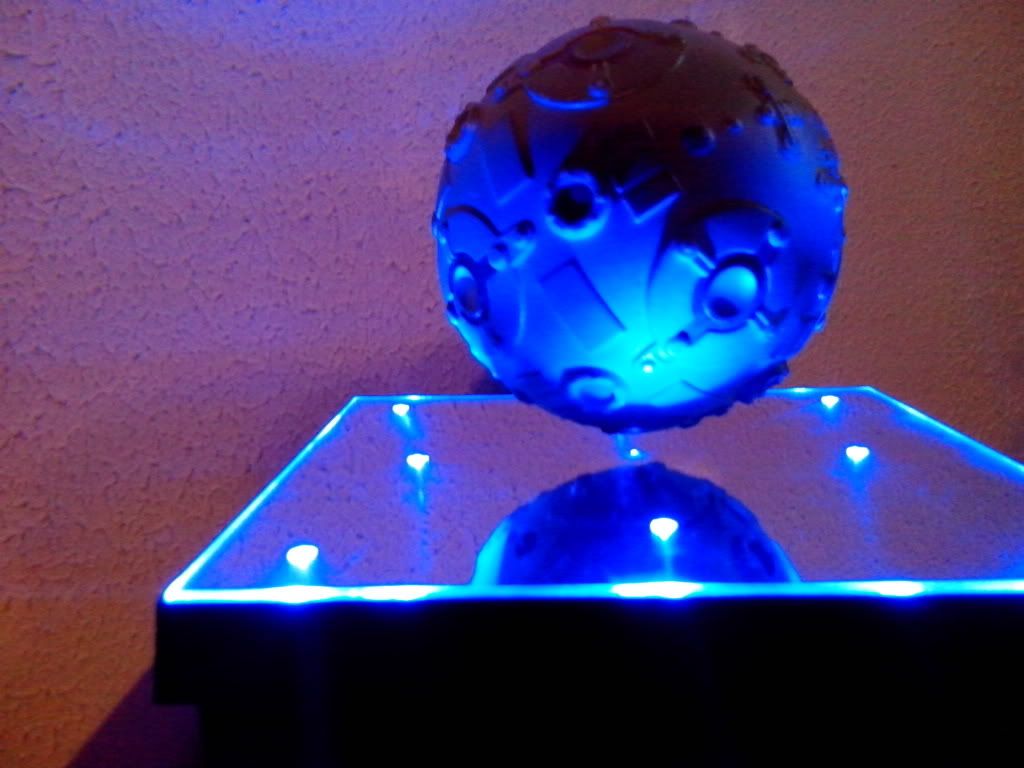
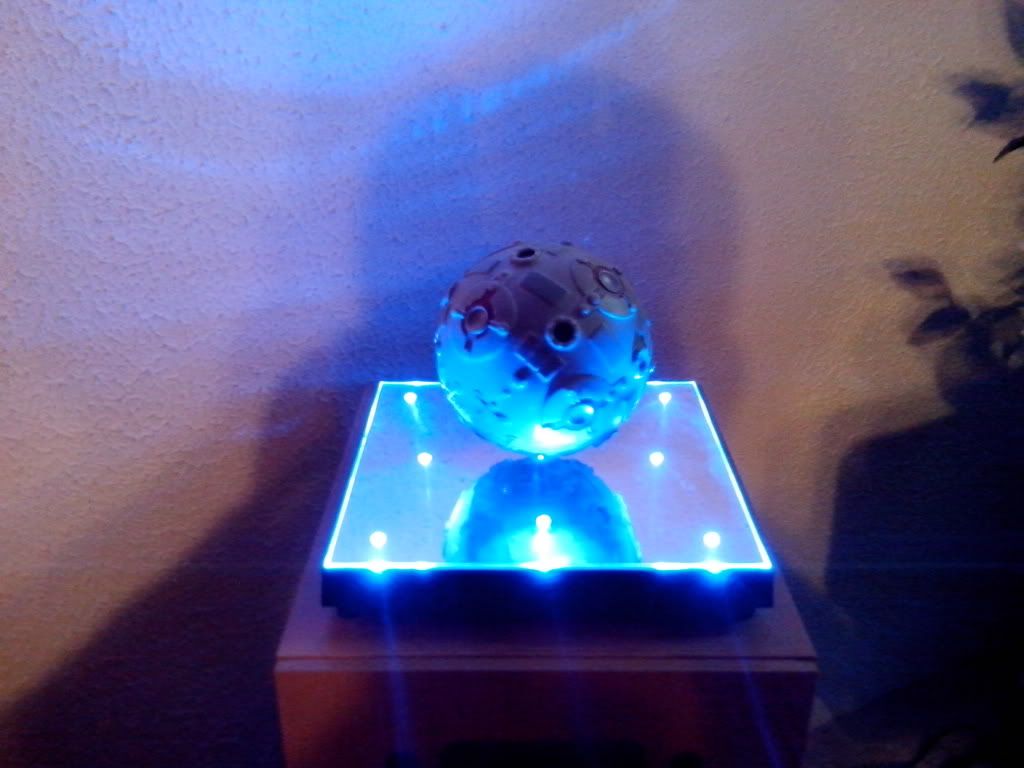
Finally, here's the end result. The paint was my own custom mix of acrylics. I'm leaving it un-weathered. Normally I prefer props weathered a bit, but for some reason, I like this one as it is now. The flash is washing out the shadows you normally see on it, which is why it's a bit sanitary in the picture, but in person I'm pleased with it.

You can see the fishing line sticking out of the top of it. I drilled a very small hole into the top nipple, ran the line through, and tied a bead on the end so it wouldn't pull back through. This was handy during the painting and drying process. I'm going to replace the string since there's paint on that one which makes it more obvious and will hang it by the new string in the case I'll build for it.
To start off I bought all of the necessary kits for the build, as well as the hemispheres from Plastruct, and some 0.02" styrene.
Rather than buy multiples of the kits, I decided to mold and cast the extra parts I would need. This became a bit more of a challenge than I first expected. The first mold I created, appeared fine, but then noticed some air bubbles on the tips of some of the parts, even though I knew I was getting all of the air out of the resin in those places. It was at this time I realized the mold itself had trapped air in these places. I decided to invest in some equipment to do pressure casting since 1) I needed to redo the mold and 2) because some of the parts were rather difficult to cast and I figured the pressure casting should make it simpler. I was right.
So once I had redone my molds (poured the molds under pressure as well) and pulled my first parts, I was very pleased, made life much simpler.
So several pulls later I had all the parts I needed to get building.
Let me divert for a minute and mention there's several build threads with about all the info you need to complete the remote, so I'm going to skip all of that and speak on a couple of things I noticed during my build which simplified the process.
The first thing came about when I started to draw my lines on the hemispheres at 45 degree angles. Reading through some of the threads I noticed several references to templates on a page Brundelfly had created. However, this page doesn't appear to be up anymore, so I figured I was on my own. When looking at my hemispheres I immediately noticed 4 half circles on the bottom which would serve as guides for half of the lines, so that was good. Went ahead and drew them, then started measuring for the other 4 lines that would bisect the first 4. I simply took the circumference of a 6" circles and divided it out. When measuring, I noticed four more marks that were just on the outside of the hemispheres. Flipped them around and found that I had all 8 marks already there from out friends at Plastruct, so no need to do any of those measurements.
Here's a couple shots of the marks, somewhat difficult to see, but with the hemispheres in front of you, should be easy to locate.
So the build continued, glued some of the parts on and I got to the circles around the wheels. I had vacuum formed the styrene, so it laid on the sphere easily, but then I tried to decide on the best way to glue them on, while keep them aligned. I could glue them on, then cut out the centers or cut them out before gluing and then carefully align them. As fast as the superglue I was using was adhering the parts, I knew the second option was no good. I had concerns over the first cause I usually slip with the knife and scratch up things that shouldn't be. I decided on a variation of the second method. I cut the centers out, but reattached them with some Scotch tape. Then I used a single piece of tape to position and hold the rings in place. This allowed me to simply flip the entire ring back, apply the glue, flip it back in place, waiting a few seconds, remove the tape (which also remove the cut out sections), and it was just right. Only had to take care not to get glue on the cutouts.
From that point it was simple matter of continuing the glue parts on, glue the halves together, prime/paint, etc.
Finally, here's the end result. The paint was my own custom mix of acrylics. I'm leaving it un-weathered. Normally I prefer props weathered a bit, but for some reason, I like this one as it is now. The flash is washing out the shadows you normally see on it, which is why it's a bit sanitary in the picture, but in person I'm pleased with it.
You can see the fishing line sticking out of the top of it. I drilled a very small hole into the top nipple, ran the line through, and tied a bead on the end so it wouldn't pull back through. This was handy during the painting and drying process. I'm going to replace the string since there's paint on that one which makes it more obvious and will hang it by the new string in the case I'll build for it.
 Wonder how strong the magnets would have to be to make the ball+wiring+batteries hover....