A Noob Hope Graflex Lightsaber Build

VFX Freak

Sr Member
Hi everyone, as the title implies I'm new to the world of making replica props. I'm another one of those guys who saw Star Wars as a kid, and it's been a part of my life ever since.

I've collected a few props from companies like Sideshow and MR, but when I discovered I could make my own using the same components as the original prop-makers, I was hooked.

Luke's Lightsaber from Star Wars seemed like a simple one to start with, since I'll be trying to dredge up model-building skills that have been dormant for many years. It's an instantly recognizable, iconic prop, and if they were real they'd be the coolest (and most dangerous) thing ever.:love

So I read the threads, did my research, hit Ebay, and got started.

Thanks to everyone who has put so much time and effort into finding and sharing so many tips and so much information. And thanks for looking, I know there have been LOTS of these builds posted here.

I'll start with a few photos of what I've got to work with.

GraflexFlashHandle.jpg

My Graflex is one of the earlier versions with the straight pins and duller finish, just what I wanted for this saber. It's battered and scratched up, but there's not too much corrosion. I gave it a good cleaning with a product called ACF-50. It's a penetrating lubricant and corrosion inhibitor made for the aircraft industry and it worked great.

GraflexFlashHandle-2.jpg

I plan on building a weathered saber that looks like it's been through the wars, so I like that this Graflex is kind of beat up. You can see in the above photo that a chunk of the Bakelite is broken off. I'm okay with that.

GraflexFlashHandle-4.jpg

The whole kit consists of the Graflex, the Exactra 20 calculator that I got on Ebay for WAY too much money,:confused a T-Track kit from Gino, and a D-Ring from Strapworks. I'm not sold on the D-Ring, but I'm working on that.

There are a couple more photos in the thumbnails below, and I'll post more as I begin to make progress. Thanks again for looking.
 
Last edited:
I know what you mean about the Exactra prices on eBay; they've been pretty ridiculous lately, to put it mildly...
 
@Organic Mechanic - Thanks! Yours came out great and I learned a lot from your posts.

@Serenity - The Exactras seem to vary wildly. I saw one sell a week later for half what I'd paid.:unsure
 
Welcome to the fabulous world of props :) WARNING: Once you're in, you can't get out. Your project looks great by the way. It's a classic that can't be missing from any collection. I'd suggest you add some acrylic case where you can display it. Your saber will deserve protection, and you can find some very affordable out there.
 
Hi there,

You're all set on your path to . . . the Dark Side my young apprentice ... muaha,ha,ha,haaa!


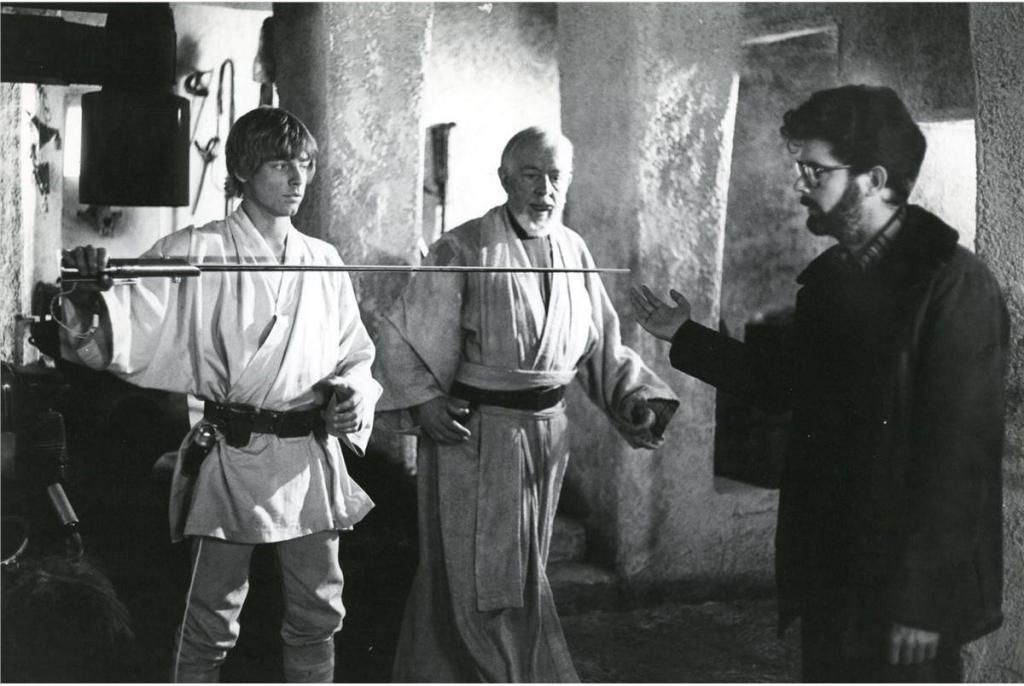
Luke01_zps741523ab.jpg


GL : 'Hey Mark ... just pretend it weighs like 20 something pounds okay? And more intense acting.'

Mark : 'More intense ... what do you mean?'

GL : 'Just do it!'

:D

-Chaim
 
Last edited:
@Manooga - You're so right about the "Once you get in" part. I'll be posting photos of a few more items I've already accumulated after thinking one Graflex would do. HAHAHA!

As for the acrylic case, Organic Mechanic posted a great one in his thread. It's a case for displaying small scale 18 Wheeler models and it's the perfect size. I'm going with that.

@Sym-Cha - Thanks for the welcome! The Dark Side? But I'm making Luke's saber, not Vader's. :confused Are you perhaps referring to the hours, money, and mental stability I'm going to lose jumping into this hobby?:wacko

That photo is awesome! I have it on good authority that Lucas never learned much beyond "Quicker, more intense!" even when making the new movies.

More photos to come soon. I made a little progress today.
 
Exactra Time

So I tackled the Exactra 20 today.

GraflexFlashHandle-11.jpg

I'm pretty sure the guys who made these would laugh their *sses off if they knew what we were willing to pay for these things.

ANHSaberWIP.jpg

Mine seems to be your run-of-the-mill green circuit board Exactra with the lighter red faceplate. The bubbles are nice and clear for 38 year old pieces of plastic. They have the flat edges along the long axis and the light frosting on the edges of the rectangular base.

ANH Saber WIP-12.jpg

Cutting away the little melted ends of the plastic posts that secure the bubble strip to the card. I tried not to be too precious about any of it, imagining that I was the prop-maker being rushed to finish the job. Then again, the prop-maker hadn't shelled out over $100 for a little strip of plastic lenses!

ANH Saber WIP-13.jpg

I took this photo on my lightbox so you could get a clear idea of what the piece looks like before any modifications have been done. The flattened edges of the bubbles are really clear this way.

I cut the ends off using my X-Acto mitre box and a fine saw. I decided to ignore all the advice given in previous builds and didn't put a protective strip of tape on the back of the bubbles. I rationalized it by thinking the original builder would never have bothered, but really, I just wasn't confident in my ability to apply the tape without scoring the plastic with the knife blade. Big mistake. Here's what you get when you do that:

Scratched Bubbles.jpg

Scratched the hell out of it while sanding it down. It looked great until I looked at this photo! Fortunately some Novus #2 plastic polish cleaned it right up.

ANHSaberWIP-2.jpg

I opted to sand down the back of the bubble strip until it was thin enough to be held underneath the edges of the clamp, as opposed to sanding the edges of the strip to be held by side-pressure against the edges of the clamp. I tested it after every ten to twenty strokes on the #600 wet or dry, and finally thought I had it. I popped it in place and clamped the Graflex shut. Here's what I ended up with:

ANH Saber WIP-4.jpg

It sure seemed like it fit at the time! Okay, no big deal. There's some more sanding to be done. Except that I couldn't get the clamp to open! It was completely jammed shut. :facepalm It took me half an hour to work it loose without damaging anything. Lesson learned. Test fit the clamp without using the handle to close it! Remove the handle completely and just squeeze the clamp together by hand until it fits properly.

I've still got a little more sanding and another round of Novus #2 to go, but that's enough for today. Tomorrow is a workday (I'm freelance) so I can pay for this new hobby, but I'll tackle the grips on Thursday. Thanks for looking.

By the way, any tips on cutting tape to fit the back of the plastic strip without scoring the plastic? What's everyone's favorite tape? I was going to use low tack drafting tape.
 
Last edited:
The bubble strip must be the single detail other than the glass eye that makes me love this saber above all others.

Great job so far
 
Re: Exactra Time

attachment.php


Except that I couldn't get the clamp to open! It was completely jammed shut.

Perhaps that's why the propmaker decided to loose the square tab under the clamplever? :confused

Thank the maker for Novus #2 . . . and Clutch for recommending it in one of his threads.

-Chaim
 
Thanks to all for the encouragement! I see the names of some of those whose previous lightsaber posts have helped so much. I appreciate your taking a look.

Not much progress made today but I have a few photos:

The clamp lever on my Graflex had an odd chunk of plating missing. I don't mind it looking beat up, but this looked like someone cut out a square of the plating with a dull X-Acto. It just looked wrong to me. I bought a 2-Cell Graflex for spare parts (the button for a future ESB build, for instance), and the better clamp. So here are the old and the new together:

ANH Saber WIP-16.jpg

The new lever is a slightly duller finish too, which actually matches the rest of the Graflex better.

The next photo shows the glass eye from the older vintage Graflex and the newer glass eye from the 2-Cell. What do you guys think? Should I stay with the older, scratched up, grungier, more yellowed glass? Or should I go for the cleaner new glass?

More Lightsaber WIP.jpg

Last photo for today. I assume the tiny screw and backing plate used to lock the clamp to the upper half of the Graflex gets discarded, right? I haven't seen anyone mention it that I can remember, but it looks like no one keeps it.

ANH Saber WIP-17.jpg

I've started work on the grips and will post an update tomorrow.
 
Last edited:
Use the older yellower glass . . . it has more character and you may discard that tiny screw (SA) or leave it on for better more secure attachment of the top whilest showing the lightsaber off to friends by swooshing it around. :lol

-Chaim
 
Great build so far! I lucked out and bought a Graflex almost all the way converted. Just need to add real bubbles and today they got here! :)

BubbleStrip_zpsd3c8069c.jpg
 
Thanks guys. The yellow eyes have it!

@Sym-Cha - As far as swooshing goes, I'm more worried about the grips coming off in my hands! Report will soon follow regarding my attempts to glue ABS plastic to nickel plating...

@KhalDrogo - I'd be curious to see what you got. What D-Ring setup did you end up with? Also, how do you plan to fit your Exactra bubbles? Have you referenced Organic Mechanic's build? Interesting stuff there. Thanks for looking.

Mine should look a whole lot more like a lightsaber by tomorrow afternoon!
 
Rubberized super glue. It's black, it can be kicked, it holds. I just checked my grips. Still as secure as the day I glued them.
 
^ @Clutch - Thanks so much! I will get some and give it a try. I was going to use a Zap medium thickness glue formulated for ABS plastic, but if you've already had success with the rubberized stuff, I'm sold. Is this the stuff?

19030.preview.jpg
 
This thread is more than 8 years old.

Your message may be considered spam for the following reasons:

  1. This thread hasn't been active in some time. A new post in this thread might not contribute constructively to this discussion after so long.
If you wish to reply despite these issues, check the box below before replying.
Be aware that malicious compliance may result in more severe penalties.
Back
Top