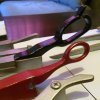
Edward Scissorhands study/WIP *28/5/13 UPDATE*

Oh, someone posted in the thread. I'll just look at that real quick before going to bed and reply tomorooooooooWOOAAAHHHHHH!

I was actually frozen for something like ten seconds. It seems like me higher brain functions shut doanrpneerph squiggle waggle bip....

No but really, I was shocked at the quality of those reference photos.

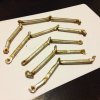
To simply say that those pictures are good would do such a disservice to how phenomenally great they are. Not only are they crisp and large, they show the objects from several angles in a controlled manner with proper lighting to show of both the structure and the textures. They show the where the casting seam is, the correct angles of the bolts and of the fingers, the exact orientation of the screws, mounting points....

I'm at a loss for words...really. It doesn't happen often that I'm this impressed, but those two pictures have completely changed the game on this build.
How on earth did you get those?

I'm forever indebted and grateful as well as a little intimidated to post any pictures of my build, so you have not only blown me away with those images, you've spurred me to even greater effort and passion in this project.

I seldom use any like functions, but now it actually seemed a little tame just to click once.:eek
 
Last edited:
I wasn't really calling that into question, what I was baffled by was how you got access to a pair of the original molds.
I imagine that is not an easy feat and seeing as how the movie is over 20 years old at this point those pictures are very likely to become crucial in reconstructing accurate replicas.

In other news I'm currently in full on construction mode making the dress dummy while I wait for alginate to arrive so that I can mold my hands.
 
It's time for a big bump on this thread! Sure, it's been months, but my plans to recreate the gloves by Halloween last year came nowhere close to fruition and I forgot about this thread until I was re-watching the Halloween episode of HIMYM, thought to myself how I always wait too long to start on my costume each year then I remembered all my fancy plans to redo the gloves and I thought of this thread.

Well for the past week I've been remodeling the scissor parts in CAD based on the previous models and as an added bonus, my new job has required me to learn Solid Works, which is a MUCH more powerful program than my previous software, FormZ. So as my modeling capabilities have improved drastically and I've been overhauling the previous model using the measurements of the old pair while implementing the more accurate shape of the actual blades, I'm also modeling the handles into the design. Here's my progress thus far on the left hand, four blades done!

leftHandCAD.JPG

EDIT: Just remembered, I can make 3d PDF files now, so here's a link to the model that you can view it in 3d and check out all the details! You may need to open it instead of viewing it your browser depending on what version you have.

3D PDF of Edward Scissorhands blades (WIP)

It's hard to see, but I'm modeling the nuts, bolts and screws into the parts, except for those that hold moving parts to the blades - for those pieces, I'll implement the found hardware as I did on the first go, so I've just modeled small holes to indicate the location of those pieces and a starter hole for drilling/screwing in those pieces. The programs features make it much easier to automatically add rounded edges to complicated shapes and as a result doesn't swarm the model with polygons for a much neater appearance and makes for more seamless building methods. It also makes it easier to add tapers to the blades as well as teeth along the edge of those that have them.

My initial upload of the new models gave me an idea of how much it would cost to 3d print these and it's pretty high (an estimated $200-$300 for all blades) but considering their size and the durability they will have, I'd say it's worth it for what I'll get as a result. I'd much rather have a $300 pair that lasts for years than a $60 pair that falls apart over one weekend of use. And between better modeling abilities and having access to the images of the hand molds that Mike posted, I'm much more inclined to model the tops of the hands as well. The straps, base, etc will still be sewn out of the faux leather I bought already, but for accuracies sake, I'm going to try my hand at 3d printing the hand plates as well, which will probably add another $50-$100 to the cost, depending on how thick I make them and how far around the hands I plan to have them wrap. I'm not very concerned about the appearance of the bottoms since they're going to need a seam to snap together when I put them on, designed as such so I can put them on or take them off on my own without assistance.

At either rate, I'm starting now so I can get a jump and hopefully this project wont fall by the wayside again like it did last year!
 
Last edited:
Another bump! I finished both sets of blades and have made improvements on the previous blades I posted. Again, I've uploaded 3d PDF's of them so you can see them from every angle. On the right hand, there are two fingers that have a secondary blade - the forefinger and the pinky. For these I implemented two different types of joints. On the forefinger, I designed a joint that allows the blade to rotate up and down as I move that finger, with a lock that prevents it from moving too far in either direction. For the pinky, I created a simple snap-in joint with a tighter fit so that it can be positioned at will but doesn't rotate freely like as forefinger will.

10296342_10152340278870772_6681309729072700227_o.jpg


I also took a stab at a simple shape build of the right hand plate, using the images Mike posted for size and shape reference, as a means to price out the additional cost for those. I designed the first pass to wrap around the sides of the hand and stop about an inch and a half from the opposing side on the bottom side, but I may design it to wrap all the way around and leave a seam since the plastic used in printing them is flexible. This way, they'll bend away from each other and make extra room for me to fit my hands through, but meet back together once they're fully fitted on my hands, leaving a less unsightly underside. To my delight, each plate would cost closer to $30 to print - possibly less as I didn't cut a hole for the thumb in the test model.

Here are the PDF's:

Left Hand:
http://www.doctoroctoroc.com/misc/3d/scissorHandsL.PDF

Right Hand:
http://www.doctoroctoroc.com/misc/3d/scissorHandsR.PDF

As before, if your browser doesn't have the proper Acrobat plugin, you will need to 'open as' to view them.
 
I'm sorry, I admire your work a lot, but I have to do an Edward Scissorhands costume in 2 days, and you said that you made a template on pepakura, where I can get that? Because I can't work with the 3D models, I'm so bad with that :( I'm sorry again, it's because you made a really good job with that.
 
I'm sorry, I admire your work a lot, but I have to do an Edward Scissorhands costume in 2 days, and you said that you made a template on pepakura, where I can get that? Because I can't work with the 3D models, I'm so bad with that :( I'm sorry again, it's because you made a really good job with that.

Two days is not enough time to build a Pepakura model, I didn't even use the method (I just used the simple faces created by the program to size and craft them as I went along, which took a good two months and I worked on them every day for hours). But on top of that, I don't have Pepakura models for these. I only have the 3d models you see here, which if imported into Pepakura would result in thousands of tiny, unusable polygons. I'd recommend checking out your local Halloween popup store like Halloween Adventure or Spirit of Halloween, whichever you have, to find the costume version. They're not the best but I used them for a few years and they look good with a decent ensemble. These are the ones I got, the only ones that I know are available to the consumer:

http://www.topsmagic.com/product_info.php?products_id=10175&gclid=CIjEi6vPzsECFQ8R7AodXmoAQg

Unfortunately, I didn't get a chance to finish the 3d printed ones in time for Halloween this year. I need to reprint both thumbs as the right one is too small the and left is too large. I'll be getting them reprinted once I've finalized the hand plated, which I have yet to design. Man, I really slacked on this one! Next year...next year...
 
That would depend on your own finger size. I built them around my fingers to ensure a proper fit - but in all the longest blade is about 13 inches long on my pair.
 
Reviving this thread for more insight into the costume as I'm redoing it. I 3d printed the blades a few years ago but a few parts didn't fit right and I couldn't afford to print them again. That was a hefty chunk of change...but during some reorganizing I stumbled upon them again and decided to finally do something with them. A bunch of my friends are doing a Stranger things group so if it doesn't work out then I still have a backup but I think I'm on track to finish them in time for Halloween since I have about the same amount of time I did when I built my first pair from wood and foam and already have the blades printed.

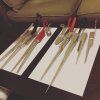
Here are the 3d printed blades:

IMG_3955.JPG

I decided to model the handles directly into them since after looking at the way they fit into the blades on the prop, many of them were too uniform in their transition to pull off with found handles. I also modeled much of the hardware (bolts, screws, etc) directly into the blades since it didn't add anything to the cost and that would be one less thing to do later on.

Since I made the original blades, my modeling skills have gotten much better since it's my job now so I took a stab at the hand plates and think they came out great. I went with more two-dimensional forms since it would have cost too much to print the full thing - plus without time to test fit, I'd have to do multiple prints to get them just right and having a 'top-only' version is safer so there's more flexibility to work them into the rest of the gauntlets. As a result of this, the underside will basically be exposed showing the black gloves, but I'll use some leather material to fill that in and they'll rarely be seen anyway. This will also make it easier to build it so I can put them on and take them off on my own without assistance.

Here are the complete models of each hand with the blades and plates in place:

wipFullRight.jpg wipFullLeft.jpg

And a better look at the two hand plates:

wipPlateRight.jpg wipPlateLeft.jpg

Obviously, I used the reference images that Mike provided earlier in the thread - fantastic material! It provided me with almost exact profiles from all the angles I needed to build them as accurately as possible. I approximated the size using a scaled image of my own hand to ensure they would fit and all the fingers would be where they needed to be when worn. I also whipped up some simple versions of each to print and papercraft to ensure the fit.

As of now, I've started painting the blades and have ordered prints for the plates that should arrive in a few weeks. I've also started cutting out the pieces for the neck piece and gauntlets that my girlfriend is going to help me sew together.
 
Last edited:
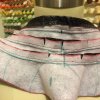
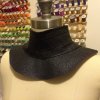
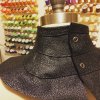
Just finished the base for the neck piece! My girlfriend sewed it for me and she nailed it!

IMG_7426.JPG IMG_7424.JPG IMG_7430.JPG

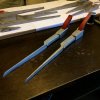
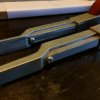
Also, here's a comparison between the old wooden and new 3d printed left forefinger. Main improvements are the surface quality, paint job and accuracy to the screen prop but without extensive sanding and air brushing, I still didn't get the true metallic finish I wanted. Still, it looks much better all around and will be far more durable.

IMG_7418.JPG IMG_7419.JPG IMG_7420.JPG
 
Last edited:
Here are the finished bone hinges, all connected to each other by two-segments worth of ball/chains (the kind you'd find on a pen in the post office or bank) with rusty weathering details - this was for character as much as to hide the imperfections throughout the form of each.

IMG_7439.JPG

For those curious, I started with inexpensive bone party favors from Party City. Here's a link to the ones I used.

http://www.partycity.com/product/mi...p=pla|Google&gclid=CMnHmpHj3s8CFdBZhgodBvsOeg

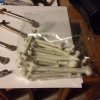
I used the larger of the assortment so I bought two since they only have 9 of those per pack and 12 total were needed. They had holes in them (likely from the injection molding process used to manufacture them, although the listing claims they were pre-drilled for the convenience of threading string through them) that I filled with hot glue then shaved/sanded down to be flush with the surface, then cut and shaved down the ends to match the prop before painting and weathering.

IMG_7440.JPG
 
Last edited:
This thread is more than 3 years old.

Your message may be considered spam for the following reasons:

  1. This thread hasn't been active in some time. A new post in this thread might not contribute constructively to this discussion after so long.
If you wish to reply despite these issues, check the box below before replying.
Be aware that malicious compliance may result in more severe penalties.
Back
Top