You are using an out of date browser. It may not display this or other websites correctly.
You should upgrade or use an alternative browser.
You should upgrade or use an alternative browser.
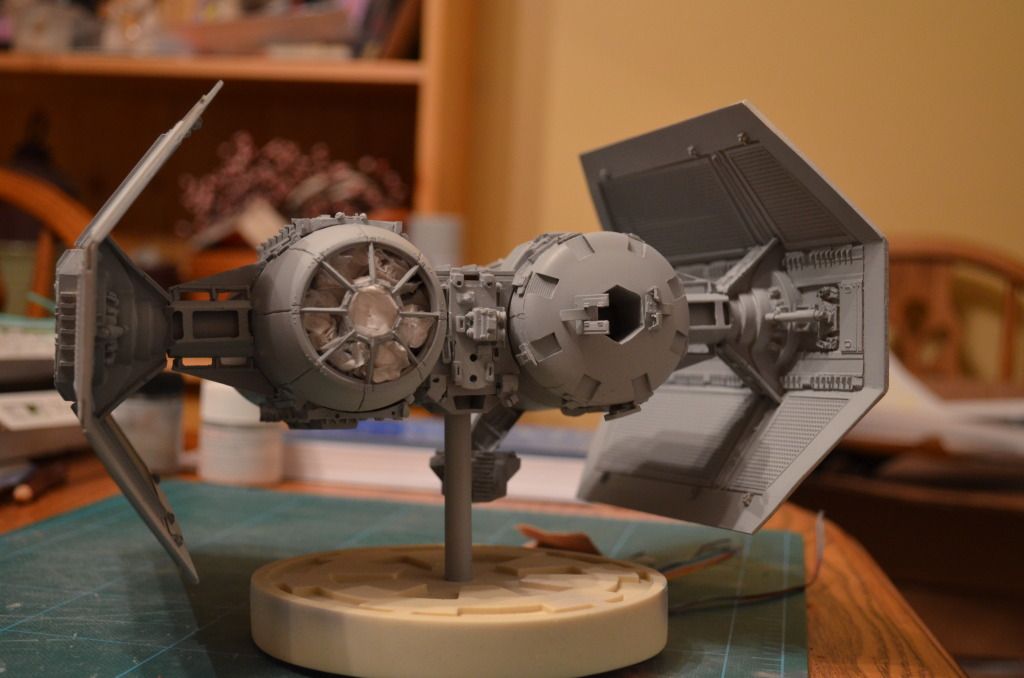
SS TIE Bomber Kit (First SS Build Attempt) Lot's of Pics!
- Thread starter daverep
- Start date
No problem. Shoot me a pm when you are ready.
Shadowknight, I can't tell you how much I appreciate the offer! I've already primed it (pics later tonight) and am at the point where I would like to finish this thing and move on. However, I've decided that I'm probably going to scratch one after doing this at some point, so if the offer still stands, I'll definitely take you up on it and reimburse you for anything that you do. After doing all of the work on this kit, I feel that scratching one may be easier to do anyway!lol:lol
One trick I learned a ways back when scribing (especially curves) is to lay down some tape where you want the scribe line to be. Its relatively easy to adjust the tape so that it lays exactly where you want, then use it as a guide for the scribe. And scribe in many small scratches instead of one deep one
and for a first SS build this aint bad at all... you should be proud of it - and welcome to the madness :thumbsup
Jedi Dade
and for a first SS build this aint bad at all... you should be proud of it - and welcome to the madness
:thumbsupJedi Dade
Last edited:
I think this is who makes the kit, can you confirm if it is Dave?
KIT ALERT!! Studio Scale ESB TIE BOMBER from D. Johnson’s RETRO PLASTIC and of course the pics of the built up model and parts look great then you get a bag a crap in the mail guys like this give garage kit makers a bad name.
KIT ALERT!! Studio Scale ESB TIE BOMBER from D. Johnson’s RETRO PLASTIC and of course the pics of the built up model and parts look great then you get a bag a crap in the mail guys like this give garage kit makers a bad name.
jedimaster
Sr Member
Like I said... Mine was a great casting. So I don't think it's as simple as You make it sound. Could be a one off bad pull. I don't know but I don't think we need pitchforks just yet. Dabs doing actress job at fixing this bomber anyway.
Hey guys...taking a quick break at work to check to see what's happening on the site.
Jedi Dade...GREAT idea on the scribing! THANK YOU!! I'll remember that for next time! I was just using a thinner sheet of styrene as a guide which worked okay on the cylinders but not so much on the more complicated curves.
Ray...again, I'm not going to drop any names.
jedimaster...I completely agree with you. I'm not on a witch-hunt for anyone or to ruin anyone's reputation. I'll admit, the first set of wings were really bad and was pretty angry about them...but I contacted him and he fixed the worst of it with the second set, got them out to me and didn't charge me for shipping those. And if I recall, he paid for expedited shipping which was great! I'm happy with what I did on the new wings thus far and you really can't tell there were any issues with them at all.
The kit I got may HAVE been a fluke. Is the casting as good as some of the other kits I've gotten since? No. There were other parts in the kit that the resin was pretty thin, but I repaired them and are fine now. In all honesty, I don't think the kit is anywhere near horrible. It just needed some love and I was willing to give it some. Okay...that sounded pretty weird.
You guys are better judges of kit quality than I since I'm still new to this.
Again, I look at what I had to do to the kit as a challenge and a learning experience that I can use down the road. Especially if I'm going to attempt a 32" Falcon down the road. :facepalm I've been having fun doing what I had to do...well, except the scribing :lol...and have been very humbled by all of the positive comments on my work.
Back to the wings one last time...our girls are at the grandparents house tonightthumbsup:thumbsup so I'm going to have the time to finish painting them up and post what they look like this evening. I might even have the time to paint up the main body. I've also started working on a base and will get those up as well.
Thanks, all! --Dave
Jedi Dade...GREAT idea on the scribing! THANK YOU!!
I'll remember that for next time! I was just using a thinner sheet of styrene as a guide which worked okay on the cylinders but not so much on the more complicated curves.Ray...again, I'm not going to drop any names.
jedimaster...I completely agree with you. I'm not on a witch-hunt for anyone or to ruin anyone's reputation. I'll admit, the first set of wings were really bad and was pretty angry about them...but I contacted him and he fixed the worst of it with the second set, got them out to me and didn't charge me for shipping those. And if I recall, he paid for expedited shipping which was great! I'm happy with what I did on the new wings thus far and you really can't tell there were any issues with them at all.
The kit I got may HAVE been a fluke. Is the casting as good as some of the other kits I've gotten since? No. There were other parts in the kit that the resin was pretty thin, but I repaired them and are fine now. In all honesty, I don't think the kit is anywhere near horrible. It just needed some love and I was willing to give it some. Okay...that sounded pretty weird.
You guys are better judges of kit quality than I since I'm still new to this.
Again, I look at what I had to do to the kit as a challenge and a learning experience that I can use down the road. Especially if I'm going to attempt a 32" Falcon down the road. :facepalm I've been having fun doing what I had to do...well, except the scribing :lol...and have been very humbled by all of the positive comments on my work.
Back to the wings one last time...our girls are at the grandparents house tonight
thumbsup:thumbsup so I'm going to have the time to finish painting them up and post what they look like this evening. I might even have the time to paint up the main body. I've also started working on a base and will get those up as well.Thanks, all! --Dave
Ray...sent you an email.
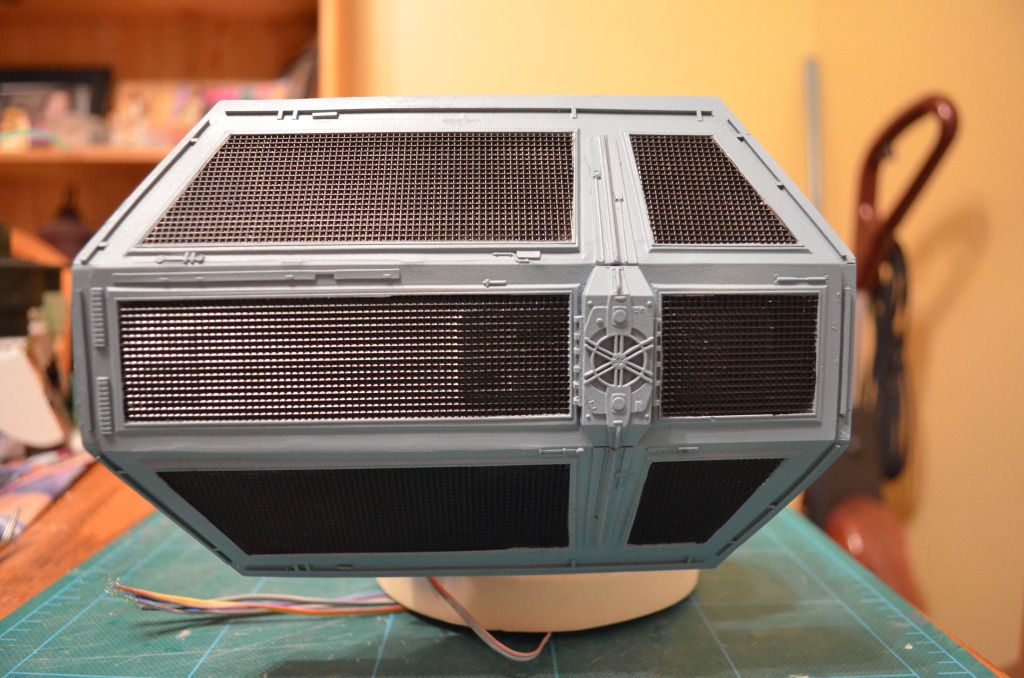
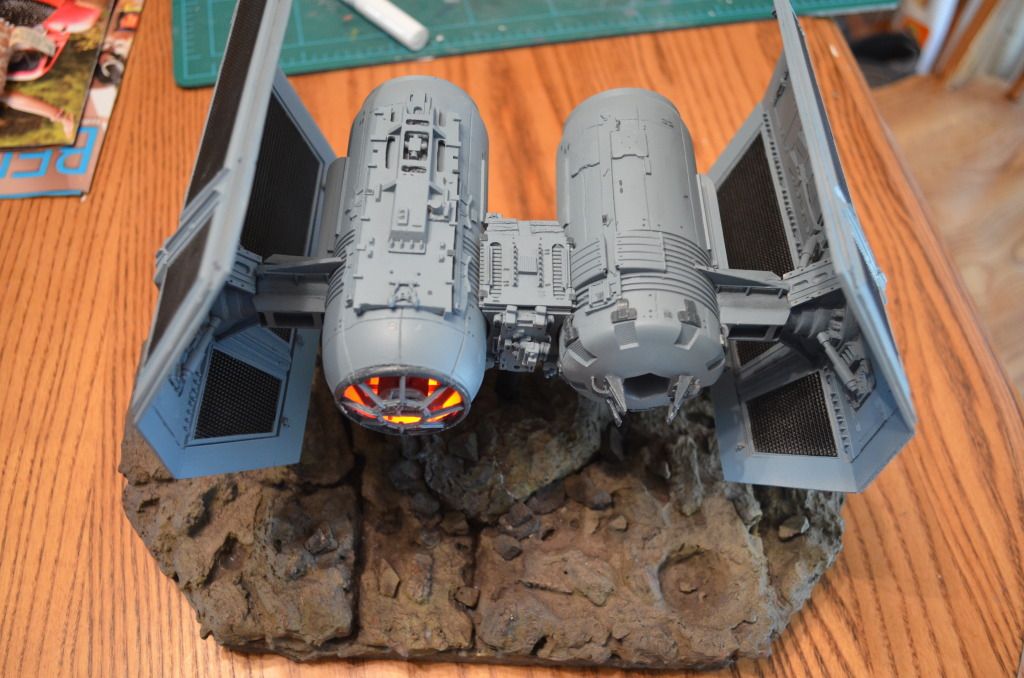
Here are more pics...first of the repaired wings with a coat of primer on them.
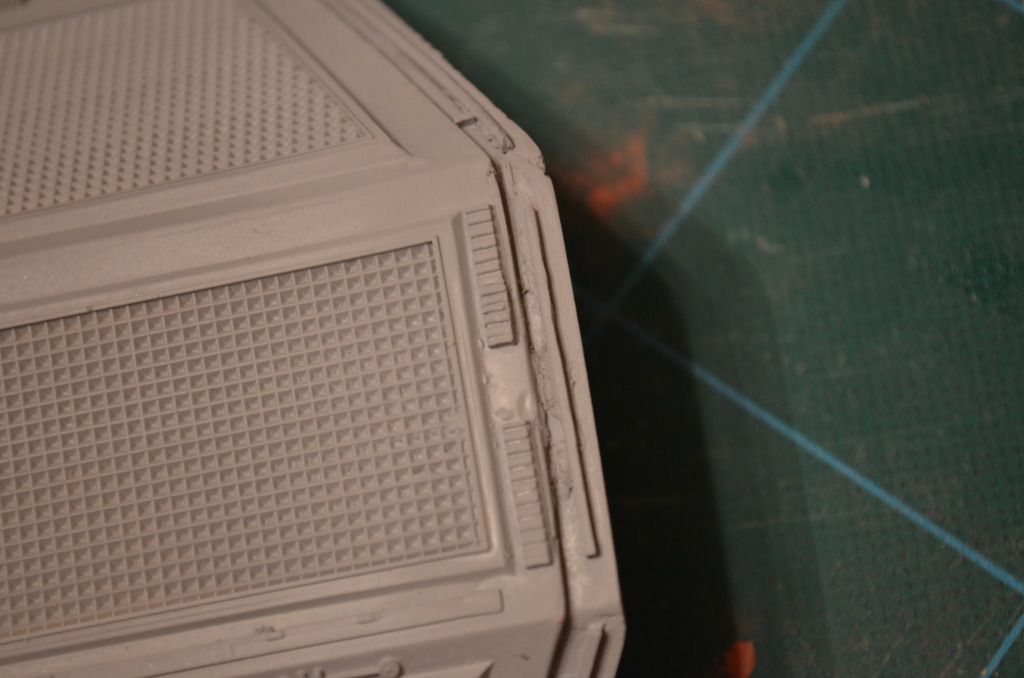
A little bit of bondo and some sanding and the styrene shims are now gone as well as the crack. A few pics ready for final a final coat...
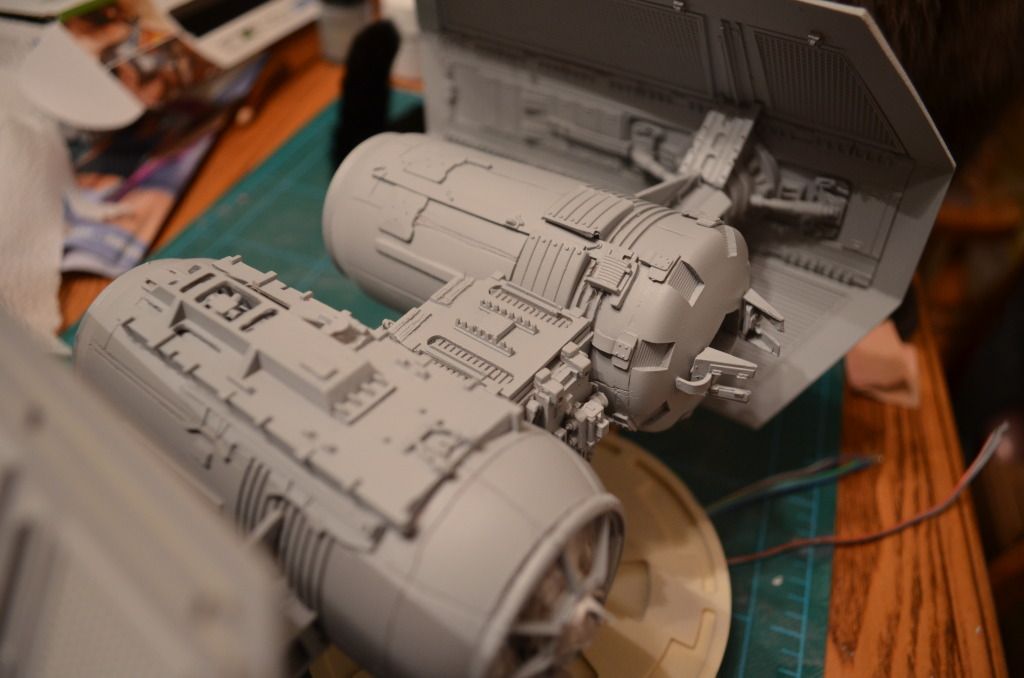
And the final coat.
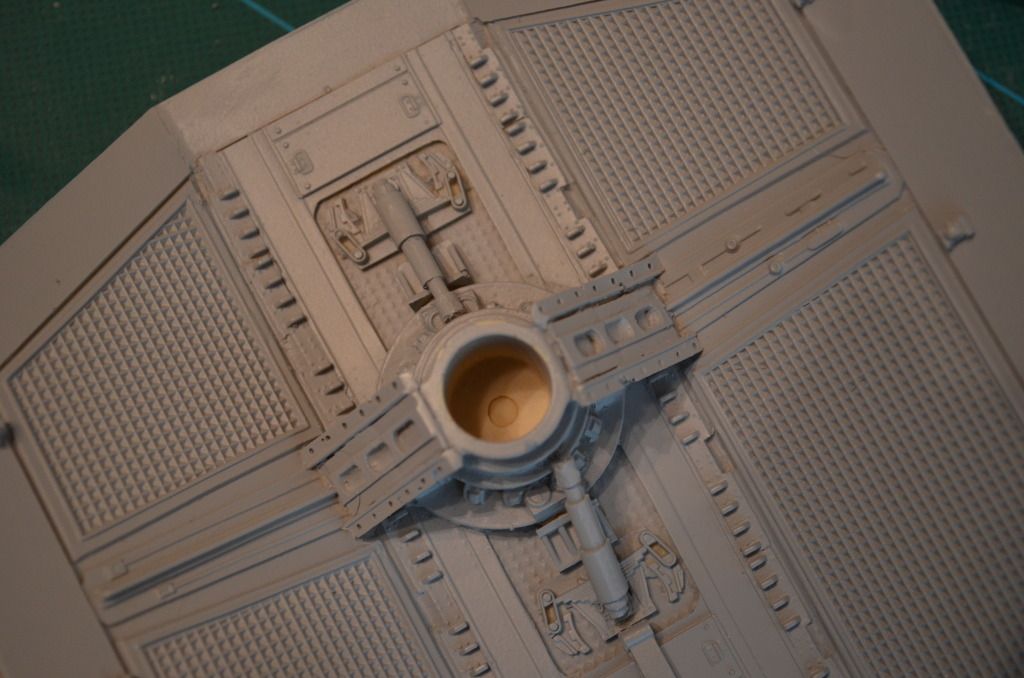
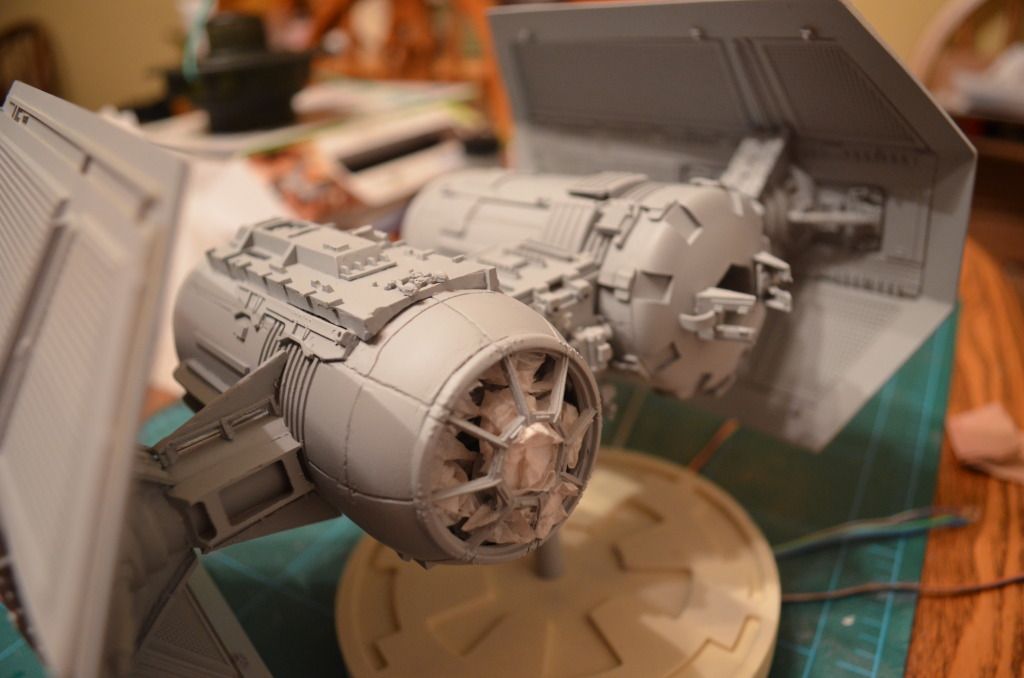
Cockpit-no flash...
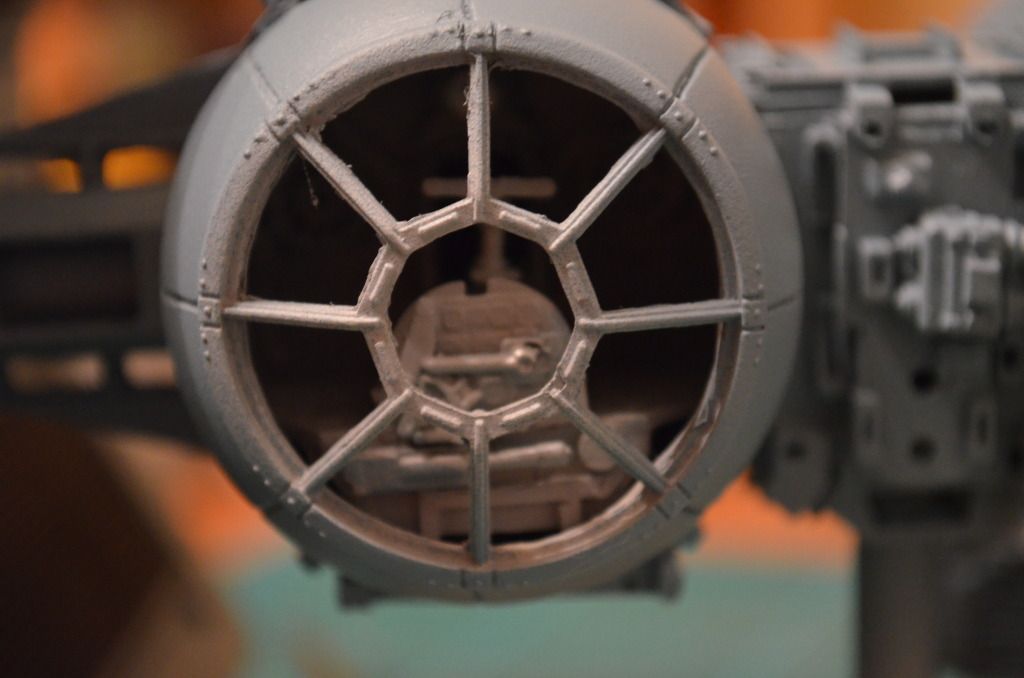
Cockpit-with flash...
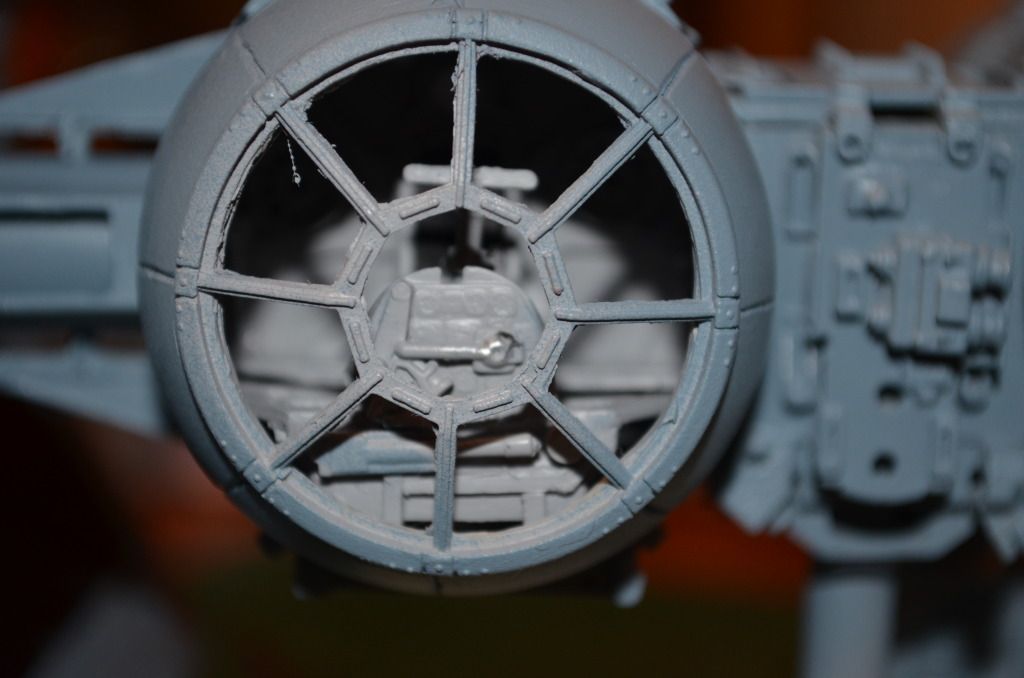
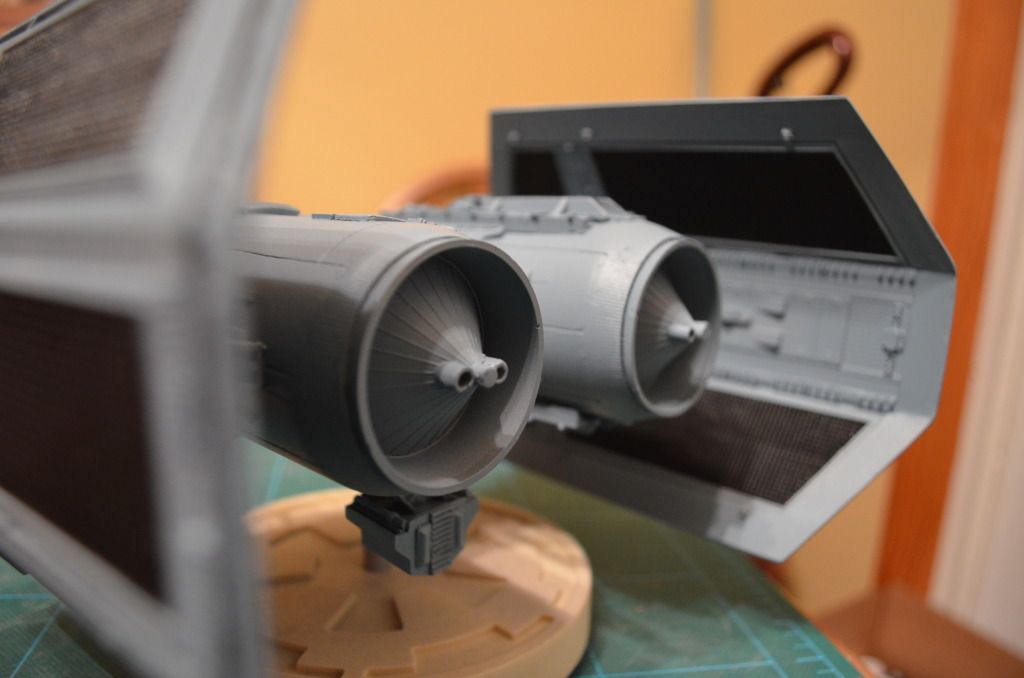
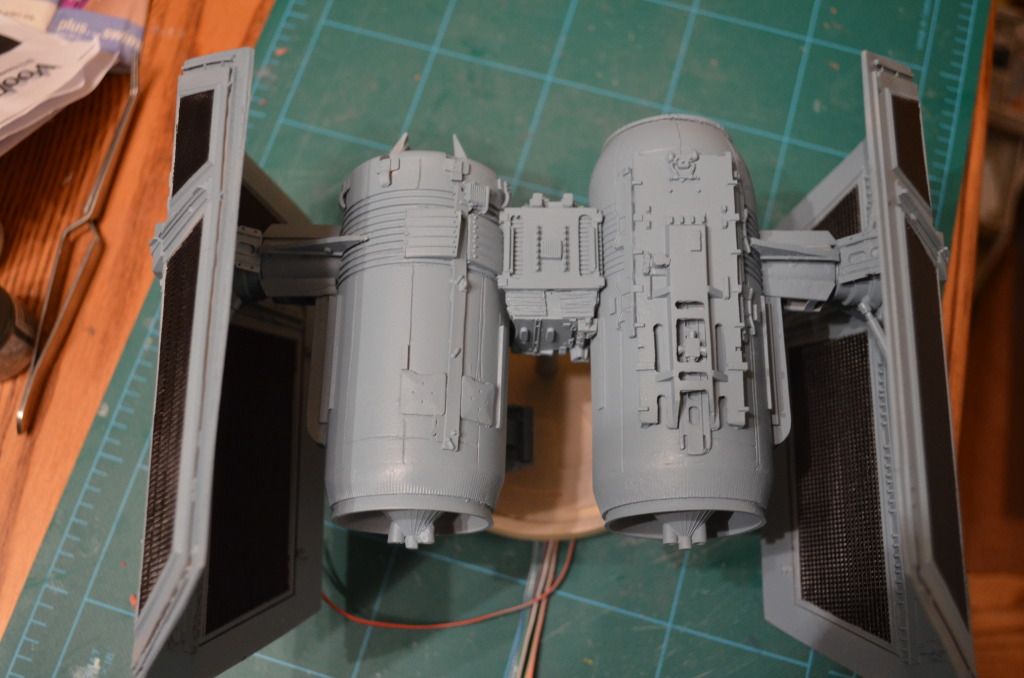
I mixed the paints myself. I think I got it pretty close. It may be a bit too dark, but I'm not too worried. I used some ref picks from over at Studio Scale. The pics that Jase has over there of the model all have a flash which causes the color to wash out a bit, so I DID want to go darker originally, but again it may be too dark. I've got a bit of detail to do yet and then I'll be finished the paint.
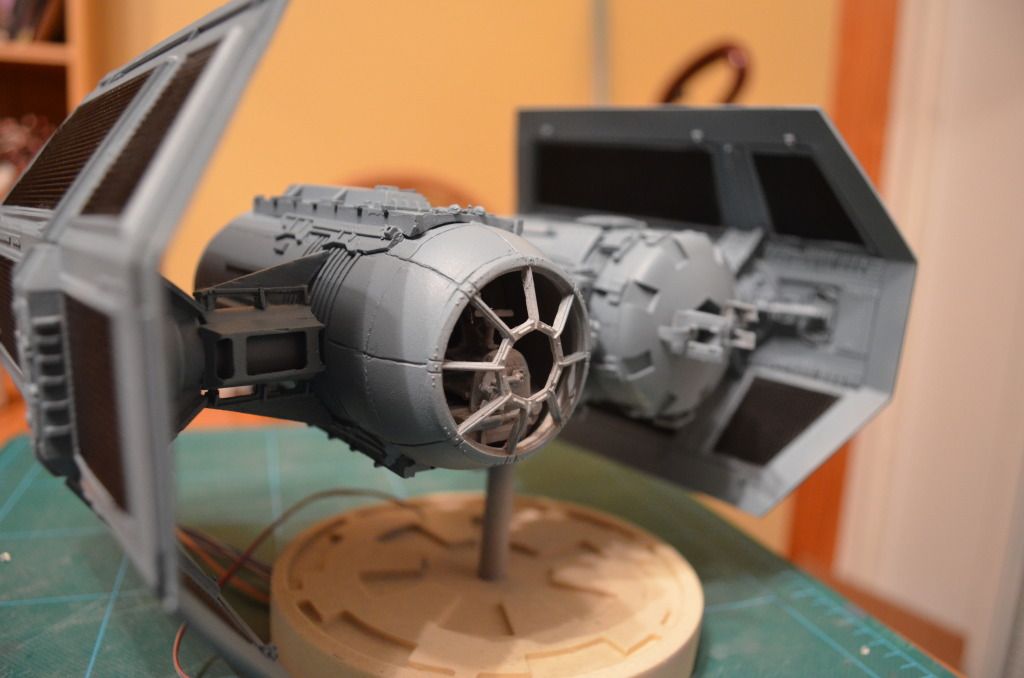
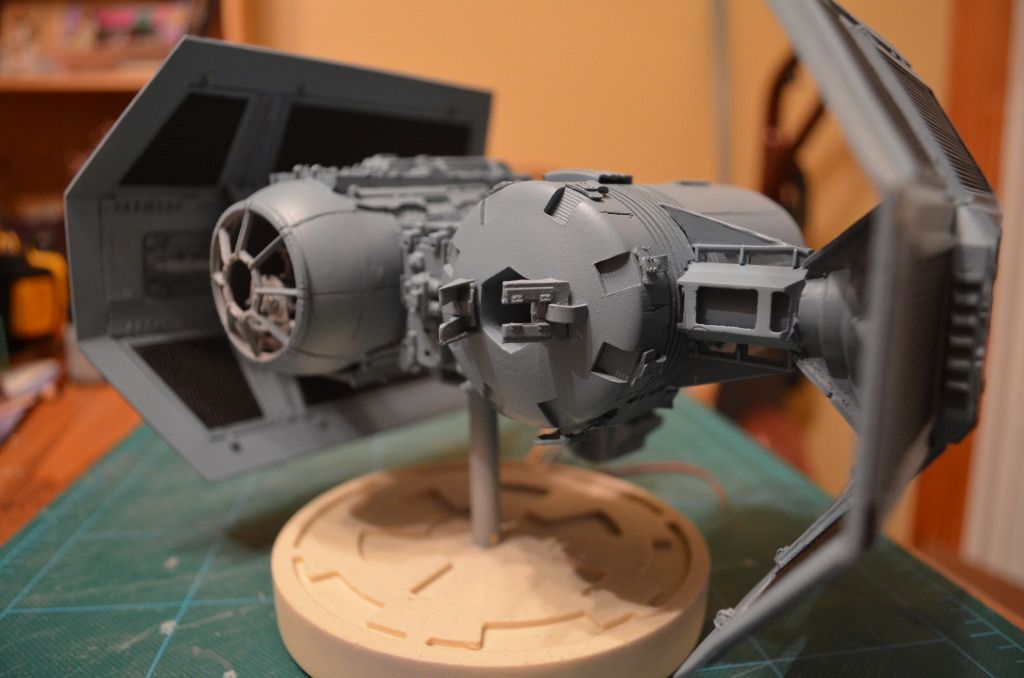
Next step is to work on a custom base for this thing. I can't go too big as I don't have a lot of display space in the house but I've decided to do an asteroid base. I think I know how I'm going to tackle the detail, but the trick is to work the 9-volt battery case and toggle switch for the lighting. This may take a while.
Here's a look at the VERY beginnings of the base.
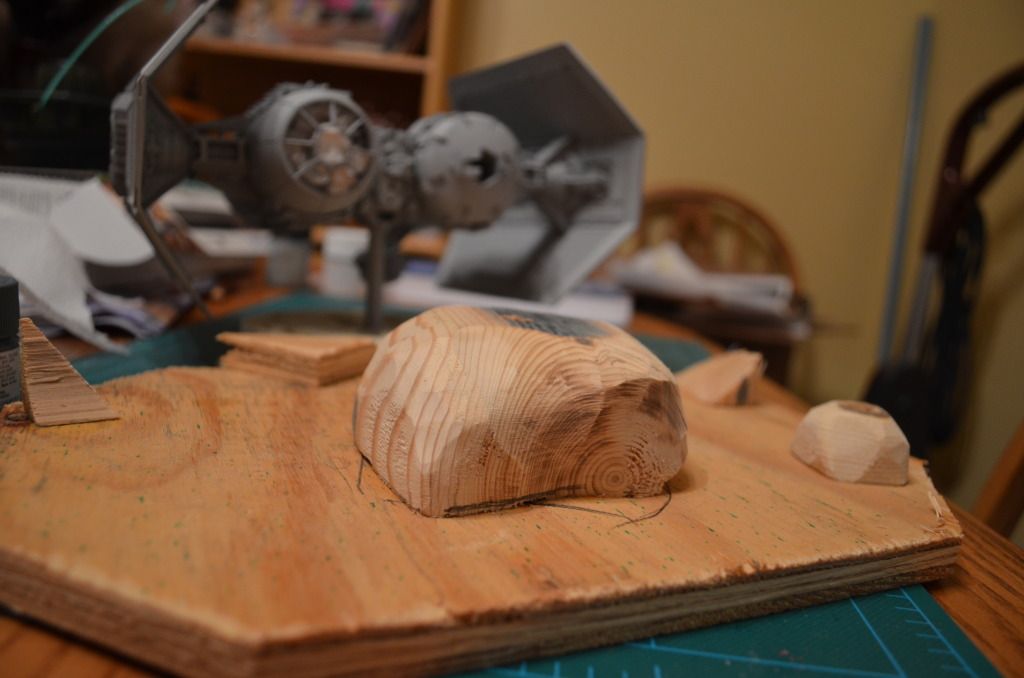
Thanks for looking!
Here are more pics...first of the repaired wings with a coat of primer on them.
A little bit of bondo and some sanding and the styrene shims are now gone as well as the crack. A few pics ready for final a final coat...
And the final coat.
Cockpit-no flash...
Cockpit-with flash...
I mixed the paints myself. I think I got it pretty close. It may be a bit too dark, but I'm not too worried. I used some ref picks from over at Studio Scale. The pics that Jase has over there of the model all have a flash which causes the color to wash out a bit, so I DID want to go darker originally, but again it may be too dark. I've got a bit of detail to do yet and then I'll be finished the paint.
Next step is to work on a custom base for this thing. I can't go too big as I don't have a lot of display space in the house but I've decided to do an asteroid base. I think I know how I'm going to tackle the detail, but the trick is to work the 9-volt battery case and toggle switch for the lighting. This may take a while.
Here's a look at the VERY beginnings of the base.
Thanks for looking!
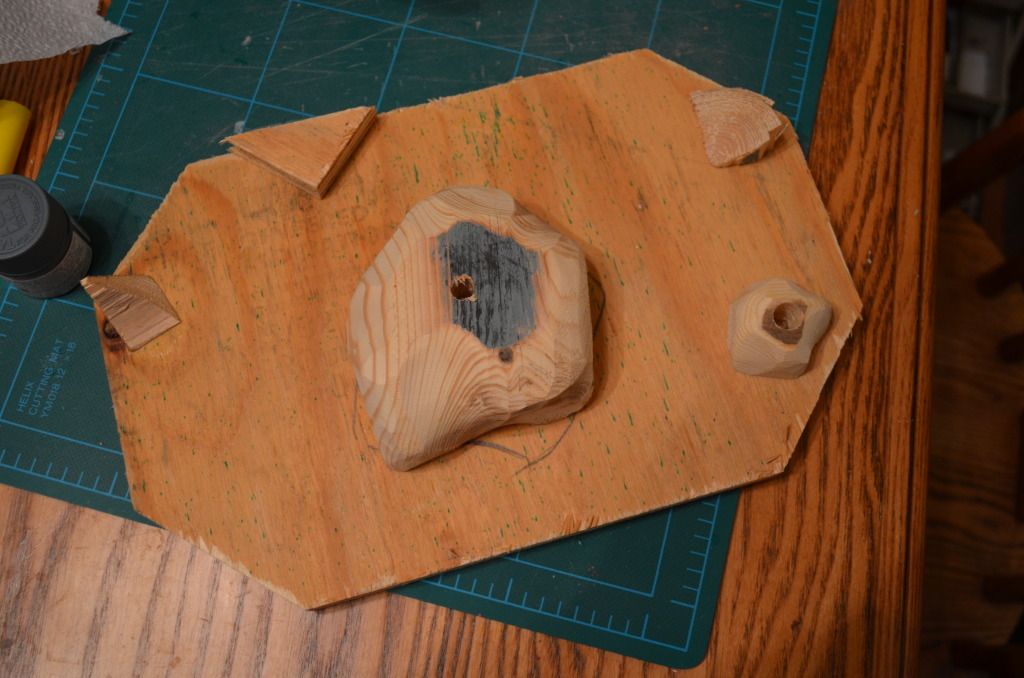
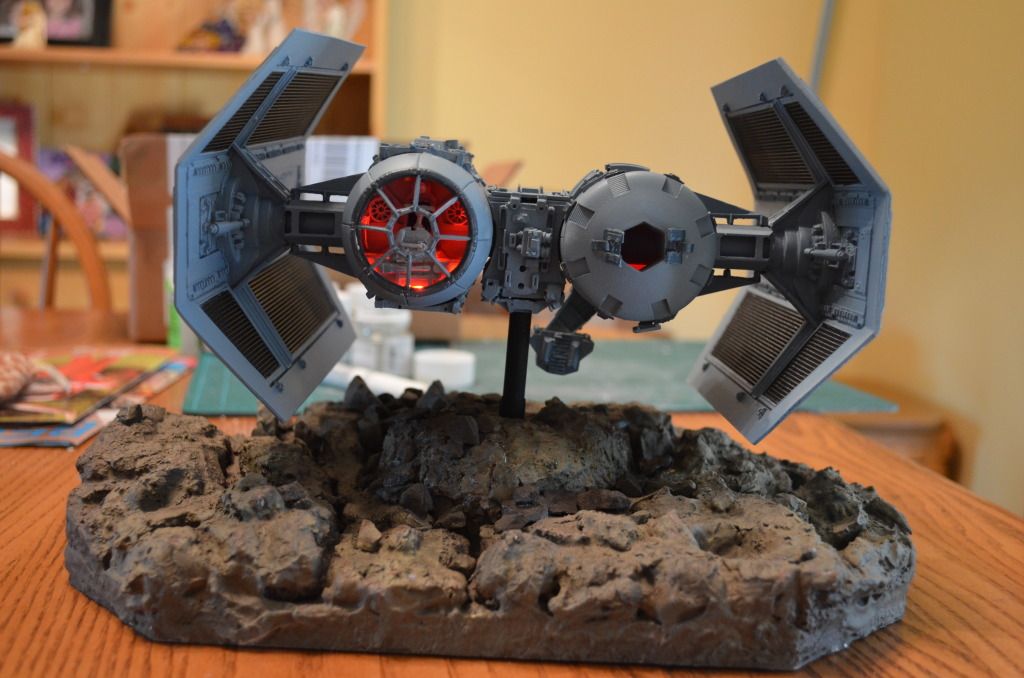
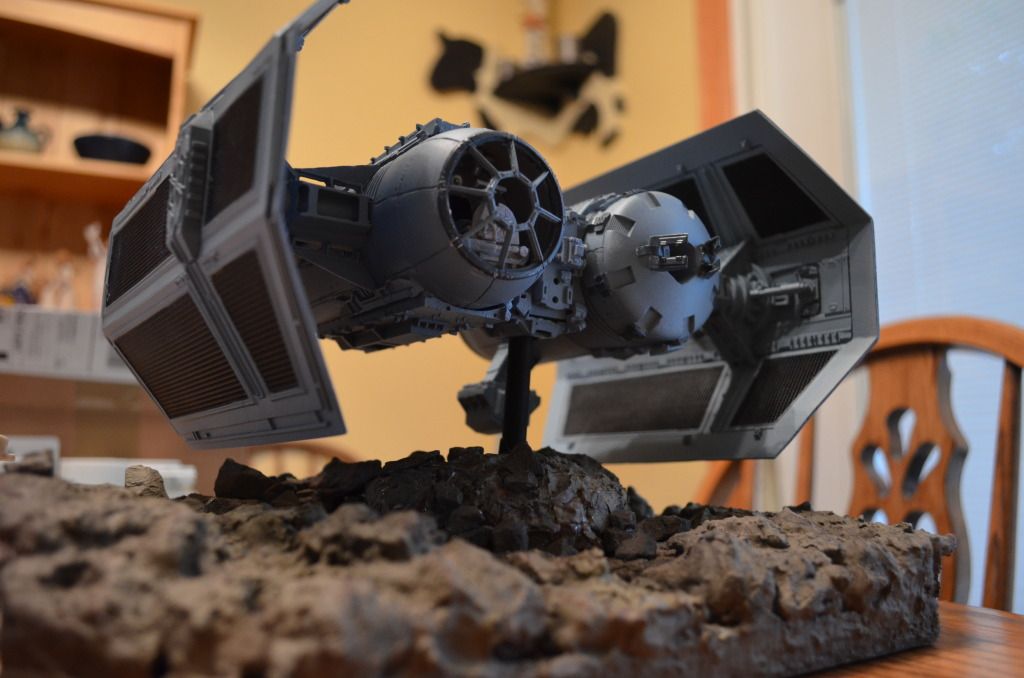
I'm back one last time. Gonna finish up the thread. Just wanted to post a few progress pics of the base I did up and the finished display.
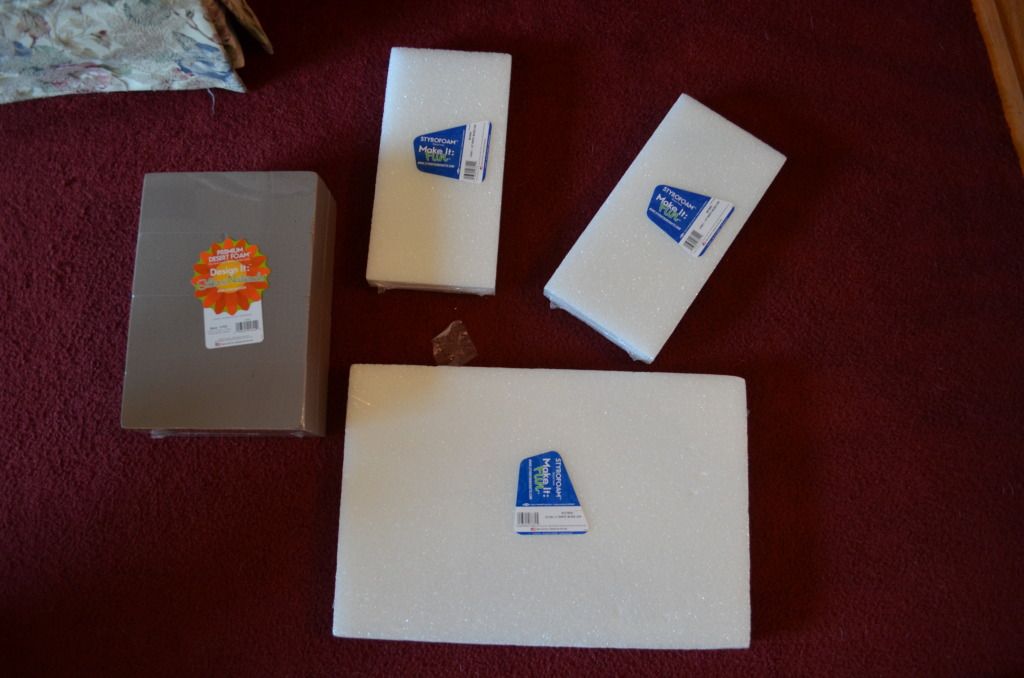
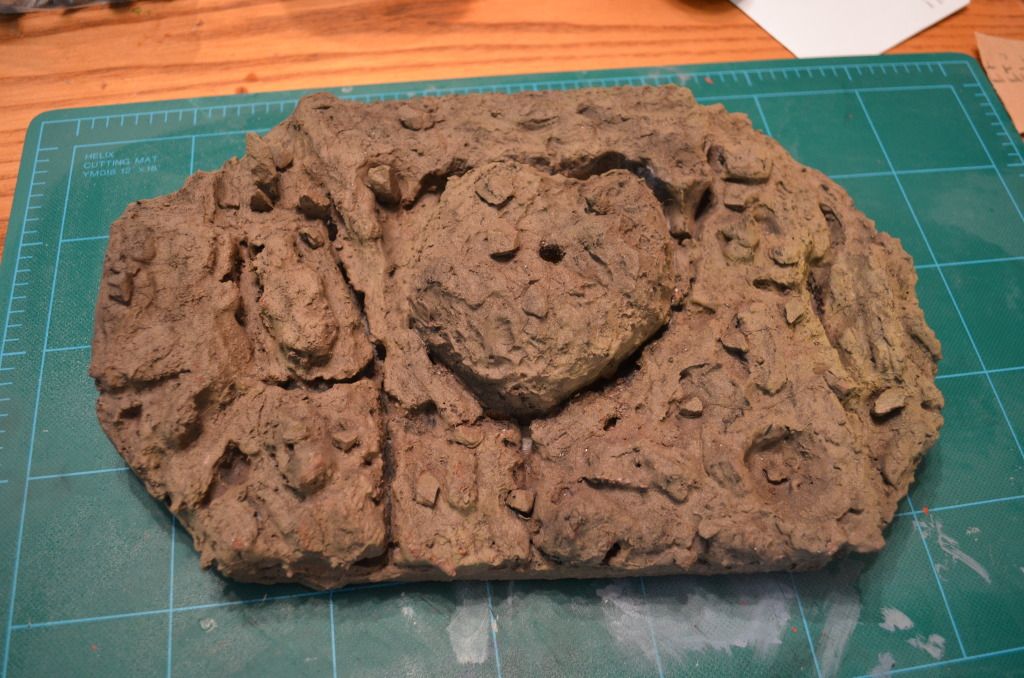
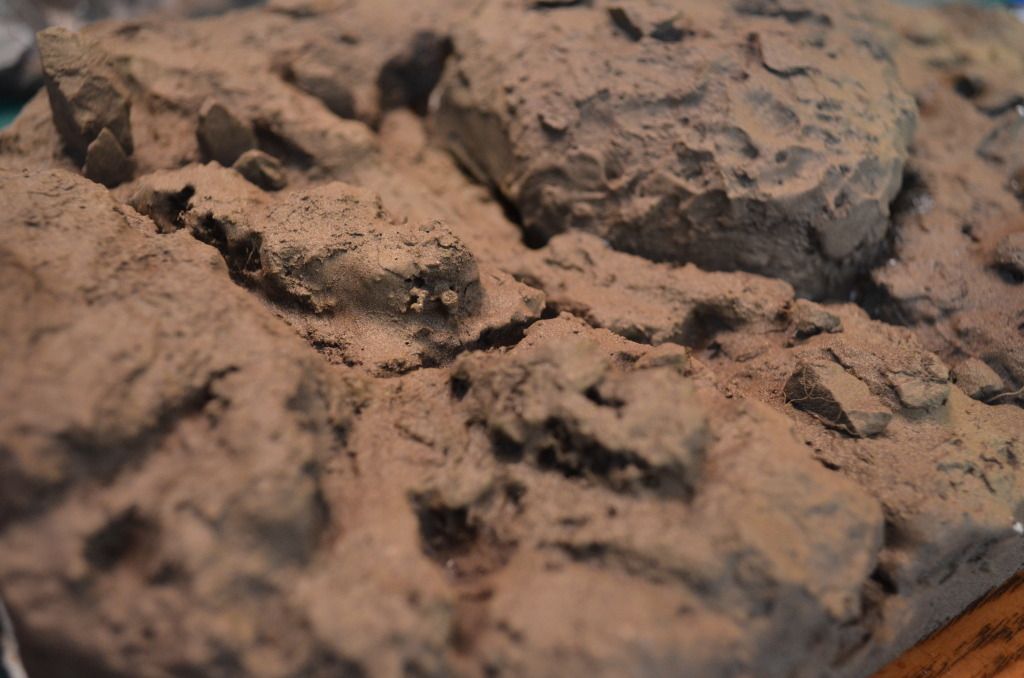
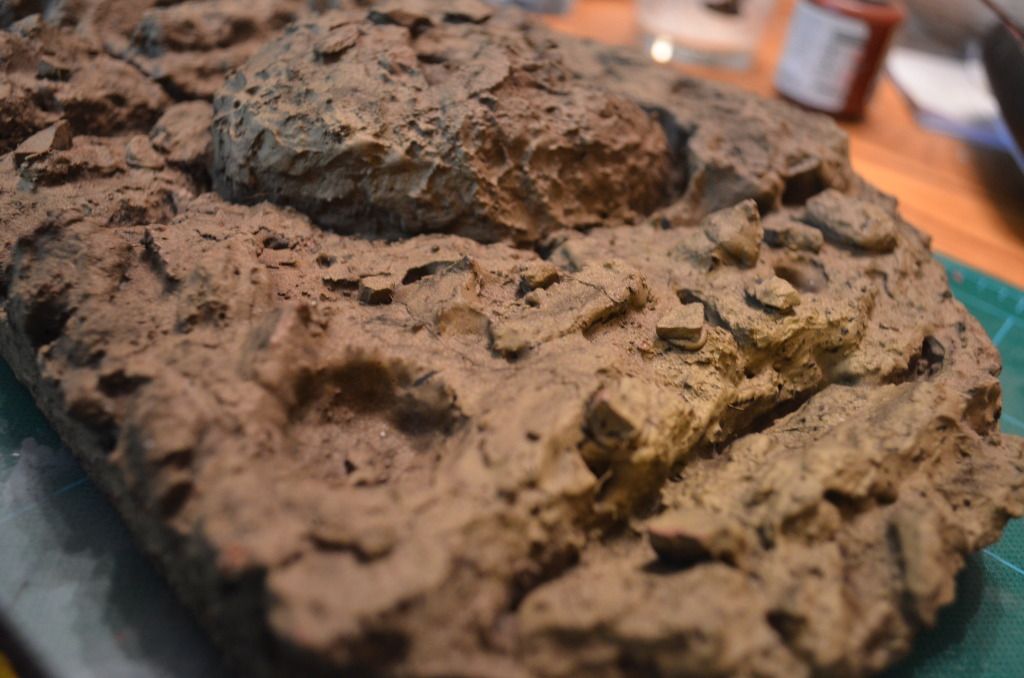
I went to one of our local hobby stores and got a couple of different pieces of styrofoam. I ended up going with the more porous foam that is used for displays and floral arrangements.
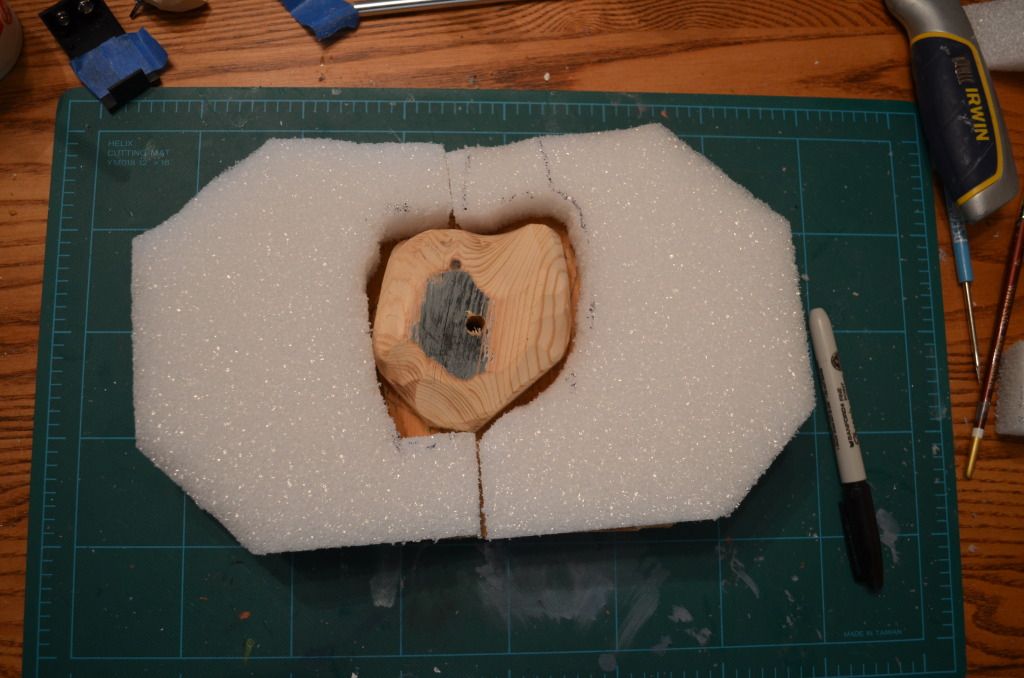
I cut the sheet to fit the base and then segmented it to create different levels for the asteroid.
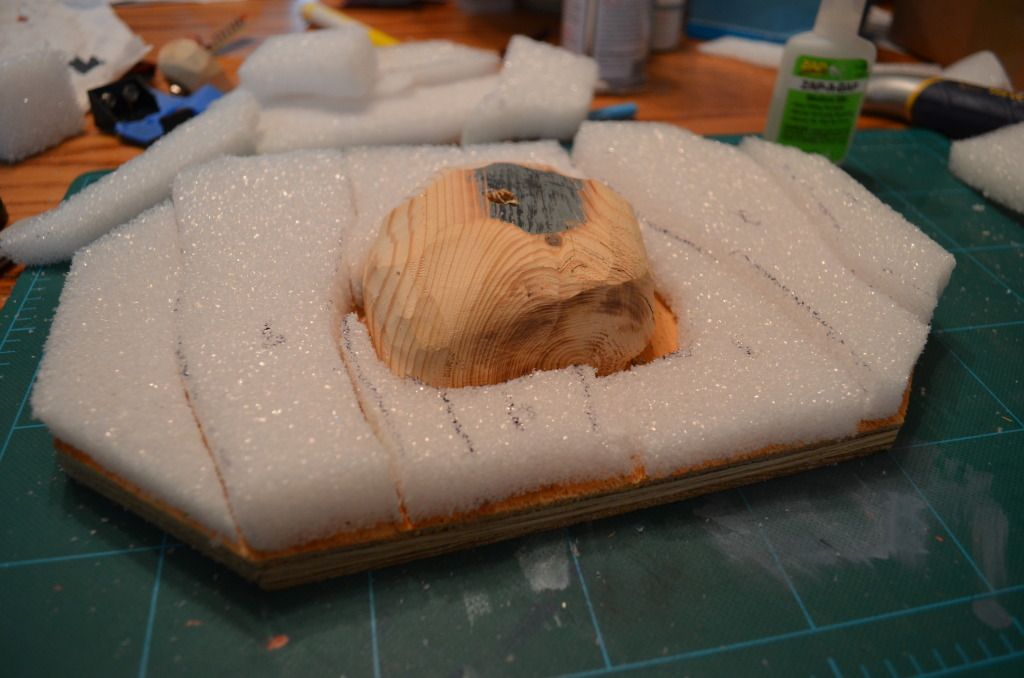
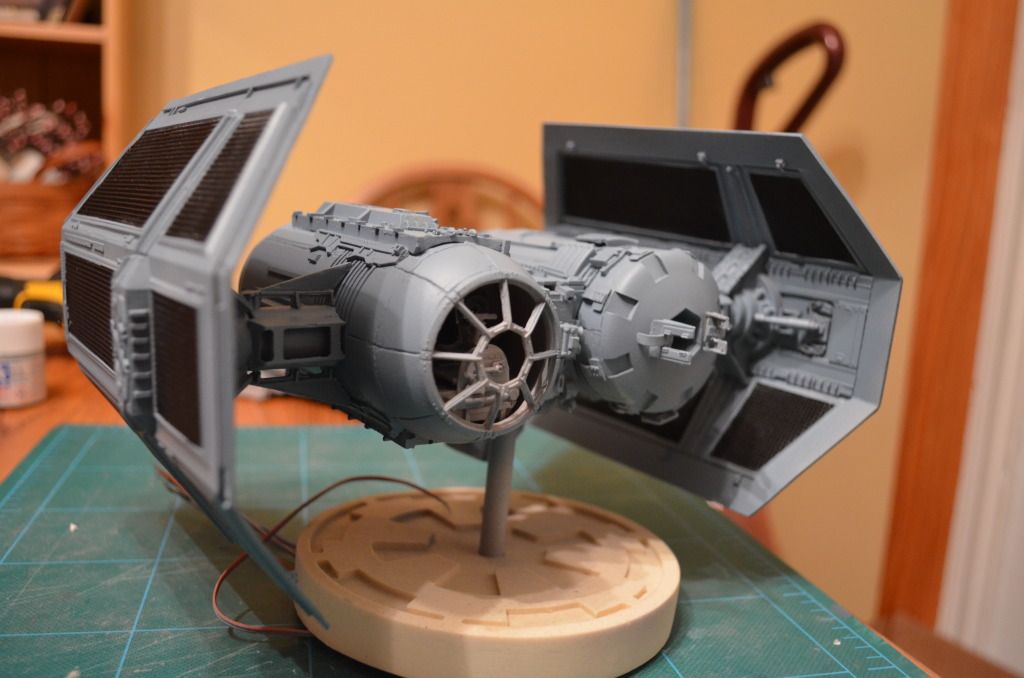
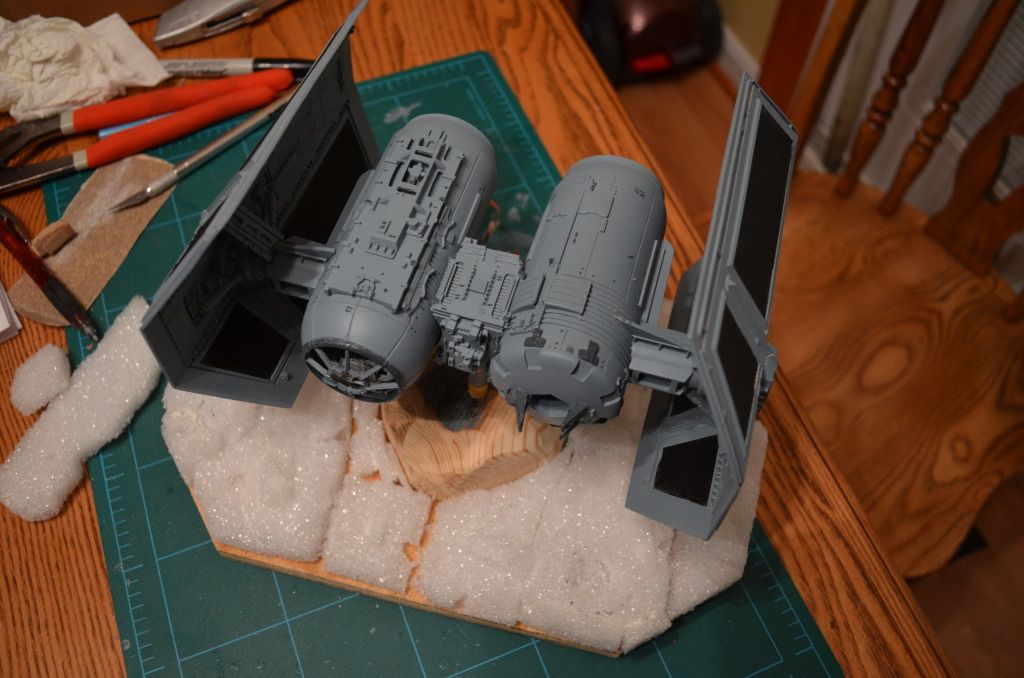
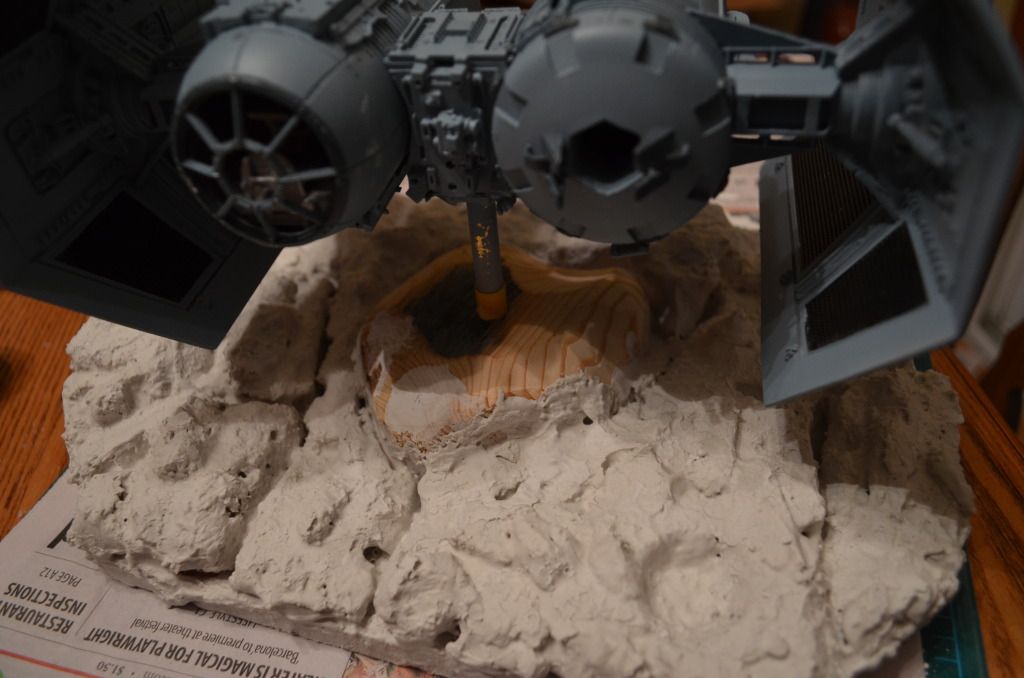
Here's the model test fitted on the base.
My original plan was to use some extra hobby plaster that I had laying around the house and then top coat that with Ultracal which his a much harder plaster.
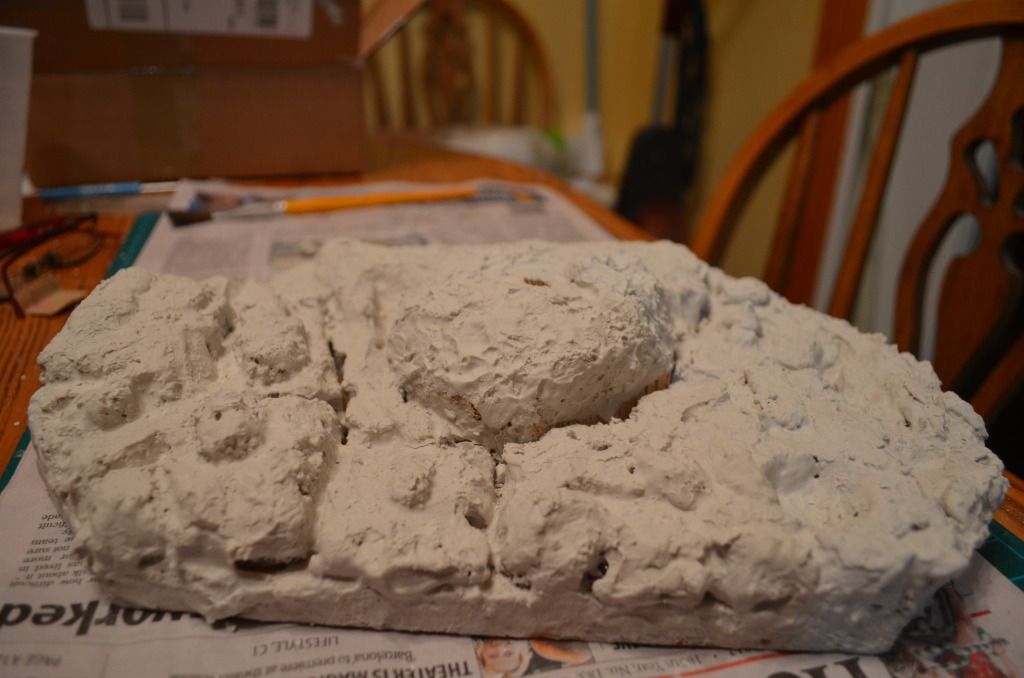
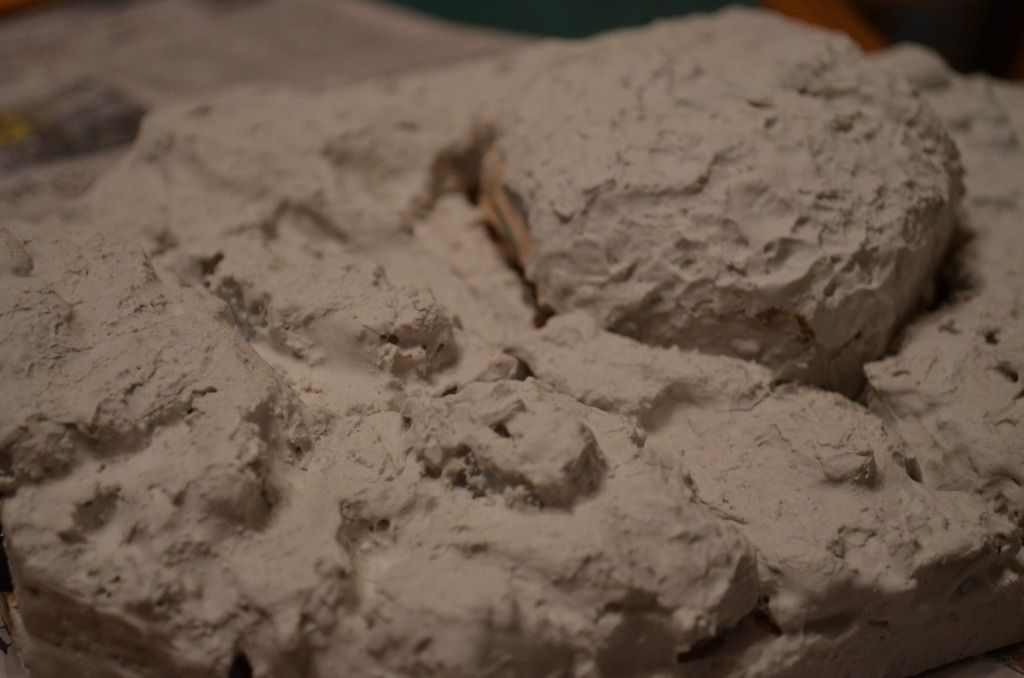
But the hobby plaster seemed, at first, to set up pretty well.
Here's the painted base. I just airbrushed a bunch of layers on the plaster after doing a black basecoat. I topcoated it with a fine layer of a very light tan.
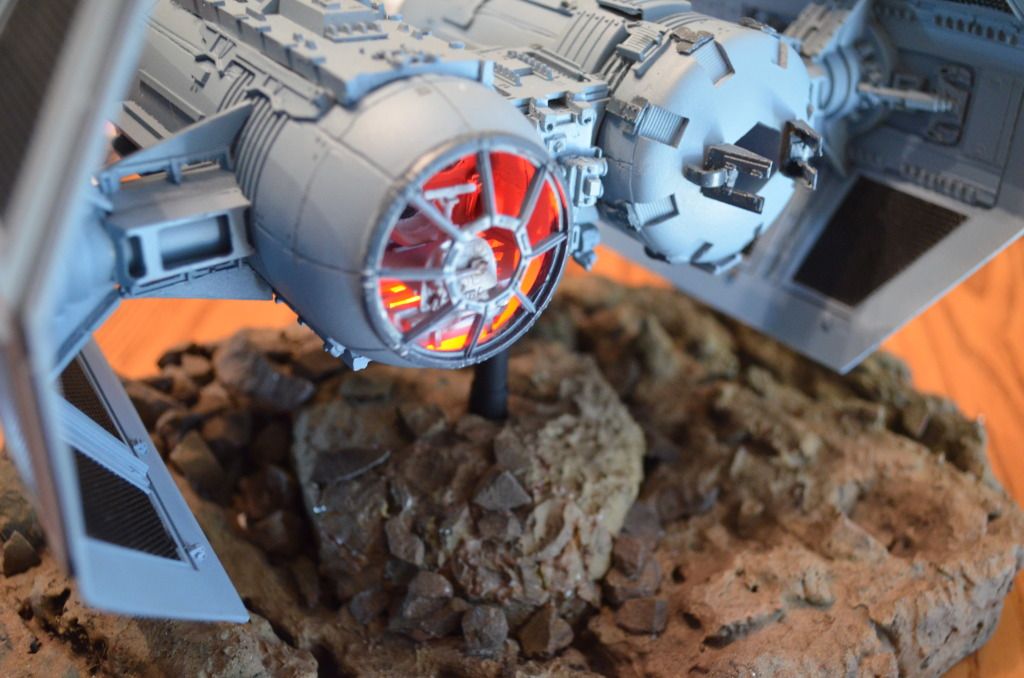
And the model on the final display.
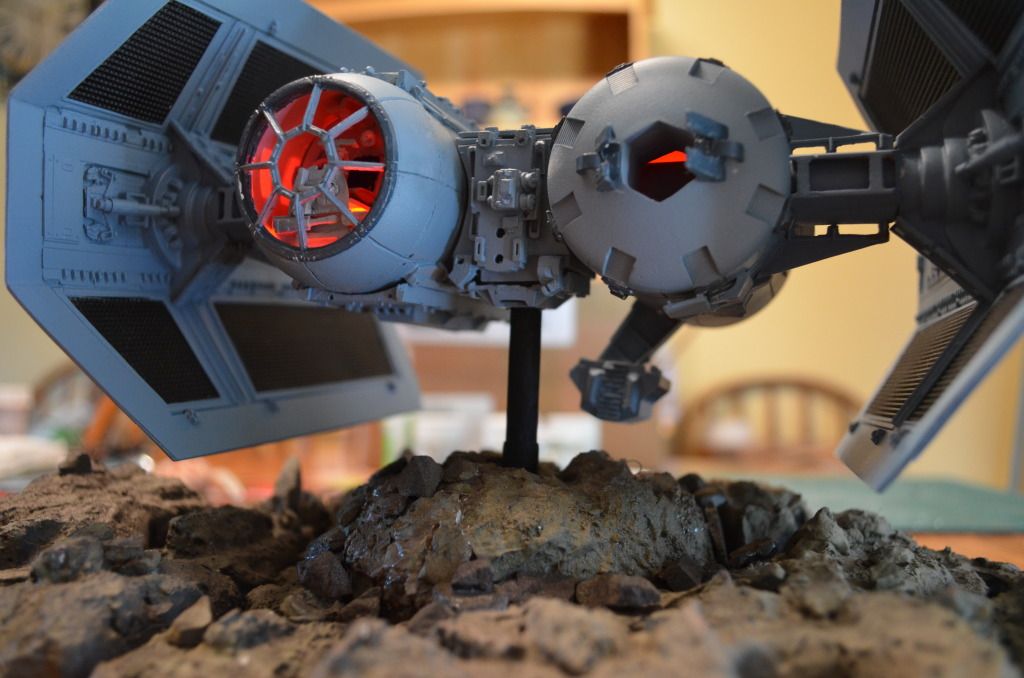
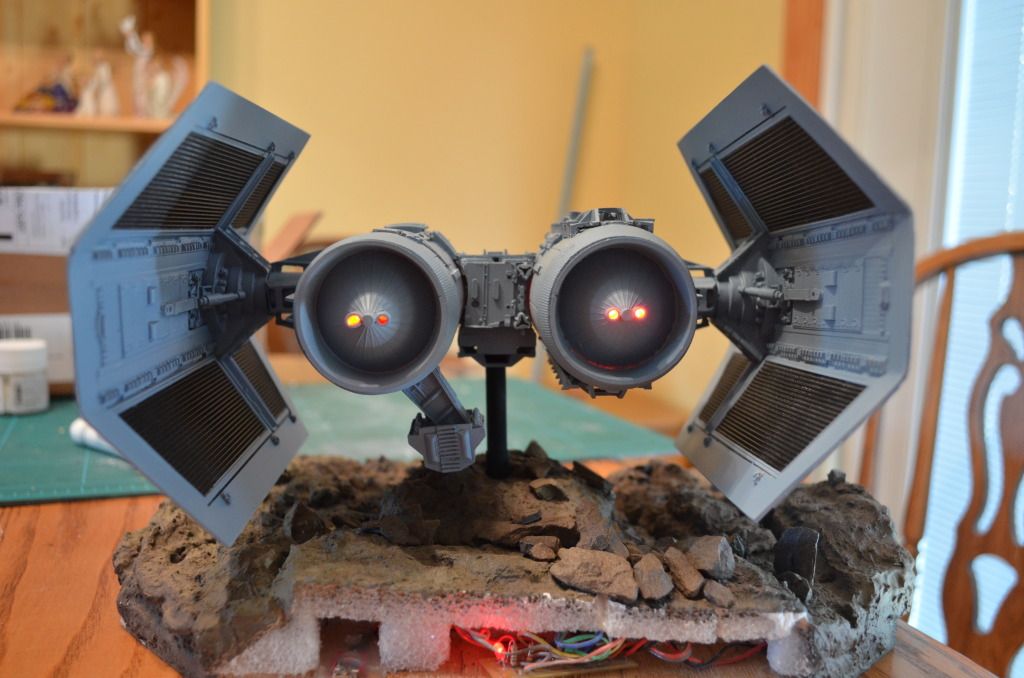
I didn't notice that I had an engine LED light out until I was finished uploading these shots to Photobucket. It was fine before I took the photos. :angry I've tried to troubleshoot it and it seems that I've blown the bulb. Oh, well...I guess 4 out of 5 isn't too bad for my first wiring job! :facepalm
I also had to do a bit of repair to the plaster around the base that the TIE is sitting in. I should have gone with the Ultracal. The hobby plaster ended up not setting too well on the 2x4 piece. Live and learn...
Thanks for looking and thanks everyone for the comments!
--Dave
I went to one of our local hobby stores and got a couple of different pieces of styrofoam. I ended up going with the more porous foam that is used for displays and floral arrangements.
I cut the sheet to fit the base and then segmented it to create different levels for the asteroid.
Here's the model test fitted on the base.
My original plan was to use some extra hobby plaster that I had laying around the house and then top coat that with Ultracal which his a much harder plaster.
But the hobby plaster seemed, at first, to set up pretty well.
Here's the painted base. I just airbrushed a bunch of layers on the plaster after doing a black basecoat. I topcoated it with a fine layer of a very light tan.
And the model on the final display.
I didn't notice that I had an engine LED light out until I was finished uploading these shots to Photobucket. It was fine before I took the photos. :angry I've tried to troubleshoot it and it seems that I've blown the bulb. Oh, well...I guess 4 out of 5 isn't too bad for my first wiring job! :facepalm
I also had to do a bit of repair to the plaster around the base that the TIE is sitting in. I should have gone with the Ultracal. The hobby plaster ended up not setting too well on the 2x4 piece. Live and learn...
Thanks for looking and thanks everyone for the comments!
--Dave
Ghost Host
Sr Member
Wow, great save of a rough kit! I love the lighting and base.
wookieefood
New Member
fantastic
Thanks guys! I really appreciate the comments! Sorry for the delay in posting...been busy doing things OTHER than modeling. :cry
Lee...I enjoy coming up with the bases as much as doing the models themselves. They're a lot of fun. Only problem is I'm a bit limited with display space. My wife keeps asking me..."Where are you going to put that?". My typical response is..."Dunno...I'll figure it out later." So far, I've been lucky! LOL!
Thanks again guys!
--Dave
3d-builder
Sr Member
:lol That base is so sneaky I love it.....great build !
Similar threads
- Replies
- 16
- Views
- 1,204