SS TIE Bomber Kit (First SS Build Attempt) Lot's of Pics!

daverep

Active Member
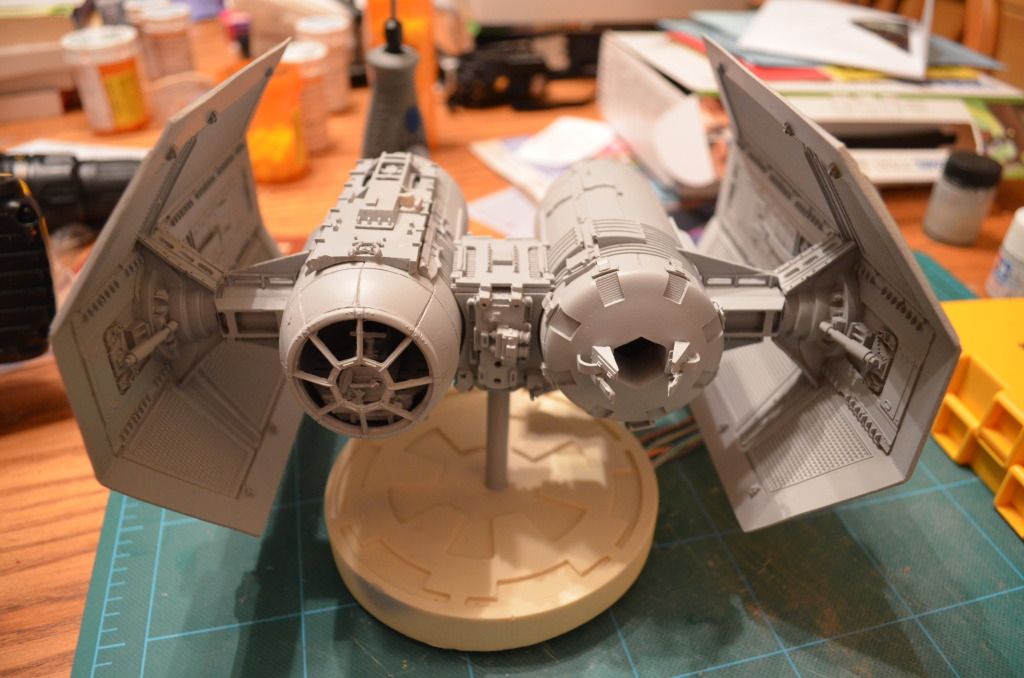
I've been wanting to start a SS build, so I picked up a TIE Bomber kit from the MMM site. It's not a bad kit in my opinion, it has it's quirks, though. But it's been pretty straight forward to build so far. The entire kit is resin.

I did have a photo of the kit contents, but the stupid file somehow got corrupt when I was transferring it over from my SD card to my computer, so my apologies for now showing the entire kit all laid out.

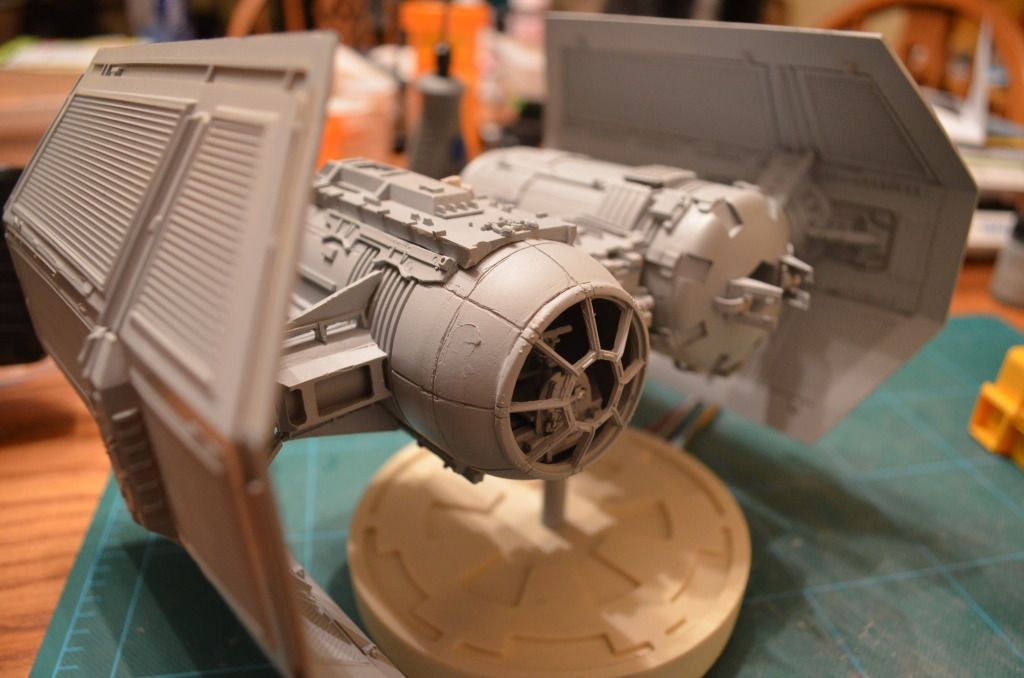
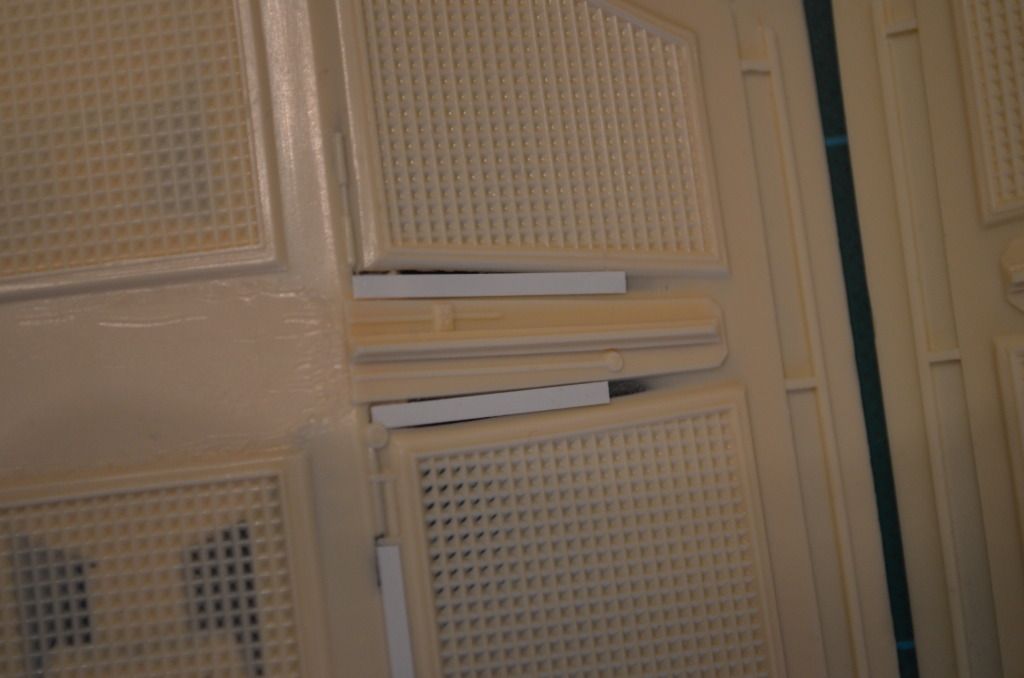
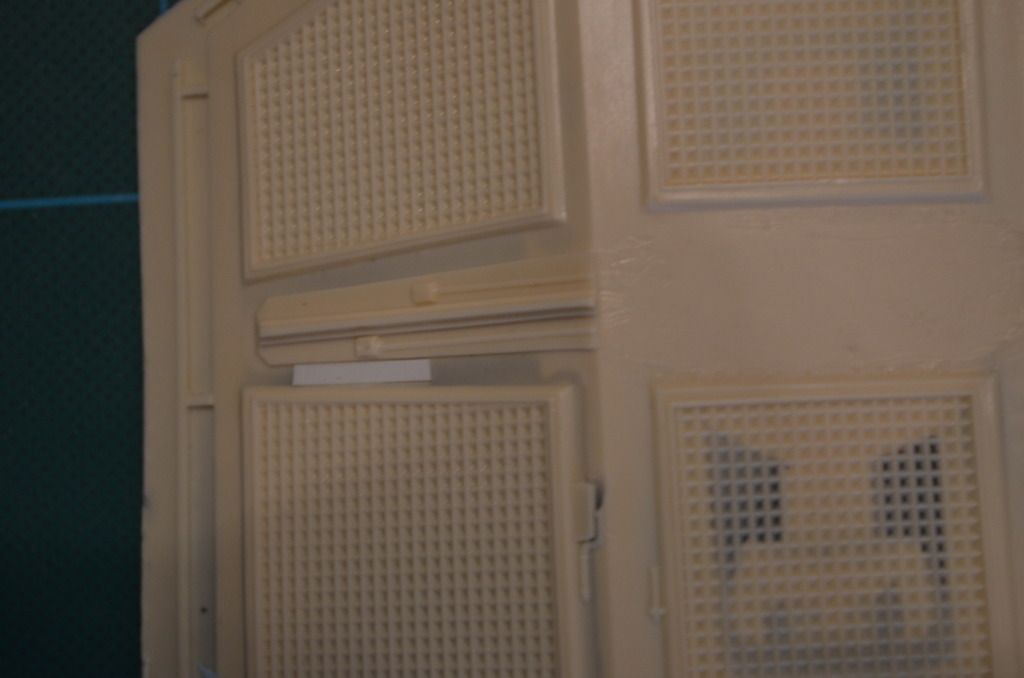
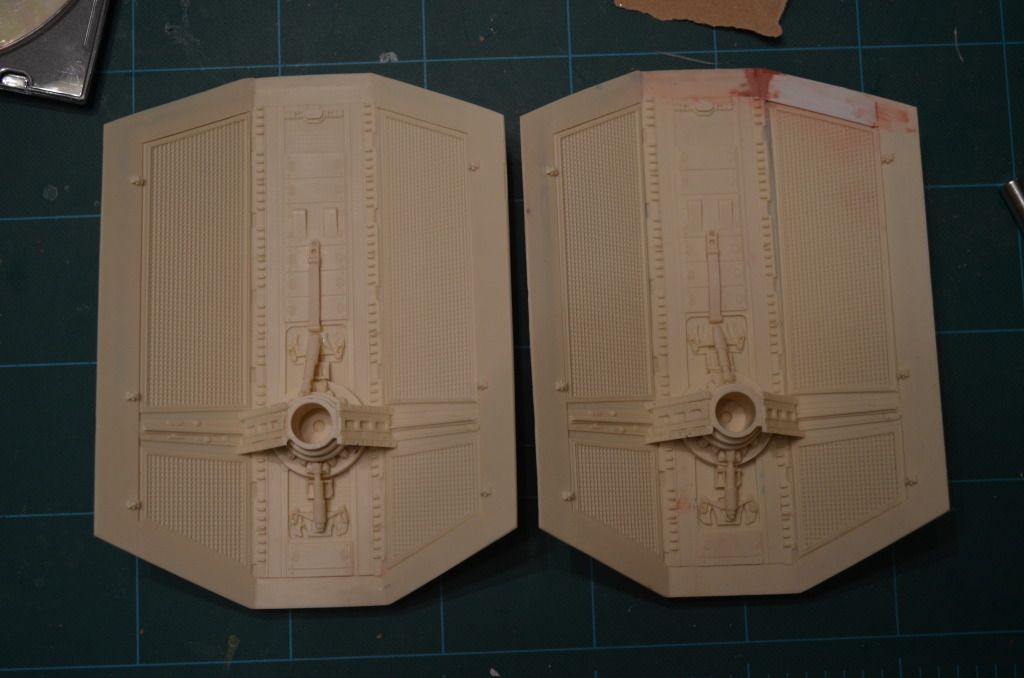
The wings are pretty thin and came with some styrene glued to them to fix some of the thinnest places. You'll notice that part of one of the wings still had a small crack because it was so thin.
DSC_0115.jpg

DSC_0116.jpg

DSC_0117.jpg


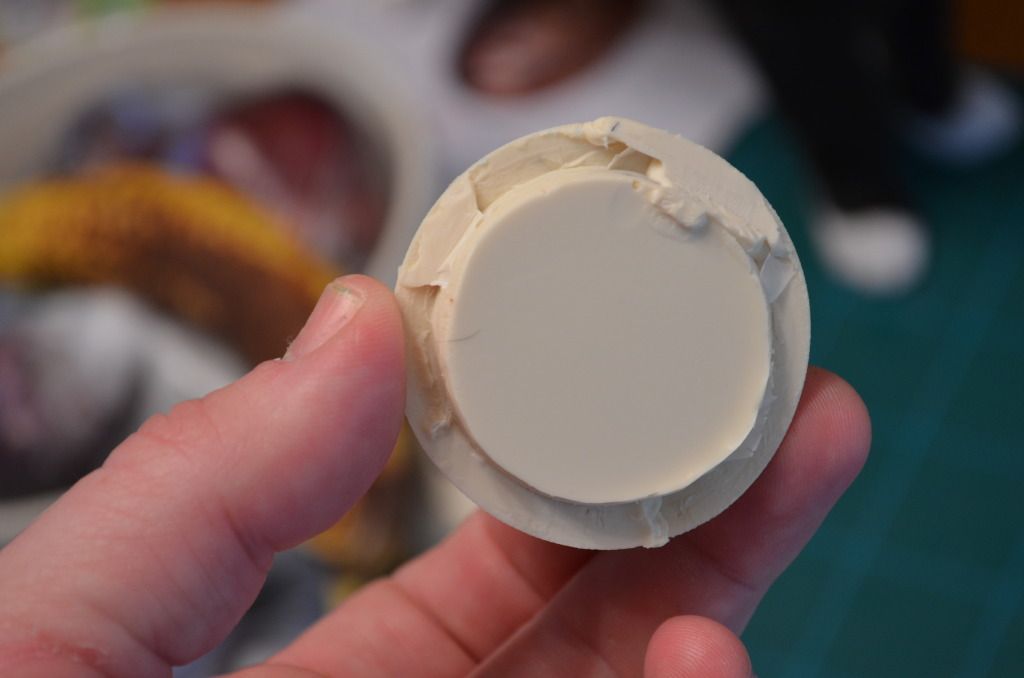
I also had to clean up the Saturn V parts as well.
DSC_0275.jpg

DSC_0276.jpg


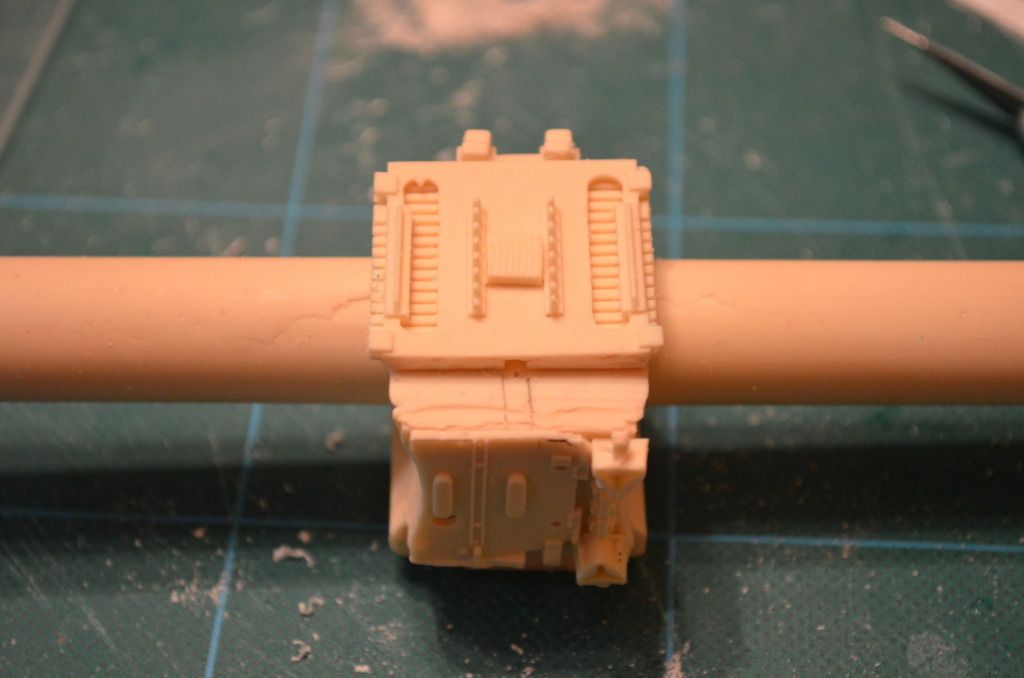
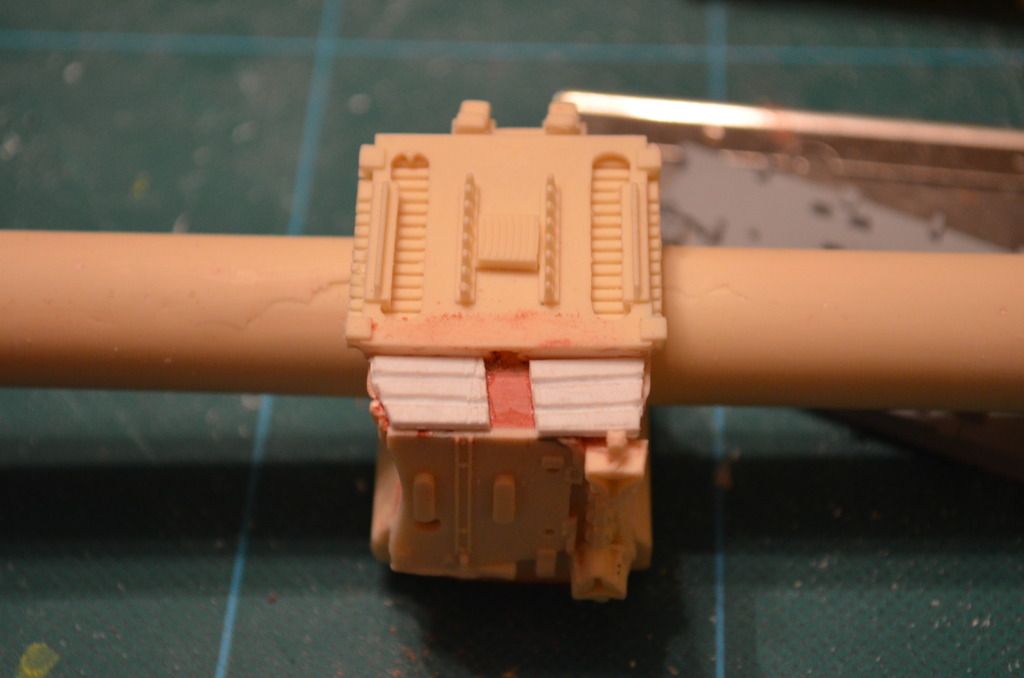
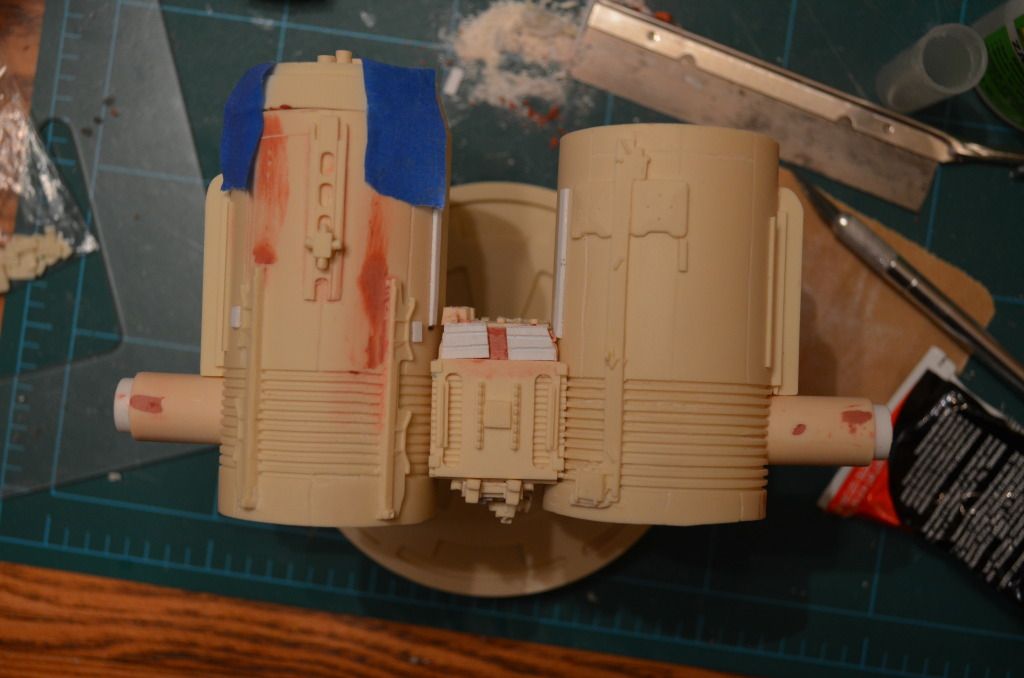
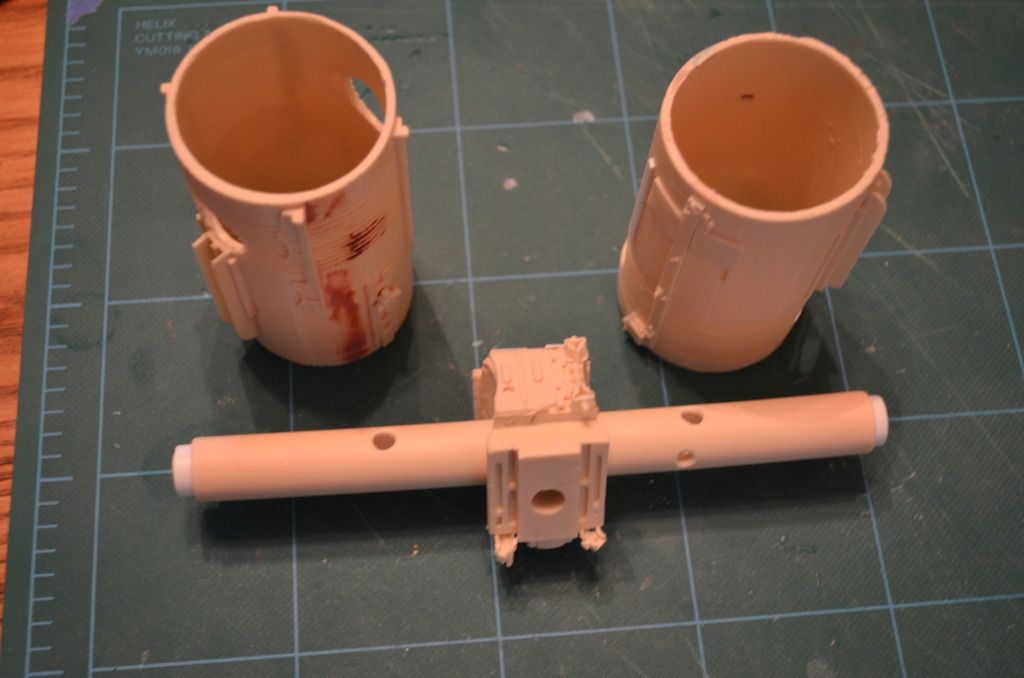
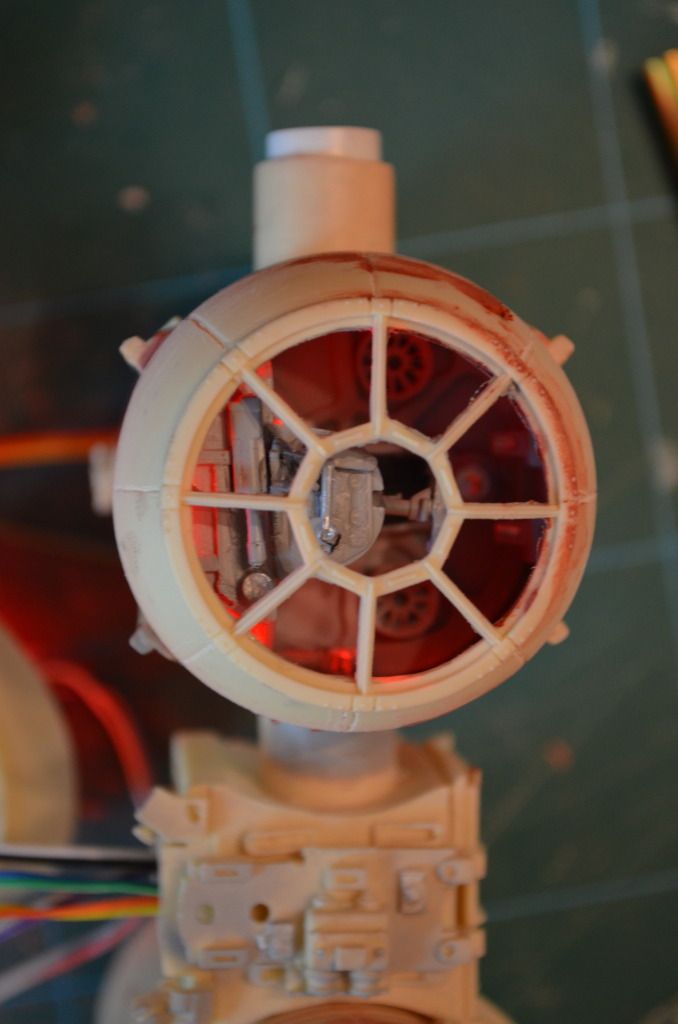
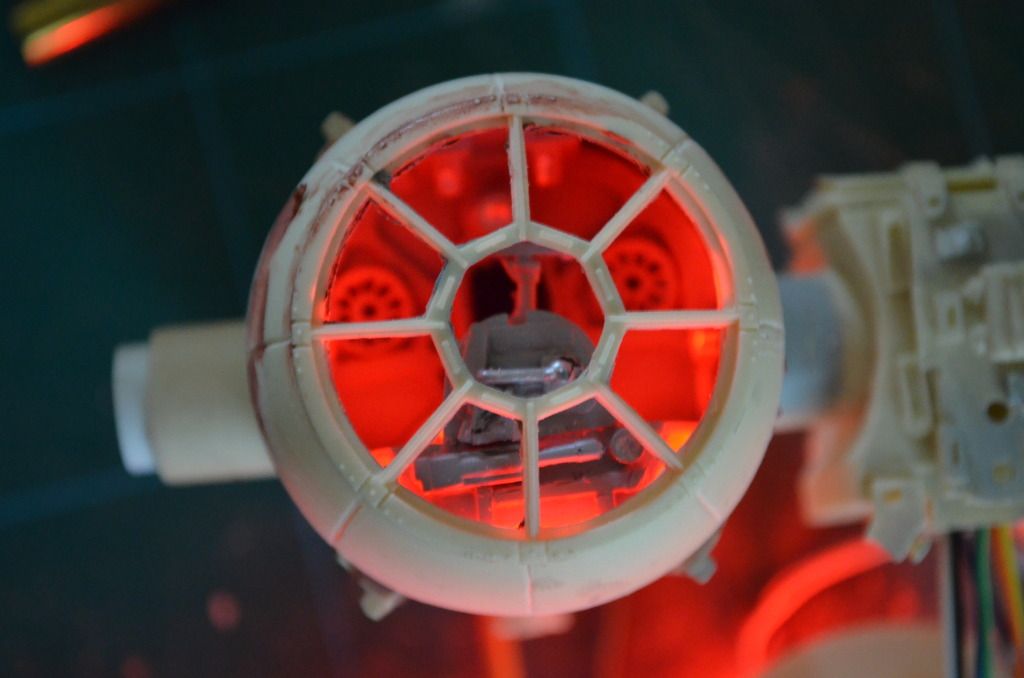
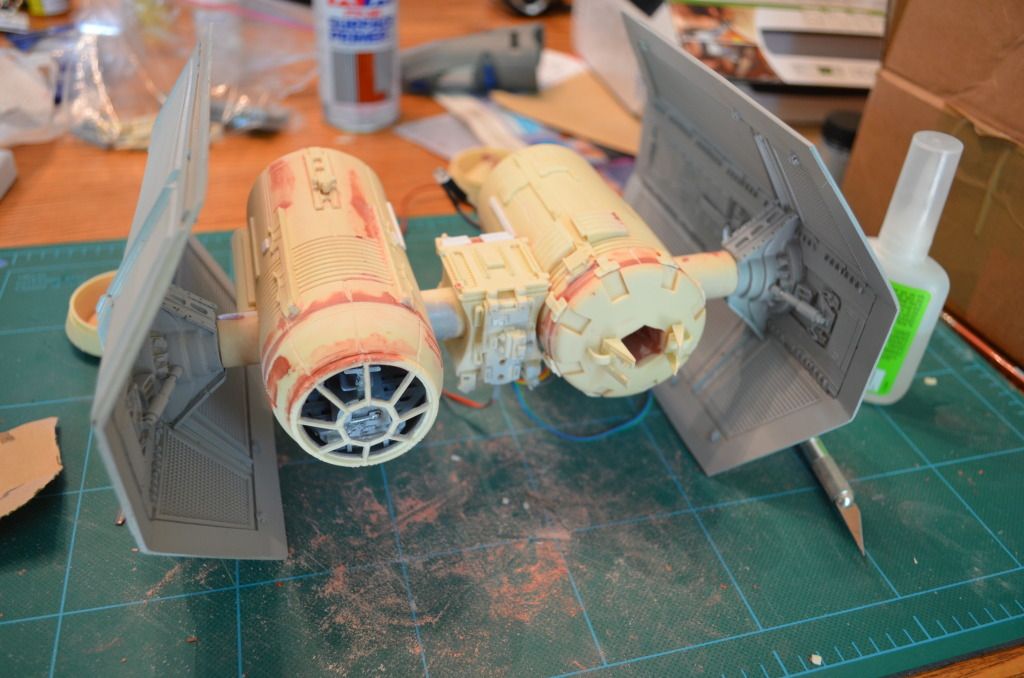
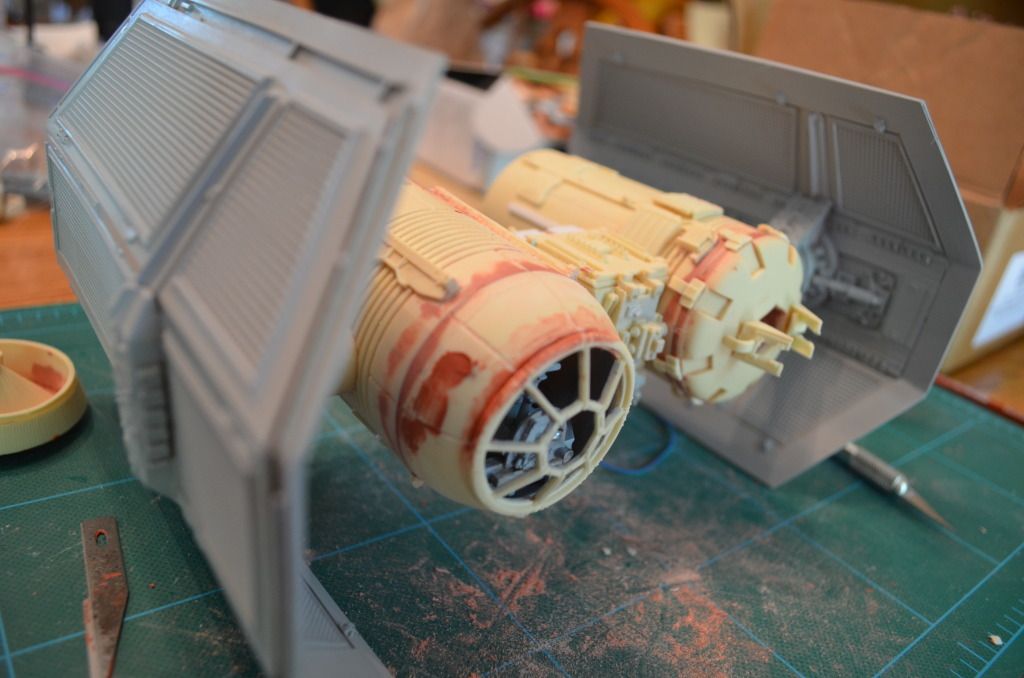
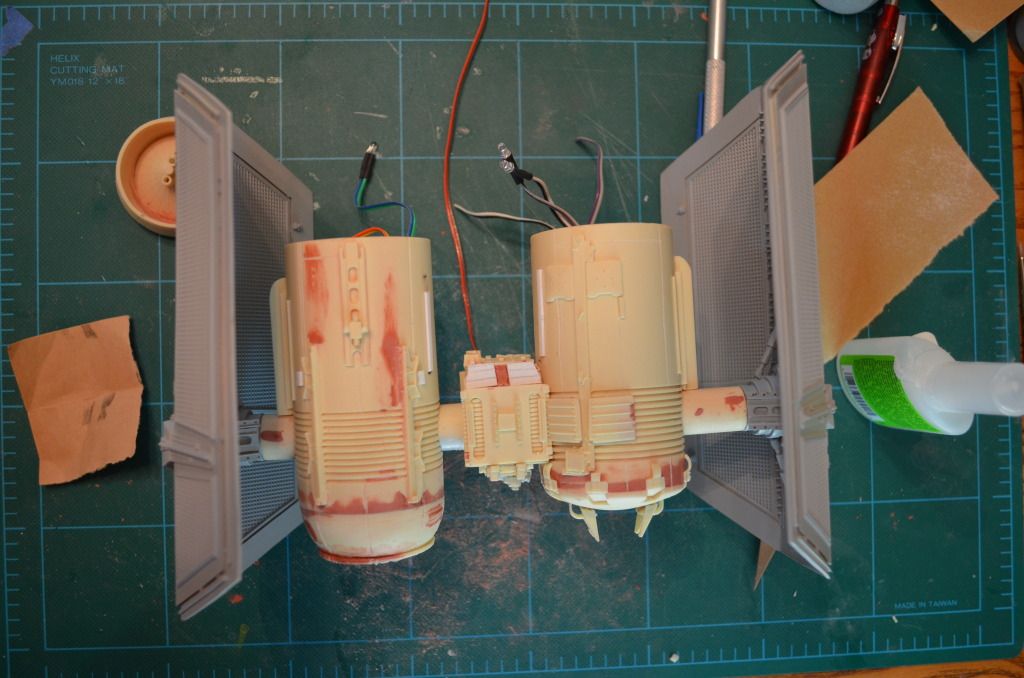
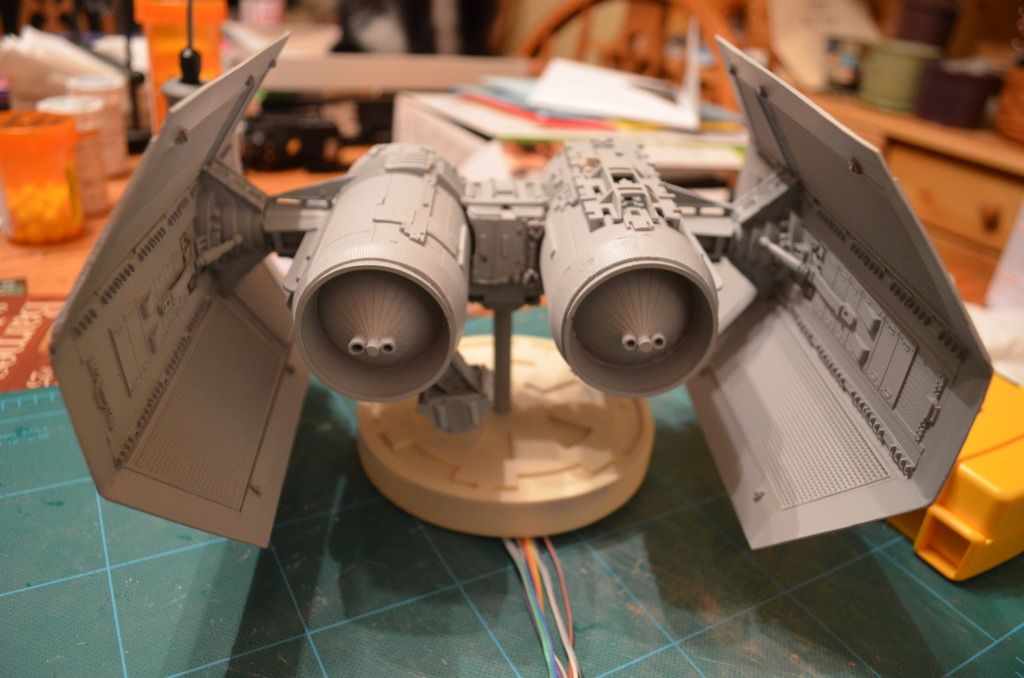
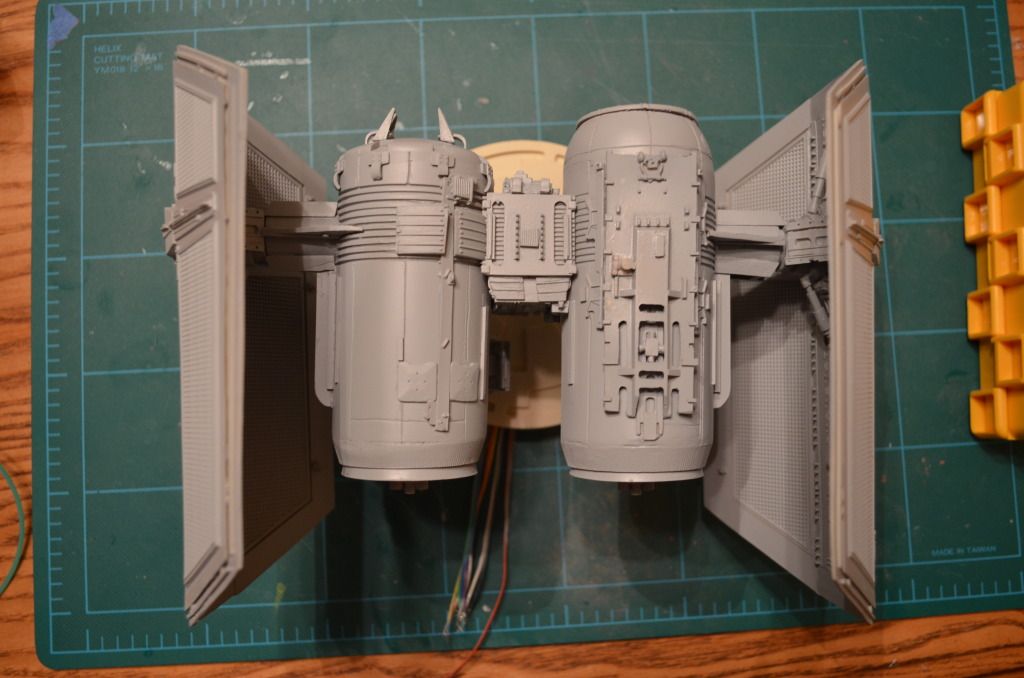
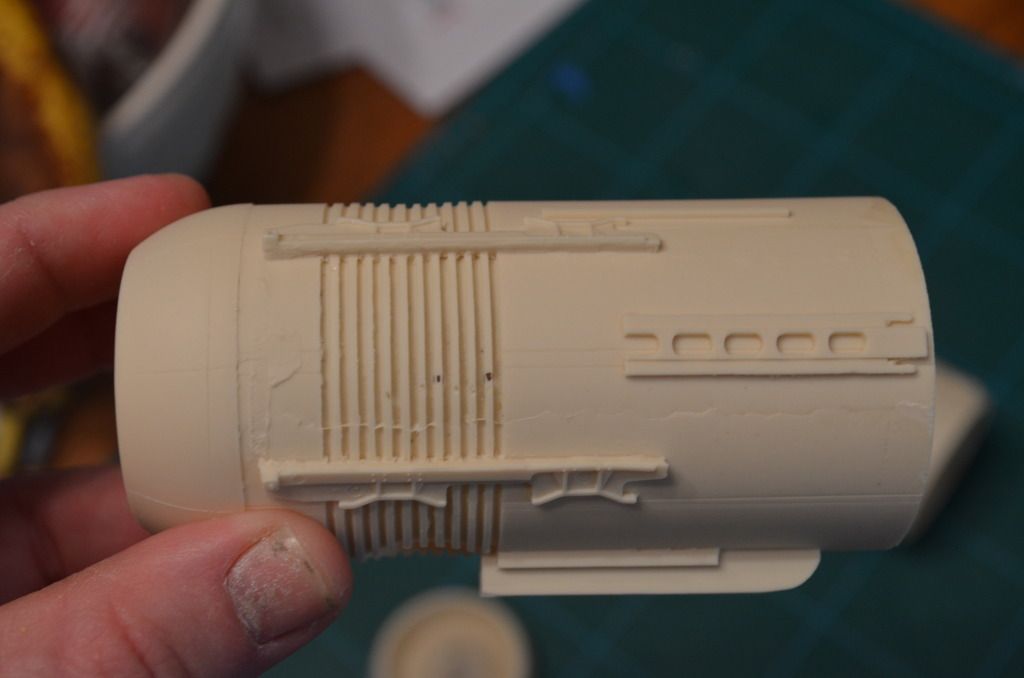
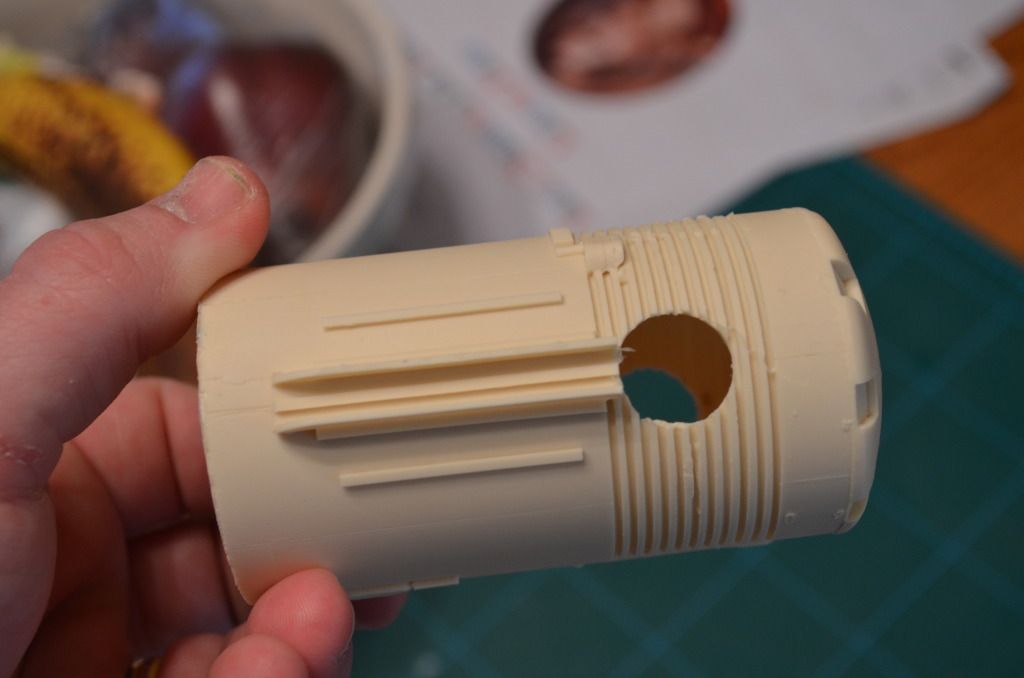
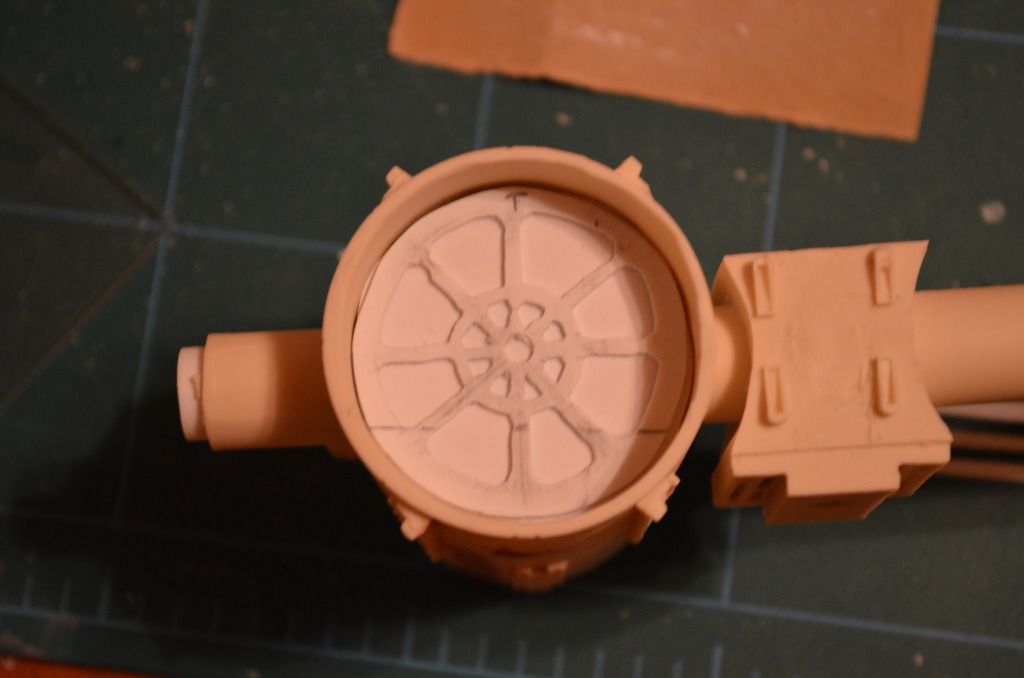
Here are the two main body cylinders. I wanted to make these a little more accurate on the outside as well as adding some cockpit detail, so I ended up cutting off the fronts of both of the fuselages.
DSC_0278.jpg

DSC_0279.jpg


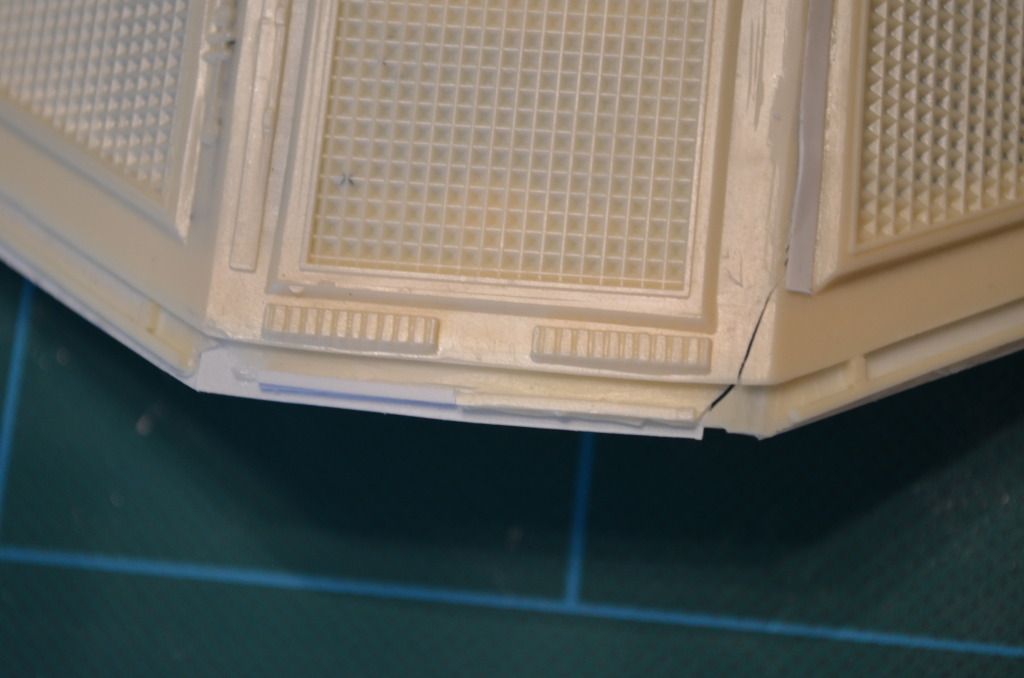
I sanded down the wings and puttied up the edges to try and smooth things out as well as hide the crack in the one wing.
DSC_0311.jpg

DSC_0329.jpg


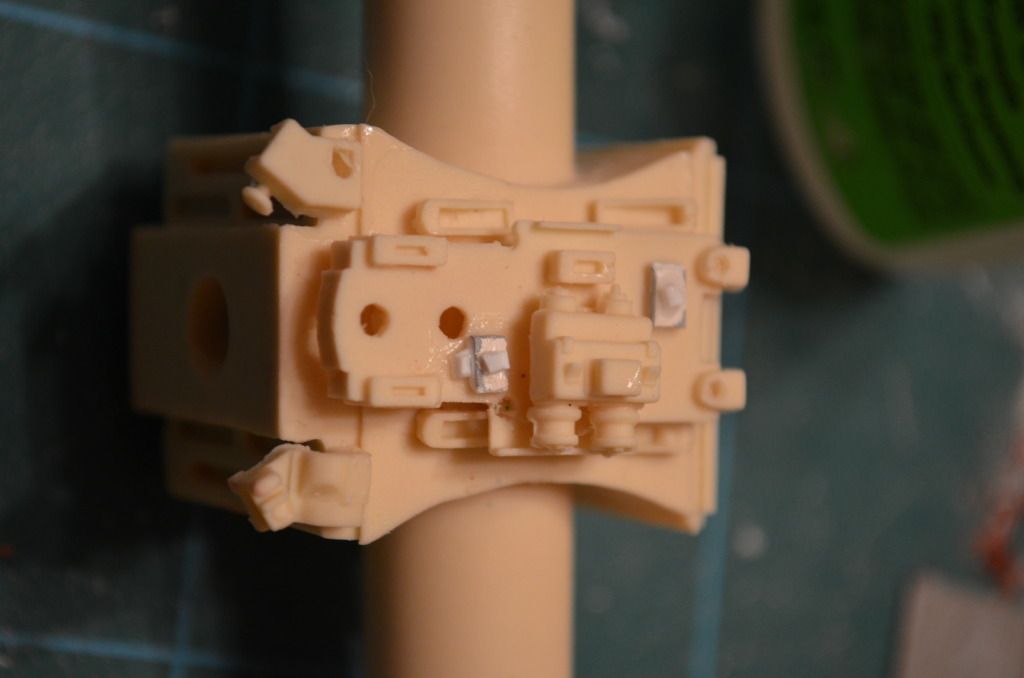
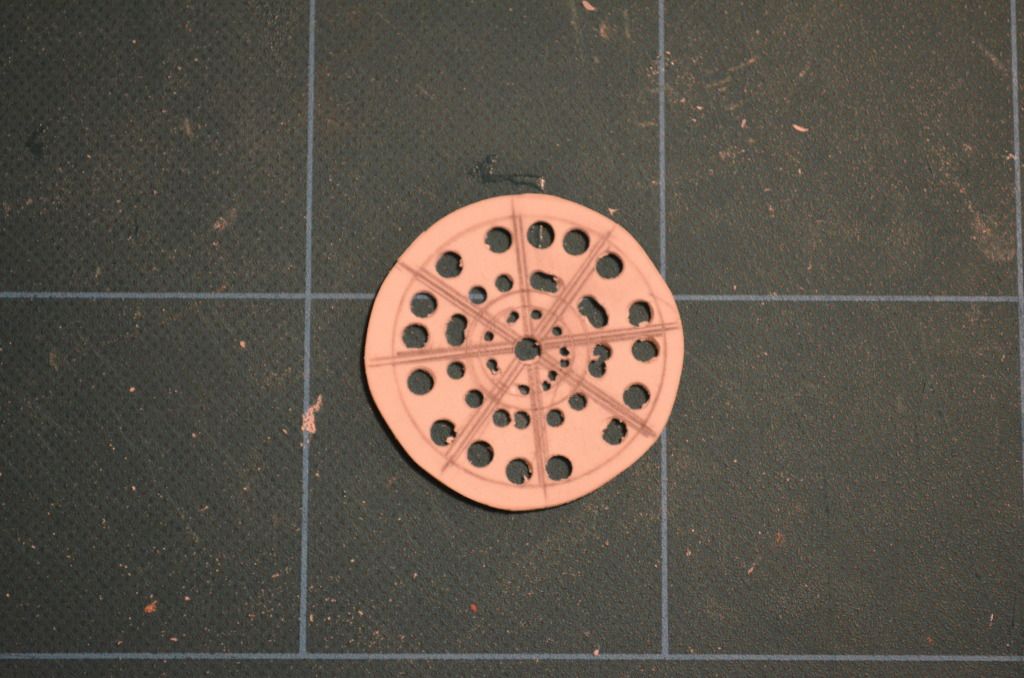
I scratched the cockpit. I didn't want to spend too much time or put too much detail into it since it's really not going to be seen really well.
DSC_0375.jpg

DSC_0376.jpg

DSC_0379.jpg


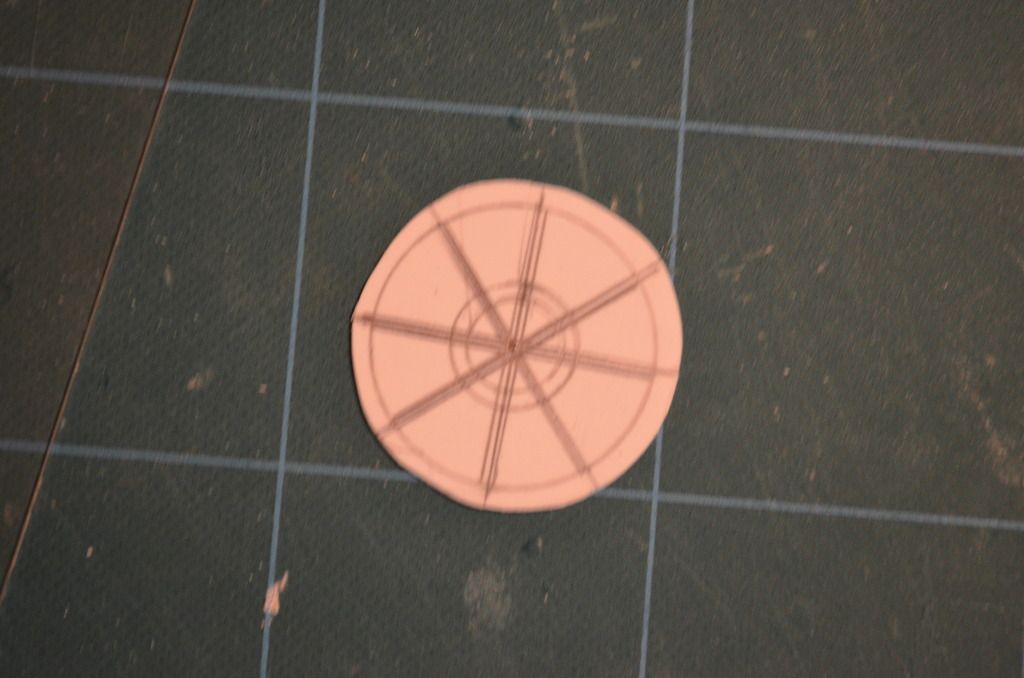
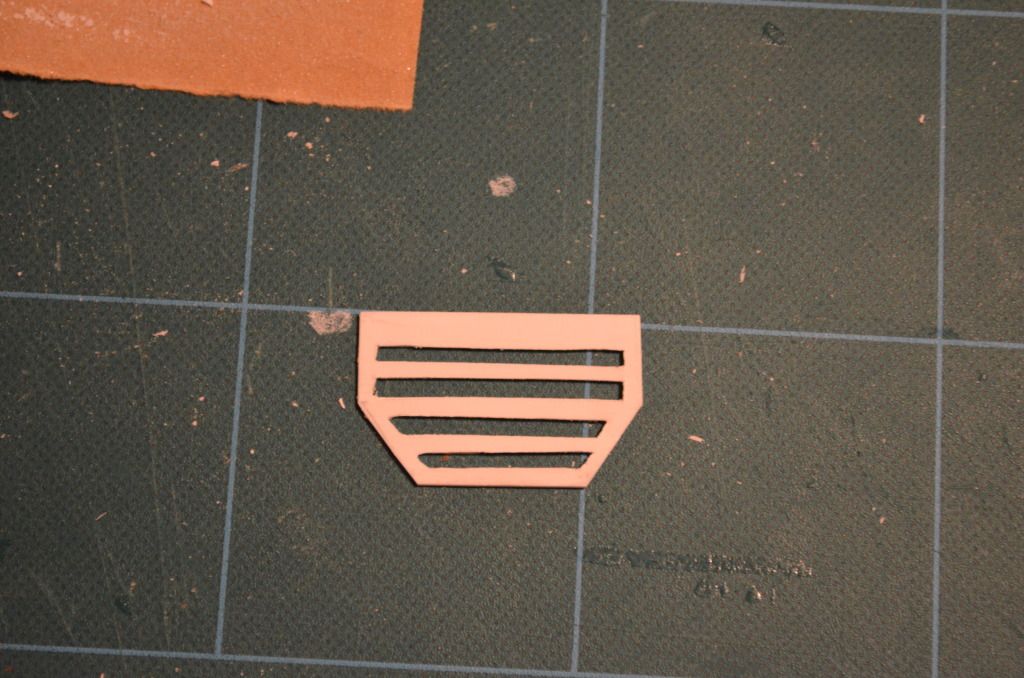
Scratched floor grate.
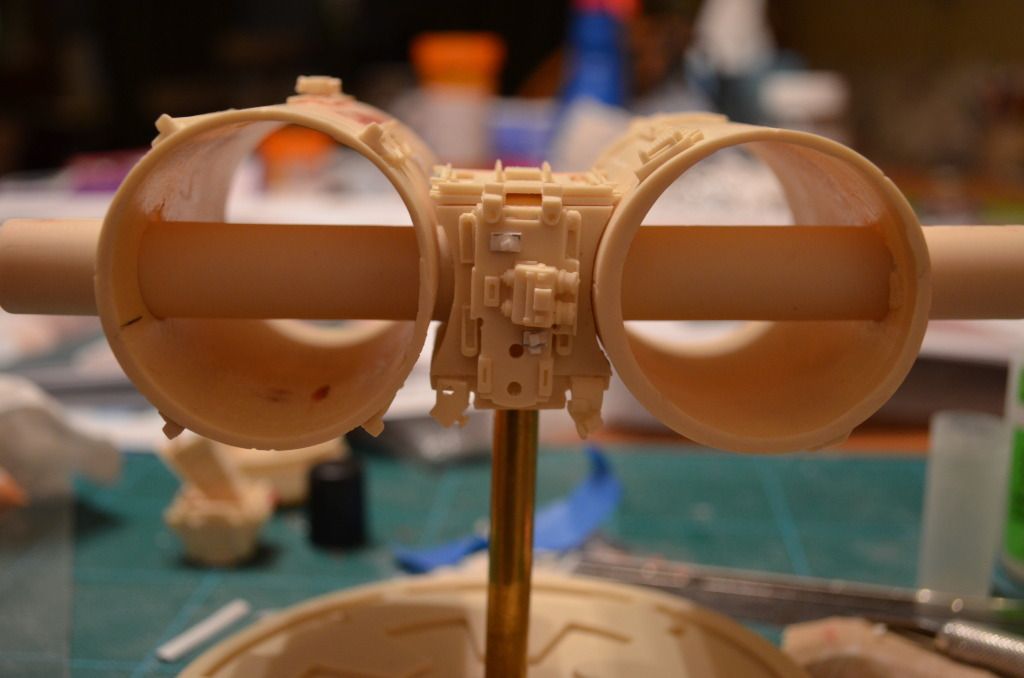
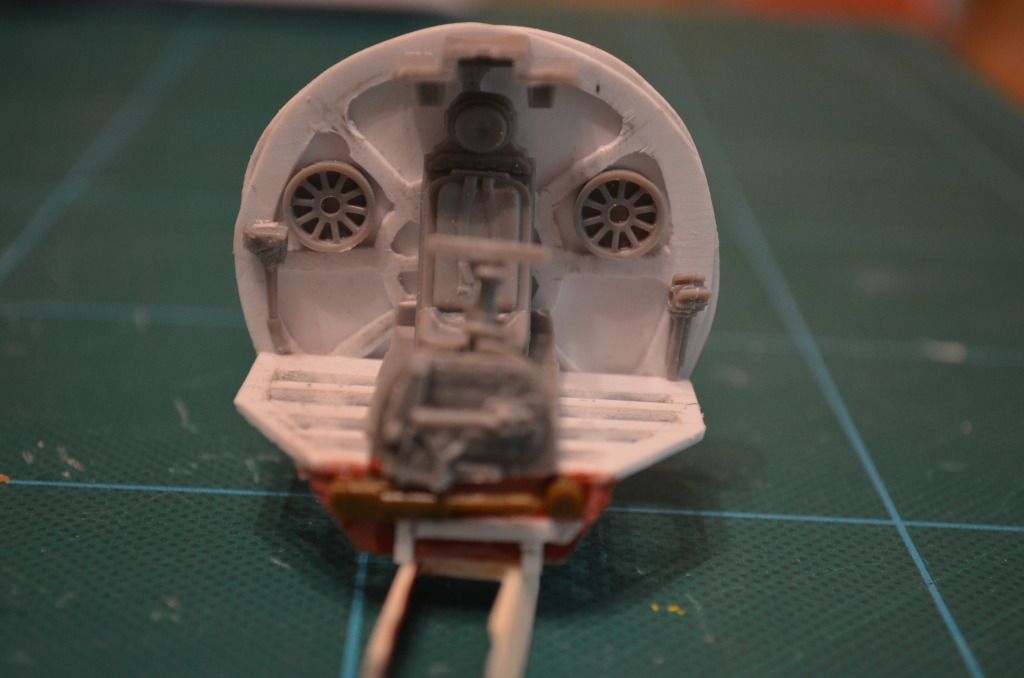
DSC_0378.jpg


Finished interior.
DSC_0382.jpg


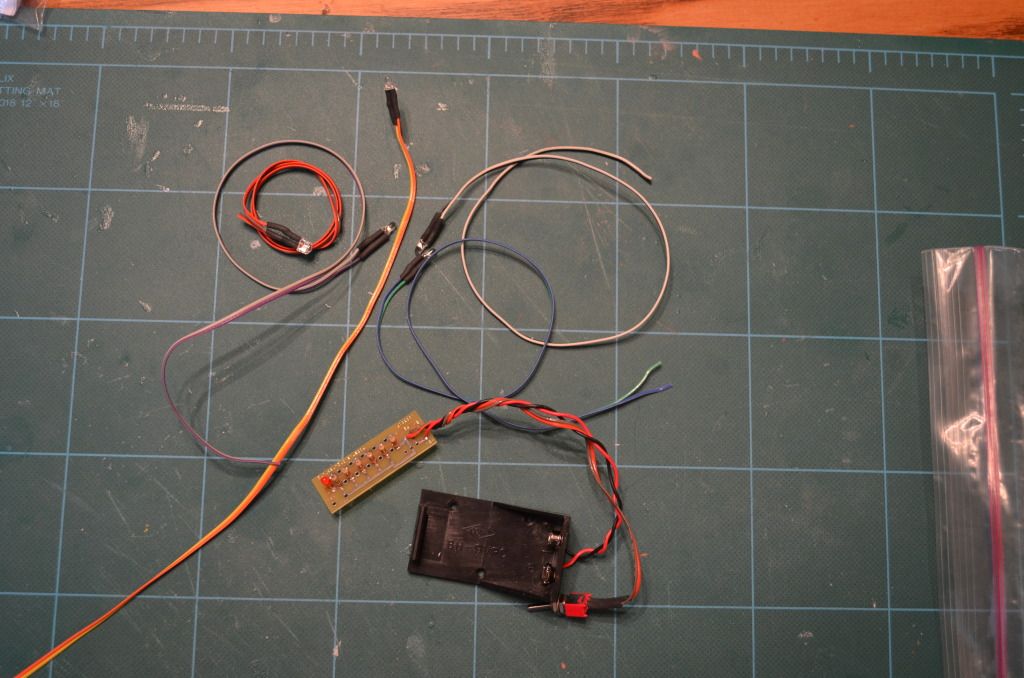
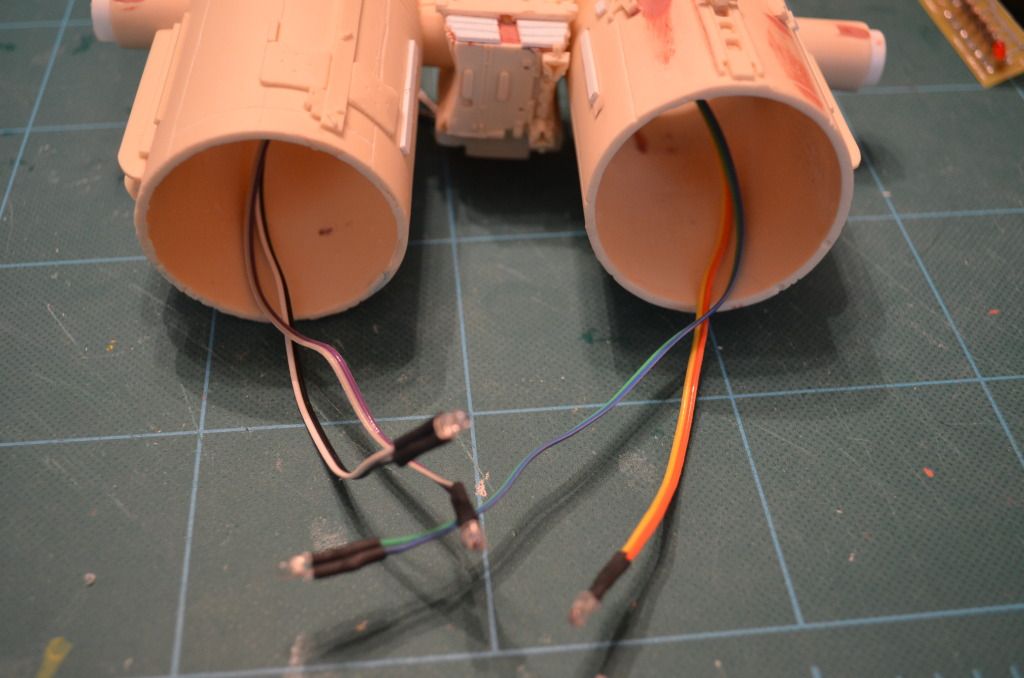
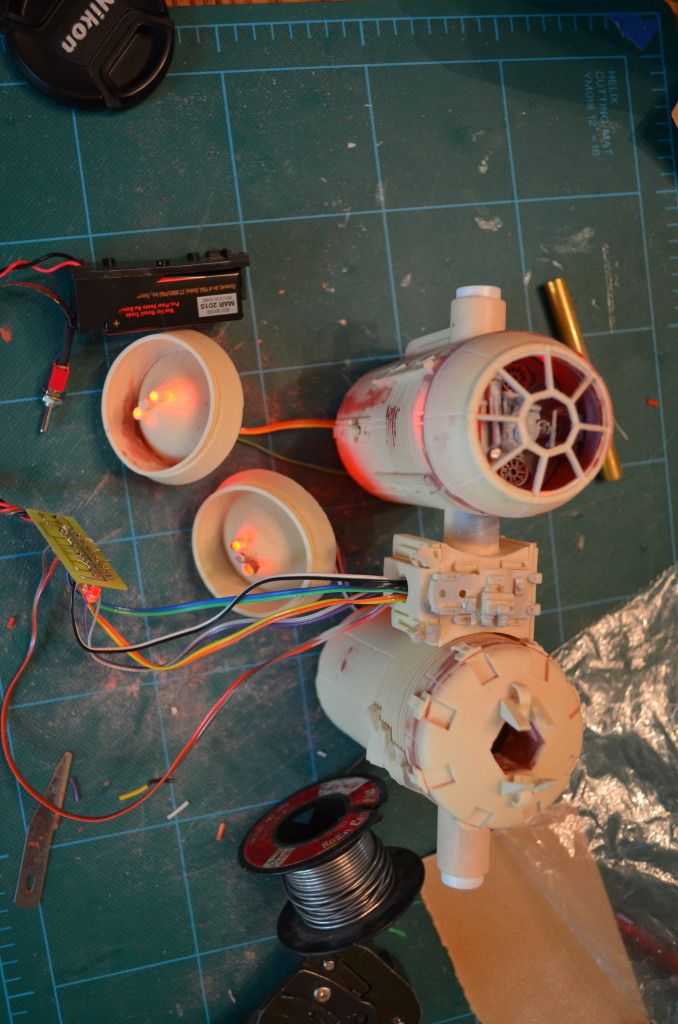
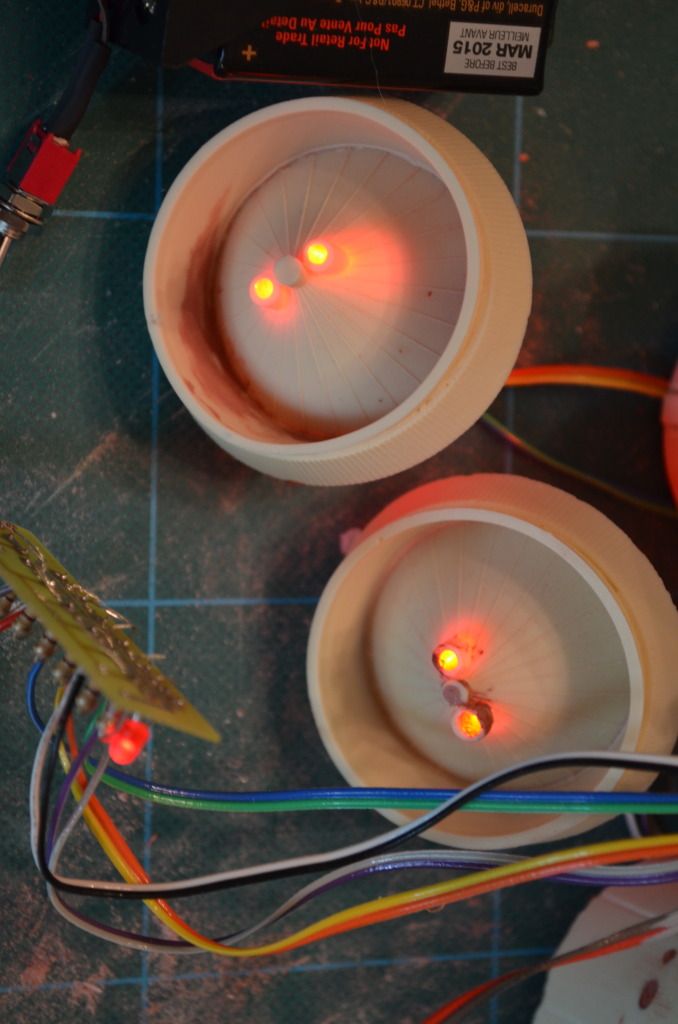
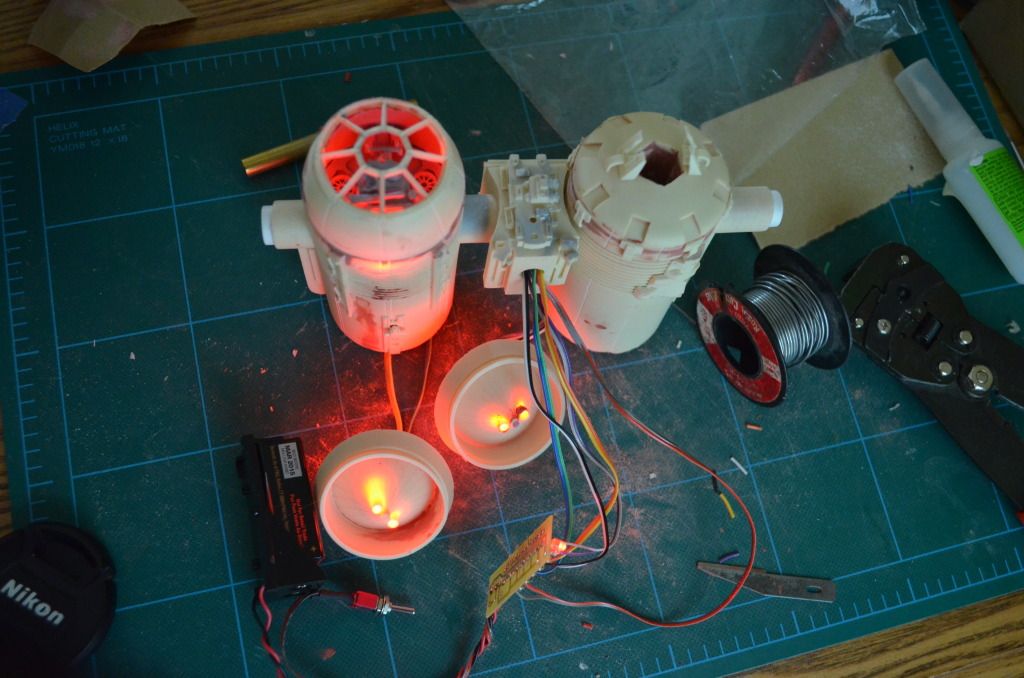
Next I'm going to work on making this a little closer to the filming model. I've also decided to light this puppy as well and I have to thank Randy at VoodooFX for his advice and help as well! (y)thumbsup He already sent me the lighting kit and it looks incredibly easy to put together!

Thanks for looking and any comments anyone may have!
 
Damn Dave I thought the guy replaced those wings for you that's a nasty crack I guess it's alot better than the 1st set. Something you can try to fill in areas and make repairs is Epoxy sculpt or Magic sculpt its the same thing you mix the 2 together and it self hardens then you just sand to shape and prime and it blends in instead of having patches of styrene all over.
 
Cool idea for the cockpit interior. Your build up is looking good! The wings needed a lot of love it seems.

Thanks the the compliments! Much appreciated. I saw some other guys here who had done the same thing and thought it'd be good scratch build practice. I didn't want to go over the top with putting a bunch of greeblies in there. Yeah...a LOT of love on the wings!

Ray...these are the second set of wings he sent me! :lol Still much better than the first if you remember those pics. But still needed some work. I used Bondo to fill in some of the larger areas that were thin, but some of the smaller areas, I just left alone. I was afraid I was going to screw that up. I'm getting more and more comfortable with my building skills, but didn't think I could tackle that.

Thanks for the epoxy/magic sculpt idea. I'll remember that for next time. Actually, I may have to use that on my Recognizer project once I get to that point!

Thanks again guys for the comments!
 
Took off work a bit early today and did some more building. The wing supports were cast all in one piece. The area between the wings (forgive me, can't remember what that's called) is cast with it as well. Most of what this needed were the resin donor kit parts attached.
DSC_0427.jpg


There were some parts on the top and front of this that I ended up scratching. Not real happy with the raised top part I scratched out of styrene, but decided to keep it since it's not a vital part.
DSC_0434.jpg

DSC_0433.jpg


Did some other mods to the kit to make it a bit more screen accurate.
DSC_0435.jpg

DSC_0436.jpg


I decided today to also start prepping this for the lighting kit.
DSC_0509.jpg

DSC_0508.jpg

DSC_0512.jpg

So I have 5 lights altogether, a cockpit light that will sit underneath the cockpit, and the four engine lights. Instead of putting the LED's on the outside of the engine ports, I decided to mount them inside to give it an "engine glow" look.
DSC_0512.jpg

DSC_0513.jpg


I did a test fire of the lights and holy crap! They worked! I actually hooked them up right!
DSC_0519.jpg

DSC_0520.jpg

DSC_0521.jpg


Lighting without any room lights on.
DSC_0524.jpg

DSC_0525.jpg


Tomorrow is buttoning this thing up and priming.

Thanks for the looks and any comments!
 
your doing a great job! :thumbsup

i'll never buy from that guy looking at those, it looks paper thin !!! and really bad cast job!! :(

what is it with some of these guys that they just dont care what they send to people !!!
 
your doing a great job! :thumbsup

i'll never buy from that guy looking at those, it looks paper thin !!! and really bad cast job!! :(

what is it with some of these guys that they just dont care what they send to people !!!
Got to agree with you Trooper you should have seen the original wings really, really bad when Dave sent me the pics I was pissed off and it wasn't even my kit Lol, But I see Dave will take a lemon and make Lemonade Lol, lookig good Dave lights look great.
 
Got to agree with you Trooper you should have seen the original wings really, really bad when Dave sent me the pics I was pissed off and it wasn't even my kit Lol, But I see Dave will take a lemon and make Lemonade Lol, lookig good Dave lights look great.


Lemonade?? i was thinking more like margarita :lol:lol
 
Who's kit is this? Its terrible, one of the worst crimes in resin ive ever seen!
Kudos to you for taking it on, good luck with the build, talk about polishing a turd, im sure itll work out great in the end!

lee
 
ya, i would like to know who this is myself, id never buy from a guy that sends out crap like that, obviously he doesn't care about his customers :angry

some one would be getting a resin enema if they sent that to me :lol
 
Who's kit is this? Its terrible, one of the worst crimes in resin ive ever seen!
Kudos to you for taking it on, good luck with the build, talk about polishing a turd, im sure itll work out great in the end!

lee
"Worst crimes in resin" LOL! I think it's a Who Done it mystery :lol.
 
If you want to replace the Harrier part that is seen in this photo, let me know and I can help you when I get back from vacation mid next week. I have a mold for it.

DSC_0279.jpg


I have some molds of some other smaller parts for this ship as well. If you wanted to get a list together, I can let you know if I can help you out with those as well.
 
Hey guys! Wow...I'm kind of speechless on the kudos from everyone! I'm pretty humbled by all of you!

Ray is right, these wings were the second set. The first set were just horrible. I contacted the guy and he sent these out pretty quickly. Even though I wasn't 100% pleased with the new set, they were MUCH better than the originals. His excuse was that he "rushed it". Yeah, ya' think????

Anyway, the rest of the stuff in the kit seemed okay, but like the wings, not 100%. But I figured it would give me a challenge to "make it right" as best as I could as well as giving me some MUCH needed experience. I'm not going to drop his name, but you can find the kit over at MMM. I'll at least point you in the right direction, though. Heh, heh. :lol

Shadowknight, I can't tell you how much I appreciate the offer! I've already primed it (pics later tonight) and am at the point where I would like to finish this thing and move on. However, I've decided that I'm probably going to scratch one after doing this at some point, so if the offer still stands, I'll definitely take you up on it and reimburse you for anything that you do. After doing all of the work on this kit, I feel that scratching one may be easier to do anyway! :lol:lol:lol

Thanks again everyone for the support and the comments! Makes me feel like I'm heading in the right direction with this thing! Makes the hours I've spent "fixing" it TOTALLY worth it!

Oh...Trooper...not partial to tequila, but maybe some vodka in the lemonade!! Definitely going to crack open some beers when this thing is finished!!
 
I think this is the Dean Johnson kit.
He goes by the name DCJ here on therpf.

I bought this kit from him when it was first released.
The casting wasn't this bad though.
Some filling and sanding had to be done to make it shine.
So....this could be a recast, maybe Dean could check it out.
 
How come you haven't replaced the resin wings with a set of the original AMT Vader Tie kit? It might have been less grief.

Junk Pilot-- I thought about it, but decided not to. I figured that I paid for them with the kit, I was going to use them. When I looked at the time, nothing popped up on evil bay and I found one on Amazon for $90. Wasn't going to pay that much. Plus, he really did do a much better job on the second set. I would have hoped for not having any cracks and really thin areas, but again I looked at it as a challenge.

Okay...here's some pics before the primer coat.
DSC_0515.jpg
DSC_0516.jpg
DSC_0518.jpg


And after the primer...
DSC_0529.jpg

DSC_0532.jpg

Crap...got a little heavy on the outside of the cockpit...gotta sand that down!
DSC_0533.jpg

DSC_0535.jpg


After looking at it with the primer, there's some stuff that I have to fix. Mostly some holes in the filler and some crappy scribing on my part. I really have to work on my scribing. I suck. This was my first attempt and I have to admit, I found scribing on a curve insanely difficult. My hat is off to everyone who does that. I have to admit that I got pretty frustrated. The reason rescribed the lines on the fuselage pieces was because I thought they may a little too shallow and was worried that the airbrushing would fill them in. I may have been totally wrong on that.

As for the wings, I'm actually pretty happy with what I did. The primer showed some small areas that I filled that I need to smooth out so I'll post some pics once the filler dries and I get another coat of primer on those areas.

Essentially I sanded down the styrene that was attached and did a little filling to the thinner areas on the flat surfaces. I glued the crack together then filled and sanded it down. I'm pretty happy with it actually. My ultimate take on the wings was that even though they were pretty thin in some places, the paint would hide all of that. I was more worried about the crack and the areas that were so thin you could actually read through. But those were all filled and I'm pretty happy with the results.

I'll try and get some pics of the wings primed and ready for final coat tonight.

One quick question for anyone who's painted a TIE wing...should I mask off the black areas of the wings when I airbrush the other areas? Oh, and one more...when I paint the black on the wings, is it easier to mask off all of the other areas and airbrush it on or actually brush it on? Total newbie questions, I know...

Thanks again for looking and I really appreciate the compliments!!
 
This thread is more than 11 years old.

Your message may be considered spam for the following reasons:

  1. This thread hasn't been active in some time. A new post in this thread might not contribute constructively to this discussion after so long.
If you wish to reply despite these issues, check the box below before replying.
Be aware that malicious compliance may result in more severe penalties.
Back
Top