Scratch Built Delivery Ship 3011AD, The Nylon Gag MK.1 FINISHED.

TheNylonGag

Well-Known Member
Gone but not forgotten.
Ello folks,
So, I decided to scratch build an original Spaceship/craft/sum-it-or-other. I was determined not to copy a style or genre. Very difficult with me being a big Star Wars fan since 1977. I was nine at the time the movie came out so most of the designs were burned into my brain pretty good.
I decided I didn't want it to be from a galaxy far far away, I thought it would be more interesting to go towards a more feasible design with a not to distant future kind a look.
I thought about the year 3011ish should do. I wanted it also to be little bit relevant in today’s world, so, during this thinking process I just happened to be watching my sport of choice, Formula 1. Red Bull Racing had just won the F1 World championship (2011) with Sebastian Vettel driving. What about Red Bull deliveries in the 3011 I thought, (as you would) how would Red Bull get its product to where ever in 3011. Bingo? You see the Red Bull logo everywhere, plus I thought it would make a very cool paint scheme.
So, I decided to build a Red Bull delivery-thingy-what-sit from the year 3011.
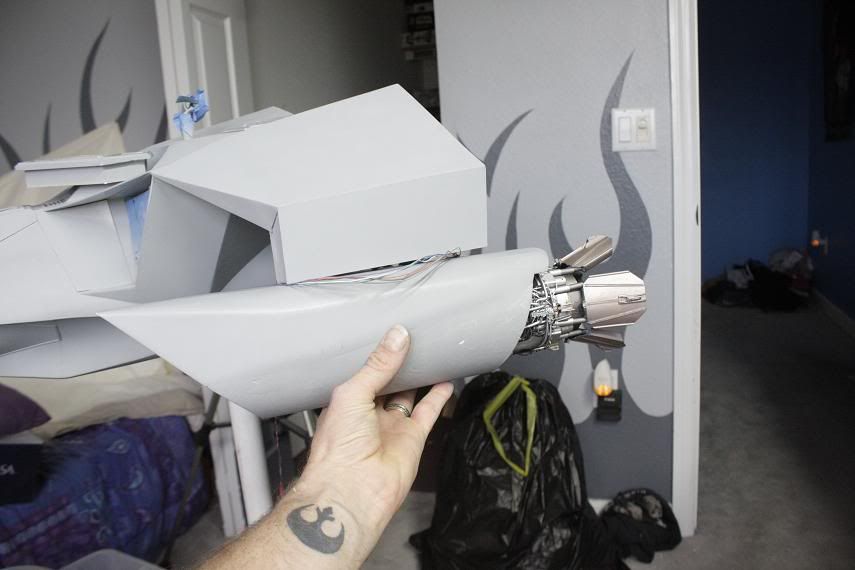
I made a few pre-liminary sketches incorporating design elements I liked. I felt the key was the cockpit shape. I always liked the shot in Alien, when Ash (the synthetic) climbs into the pilot seat of the Nostromo, and its an underbelly canopy, with the whole planet layed out under him. So after much searching I found my canopy material and established the design from there back.
I made a small model just to see if my vision of the wing profile would have ‘flow’, look ‘feasible’ & be ‘cool’, my 3 main criteria for this build.

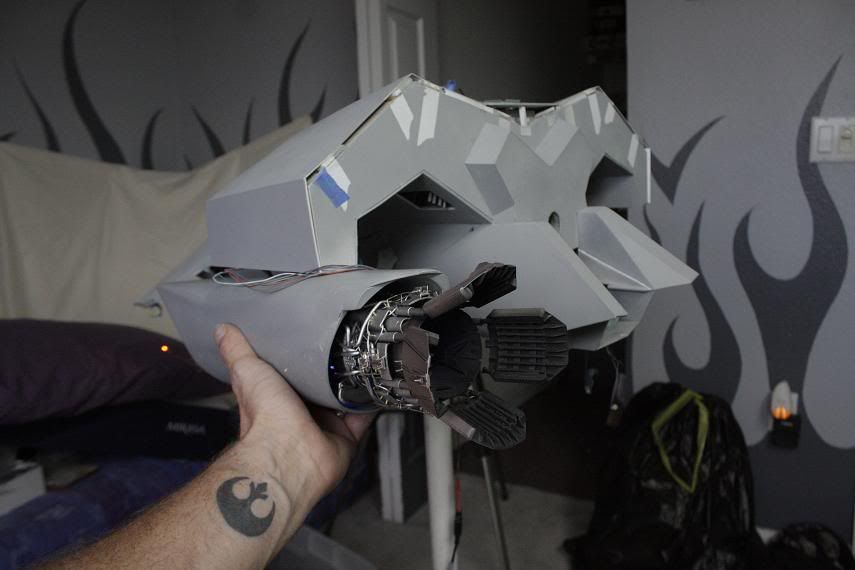
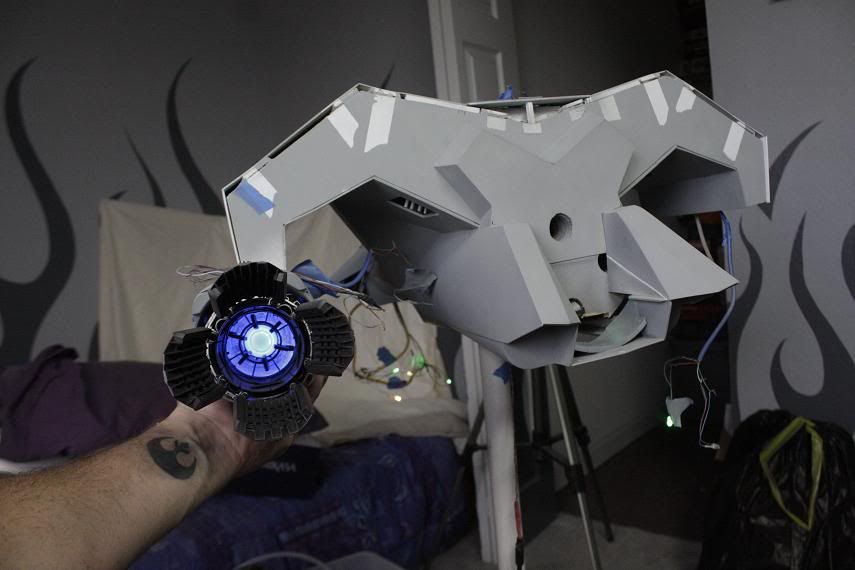
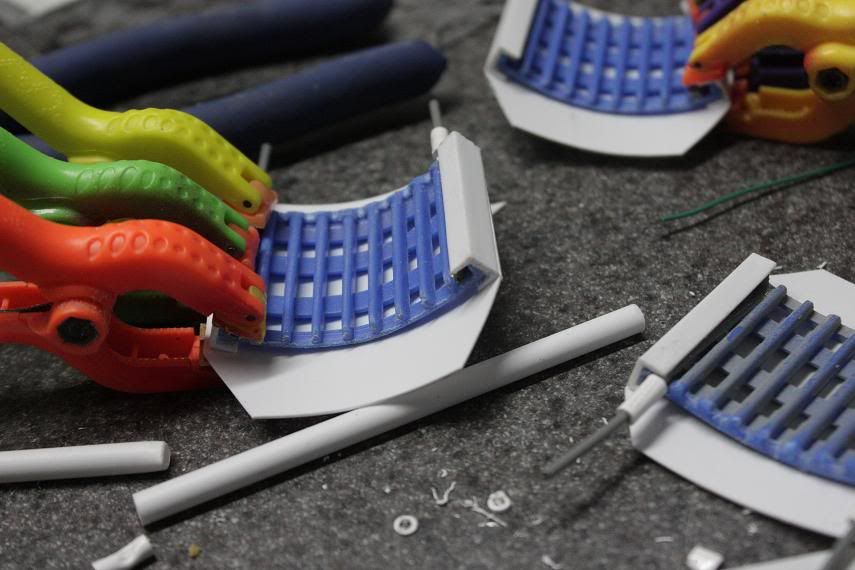
So after that ‘short’ intro, here are some ‘story so far’ pix.

TheNylonGagMK101.jpg


TheNylonGagMK102.jpg


TheNylonGagMK108.jpg


TheNylonGagMK128.jpg


TheNylonGagMK127.jpg


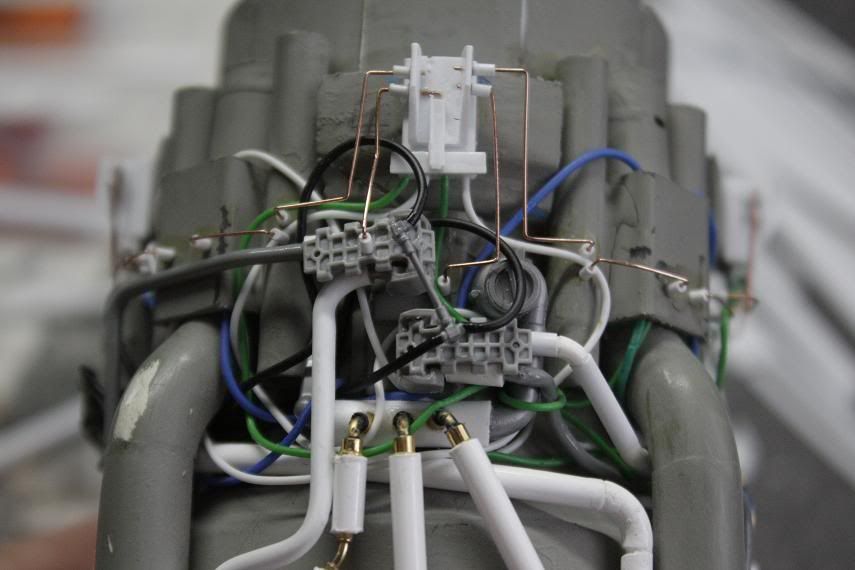
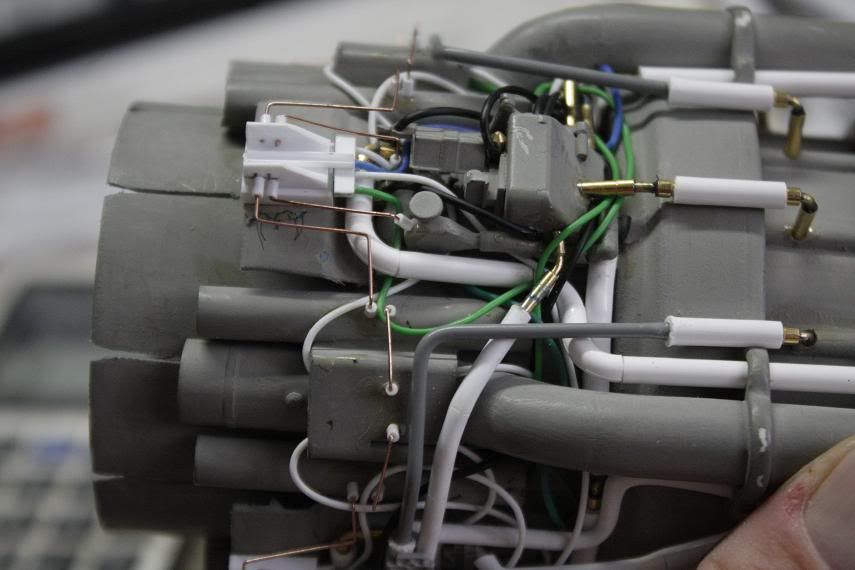
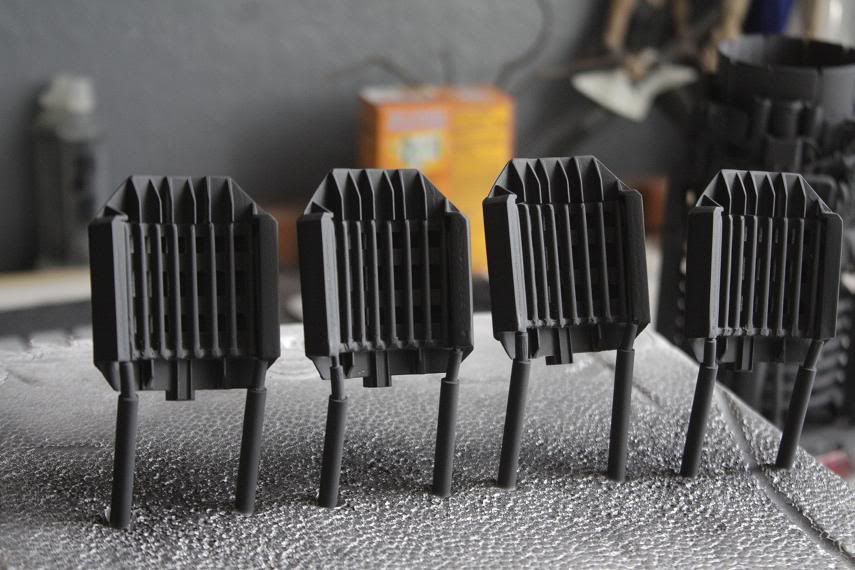
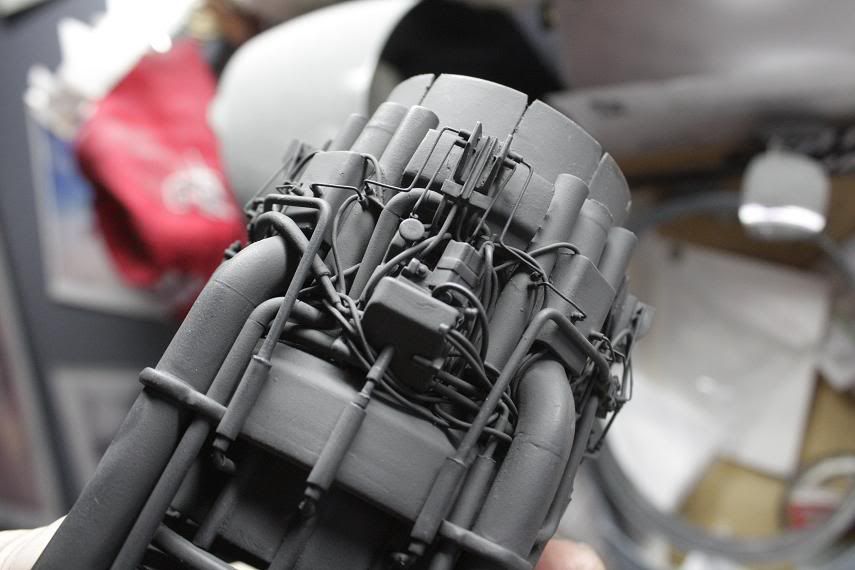
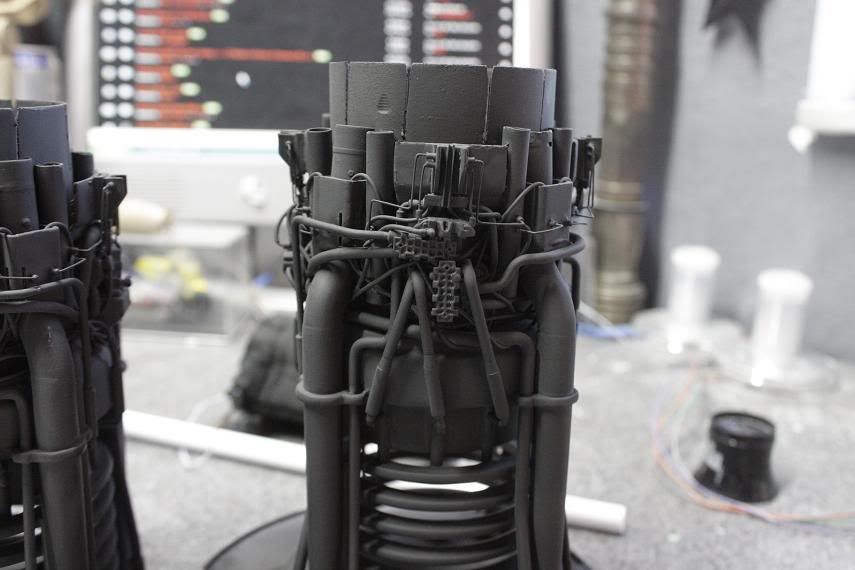
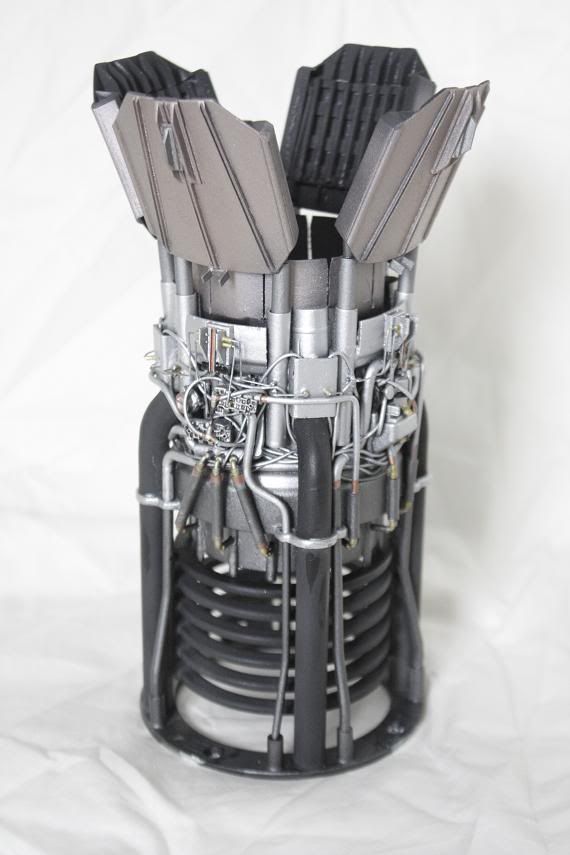
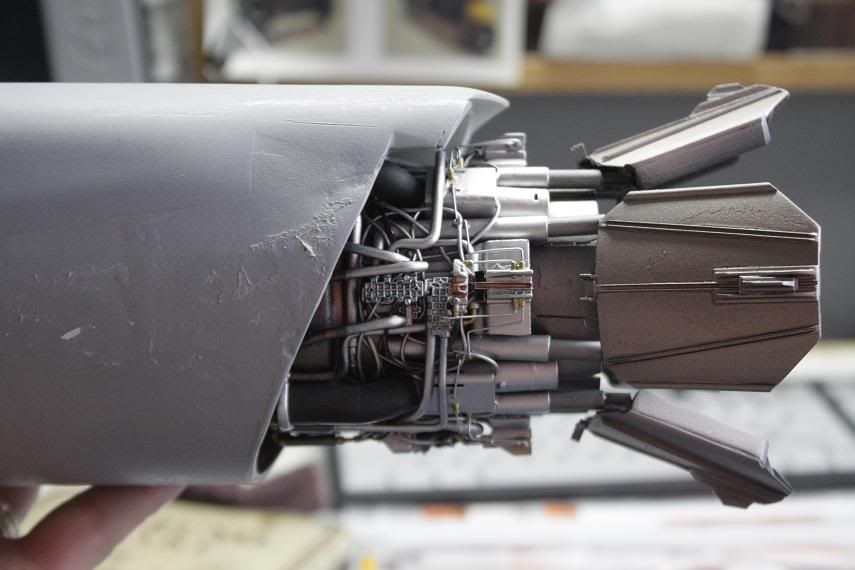
Currently working on the main engine asseblies

Thanks for looking

The Nylon Gag
 
Last edited:
Re: The Nylon Gag

I love peoples scratchbuilds more than the copies of movie stuff. Great start, love the lighting.
 
Re: The Nylon Gag

Afternoon Movers And Groovers,

Been working on the engine asseblies.

Pipes, pipes, pipes.

Thats pretty much all i been doin lately.

Next i'm gunna install some wiring looms.

Picture967-008.jpg


Picture978-005.jpg


Picture976-005.jpg


Picture972-007.jpg


Thanks for looking

Gagster Man
 
Re: The Nylon Gag MK1.0

Ello RPF'ers,
Hope everybody is well and working on some interesting builds.
Thank's for your kind words.

So, once again we look at the detailing of the engines. So "PIX"

I was never happy with the rear nozzel deflectors, they looked very plastic (which they are, but in a bad way)
so i set about adding some small details to diguise them a bit.
First i added a piece of 0.5mm sheet to the back (X8).

Picture934-012.jpg


I then added 3 piece of 'U' channel to the top, being careful to allign them with the existing ribs.

Picture941-012.jpg


I then chamfered the ends down.

Picture938-012.jpg


I then added more 'U' channel to cover the ends of the side supports & removed one of the U's legs

Picture943-012.jpg


Everything was sanded smooth and then a quick test fit to see how we were looking.

Picture945-012.jpg


I then turned my attention to the back of the deflector, where i added 'T's, half round, small 'U' pieces of syrene for my details.

Picture947-012.jpg


This is how both sides finished up.

Picture954-012.jpg


Picture955-012.jpg


Picture956-012.jpg


I then concetrated on the telescopic adjusters for the back of each deflector.
I made 8 of everything, i dry assembled them and then dry fit one on the engine just to make sure it had the look i was after.

Picture962-010.jpg


Picture963-010.jpg


Picture961-010.jpg


Picture959-011.jpg


Picture958-012.jpg


Everything is dry fit at the moment but it is exactly the look i was after.
Also, i got hold of some fine gauge wire, which i plan to add for control lines on the engines and maybe attach them to the adjusters, i will have to see what looks best.
I now have the dilemma of what to paint and when. I think i will have to do it in small sub-assemblies and then try not to get too much glue everywhere when i put them together.
Thats as far as i've got this week.
Your comments are always welcome.
Thanks for stopping by.
 
The Nylon Gag
 
Re: The Nylon Gag

:lol Your one of the sickest guys on the planet.......I love this thing the detail
is off the charts!:thumbsup
 
Re: The Nylon Gag

Hello,
Thanks for the comments guys, i realy appreciate them
Just a short update to a lot of realy fiddly stuff, that at times nearly resulted in me launching these things against the wall, but i just about kept my head:facepalm ........................... just' :lol
So, here we go....
Basically added more hydralic lines, oil lines and any other type of line i could squeeze in.
Started with the 0.016wire from the back of the telescopic adjusters.

001.jpg


Then glued wires into 'H' profile styrene

002.jpg


Added a small piece of 'U' and fixed to the base unit of the adjusters

003.jpg


Then just threaded the wire thru all the other stuff

004.jpg


005.jpg


006.jpg


Then primered it all up,
Deflector vanes.

007.jpg


Then the main units.

008.jpg


009.jpg


010.jpg


They are alot blacker in real life than in the photos.
Now comes the scary part, painting the bloody things. My paint skills are very poor so i hope i don't mess them up too bad. :confused

Any suggestions on colours to use would be appreciated, i'm thinking mainly metallic grey, gun metal, silver, copper, gold and some blends of these.

Comments welcome
Gag
 
Re: The Nylon Gag

Wow! Loving the amount of detail your putting into this build.
Looking forward to seeing more!
 
Re: The Nylon Gag

What I really like about the engines is they are detailed, yet they are not patterned after a real life jet engine so there is nothing to go off of. You are not trying to duplicate something that exists, so you need to add just the right amount of detail and make it look like it all works for something completely fictional and made up. Well done.
 
Re: The Nylon Gag

Wow, this is awesome. I love those deflectors.

Might I suggest a thread title change? I almost didn't click on it, not knowing it was a spaceship build. Didn't know it was your username, and wondered if it was even in the right forum.
 
Re: Scratch built Red Bull Delivery Ship 3011AD, The Nylon Gag MK.1

Ello RPF Dudes & Dudets,

Thanks for the comments guys, i appreciate you comments, they encourage me a great deal.


Might I suggest a thread title change? I almost didn't click on it, not knowing it was a spaceship build. Didn't know it was your username, and wondered if it was even in the right forum.

Thanks for the advice, i just spent 10mins figuring out how to change it but i got there in the end.

I have spent the last couple of days painting, not my favourite thing but its been a few years so i'm pretty pleased with the results.

paint.jpg


paint1.jpg


I then had a light test to see how it looked in the fairing

paint4.jpg


paint2.jpg


paint6.jpg


paint5.jpg


paint3.jpg


Got a little video for you to check out. :lol

First Full light test with finished Engine in position in fairing. - YouTube

Now have to paint the front intakes, wish me luck:confused

Gagster
 

Your message may be considered spam for the following reasons:

If you wish to reply despite these issues, check the box below before replying.
Be aware that malicious compliance may result in more severe penalties.
Back
Top