[ANH] Jedi Training Remote

KrokoHunter

Sr Member
As mentioned in Nighteyes' thread, I've also started building a studio scale ANH Jedi Training Remote.

This wouldn't have been possible, without Franks awesome tutorial .. Thanks Frank :cheers

Frank recommended to make a couple of vac-pulls over the 6" Plastruct hemispheres, to use for all the styrene-details.

Moe helped me with the vac-pulls, since I haven't made my own vac-table yet (will have to make one very soon :) ) ... Thanks Moe :cheers

Here are the pulls

1_11_06_12_9_35_30_0.jpg

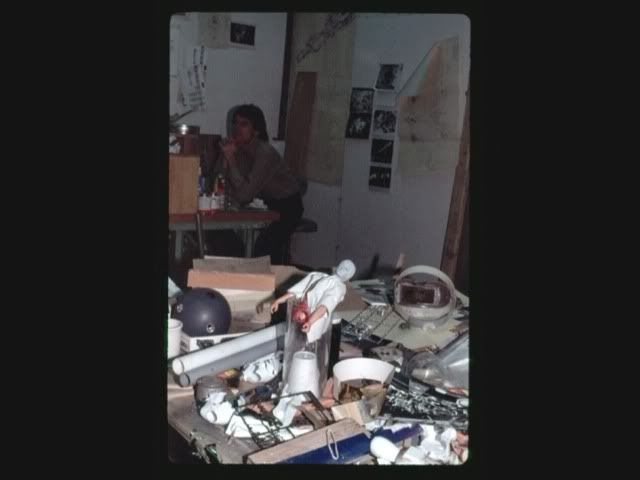
No additional comment for this pic .. I'll leave that to you dirty, geeky minds :behave

Using an Olfa disccutter, I cut out 8 disc on the vac-hemisphere

1_11_06_12_10_49_38_0.jpg


and then I cut out the the inner diameter, to make the 8 rings that go around
the crome rims

1_11_06_12_11_24_36_0.jpg


all I have to do know, is to remove the 7mm gap already marked on the rings.

(sorry about the lousy pics... I've been working while sitting in a hotelroom .. so I only had access to a lousy cell-cam)

I plan to cut the remaining styrene detail, prep the kitparts I have in stock, and drill the 8 holes for the rims, plus 1 for mounting, this week ... so expect updates soon :)
 
Looks great, and congrats on the successful vac'ed circles.

Will you be using the Bandai Panther G or the newer Tamiya?

Here's a curious photo from the Sculpting a Galaxy dvd. Either its a reject ball, or the remote itself. Begging the question, do the hemispheres come in black/dark grey? I thought that I had read they did.
cap132.jpg
 
Hey Nighteyes

Thanks, mate

I'll be using the Bandai parts .... but I don't have enough, so I'll be using castings

It looks like a reject to me ... seems like the AMT rims are placed along the equatorial line of the ball .. so I don't think this is the actual remote

And concerning the grey/black ... it could be EMA hemispheres instead of Plastruct .. Those come in grey ABS


Looks great, and congrats on the successful vac'ed circles.

Will you be using the Bandai Panther G or the newer Tamiya?

Here's a curious photo from the Sculpting a Galaxy dvd. Either its a reject ball, or the remote itself. Begging the question, do the hemispheres come in black/dark grey? I thought that I had read they did.
cap132.jpg
 
Plastruct is just the name for the hobby/retail range of products from EMA (which is also the name used by the UK importer/distributor). The products are the same, they're just set out differently in the catalogs and online. EMA in the UK offer the ABS and acrylic hemispheres in different sections, so they're relatively easy to find. The Plastruct site offers the acrylic domes by 'default', so the ABS ones don't show up as easily, but you just have to add VG to the code. So the order code for a 1" acrylic hemisphere is VHH-32, and for ABS VHH-32VG.

EMA in the UK also list the complete range of ABS domes right up to 12" in diameter, where Plastruct only list them up to 6". There's a whopping jump in the prices over 6", though!
 
I've started drawing all the guidelines on the hemispheres. I made a "ruler" from a piece of the vac-pull ... makes it a whole lot easier :D

1_15_06_12_3_20_31_0.jpg
 
turned out, that the rings I've cut we're to small, since the measurements in Franks tutorial were meant for being cut out of a flat piece of styrene, and then the warping of the part would take care of the rest...

Well, since i cut my rings of a vac-pull, there would be no additional warping and twisting of the part, and hence it turned out to small .. oh well ... back to the cutting

I've been asked how I've cut my rings .. so here's a small walkthrough.


1. I started by marking the circles on the vac-pull ... I marked an outer diameter of 54mm and an inner diameter of 32mm.. these measurements works spot on, when cutting from a vac-pull

1_27_06_12_7_08_32_0.jpg


2. After cutting the outer ring, I marked the center line, plus parallel lines 3.5mm from the center line (on each side of the center line)

1_27_06_12_7_08_32_1.jpg


3. Then I cut the inner diameter. Fixing the styrene with some tape, makes the job a lot easier

1_27_06_12_7_08_32_2.jpg


4. Voila ... the ring to rule them all .... well .. hmmm

1_27_06_12_7_08_32_3.jpg


5. Then I simply removed the areas marked by my 2 parallel lines, making a 7mm gap

1_27_06_12_7_08_32_4.jpg


1_27_06_12_7_08_32_5.jpg


6. Next, I marked the same measurements on the hemisphere

1_27_06_12_7_08_33_6.jpg


7. and voila ... just a quick testfit ... whoopsie .. seems like one of the Panzer IV parts dropped a bit :-/

1_27_06_12_7_08_33_7.jpg


and that's it folks :D
 
That's is indeed very useful information Niels, thanks very much for the updating of Frank's excellent tutorial! :thumbsup
Cheers, JT
 
This looks great! I have that same circle cutter. I find it likes to slip just as I'm about to finish the final turn. :angry

Your cuts look very clean.

May I ask you how you cut the hole in the clear plastic hemisphere (the hole the wheel rim fits in)? It's pretty hard, ridged plastic for that cutter to get through, isn't it?

Thanks mate

I didn't use the circlecutter for the hemispheres ... a friend of mine helped me with those, using a bench drill.
 
You can use those fancy HOLE boring Drill Bits, You know the ones that look like Bottle tops with TEETH.

Or...make a hole Big enough to fit a drum sander in, and do it carefully manually.
 
This thread has been very helpful to my own build, thank you Niels! I did work out a neat little method for shaping sheet material without vac-forming equipment, just using heat for thermo-forming... Perhaps others working on this project might be interested:

I made a quick hydrocal negative casting of a small section of a 6" acrylic hemisphere. From that I made a hydrocal positive. This positive became my "buck" for shaping the sheet styrene.
attachment.php


Made a circular frame from 2 pieces of cardboard, and clamped scrap styrene between them with several C47's. Applied heat from an electric stove burner, and when the styrene was appropriately soft, simply stretched the frame down around the buck.
attachment.php

attachment.php


I made enough of these for the 8 "emitter rings" (and a few spares).
attachment.php

attachment.php


Incidentally, my detail parts are from Adamata's current run. Very nice little castings! One more quick idea to share: When "dry-fitting" parts, I'll often use fun-tak putty (made for hanging lightweight pictures, posters, etc). That way I can position, and easily re-position parts, and get a good idea of the finished look without holding everything together with tape.
attachment.php
 
Wow, some great scratchbuilding tops and tricks coming from this thread! Thanks to all for sharing ..... and motivating :thumbsup :thumbsup
 
Hey VistaVision

Great and simple solution ... but I must say, after experiencing how easy vacforming is .. I just have to get my thumb out of the a**** and build myself a vactable .. I won't regret it :D
 
This thread is more than 7 years old.

Your message may be considered spam for the following reasons:

  1. This thread hasn't been active in some time. A new post in this thread might not contribute constructively to this discussion after so long.
If you wish to reply despite these issues, check the box below before replying.
Be aware that malicious compliance may result in more severe penalties.
Back
Top