You are using an out of date browser. It may not display this or other websites correctly.
You should upgrade or use an alternative browser.
You should upgrade or use an alternative browser.
1:1 Millennium Falcon Cockpit Replica - Group Build
- Thread starter SteveStarkiller
- Start date

trainman
Well-Known Member
Hi Gang,
I have 3 more days to jump as many hurdles as possible! Fingers crossed!
What happens in 3 days?... The Empire discovered the location of your workshop?
Wow, nice update. I forgot what you decided in the end, but I can't help thinking it would look so much better if the entrance would be a full tube and not just stop halfway
Hey OC,
Thanks! I'm going to have both the half and full corridor. I'm just glad the half panels even aligned! That's one less thing I have to do. But I do intend on making the full corridor.
")
- - - Updated - - -
Hi Greg
I still remind you that the corridor is angled to the cockpit...
And a non-perpendicular miter joint of two tubes is not trivial
View attachment 733227
Hey T,
I would LOVE to include the angle in the corridor. Unfortunately, there just isn't enough room in the shop for me to create the other section. I'm sharing the shop with 4 other people and I can't step into their work space. That doesn't mean I wont go back and do it. Who knows what the future brings?
- - - Updated - - -
What happens in 3 days?... The Empire discovered the location of your workshop?
SHHHHHHHHHHHHHHHHHHH!
Just a self imposed deadline to see how far I can get with the week off that I have. Some people spend the time relaxing... I spend my time building corridors and arches!
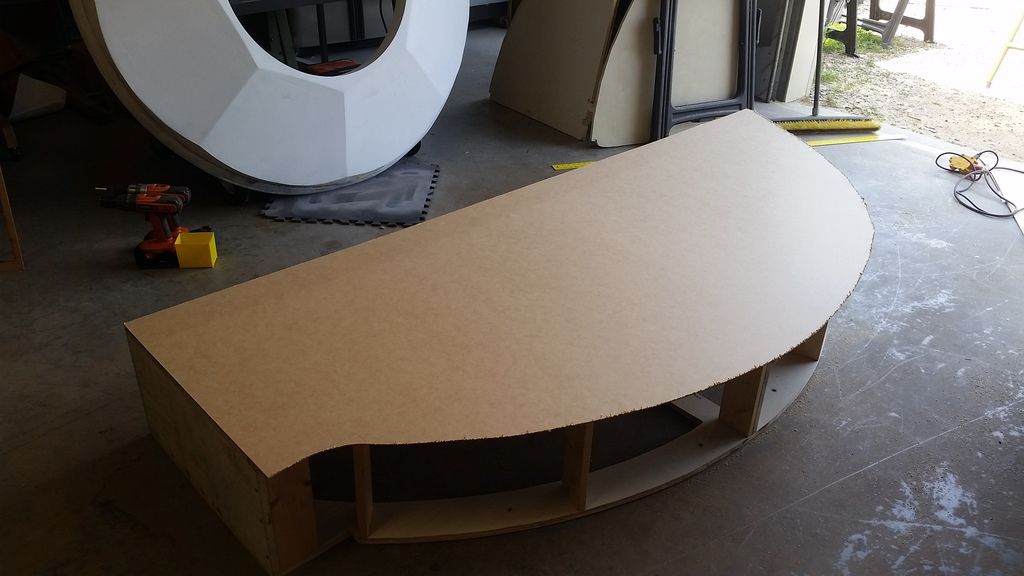
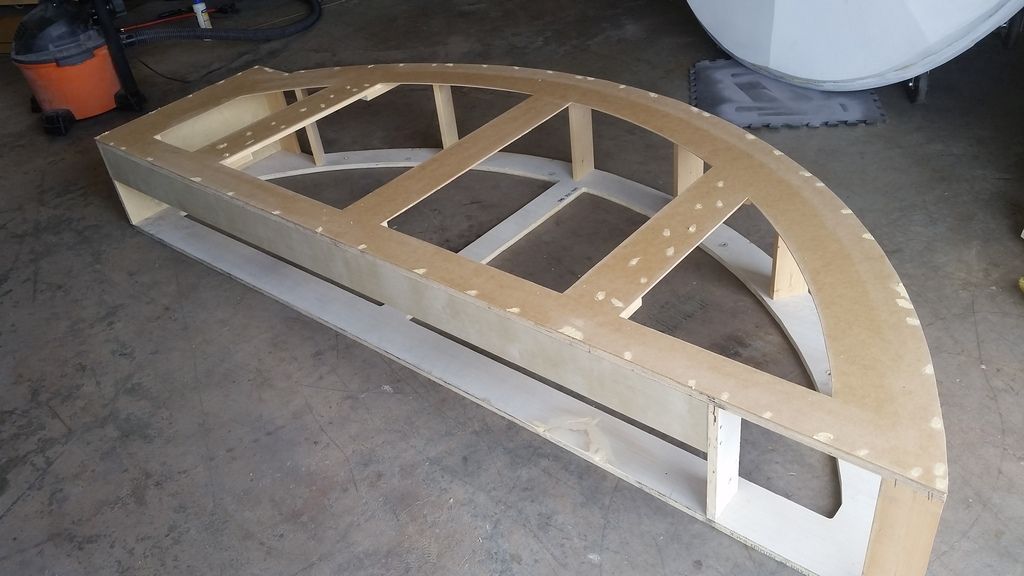
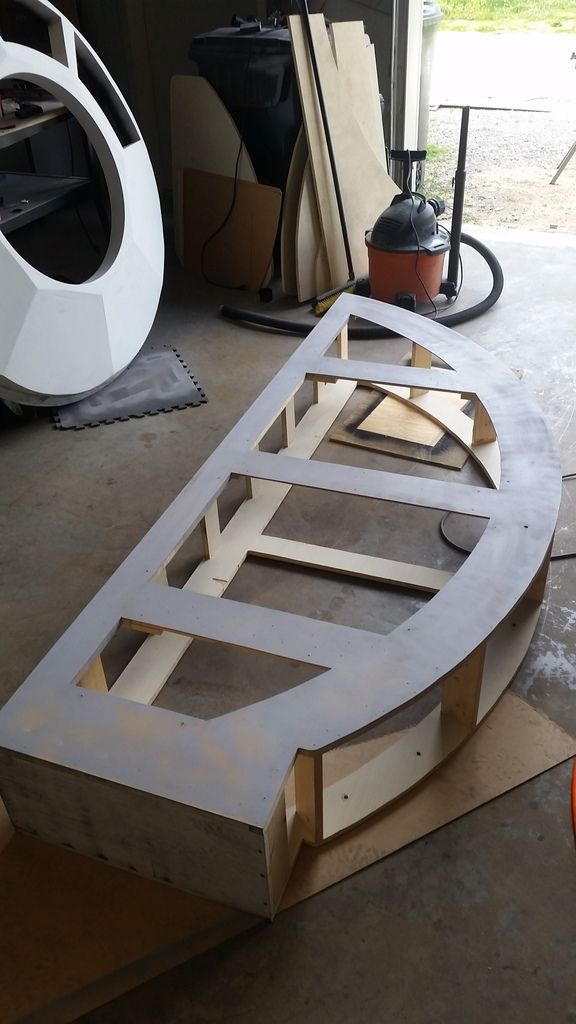
Hi Gang,
Update Part V!
Had a few accidents yesterday...
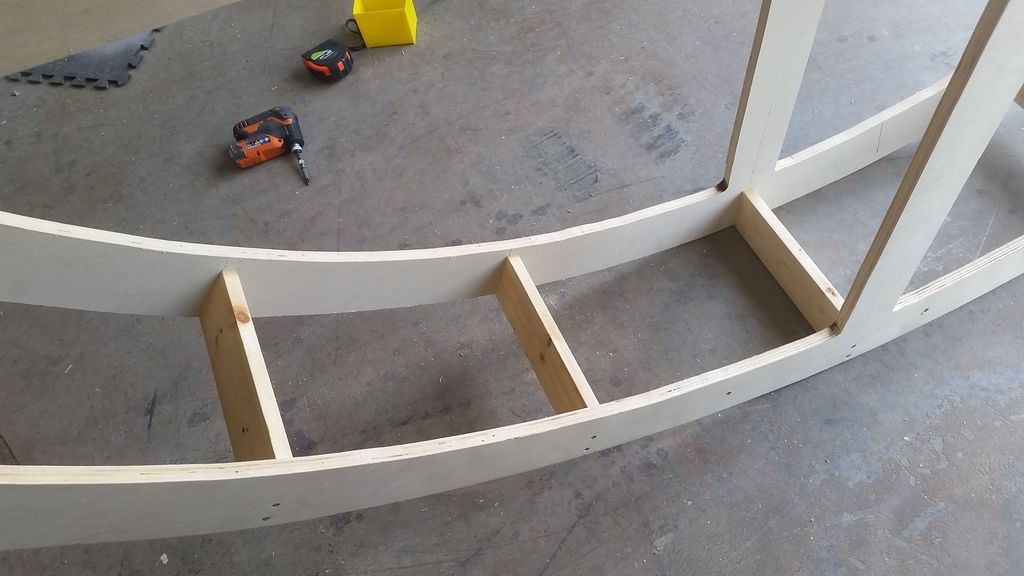
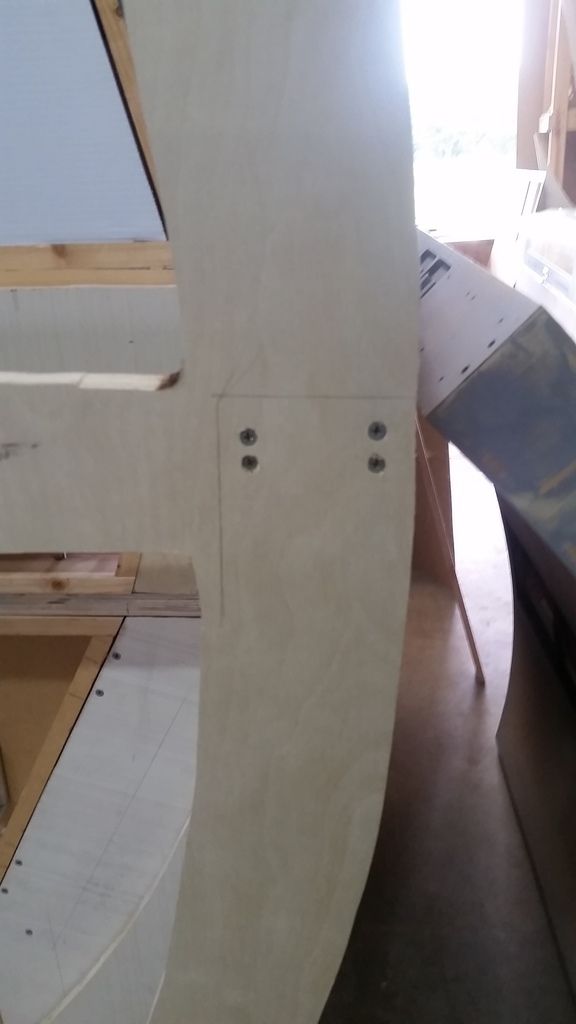
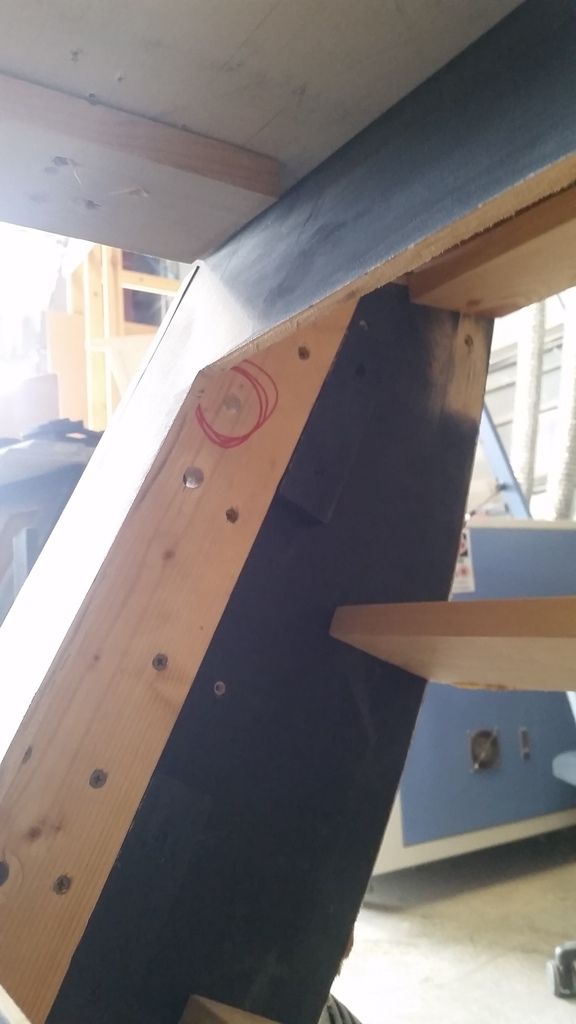
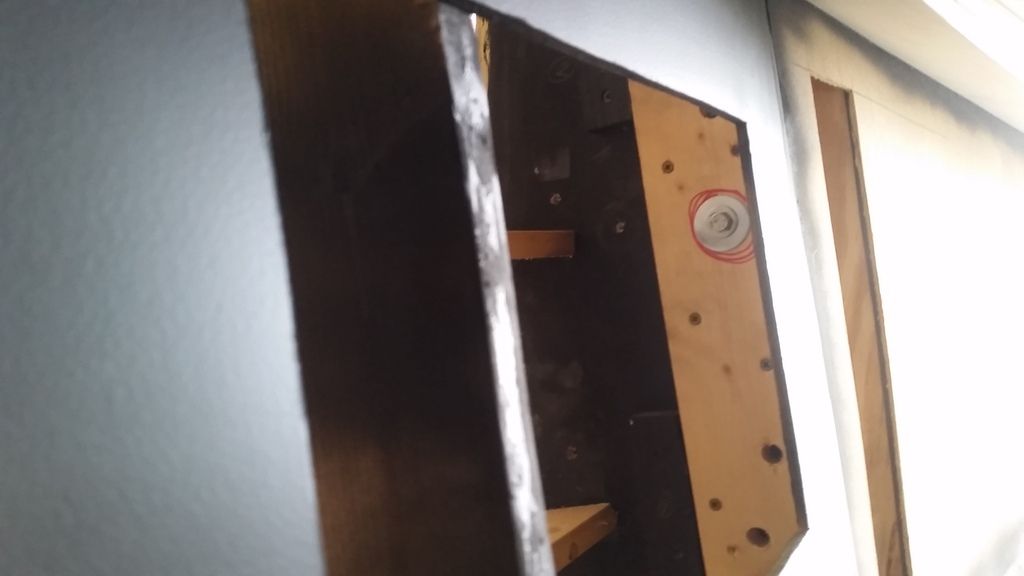
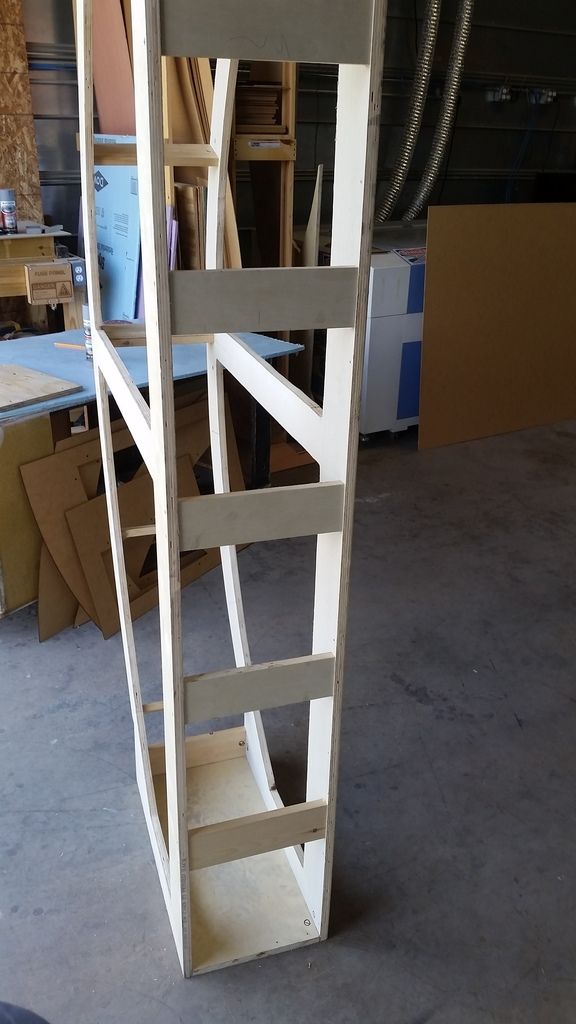
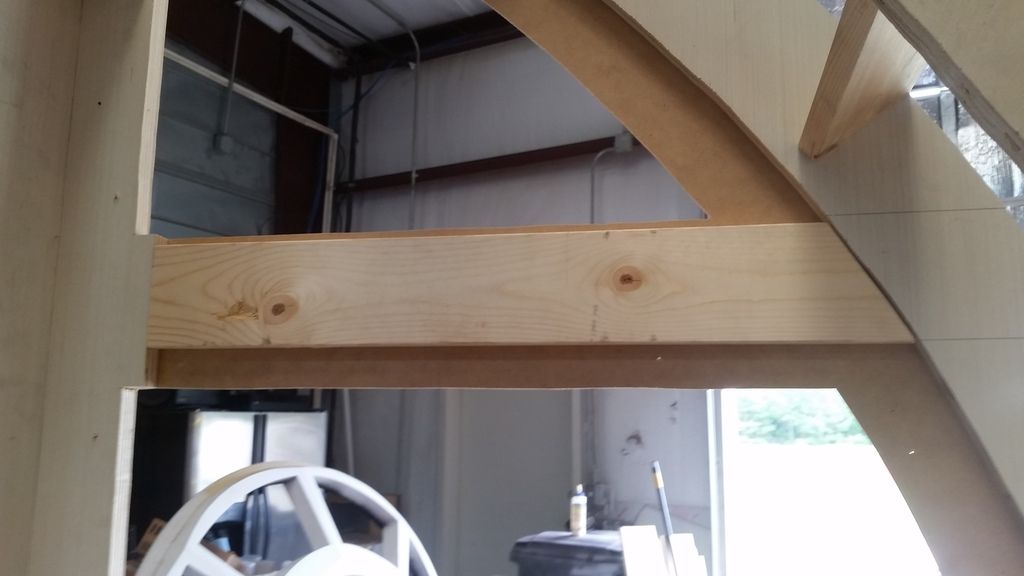
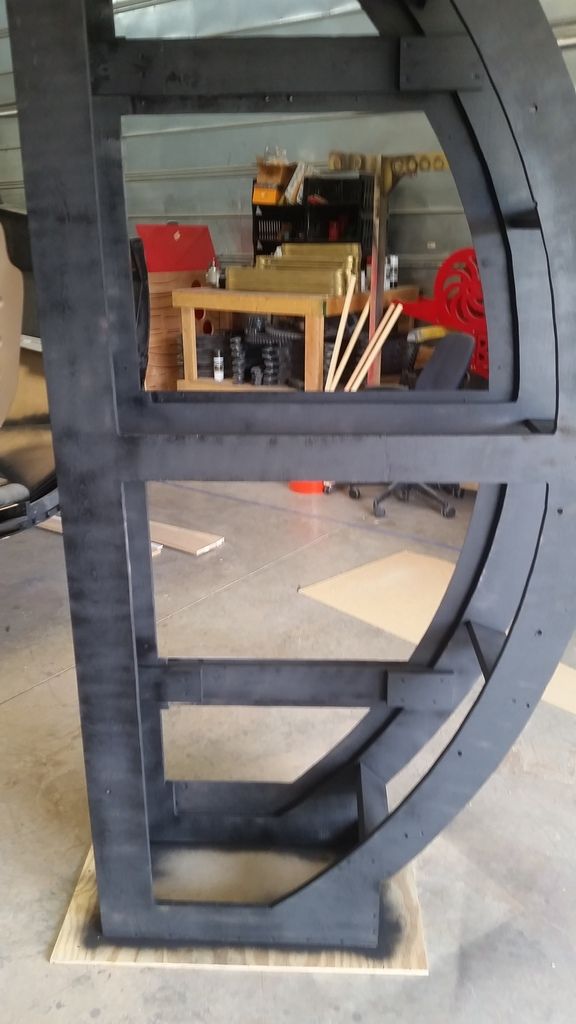
I drilled a hole in the center so I can mount the entire piece and give more structural rigidity

Glued together - just need to find a bolt long enough
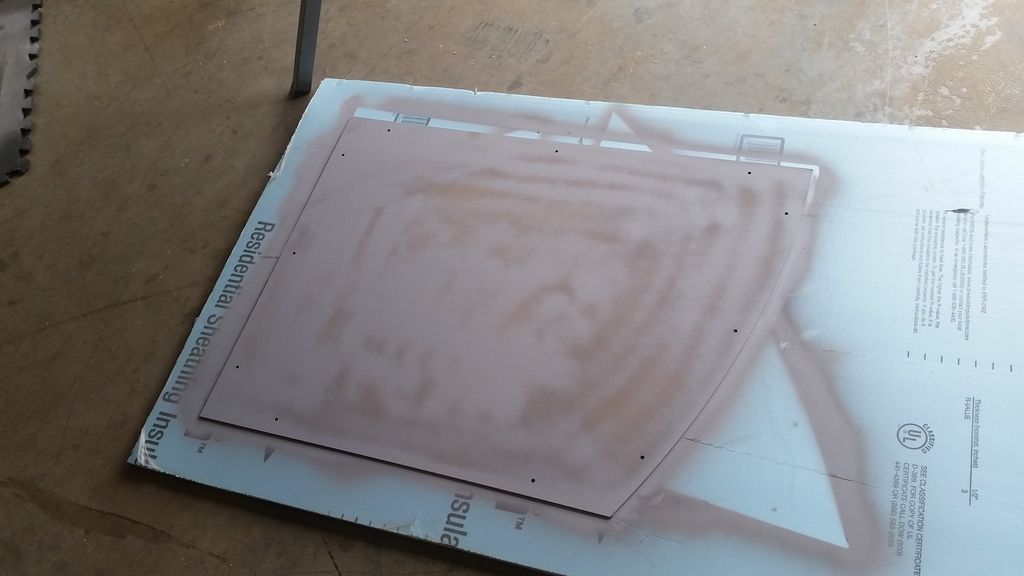
Worked on the new access panel lids. I'll these primed painted and mounted today
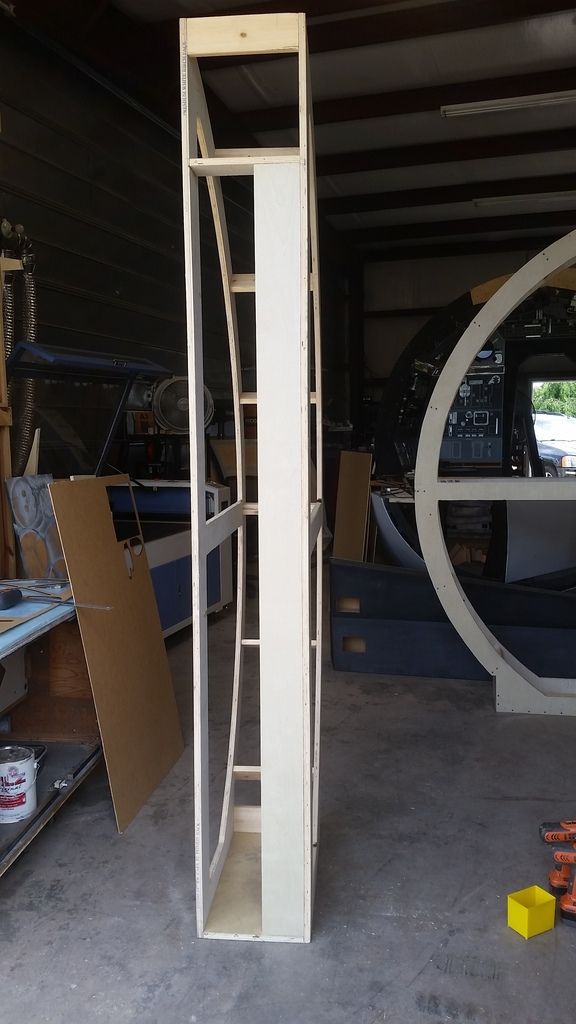
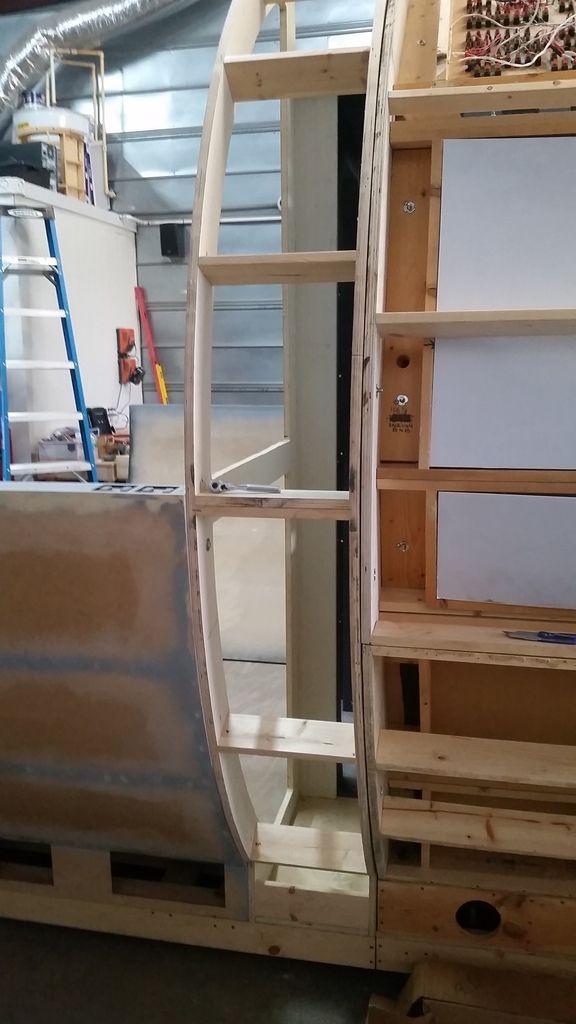
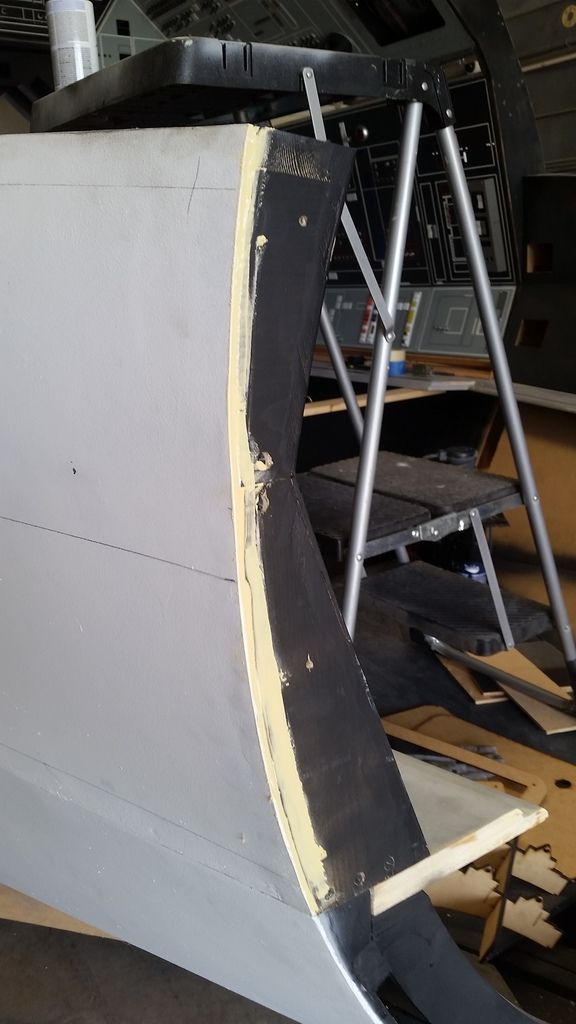
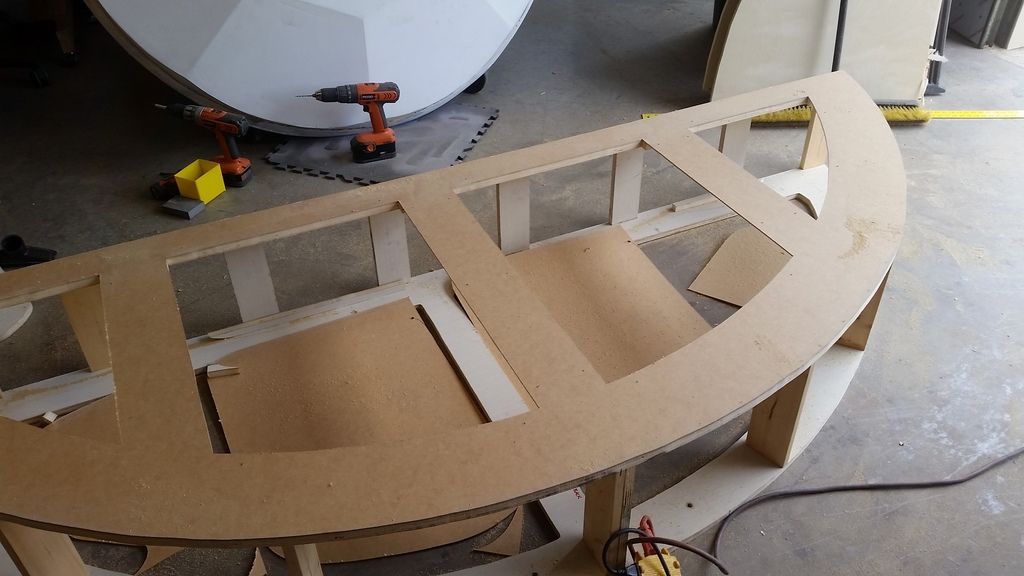
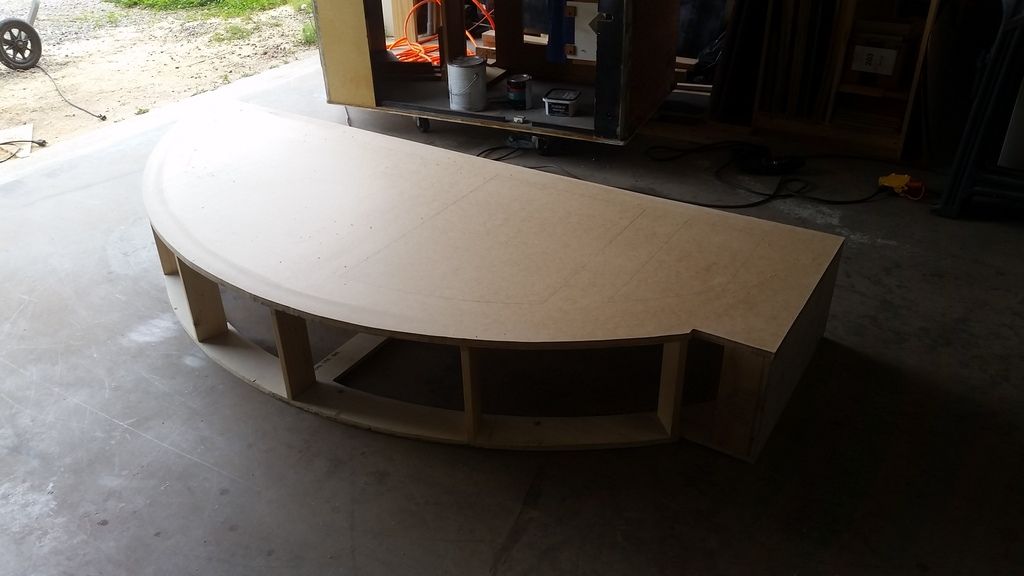
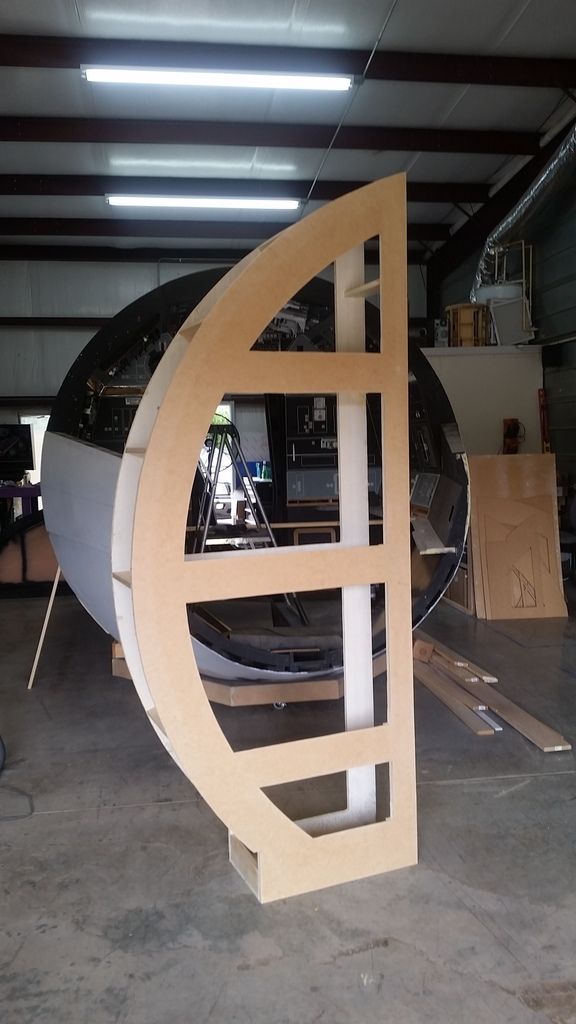
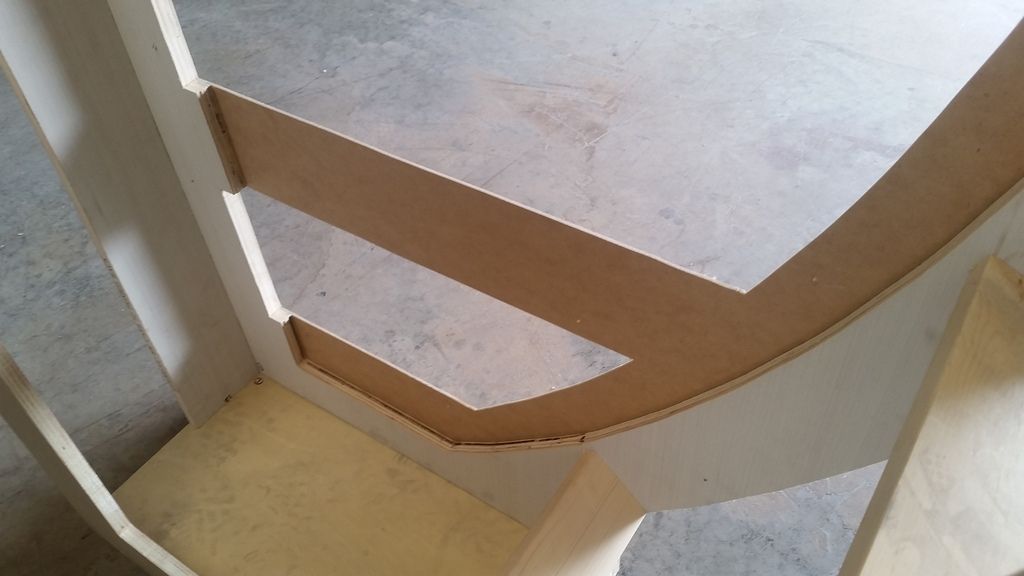
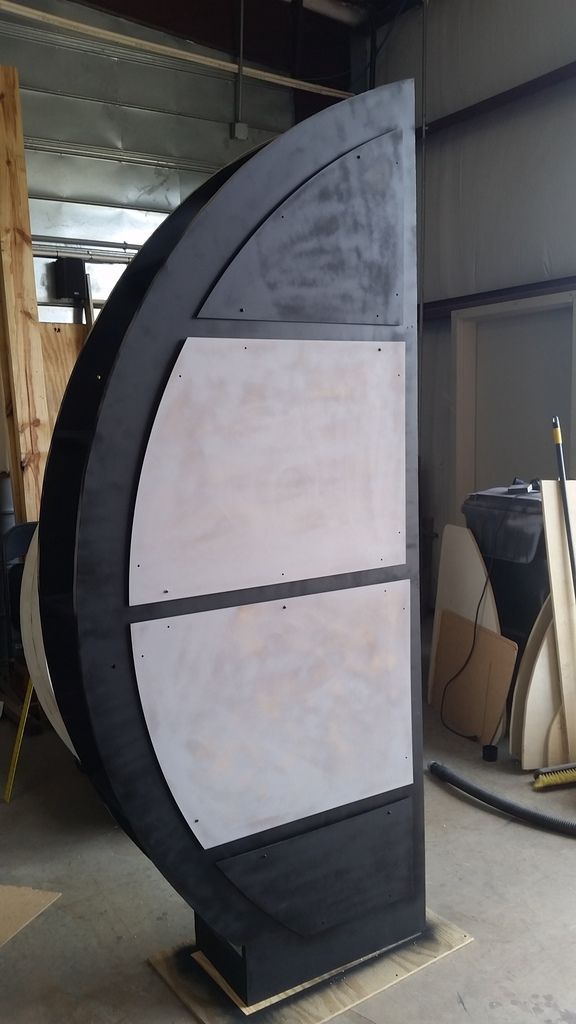
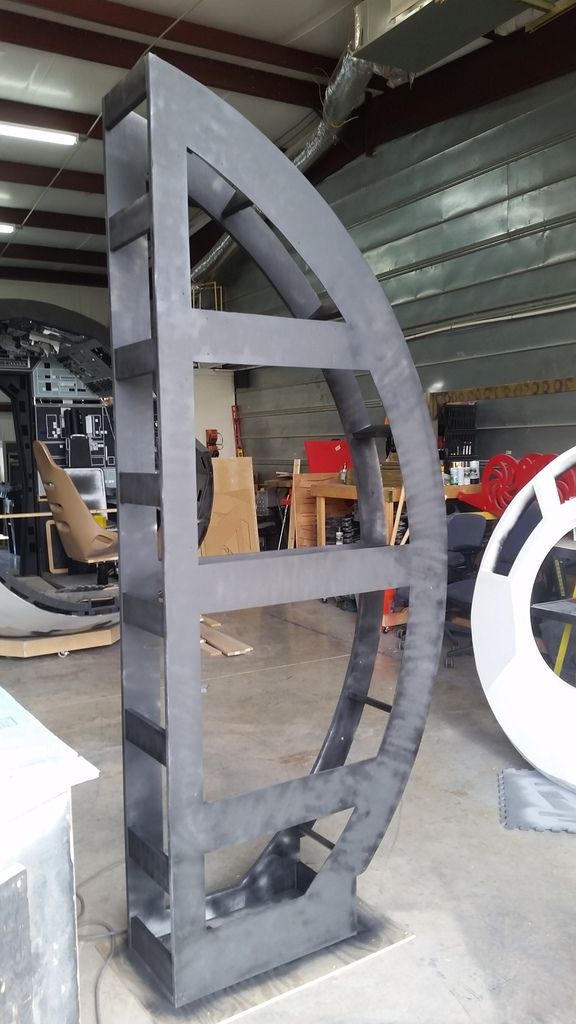
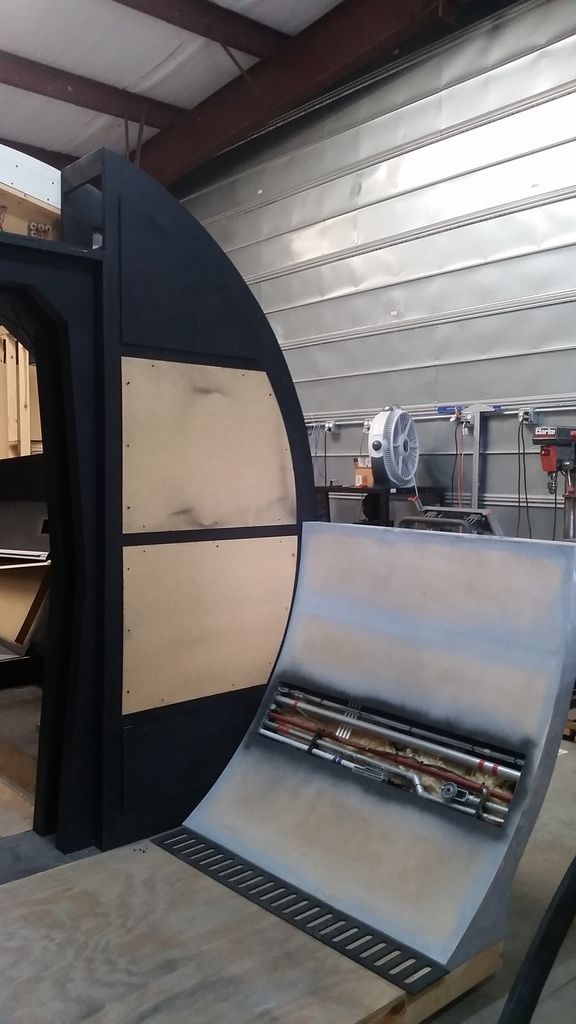
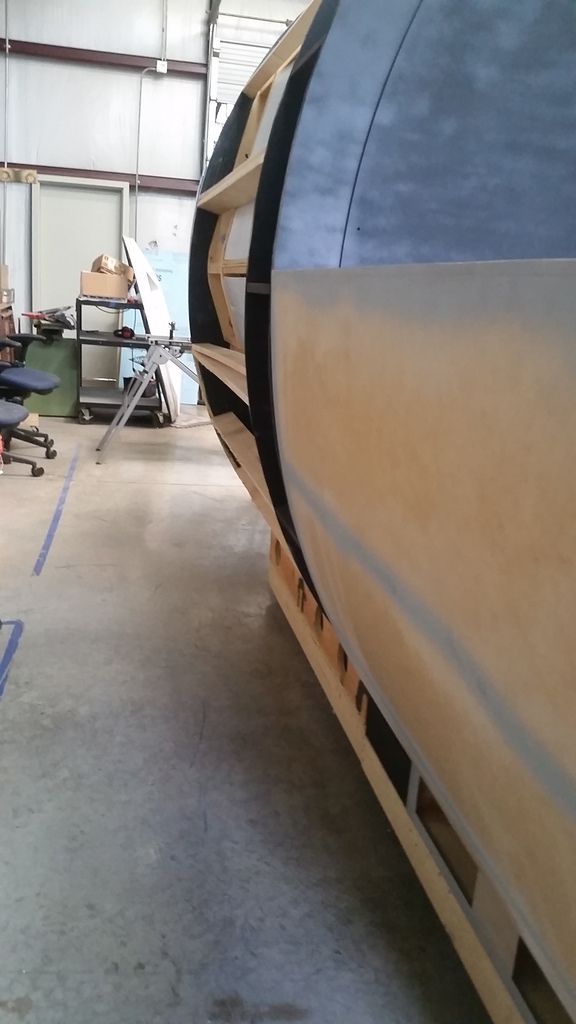
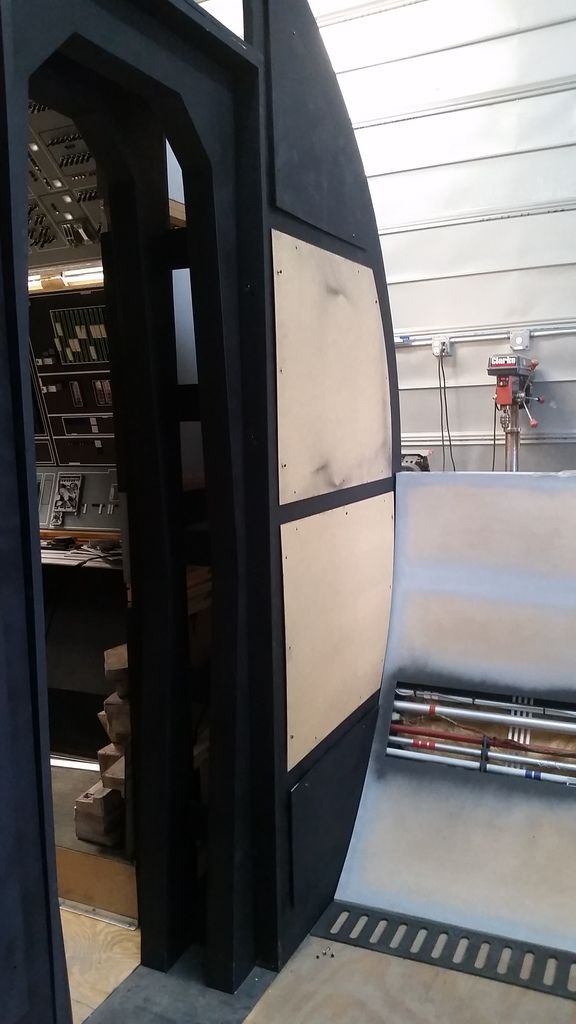
I spent a lot of time on the new cockpit entrance frames and designed the new access panels and openings.
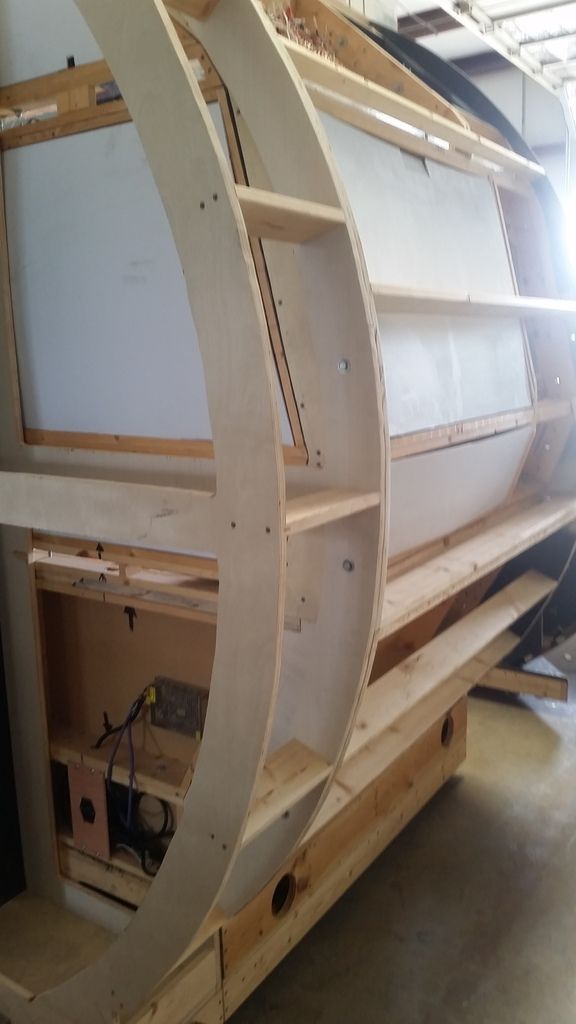

She stands just under 8 feet!
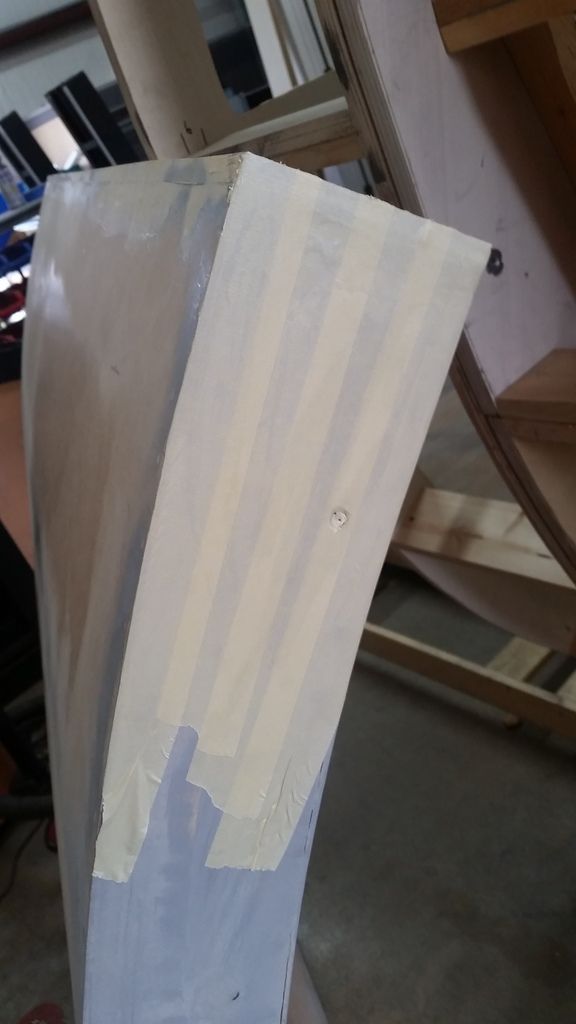
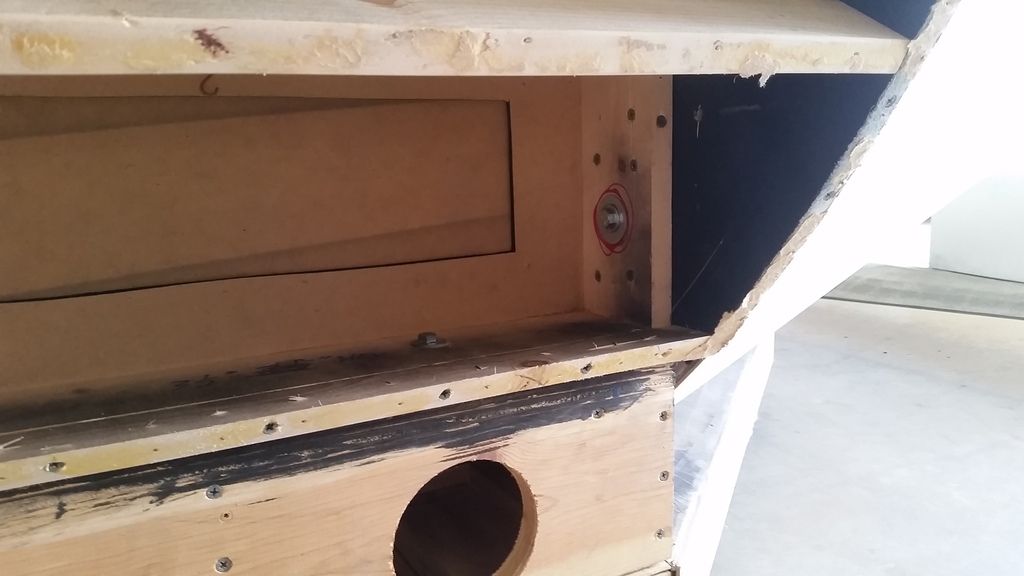
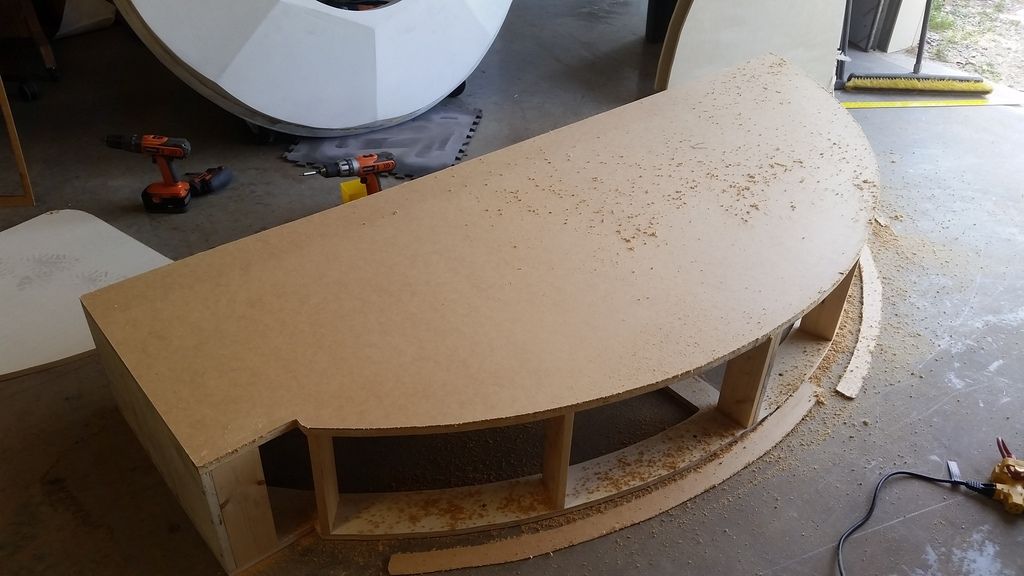
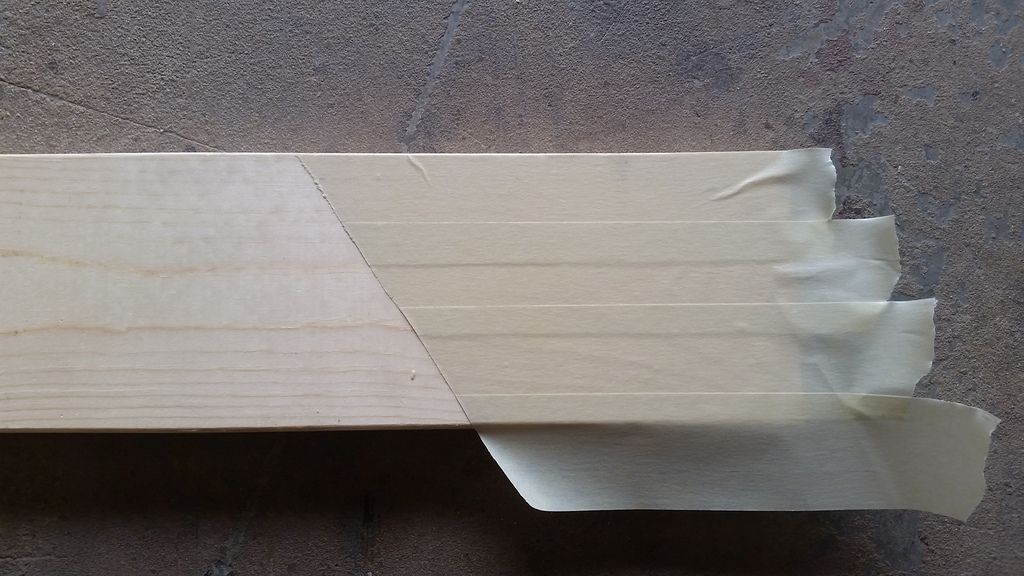
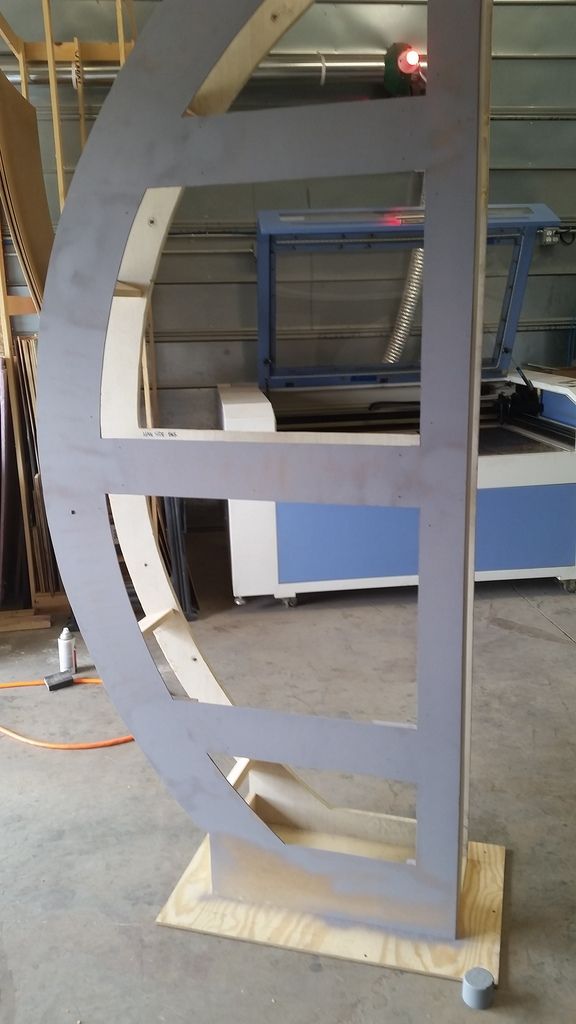
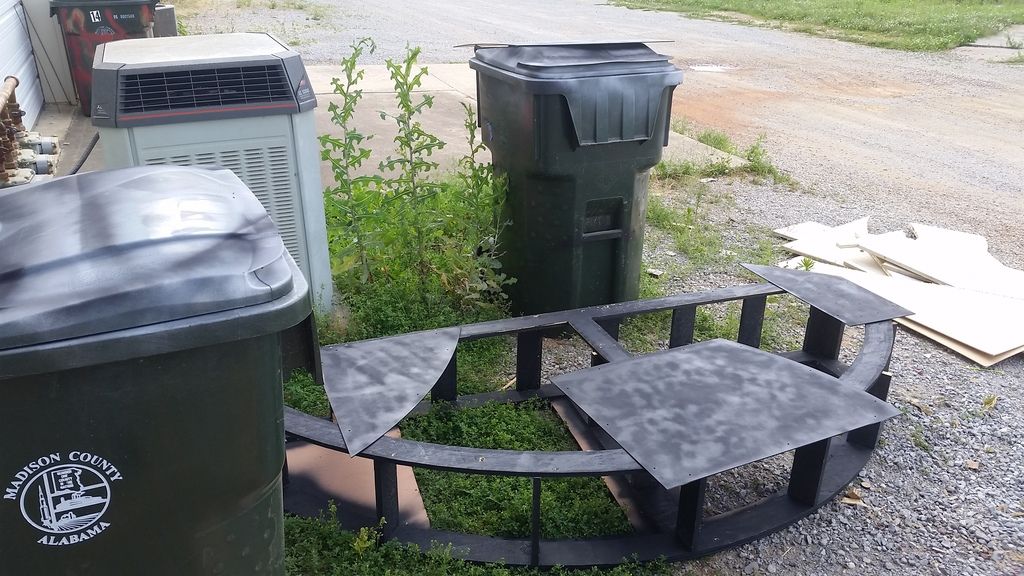
I then mounted the other half corridor - this required me to use the existing bolt / "T" nut so I had to create a template by using tape
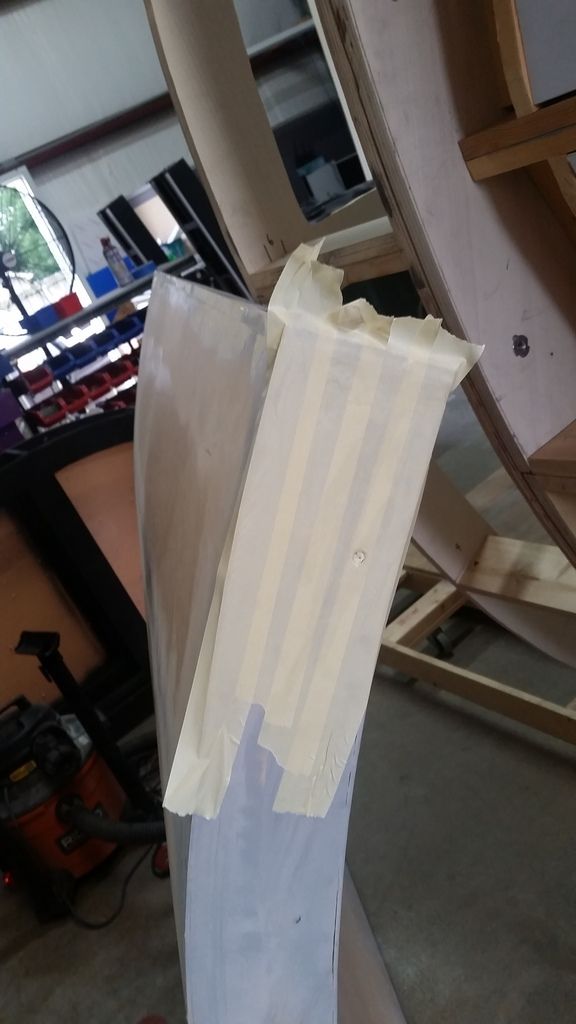
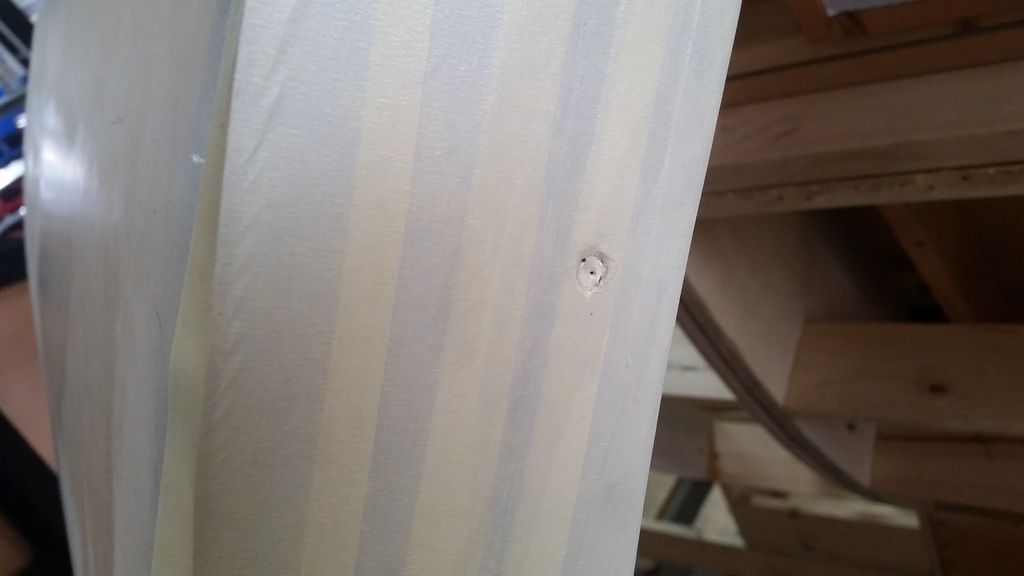
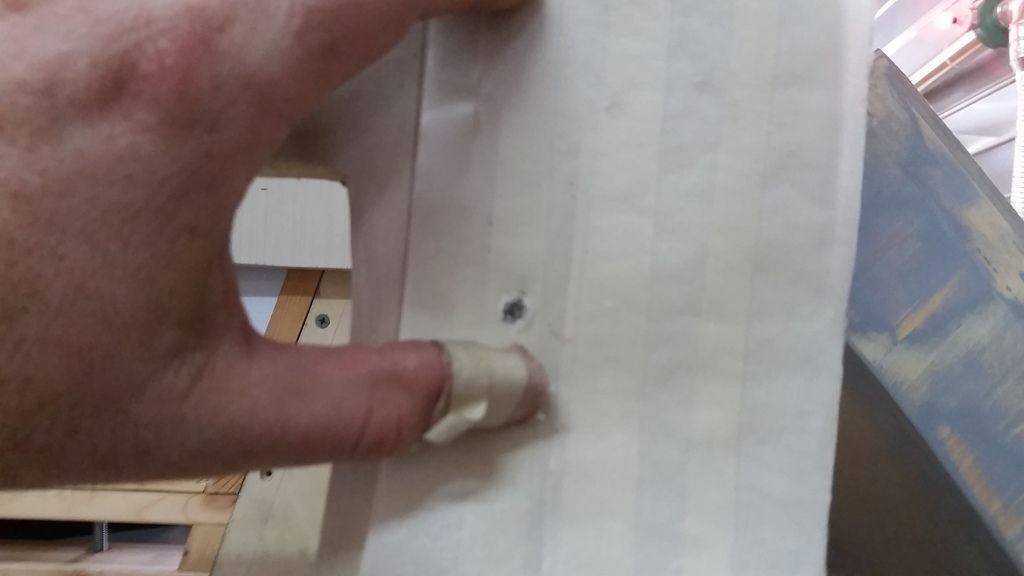
Located the hole for the "T" nut
Cut off the edges of the tape
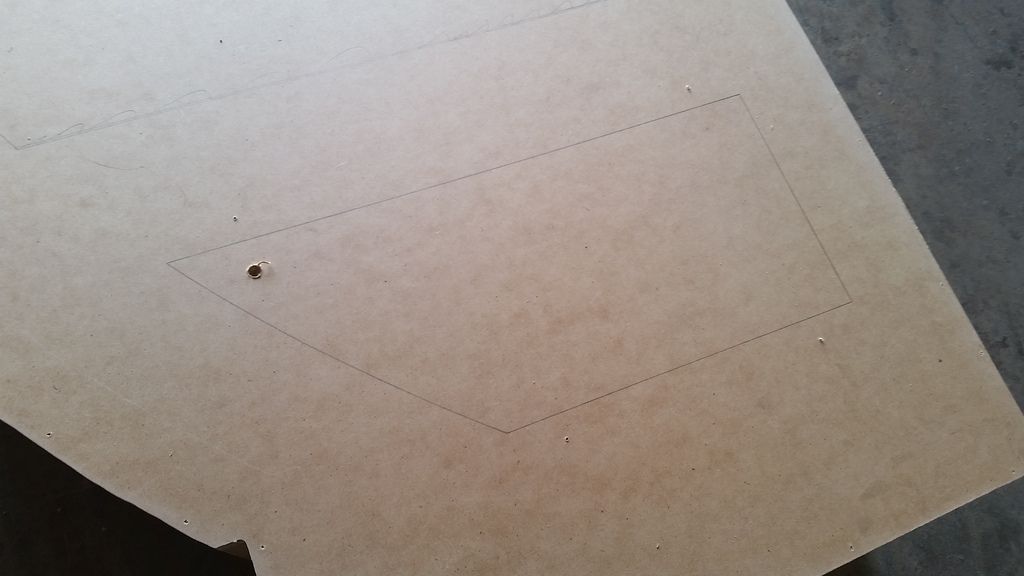
Pre-marked the outline of the panel
Peeled the tape off and turned it around and aligned everything and marked the hole
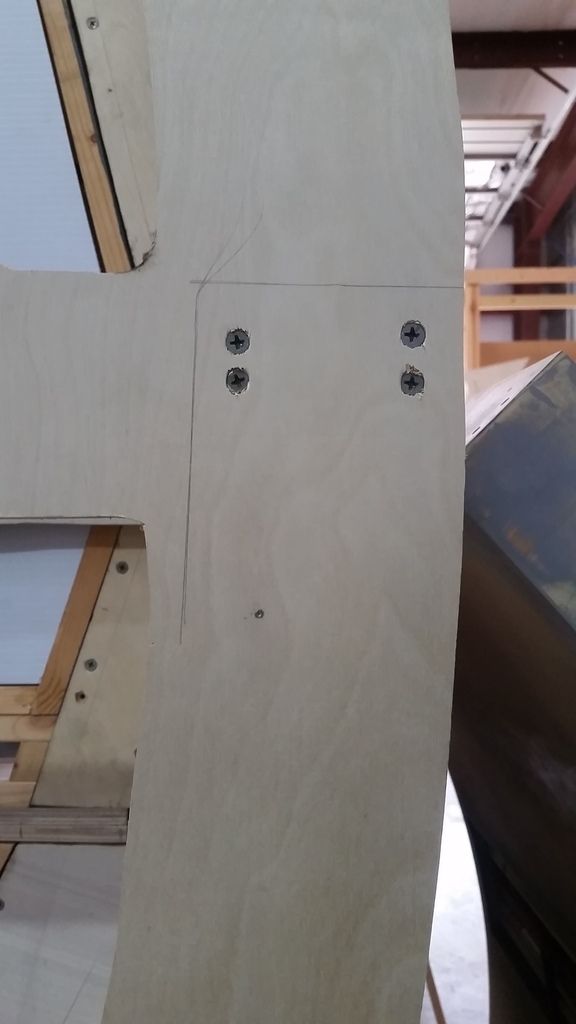
I drilled the hole slightly larger than usual for extra play and movement. Perfect!
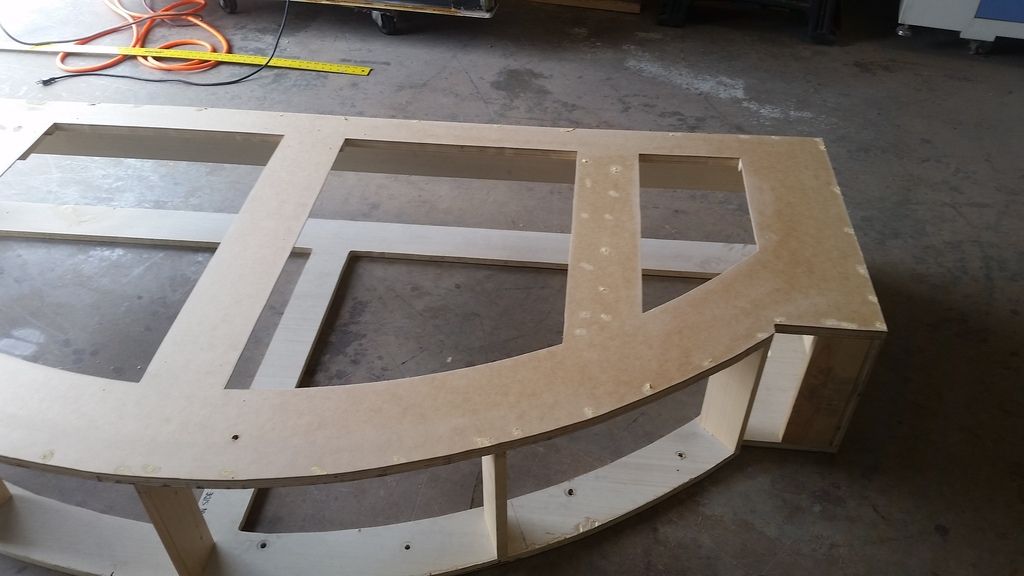
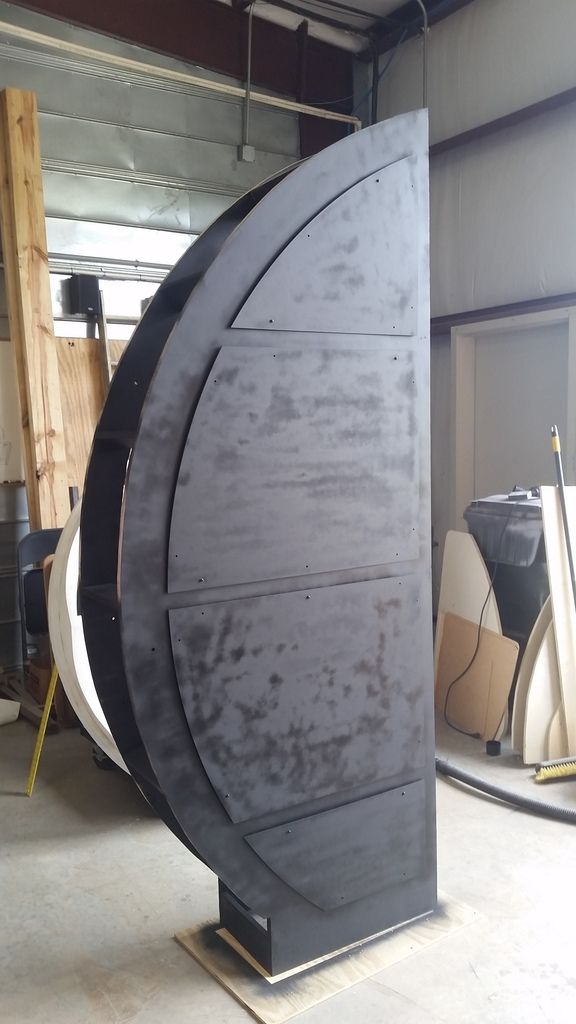
ALL of the edges now align - they are almost perfect!
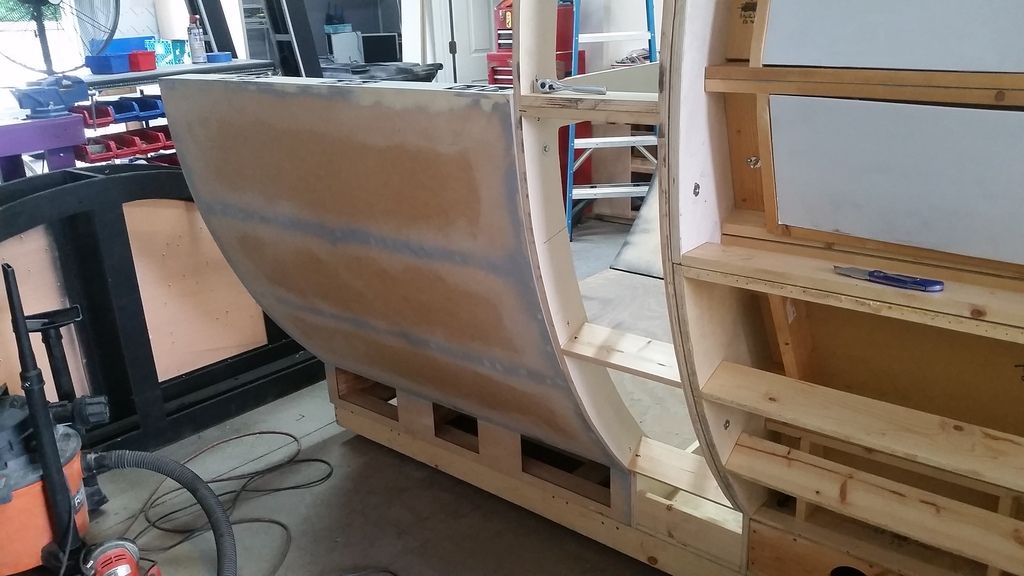
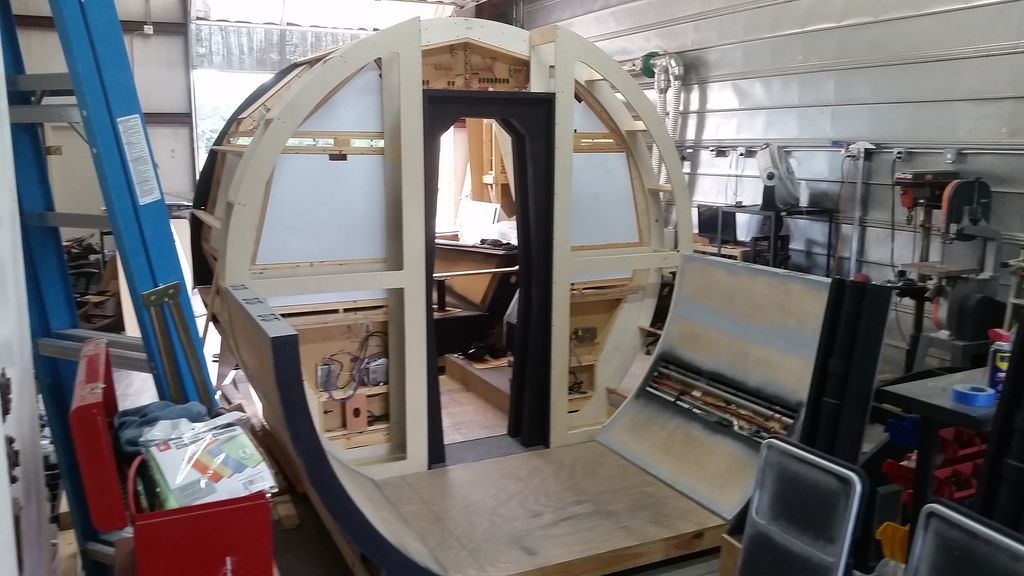
And this is where we are!
Stay Tuned for Part VI!
EDIT:As much as I want to skin this beast I'm going to hold off until all the wiring is fixed, all the panels are mounted / aligned and decide to whether I want to make the full corridor. If we go that route then I have to trace the new cockpit entrance panels (above) "pre-skinned" so I get a correct outline.
Hope that made sense?
Update Part V!
Had a few accidents yesterday...
I drilled a hole in the center so I can mount the entire piece and give more structural rigidity
Glued together - just need to find a bolt long enough
Worked on the new access panel lids. I'll these primed painted and mounted today
I spent a lot of time on the new cockpit entrance frames and designed the new access panels and openings.
She stands just under 8 feet!
I then mounted the other half corridor - this required me to use the existing bolt / "T" nut so I had to create a template by using tape
Located the hole for the "T" nut
Cut off the edges of the tape
Pre-marked the outline of the panel
Peeled the tape off and turned it around and aligned everything and marked the hole
I drilled the hole slightly larger than usual for extra play and movement. Perfect!
ALL of the edges now align - they are almost perfect!
And this is where we are!
Stay Tuned for Part VI!
EDIT:As much as I want to skin this beast I'm going to hold off until all the wiring is fixed, all the panels are mounted / aligned and decide to whether I want to make the full corridor. If we go that route then I have to trace the new cockpit entrance panels (above) "pre-skinned" so I get a correct outline.
Hope that made sense?
Last edited:
Hi Gang,
Update Part VI!
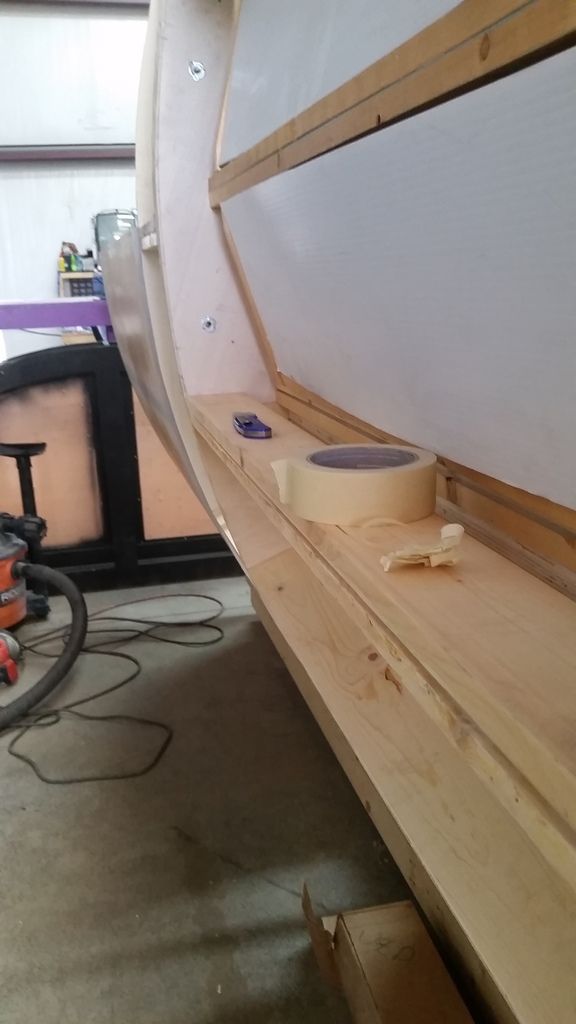
I'm really happy with the amount of forward progress I was able to make this week! I hope you guys/gals enjoyed this latest push and enjoy Update Part VI! Along with the modular panel framing and a new cockpit entrance I was able to knock out a LOT of the other little but very necessary tasks.
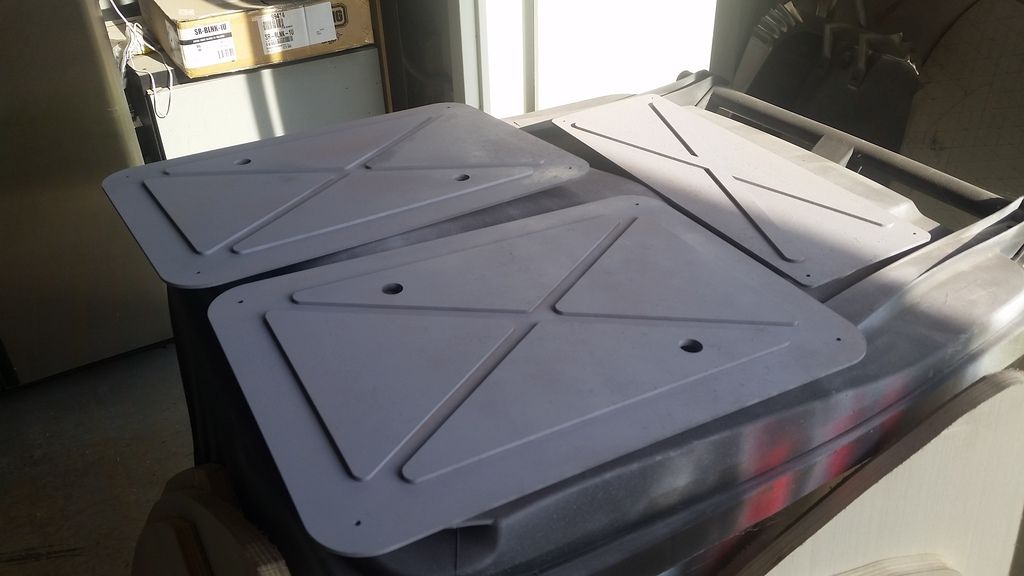
Primed and painted the smaller access covers
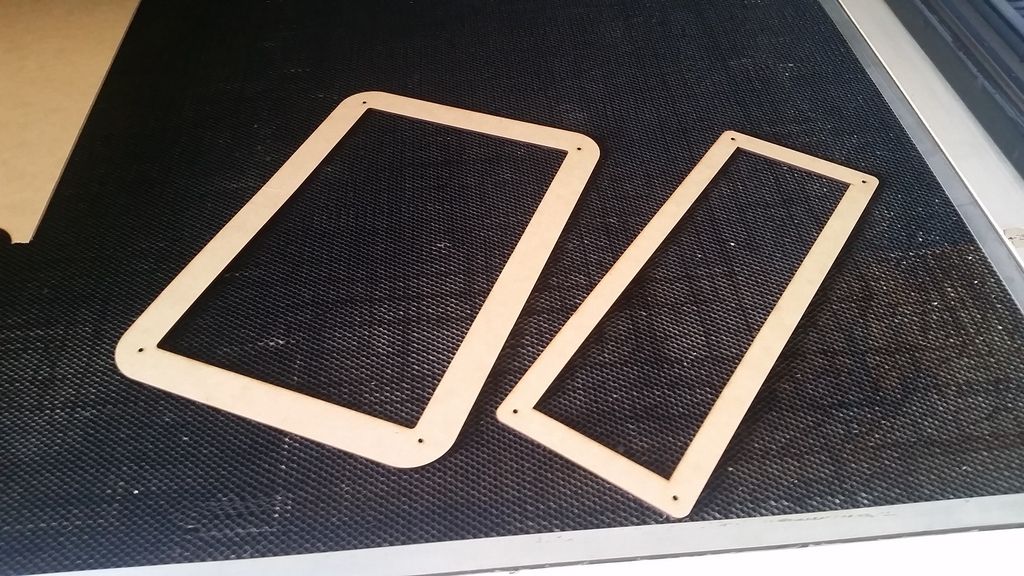
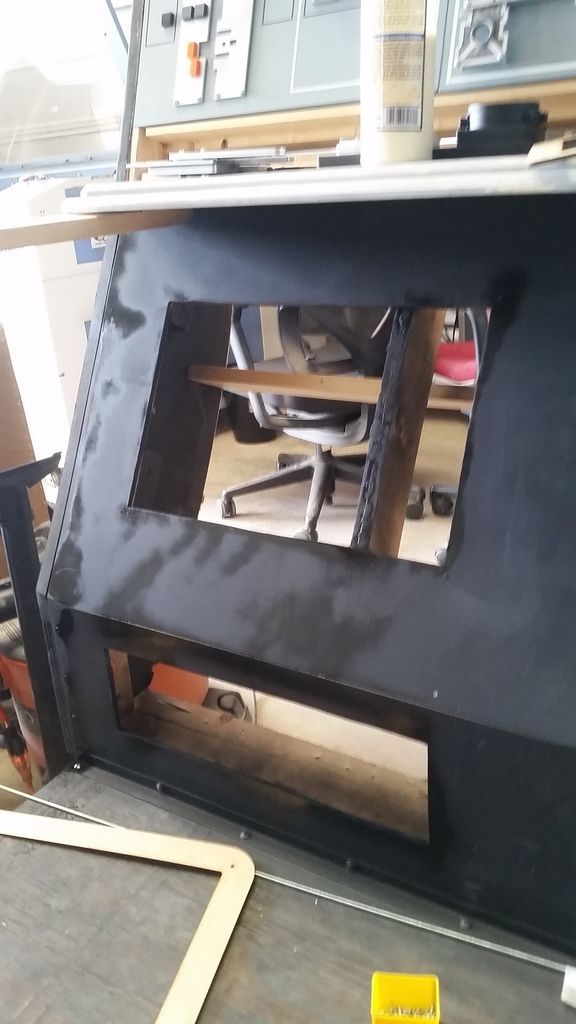
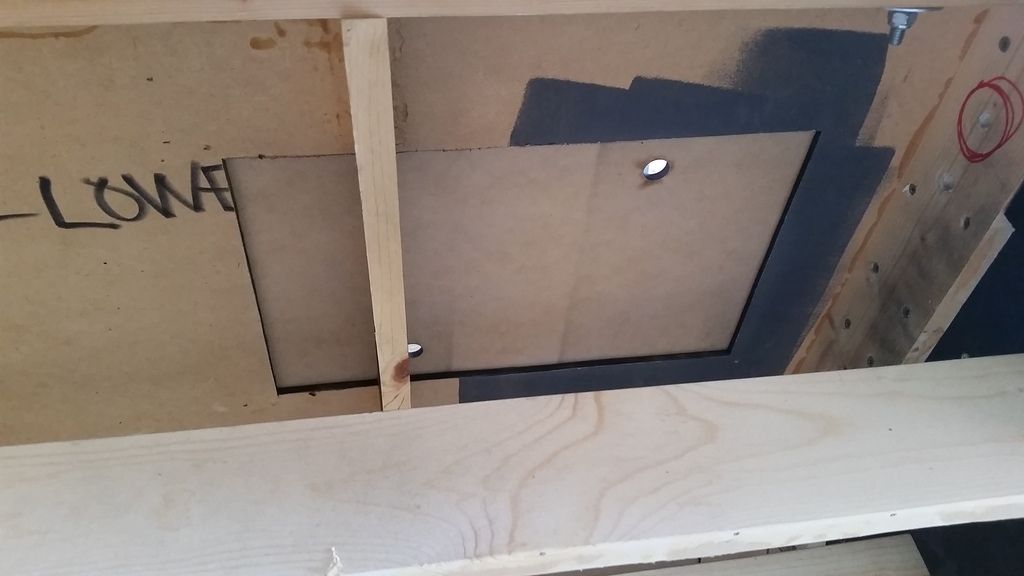
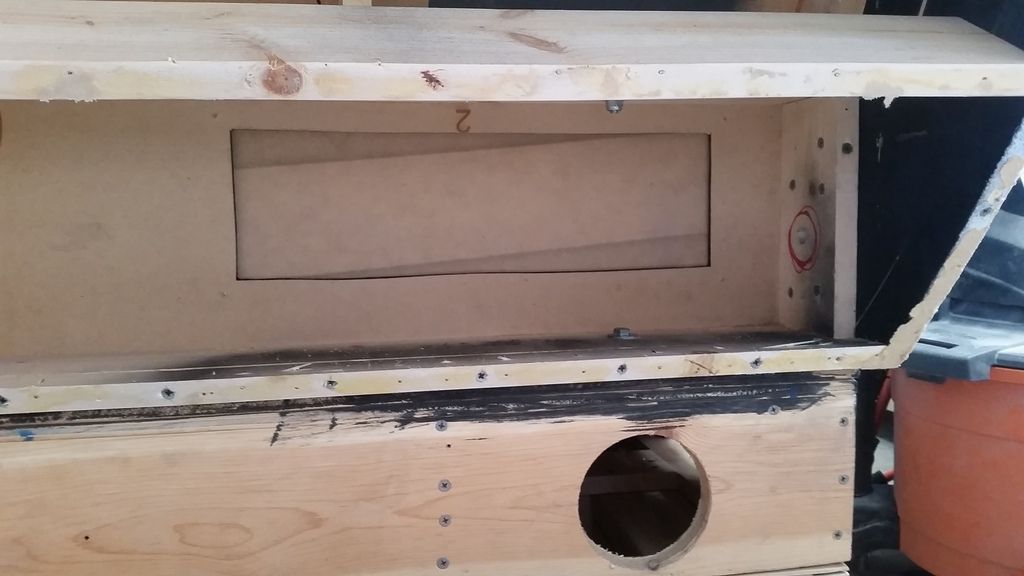
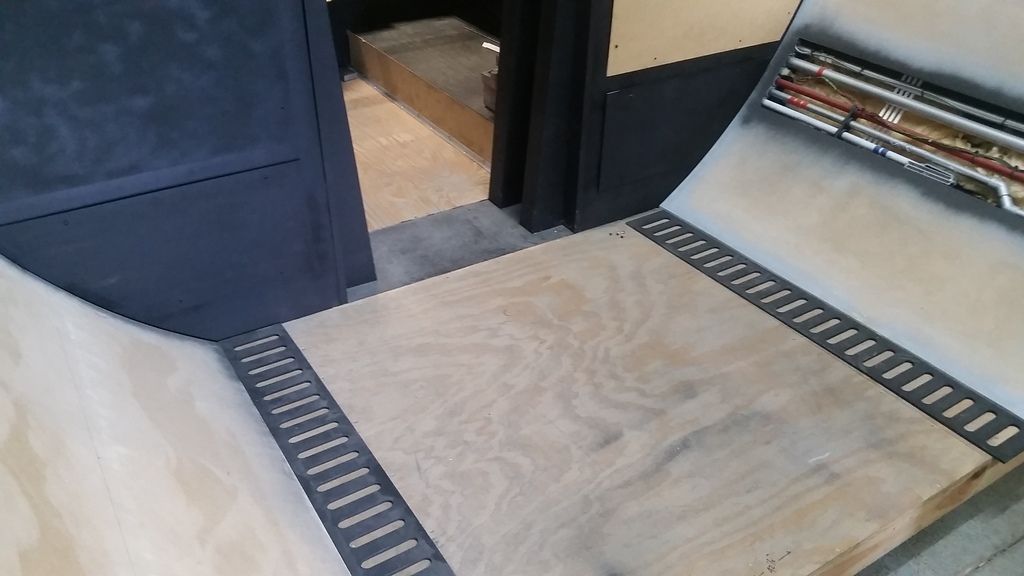
I cut these hole templates
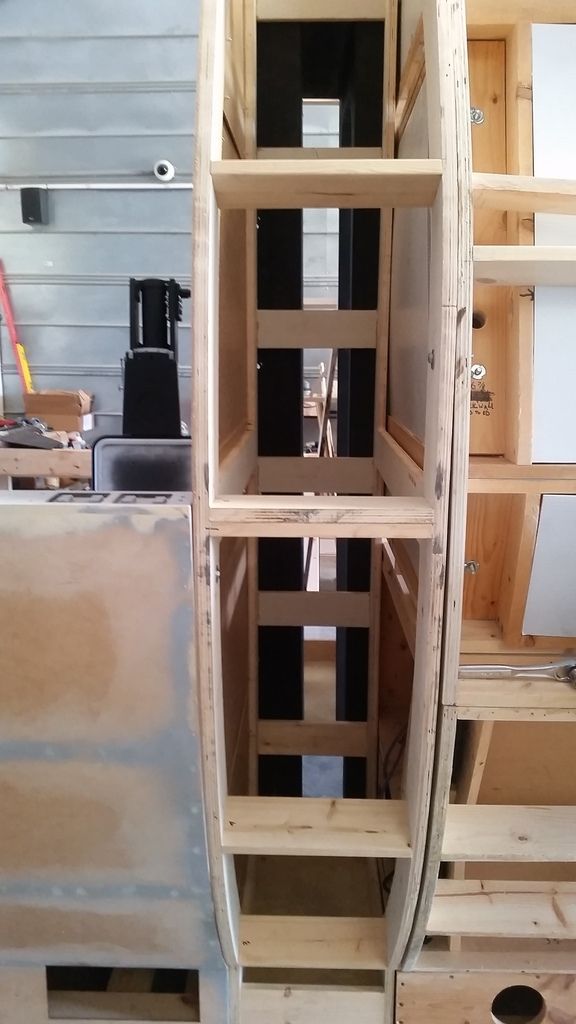
And used them to trace out and cut the holes in the lower interior panels (below the shelf)
I now have easy access to the nose to body mounting points!

A little touch up paint
And now the other side
Panels in place
From the back
This will make mounting the panels so much easier!
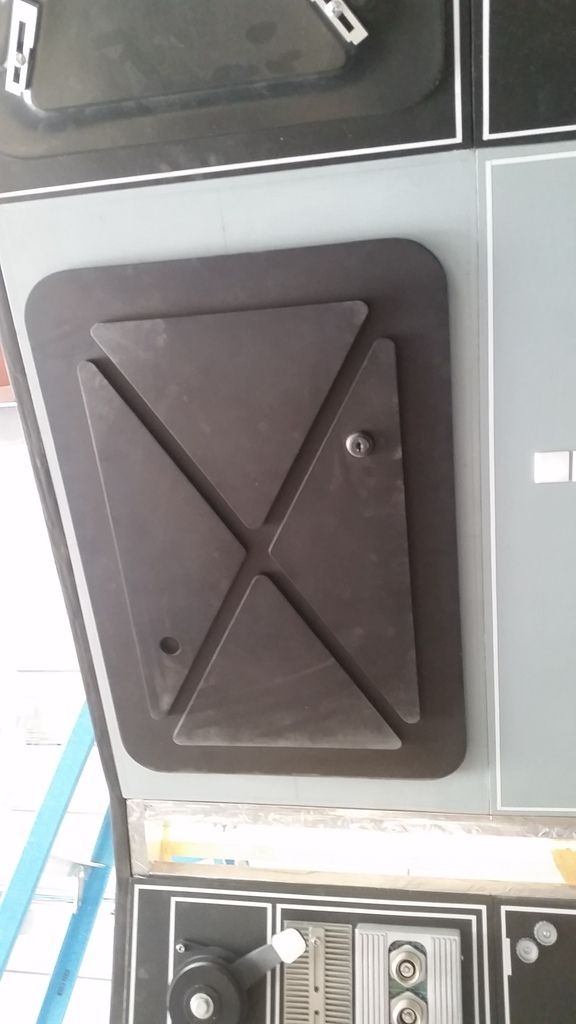
I then worked on adding a magnet to the access panel lids
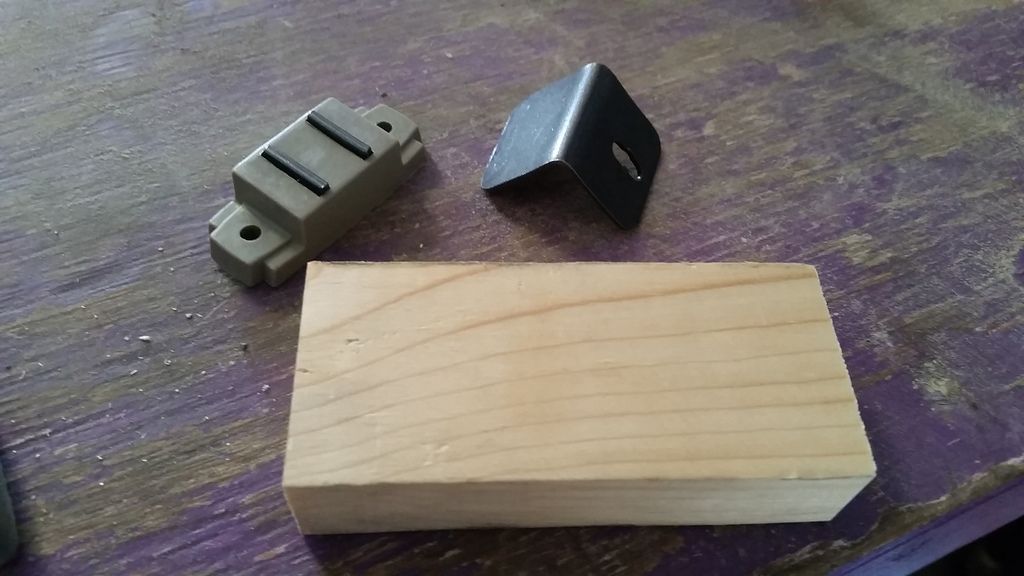
I tossed the wood idea and dug through the boxes of scrap pinball parts Scott has and found this greeblie - perfect! Need to create spacer from 1/4" MDF to align with the magnet
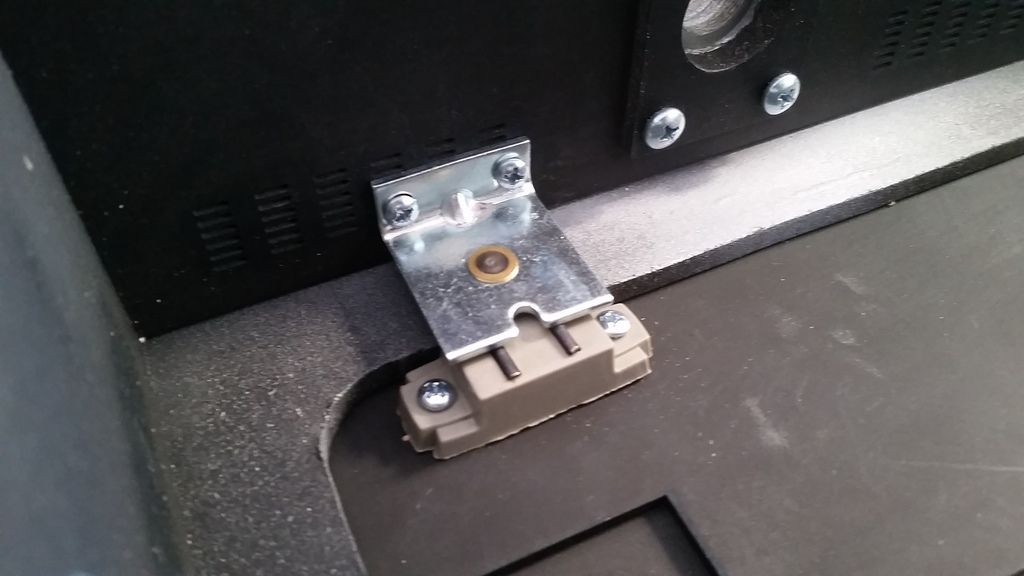
Success!
I'm going to add two magnets to both sides to ensure the lid stays in place
I added a little color to upper panel arch
EWE! Gotta make these edges a little more presentable
I sanded and painted and forgot to take a pic... shame on me!
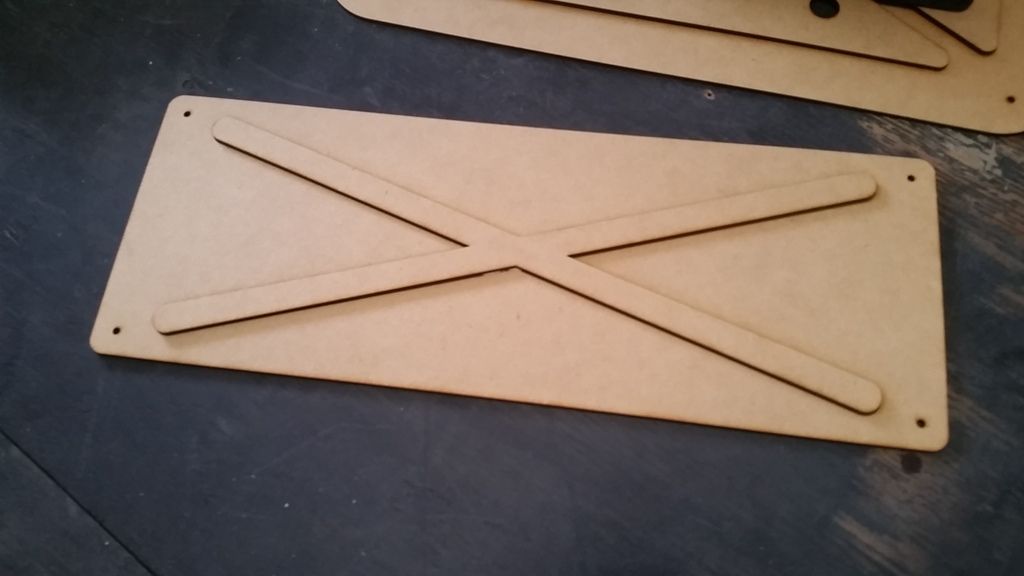
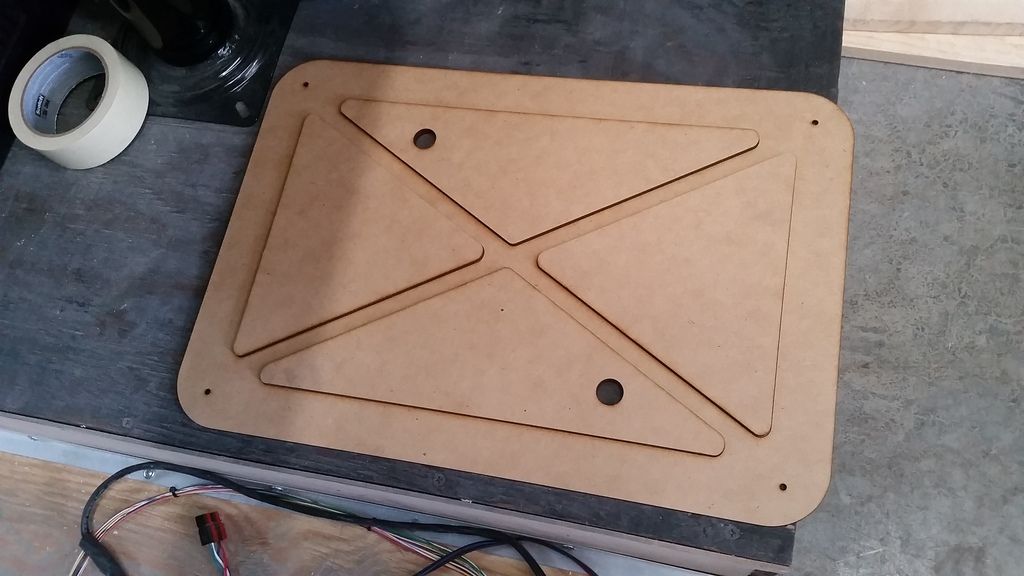
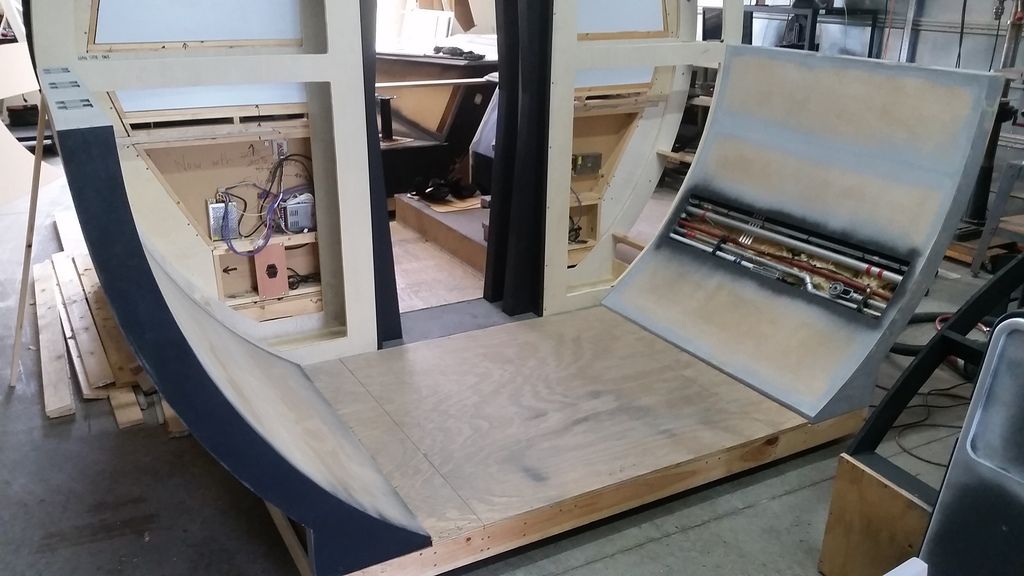
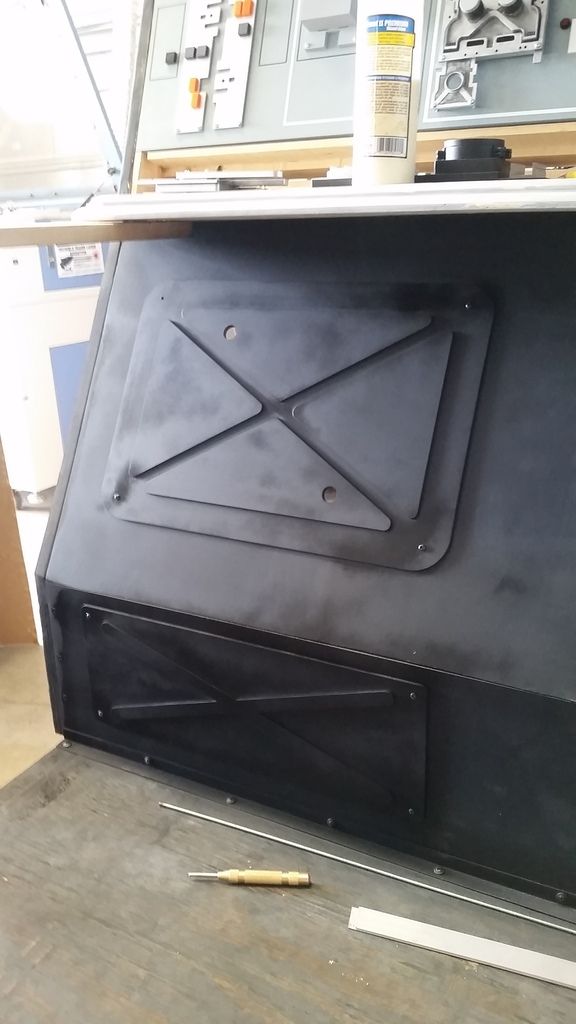
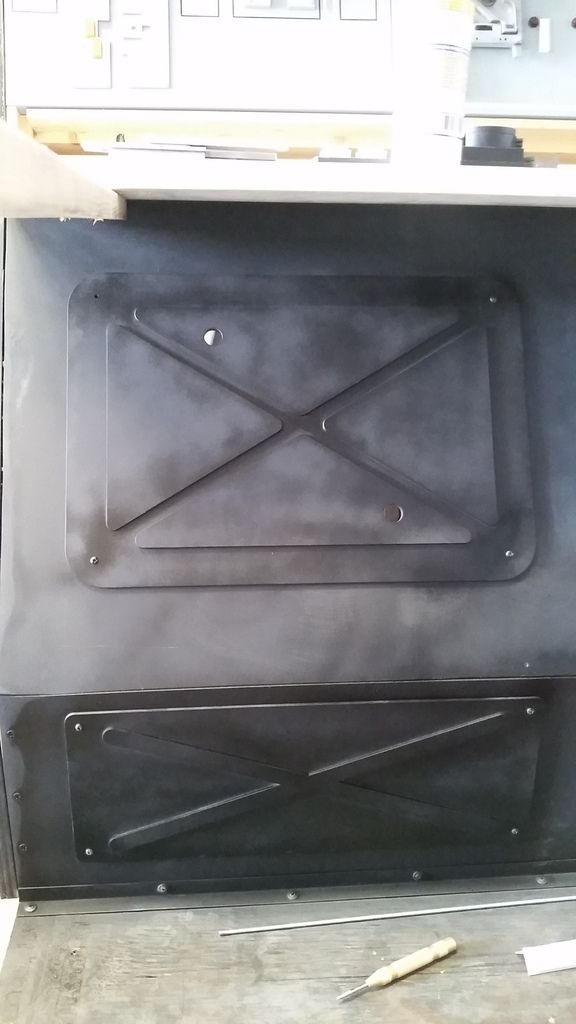
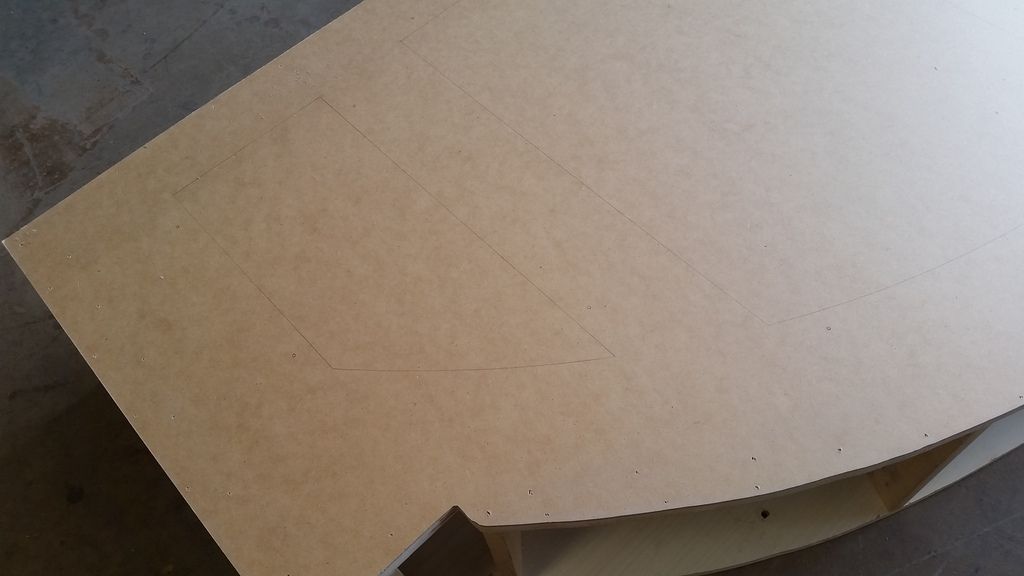
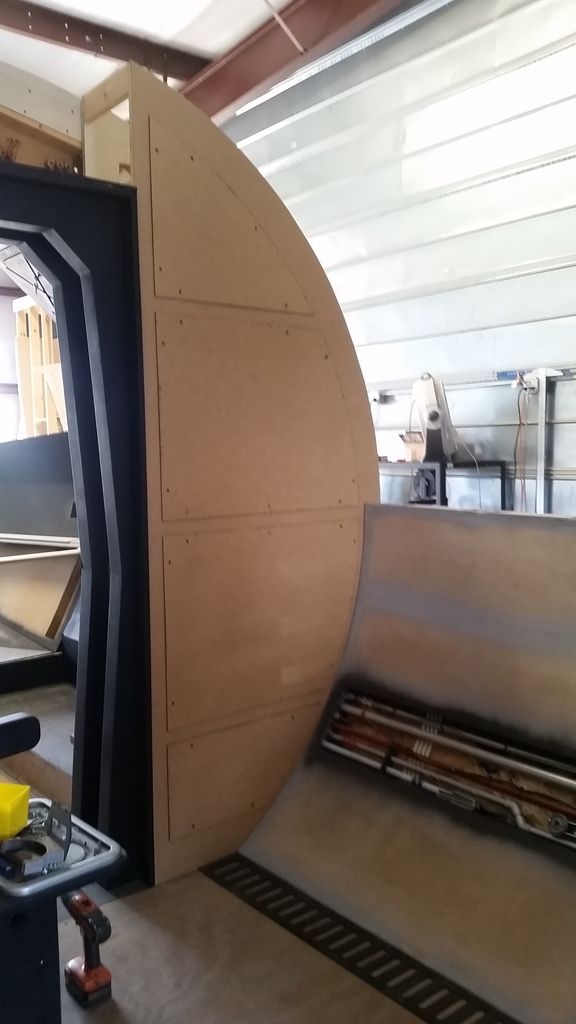
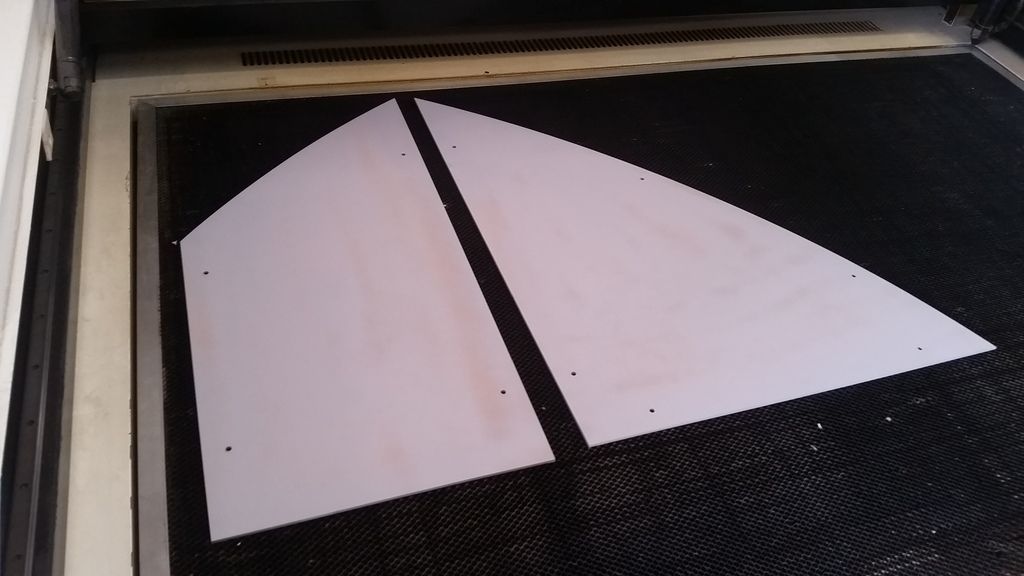
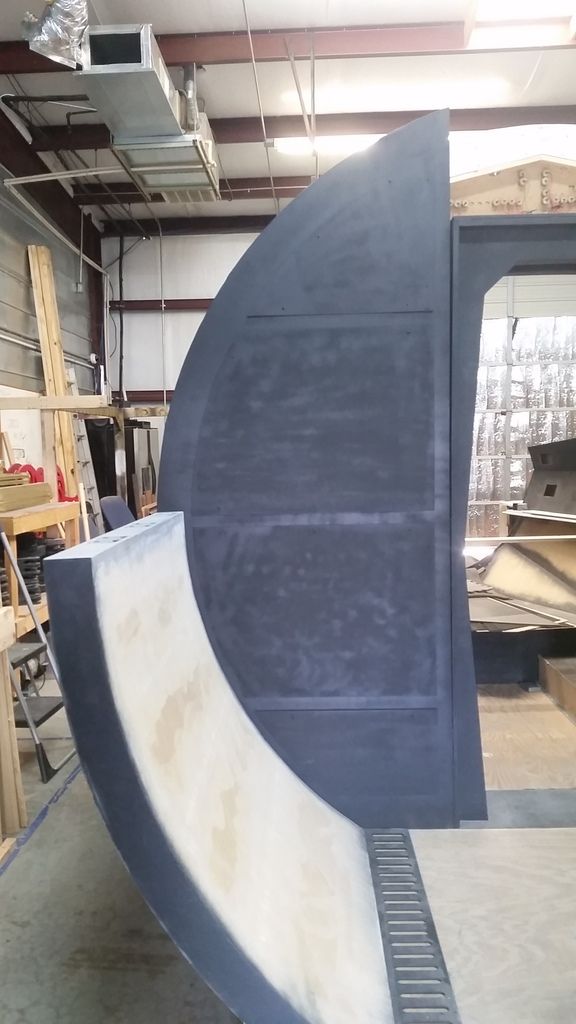
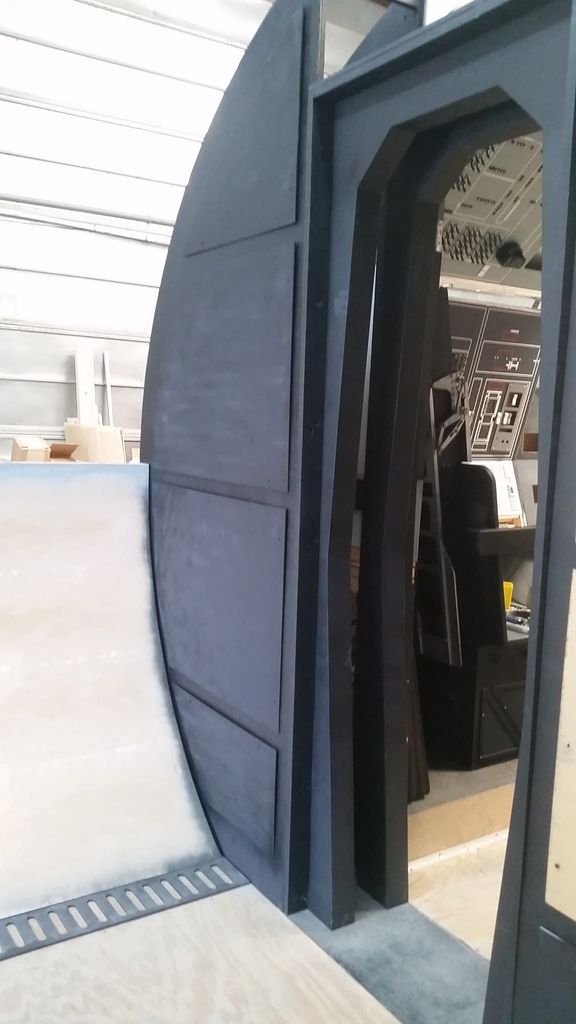
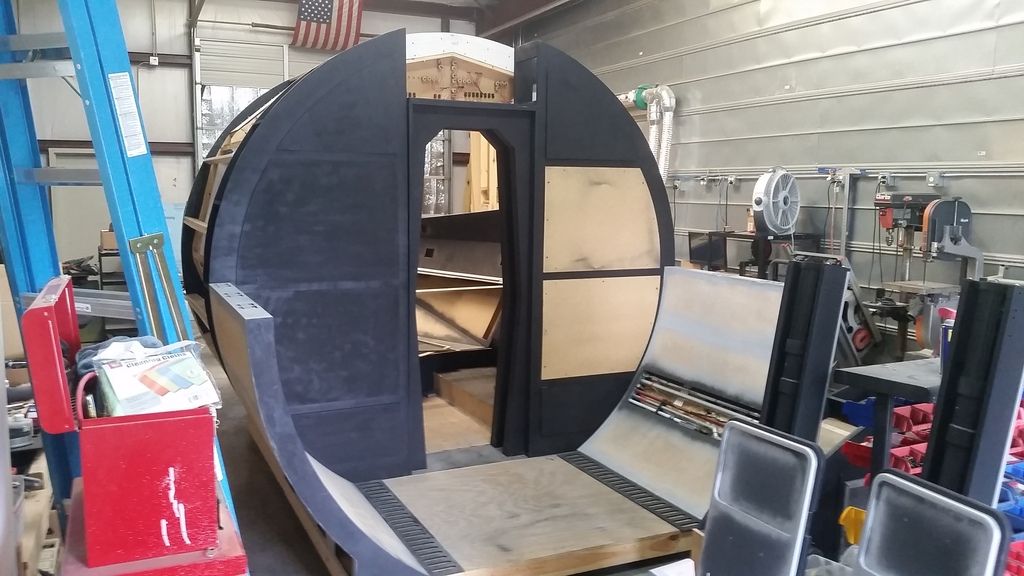
Let's get to these entrance panels! Added more rigidity
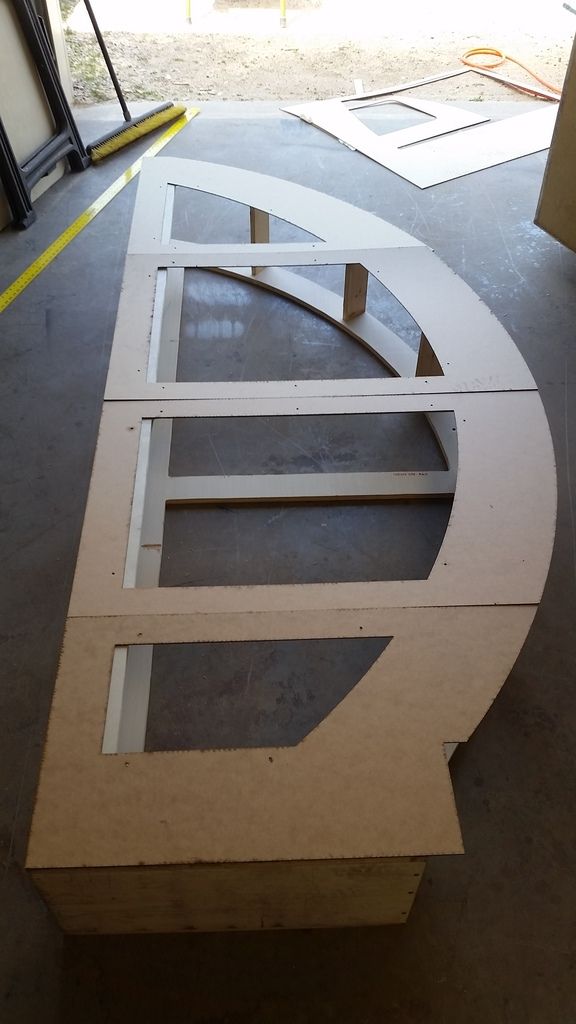
I spent a LOT of time at the computer designing new access panels/templates. I laser cut these templates and laid them in place to ensure they fit - PERFECT!
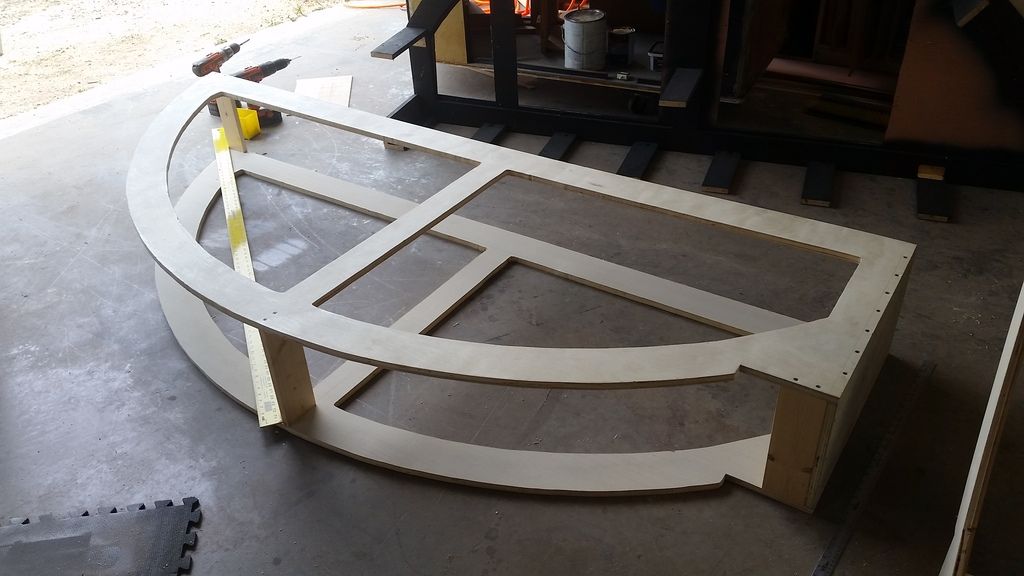
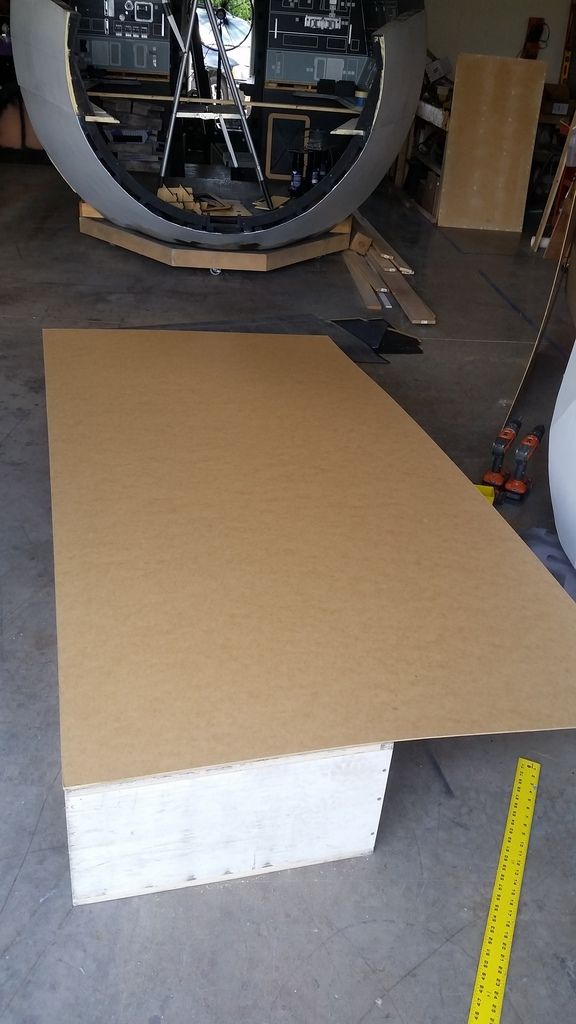
Time to add some skin! I adhered 1/8" MDF
Trimmed
Routed
Sanded

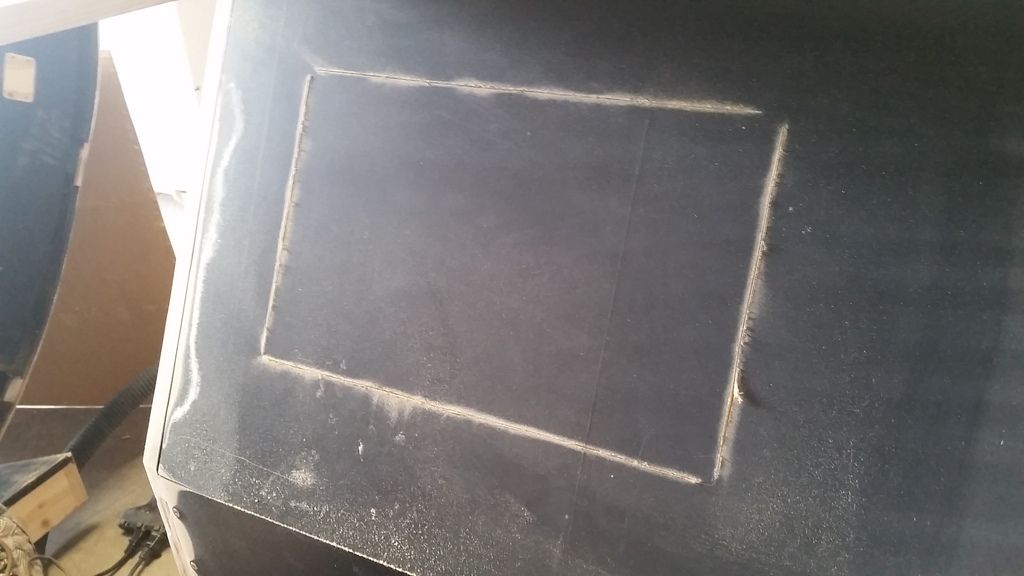
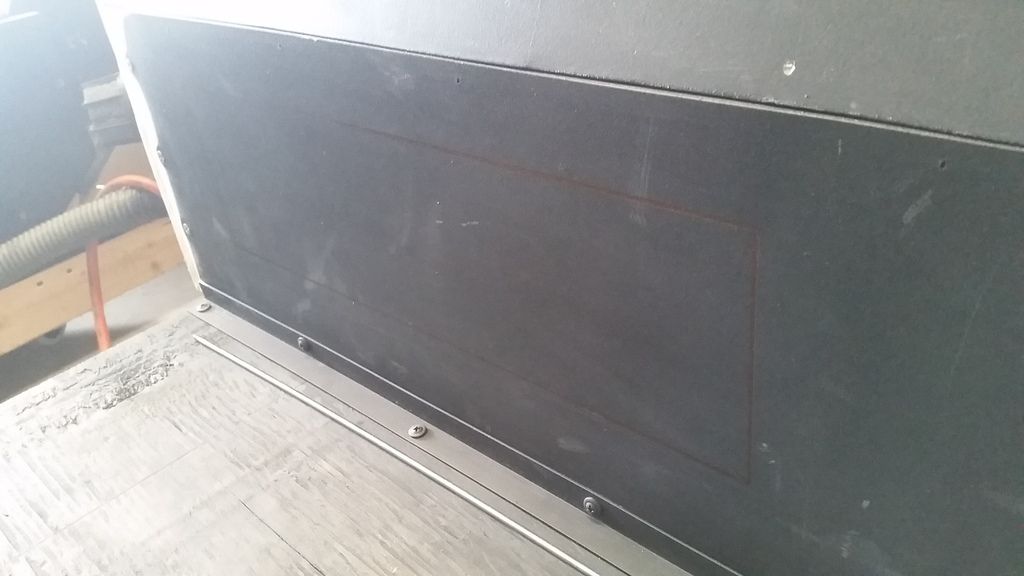
Used the templates and penciled in the new access areas
The jig saw blasted through this process
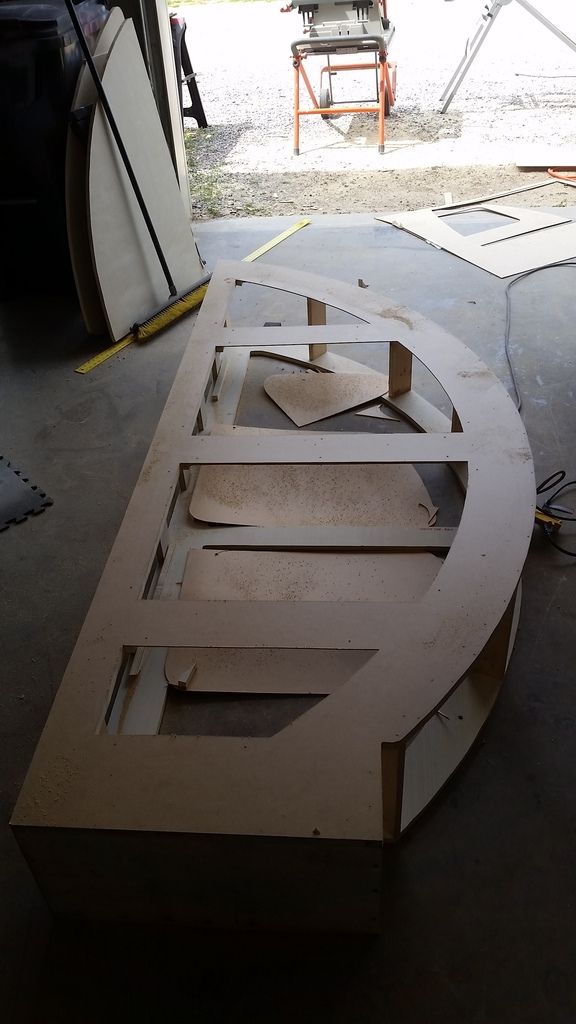
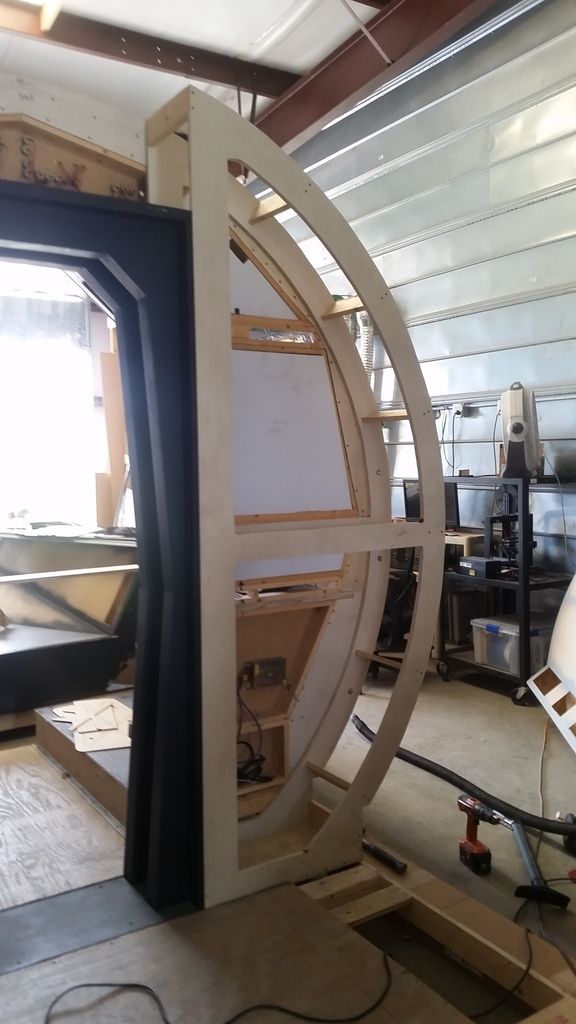
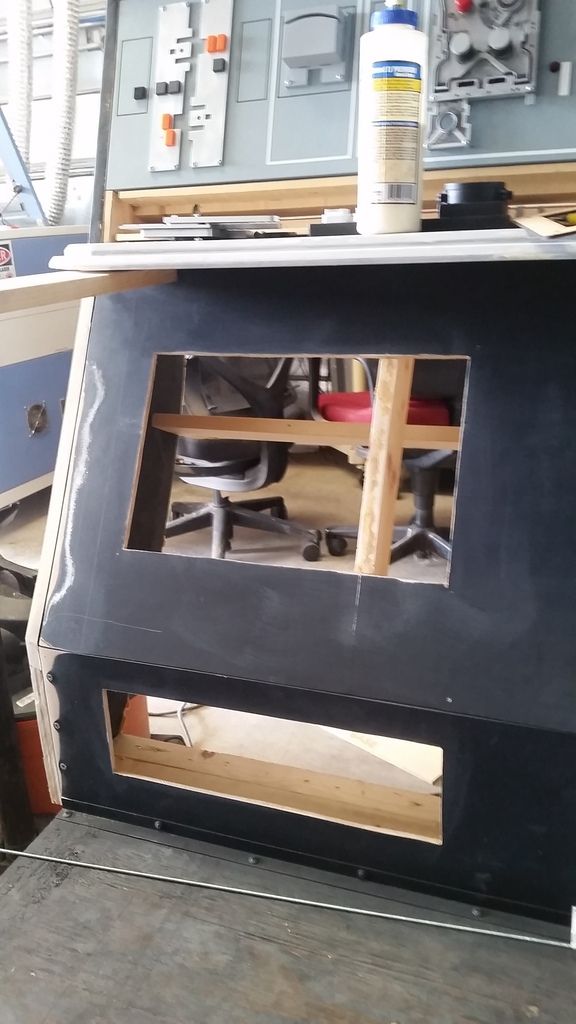
Temp in place. It fits!
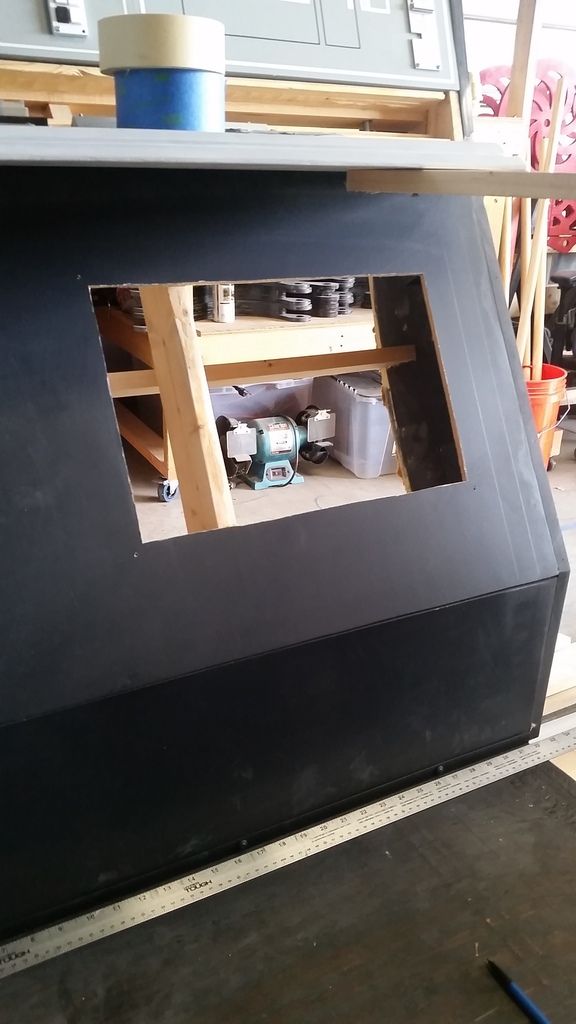
Got to the shop early this morning and blasted through the second panel
Same process

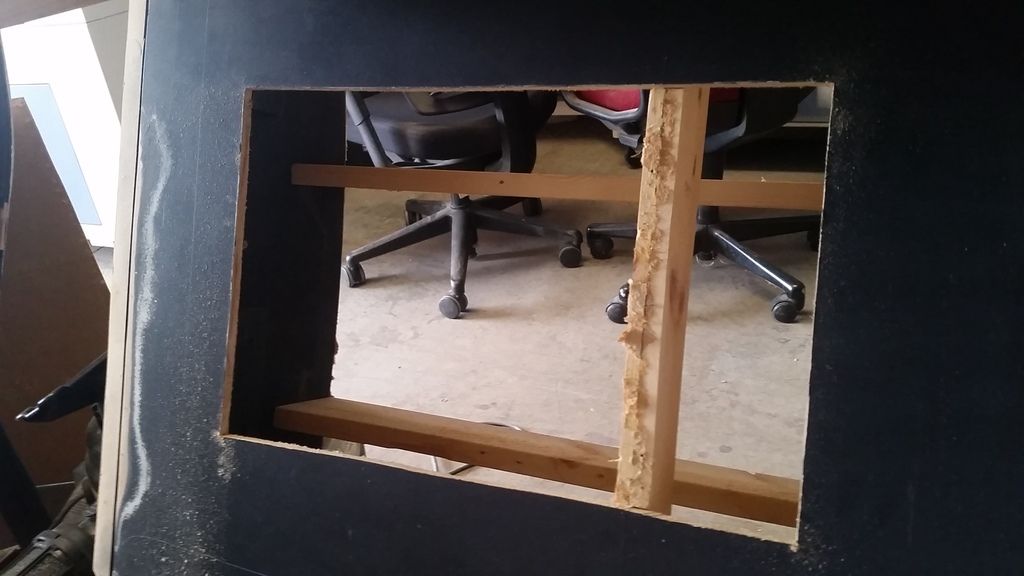
Drill the hole
Cut the holes and clean up as you go!
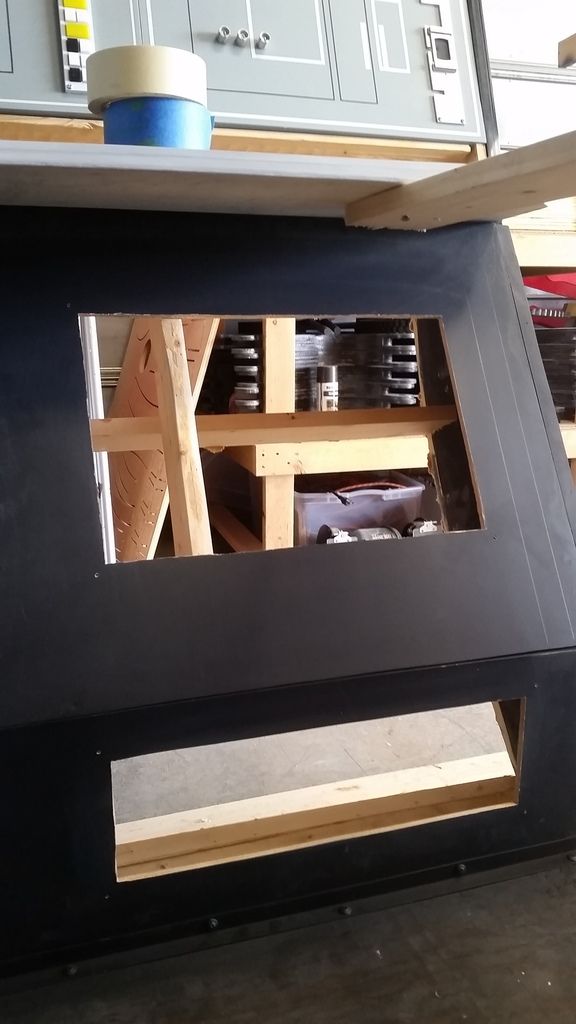
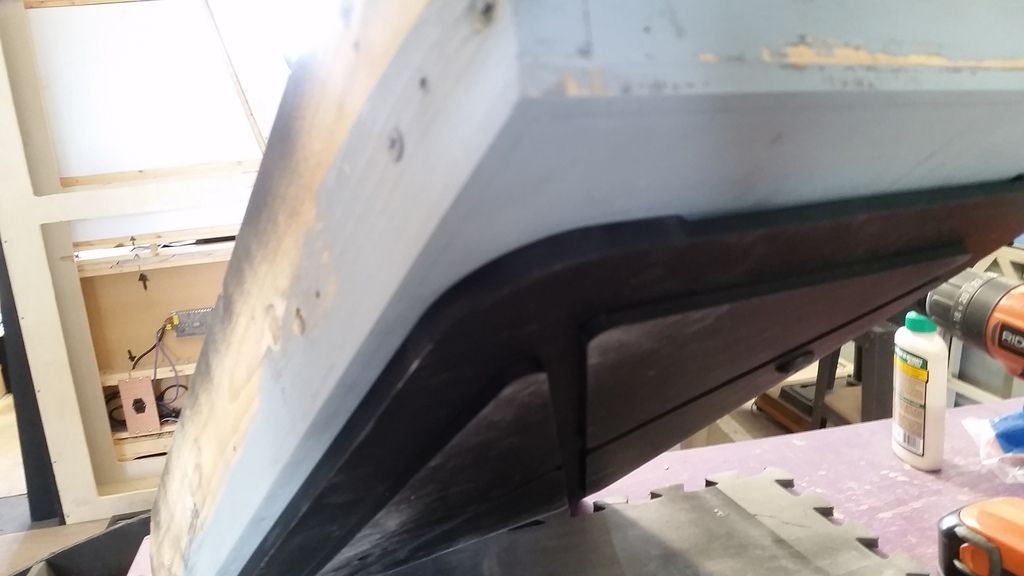
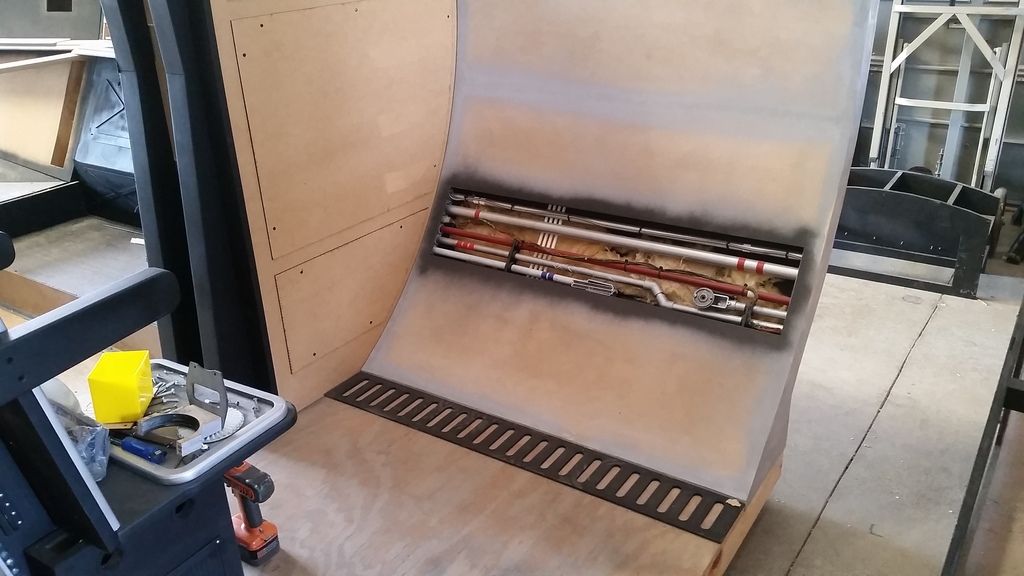
These areas looked a little weak
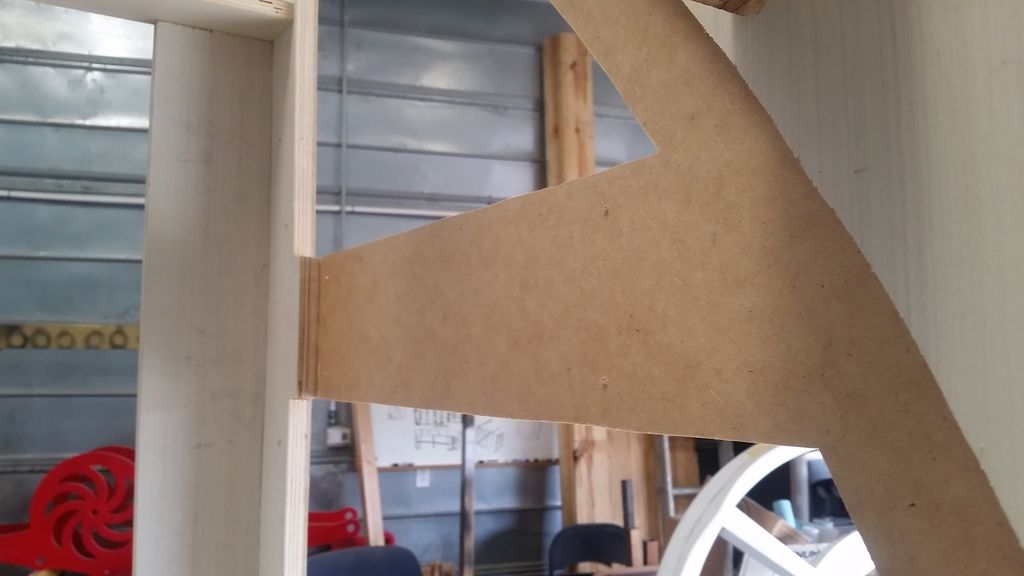
Using some scrap wood I marked out the angle
Created a filler piece, adhered and braded into place along with some extra reinforcement
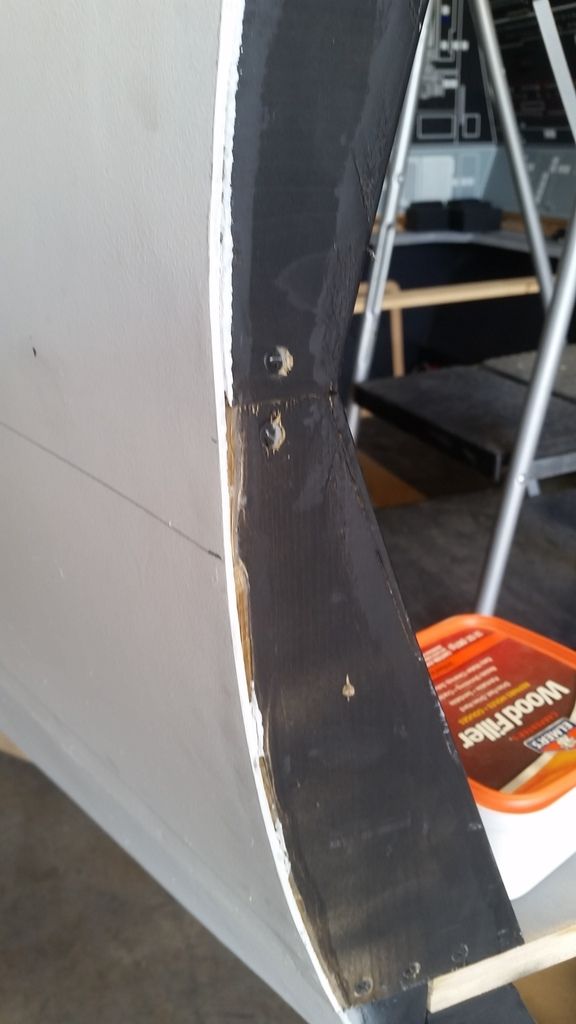
Started filling all the holes
Sanded
Primed!
Primer
Black!
Han's side almost finished!
When the black paint dries I'm going to sand smooth and spray another layer
On to Chewie's side!
In place!
UGH... I ran of black paint. 9 Cans! Only because I accidentally painted the wrong side of the two panels!
Nice clean edges
I love that shot!
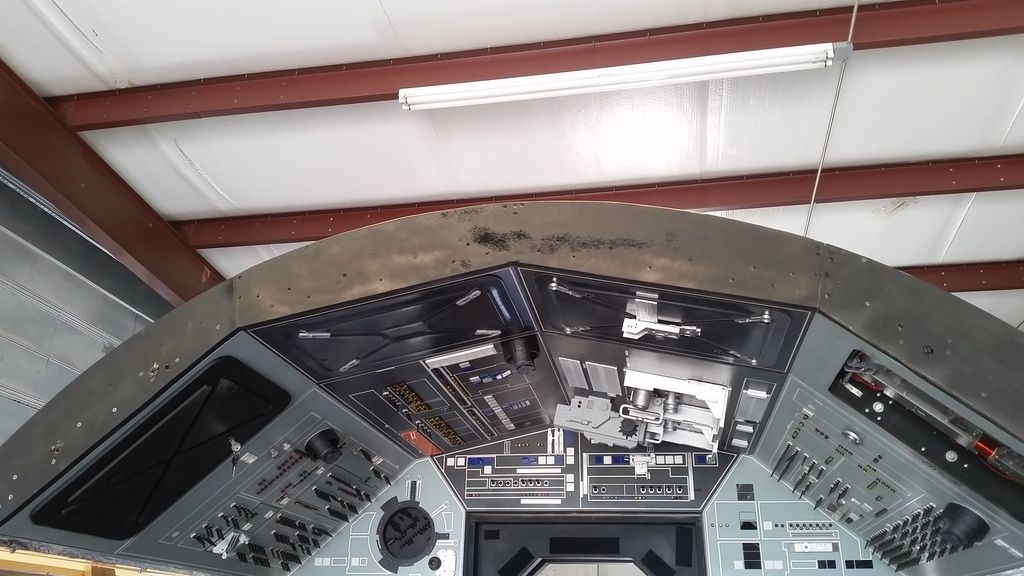
Quick Pano View...
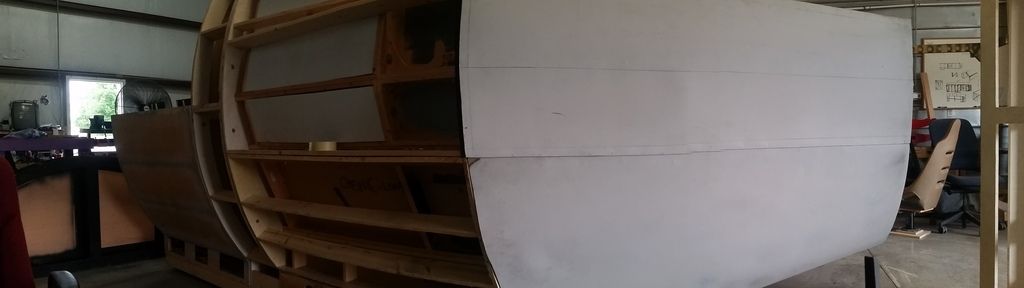
And this is where are...
WHEW... I am exhausted! Again, I'm really happy with how much I was able to get done in such a short amount of time. Have I been slacking all this time?
Next up... sanding and more paint on the entrance panels and then clean up and mount all the greeblies. Then... back to the Nav Chairs!
I'm going to take a few days off and relax
Stay Tuned!
Update Part VI!
I'm really happy with the amount of forward progress I was able to make this week! I hope you guys/gals enjoyed this latest push and enjoy Update Part VI! Along with the modular panel framing and a new cockpit entrance I was able to knock out a LOT of the other little but very necessary tasks.
Primed and painted the smaller access covers
I cut these hole templates
And used them to trace out and cut the holes in the lower interior panels (below the shelf)
I now have easy access to the nose to body mounting points!
A little touch up paint
And now the other side
Panels in place
From the back
This will make mounting the panels so much easier!
I then worked on adding a magnet to the access panel lids
I tossed the wood idea and dug through the boxes of scrap pinball parts Scott has and found this greeblie - perfect! Need to create spacer from 1/4" MDF to align with the magnet
Success!
I'm going to add two magnets to both sides to ensure the lid stays in place
I added a little color to upper panel arch
EWE! Gotta make these edges a little more presentable
I sanded and painted and forgot to take a pic... shame on me!
Let's get to these entrance panels! Added more rigidity
I spent a LOT of time at the computer designing new access panels/templates. I laser cut these templates and laid them in place to ensure they fit - PERFECT!
Time to add some skin! I adhered 1/8" MDF
Trimmed
Routed
Sanded
Used the templates and penciled in the new access areas
The jig saw blasted through this process
Temp in place. It fits!
Got to the shop early this morning and blasted through the second panel
Same process
Drill the hole
Cut the holes and clean up as you go!
These areas looked a little weak
Using some scrap wood I marked out the angle
Created a filler piece, adhered and braded into place along with some extra reinforcement
Started filling all the holes
Sanded
Primed!
Primer
Black!
Han's side almost finished!
When the black paint dries I'm going to sand smooth and spray another layer
On to Chewie's side!
In place!
UGH... I ran of black paint. 9 Cans! Only because I accidentally painted the wrong side of the two panels!
Nice clean edges
I love that shot!
Quick Pano View...
And this is where are...
WHEW... I am exhausted! Again, I'm really happy with how much I was able to get done in such a short amount of time. Have I been slacking all this time?
Next up... sanding and more paint on the entrance panels and then clean up and mount all the greeblies. Then... back to the Nav Chairs!
I'm going to take a few days off and relax
Stay Tuned!
Last edited:
VanOaksProps
Sr Member
Damn, you painted the whole thing with rattle cans? Time to get a spray gun! It'll cut down your paint costs.
trainman
Well-Known Member
Damn, you painted the whole thing with rattle cans? Time to get a spray gun! It'll cut down your paint costs.
I bought one years ago but have never used it because it looks like such a pain in the arse to set up and then clean afterwards. I might be wrong though. One of these days will have to give it a try.
OlivierC
Well-Known Member
I'll second that. Plus if you use acrylic paint, you can use much less aggressive solvants, like 90% water. The fumes won't be as bad. But yeah, if you want it to last, you have to clean it up after each use, and it's a bit of a pain in the assDamn, you painted the whole thing with rattle cans? Time to get a spray gun! It'll cut down your paint costs.
BaronPapanoida
New Member
When are you going to put the window struts in? Even without glass? Its like you haven't even thought about them or are trying to avoid them somehow! Love your work!
VanOaksProps
Sr Member
You could probably get away with a Critter gun. Relatively inexpensive, easy to clean.

Lt Washburn
Sr Member
When are you going to put the window struts in? Even without glass? Its like you haven't even thought about them or are trying to avoid them somehow! Love your work!
He's already made them, they're just not in place right now.
trainman
Well-Known Member
He's already made them, they're just not in place right now.
Han opens the sunroof on warm days.
BaronPapanoida
New Member
I guess I musta missed those posts!
Damn, you painted the whole thing with rattle cans? Time to get a spray gun! It'll cut down your paint costs.
Hey D,
I have a sprayer I just opted not to use it this time around. I painted the quad laser with the gun and it turned out really well. Considering the size of the entrance panels it does make more sense to use the gun but I cant find any local stores that sell the Rust-O-Leum flat black in a can. I find all the others! Go figure?
- - - Updated - - -
I'll second that. Plus if you use acrylic paint, you can use much less aggressive solvants, like 90% water. The fumes won't be as bad. But yeah, if you want it to last, you have to clean it up after each use, and it's a bit of a pain in the ass
Hey OC,
I try to use acrylics as much as I can. The enamels take too long to dry and clean up, as you mentioned, is a pain. The acrylics are also much more forgiving than enamels.
- - - Updated - - -
I bought one years ago but have never used it because it looks like such a pain in the arse to set up and then clean afterwards. I might be wrong though. One of these days will have to give it a try.
Hey T,
Spray guns are not difficult to use at all. Set up and cleaning are the 2 things that take the most time. But since you have to wait for the paint to dry anyways... give it a "shot" and see if you like it.
When are you going to put the window struts in? Even without glass? Its like you haven't even thought about them or are trying to avoid them somehow! Love your work!
Hi BP,
Thanks so much! You can actually see the pieces for the canopy in many past months photos. We CNCd part of the canopy a few months back. Seattle Scot did a great job at designing this part of the build. He also designed the main nose piece. I just haven't gotten around to putting the pieces together because I knew the canopy arch had to be worked on / completed beforehand.
We've talked about adding windows but the air circulation within the cockpit, even without the windows, is so bad that w/o installing fans, the cockpit would get too hot. It's not fun when you have hundreds of people wanting to come in and take peak.
Hope that made sense?
- - - Updated - - -
Looking very good and yes, I agree with others here: buy yourself a spray-gun (a small one would be enough) and off you go!!
Thank you, my friend. When we get to the body panels and armor plating I'll DEF break out the gun. And we're really close to seeing that happen!
- - - Updated - - -
You could probably get away with a Critter gun. Relatively inexpensive, easy to clean.
View attachment 734390
Hey D,
I've got a Harbor Freight gun that I used on the quad laser. It worked really well and I didn't have any issues at all. So long as you keep it clean... should be fine.
- - - Updated - - -
He's already made them, they're just not in place right now.
Hey Lt W,
I tossed the old canopy out a few years ago. They wouldn't have fit the new nose so it made no sense to hang on to them. I should be getting to the canopy very very soon.
- - - Updated - - -
Han opens the sunroof on warm days.
LOL!
- - - Updated - - -
I guess I musta missed those posts!
Hey BP,
I think they're in the early to mid 200s pages of this thread.
Not looked for a while been busy but now I'm all up to date my wife is annoyed at me !!! I can't stop showing her your pics !!! " yea, nice, " is all I got from her !!! she cannot understand or see a craftsman at work, your greeblies and CNC work is outstanding, all the small finer details you don't notice but see being built just adds that little bit more of a dimension for your eyes, they are not just chairs you sit in, they are nav chairs with outstanding details that your eyes are drawn to every time you look, the panels, the wiring, buttons, it's eye candy through and through, if I lived closer I would have loved to have lent you my hands every weekend,
best build on the RPF
Ben
best build on the RPF
Ben
Junkyard Jedi
New Member
Excellent job there big G!, the new arches look great. We knew it was going to be a big undertaking to get them all refitted. But you nailed it! Now you can get back to doing the fun stuff again.
Similar threads
- Replies
- 2
- Views
- 865
- Replies
- 6
- Views
- 626
- Replies
- 8
- Views
- 557
- Replies
- 9
- Views
- 999
- Replies
- 4
- Views
- 2,326