You are using an out of date browser. It may not display this or other websites correctly.
You should upgrade or use an alternative browser.
You should upgrade or use an alternative browser.
1:1 Millennium Falcon Cockpit Replica - Group Build
- Thread starter SteveStarkiller
- Start date
I was looking back at the keystone panel from the other day. What if you flipped one of the three nozzle-looking things 180 degrees? That was a pretty common thing the original designers did and it might do something cool visually.
Awesome progress!
Hey BBD,
Thanks so much! That's a great idea! I'll flip the single greeblie and see how it looks. Maybe even add a hose coming out of it?
- - - Updated - - -
The headbox is spot on! Great work guys!!
Hey W,
The team has done an amazing job trying to get that part right!
Man..... It's been a while since I checked on this thread. Amazing progress! As mentioned before I need to drop by some time and take a look! And I need a falcon cockpit chair for my office")
Sent from my XT1097 using Tapatalk
Sent from my XT1097 using Tapatalk
Hi Gang,
Time for the Weekend Update. One step forward... 19 steps back! I think the corridor rings pads are a bust. It's taken me 4 days just to get one pad to a 90% solution and its still fighting me. Going to have to push this part of the build aside and try to come up with something else...
After 1st round of sanding
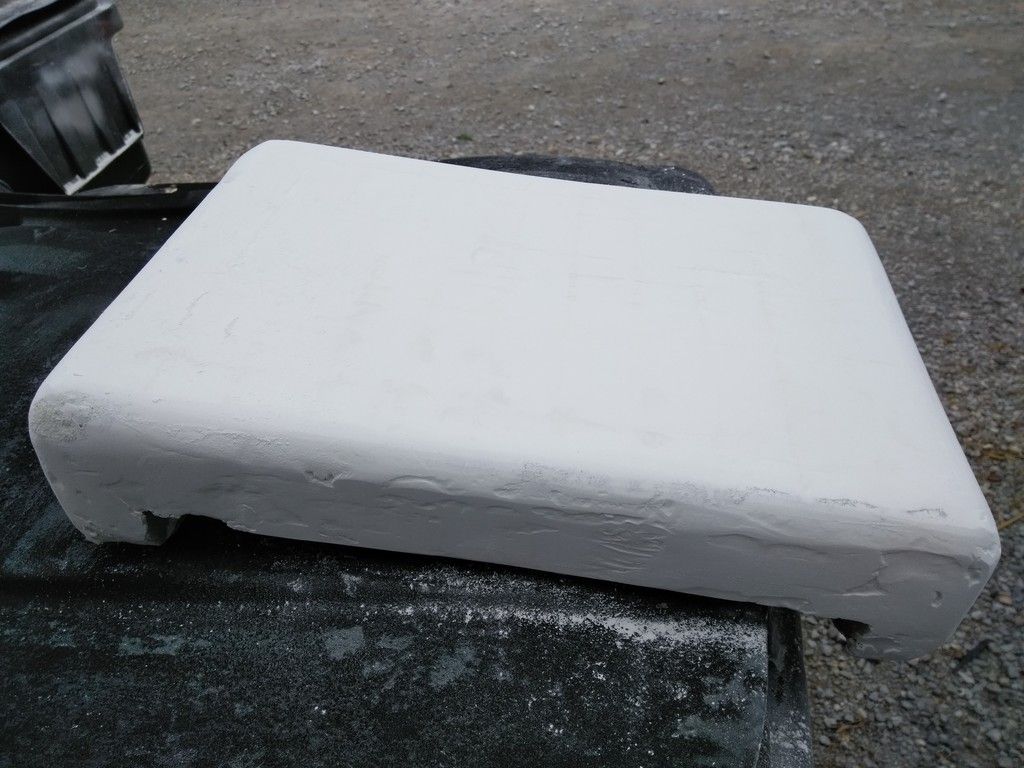
Spot filler
Second round of sanding
More spot filler
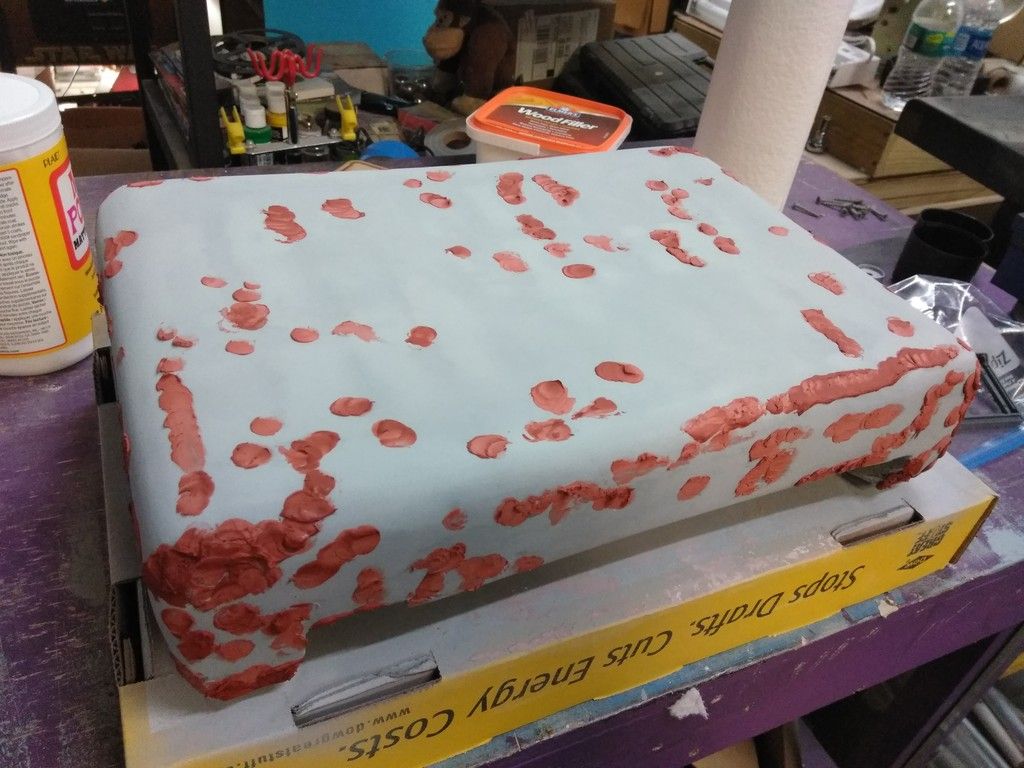
3rd round of sanding
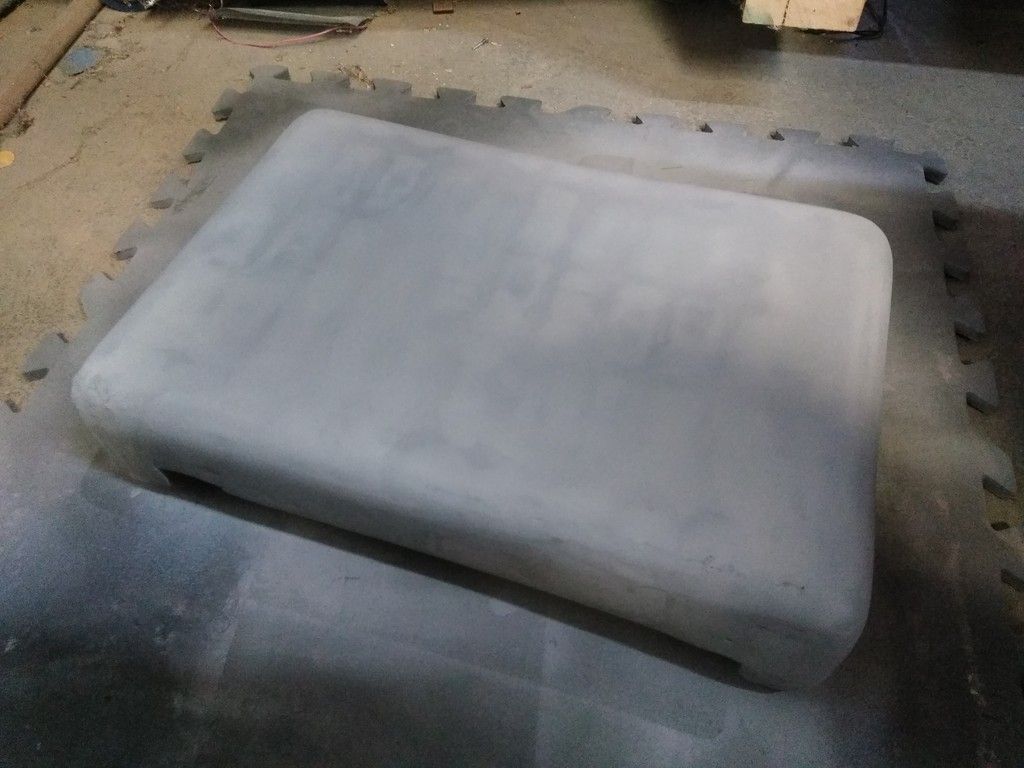
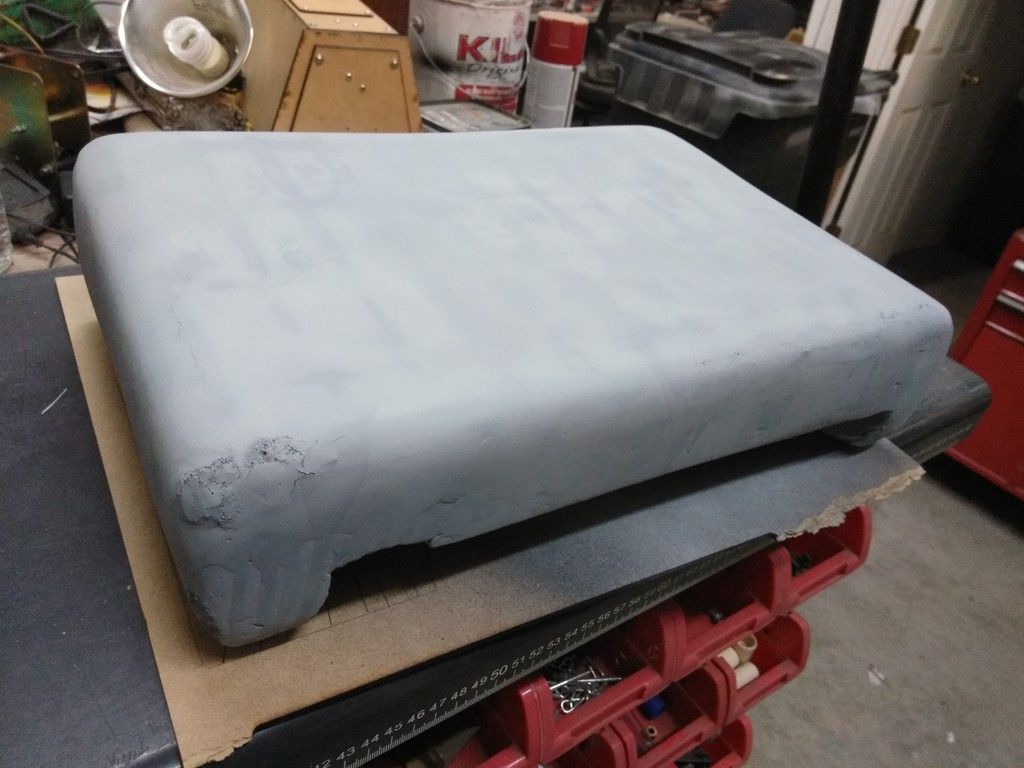
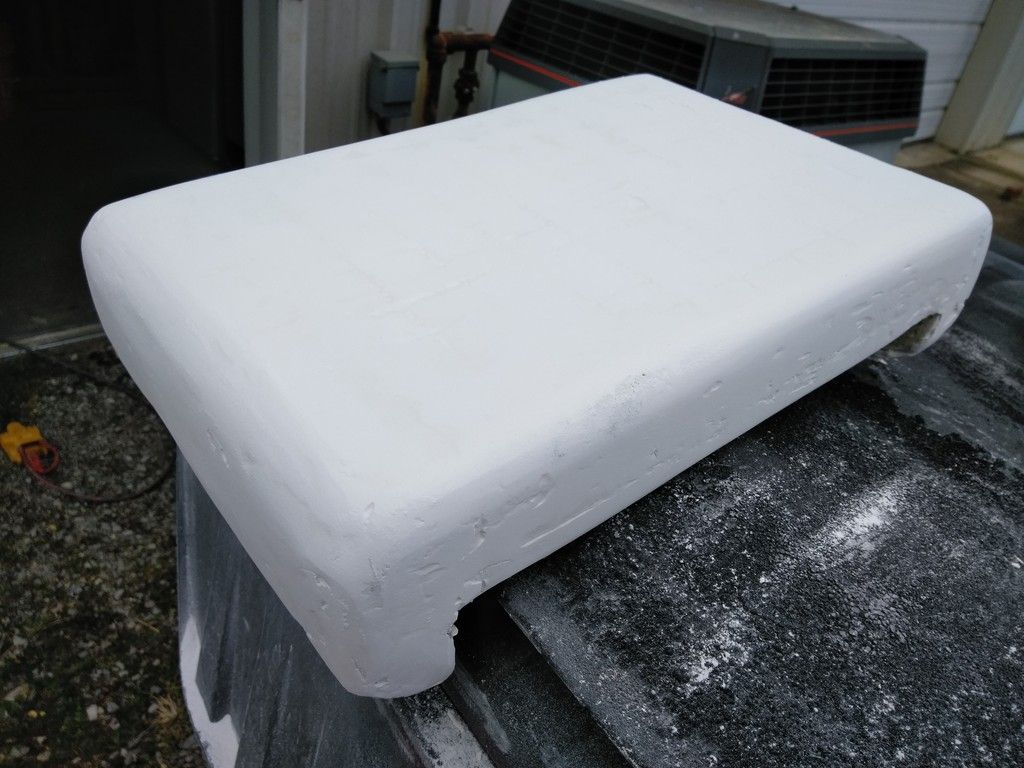
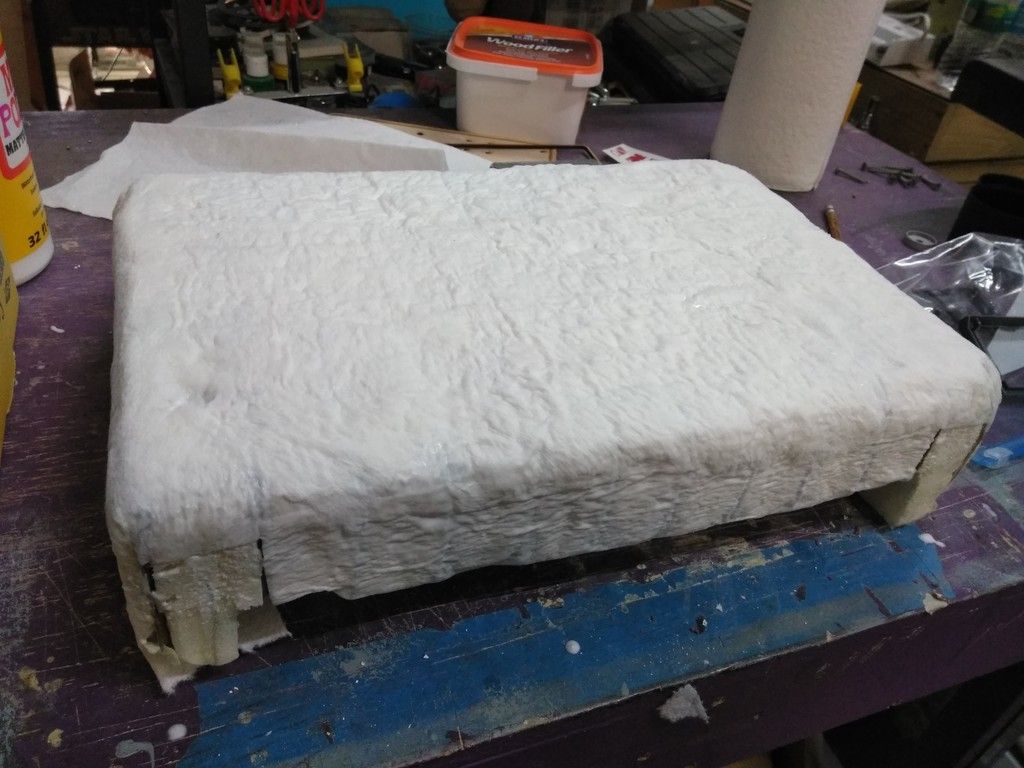
The exposed foam is driving me nuts! Time for another approach
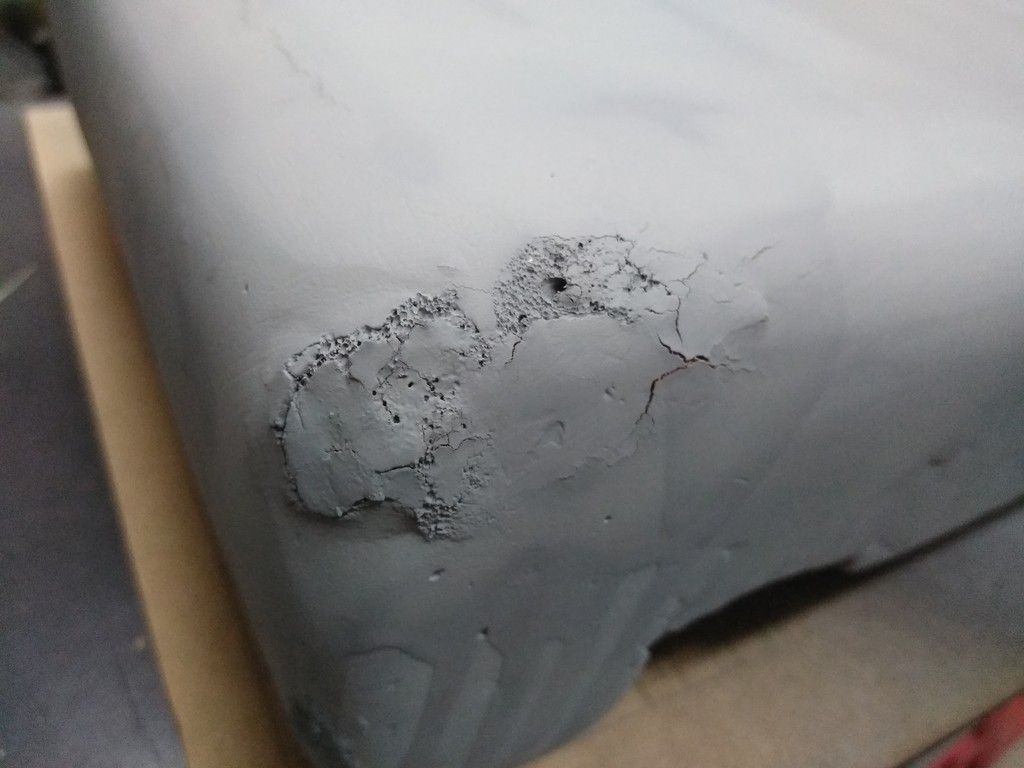
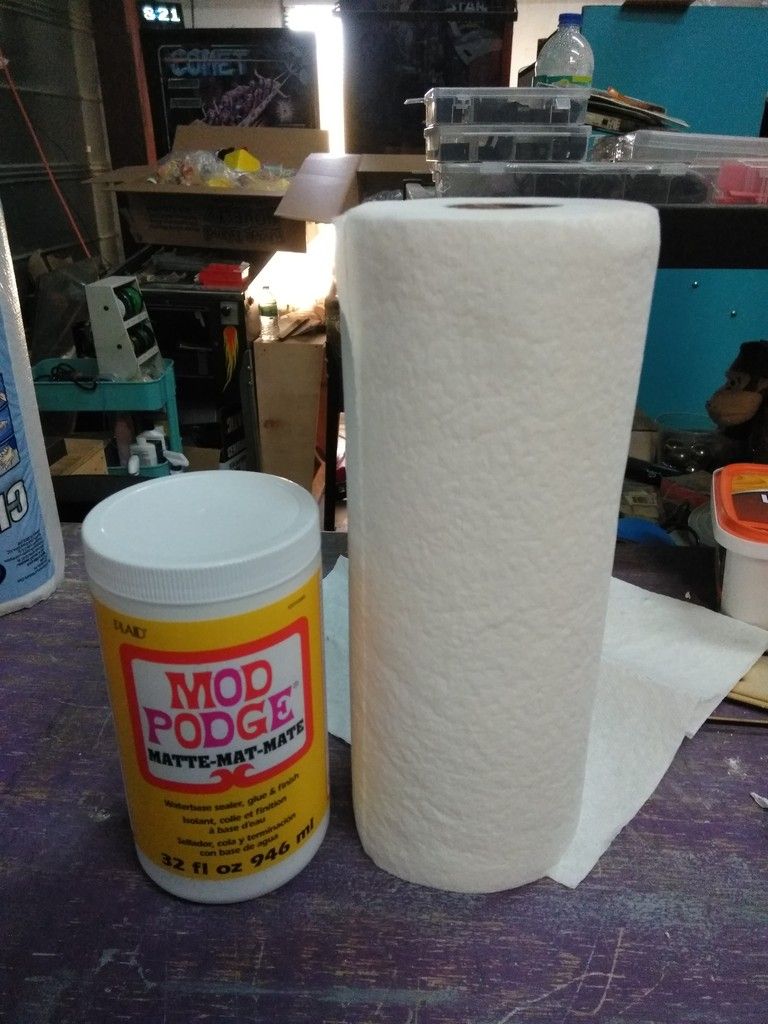
Picked up some Mod Podge and white shop towels and decided to try this technique on another pad
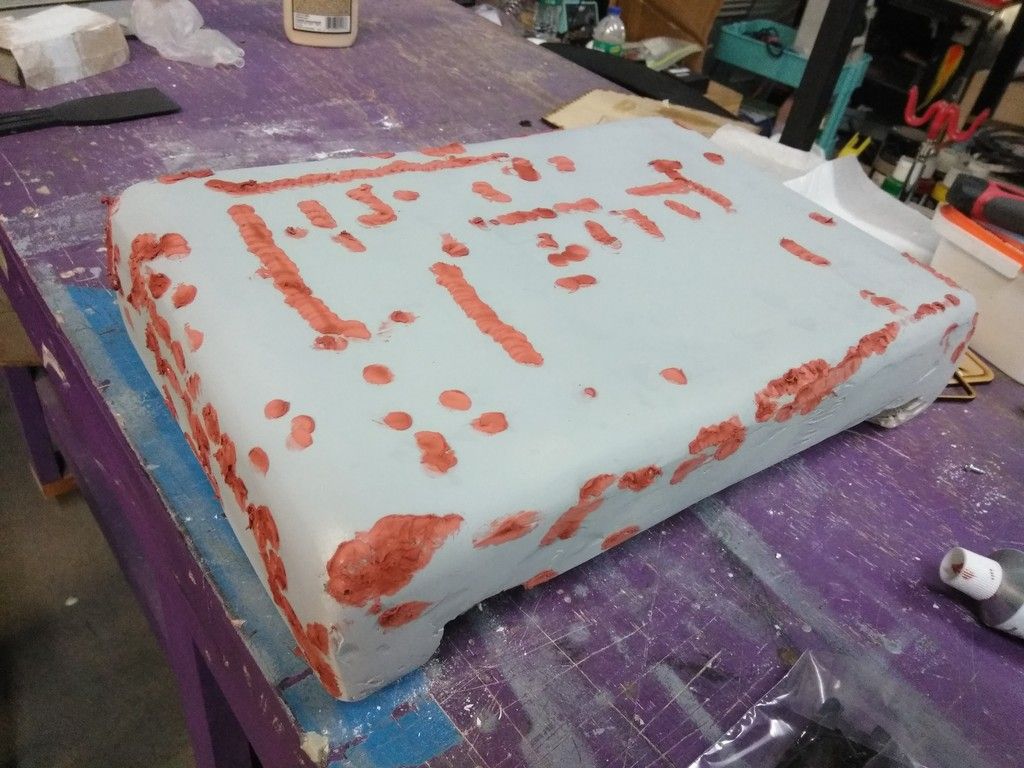
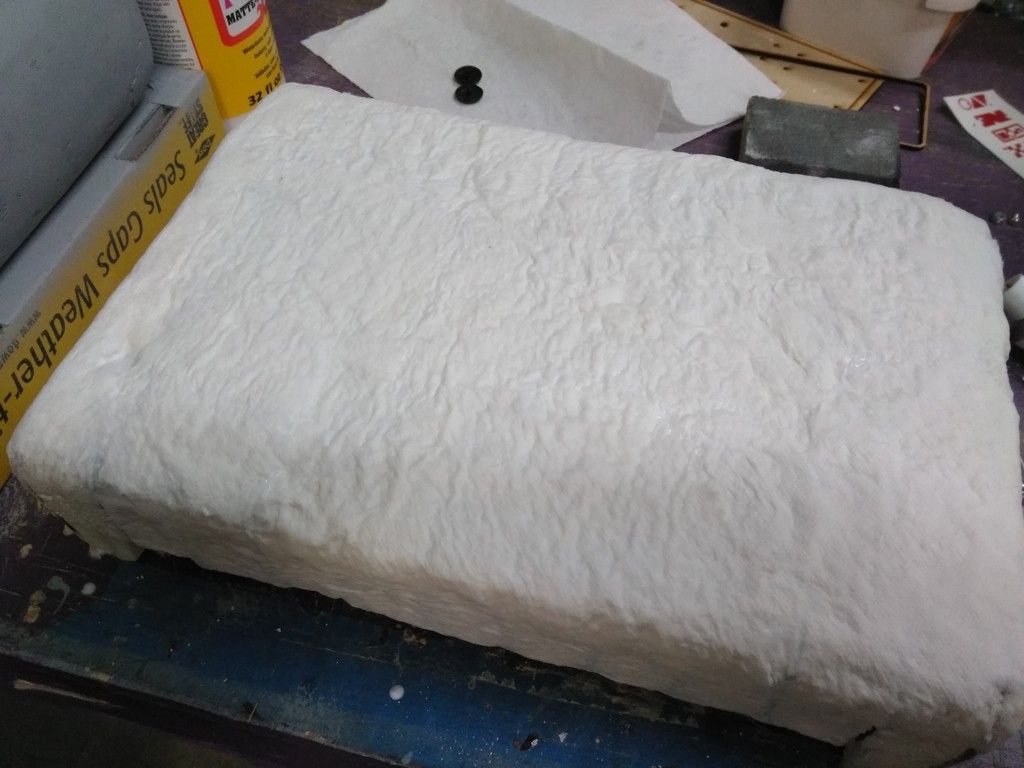
That didn't work either! I'm really frustrated! 60 bucks for all the expandable foam down the toilet!
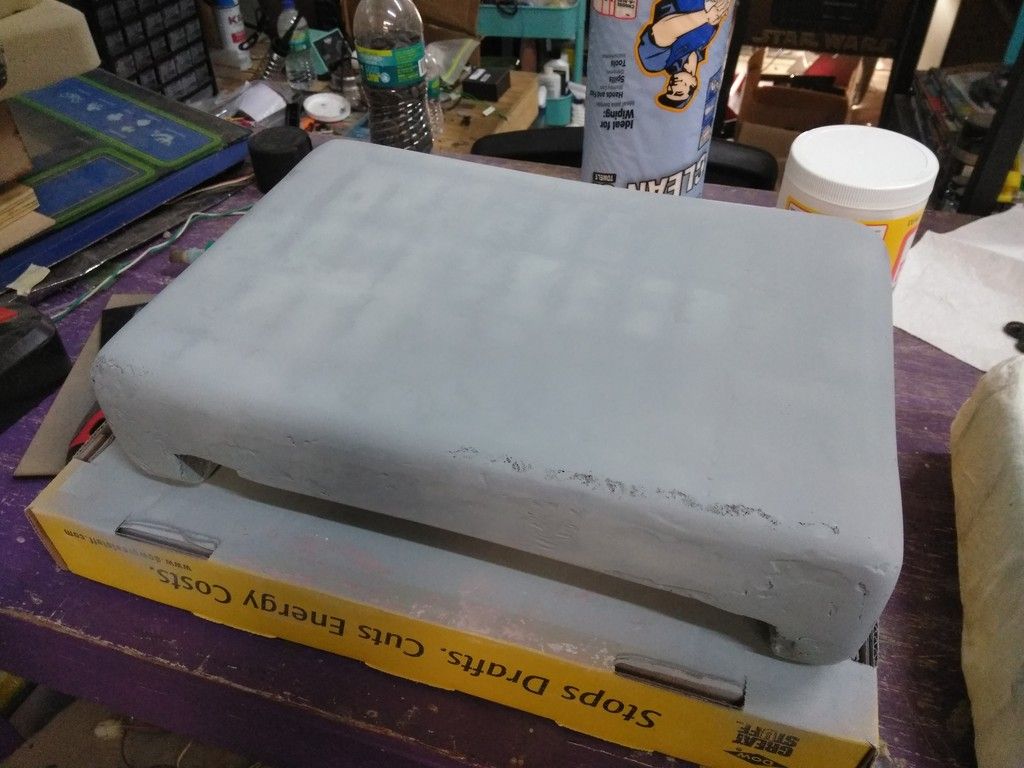
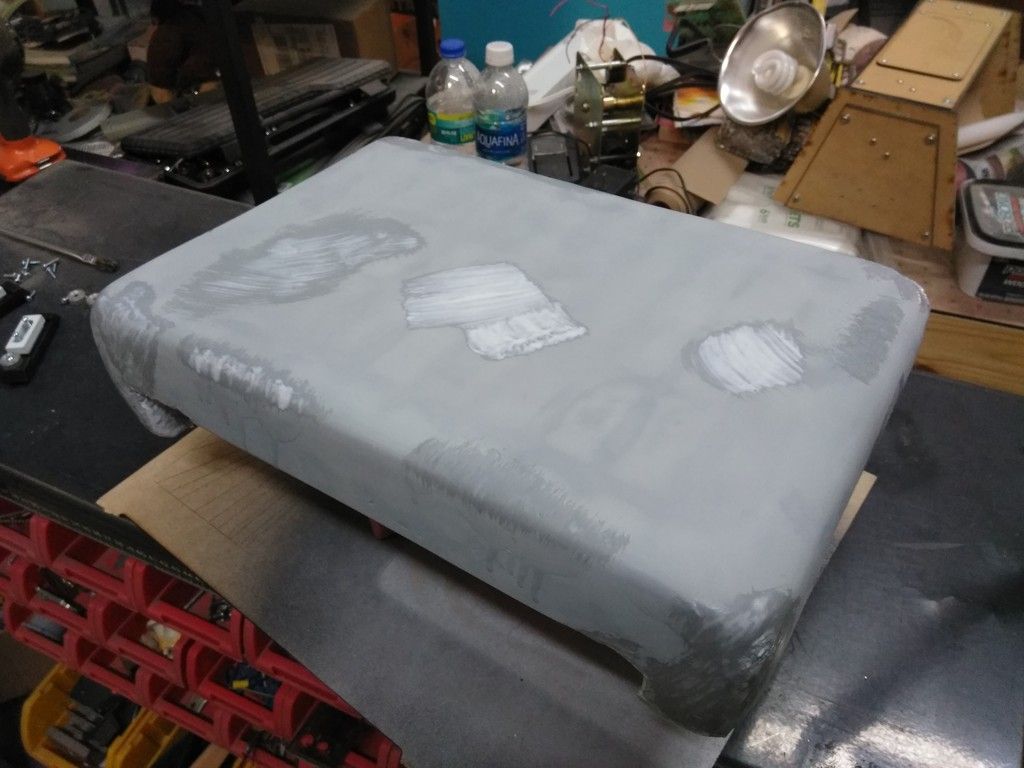
If I can get ONE pad looking good I'm going to try to create a fiberglass mold OR we CNC new pads using 4" foam.
I tried using the Podge on the near finished pad to help seal/harden the exposed foam - fingers crossed. UGH
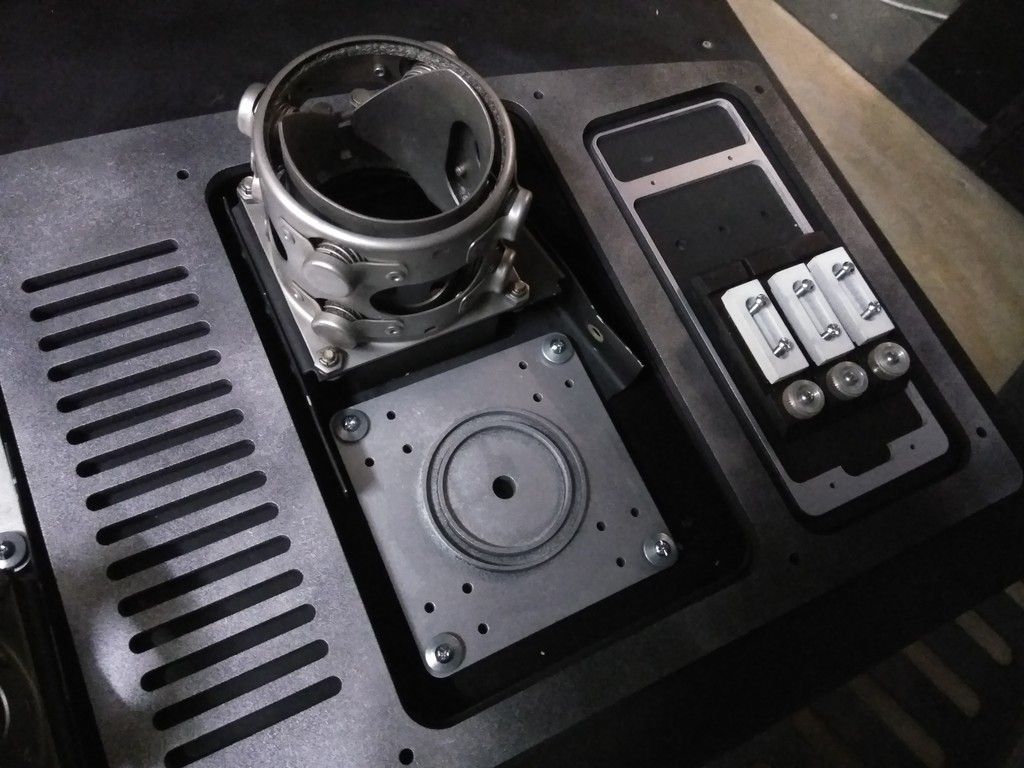
Cockpit Laser Gun Tip is almost ready to mount into place
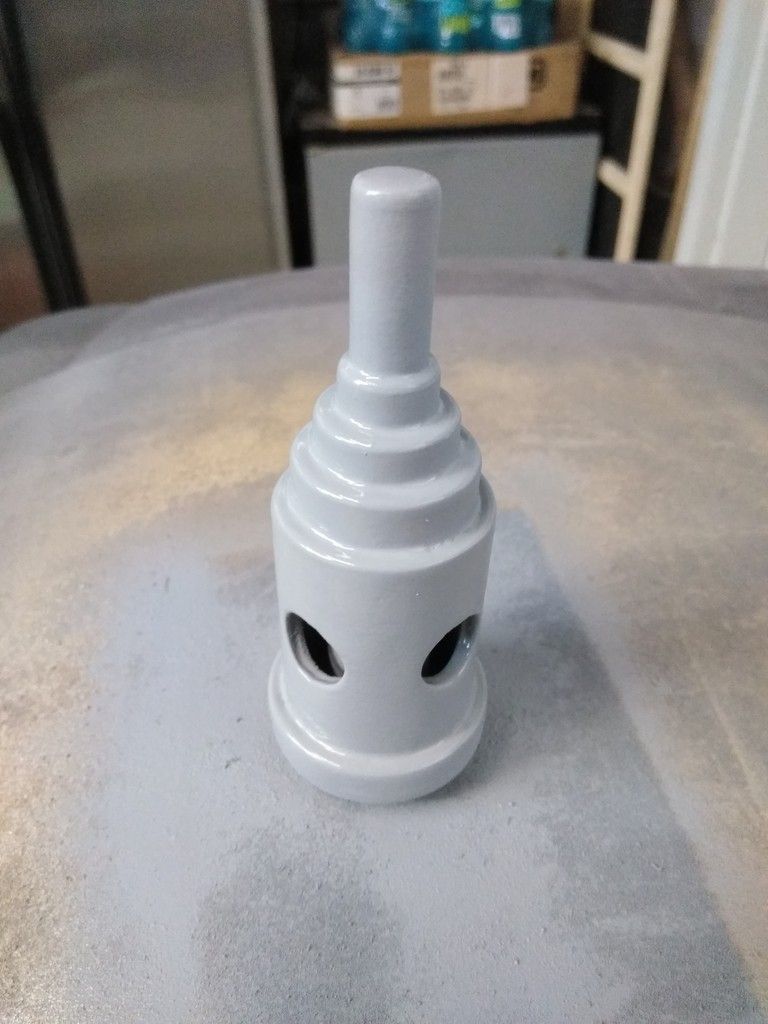
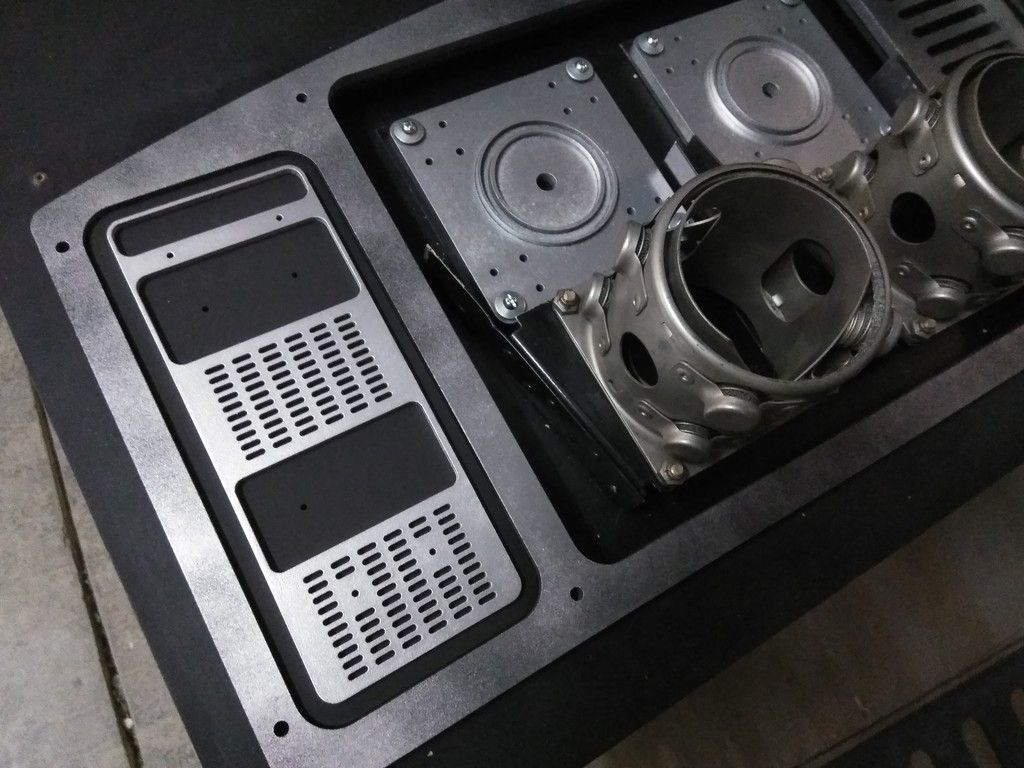
I think I found a place for this old greeblie

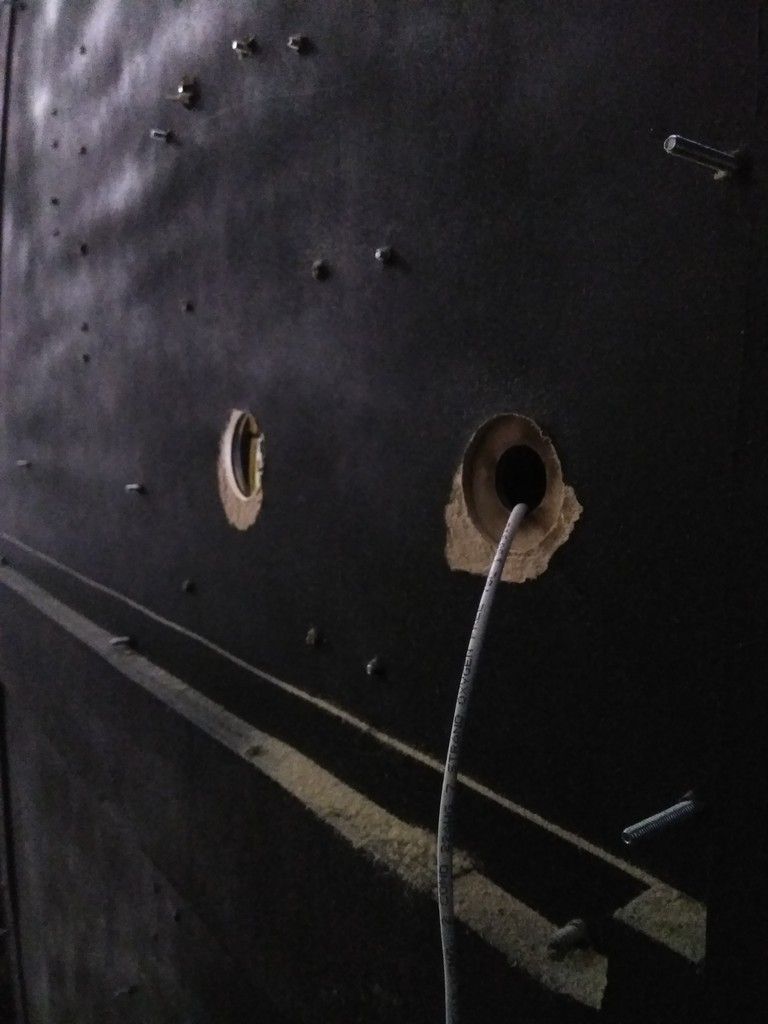
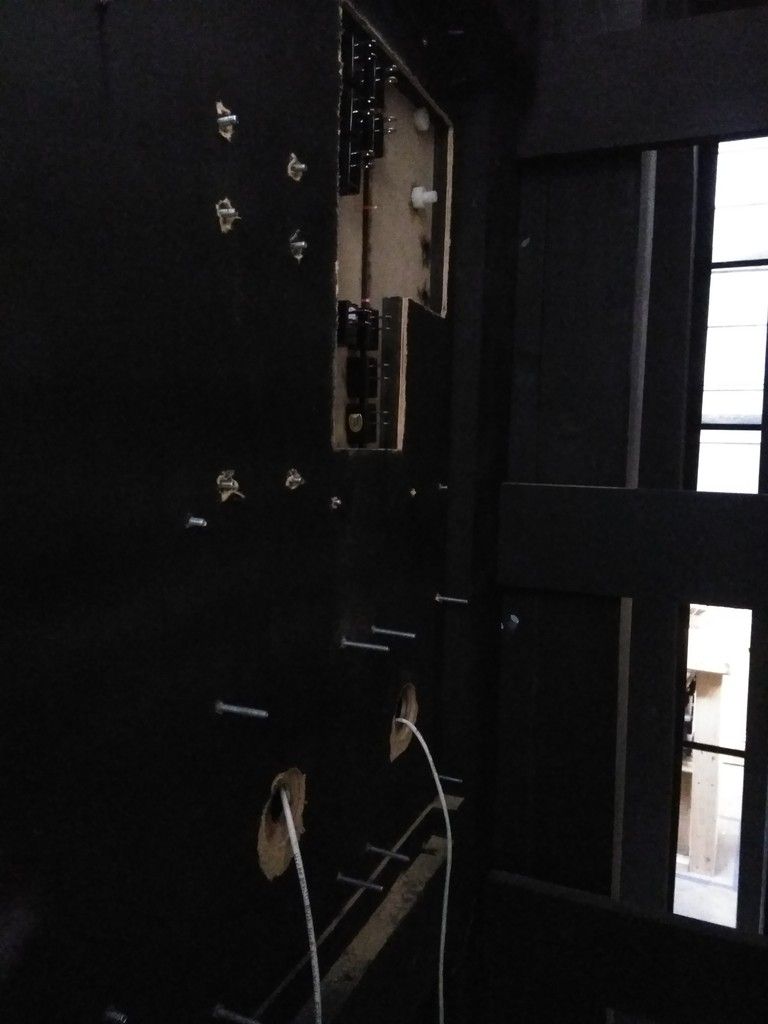
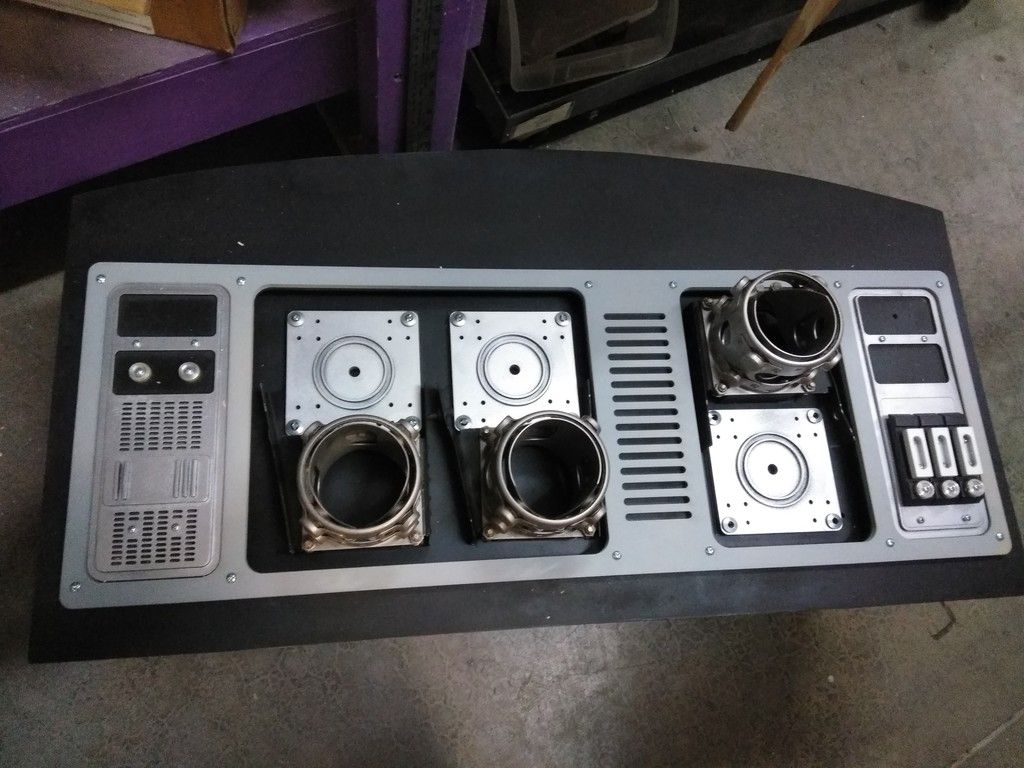
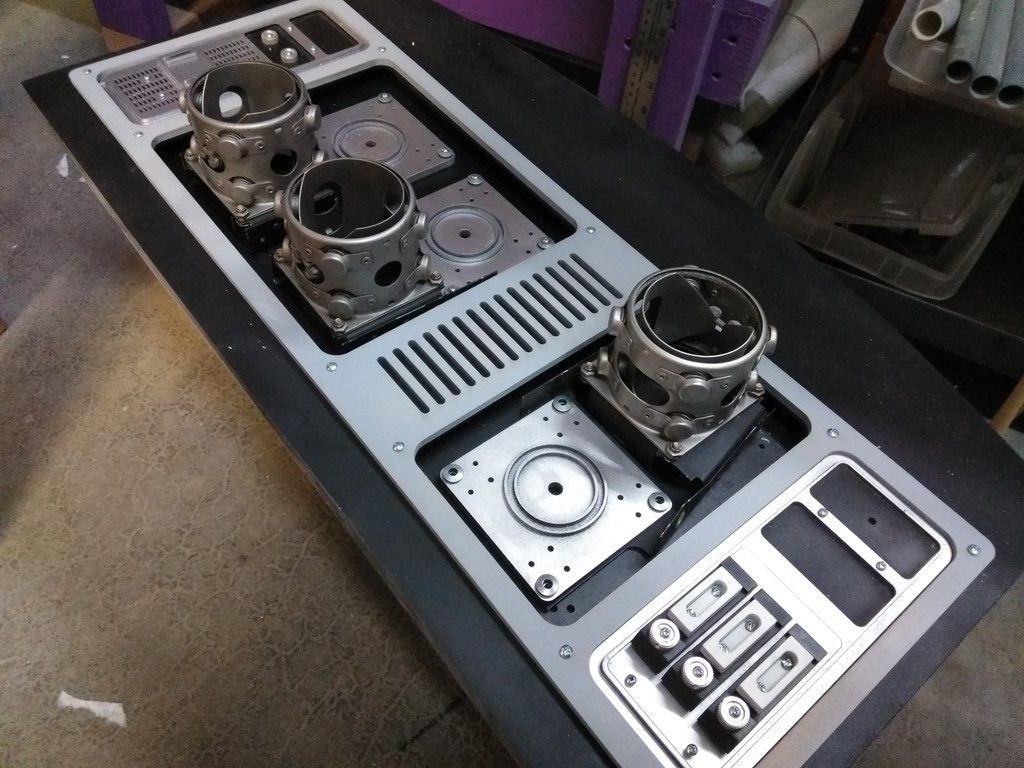
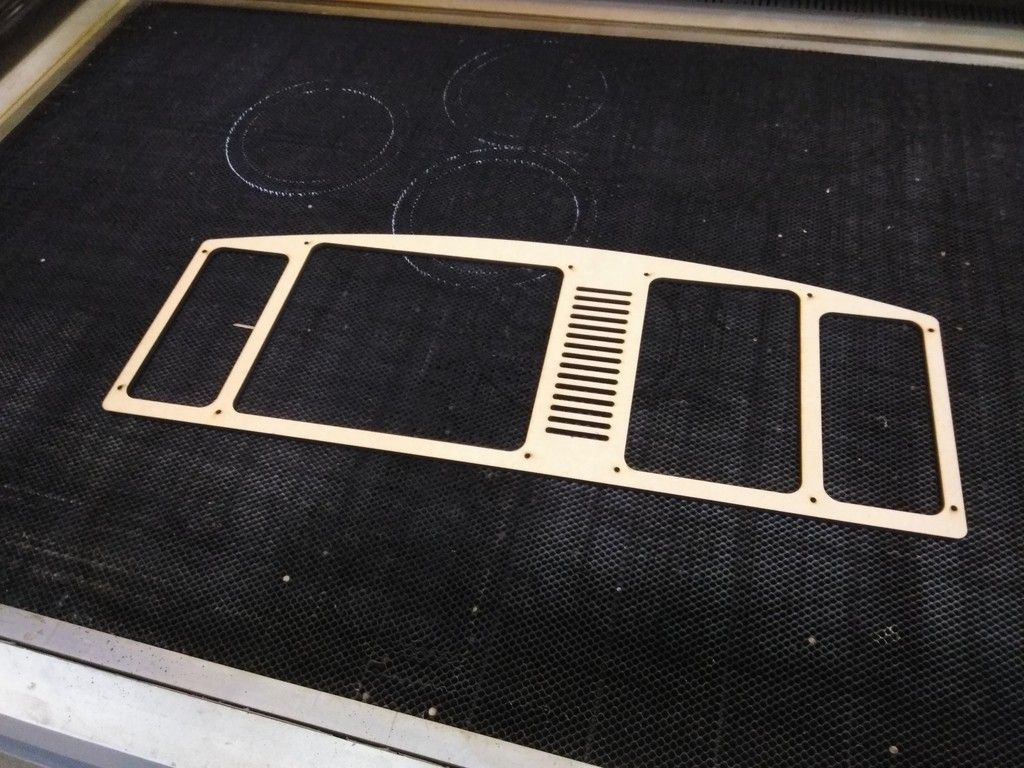
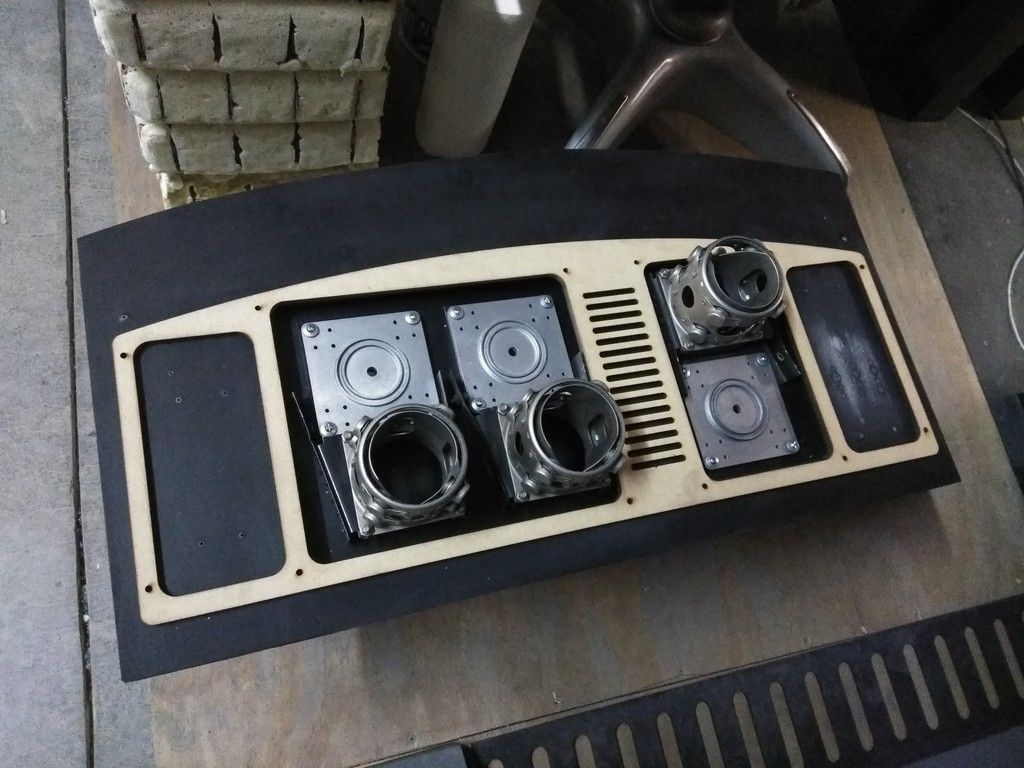
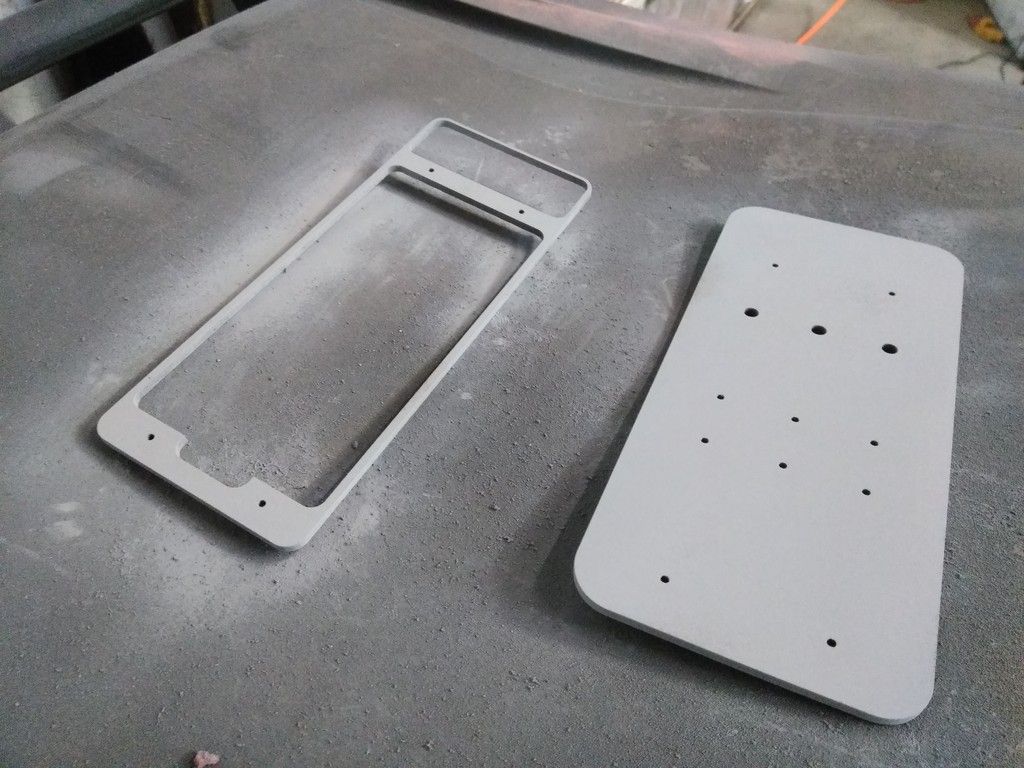
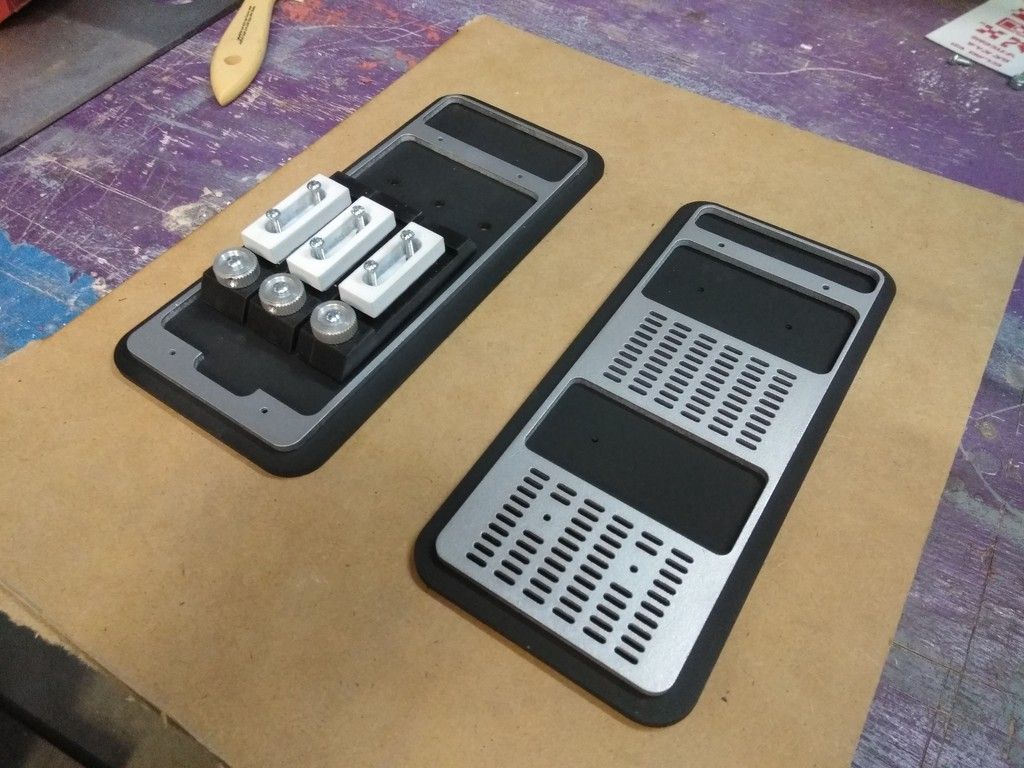
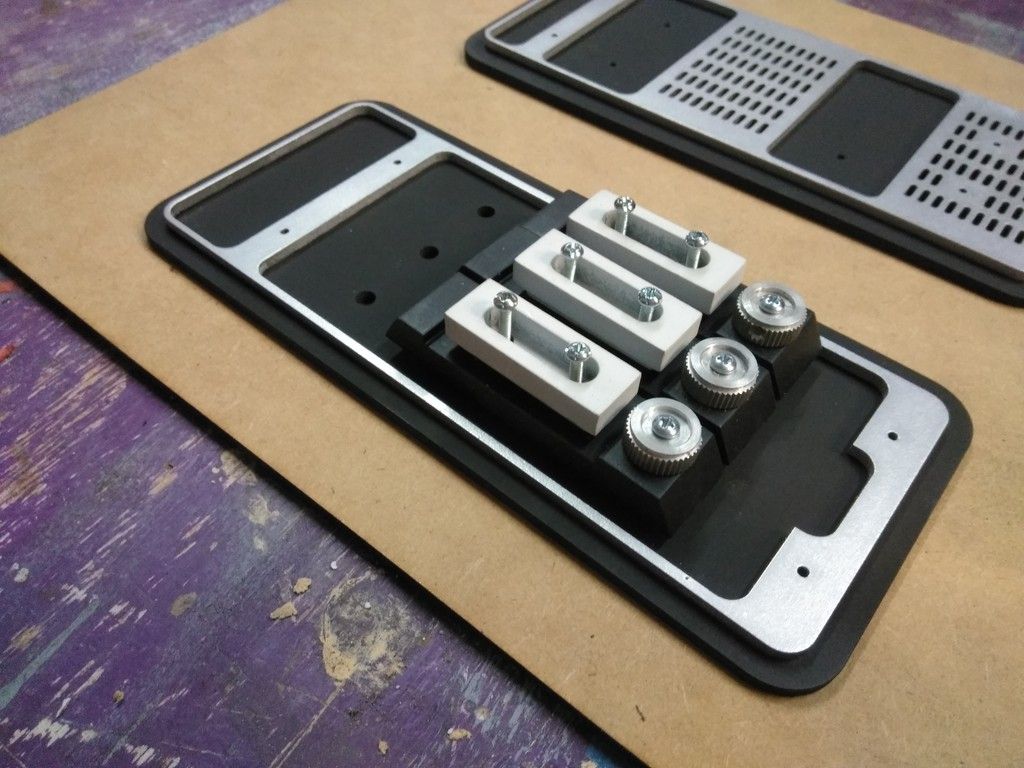
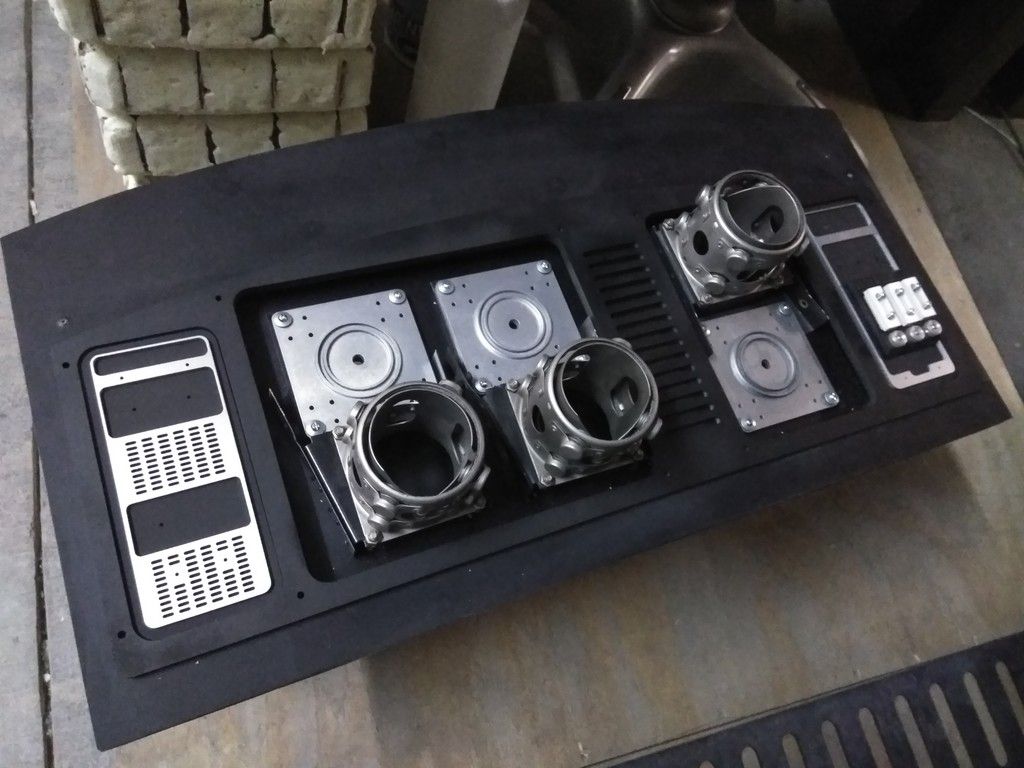
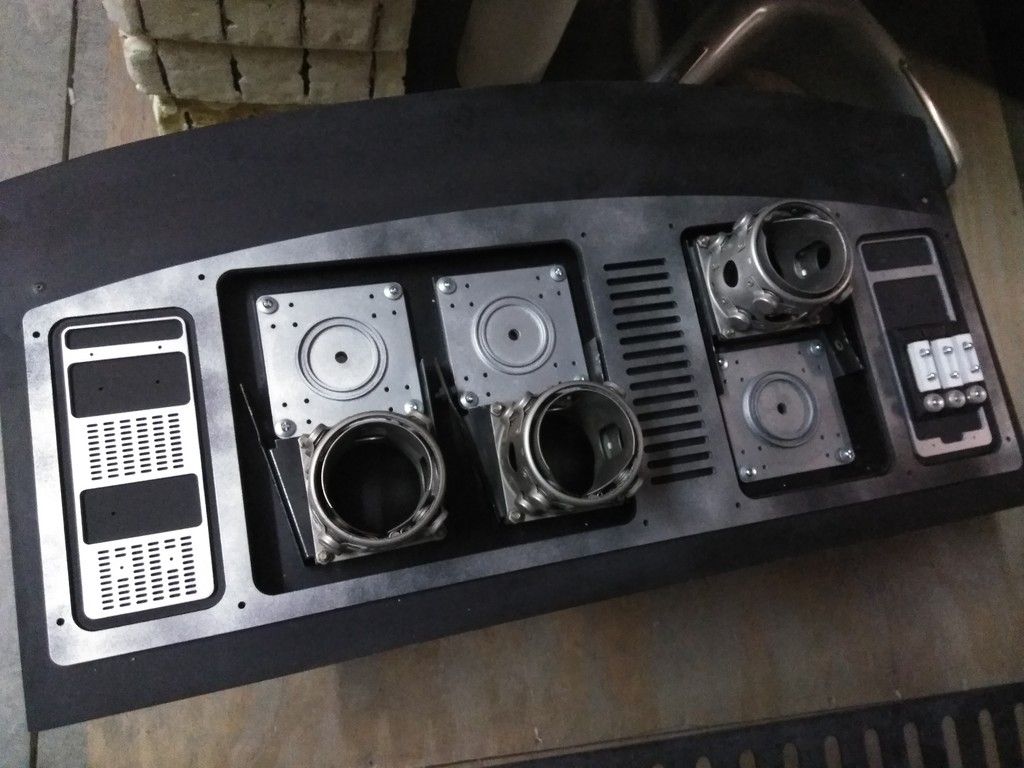
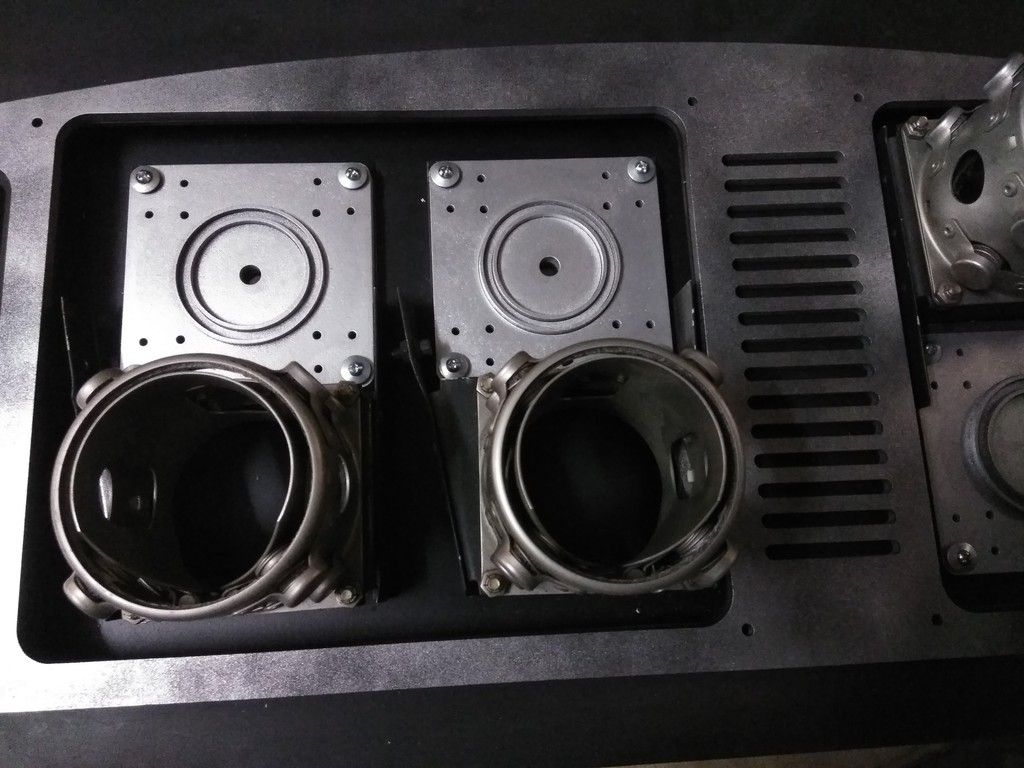
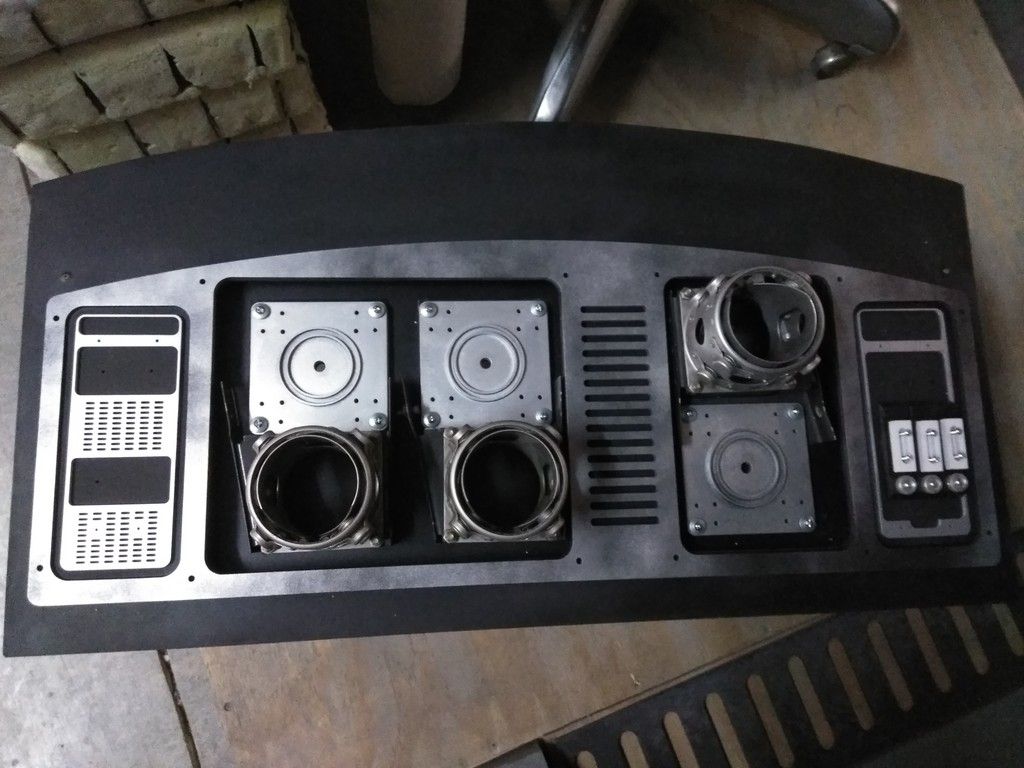
The new silver boxes with interior lighting were finally remounted and ready for wiring - cut the hole for the wire
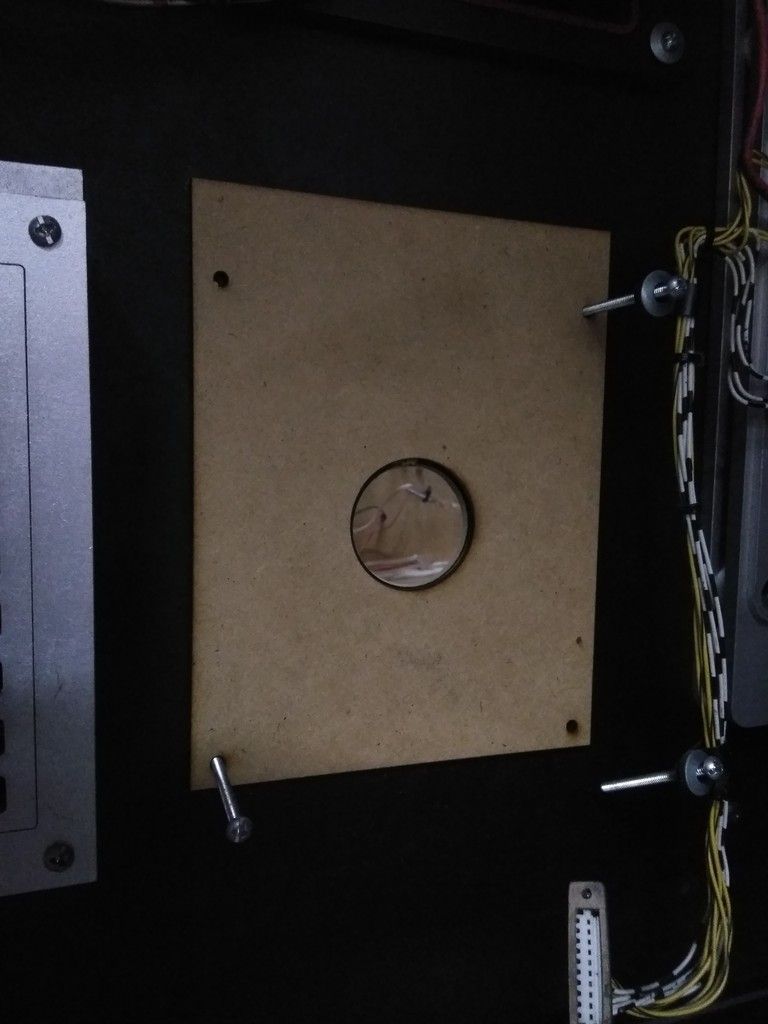
From the back
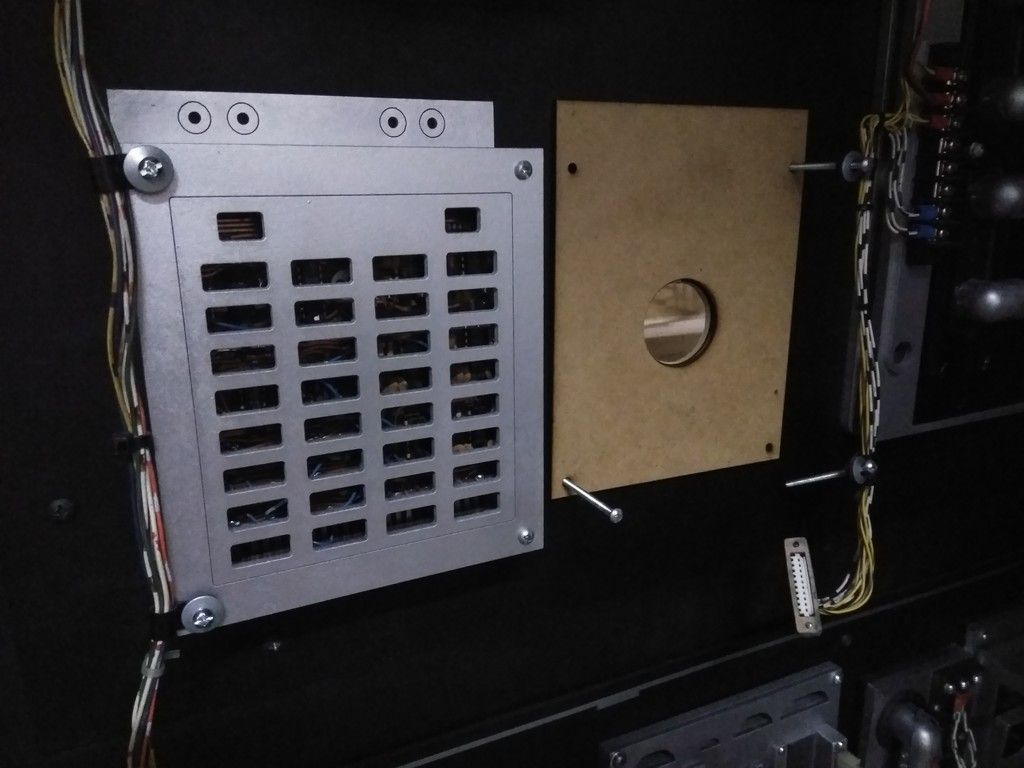
The boxes also got their faux wire connectors
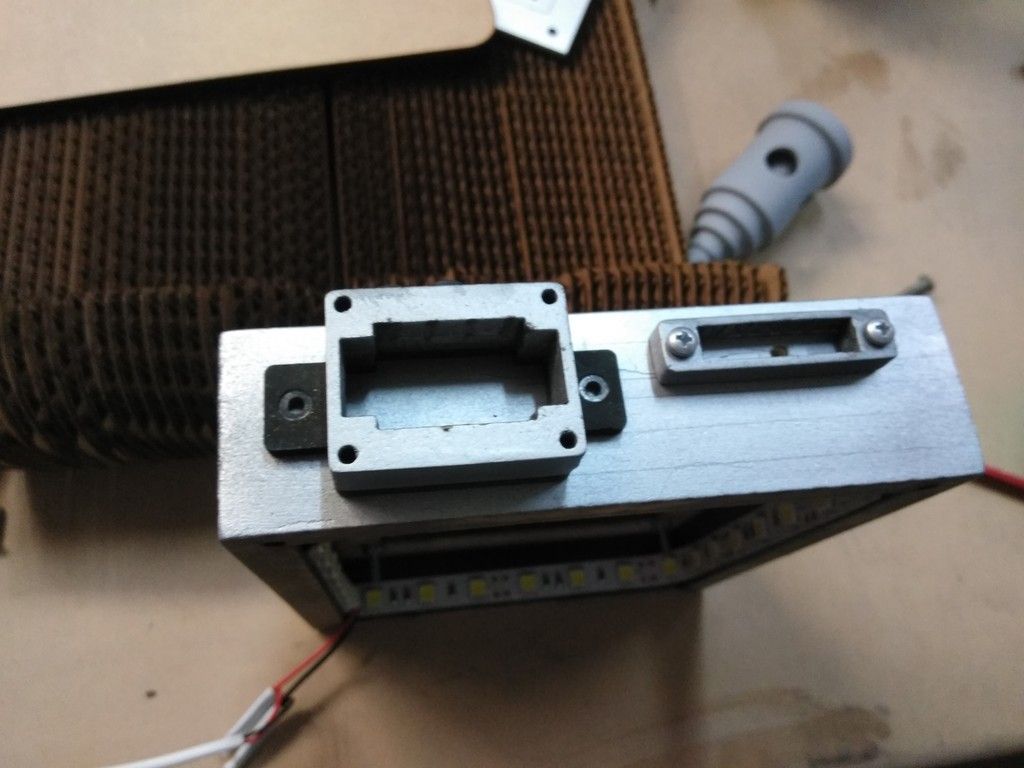
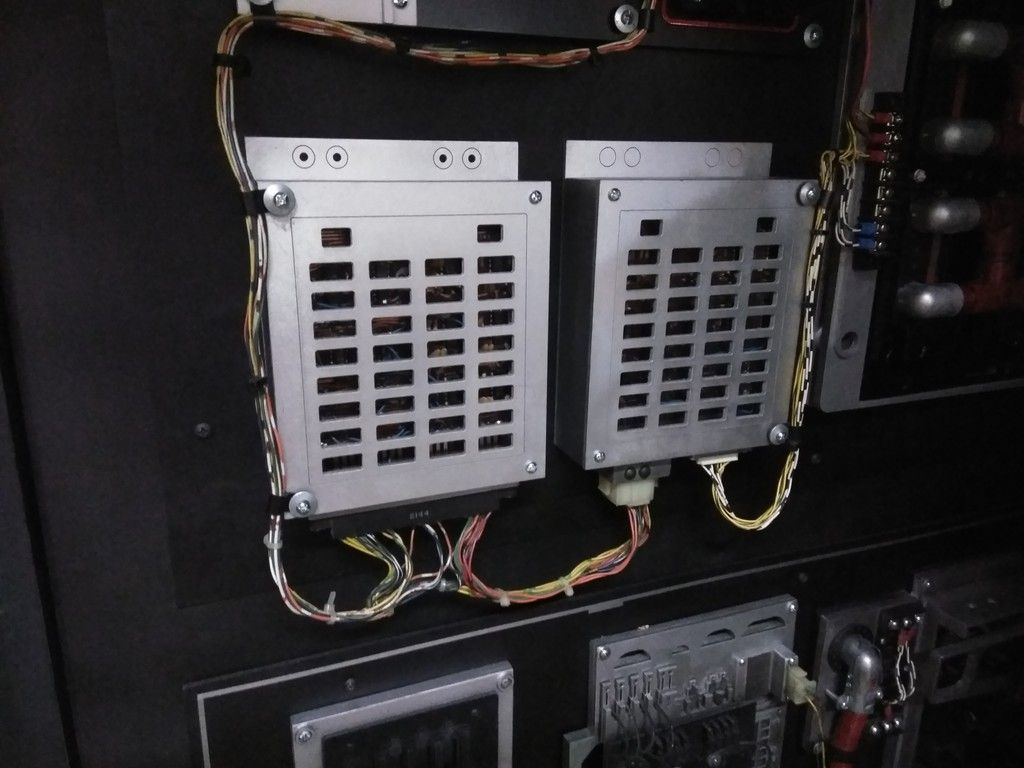
Backside
Fellow RPFer Bigturc was kind enough to forward me some AWESOME greeblies!
There are lenses included but forgot to take a pic - BAD ME! Thanks BT!
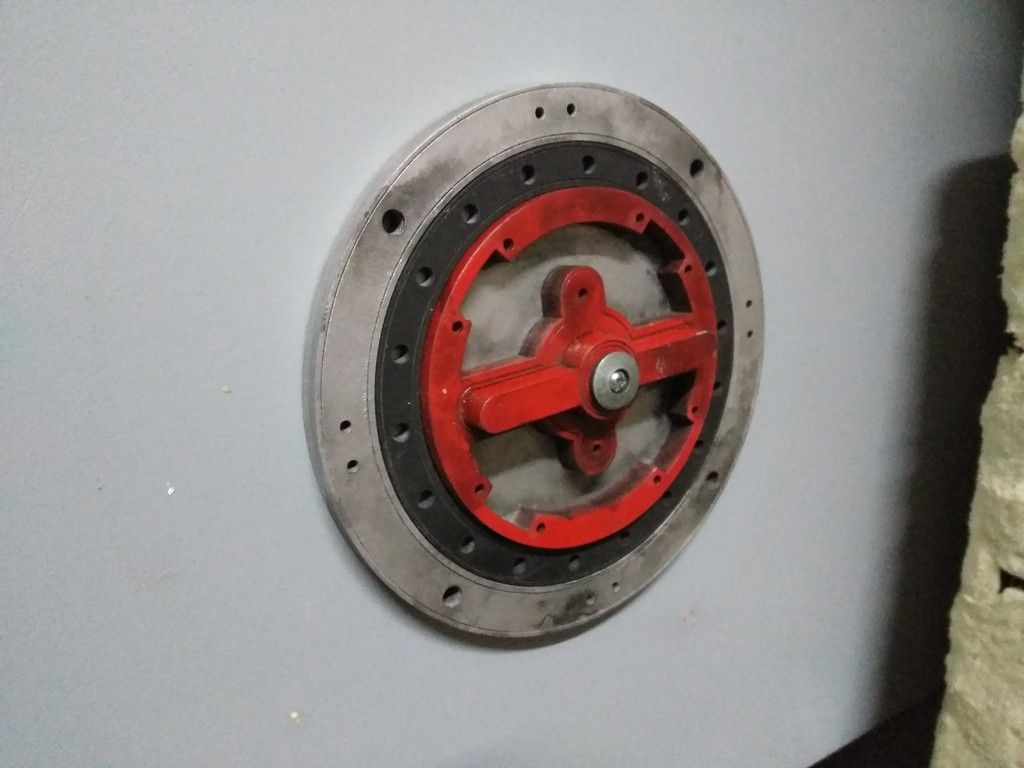
Fellow RPFer, BigBadDave, suggested I spin the single greeblie around to see what it would look like with the silver cylinder on top. I LOVE IT! But I suddenly realized...
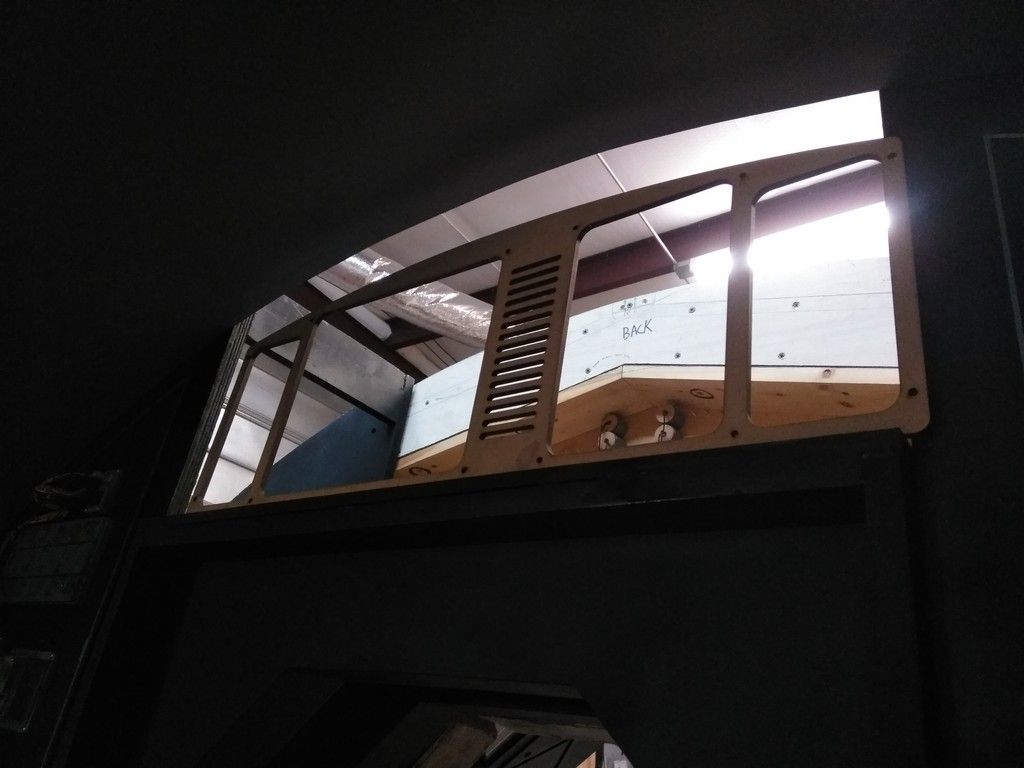
Another step backwards. The capstone panel would never fit in its current configuration! The curve of the corridor wall/top panel would hit the primered trim piece.
So, I took measurements and designed a new trim piece
Dry fit
There's the space it has to fit

WHEW!
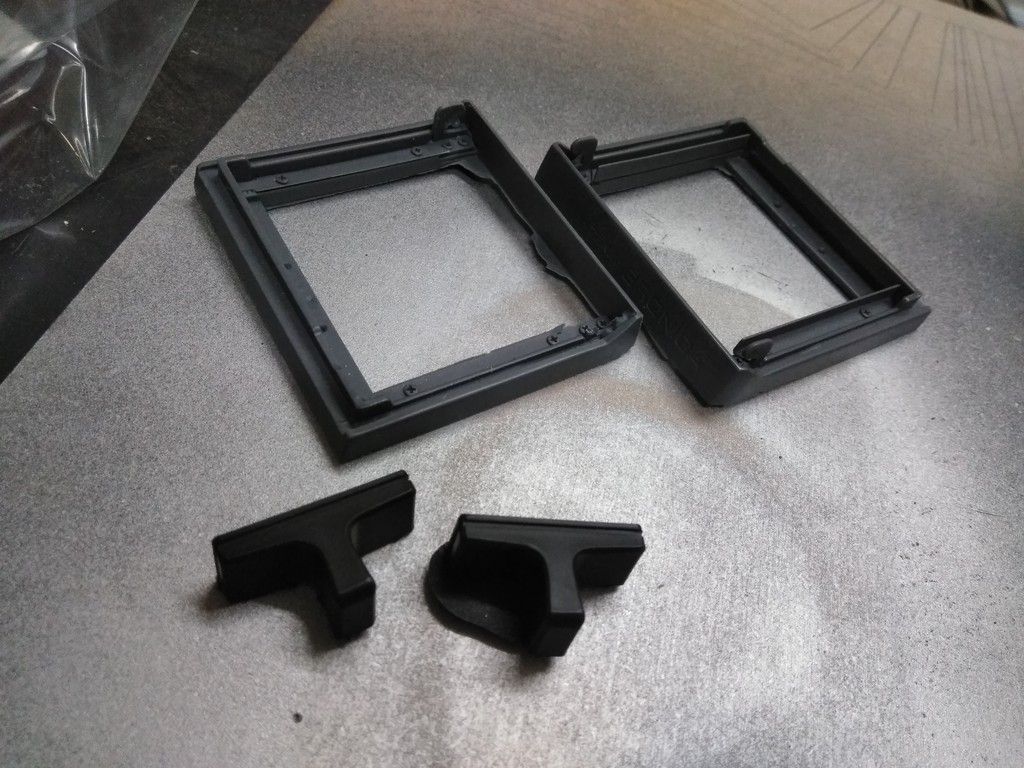
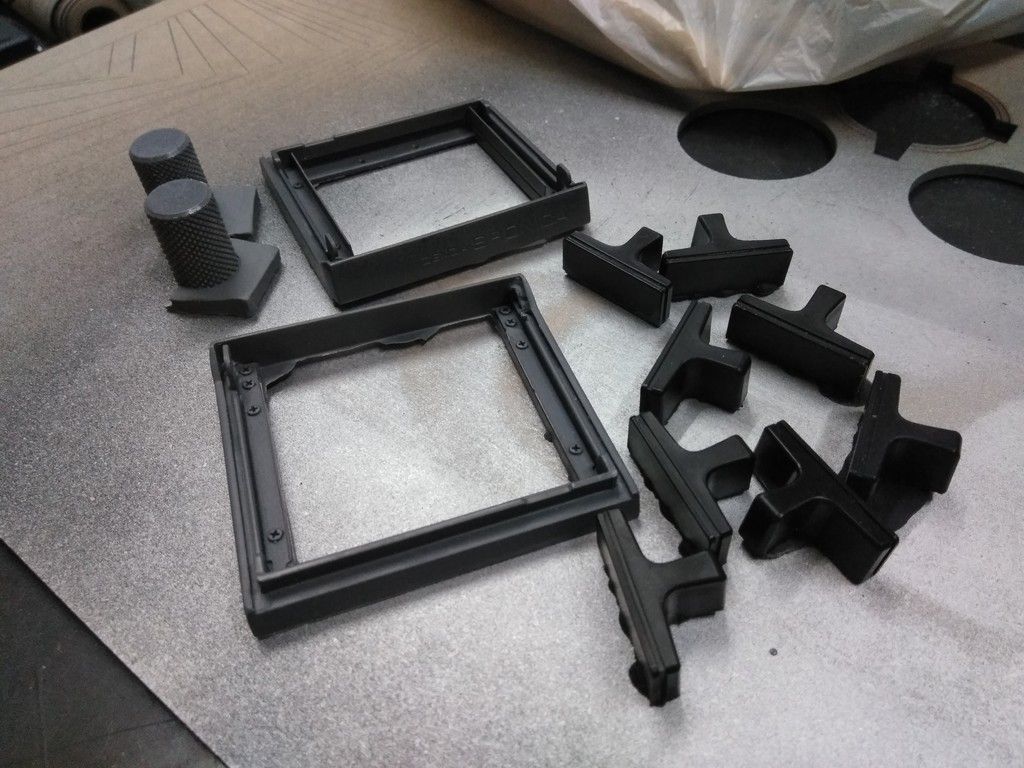
The new trim piece required me to redesign and laser cut these new parts
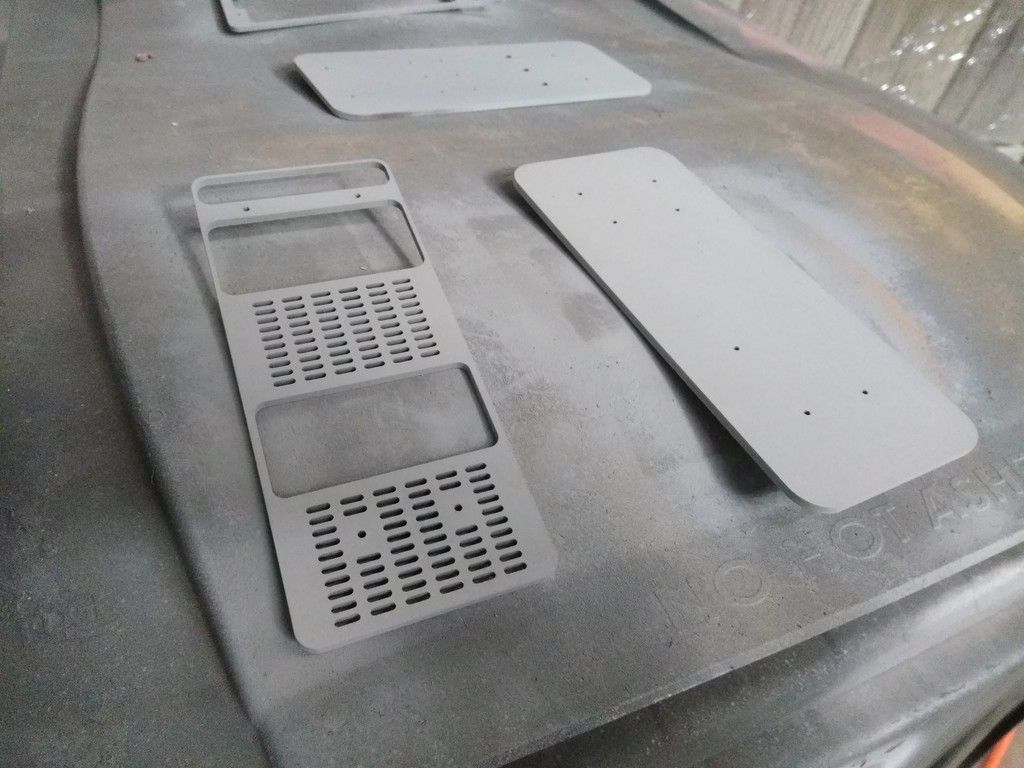
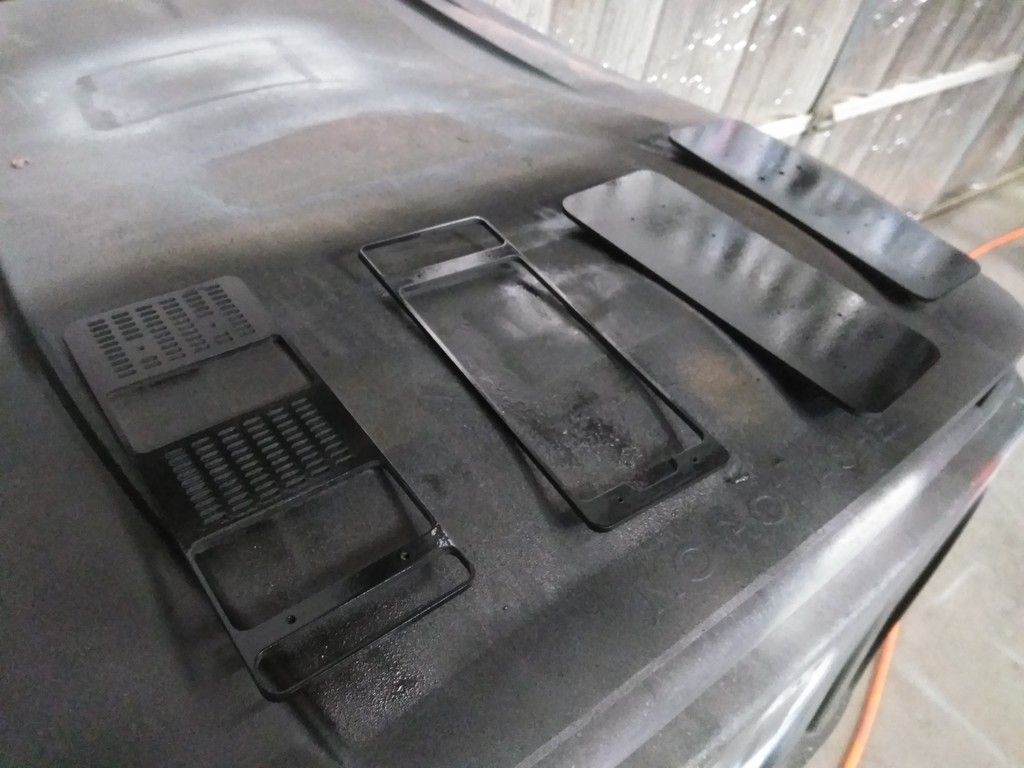
Black trim piece - needed to pop against the already black panel
Light dusting of silver paint - I like it! Great call BBD!
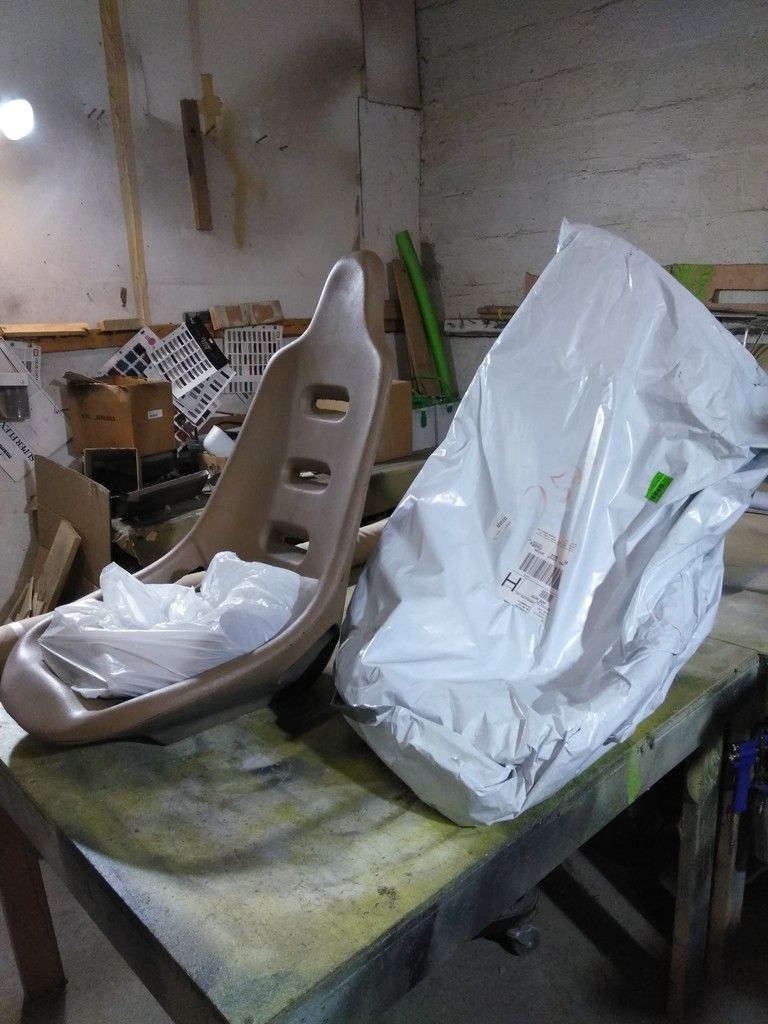
Saving the "actual" best for last... I dropped the captains chairs off to be finished up!
And that's where we are! UGH...
Another HUGE thanks to BT for the awesome greeblies! More to follow
Time for the Weekend Update. One step forward... 19 steps back! I think the corridor rings pads are a bust. It's taken me 4 days just to get one pad to a 90% solution and its still fighting me. Going to have to push this part of the build aside and try to come up with something else...
After 1st round of sanding
Spot filler
Second round of sanding
More spot filler
3rd round of sanding
The exposed foam is driving me nuts! Time for another approach
Picked up some Mod Podge and white shop towels and decided to try this technique on another pad
That didn't work either! I'm really frustrated! 60 bucks for all the expandable foam down the toilet!
If I can get ONE pad looking good I'm going to try to create a fiberglass mold OR we CNC new pads using 4" foam.
I tried using the Podge on the near finished pad to help seal/harden the exposed foam - fingers crossed. UGH
Cockpit Laser Gun Tip is almost ready to mount into place
I think I found a place for this old greeblie
The new silver boxes with interior lighting were finally remounted and ready for wiring - cut the hole for the wire
From the back
The boxes also got their faux wire connectors
Backside
Fellow RPFer Bigturc was kind enough to forward me some AWESOME greeblies!
There are lenses included but forgot to take a pic - BAD ME! Thanks BT!
Fellow RPFer, BigBadDave, suggested I spin the single greeblie around to see what it would look like with the silver cylinder on top. I LOVE IT! But I suddenly realized...
Another step backwards. The capstone panel would never fit in its current configuration! The curve of the corridor wall/top panel would hit the primered trim piece.
So, I took measurements and designed a new trim piece
Dry fit
There's the space it has to fit
WHEW!
The new trim piece required me to redesign and laser cut these new parts
Black trim piece - needed to pop against the already black panel
Light dusting of silver paint - I like it! Great call BBD!
Saving the "actual" best for last... I dropped the captains chairs off to be finished up!
And that's where we are! UGH...
Another HUGE thanks to BT for the awesome greeblies! More to follow
Last edited:
Katuna
Member
Argh, one step forward and 8 steps back is the story of my life! I feel your pain, brother!
Could you CNC one good form and then make a batch of vacuum formed caps to fit over the pads you've already built? Your existing pads would give you the rigidity plus you would still be able to salvage them.
Could you CNC one good form and then make a batch of vacuum formed caps to fit over the pads you've already built? Your existing pads would give you the rigidity plus you would still be able to salvage them.
Loosebruce704
Member
great work as always.
have you seen this video
https://youtu.be/kkq3lAW875o
full sized kylo rens tie fighter it's a beast.
also another thing I'm came across the other day and wasn't sure if you had or not is the
Haynes Manual for Falcon some really good pictures of the cockpit in it including break downs etc.
loosebruce
BigBigDave
Active Member
Light dusting of silver paint - I like it! Great call BBD!
Thanks! Glad to help.
Speaking of help (and vacuforming), what are the dimensions of those pads?
trainman
Well-Known Member
I wonder how these guys made the pads for their project?... https://www.pinterest.com/pin/162200024052891278/
Bigturc
Sr Member
SK,
I always assumed those ring pads were just that .. pads! So why not just cover your cardboard/expending foam with some kind of faux leather/material and call it a day? It's always been that image in my head since I was young. Also, considering you've already done it for the nav chair and it looks quite nice, I figured you'd do it that way also.
If all else fails, I would finish one, make a mold of it and use (smooth on) expanding foam to replicate it even though that would imply sculpting the bottom to fit (which sucks).
Anywho, the last thing I would imagine is for those pads to be solid as it's there for bumping protection in my mind!
Keep at it!
Thunderkatt740
New Member
I wonder if Plasti Dip would make a good coating for the pads?
STRYCKER
New Member
Hello, I am your project from the beginning, and it must be said that you ensure maximum.As for Pads, there are very high density (very hard) foams 70 kg cm3
https://www.alibaba.com/product-detail/pvc-vinyl-sheet-pvc-flexible-plastic_60202452379.html
Which are laser cut and can receive a layer of polyurethane paint.
I am French so the translation can be approximate.
SteveStarkiller
Sr Member

YYEEESS!!! that's so exciting. What a long time in the making for this.
Loosebruce704
Member
here's a new picture just released by Disney for star wars land
mobile.twitter.com/DisneyParks/status/941004865827942400/photo/1?ref_src=twsrc%5Etfw&ref_url=https%3A%2F%2Fd-17361517374131841470.ampproject.net%2F1512677960104%2Fframe.html
shows alot of the pads
loosebruce
mobile.twitter.com/DisneyParks/status/941004865827942400/photo/1?ref_src=twsrc%5Etfw&ref_url=https%3A%2F%2Fd-17361517374131841470.ampproject.net%2F1512677960104%2Fframe.html
shows alot of the pads
loosebruce
Argh, one step forward and 8 steps back is the story of my life! I feel your pain, brother!
Could you CNC one good form and then make a batch of vacuum formed caps to fit over the pads you've already built? Your existing pads would give you the rigidity plus you would still be able to salvage them.
Thank you, my friend! Glad to know you feel the burn!
I originally wanted to CNC the pads and then take a 1" round over bit for the edges but unfortunately the CNC was moved and is pieces and wont be ready for a few months. Hindsight should have told me to wait and work on another part of the cockpit but I got anxious.
Not sure how I'm going to move forward. I really need to get the canopy built. And that's another "Volvo Panel" nightmare!
great work as always.
have you seen this video
https://youtu.be/kkq3lAW875o
full sized kylo rens tie fighter it's a beast.
also another thing I'm came across the other day and wasn't sure if you had or not is the
Haynes Manual for Falcon some really good pictures of the cockpit in it including break downs etc.
loosebruce
Hey LB,
AWESOME! What a great vid! They did an amazing job. Thanks for sharing!
I've seen the Haynes manual a few times. Good stuff
- - - Updated - - -
Thanks! Glad to help.
Speaking of help (and vacuforming), what are the dimensions of those pads?
It worked out really well! I never would have thought to flip the greeblie.
Can't remember exact dims off hand but I believe the pads are approx 12-14" wide, ~8" high and 4" deep. You must be thinking something?
- - - Updated - - -
I wonder how these guys made the pads for their project?... https://www.pinterest.com/pin/162200024052891278/
Hey T,
Those pads are made of wood (if I remember) and have hard angled edges - no curves. MUCH easier to make in bulk.
SK,
I always assumed those ring pads were just that .. pads! So why not just cover your cardboard/expending foam with some kind of faux leather/material and call it a day? It's always been that image in my head since I was young. Also, considering you've already done it for the nav chair and it looks quite nice, I figured you'd do it that way also.
If all else fails, I would finish one, make a mold of it and use (smooth on) expanding foam to replicate it even though that would imply sculpting the bottom to fit (which sucks).
Anywho, the last thing I would imagine is for those pads to be solid as it's there for bumping protection in my mind!
Keep at it!
Hey BT,
Wrapping the pads in leather would be next to impossible as there needs to be a solid surface for the staples to grab hold. The cardboard just isn't enough let alone the stress from stretching and wrapping the material would probably warp / collapse the pad.
The originals were in fact fiberglass so I think I'm going to head in that direction. I just have to make ONE good solid mold to use multiple times. I'm really frustrated but I'll figure something out...
- - - Updated - - -
I wonder if Plasti Dip would make a good coating for the pads?
Hey TK,
I've considered that. Not sure the texture would be right. As I mentioned, the originals were fiberglass and had a smooth finish. I'm trying to replicate the exact look and feel.
- - - Updated - - -
As for Pads, there are very high density (very hard) foams 70 kg cm3
https://www.alibaba.com/product-detail/pvc-vinyl-sheet-pvc-flexible-plastic_60202452379.html
Which are laser cut and can receive a layer of polyurethane paint.
I am French so the translation can be approximate.
Hi S,
For a second there I thought my own project was reaching out to me!
As I mentioned, I wanted to CNC the pads but we dont have access to the CNC anytime soon. I'll figure something out. I hope!
Cover them with some sort of faux leather or cotton like Ya know.....pads. Or spray the crap out of them with plastidip and weather them with paint.
Hey L,
As I explained in a earlier post, covering the pads in a leather-like upholstery material wont work and the plasti-dip wont have the same texture. I think the fiberglass approach is the way to go. I just have to get ONE good solid pad to start with. Disney (any movie studio) has the ability to assemble a team of professionals who know everything from 3D printing to welding to electrical to fiberglass. We're just a handful of knuckleheads trying to figure it out as we go!
The good news is all that we have learned can and will be applied to the next cockpit! No more surprises and guessing our way through the build.
Similar threads
- Replies
- 2
- Views
- 859
- Replies
- 6
- Views
- 609
- Replies
- 8
- Views
- 549
- Replies
- 4
- Views
- 775
- Replies
- 4
- Views
- 2,304