Read Slooweeerrrr..............
I'm trying but there's alot of "THAT'S AWESOME"... and "WOW... INCREDIBLE" posts that are hard to read any slower! I'm up to 214 now... and oh my god man... I can barely stand it any more!
Read Slooweeerrrr..............
Hey Sofa King,
I'm having a Super Bowl party, and I'd love to buy one of these off you, to show-off to my friends! Do you think it could be delivered by the big game?!
The Wook
ps~but seriously, absolutely amazing work!
") Delivery might be tough...
Delivery might be tough...Sitting here going thru all the pages... needing my greeblie fix. I'm up to page 92!
I am thinking of making a trip down there if you guys are still there with the cockpit in Alabama this summer, do you guy mind people getting photo ops sitting or standing in the cockpit? I will make a donation for your cause.
Nice looking Falcon cockpit you guys have going. It's amazing and I know how long these can take. I've been watching the evolution from time to time. I build a lot of them myself (aircraft cockpits for customers) using a lot of the same basic methods. I do all my own designwork and CnC, carpentry, 3D modeling, etc. I have instrument panels water jetted from 6061 aluminum. I also integrate real controls from various vendors as well build some myself too but also use a lot of virtualware with touchscreens as its a lot more flexible and less costly than hardware. I'm currently working on a new virtual panel set for a StarTrek shuttle which if all goes to plan I will be taking it to Las Vegas this summer for the TOS 50th Anniversary convention. Basically I can land it in the Enterprise using real world navigational techniques (VORs, GPS, etc). I'm essentially blending real world skills and avionics to look sci-fi but it requires an actual pilot to fly it. I'm attaching an image of one of my designs but if it violates any sort of advertising rules I can remove it or understand if an admin does (or can remove my logos) Anyway, this is my first post on this forum and I'm just wanting to show some similarity of building as I mostly use high grade plywood for the shells along with ABS or aluminum for skin. It's interesting how both NASA, the aviation community, and the sci-fi world all turn to good old plywood for mock-ups. I've been building these for 8 years and have done a lot with wood and am always learning new things. I would love to take the Falcon out sometime! You guys should think about integrating some real flight controls and get some projectors going. Personally, after all that work there's just no way I could keep it on the "ground".
Love the image you attached. Fantastic design!Man, I haven't checked this thread for a while, but everything is looking great! Whenever I think "okay, that part is perfect" you go an make it better! I can't wait to see what else you come up with.
Thanks for the kind words. It's funny, I was digging through my emails and I realized just the other day that Daniel had sent a Behind the Scenes image of the EPVII cockpit back wall! It's one of the clearest images of I've seen of the greeblies. I was both in awe and frustrated because I have to redo a few of the greeblies. So hang on... more is on the way! Am now up to page 156... this is getting harder and harder! Starting to shake!
I'm trying but there's alot of "THAT'S AWESOME"... and "WOW... INCREDIBLE" posts that are hard to read any slower! I'm up to 214 now... and oh my god man... I can barely stand it any more!
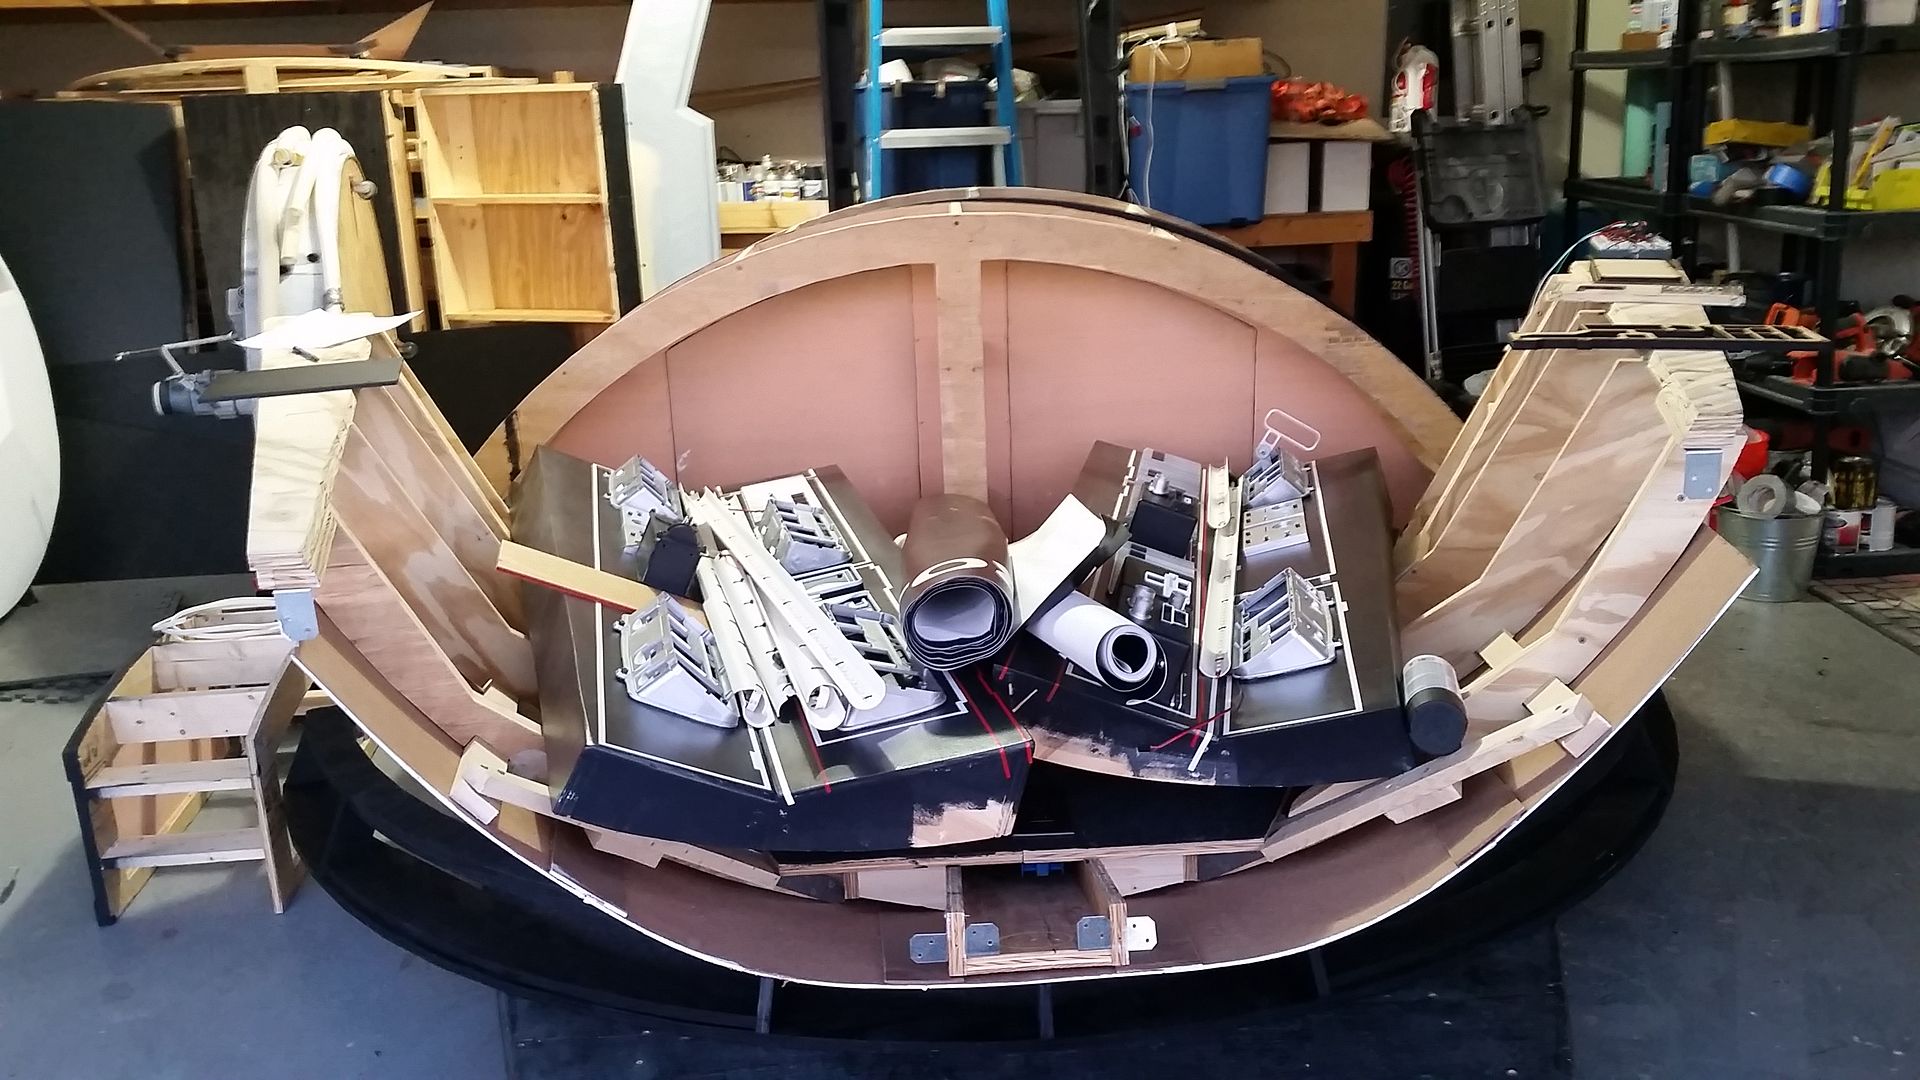
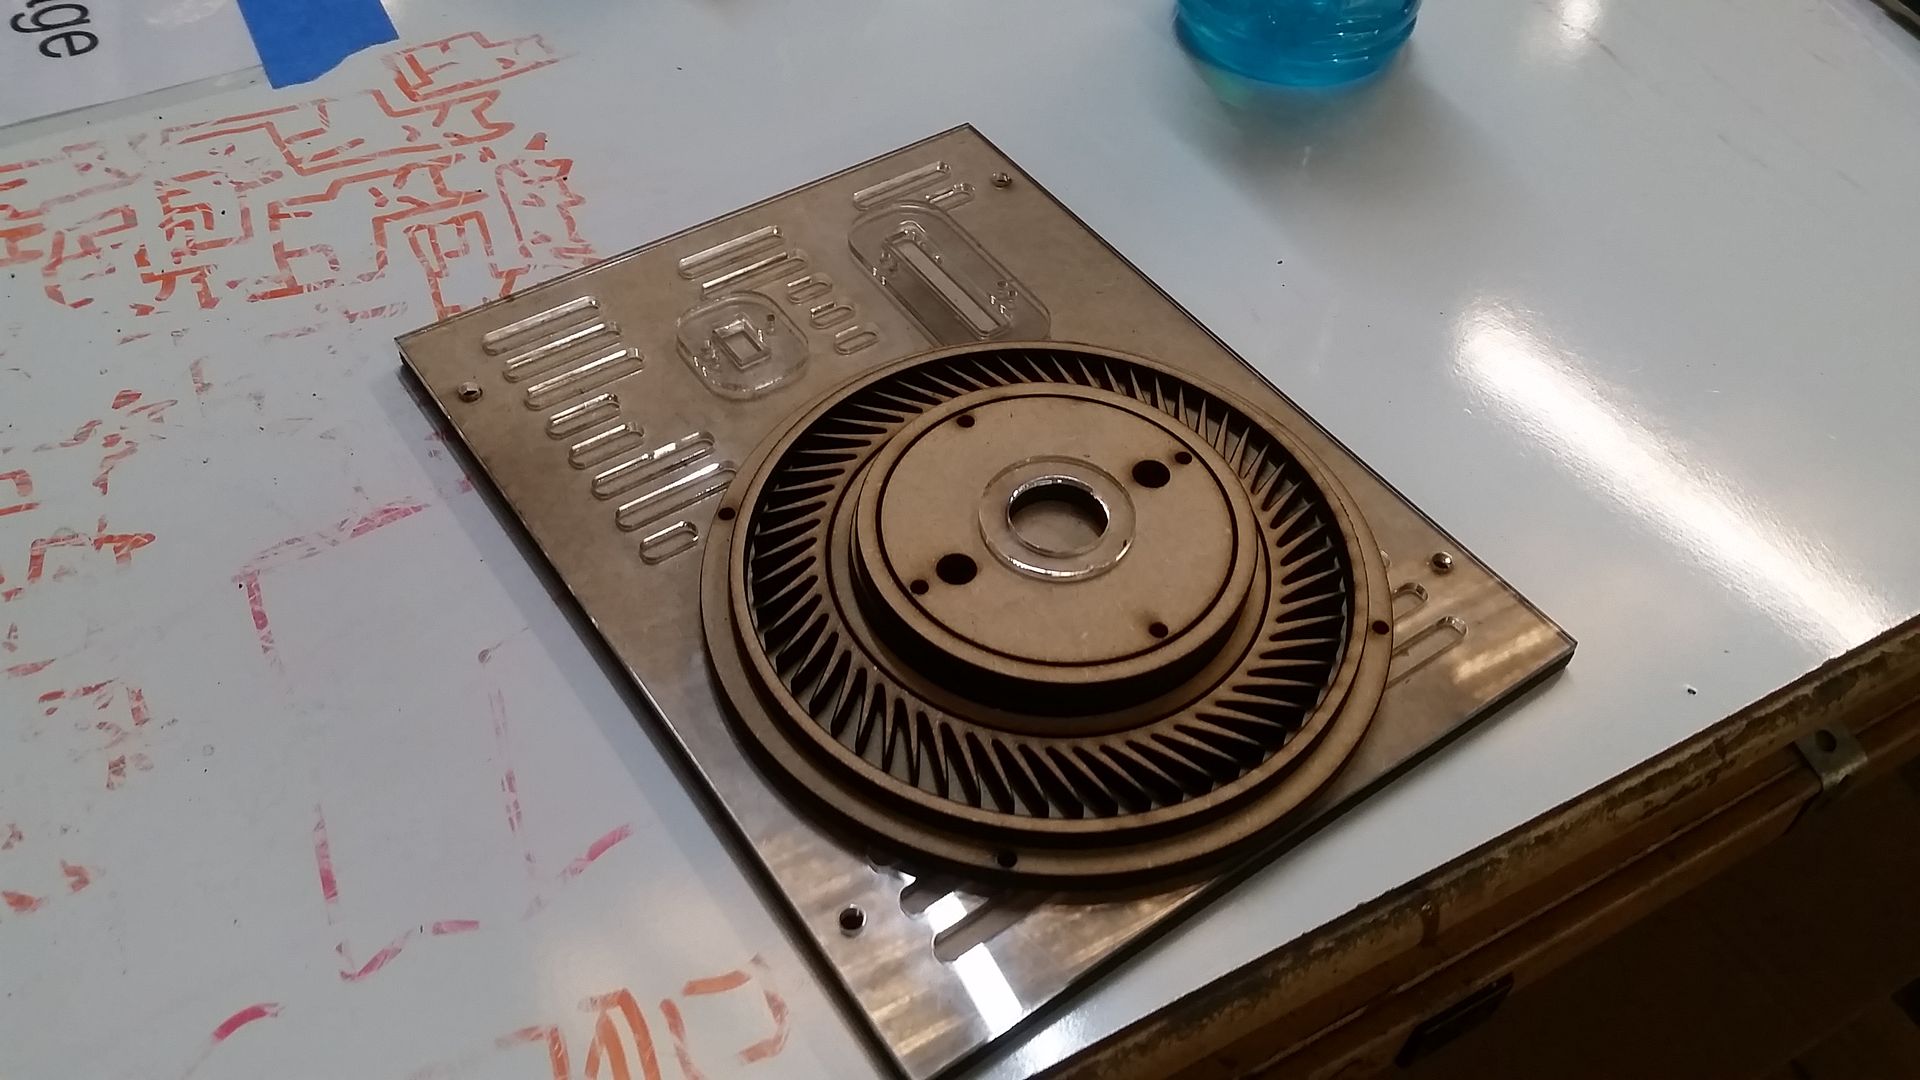
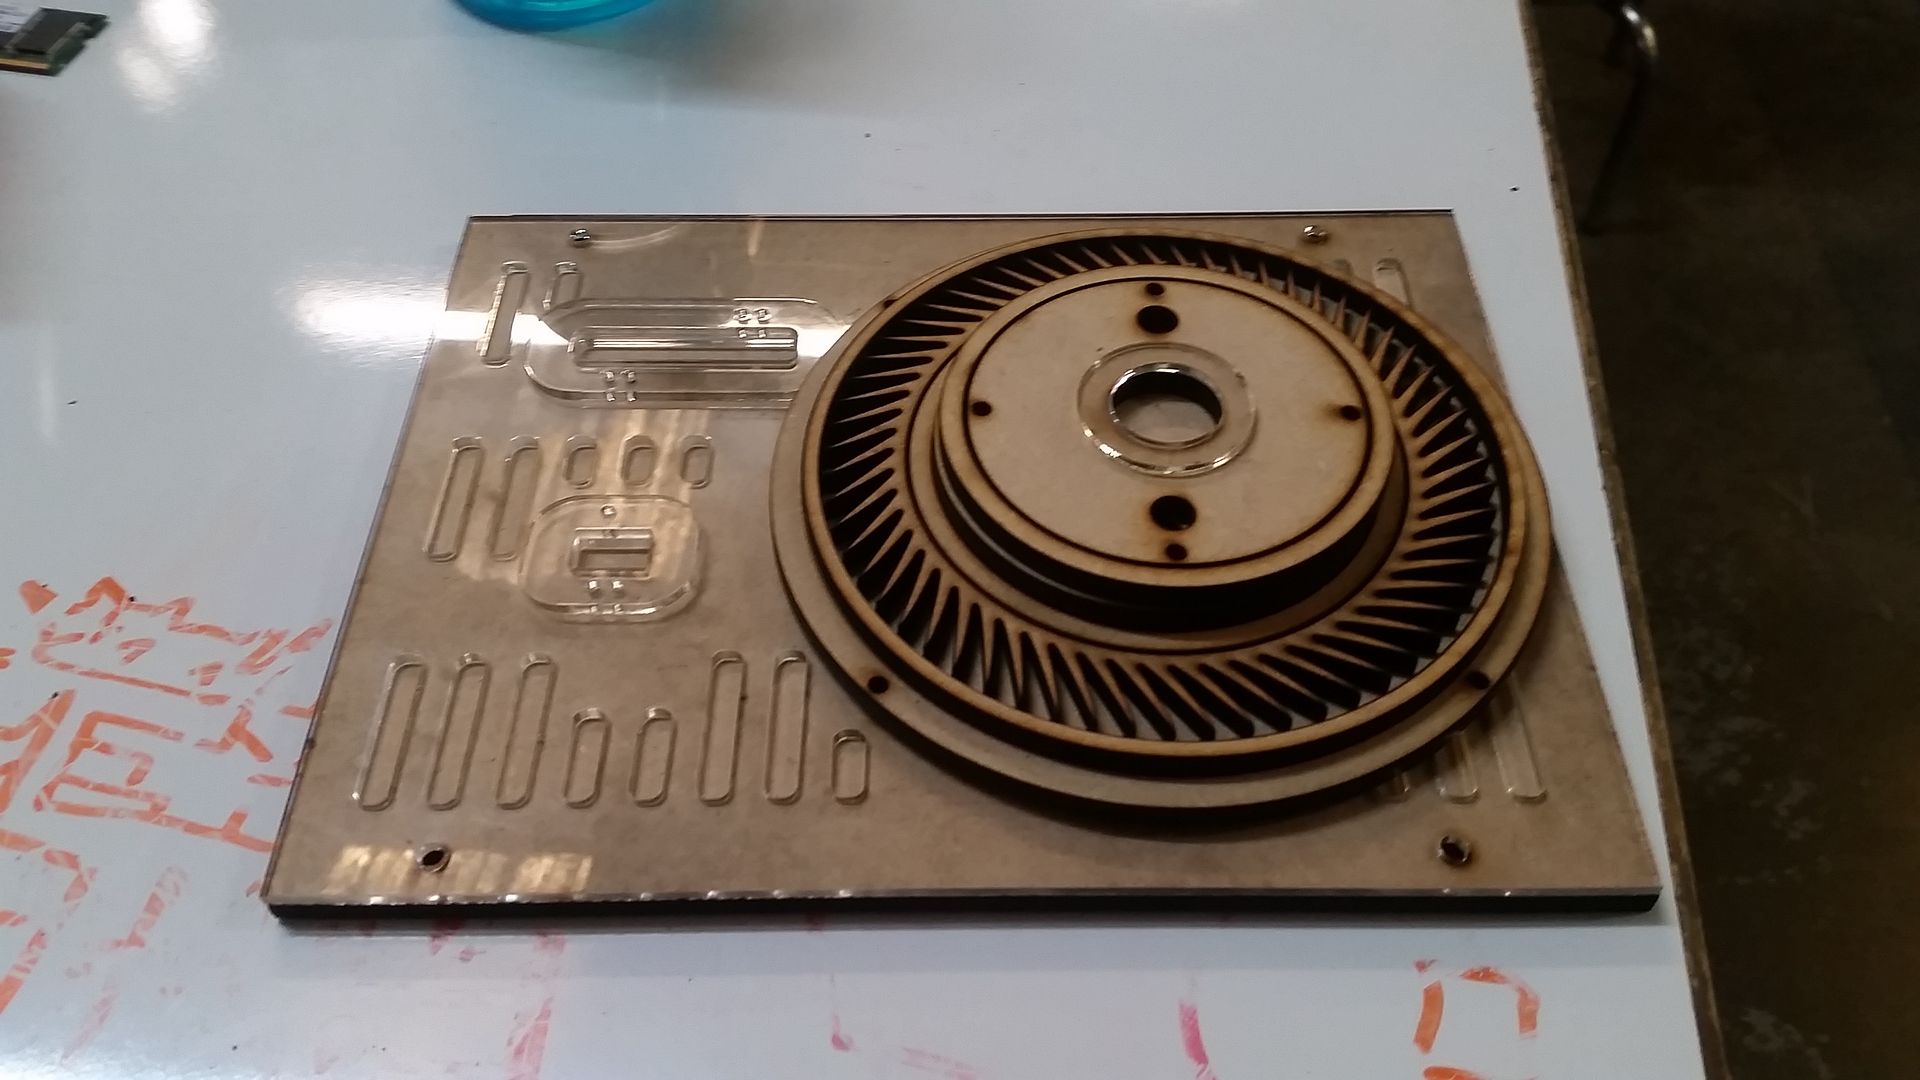
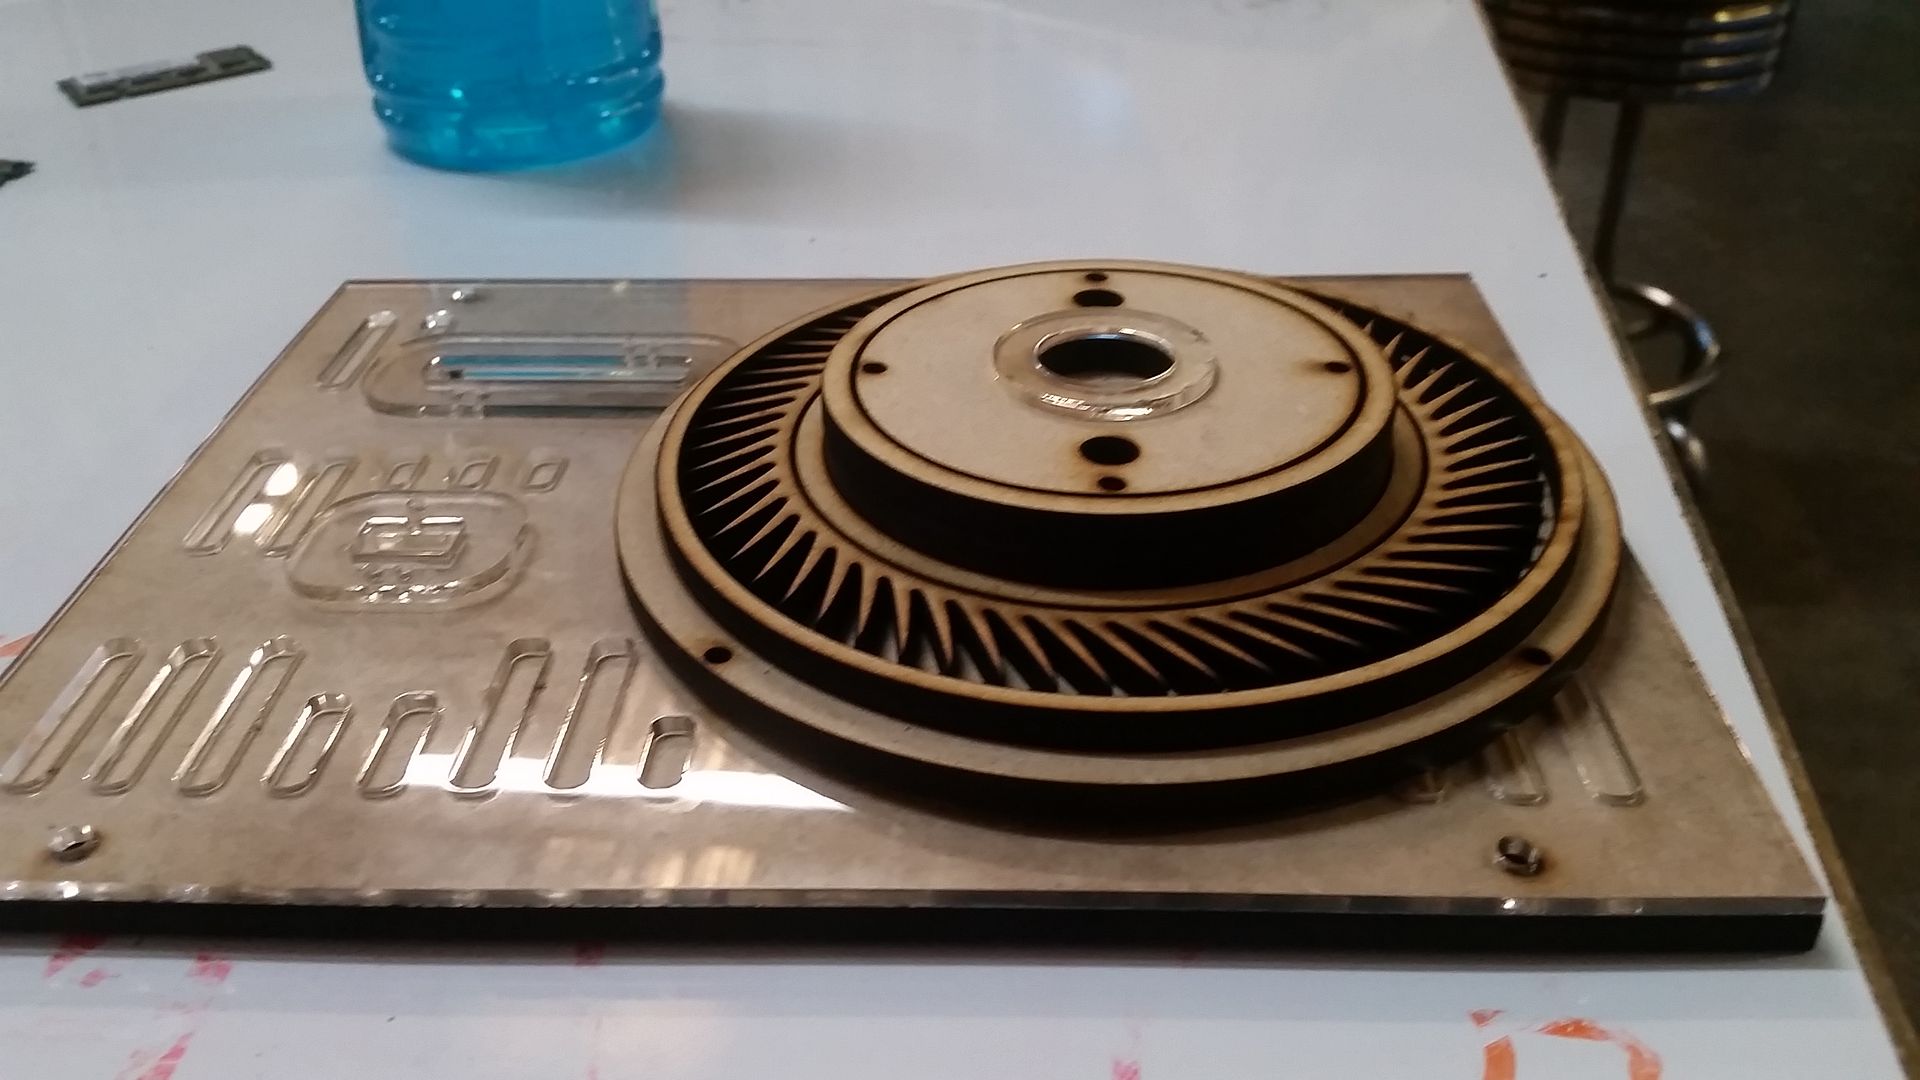
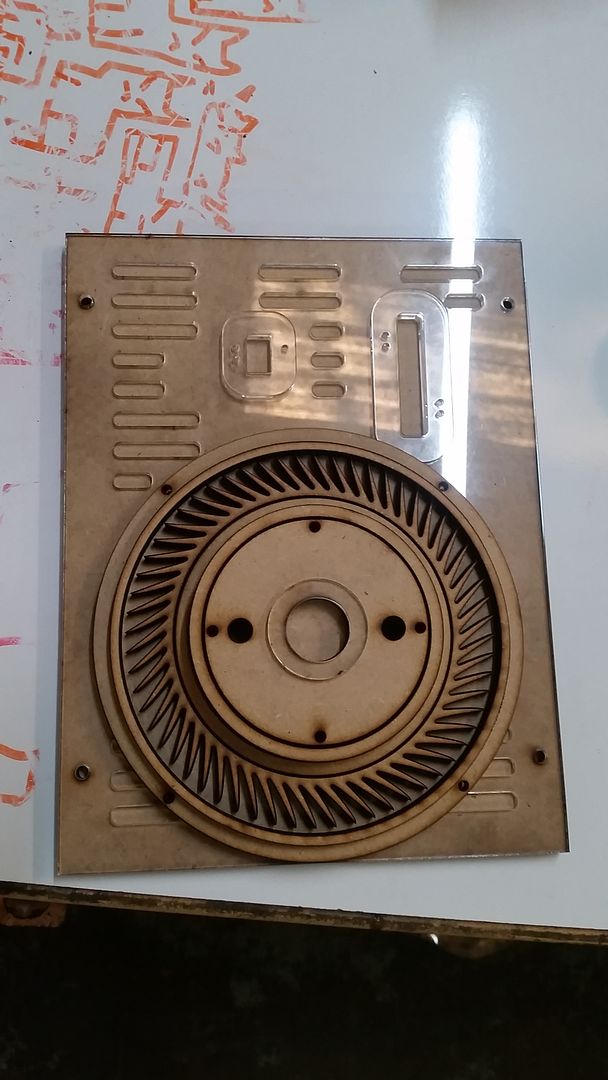
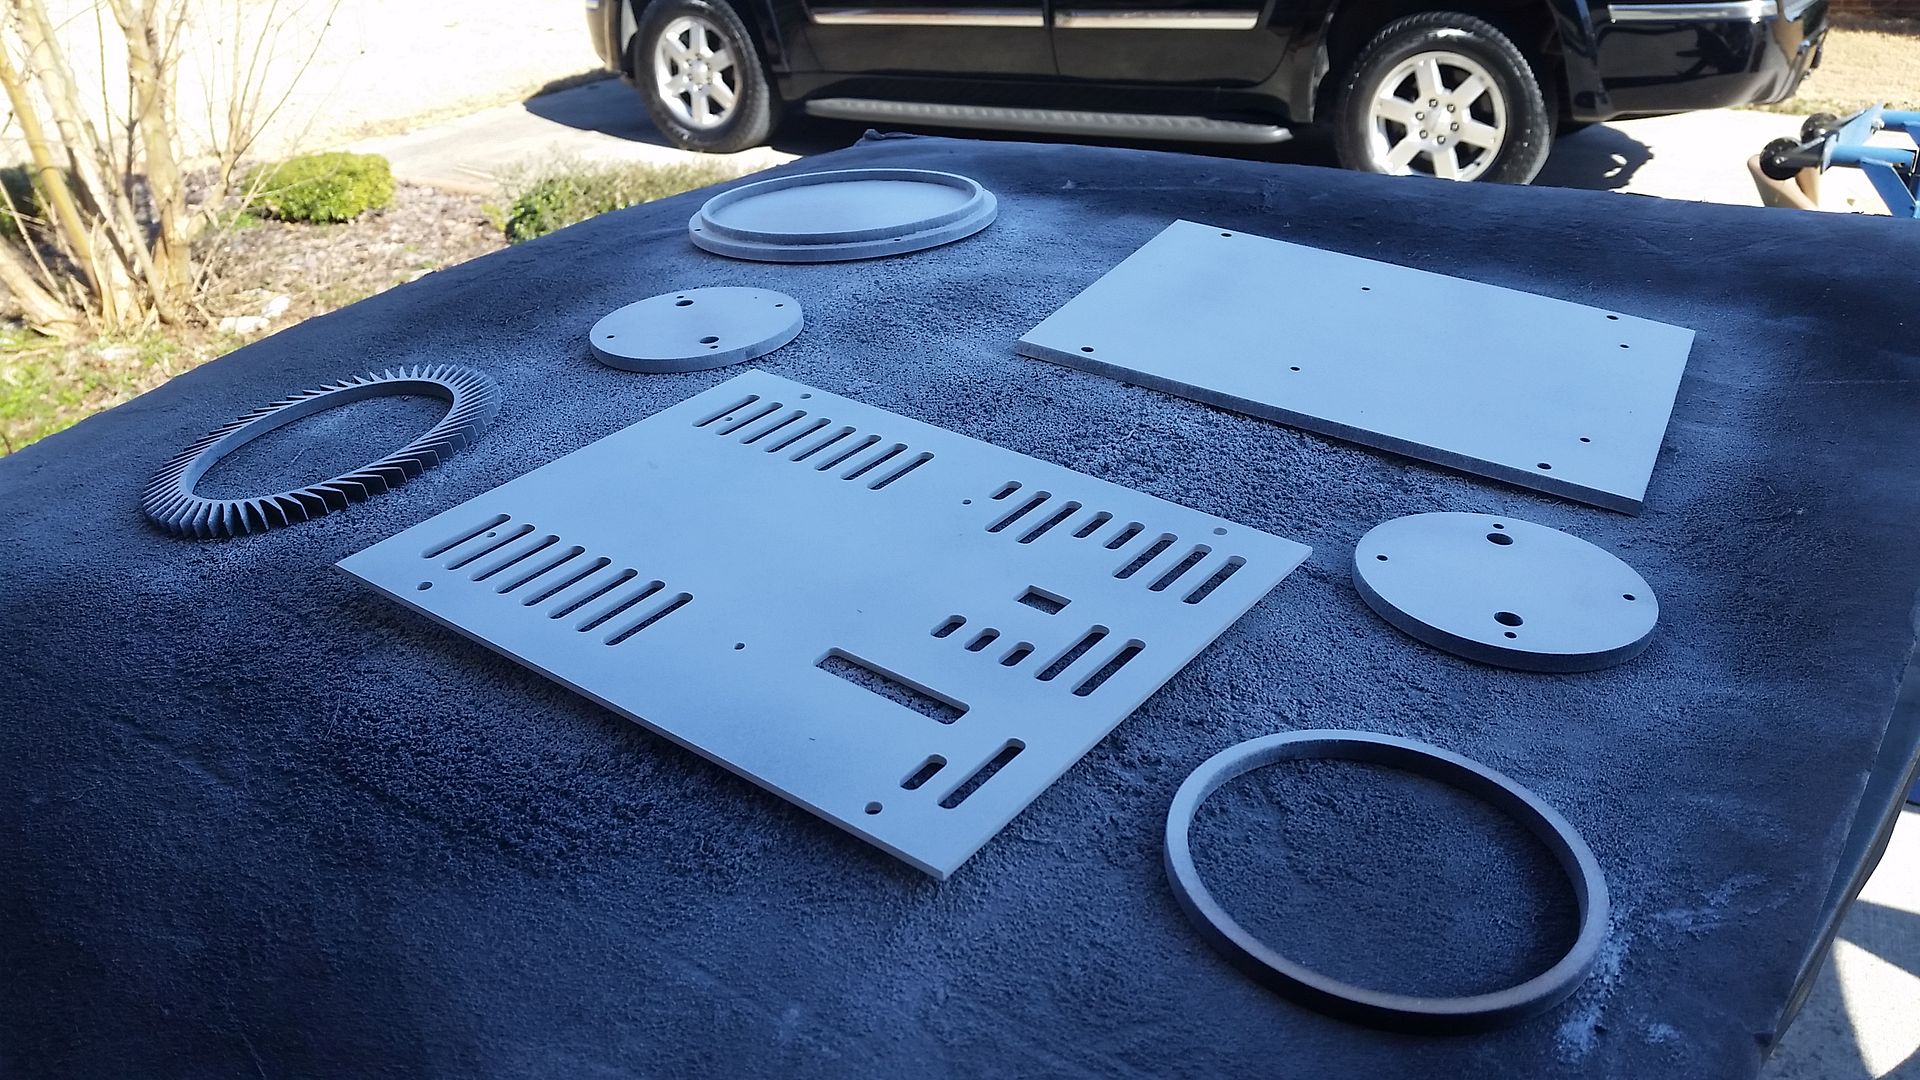
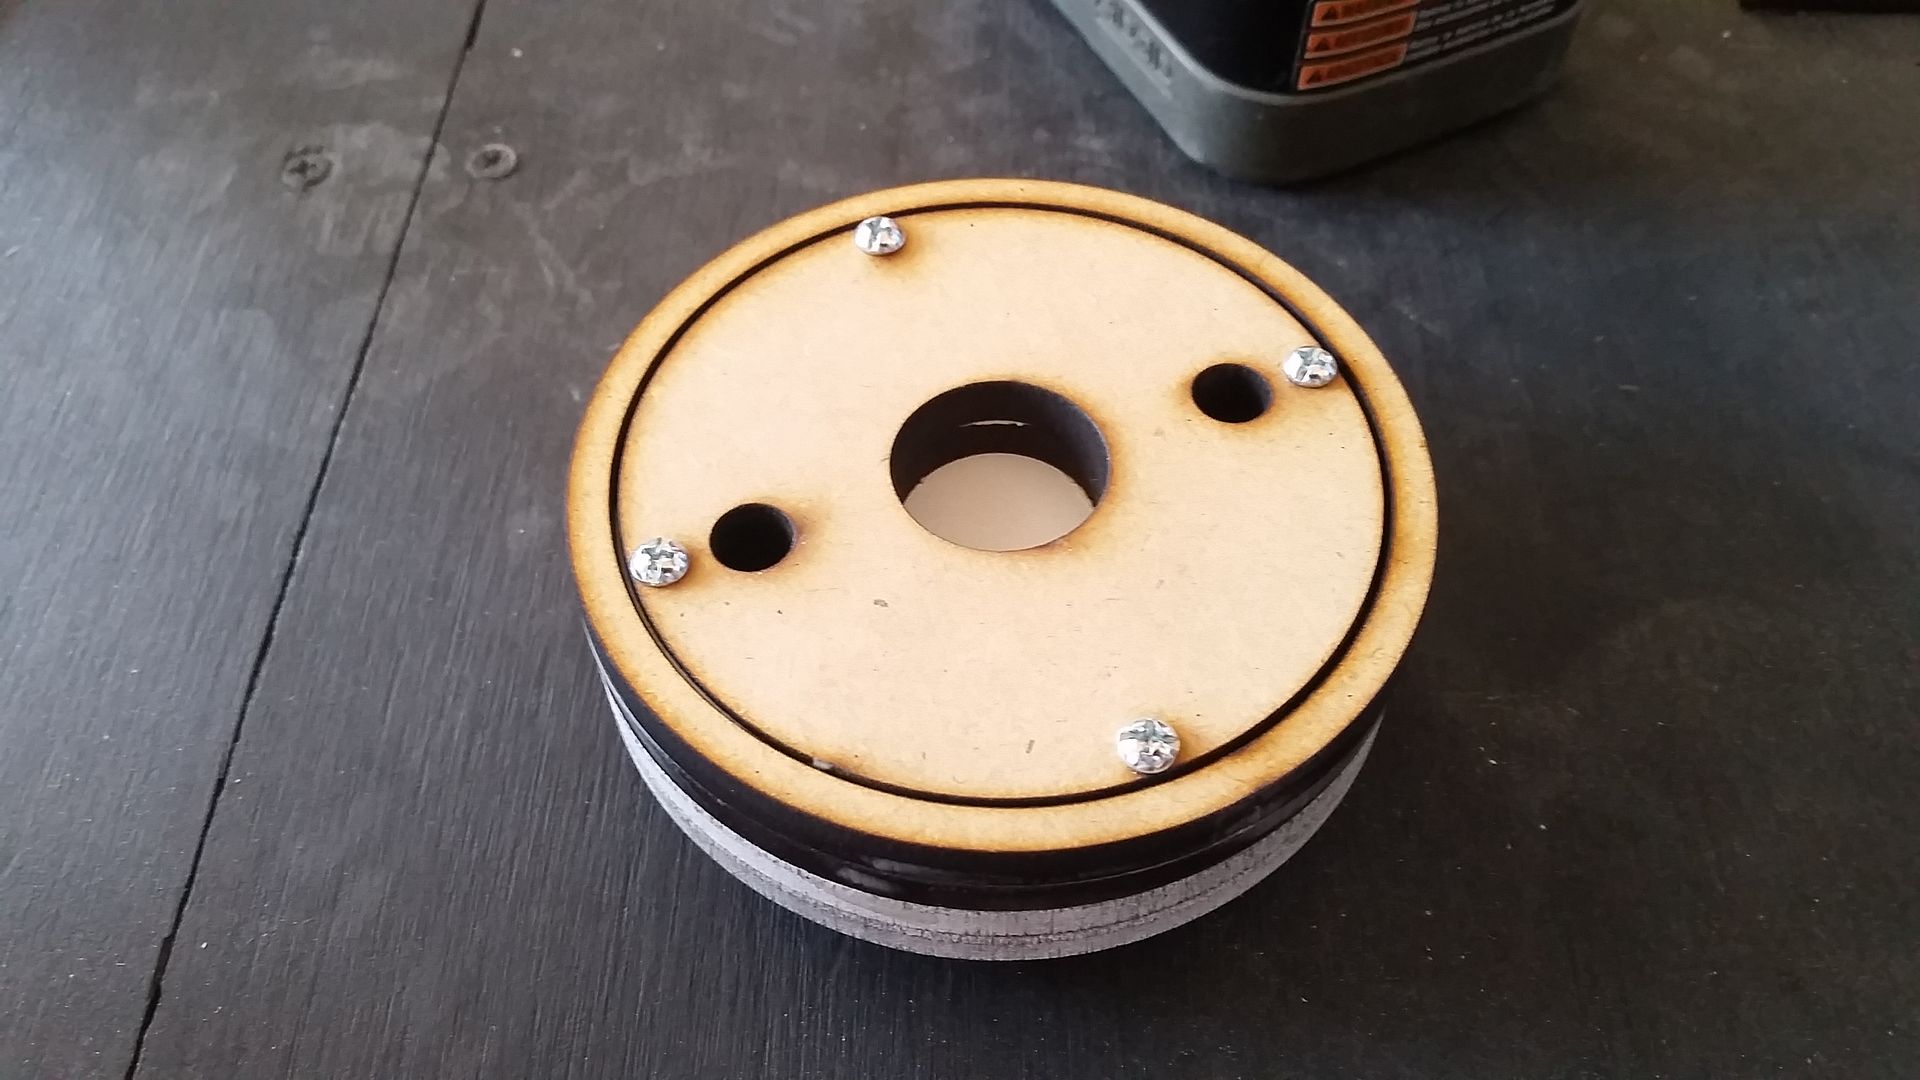
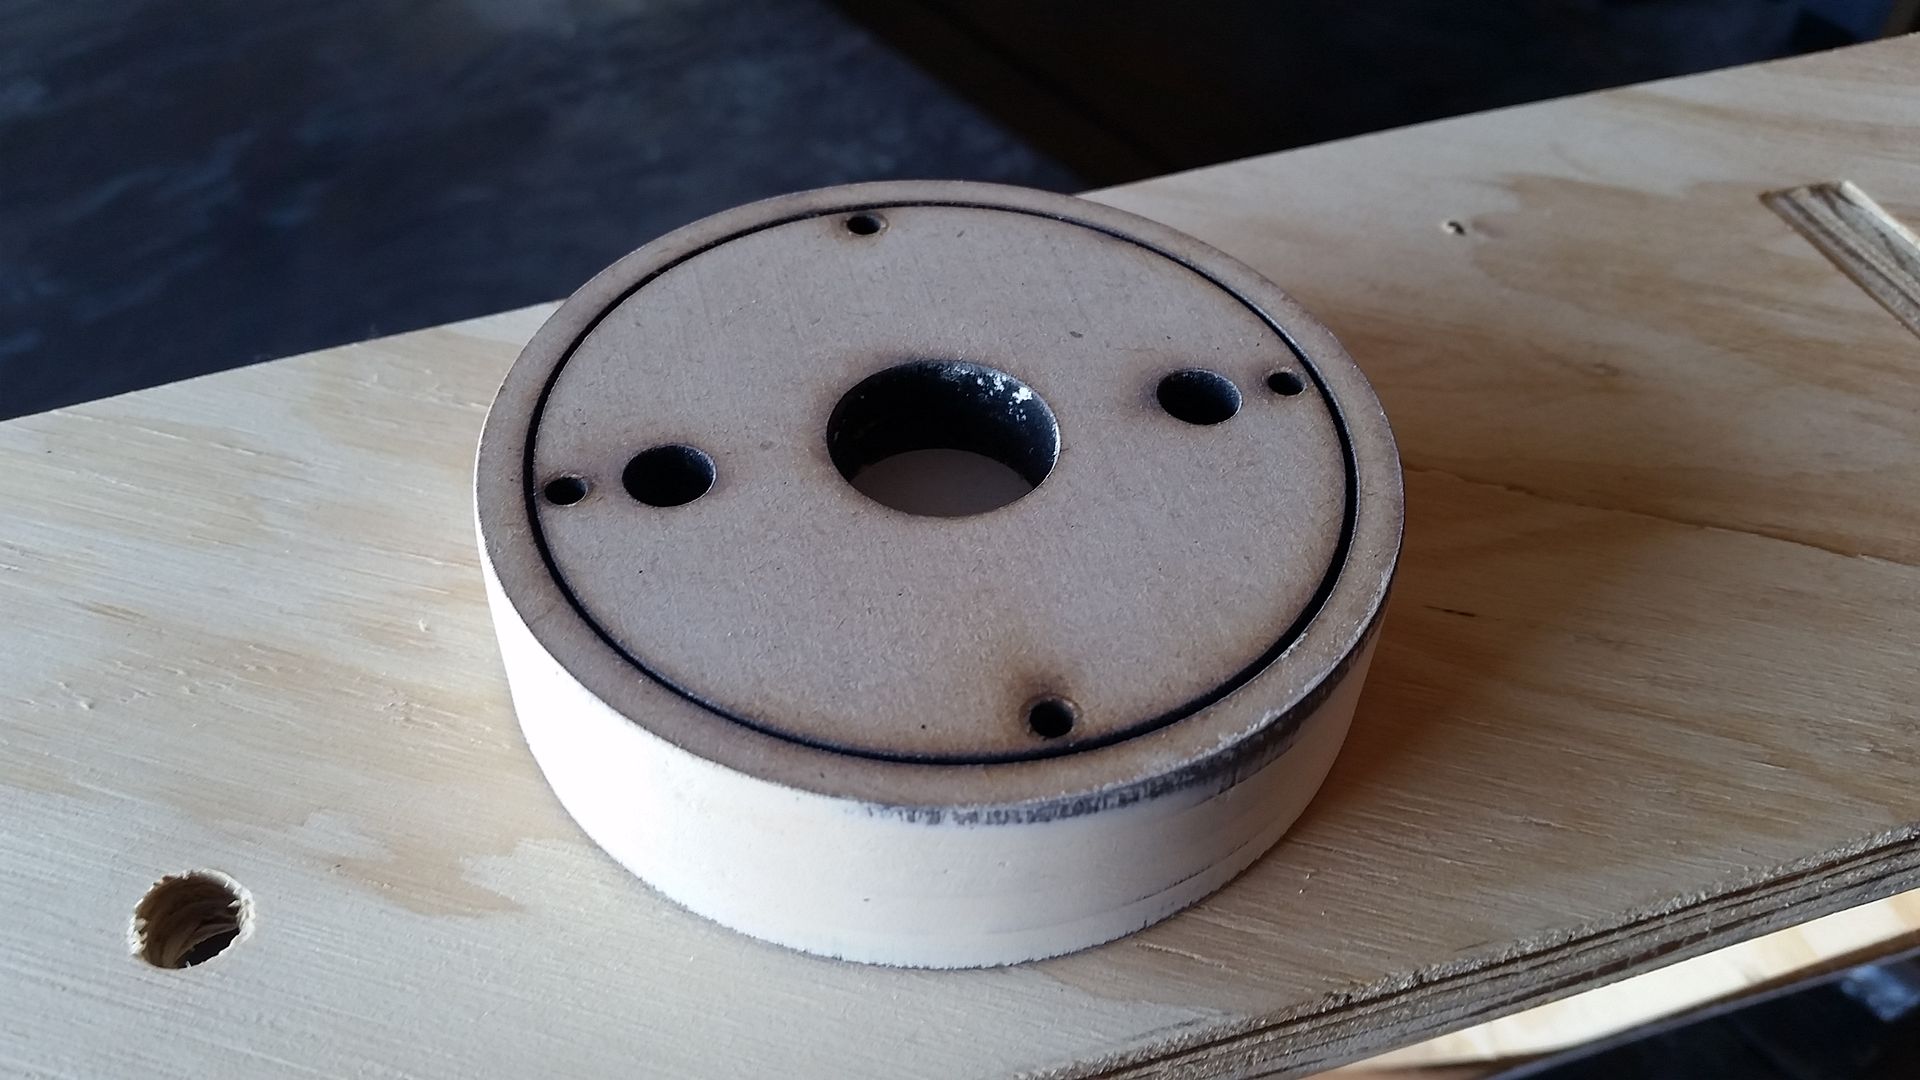
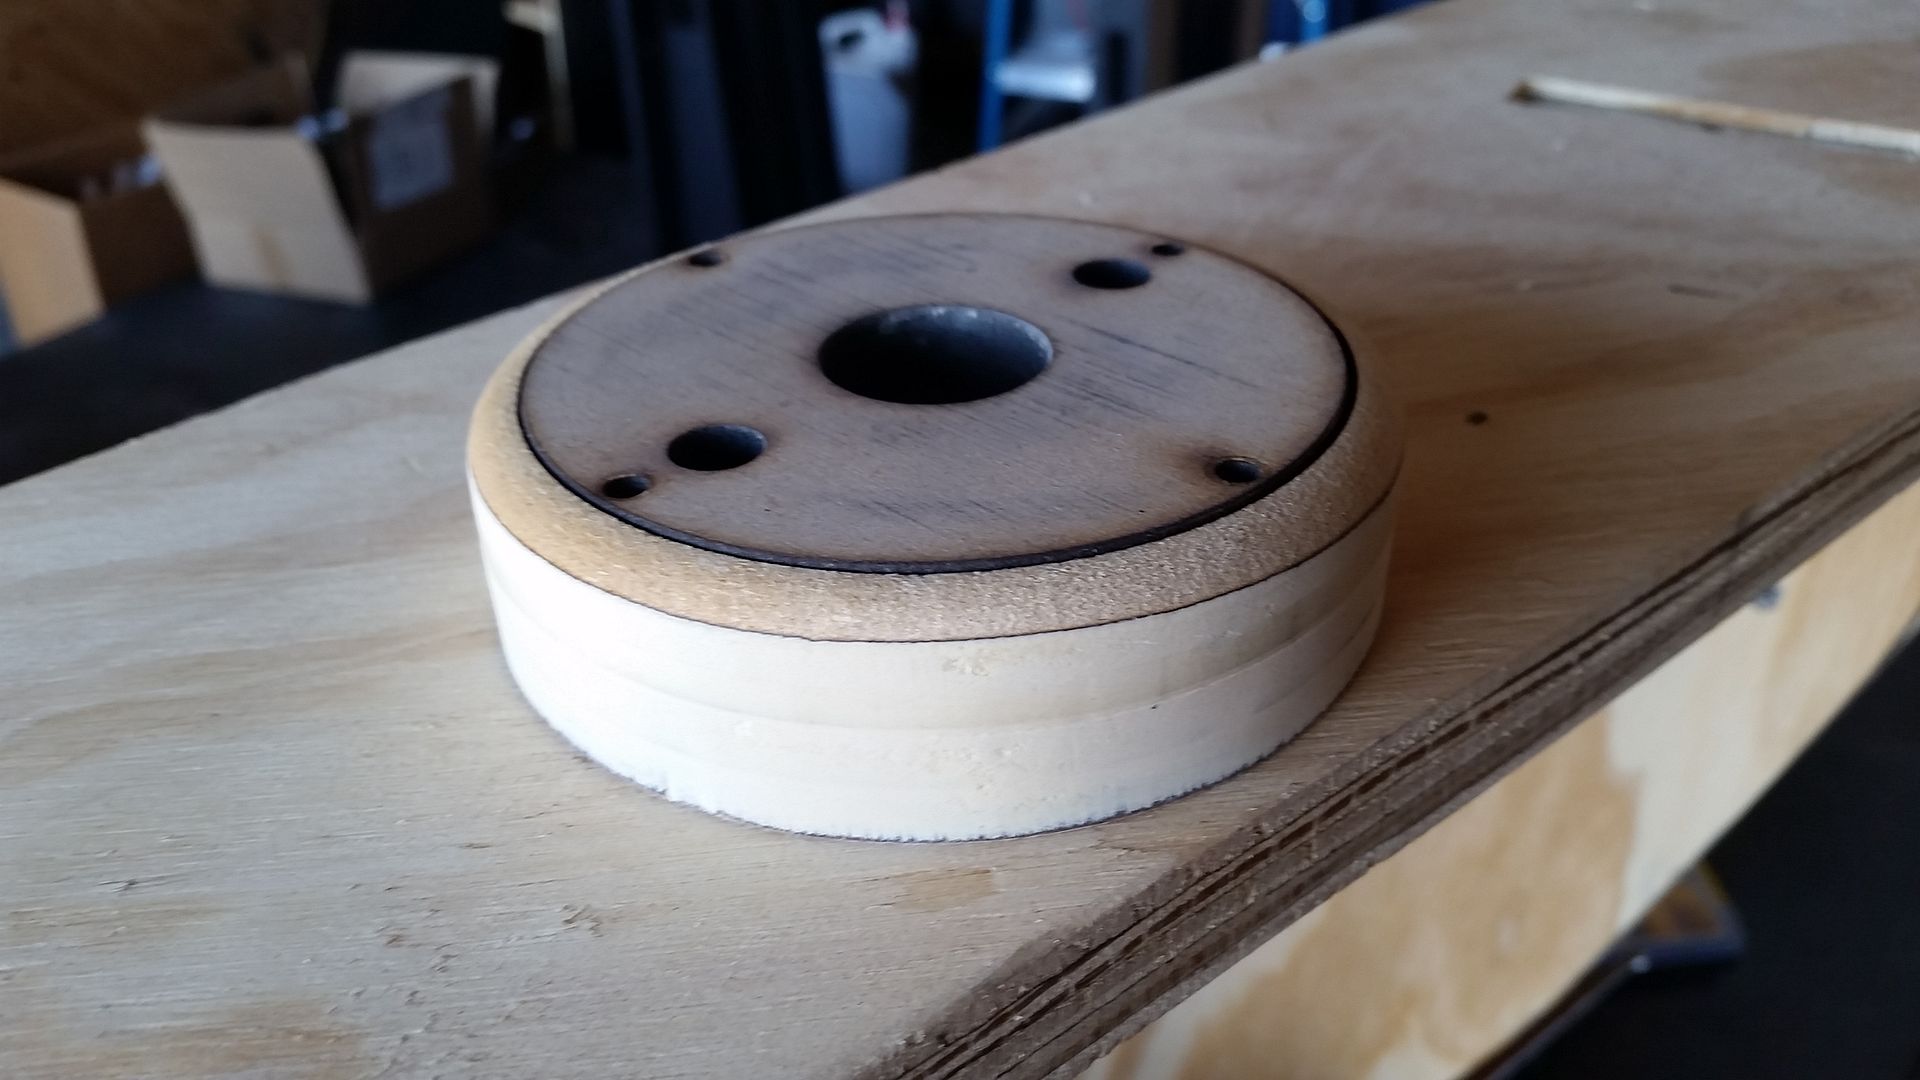
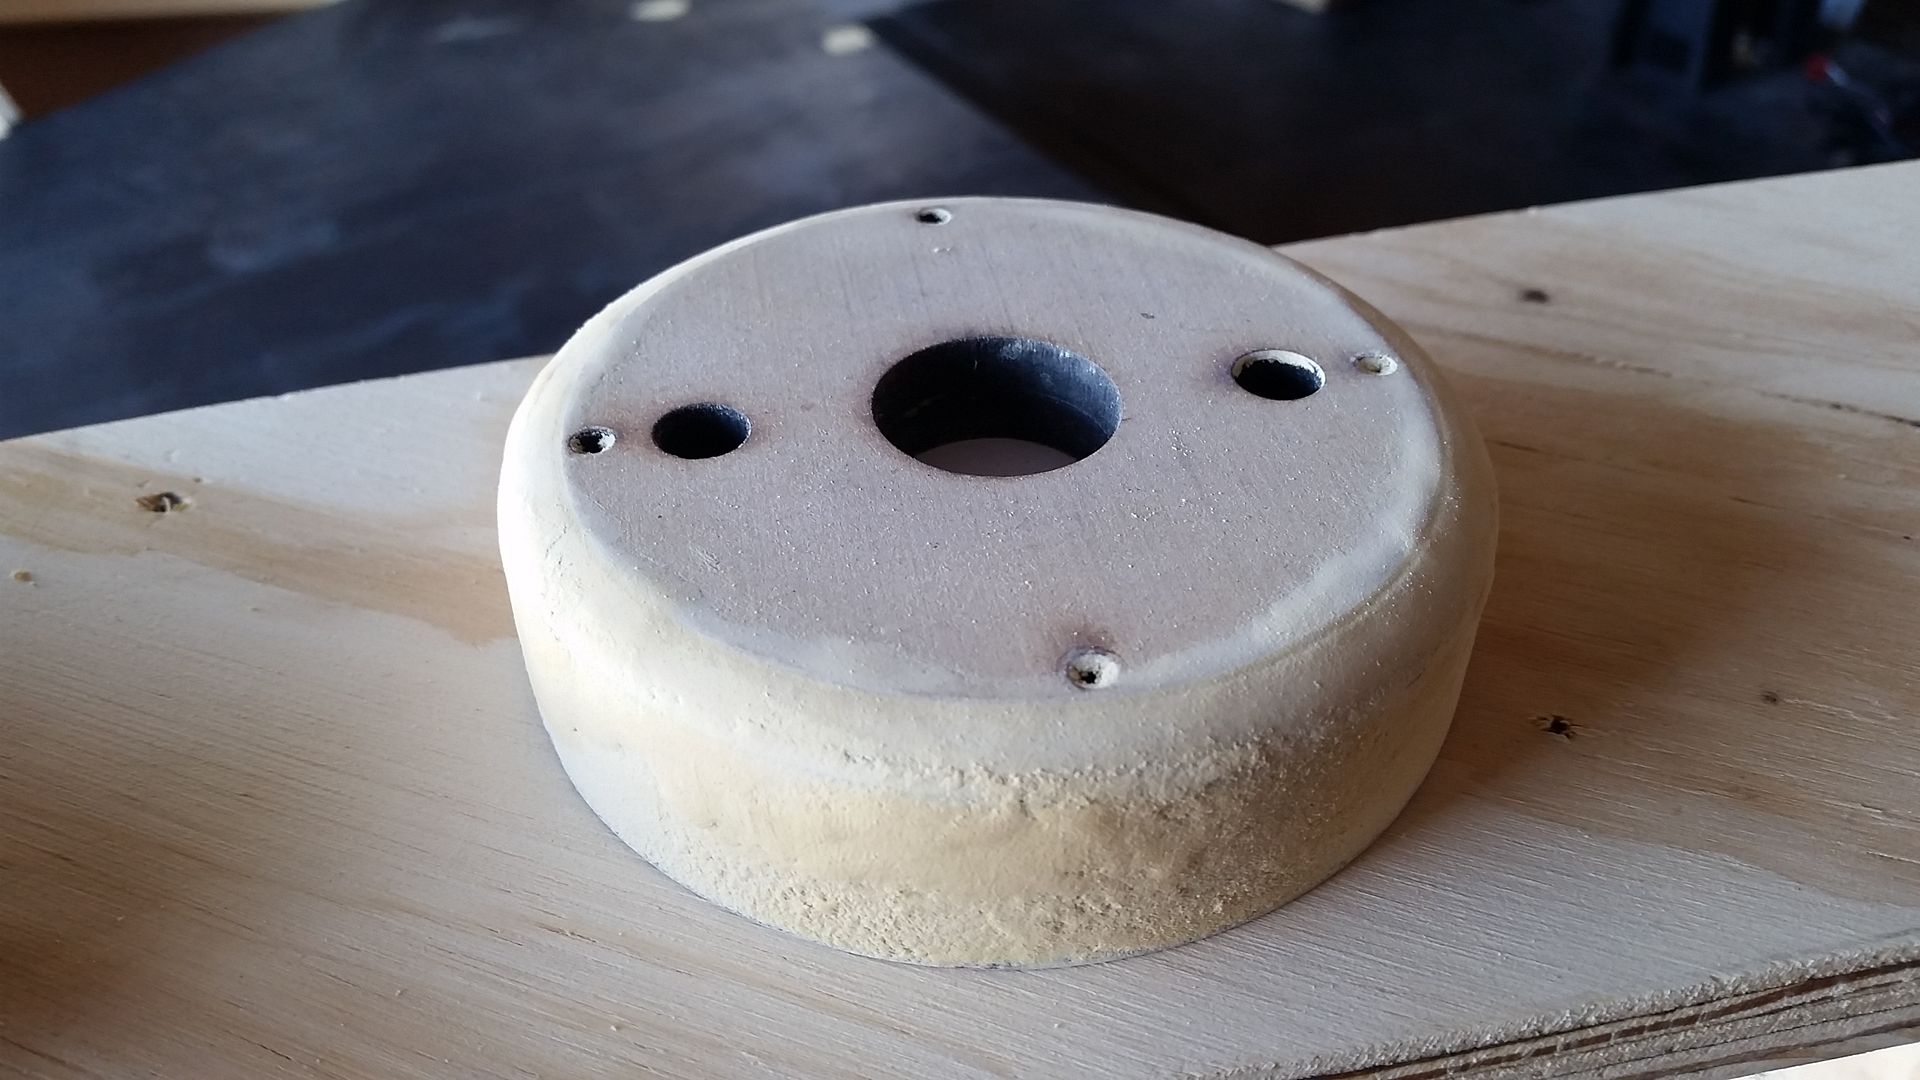
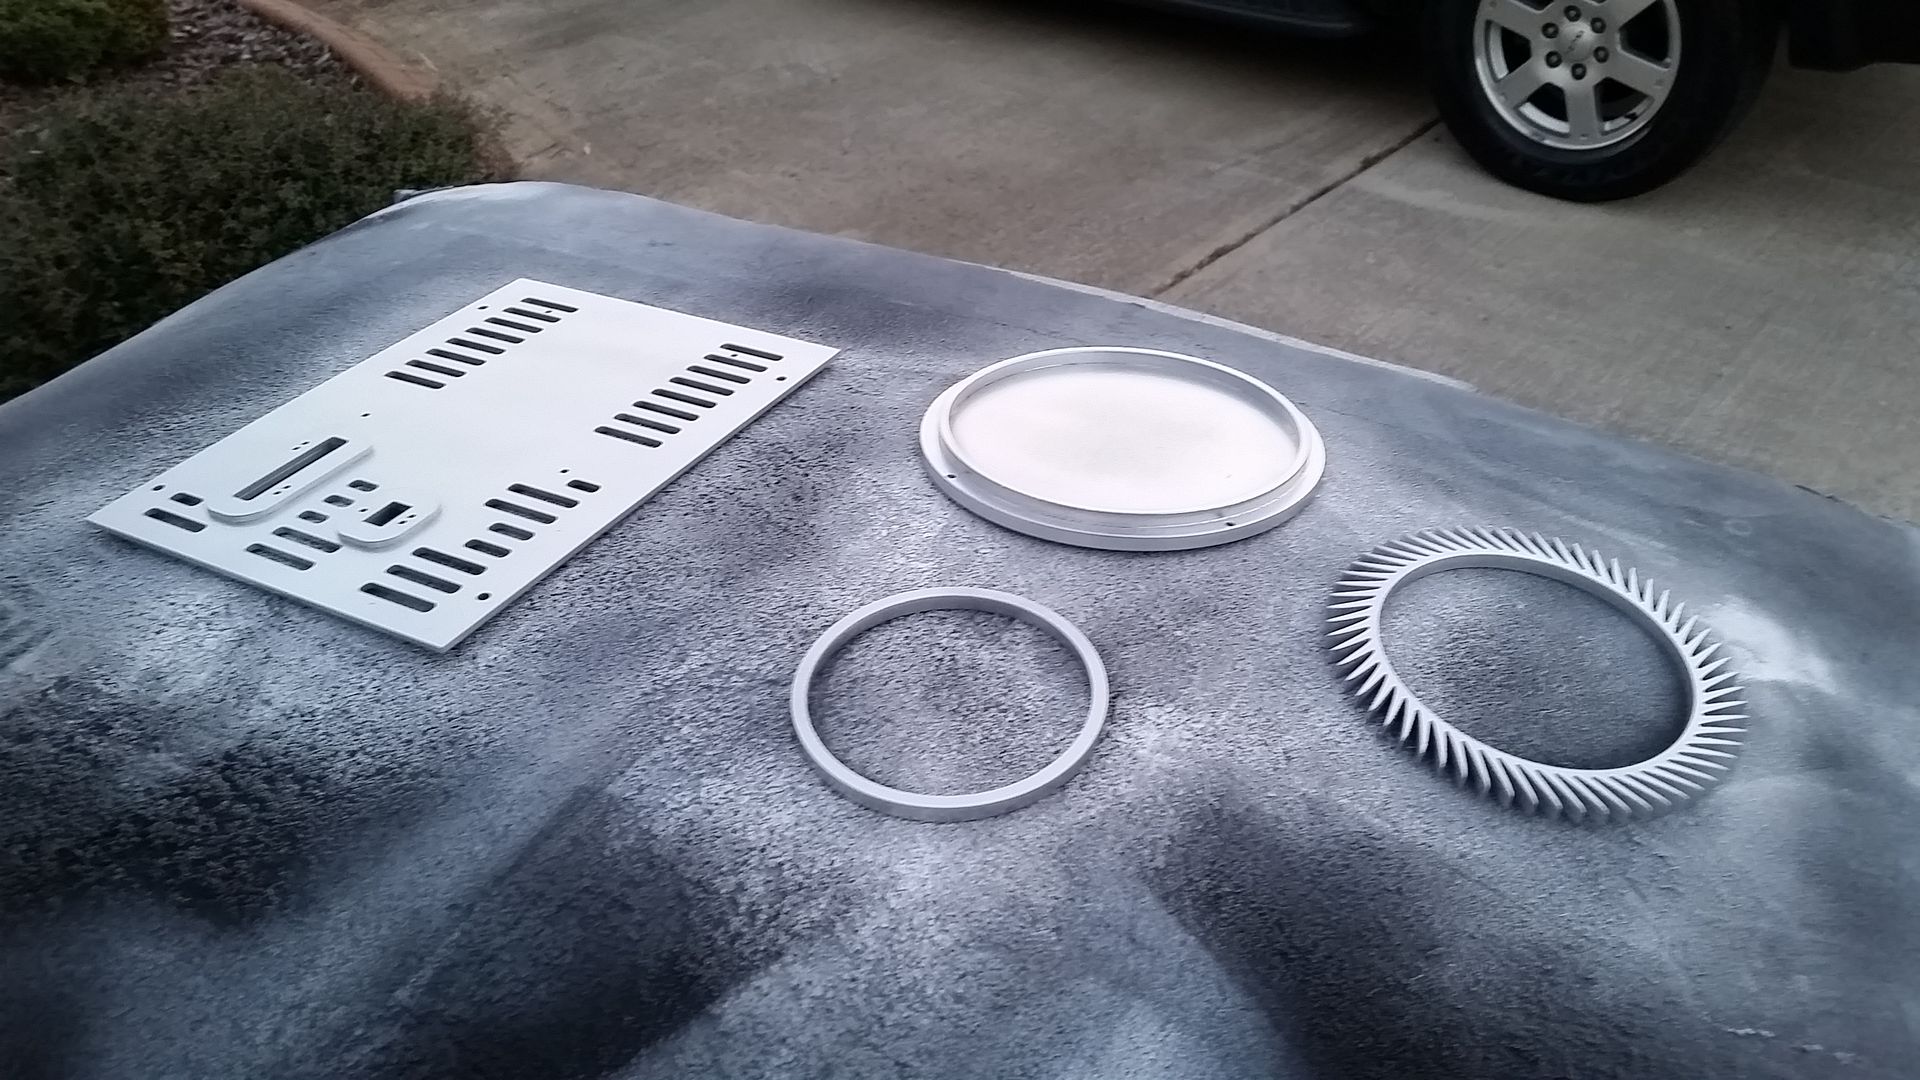
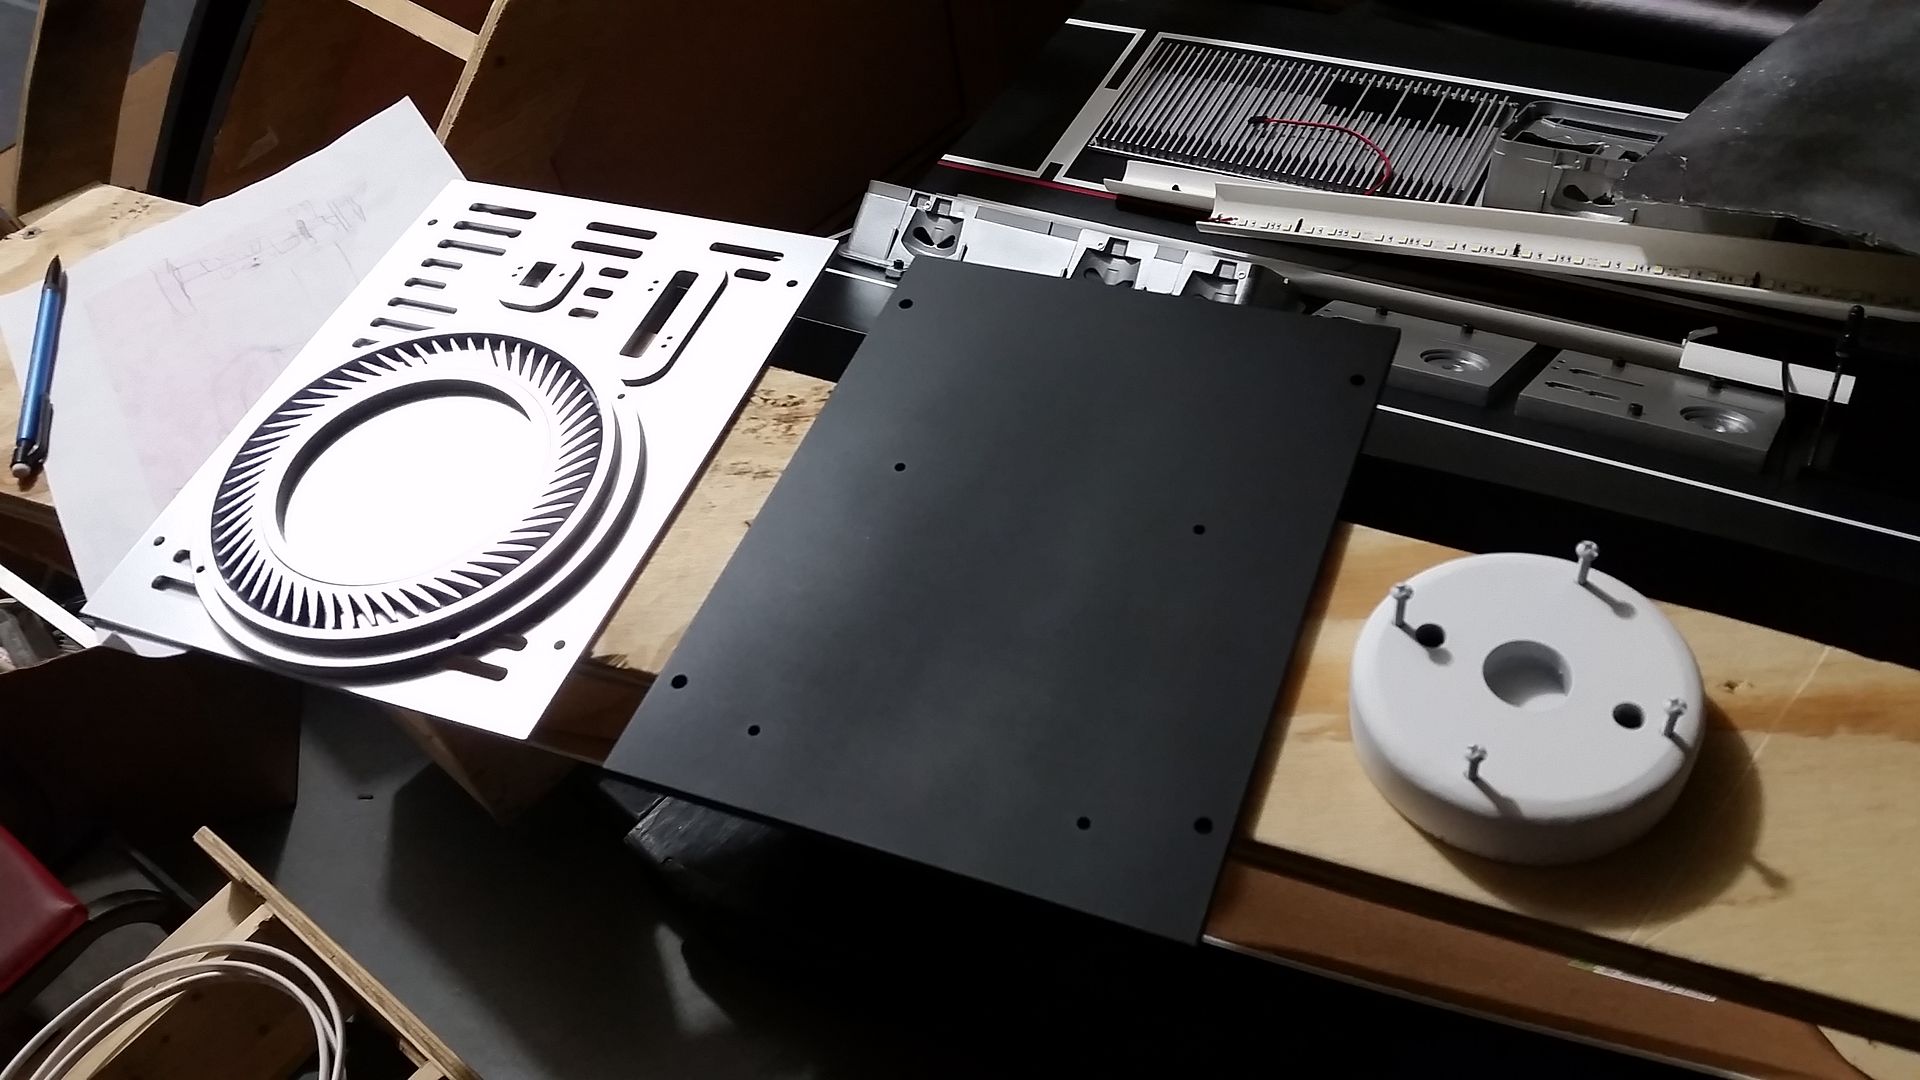
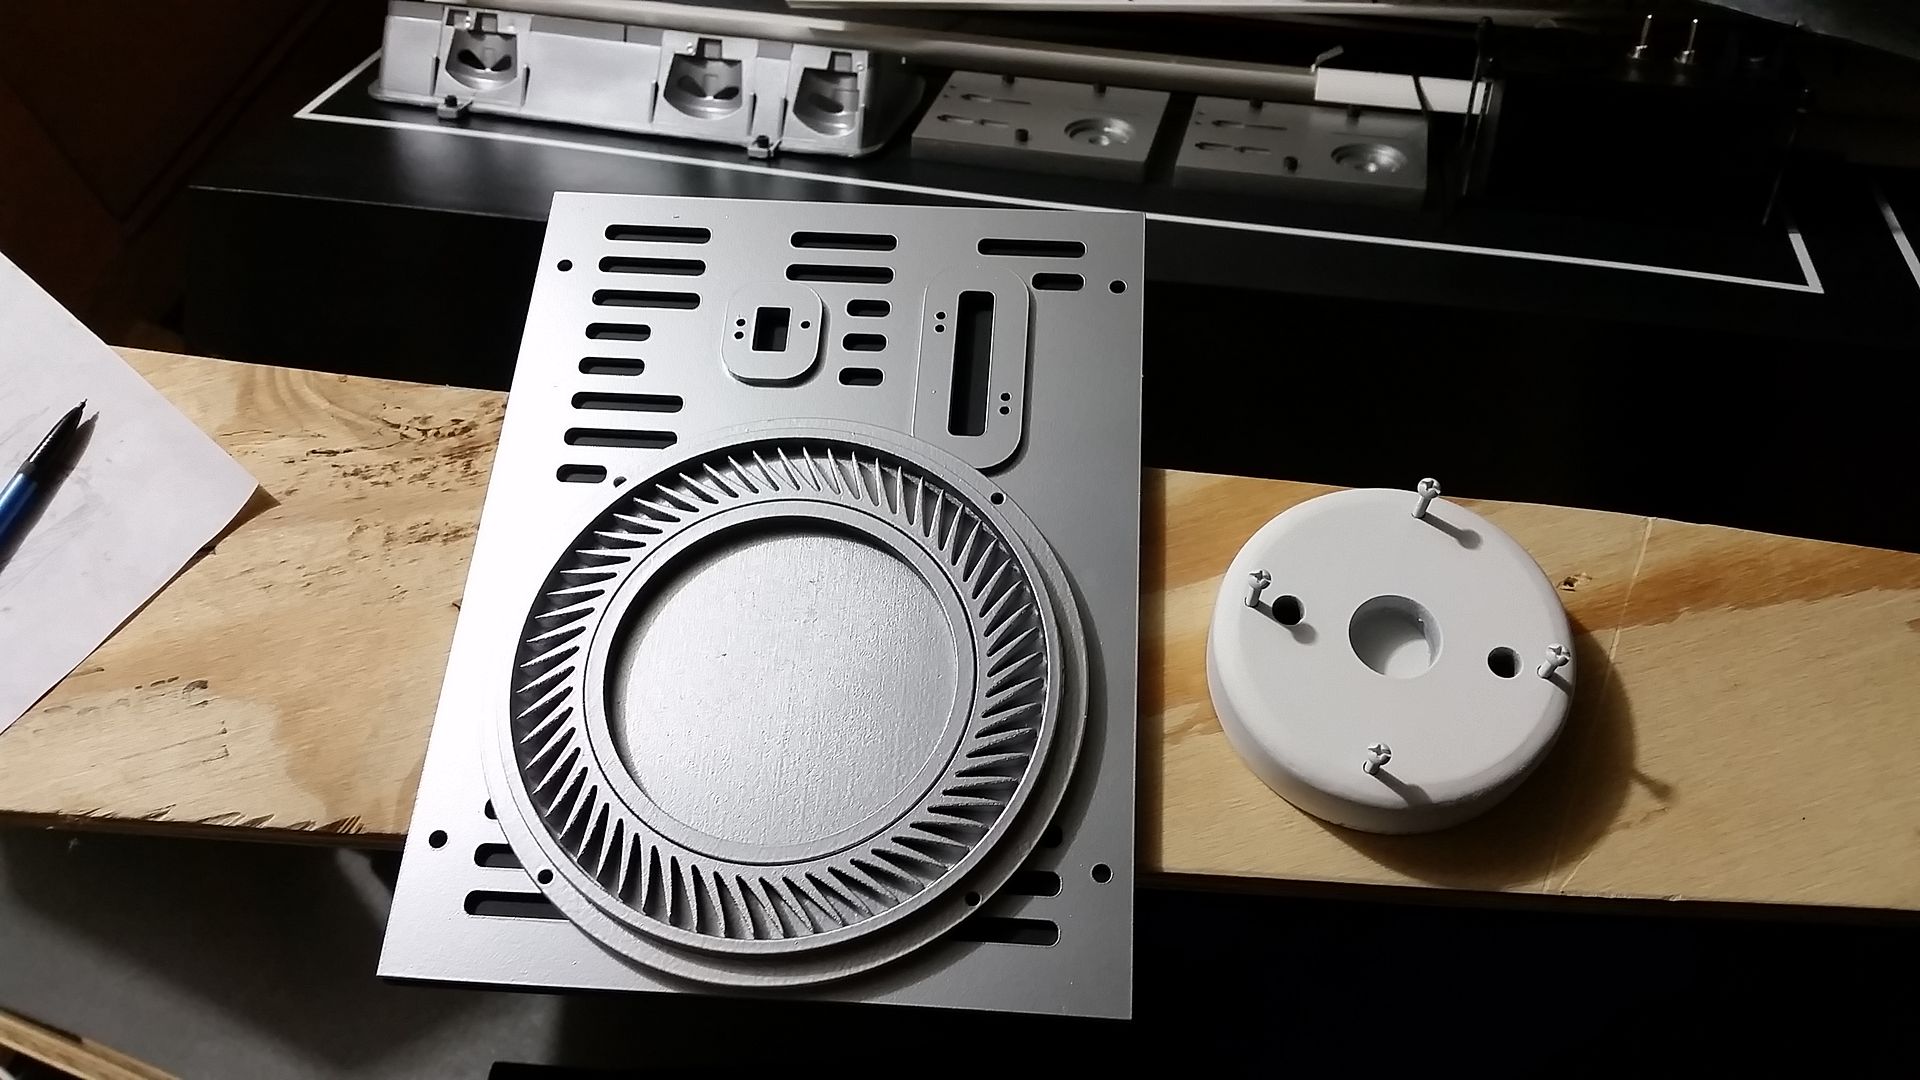
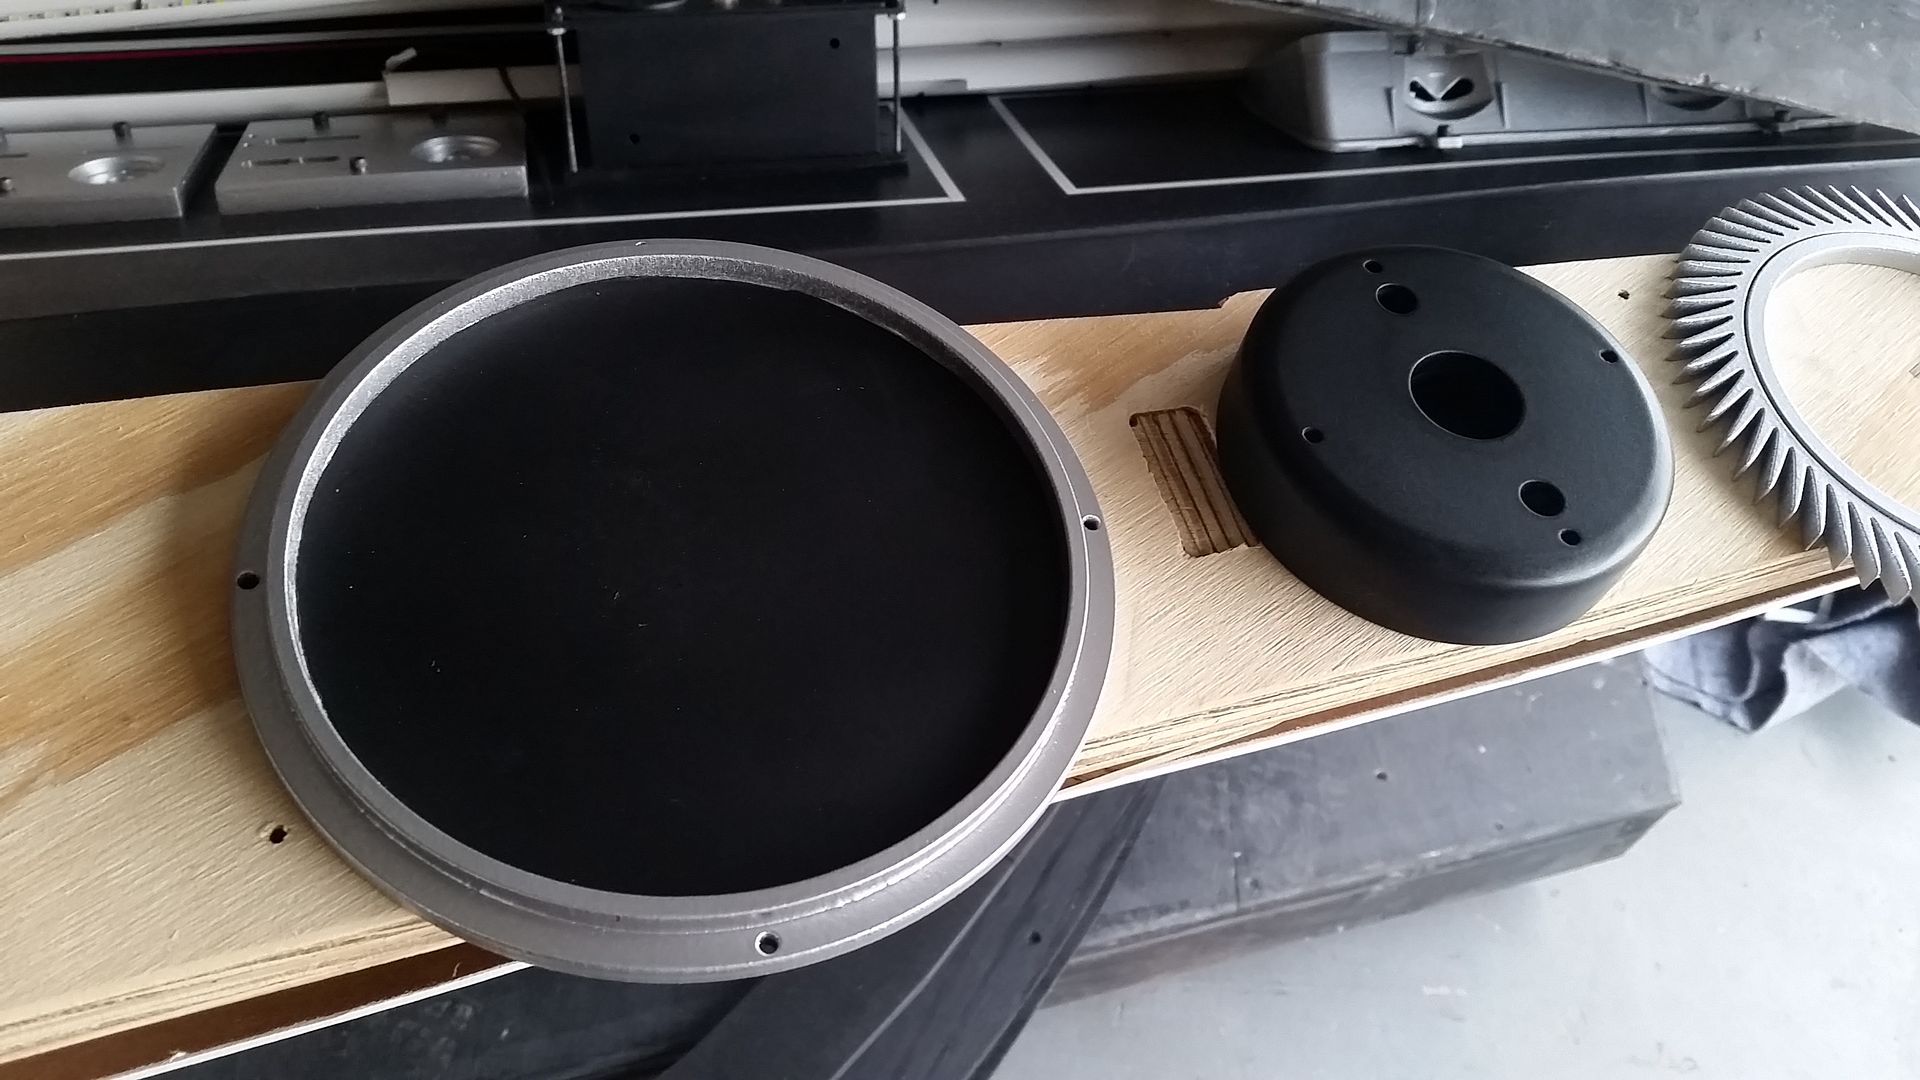
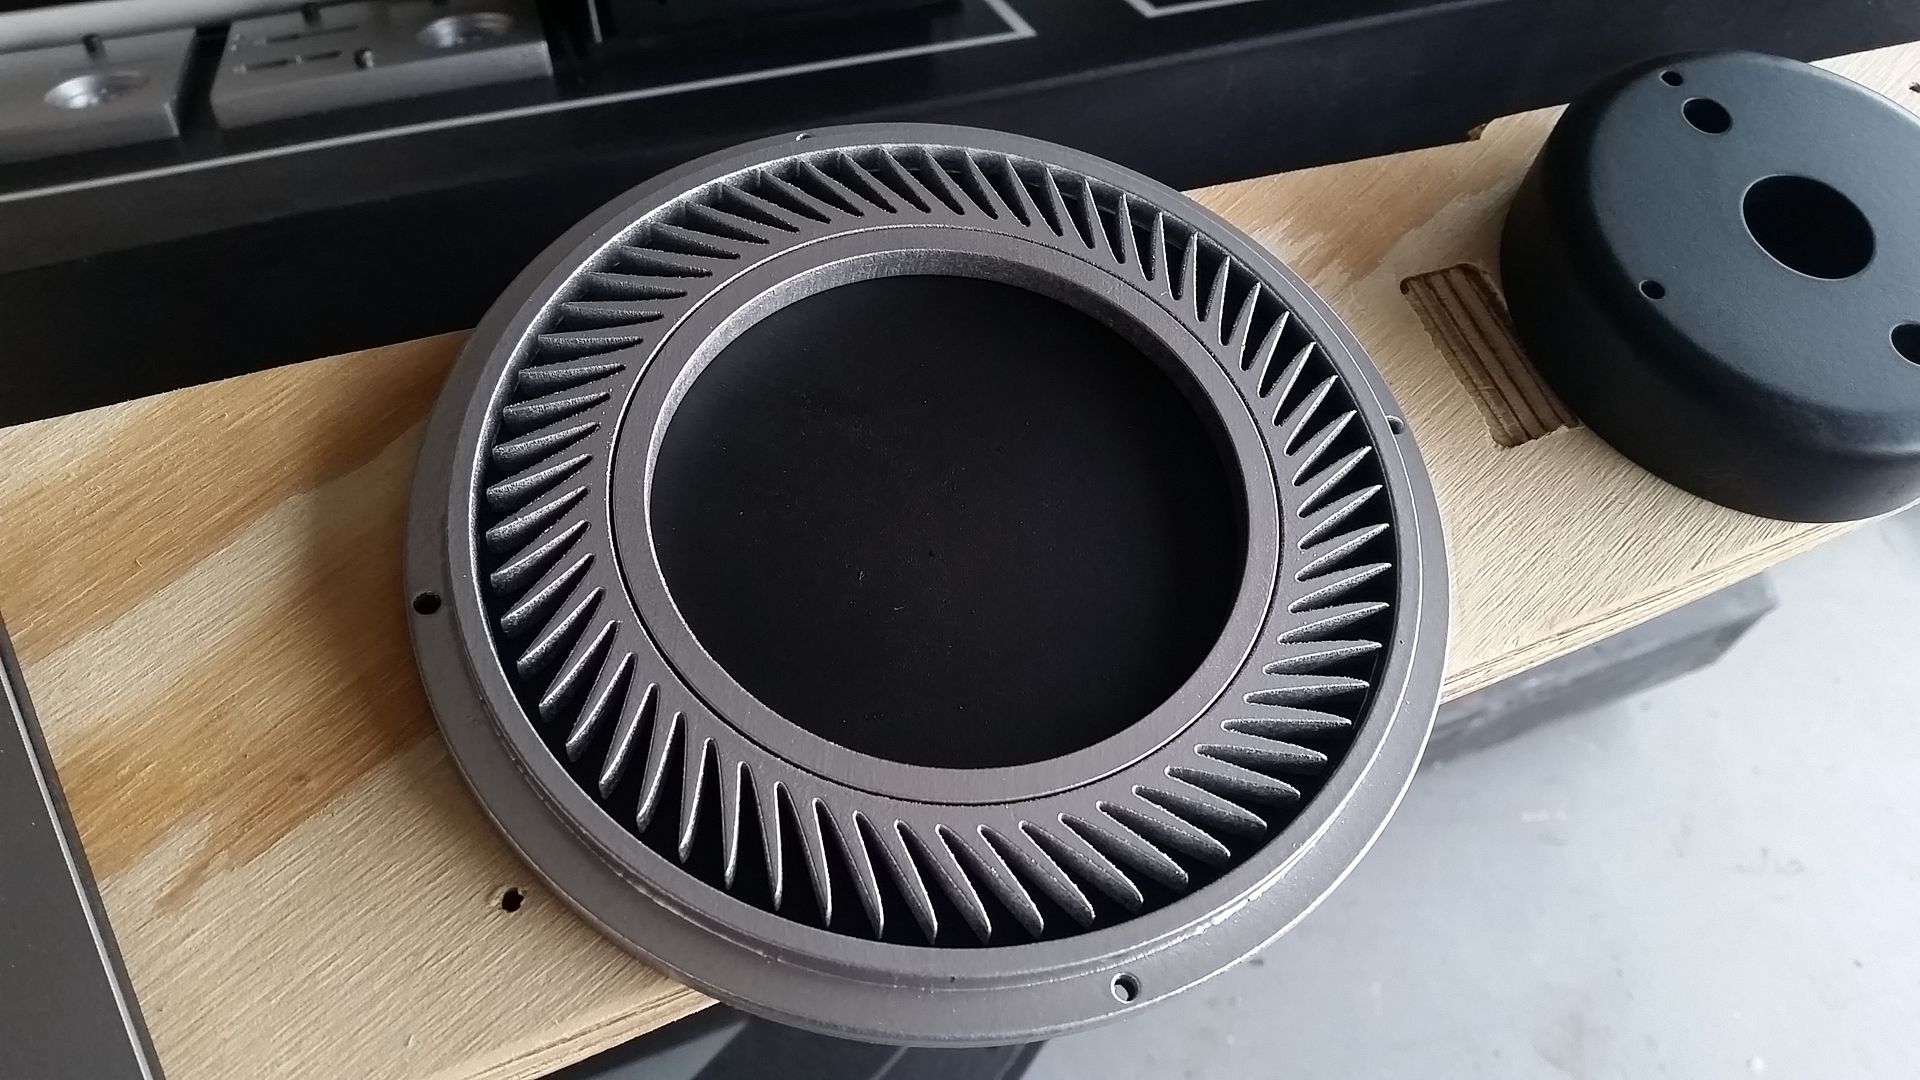
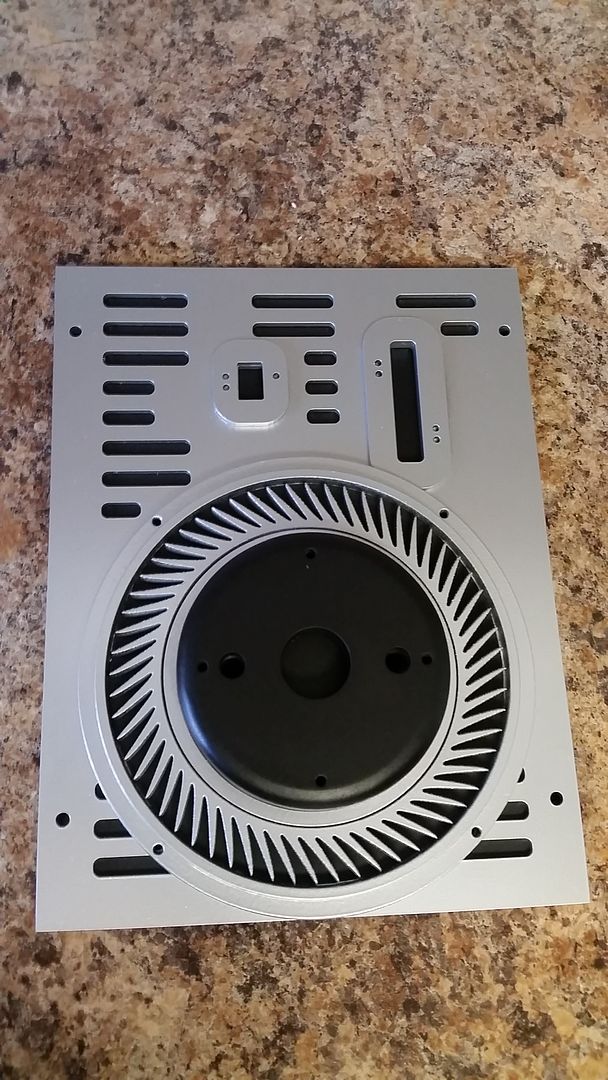
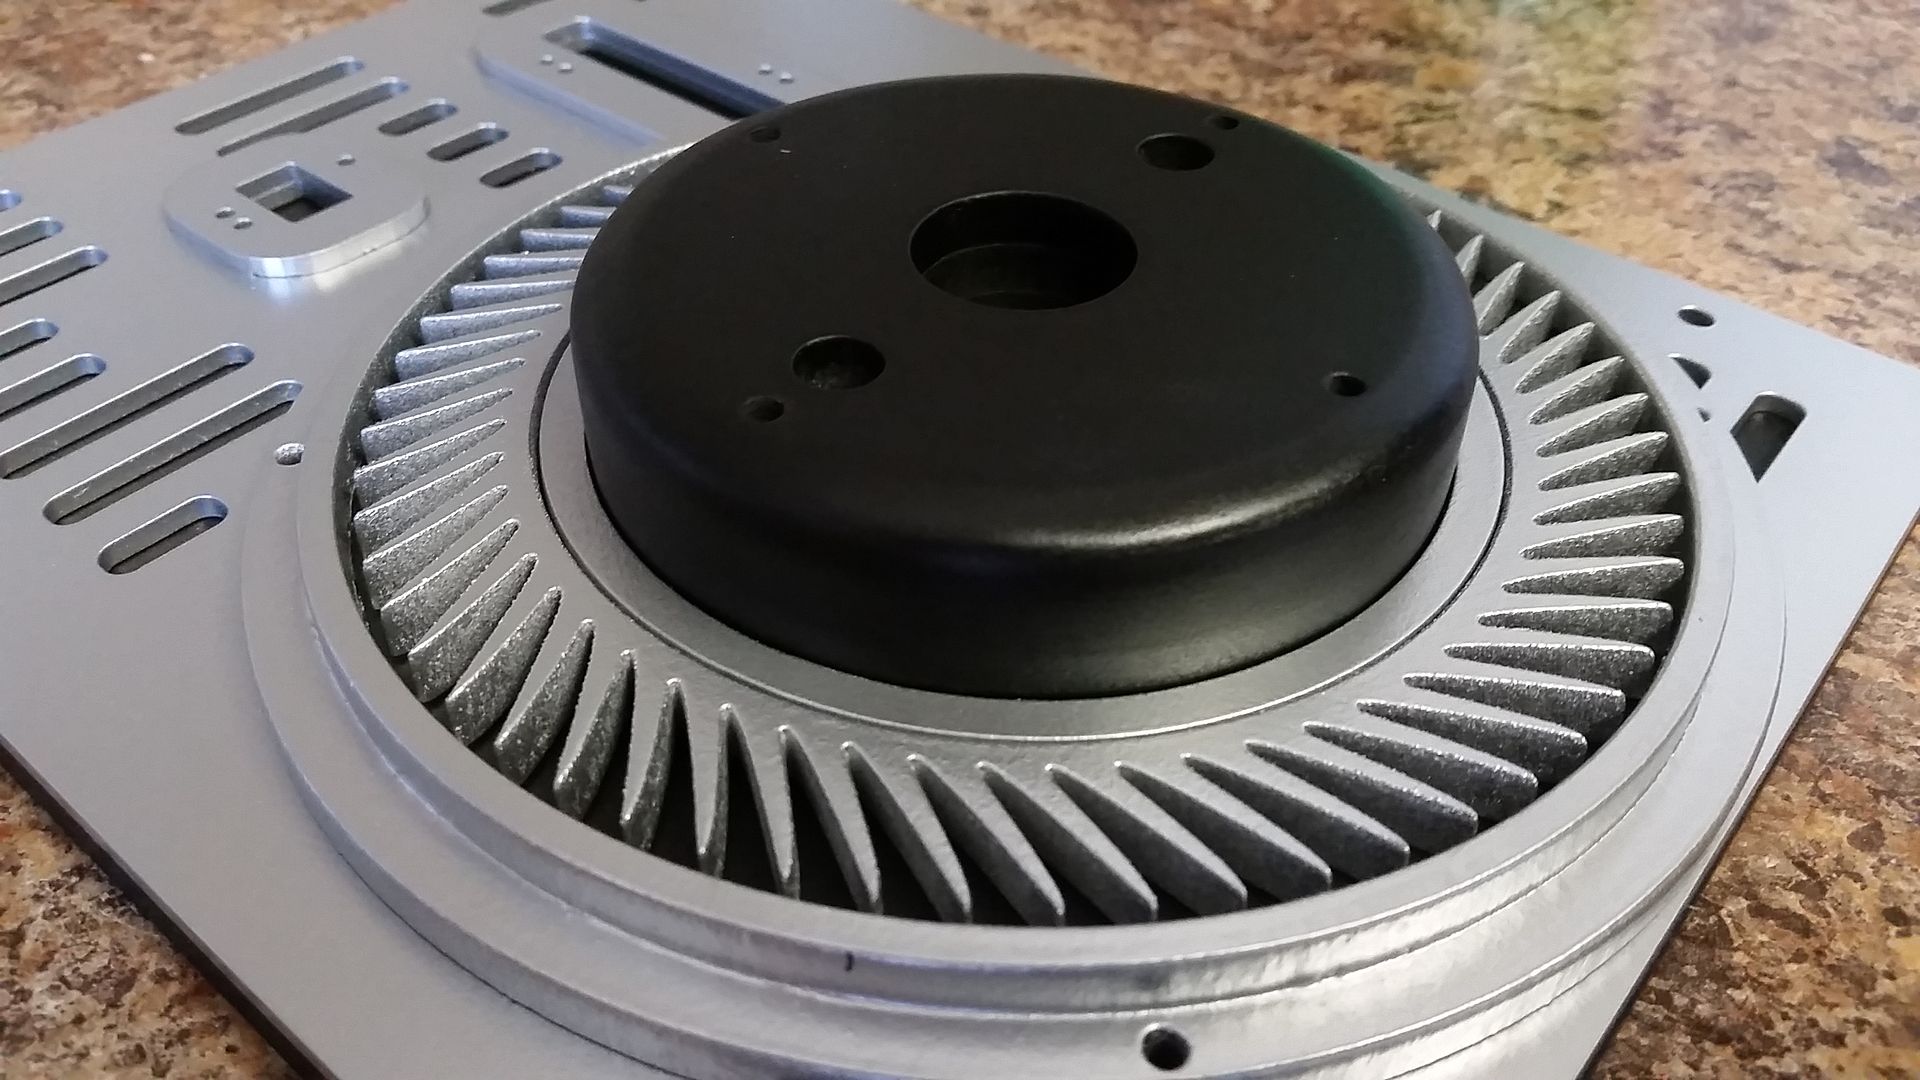
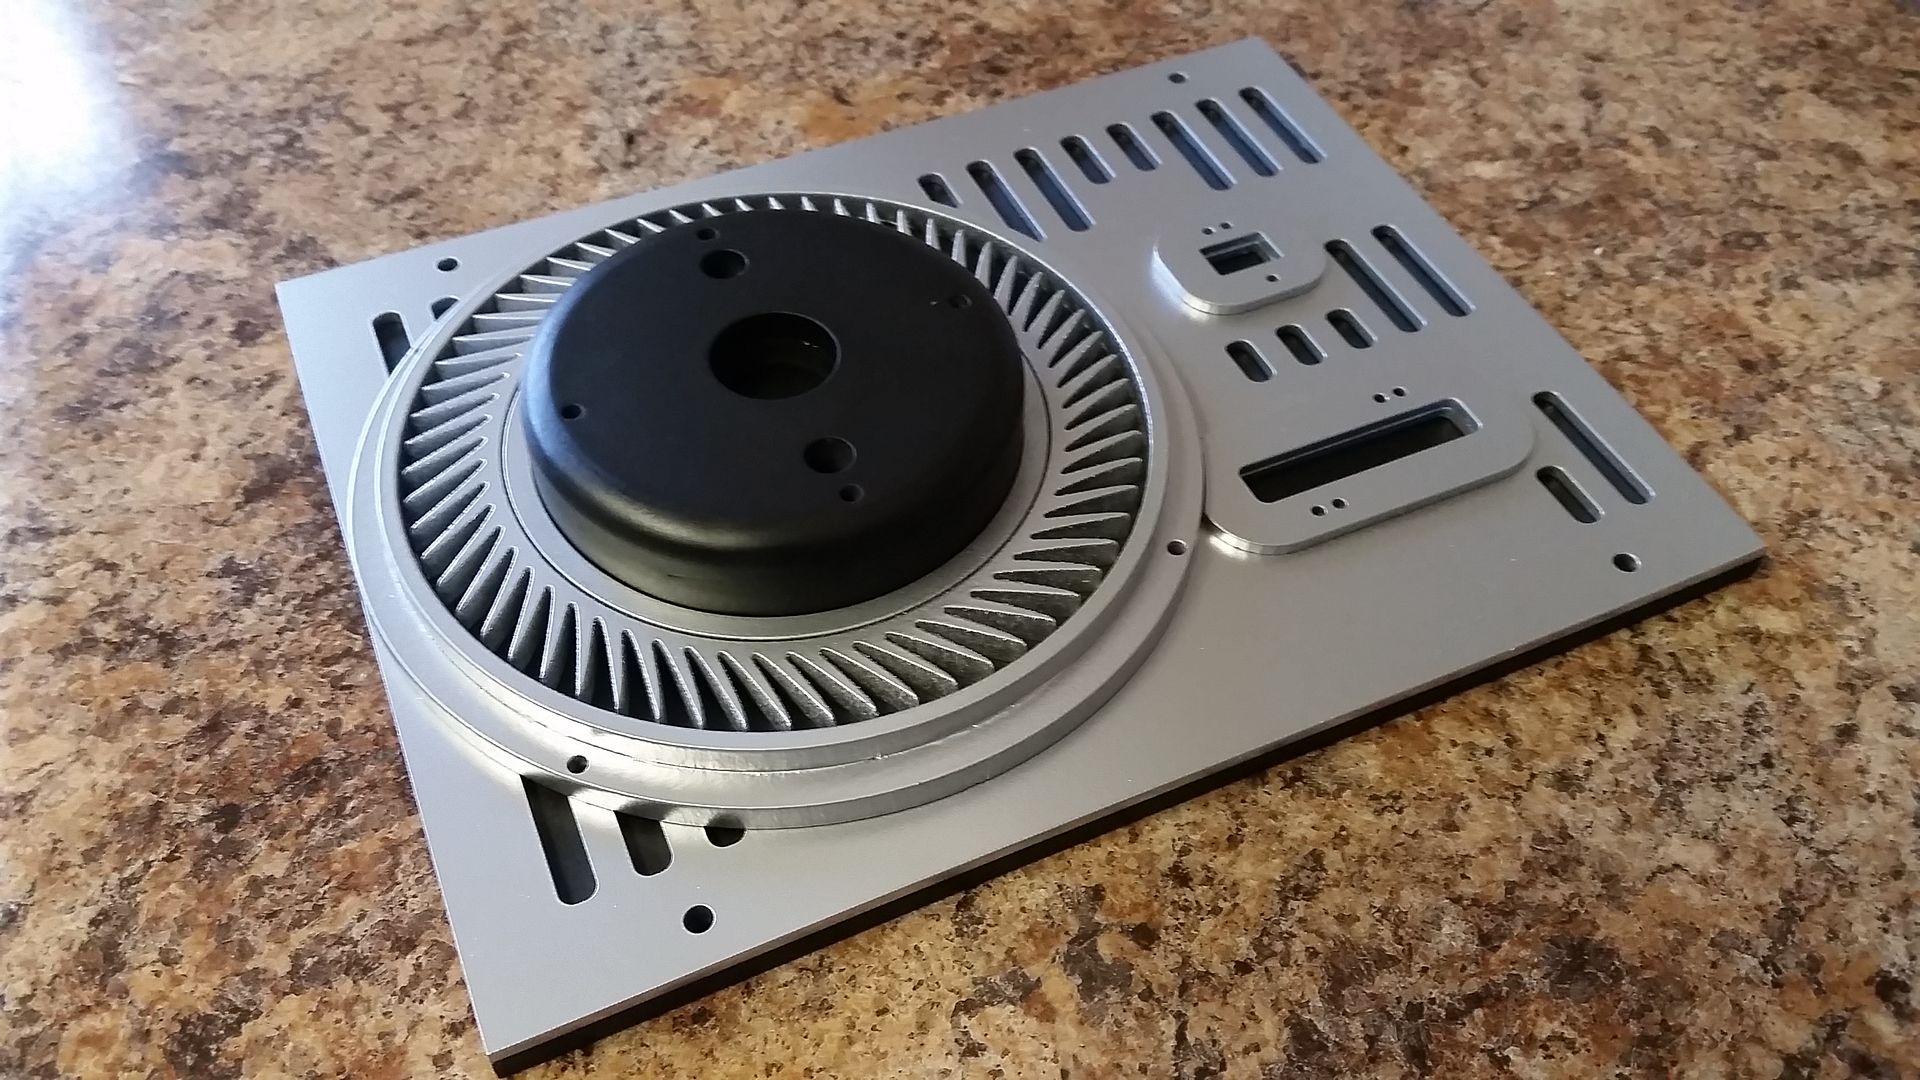
Thank you, my friend! The garage is a huge pile of MF right now. I have to do several things before putting the cockpit back together. One of them is FINALLY redesigning a new platform. The current one works but it's WAY too heavy. So there is that and the new CNC pieces that will add vertical stability to the main panels. And then of course the new Volvo panels and back wall greeblies and all the associated pipes and wires that wonderfully grace the back wall!
Also, I found this image of the EPVII cockpit.. maybe you've already seen it but I thought this group would appreciate it.SK,
I'm beginning a similar build and was curious, what would you do differently if you were to start over? Like use formica?
HW
View attachment 582275
Hate to say it but you may have to break out your welding equipment and got with square stock metal framing for the flooring platform. Will provide enough stability and be 10x lighter. Time to dust off the ol welding talents! LOL
Ok Greg.. been pacing myself... am at 234 now... Am I gonna have to start again or are things gonna start getting violent around here!?
That's a great page! Lots of pics from our last Geek media Expo show! I personally like page 249. Other than page 1, that's where the fun and chaos really began!
Not to mention that was when you did your first scale mock up! 143 was good... but my fav so far was when you discovered the difference in the top panels from ANH to ESB on 74... was a major good find and totally changed the dimensions of everything!

Thanks Sofa, I feel all warm and fuzzy seeing the Pit nestling in you garage again, and more greeblies too, can it get any better on a Monday morning!
Good to see ya back my friend.:love
Roughneckone:cool
Oh sweet mother of greeblie goodness! AHHHHHHHHHHHHHHHHHhhhhhhhhhhhhh... now I can face the day!
Great, I look forward to the Pit having an actual cockpit canopy, that will be awesome.This week is going to be fun! OperaScot is on his way for a visit and he's anxious to get started on the canopy
Great, I look forward to the Pit having an actual cockpit canopy, that will be awesome.