1/700 & 1/350 scale BH Cygnus builds

Yes, my armature is complete. I made the plans up on paper(old school here) and had the acrylic parts cut out at the local lasersmith's. Then it was simply a case of drilling and fitting the parts together. There's no hardship in creating the parts. Just make -up a box to fit the hollow in the bow. I can't remember the overall dimensions I used, but it's just a case of holding the front fuel pod section against the upper bow and measuring the hollow. Once you've got the width and length, add the lower bow-hold both parts together with a rubber band and take that measurement too. By that point you'll have the dimensions of a rectangular box. Next,assemble the main spine armature(do NOT glue these parts-use rubber bands), then slide the front section of the main body onto the armature. You will see the armature does not fully fill this section. The gap is the part you need to fill using the part you have previously measured for. If you've drawn up a top-down plan for what you've already measured,just add a box to the end of the one you've already got. Then go get all the parts cut(not forgetting to mark holes for the lighting and screw points).
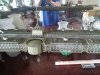
Some more progress pics.
This is as far as I can go now.
I need to get a proper stand organised before I can go ahead and fit the rest.
Also, it'll be a couple more weeks before I get the antenna parts etc.
Enjoy. 250517a.jpg250517c.jpg250517b.jpg250517i.jpg250517d.jpg250517g.jpg250517f.jpg250517h.jpg


On a different issue-why do my pictures never upload the right way round?....
 
... You will see the armature does not fully fill this section. The gap is the part you need to fill using the part you have previously measured for. If you've drawn up a top-down plan for what you've already measured,just add a box to the end of the one you've already got.

Thanks for your reply and detailed instructions. The box part is not really an issue but the connecting part (box to mail hull). That is the part I am confused about. Can you show a picture of your armature at this point so I can better understand your instructions and what you did?

BTW your Cygnus build WIPs look amazing!!!
 
Unfortunately I didn't take any pictures of the box I had cut, but if you look at the picture I have uploaded, you will see the front of the main armature. Behind the armature is the 3d printed front section that slides over the armature. When you slide this part over the armature, you will notice there is a sizable gap. Measure this gap and make a smaller box,using these measurements, adding it to the armature end of the bigger box that fits inside the bow. when I say "adding it to ", what I mean is alter your drawing, so that this smaller box is part of the bigger box. You should finish up with something like the picture I've attached-roughly the size of a tape cassette box.arm2.jpg

arm.jpg


The smaller box then has holes drilled in it for attaching to the main armature, and passing wires through.
 
This is so cool and different from the usual SW or other Scifi models we are used seeing!

BTW am I seeing correctly there's a textured finish, I assume its from the print process?
 
Hi GF. Yes, there is a textured finish to the model. It's because the 3d printing process uses a laser to fuse tiny particles of plastic together, making each part. It's reasonably smooth to touch,but you can feel the difference between a 3d printed part and a styrene moulded part.
Any other textures are purely down to my painting,,,,,,:)
 
Re: 1/700 & 1/350 scale BH Cygnus builds

When you take a picture with a phone and some cameras it imbeds an orientation flag in the file. To remove it import it into paint and save over the original. Voila correctly orientated pictures !!
aha,i have the same problem.thought it was the phone.:)
great work on cygnus by the way

- - - Updated - - -
 
Nearly finished!:) I don't mind waving my own flag and saying "This has turned out great"! Hats off to Dave, Martyn and Marc for all their help. Just a few more tweaks and she's all done. Pix to follow...
 
Finally after 3 or so years since I originally made these I finally get to see all my parts painted up and on the model. :D

They look superb and you've done an excellent job on painting such delicate parts and they finish off your work perfectly. I knew they'd print perfectly and it's unfortunate a couple of parts didn't survive postage, but as I'm sure you've found out FUD/FXD loves super glue. Apart from breaking all of Shapeways thickness rules I know their concerns on parts surviving postage is a main reason these have to be done under the "Print It Anyway" scheme. I know it's a little late but dipping any warped parts in warm water will help straighten them and one the guys who has these parts dipped them in a glue solution to keep them solid, but I'm not 100% on what....hopefully he'll pipe in.

How's it going with the Palomino painting and when do we get to see a fully lit night shot? Did you also manage to add the docking bridge?

The Probe ship was actually my first ever scratch build and I also did a 1/125 version of both the Palomino and Probe Ship along with a matching scale MAXIMILLIAN and VINCENT. The same level of detail on this lit adjustable model was scaled down to the 1/700 version.

125 MAX + VINCENT.jpgGEDC0089.JPGGEDC0077.JPGGEDC0079.JPGGEDC0084.JPGGEDC0088.JPGGEDC0087.JPG125 Probe WSF 2.jpg125 Probe WSF.jpg

Marc
 
Hi Marc-night shots when she's completed. The Palomino and a couple of the lower antenna took a hit from a feather duster shaped asteroid a week or so ago. The antenna are back on,but the Palomino went off at a tangent and ended up in pieces on the living room floor.
Needless to say, I'm now doing any dusting around the Cygnus!
Fine extra detail is pretty much unfixable, at that level of detail, so I'm currently waiting on it's replacement.
The dispatch day is supposed to be this Friday....
I'm not sure about using the docking bridge- the thought of taking a drill to it fills me with trepidation.
On the plus side, the stand is now completed with the addition of a name plaque.
I had that cut and etched by a local lasersmith.

On a different subject(DD spacefort), that's had to be rescheduled for a couple of months.
I've a new kitchen arriving on Monday-it's all money.....
Obviously I'll keep you up to date-this is a definite.
Cheers.
 

Your message may be considered spam for the following reasons:

If you wish to reply despite these issues, check the box below before replying.
Be aware that malicious compliance may result in more severe penalties.
Back
Top