qcfoundry
Sr Member
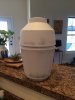
Here's my approach to creating an escape pod:


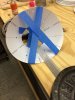
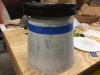
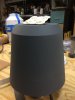
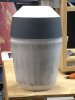
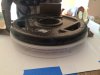
in its simplest forms, its just six frustrums (plus a little dome). there's plenty of reference material out there to get the shape correct (or pretty close). i'm kinda surprised nobody has attempted to build it this way. its cheap. its easy for anybody to do.
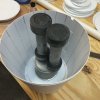
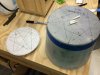
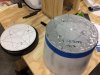
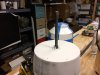
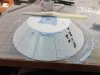
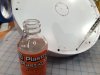
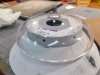
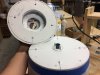
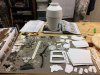
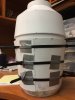
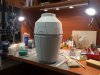
what i've posted was a rough draft..a first run. all this work was created by hand -- ie, with rough paper templates, traced onto plastic sheet, cut with a cheap harbor freight scroll saw, etc. you will likely see in some of the pictures that the sections don't always lay perfectly flat against each other. the final form will not have these problems since i've figured out how to correct that (due to the trial and error of this first draft).
i'll be tacking donor kit pieces to this form to double/triple check that the size & proportions are correct, then editing my drawings as necessary. after that i'll get the next/final pieces laser cut for the final version. not only will this cut down on a lot of manual labor i invested, but will further alleviate the fit problems.
once i've created my final form i'll be releasing the drawings to the general pubic for free. the drawings will basically be instructions. if you've seen my drafting efforts on the AT-ST then you should expect something similar. the drawings will include the cutting templates (that you can give directly to a laser cutter), instructions/hints on how to assemble the pieces, perhaps how to install an inner metal armature to mount to a panavise, perhaps additional templates for the exterior panels, and (what i call) a donor matrix which indicates which donor pieces go where - how many are required, etc (to the best of my knowledge).
in its simplest forms, its just six frustrums (plus a little dome). there's plenty of reference material out there to get the shape correct (or pretty close). i'm kinda surprised nobody has attempted to build it this way. its cheap. its easy for anybody to do.
what i've posted was a rough draft..a first run. all this work was created by hand -- ie, with rough paper templates, traced onto plastic sheet, cut with a cheap harbor freight scroll saw, etc. you will likely see in some of the pictures that the sections don't always lay perfectly flat against each other. the final form will not have these problems since i've figured out how to correct that (due to the trial and error of this first draft).
i'll be tacking donor kit pieces to this form to double/triple check that the size & proportions are correct, then editing my drawings as necessary. after that i'll get the next/final pieces laser cut for the final version. not only will this cut down on a lot of manual labor i invested, but will further alleviate the fit problems.
once i've created my final form i'll be releasing the drawings to the general pubic for free. the drawings will basically be instructions. if you've seen my drafting efforts on the AT-ST then you should expect something similar. the drawings will include the cutting templates (that you can give directly to a laser cutter), instructions/hints on how to assemble the pieces, perhaps how to install an inner metal armature to mount to a panavise, perhaps additional templates for the exterior panels, and (what i call) a donor matrix which indicates which donor pieces go where - how many are required, etc (to the best of my knowledge).
")