Nostromo Costumes

I'll definitely share the scanned magazine in the paper props forum, if the RPF allows it. (The woman on the cover is topless). Right now, I have to find a good hi rez scanner. I know my little home one isn't going to cut it; I don't know if Kinkos or someplace like that will scan it for me.

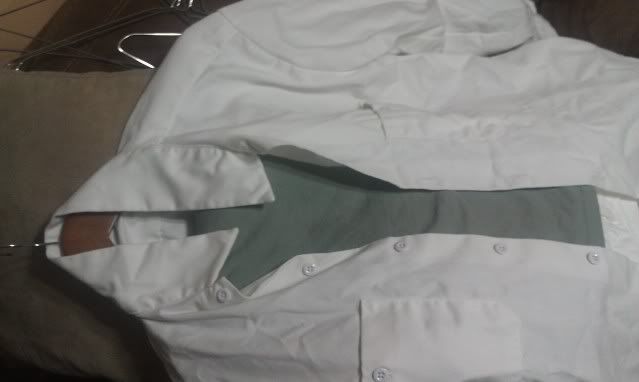
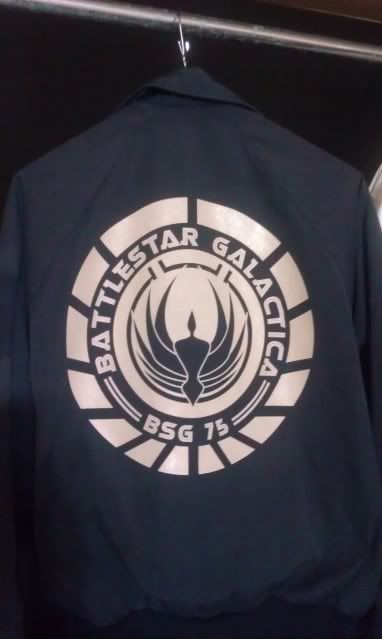
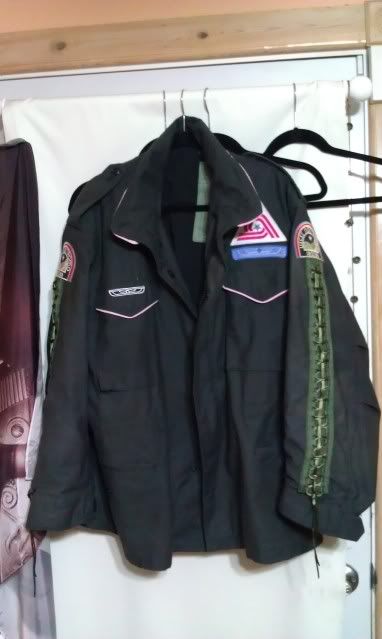
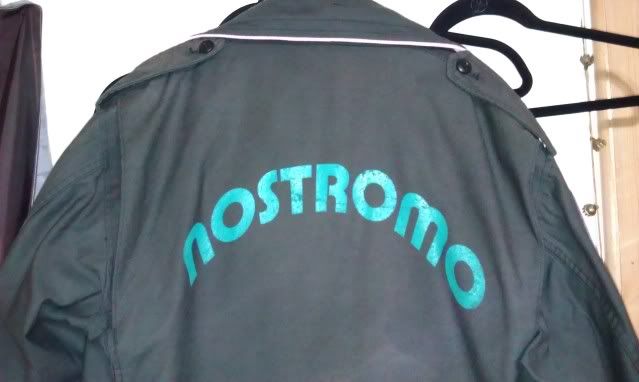
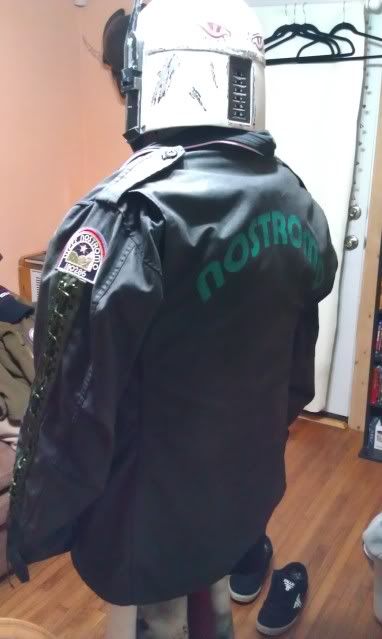
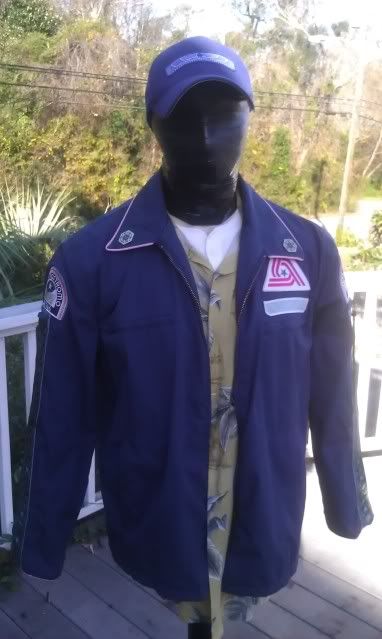
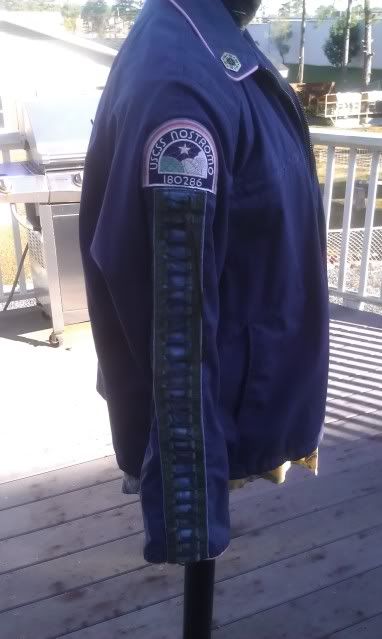
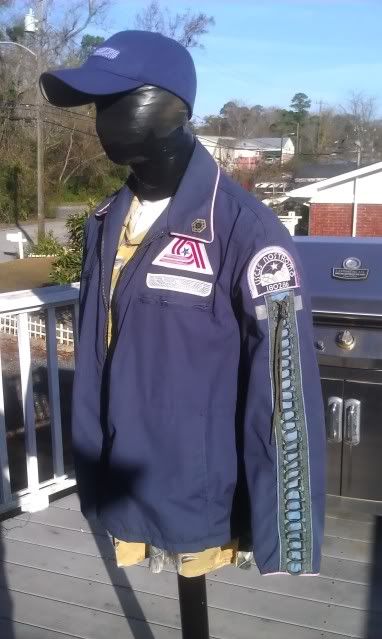
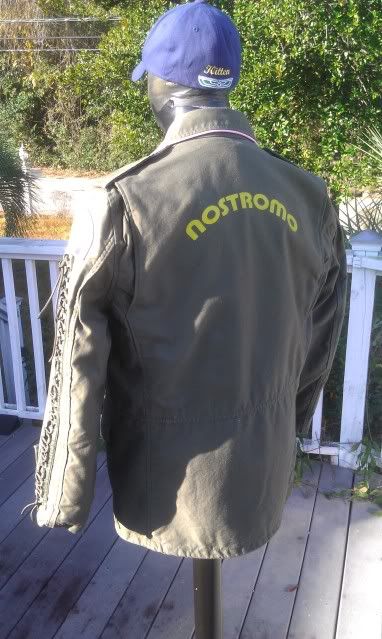
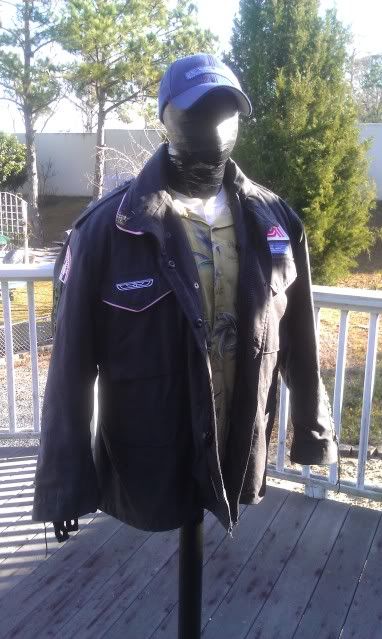
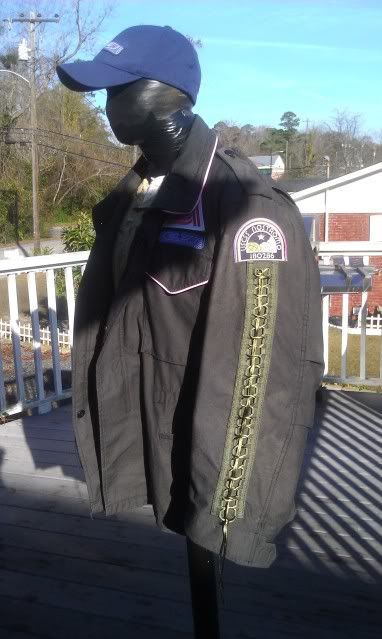
I also dropped off the jacket with the screen printers today. I talked with him about the sizing. For reference, the yellow print on the green jackets is 9" across. The yellow on the blue jacket is 11". The one for the black jacket is going to be just at 13". He also had a great teal colour, a very nice blue-green already made up. It's very close to what I think Dallas has on his jacket. I'm really looking forward to it. He said it would be ready on Wensday afternoon, so hopefully I will have pics up that night. BTW, if anyone would be interested, the guy doing my screen printing said he does mailing and shipping. If anyone would like his business info, he is willing to do screen printing on jackets if you send them to him (don't know if it would be worth it with shipping costing what it does these days). His web site is truimagescreenprinting.com (no www.)

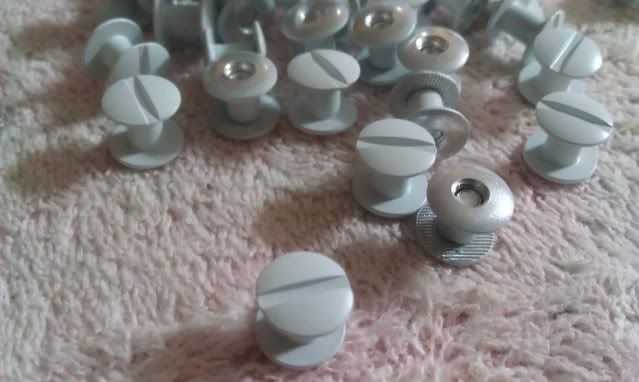
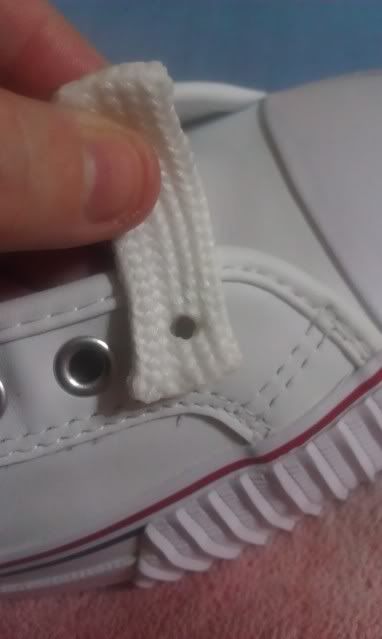
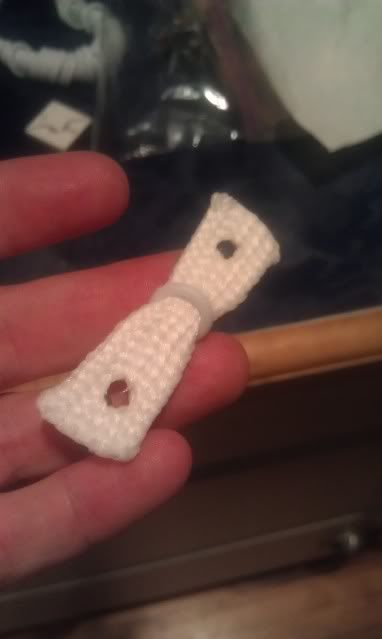
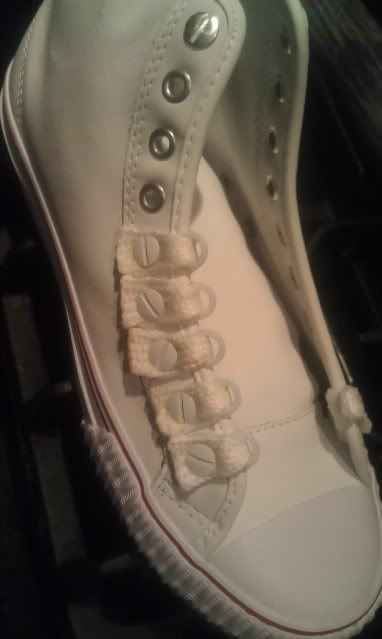
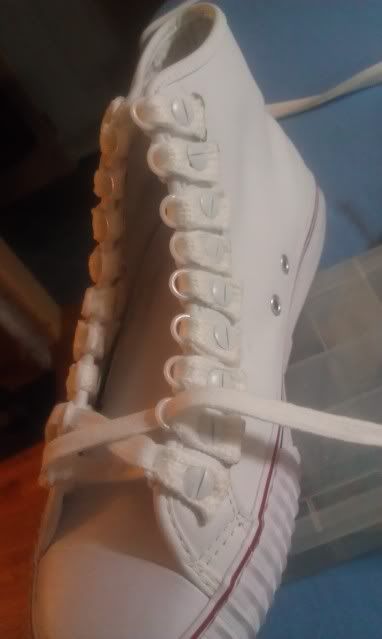
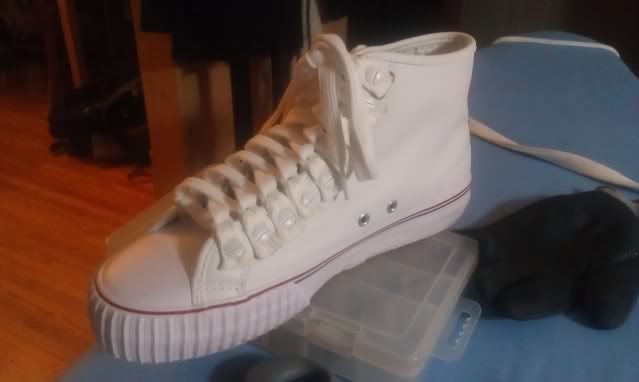
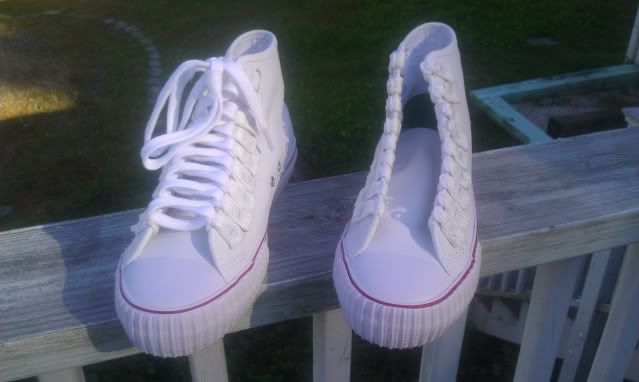
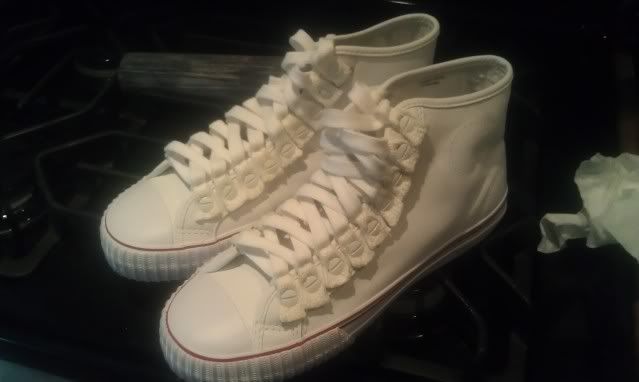
The shoes shipped today from PF Flyers, and the post screws shipped too. Hopefully that will all get here this week and I will have my girl's shoes done on Friday! I will make sure to take detailed pictures as I go through on how I modify the shoes.

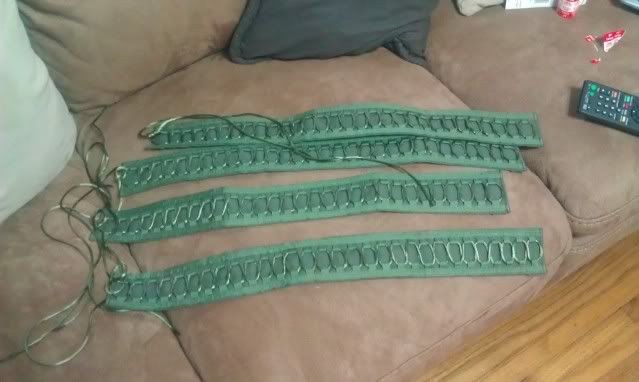
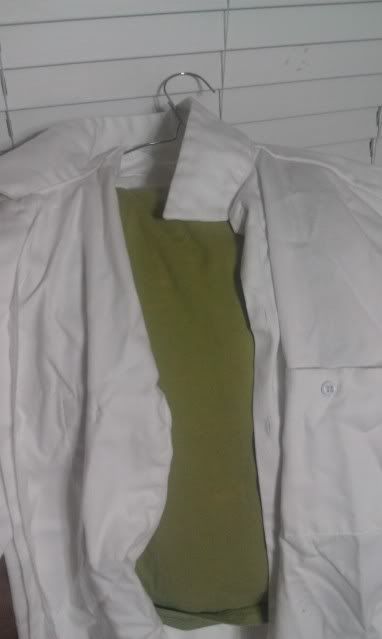
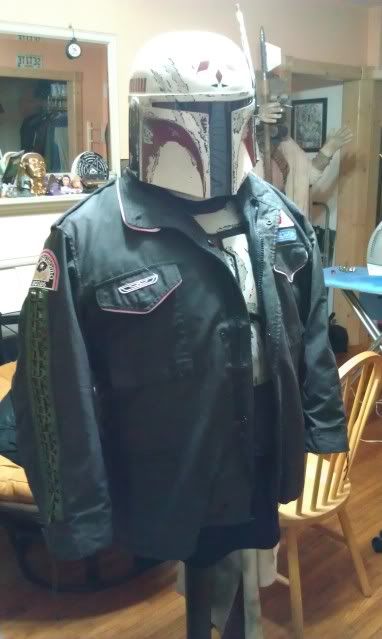
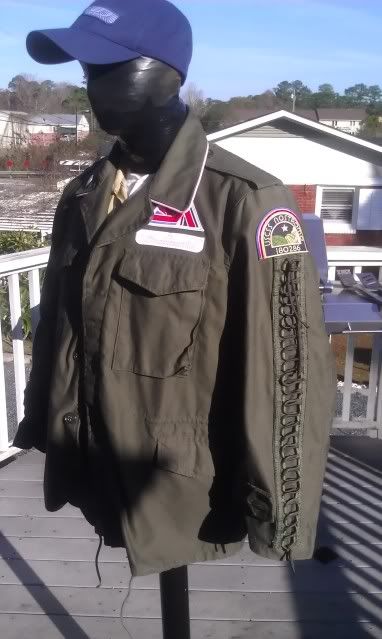
@Chris, thanks for the compliments buddy! The old costumes still isn't screen accurate, but it is getting better; the jacket is still waaaaaaaay off (I don't like Brett's jacket at all) but otherwise I have done a lot of mods to the blue pants and ALMOST found the correct thermal undershirt. These new ones still won't be screen accurate either (I tell ya, Boba Fett has cured me of that) but I do hope they are "realistic." I'd like to wear them to the premiere of Promethus. (And you know, I just may break out Brett and wear that to go see the Thing this weekend!)

Charlie
 
Once the excuse for buying porn magazines was "it contains interesting articles!"... now it's "it was seen in that movie!"

When you scan the cover in hi-res I'm sure many here will be very thankful if you could share it with all of us. :thumbsup

A photo of the cover has been posted many moons ago on propsummit (where these kind of props are OK so far) !

:)

Here :

Propsummit.com a Blade Runner Prop Community Forum BladeRunnerProps.comView topic - SURFIN' BIRDS & GASHAPONS

You'll also find on this thread info on other props used aboard the Nostromo such as ashtrays, beer cans, tobacco boxes, etc... Hope it'll help !

Fred
 
Last edited:
Well the shoes arrived yesterday (yay!) and so did the binding post screws (yay!). The screws fit into the eyelets of the shoes perfectly (yay!). I removed the PF Flyers logo from the side as well as the green bit on the back of the shoe (yay!). Unfortuntately, the3/8" lanyard cord is too small. I double checked with my old pair of shoes (should have done this earlier) and I think it's more like 5/8" or maybe even 3/4" (boo!). Also, the jacket is delayed at the printers, so it will not be ready until Friday (also boo). My solution to the lanyard cord is to go back to Joanns, this time bringing the shoes with me. I'll measure better this time, but I don't want to repeat the process. This does give me a bit of time; hopefully tonight I will be able to get the binding post screws painted, so that will give them a day or two to dry before I start putting the shoes together. I do have photos of the mods I've done so far; those will get posted up when I have a complete report for it.

Also, I think I have a lead on a tailor to at least get the alterations to the jackets done. Possibly they will also be able to help out with the shirts and pants too. The shirts and pants are ordered; I believe they will be here next Monday. Once I get them in hand, I'm going to print out the patterns and start looking. I've ordered two of each so that I can make sure the materials match (I don't want to run into the same problems with the gen 1 pants). Since I've already sorta left screen accuracy behind, I'm going to make up pattterns for the pants that help replicate the screen pants, but they are not going to be exact. Hopefully the end result of that will be that the pants will be robust and able to take a beating. Since some of the mods will be based on how the pants are actually made, I'm waiting to do a lot of the design until I have them in hand. I'll make sketches though, more detailed than my originals, and I will post them up.

Charlie
 
I had asked about the mag before on the Alien Legacy forum before the propsummit post.

A good scan of the original would be nice,

I did a custom cover with Lt Ellis from U.F.O.
The girl with the purple hair.
 
Last edited:
Better to have it confirmed.;)

I haven't been to either forums in a while.
Got tired of the same stupid things being asked over and over again on the Aliens forum.
 
Minor updates: I didn't get my jacket back. More issues with printer. Since I will be working all weekend, I'm not overly concerned. He said it would be ready by Monday afternoon. I did NOT get a chance to go to Joanns for the lacing, so the shoes are pretty much all stop until then. :( I also didn't paint. I did get my girl's jacket to the alterations shop! (as well as my hat). They are sewing the patches on, and the collar piping. Depending on how well it all works out and the cost, I will see about having them do the mods to the shirt and pants as well. I will be busy until mid next week, so updates will be pretty done until then.

Charlie
 
Ok, well the shoes are done!! I didn't end up using the lanyard tubing, as I couldn't find anything big enough. I also may have misremembered using it. A closer inspection of my shoes showed that it was folded, not a solid tube. So, I got some 1/2" folded polyester ribbon. Exactly what I used before, down to the pattern. I didn't get a photo of the label though. :( This stuff is good to use because it's thick, it melts (you'll see why that is important) and it's cheap. :)

To start, the shoes as they arrived:

IMAG0418.jpg


and the back green PF marking removed. To take that off I used a razor and some sandpaper. It's not perfect, but I was more worried about damaging the binding of the shoes. It can always be painted over if I want.

IMAG0419.jpg


Next, thanks to some good weather, I took 40 of the binding posts and painted them white. (I only need 36 for the shoes, but spares never hurt). I put the two halves together, stood them upright, and sprayed them using a semi-gloss white. Let them dry for a day before I started work.

IMAG0422.jpg


I then measured and cut out 40 strips of the ribboning. I measured by just folding over. There is some excess, and I defaulted to "too much" when I was cutting. Thats ok; its much easier to trim it down than to try to stretch it. Once they were cut, I melted the edges together using a cigarette lighter. I put them in place on the shoes, and used a wood burning kit (read: soldering iron) to melt a hole through.

IMAG0423.jpg


A few notes: the fumes are bad. BAD. Do this outside, well ventilated, with a mask if you have it. BAD FUMES. Also, this is why its important to use a synthetic, meltable material. The edges and the holes have to seal up, and melting them together prevents fraying.

Once I had the holes in place, I put 1/2" diameter (total) white plastic rings on the strips. Then I put them in place on the shoes, and bolted them down.

IMAG0424.jpg


IMAG0425.jpg


I did all 18 on the shoe. Woohoo! Actually rather tedious and tiring.

IMAG0426.jpg


A shoe with laces:

IMAG0428.jpg


Next, I did the same thing on the other shoe. I took a break of a night in between. Once the second shoe was done, I placed a drop of superglue in each binding post and turned the screw an additional 1/4 turn. This will help them from working their way loose as the shoes are worn.

With and without laces:

IMAG0429.jpg


And the final product:

IMAG0431.jpg


Jackets are having patches and piping sewn on; they are supposed to be ready next Wens. I'm still trying to find someone to work on the shirts, but it's a bit difficult. :( I do have the base materials in hand though.

Oh, in case anyone in interested. Check out hanes.com (the t-shirt). They have a tagless short sleeve that comes in a colour called Stonewashed Green. I've got them in hand. They are very good match for the screen used tshirt, and so far the closest I have seen to colour match. I will try to put up a picture or two, but just like the movie shirts, lighting greatly affects how the colour is percieved.

Charlie
 
Well done there, Charlie! Thanks for all your observations! And for the "crew t-shirt" lead; there IS another vendor of correct color shirts that I read about on Propsummit; I think it was WalMart? I'll check and post again.
 
Well done there, Charlie! Thanks for all your observations! And for the "crew t-shirt" lead; there IS another vendor of correct color shirts that I read about on Propsummit; I think it was WalMart? I'll check and post again.

I believe my original t-shirt purchase was from wal-mart, but it was the Hanes tagless in that stonewashed green. I've found wal-mart to be hit or miss when it comes to t-shirts; I know the website has them.

Charlie
 
I believe my original t-shirt purchase was from wal-mart, but it was the Hanes tagless in that stonewashed green. I've found wal-mart to be hit or miss when it comes to t-shirts; I know the website has them.

Charlie

You're right Charlie; they had that correct type before; I cannot find it in their online listings now. So, thank you for the Hanes shirt info!
 
Fun fun today! The seamstress is slightly delayed on the jackets due to a death in family. I certainly can understand that, so the jackets won't be ready until at least Friday. But the reason I know is because I stopped by the shop to find out about....

PUTTING ON LACING!

IMAG0442.jpg


IMAG0443.jpg


Randy did a great job on the lacing. Very nice! I took them by the seamstress. They are not sure if they can actually put them on the jackets, but they recommended a shoe repair store that they "out-source" to that will be able to do the work I need. When I pick up the jackets on Friday I will swing by and see about getting the lacing installed.
It will need to be trimmed just a bit to fit my girl's jacket and the cuff on her jacket will need to be modified. Currently, the button that holds it down will need to be removed. My plan is to do that, back the button up about 1/2" and loop the sleeve cuff over. It will still look good, and it will add a bit more "futuristic flair" to the jacket. Due to the wonky sleeves on mine, the lacing may or may not need to be trimmed. Most likely it will, but I will talk with the actual sewer and get their opinion.

I have also take some pictures of the t-shirts. From left to right as seen they are : the stonewashed green I ordered, the "old" t-shirt that i believe is stonewashed green, and a new lime-green I ordered.

IMAG0439.jpg


IMAG0438.jpg


The lime is obviously too bright. The center one is honestly perfect spot on. The left appears too dark, but that is because of the photo. In the real world, it is not that dark. Also, to the best of my memory (never a good source), the center one was the same darker green. After a few washings it lightened up. I don't know if the new one will do that, but it fits a lot better. The old one is an XL, the new one is a medium (I've lost a lot of weight).

Here is a picture of the new green with the white clothing:
IMAG0440.jpg


and the old green

IMAG0441.jpg


I'm really hoping the new green fades out soon.

Charlie

PS:

Oh, I did do one more thing. It's not ALIEN related but I thought I would share it here anyway.
Since I love jackets so much:

IMAG0433.jpg
 
Last edited:
Minor update: got the jackets back from the seamstress. Patches and piping are all on. I had to go to a shoe repair place they recommended to get the lacing put on, but that is in progress right now. Hopefully the jackets will be completely finished by next weekend!
Of course, I didn't get a chance to get any pics since it was straight from the seamstress to the shoe repair.

Charlie
 
I'm terrible at updates lately. I'm going to blame work. :) Well, I have a big update, with good news and bad news, so here goes:

My girl's jacket is perfect! Here's the end result:

IMAG0452.jpg


It looks like it is newly issued, which is what it is supposed to look like. The lacing blend perfectly with the jacket material. It's really amazing how well it goes together.

IMAG0454.jpg


IMAG0455.jpg


Now my jacket...well, it looks great. I got the patches put on, added piping to the collar and decided to add it to the front pockets. (It's more a match for the shirt. The RAF jackets had slit front pockets. This M65 had front pockets like the shirts do). There is one minor problem. It's too big. I thought it would fill out better than it does, but apparently a "large" is just too large. :( Pity, cause it looks good:

IMAG0457.jpg


IMAG0456.jpg


The patches weathered beautifully. I used a bleach/water combo to fade them out.

IMAG0458.jpg


IMAG0459.jpg


It's a nice jacket. It has a removeable liner; it's pretty warm with the liner but lightweight with it out.

I put it on one my mannequins just to fill it out, bear in mind there is a full set of body armor (complete with spikes) underneath it:

IMAG0461.jpg


IMAG0462.jpg


Right now I'm not sure what to do with the jacket. My girl has hers, so she doesn't need it. I might end up putting it on the Junkyard, but I'm not sure about an interest for a custom jacket. I could use it for parts. Eh, I will think of something. In the meantime, I need to do something for a jacket. So, I went back to basics, and started thinking about my original blue navy jacket. I got another set of laces, and ship patches. My original patches are before I did a lot of research into the uniform. I really like the new ones from patchesnpins. I was trying to decide between light background and dark background. I weathered the patches the same as I did for the black jacket. The dark background patches will go on mine; the lighter background ones are going on the kid's jacket. I did a lot of thinking about the lacings; I wasn't sure if the green lacings would work on a blue jacket. I thought about it a lot. I had asked Randy if it were possible to get different colours. He couldn't do that (and I understand completely). In the end, I decided to go ahead and try to dye them. The materials for the lacings are different; the inner loops are nylon. The back piece is more a cotton type material. So, I put the lacings in some colour remover:

IMAG0446.jpg


IMAG0447.jpg


They came out looking like this:

IMAG0448.jpg


IMAG0449.jpg


The pictures don't show the real colour. It looked pretty cool, but not for the blue jacket. Into a blue dye!

IMAG0451.jpg


I did a few washes. Dye for a few minutes, then bleach wash it, then dye, water wash, dye, etc. In between I was hitting it with the iron.

IMAG0464.jpg


It's a great match for the jacket. I'm going to use a slightly thicker cord. I have a spool of dark green paracord. It fits the loops, looks good, and makes it a bit different from the other jackets. I like it. The jacket is getting the patches put on now, and the laces go on next week.

Work is still slamming, and with the holidays coming up I won't have much free time. I've got a few sketches for the pants, but I still need to find a local seamstress or tailor to help me create the shirts. Most likely it will be another month before I get anything substantial done. :( Still, better slow progress than no progress.

Charlie
 
Charlie~thank you for the continuing updates, they are very interesting! Especially about "getting the right look" down on the jacket. Yeah, I think all of us have had "real world" time issues; oh well, at least I can check in & see how you are progressing. Good luck with the projects!
 
Well, my jacket is done. There are two more minor details I want to add, but they are very minor, and I doubt anyone besides me would notice.

IMAG0486.jpg


IMAG0487.jpg


For the lacing, I tried using paracord. It worked, but wound up being a bit too stiff. So, I took the paracord and removed the inner strands. Then I ironed the cord flat. I wound it through the lacings and then reironed it. I like the look and it moves easily.

IMAG0488.jpg


Since I had the mannequin out, I put the green and black jackets on it for some comparison.

IMAG0490.jpg


IMAG0491.jpg


IMAG0492.jpg


And here's the black jacket. Definitely larger.

IMAG0496.jpg


IMAG0498.jpg


IMAG0499.jpg


Hopefully I will be able to get the pants and shirts done by the end of Jan.

Charlie
 
Long overdue update: Well, I haven't been able to get the jackets done by the end of Jan. Or the end of Feb. :) However, I did relocate the seamstress who did my work on my Mandalorian and my original pants. She now has my plans and materials for the new sets. I am hoping to get them all done by the end of March.

Charlie
 
Sorry to hijack the thread, but I wanted to briefly share my efforts for a Nostromo Ripley costume - and I didn't think it warranted it's own thread.

This is my quick Ripley costume I threw together for Megacon. I had the most trouble finding appropriate shoes. As previously discussed her shoes are an odd combination of high-top sneakers with d-rings with some other alterations. In the end I re-used some old high-top boxing shoes to save some money.

Another thing I had trouble with was make-up. Sigourney Weaver's face is incredibly angular. I tried some contouring on my cheek bones/nose, while I don't look like myself I don't exactly look like Ripley either.

The costume itself is not very flattering. Next time I'm going to opt to not have the 2 undershirts to get rid of the bulk - Weaver had a magazine photoshoot wearing just the flightsuit.

Ripley1.png
 
This thread is more than 11 years old.

Your message may be considered spam for the following reasons:

  1. This thread hasn't been active in some time. A new post in this thread might not contribute constructively to this discussion after so long.
If you wish to reply despite these issues, check the box below before replying.
Be aware that malicious compliance may result in more severe penalties.
Back
Top