marsattack
Sr Member
Hello, I have started a thread as some of you received our zf armature frames!
For those who would just like to browse , please feel free to comment and add as you like!
This thread is strictly related to the products that Glenn, (zombie killler ,) Lewis (LDR) and myself have design and made.
I cannot guarantee the build up to any other zf available or scratched build, obviously!
The thread is also intended for problem solving and adding opinions and suggestions you all may have, as it is safe to say, there has NEVER been a thread here like this, so NONE of us know exactly how the buiild is!
We can only guide to the parts we built, which BTW are the closest thing you will ever see.
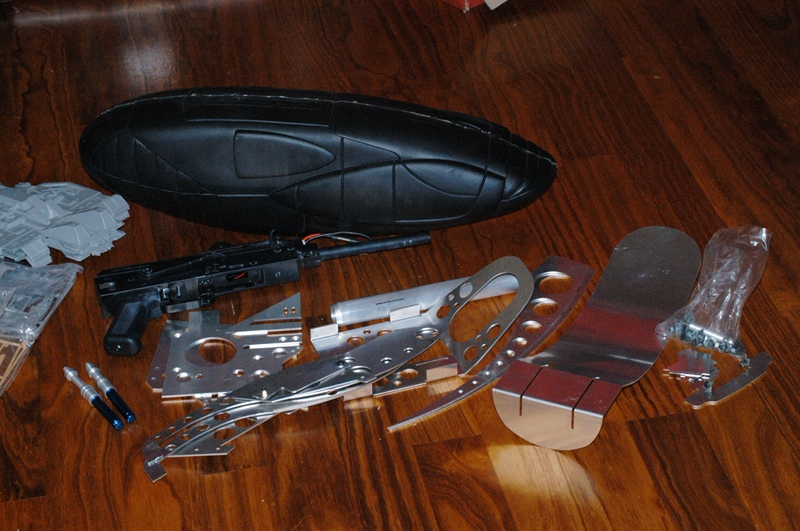
I will start with the frame:
The armature has been cut in a laser table, if anyone has seen one of this before , the bottom of whatever you are cutting sits amongst steel burnt out prongs!
these scratch the bottom of the alloy, so scratches are likely to be seen in all parts, as much as i would like to say , i ordered with instructions for least scratches as possible , there will be scratches.
hopefully we try to put the scratches towards he area not seen, most of these scratches come out with medium sandpaper or emery tape, followed by wet paper , finally alloy polish, turn out like a mirror!
So first up , clean all your pars from debris, if any, splatter or scratches.
sort out what will be covered by the pod, etc.
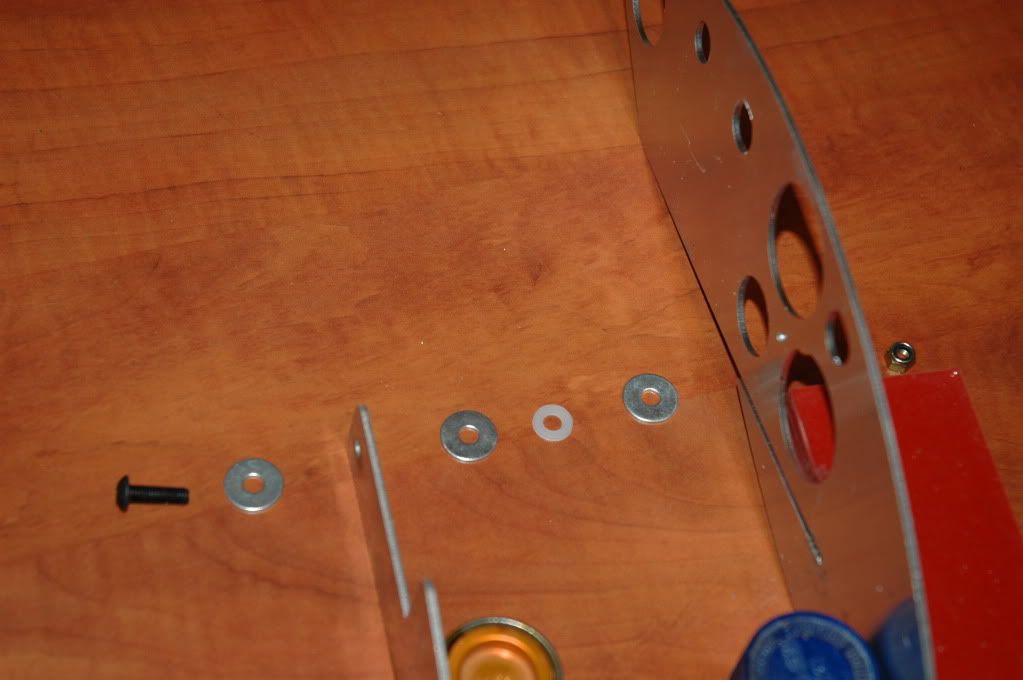
First question i had was the assembly of the lift bars with the screws.
I think by memory only 2 went out without assembly as i reorganised the box for shipment, so here is , for example the right fram and right lift bar:
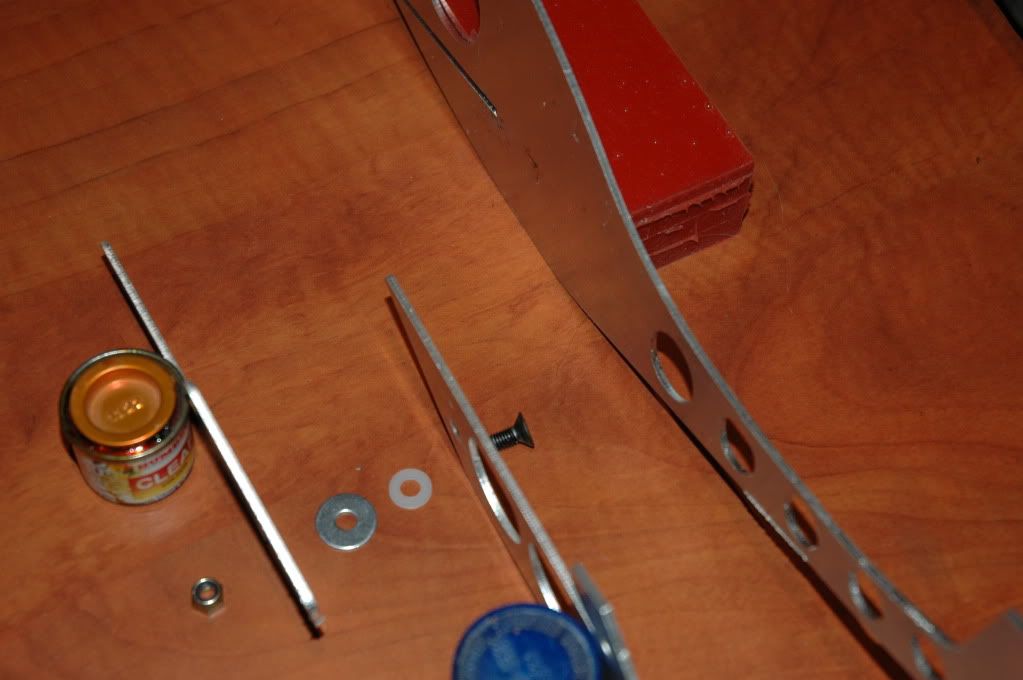
for the left WHALE plate, assemble the opposite way
for the actual 2 part lift bar again right side , and invert for the left.
I am pretty sure all lift bars were counter sunk to allow the head of screw, to sit as close to the frame as possible.
It is important that you notice which side the plates go.
not sure if this is clear enough but , lets start with the questions or comments!!!
Mars
For those who would just like to browse , please feel free to comment and add as you like!
This thread is strictly related to the products that Glenn, (zombie killler ,) Lewis (LDR) and myself have design and made.
I cannot guarantee the build up to any other zf available or scratched build, obviously!
The thread is also intended for problem solving and adding opinions and suggestions you all may have, as it is safe to say, there has NEVER been a thread here like this, so NONE of us know exactly how the buiild is!
We can only guide to the parts we built, which BTW are the closest thing you will ever see.
I will start with the frame:
The armature has been cut in a laser table, if anyone has seen one of this before , the bottom of whatever you are cutting sits amongst steel burnt out prongs!
these scratch the bottom of the alloy, so scratches are likely to be seen in all parts, as much as i would like to say , i ordered with instructions for least scratches as possible , there will be scratches.
hopefully we try to put the scratches towards he area not seen, most of these scratches come out with medium sandpaper or emery tape, followed by wet paper , finally alloy polish, turn out like a mirror!
So first up , clean all your pars from debris, if any, splatter or scratches.
sort out what will be covered by the pod, etc.
First question i had was the assembly of the lift bars with the screws.
I think by memory only 2 went out without assembly as i reorganised the box for shipment, so here is , for example the right fram and right lift bar:
for the left WHALE plate, assemble the opposite way
for the actual 2 part lift bar again right side , and invert for the left.
I am pretty sure all lift bars were counter sunk to allow the head of screw, to sit as close to the frame as possible.
It is important that you notice which side the plates go.
not sure if this is clear enough but , lets start with the questions or comments!!!
Mars


")