ZF-1 BUILD UP problems and questions

I will definitely put an AK in mine, I bought a fairly decent sized toy replica AK74 off ebay. But it looks a bit small and toyish after seeing the one Mars is using, so I will be looking for something a bit better.

Which is what I should have done in the first place instead of trying to do it on the cheap. It's definitely better to just go with what is best for you and your budget though. I don't really know just how much of the AK I will even see in the end but for me it's a key piece
 
I've got a PFC model one as i want it to be able to fire.

Will need to make a hole in the POD to let the shells out.
 
I don't know if I care if it fires, I think the big thing for me would just be to have the banana clip stick out.
 
I've got a PFC model one as i want it to be able to fire.

Will need to make a hole in the POD to let the shells out.

I have never heard of the PFC ones, and did a search and saw them on you tube what is it they fire? you blokes get all the best stuff over there.

I don't know if I care if it fires, I think the big thing for me would just be to have the banana clip stick out.

That's the biggest thing for me too, as far as the AK goes, the toy replica mag looks surprisingly..like a toy.

A holllow cast resin Ak mag would be great.
 
Gregg, for another $20 bucks , you can get a crossman pulse R76 form walmart!!!
the clip is very nice, short from a real one , you can have the whole AK real cheap!!
Ken here , is working on a net launcher!!
Maybe CO charged, which blew my mind after he showed me some pics of what he wants.
this being the case , it may be an option to just put the mag in there and free up the barrel.
you wont be able to fire BB's but may be firing a net 50 feet!!
Hopefully he soons comes in with some news!

Mars
 
I have been researching a net gun add on. The big problem is that the
commercially available units are too large to fit in the barrel and too
expensive, around $1,700. After looking at some screen shots it is clear
that they used a round net with 8 corner weights (these weights are what
are propelled by the co2 or blank charge). There is a net out there that
is square with 4 weights and is smaller, but still waiting on info from the vendor.
Here is a photo of the Super Talon net gun with 8 weights
Tactical-Life.com » Net Gun
If we want a screen accurate net, I was thinking of just getting the net
and then we would have to make a launcher to fit in the barrel tube. This
can be done but will take a while to design to work with a co2 cartridge
or compressed air. The vendor who manufactures the Super Talon is
close to me, so I will talk with them when they get back from vacation
next month..
Does anyone have any experience with a compressed air or co2 release
mechanisms?

Ken
 
Got my mag block and clippard from Mars today and had an issue putting it together. The clippard cylinder part was super tight trying to get it in the bottom of the clippard. I had to use some 180 grit sand paper and run it around the tube a bunch to get it to fit. Once it fit i cleaned it up with some 400 grit. I guess that will teach me to put imperial parts in metric holes.

Also the top piece was a hair too tall and was tight against the rocket tube block so i hit it with a file on top a little and it fit fine. The plan was to JB weld the top and bottom piece to the clippard but the clippard cylinder is in there tight, the top piece i will JB in so it doesn't rattle around.

One other thing was i needed to file the edge on the bottom of the top brass piece to let it slide by the clippard to torch tube block screw (the screw that holds the clippard valve to the lower blue block). This was an issue i knew we would have when i moved all the holes back to mimick the real clippard. I think having the proper looking clippard was more important than a little filing on the parts i had sent already. Sorry, got all kinds of reference half way into it.

clippardtweeks.jpg


Mars said his maglights did not sit out of the block perfectly the same amount. Mine seem to be fine and sit out the same distance. I'll put my estes sticker on it at the end. Man, I am loving this magblock.

magblck.jpg


Mars wanted an exploded view of the torch so here it is for all. There is a metal disc and spring that go between the brass part and the silver finned part but the spring was destroyed and the disc is missing.

DSC06044Small.jpg


IF you don't care about the torch working then you can cut the torches brass tube part off the brass block BUT you MUST unscrew the finned silver part from the brass block and remove the spring and disc or you will destroy them like i did. Then you can cut the brass tube part off flush with the block (more flush than i did) and screw it back on the silver finned part. There is a little nozzle with a disc and filter in the back end of the silver finned part. You will need to unscrew it and remove the disc and filter and glue the little brass tube in it instead. Then glue that assembly to the torch tube. IF you want the torch to work then you have to wait for me to figure it out.

DSC06045Small.jpg


The brass piece i sent is too short for this. If you are not going to have a working torch and want a longer piece let me know and i'll send it with the next stuff.

DSC06046Small.jpg

DSC06047Small.jpg


It all started with a red button and i have to say i don't think i ever thought i would have this. The torch is not glued and just hanging. The brass tube next to the torch tube is for running the ignitor wire to the torch and will need to be cut to it's final length once i know where that is.

DSC06050Large.jpg
 
Sorry Glenn my bad!
When I meant that the magslights dint fit the same , I was referring tothe actual prop. I think the top one sticks out a mm or two.
On all our blocks the mags fit exactly the same so it's up to the individual to slightly pull one out or leave them the same.
Regarding the clippard to clippard on some I sent I did the work , on others I didn't!
But the top nut on mine did not need shaving .
Also need to explain, on the US buyers your clippard is set for a 4-40 screw found in zombie pack number2 unless I have provided you with one already, which would mean you don't need the 4-40 .
For the rest of the world you have a 2.5mm bolt supplied.
How freakin technical is this!!! Lol


Any questions please ask before using hammer!!
Also what an awesome explanation Glenn!
Was wondering when you were going to show some of this!!
Awesome!
Mars
 
Hi guys, thought I do some work on these doors!!!
I want simple, smooth and be able to work via a servo.
Well I am on my way, based on what you see here I know what to extend and what to make shorter, works a treat!

I will get micro servos although the low profile ones fit fine,
whatever I can make in alloy I will however it is getting pretty heavy , so maybe some styrene will do for the cases..
carefully cut out the pod:

photo2.jpg


and added a simple 3 pin system

photo.jpg


photo3.jpg
 
Moving on the the main tube barrel, as most of you have it already , I thought I would post the measurements you need to cut and paint it.
Also the position of the middle ring.


Regarding the rings....
First set of rings went to those that bought them.
We have since altered slightly the front ring and added the holes in the middle ring.

for those who are missing these, please contact me to purchase , or directly post in the junkyard sale thread.
So again if you are missing any of these , please contact ME!


Main tube length that was supplied is sufficient for what we need.
Measuring from the tip of the barrel, regardless of which front cap you have, is 203mm to the edge of the side plates, this does not take into account of what you need to cover the remaining part that goes inside the plates.
This would vary as some are using an airsoft and some are not, in which case the entire tube can be used.
In the case of an airsoft some cutouts of the airsoft contours may be cut for an exact fit.
This measurement is to the tube barrel and NOT to the cap.
Again from the front barrel measuring back is 95mm of painted black tube and to the edge (start) of the middle ring.
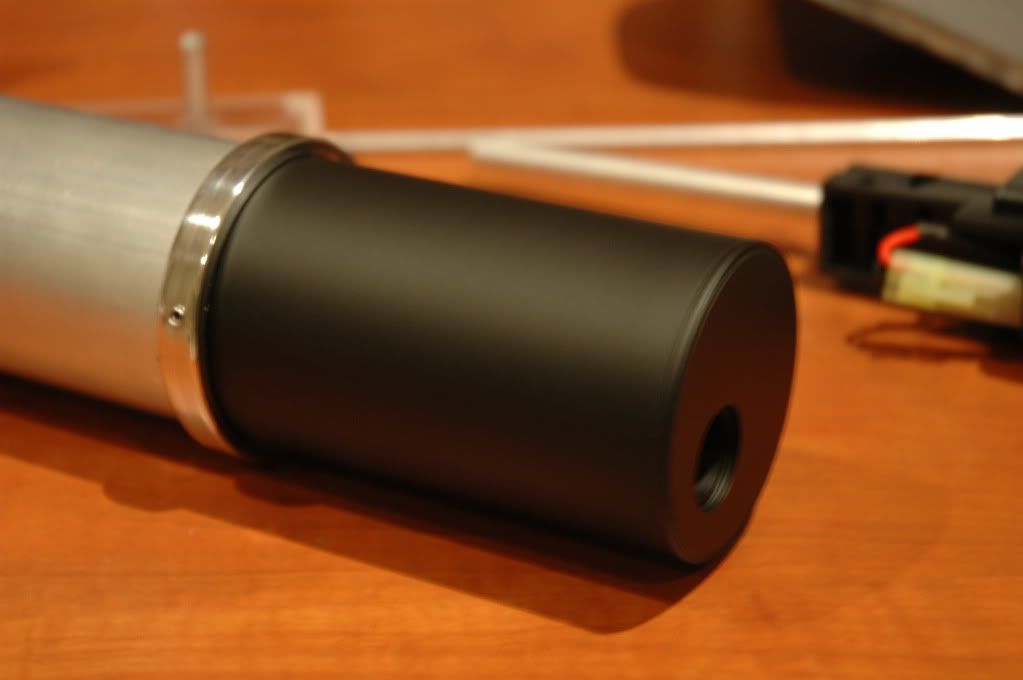
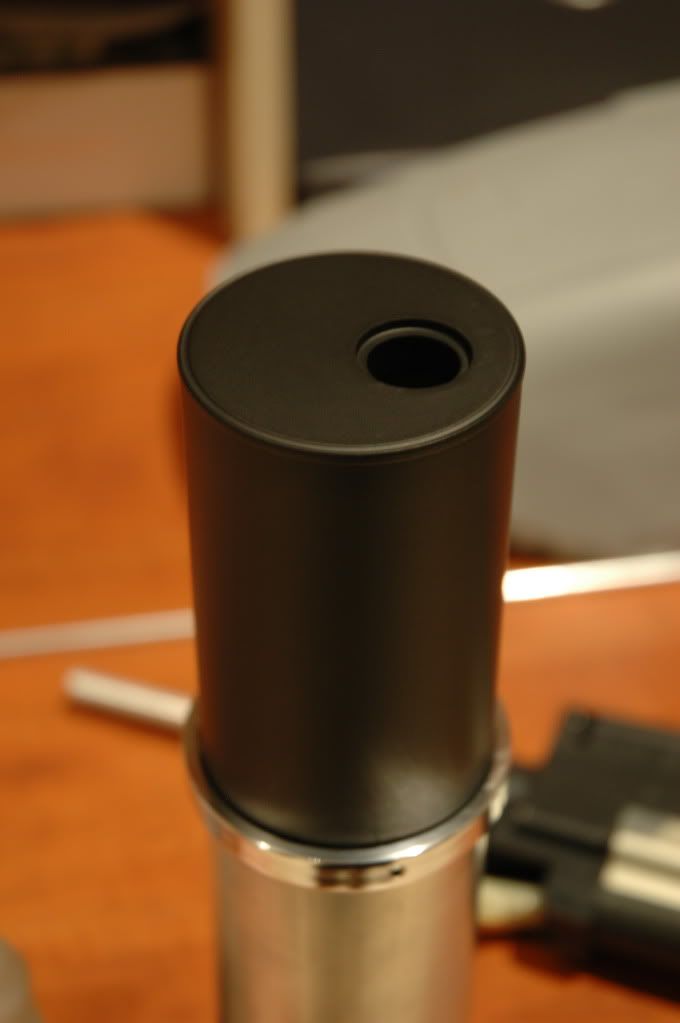
Here is my completed tube, front was cleaned and painted with Rust o leum satin black, which is an awesome paint.
Ring was polished and fitted using the 3 screws supplied in zombie pack 2.
The rest of the tube as seen in the real prop is un polished and unclean, so it will be left this way on mine!

One note, the new caps will have to be fitted using a timber over the top and tapping them i place, I grinded a little the inside of the tube as the fitting is super tight!

pics!!

DSC_0740-2.jpg

DSC_0739-1.jpg
 
Last edited:
Hi guys, Ken is unable to post these pics!!
he has done some work on the butane torch and has gotten this far.
I am uploading his pics on his behalf and he will post soon:

Mars

photo8.jpg


photo4.jpg
 
So here is the problem.. Since I added all the fittings to get this to work
the pressure at the end of the torch is not enough to drive the flame
to get a real torch flame, it just dribbles out. I have tried a few configs
to get this to work, but can't seem to get anywhere. So I am looking for
ideas to try. I think the torch was only designed to be short, but then
they go it to work on the prop, I think?

Any thoughts would be appreciated
Thanks Ken
 
Ken i don't think it can work like that. The pressurization point like you have it is at the torch and it needs to be moved to the tip of the torch tube. Just extending the tube will not work. Think of it like your house outside water valve. At the valve if you open it a little there there is plenty of pressure. If you put a hose on it and only open the valve a little it will take a long time to fill the hose so you only get pressure for a second when you open the nozzle at the end of the hose then it just drizzles. You have to go back and open the water valve all the way so then the hose is always filled. Then when you open the hose nozzle there is always enough water feed the hose and have pressure. This is different because we don't have a valve at the end of the hose. You either have to increase the torches ability to fill the tube or make the tube very small. Either way i don't think rubber tube will work to hold the amount of pressure needed. I have not messed with it yet because this has to be figured out before doing it. Too much risk of blowing it all up. If that hose comes off while lit you will have a ball of flames. I don't usually like to discourage people from trying things but this is one instance that i recommend you stop before hurting yourself. It's really not a "lets see if this works" type of project.
 
This thread is more than 6 years old.

Your message may be considered spam for the following reasons:

  1. This thread hasn't been active in some time. A new post in this thread might not contribute constructively to this discussion after so long.
If you wish to reply despite these issues, check the box below before replying.
Be aware that malicious compliance may result in more severe penalties.
Back
Top