You are using an out of date browser. It may not display this or other websites correctly.
You should upgrade or use an alternative browser.
You should upgrade or use an alternative browser.
Star Destroyer #3
- Thread starter ringa
- Start date
ringa
Well-Known Member
Yesterday I went to a craft store and bought a huge piece of black fabric for use as a backdrop for taking pictures of this model. It makes silhouetting so much easier.
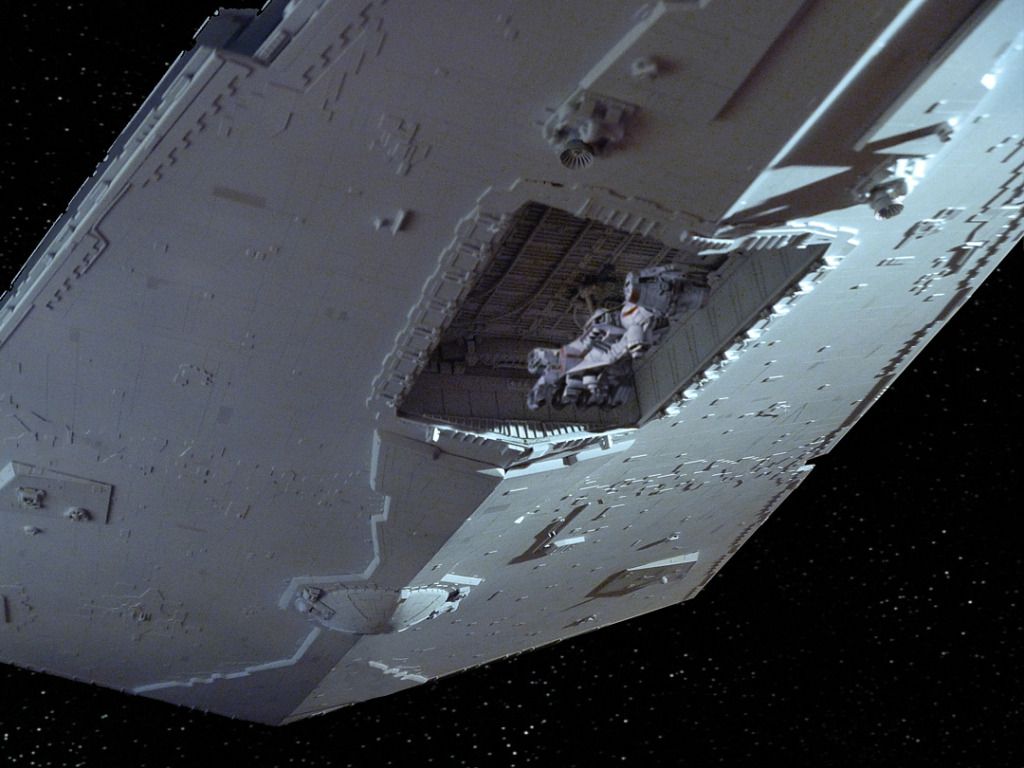
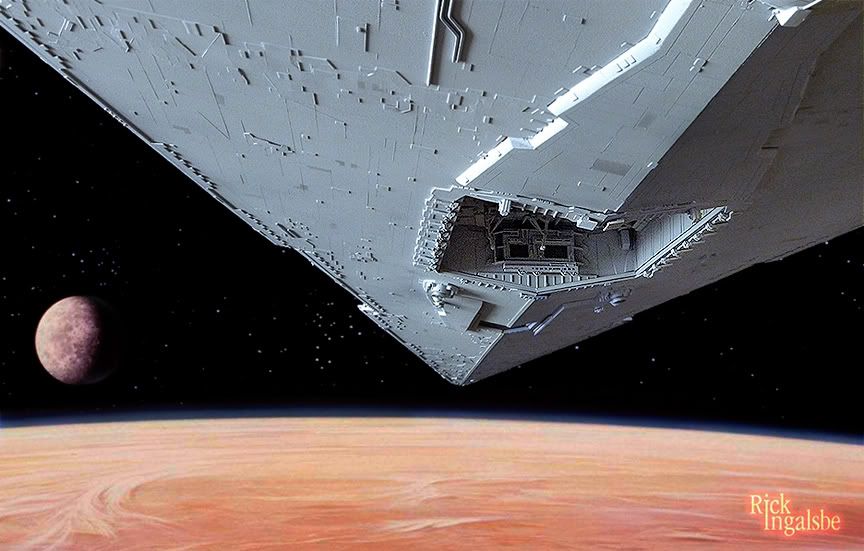
In shooting some photos of the model this morning, it suddenly occurred to me that I don't have any recent side view shots of the model. The side view shows the gradual tapering of the forced perspective of the trenches. It is about half as wide at the back as it is at the nose.
So here, along with a new front view, is a side view...
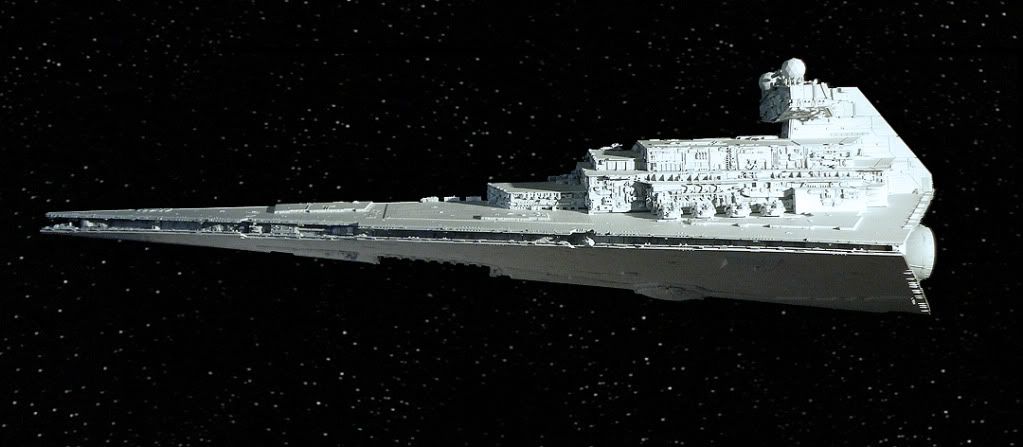
Last edited:
JD1
Well-Known Member
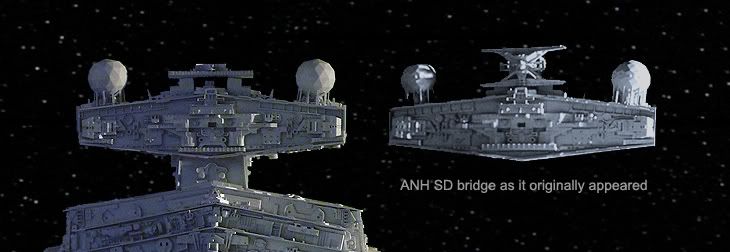
Why are there no main guns on the starboard side of the ship ?
Rick is replicating the studio model, not a Stardestroyer as if 'real'.
The model was shot for ANH from the underside, rear, and port sides. The upper starboard faces of the model weren't detailed as they didn't appear on-screen in Star Wars.
ringa
Well-Known Member
Rick is replicating the studio model, not a Stardestroyer as if 'real'.
The model was shot for ANH from the underside, rear, and port sides. The upper starboard faces of the model weren't detailed as they didn't appear on-screen in Star Wars.
That's exactly right. In fact, the only area on mine that is detailed where the original is not is the starboard side of the bridge. That was a decision I made back in 2008 when all I had built was the bridge and wasn't sure if I was going to ever build more than that.
Actually, Eric did the same thing with the lack of starboard guns on his SD...
http://www.therpf.com/f10/making-anh-star-destroyer-33301/index5.html (scroll down to photos)
I'm a big fan of his work, and his star destroyer build inspired me to build this third, more accurate model than my first two attempts.
ringa
Well-Known Member
We started to discuss this over at studioscalemodelers.com...
I would love to know what the correct ribbed piece is on the bridge face. The one I made for my model is temporary. From the photo of the SD in the Chronicles book, you can see that ribbed piece is not just below, but in front of the pieces above it. It also looks bigger than the piece I made from the Akagi kit. Below is a comparison of my bridge with the Chronicles photo. Does anyone have any idea where this ribbed piece comes from?
Also, it seems that if I decide to reposition the antenna upright, it would be straighter than the original as it leaned pretty far to the starboard side. I think this was done as part of a forced perspective issue like the trenches, since the ship was only filmed from the port side. I can't see the ILM crew positioning it that far off by accident.
ReplicantShadow
Member
Holy smokes ringa, beauty of a build!! I am totally with you on building star wars stuff from scraps as a kid, was right there with you! Great build and great thread! I have always liked the X antenna over the original ANH version, just seems that much more capable with that massive array. However, it's mass throws the scale off on the ship too, kinda can see why the ESB ships are without that array. One idea could be that you set-up it in such away where the antenna can be optional, where it can be taken on and off at a whim. Maybe a gentle magnetic set up, firm enough but not super firm to be too dangerous to remove. I have a few costume helmets where I can interchange Rangefinders for different looks and characters. But you got to careful with some of these magnets, especially those rare earth ones, some can shatter your work if not carefully handled.
Last edited:
ringa
Well-Known Member
Thanks for the compliments and good ideas. I would like a system where the antenna can be either way. It is more secure in the down (ESB) position, which is why I have it that way for now.
I went to the hobby store today looking for the Revell Defiance and came up dry. I'll keep looking.
I went to the hobby store today looking for the Revell Defiance and came up dry. I'll keep looking.
ckwanwoo
Sr Member
Hey Rick,
Your words is not correct because rather, my building was inspired by your 1st ISD.")
I wonder if you found the part for the underside of the bridge antenna part?
As I posted, it was used from fujimi 1/76 Panzer IV Ausf.J.
Help with Bridge Antenna part?
thanks Eric.
Your words is not correct because rather, my building was inspired by your 1st ISD.
I wonder if you found the part for the underside of the bridge antenna part?
As I posted, it was used from fujimi 1/76 Panzer IV Ausf.J.
Help with Bridge Antenna part?
thanks Eric.
ringa
Well-Known Member
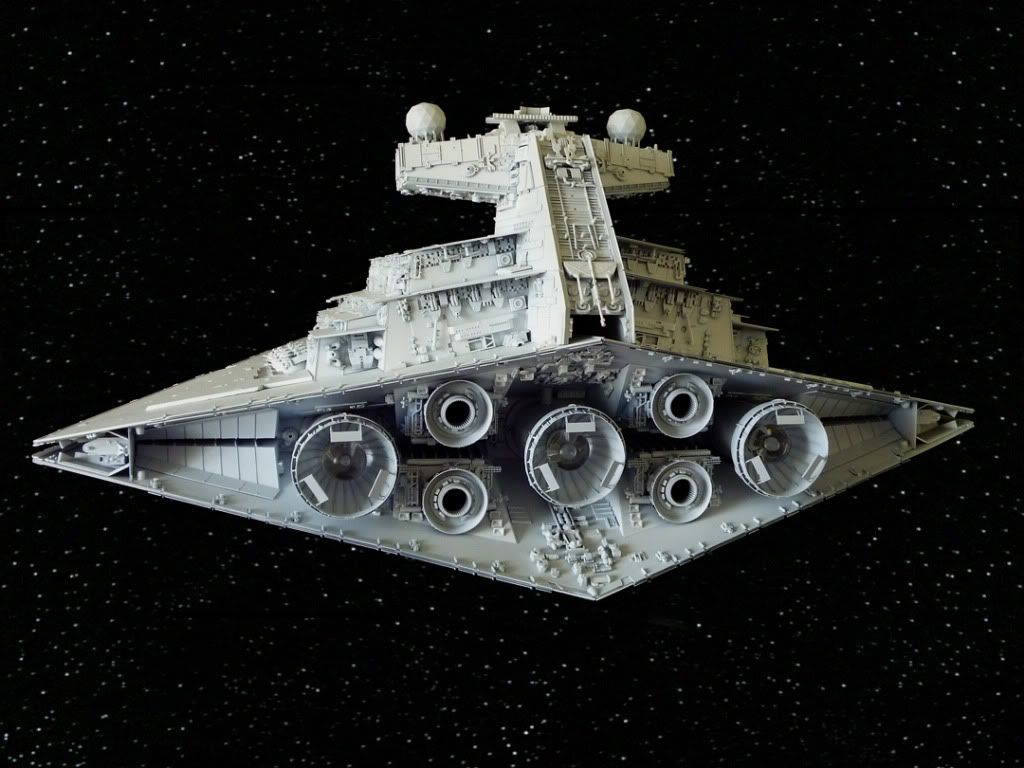
Thanks to our friend Jason Wright, I was finally able to add more missing parts to this model. New parts include the detailed rings inside the secondary engines that come from the Tamiya Centurion kit, and the two small, square pieces at the bottom of the bridge neck from the Kirishima.
Thanks again to Jason for helping me make this model one step closer to resembling the real thing!
Thanks again to Jason for helping me make this model one step closer to resembling the real thing!
Last edited:
Noumcea
Well-Known Member
That's exactly right. In fact, the only area on mine that is detailed where the original is not is the starboard side of the bridge. That was a decision I made back in 2008 when all I had built was the bridge and wasn't sure if I was going to ever build more than that.
Actually, Eric did the same thing with the lack of starboard guns on his SD...
http://www.therpf.com/f10/making-anh-star-destroyer-33301/index5.html (scroll down to photos)
I'm a big fan of his work, and his star destroyer build inspired me to build this third, more accurate model than my first two attempts.
My apologies JD and Ringa. I stand corrected.
Most excekkent build BTW !!!!
ringa
Well-Known Member
My apologies JD and Ringa. I stand corrected.
Most excekkent build BTW !!!!
No need to apologize. I would've wondered the same thing if I didn't know about the filming model.
Thanks for the compliment!
Wow! That's great.
AWESOME!!!!!!!
Last edited by a moderator:
SciFiMuseum
Sr Member
You did a great job! It looks fantastic, A+!!!
Similar threads
- Replies
- 25
- Views
- 5,865