Tutorial: BTTF Doc's Red Wind-Up car *lots of Pics*

Here's what I came up with for my lightning rod

Small brass tubing with a thin steel rod running through the middle... I curled the rod around a pen to get the circle. The steel rod also kept the brass tube from kinking when I bent it.

i724u9.jpg


2jcar8y.jpg


bttf1_toycar.jpg


Still waiting on my car to arrive before I can really start in on it :)

-Jay
 
Im pretty sure that burnt up car is from Part II. (from when Marty throws it in the trash)

The lightning rod is definitely a tube with a smaller wire inside it, thou I dont think the brass tube is hooked on the Part I car.

The idea is that the inner wire can slide out after it hooks on the overhead cable (otherwise it would stop the car when it hooked the wire)
 
Last edited:
The tube is hooked on part one
VilleLeskinen provided us with some screen grabs that show it
bttf-help-pics-needed-docs-red-car-bttf-car-1.jpg-45069d1297453558

bttf-help-pics-needed-docs-red-car-bttf-car-2.jpg-45070d1297453558


As you can see, the "loop" isn't pretty or round.
I'll be working on a new version of the Lightning Rod tomorrow
 
Ok, I've made a little progress today.
First though, let's address a topic that keeps coming up;
Many say that the rod is not hooked because it would get caught on the wire across the road and stop the car.
I say it is hooked exactly for that reason, well sort of. It's hooked so it can be pulled out of the toy car just as it is on the Delorean. When the Delorean crosses the line, it's Lightning Rod hooks the cable and is pulled out as Marty crosses. You can see it dangling from the cable after the flame trails.

anyway, back on topic...

Let's get that Lightning Rod and Key handled, shall we?

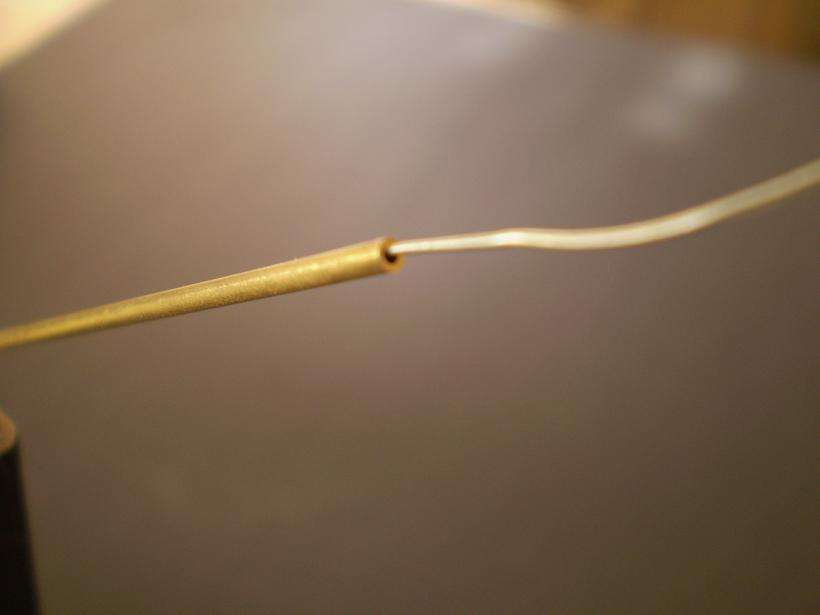
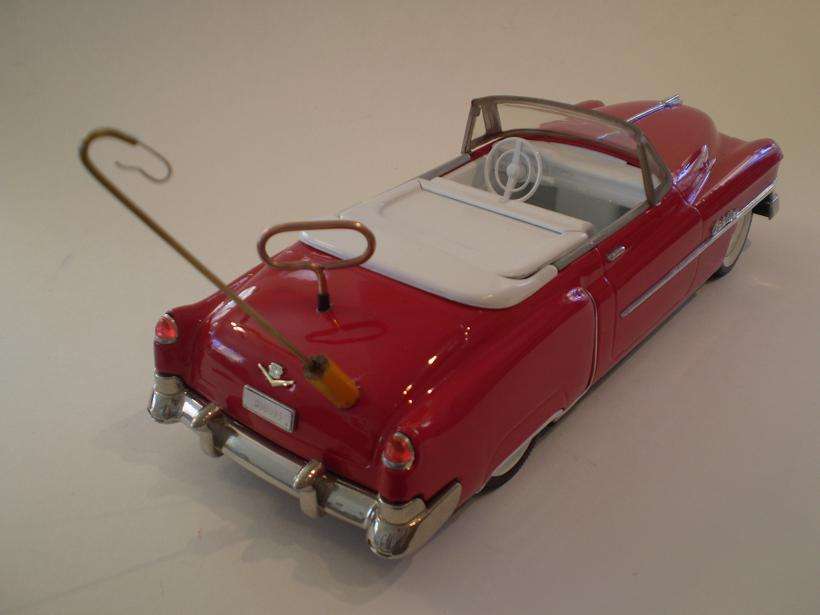
Just as luke moonwalker has done above, I too have used a brass tube for the Lightning Rod.
I bought mine from the local hobby store, here it is
bttfwindup190.jpg


take this hollow tube and insert some very fine wire.
I used "mechanic's wire", cuz well... I'm a mechanic.
bttfwindup191.jpg

bttfwindup200.jpg


Bend the little wire to an appropriate shape and cut to length (mine is about 4 inches or 10cm)
bttfwindup158.jpg

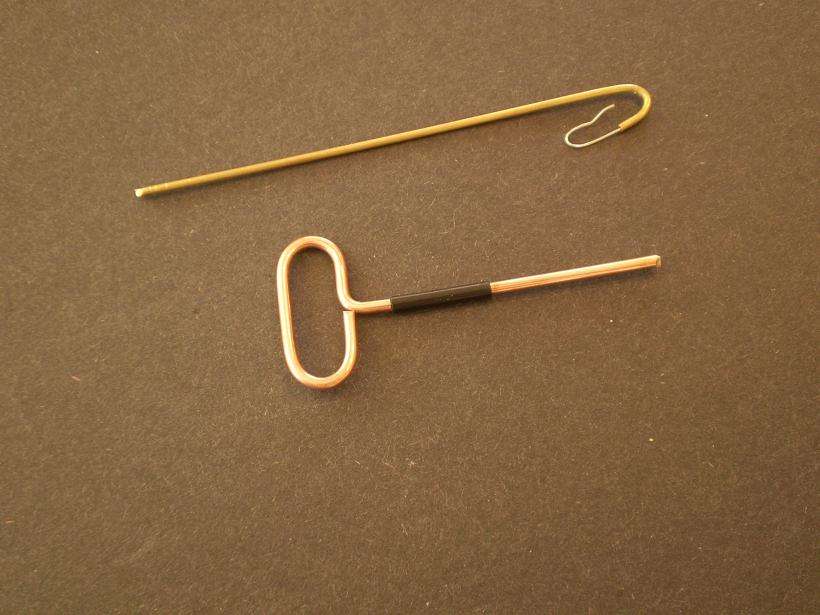
You'll also see that I used electrical tape to simulate the black collar on the Key. I don't know what was actually used, so I went with Tape (for now)

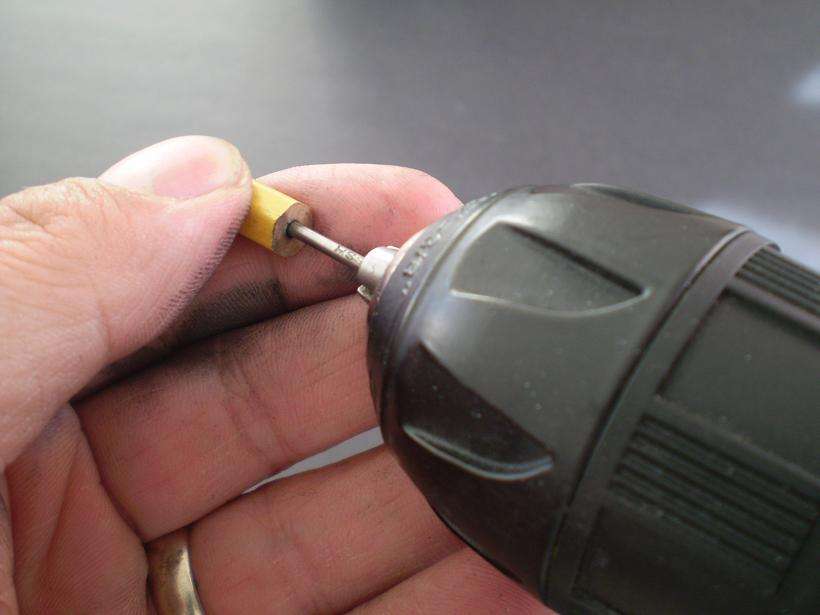
Next, you have to hack up a pencil. MAKE SURE IT'S THE RIGHT COLOR YELLOW! You want the more orange color.
Mine were not, so some of the pics have the wrong pencil.
Cut a section about 3/4 in ( 20cm) long and drill the graphite out
Start small and use progressively larger bits until you get the size you want.
bttfwindup201.jpg

A drill press is optimal, but I live life on the edge:lol

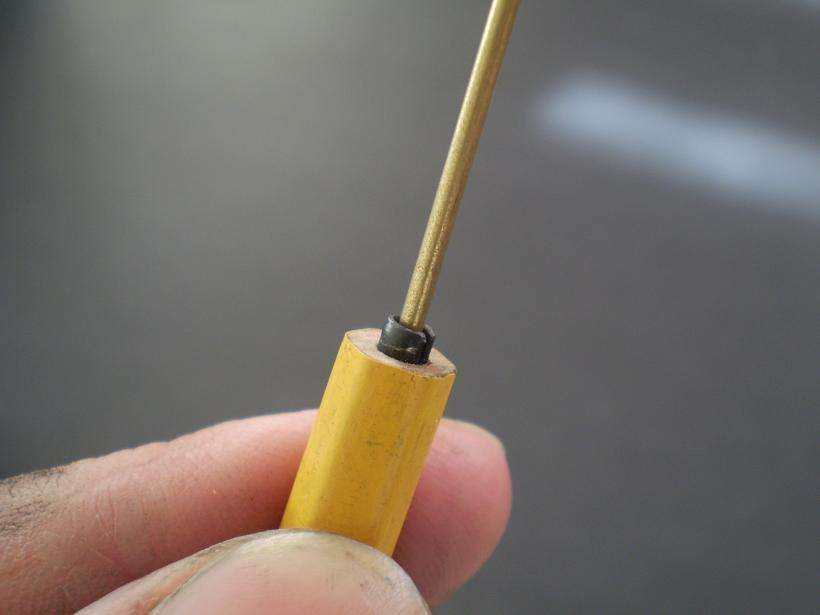
Then, insert a 1/32 roll pin into the hole.
Lowe's has these in their bins, 2 for 80 cents.
bttfwindup203.jpg


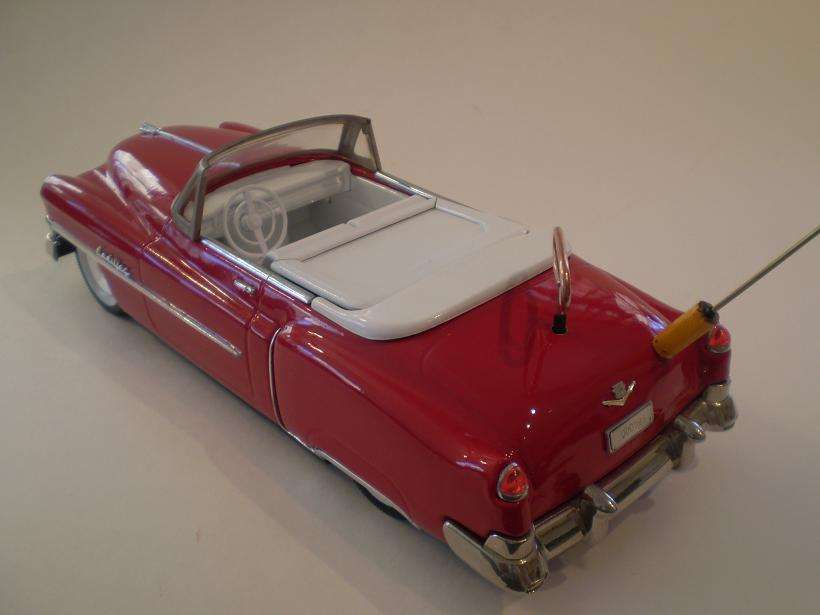
Then insert the lightning rod into your new receiver.
bttfwindup204.jpg

you can attach the receiver to the car now. Mine is hot-glued and feels quite strong

Drill a hole on the trunk big enough for your key with tape on it.
Center it using the crest as a guide. make a hole 3/4 in (20cm) down from the top of the trunk NOT THE CONVERTIBLE COVER, THE TRUNK. There is a line that you measure from.
Take your time and try to drill a better hole than I did. Mine looks like garbage, so I didn't take any pics.
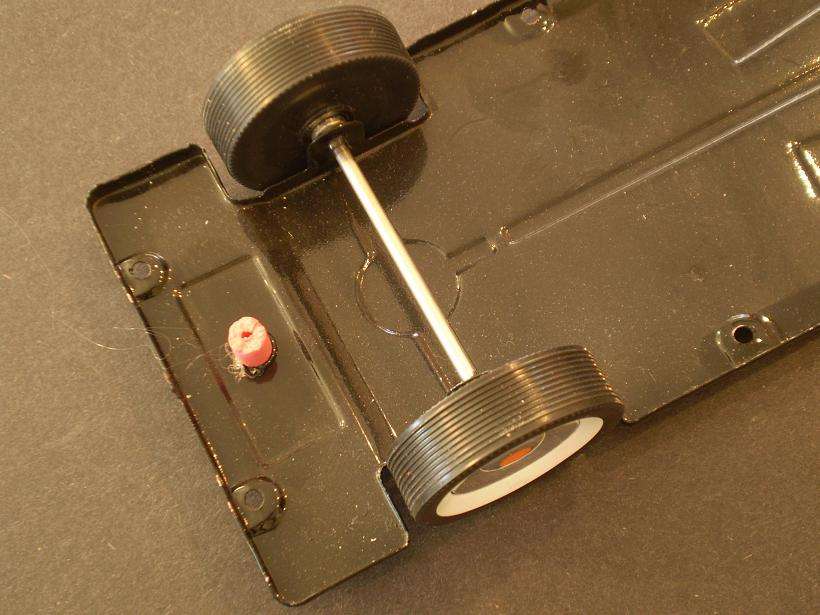
Now take the eraser from the pencil you chopped up and drill a hole in the middle of it.
Hot glue that in this location;
bttfwindup162.jpg

This is for the key to stick into. It's a little difficult to get the key to stick in the eraser, but it'll keep the key from flopping around.
If you are making your key spin, skip these steps.

Here's where we all should be now
bttfwindup186.jpg

bttfwindup184.jpg


Stay tuned, we'll address the copper contact on the bottom of the car next...
 
I actually traded that car for some other Props, but i bought a new car that was the correct colors out of the box.
i've been busy with other stuff and haven't had a chance to get back to this project.
 
I made a few of these with some cars I picked up over the years. I painted one a few years ago, that's not fun. Way too many chrome pieces to take off. I find melting the glue with a soldering iron works well. Anyways, my cars (the correct unpainted red) are going up on eBay. Search Doc Brown Demo Cadillac you will find it.
 
Reviving this thread, as I'd like to finish my Cadillac car x)!

What would the the inner and outer diameter of the brass tube? Also how long does it need to be? including curve?

So would I have to drill through the car? Such a beautiful car, it's a shame xD!

Thanks!
 
This thread is more than 5 years old.

Your message may be considered spam for the following reasons:

  1. This thread hasn't been active in some time. A new post in this thread might not contribute constructively to this discussion after so long.
If you wish to reply despite these issues, check the box below before replying.
Be aware that malicious compliance may result in more severe penalties.
Back
Top