Nerf Gun Props? YES!

Hi talented types!

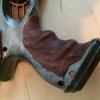
I'm about to have a bash, at painting, a pair of HFC HA 118 Beretta 92fs spring BB guns for my daughter. Specifically Basing them on the Berettas sported by Death the Kid from the Soul Eater Anime Series.

Being Based in the UK the first problem that pops up is I shouldn't really be respraying them.......... Oh dear.... Well they are going in a presentation case once finished and wont be being brandished at any CONS, Banks, corner shops or anywhere in public. The other slight side step is the change in colour I'm going for. Presumably 'real world' would see the guns in silver. But I'm going to paint up in the anime colours, so, at least two shades of grey and one charcoal/black with ivory for the 'eye' detail.

The serrations in the slide will be filled, where the 'eye' detail goes. I will also be cutting/carving the teeth/triangles into the slide as well once I've added a little thickener internally. As well as adding the death head symbol to the grip. There are a few mold lines to be wet n dried out but nothing major and over all the build of the guns is pretty nice.

I've had one of the guns in pieces so painting should be easy. The only parts I couldn't remove were the trigger and the hammer mechanism. I wasn't sure if they were secured by drift pins and didn't want to risk damaging anything trying to find out.

The only other 'artsy' thing I may try is a DIY transfer of Liz and Patty done in a translucent print so they can only just be seen when in situ on each gun.

Here's a couple of images.

IMG_20160622_163725.jpgvlcsnap-2016-06-19-22h02m57s977.pngvlcsnap-2016-06-19-22h25m44s727.png
 
Hello all!

A few new blasters to finish off my Star Wars Blaster season.

First up; the standard issue First Order stormtrooper blaster pistol, done in a similar fashion to the E7-11 blaster rifle from my last post. Because the rifle was on display at my office, I had to guess at how much weathering this one needed to match nicely. I got pretty close...

qve3cms.jpg


Next up is the infamous Greedo killer - Han's DL-44 Heavy Blaster Pistol. I kept it pretty simple for this one.

tzLzjAv.jpg


And finally - at least for this set of blasters - Rey's NN-14 Blaster Pistol. The heat scorching on the barrel was fun - I don't own an airbrush (not a working one anyway), so I had to think about it a little differently. I ended up using Sharpie markers, with a bit of distilled spirit to smudge them around. They behave a little bit like watercolours this way... I was pretty happy with how it turned out, and now I want to heat scorch everything!

uUHb13N.jpg


The latter two blasters were very easy to paint, as all of the different coloured pieces separate nicely for painting - no masking required! I'd very much recommend them to novice modders or someone looking for a super-easy weekend project.

Nerf on, trooper!
 
Not nerf guns, but i did a custum paint job on these for my upcomming 'the division' cosplay.
The paint job resembles the skins you can put on your guns.

These are my first steps in props and cosplay, so any feedback is welcome.

2016-07-08 15.49.04.jpg2016-07-08 15.49.21.jpg2016-07-08 15.48.29.jpg
 
I need a tutorial on paint applications for various finishes as shown in this topic. I can only guess that silver or light colors spray on first? then the darker ones and then scuff areas to make it look worn?
I am not about to experiment as good hobby spray paints are not cheap!!
Any write-up or suggestions, appreciated. I just finished my M41 Nerf Pulse. magazine and main off/on switch still to be added for the 4-digit counter :) could not source a 2-digit one and it will only count-down with single press with button, kinda sucks.
20160716_235755.jpg 20160611_162556.jpg
 
Last edited:
I need a tutorial on paint applications for various finishes as shown in this topic. I can only guess that silver or light colors spray on first? then the darker ones and then scuff areas to make it look worn?
I am not about to experiment as good hobby spray paints are not cheap!!

There are as many techniques for prop painting as there are threads on the RPF, but the most common one is to start with the darker colour, and then drybrush a lighter shade over the top, then highlight random edges with silver to simulate paint-chipping. Most metal parts are as simple as a matte black base-coat with a liberal amount of dry brushed silver on top.

If you want, you can then go in with a bit of thinned-down black or dark brown that'll creep into all of the cracks and crevices to give it a little more of a well-used look. Use a rag or similar to wipe away excess if it gets a bit too heavy. I find that spirit-based acrylic is great for this, as it won't disturb the enamel paint underneath (assuming you use enamel for the base/top coats...).

If you wanted to get a little more complicated, you can start with a metalic silver/aluminium base (or rust, if that's the look you're going for), and apply a rock-salt mask before you go over it with your top coat - you can see the results of this technique on a few of my posts. It gives a nice pitted finish that looks a little more authentic because of the slightly raised edges of the top-coat.

e.g.
attachment.php


The above is from my Dieselpunk Hammershot (apologies for the potato photo) which can be seen at the bottom of post #1975, here.

As I said - there are dozens of techniques, but these are just a couple of my favourites - I hope this short explanation helps a bit.

Search for 'nerf painting' and 'model painting techniques' on youtube for more...
 

Attachments

  • Pitting_example.jpg
    Pitting_example.jpg
    136.3 KB · Views: 1,807
Thank you. My current nerfs are all boxed up right now, too afraid where to start :( Also looking for cheaper sprays as my hobby store sells the small canisters for $10 and that adds up really fast so hoping that going with the $5.99 special from the hardware store is a cheaper alternative. Have NO experience with airbrushing and not about to venture into that too soon, again, it is just a hobby that keeps me satisfied with the end result.
 
bladerunnner59 - i use these - Rust-oleum 2X

I also didn't mention, but preparation is important too - you'll get a better result if you lightly sand your plastic parts with a high-grit sandpaper and then wash them thoroughly with standard dish-washing liquid (exactly the same dilution as if you were doing the dishes). This will give your paint a better grip on the surface, while the dish-soap gets rid of the thin layer of grease that forms on the surface of the plastic. Rinse it thoroughly with warm water, but don't dry it with a dish-cloth, as this will only transfer oils back onto the plastic. Air-drying is the best way, but slow, so give yourself a bit of time for effective preparation.

Oh, and I don't have an airbrush either :D
 
Last edited by a moderator:
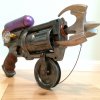
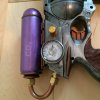
Here is Rorschach's Grappling Gun (comic version) that I made after seeing someone have a go at it on pinterest. Real leather grips, copper tubing, pressure gauge, pressure knob. Was for a costume that I am not going to get around to remaking.
IMG_0281.JPG IMG_0271.JPG IMG_0272.JPG IMG_0273.JPG IMG_0274.JPG
 
You HAVE to get a bending tool or you will be a long time fighting it and crushing the pipe as it bends. Harbor Freight sells a 'tubing bender' for $7.99. Worked like a champ.

Thanks for the tip! Now I just have to find my copper tubing...:confused
 
I recently did a quick and simple mod to a Kata blaster from GI Joe. I removed the charging handle and filled in the gaps where it was used.

I also added an aluminum magazine plate to give it a little metal.

This was a two day build, and was just an easy, fun mod.

kata1.jpgkata2.jpgkata3.jpgkata4.jpgkata5.jpgkata6.jpg

This build is intended to be used in a cyberpunk short film. Here is the concept art I created for that scene.

cyberpunk_MASK_150.jpg

kata1.jpg


kata2.jpg


kata3.jpg


kata4.jpg


kata5.jpg


cyberpunk_MASK_150.jpg


kata6.jpg
 

Your message may be considered spam for the following reasons:

If you wish to reply despite these issues, check the box below before replying.
Be aware that malicious compliance may result in more severe penalties.
Back
Top