Nerf Gun Props? YES!

I like how you are using daily waste to create awesomeness. I'm always fascinated by the art people from Star Trek, when they shop the hardware store for "spaceship parts". Seeing kitbashing is always more interesting than a re-paint (not that they're not very cool). Thanks for sharing. :)
 
Awesome work! Question: do you use any special paints or techniques for painting the plastic guns?

I have some projects in the works that require painting plastic including some prop guns and a ride on car and I was wondering what the best way would be to ensure that the paint job is high quality :)
 
Use a fine grit sandpaper (700+ is ok) on areas that will be handled a lot, and check to see if the paint you are thinking of using is ok for plastics. If you need to use a primer, go for an etch primer. Spray light coats and give the recommended time before re-spraying.

One of the handyest tips I've learned (thanks to this thread) is to warm the spray paint to room temperature before using it. It will give a much more even coat and nicer finish.

Good luck, and hope to see some of your work :thumbsup
 
Ok, freaky experiance alert! The trigger for the FrankenNerf disappeared from the container I'm keeping all the screws and internal bits in, and I have been looking for it for so long I was thinking I had to get a new one just for the trigger. I totaly messed up my workshop looking (again) this morning, along with anywhere else I might have been working on it, and find it did I not. Got back from work, unlock workshop and it's sitting there on the side, clear as day?!?!? I thought my missus was having a laugh or something, but apparent not.

If I got ghosts, at least I'm in the right place to find a ghostbuster or two :lol
 
Our courtious and efficient staff is available 24 hours a day to serve all your supernatural elimination needs. ;)

Off the top of my head.
 
Hi all

JhonsonArms, I want to thank you for starting this thread and inspiring me to have a go too. My kid loves his new gun & my wife has now stopped pestering me about my collection of tat she keeps wanting me to get rid of.

Here's a couple a pics of it as it is at the moment:

343b674b.jpg


5647db63.jpg
 
Man, that came out looking slick! I'm happy to have played my bit part in the inspiration for making these great toys :)

Thank you as well for the help in answering questions posted here. I try to stop by as often as possible, but my schedule of two full-time jobs has really had me buried here lately..plus side? Lots of photos coming :)

All the best and I hope you keep making them!

Brian


Cool, I'm glad you like, it means a lot coming from a master such as yourself :)


Whew! I was worried I was hijacking your thread by answering questions directed to you. I'm trying to give as much due credit in my responses and only answer questions I actually know about. You can consider me your apprentice in this amazing art as I am truly hooked.

I managed to pick up one of the last longshots (they only had four) from toys r us in Chester for my bro's pulse rifle mod, and an element ex 6 (for £10). I now have a cool scope for the long strike/halo mod (I think it looks halo-ish anyway), and an extra "laser" sight for the FrankenNerf (I've started calling it The Pug.


While I'm on the subject of lasers, here's what it looks like on "the pug" (shyly modeled by its happy owner) :

7269ca42.jpg


I sripped out and drilled the battery compartment to fit my eldest's pen laser. It did have a button for an led, but was given permission to remove it.

2b878efe.jpg


I then chopped up the slidy focus thing for a new inner switch to turn the laser on (I made the first one too shallow so ended up having use the other side) :

889cf222.jpg


Once I was happy with the alignment and everything was secure I drilled out the lens, and hand routed the remaining so it was flush to the orenge plastic (dremel is your friend :thumbsup). The lense is a great alignment tool, so leave the lens for last as you can see the laser as it passes through making it easy to get it bang on.

40cd43a3.jpg


For better results I'd also use a one trick pony pen laser. The laser emitter is off centre in this one to make room for the now useless led. It's no biggie with this one off mod, but I've come up with a better idea and I'll need a centred one for it.
 
Last edited:
Nice build, Canobi!

I've been inspired by the post for awhile now and I'm in the process of getting the prep work done of some Nerf guns, etc., myself. (What a looooong process.)

But, I couldn't wait to get some paint on something quick, so I did a couple of cheap squirt guns for fun. Check 'em out and let me know what you think, guys.

12432-rayguns02.jpg


12431-rayguns01.jpg
 
I showed my nephew this thread (who has an enormous amount of nerf guns), he wanted me to paint up a longstrike for him. (yellow stripe idea came from johnson arms... couldn't resist its just too darn cool)

c7f96b51.jpg
68ec6def.jpg
f4001886.jpg
fecafdf4.jpg
5bfd8bf2.jpg
e798eeb2.jpg
1ee67fba.jpg
 
Nice one Solo, they came out great :thumbsup I'm glad my work inspired you :) but all credit to JhonsonArms for the inspiration, he's the one that got me started.

Yeh, preperation can take ages :/ , but it pays off in the end. I think there should be a new catagory of RSI = prop sanders elbow = I mostly just concentrate on the areas that will be handled the most now (or I won't have any elbows by this time next year :lol). Can't wait to see more from you, keep it up :thumbsup

@Ironfett
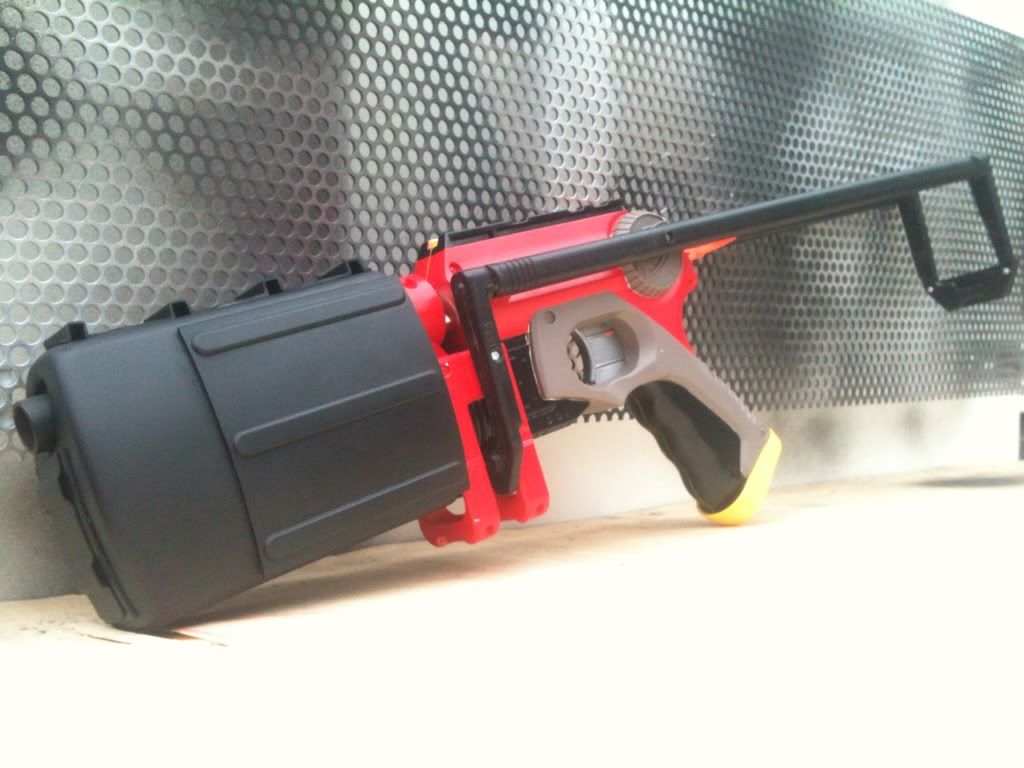
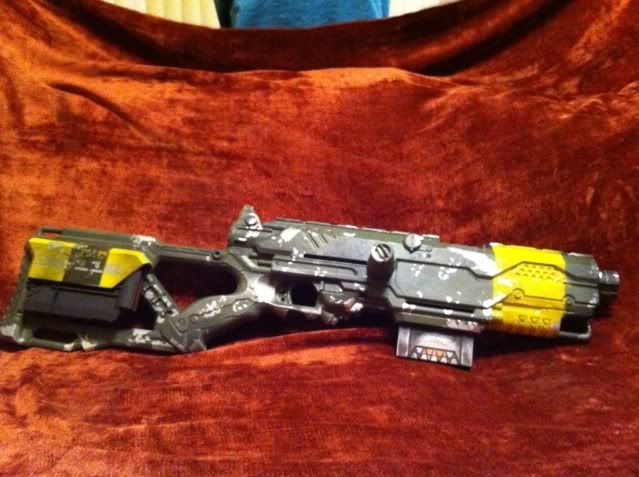
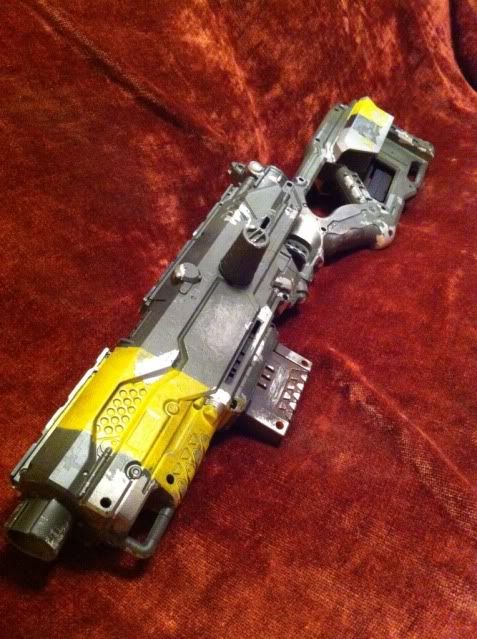
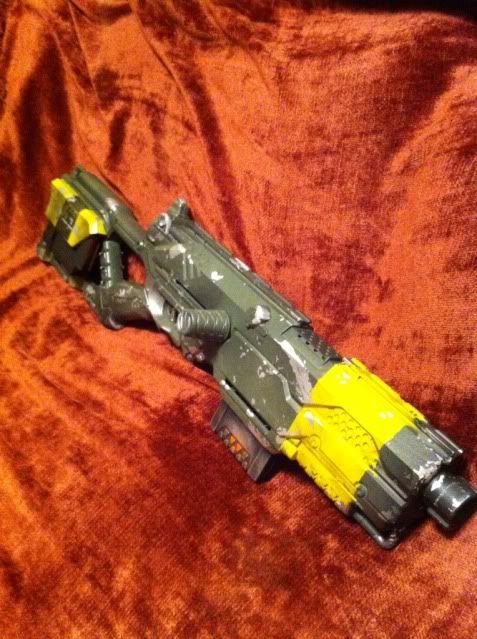
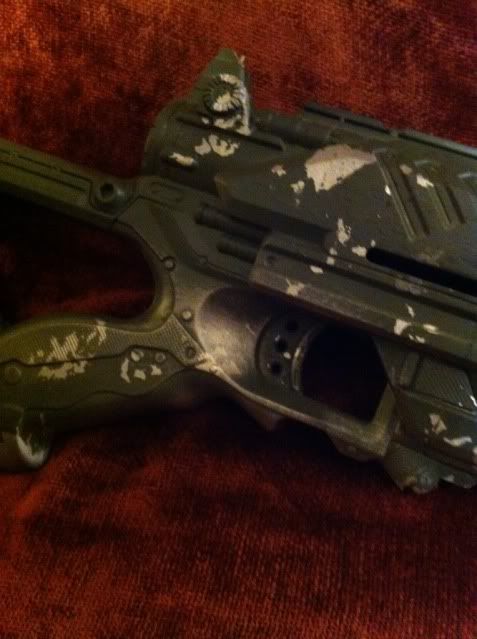
I love the longstrike, and the weathering on it is awesome :cool

I would love some weathering tips from you guys. All my experiance has been on a somewhat smaller scale and I'm finding my techniques don't translate to the larger format very well. Hope you don't mind if I ask a few questions?

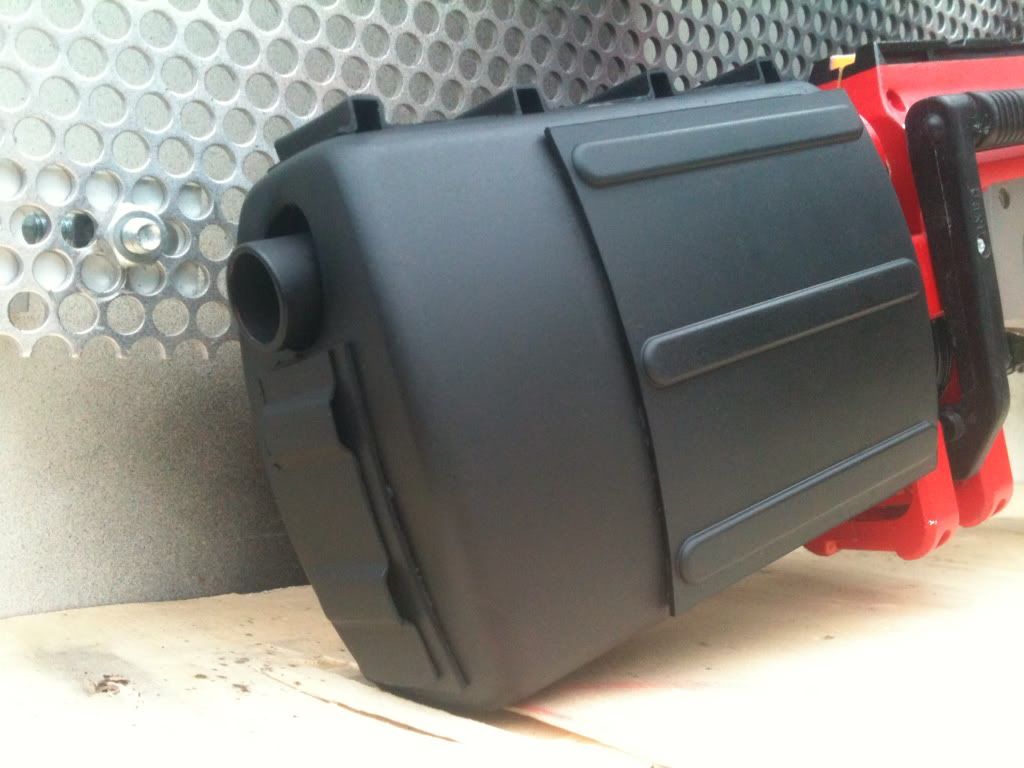
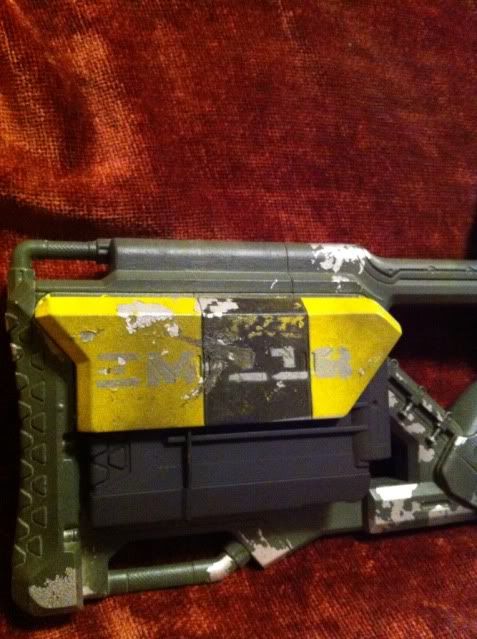
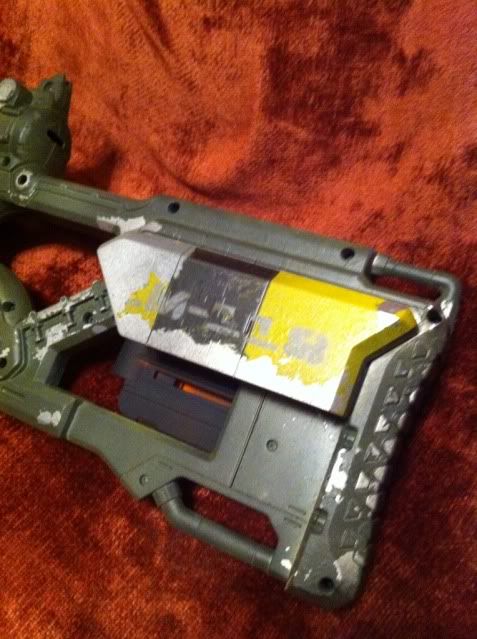
IronFett, the areas that look like the paint has chipped off, is that just silver over the top of the original paintwork? It's realy affective if it is.

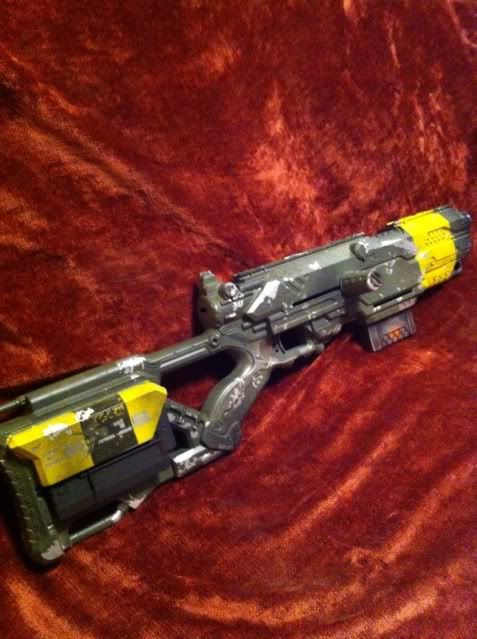
Solo, the silver one looks like its been kicking around for a while, is that a wash of some sort? That too is a good effect, not battered, but used a lot. I like = )

I've always been into making, modding and kit bashing stuff, so that part of it is just application on my part, the art form in this for me is the "lifelike" appearance of the finished piece. I'd love to get that battered about look down too, and you guys inspire me to try and nail it, thanks :cheers
 
Last edited:
I use liquid latex to mask off the areas I want to stay silver. Then I dusted the entire gun with a flat black mist. I was gonna do some more rusting and natural weathering but I was runnin short on time.
 
In the case of the silver ray gun, Canobi, I sprayed the gun with gray primer, then wiped silver spray paint over the high points so it looked like the recess was oxidized. It really gives it dimension and looks quite realistic.

Glad you like it! It is definitely my favorite of these 2.
 
I use liquid latex to mask off the areas I want to stay silver. Then I dusted the entire gun with a flat black mist. I was gonna do some more rusting and natural weathering but I was runnin short on time.

Hi IronFett

Got some latex :thumbsup I got fluorescent orenge as it won't get lost on any of the colours I'd use. I figured it would be harder to try and get the edges right if the latex was too close in colour to paint job I was working on.

When you say light dustings, is this in terms of spray speed (i.e lightly pressed nozzle) or distance from object?


Making something plastic look rusty is a true art and I've seen some great examples on this forum.

I did a bit of googeling and I found this looking up rust effect:

Gold Leaf Supplies : For all your gold leaf, silver leaf and gilding supplies

It's called rust patina. It comes as an iron rich paint and a seperate oxidising agent. I'd also get the sealing agent so you can stop the rusting at just the right point. I can't wait to try out mine, I just ordered some as its perfect for a seperate project I'm working on :)
 
more distance than speed, a great lesson for rust is metallic painting techniques from stan winston online. Ive been doing it and its been a HUGE benefit.
 

Your message may be considered spam for the following reasons:

If you wish to reply despite these issues, check the box below before replying.
Be aware that malicious compliance may result in more severe penalties.
Back
Top