I Will Find You. All of You: Crossbones Civil War WIP.

After seeing the new trailer it looks like Crossbones has a rifle(maybe the steyr aug ?) and the gauntlets on in the back of the van.
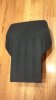
This is my interpretation of the "retracted power gauntlets"
I have this one complete and the base gauntlet and almost all the pieces cut of the second one, just need to glue it up then I can paint both.

2016-03-11_08-08-04_902.jpg2016-03-12_15-24-50_256.jpg2016-03-12_19-00-05_39.jpg2016-03-13_16-44-29_291.jpg2016-03-13_16-45-39_241.jpg

2016-03-11_08-08-04_902.jpg


2016-03-12_15-24-50_256.jpg


2016-03-12_19-00-05_39.jpg


2016-03-13_16-44-29_291.jpg


2016-03-13_16-45-39_241.jpg
 
Last edited:
Wow, man. You are crushing this build. Great, great job!
Thanks! really appreciate it.
I have the second retracted power gauntlet sorted and glued up. Both are as complete as I can get them with little or no reference.
They are ready to disassemble, paint and then put the finishing touches on.
I also re-did the chest armor piece and the shoulder armor and need to get those re painted.
Once I get these few things finished I am calling it done until the movie release.
2016-03-20_19-49-00_175.jpg2016-03-20_19-49-42_869.jpg2016-03-20_19-51-04_337.jpg

2016-03-20_19-47-39_236.jpg


2016-03-20_19-49-00_175.jpg


2016-03-20_19-49-42_869.jpg


2016-03-20_19-51-04_337.jpg
 
Got them taken apart and plasti- dipped. The pistons are based with silver and ready to get the black top coat on the middle parts.

once I get some good weather I am going to get the silver on the gauntlets and put it all back together.

2016-03-27_12-41-32_103.jpg

2016-03-27_12-41-32_103.jpg
 
Had not put much thought to the gloves since the gauntlets covered them.
Since the retracted gauntlets allow hands to be free , my cheap dollar general gloves weren't cuttin' it.
used some craft foam and contact cement and I think these are close enough.
2016-03-29_11-12-33_485.jpgIMG_0935.JPGIMG_0936.JPG

2016-03-29_11-12-33_485.jpg


IMG_0935.JPG


IMG_0936.JPG


IMG_0935.JPG


IMG_0936.JPG
 
I thought this was done, but I am not quite happy with the shape of the main armor chest piece.
I finally have the shape as close as I can get it.

Using the foam, heat form, pva, 65d brushed on method.


here is the piece cut, formed , and with 3 coats of pva.
chest plate 3.jpg

Third coat of 65d brushed on.
chest plate 2.jpg
last layer of 65d and cured overnight.

chest plate.jpg

It has bubbles and is not as clean/smooth as I was expecting.
In my experience 65d sands well. I tested sanded a small portion and the air bubbles will smooth out no problem.
Nothing some sanding and priming wont fix.
 
Man this whole build is fantastic, you're doing an amazing job. Just wanted to let you know, we saw the movie last week at an early screening. Not going to type any spoilers in here but there is one thing you're missing on the gauntlets that I haven't seen anywhere but in the movie. However, just today I saw photos of the Crossbones Hot Toys figure and they are there. So if you want to know, just Google "Hot Toys pop up store Crossbones figure" and you'll find it. Should be an easy add. ;)
 
Man this whole build is fantastic, you're doing an amazing job. Just wanted to let you know, we saw the movie last week at an early screening. Not going to type any spoilers in here but there is one thing you're missing on the gauntlets that I haven't seen anywhere but in the movie. However, just today I saw photos of the Crossbones Hot Toys figure and they are there. So if you want to know, just Google "Hot Toys pop up store Crossbones figure" and you'll find it. Should be an easy add. ;)

I appreciate it, Thanks! I am jealous(in a good way) you have seen it already This build has been fun.
And to your point I "think" I know what you are talking about, and I have it just haven't posted a clear pic of it.T
This pic is from earlier in the thread and I think what you are talking about is in there.
power gauntlet parts.jpg
 
Progress on the chest plate: self etching primer, sand, krylon sandable primer, bondo putty, sand, prime ,topcoat
plate 5.jpgplate 2.jpgplate4.jpg

Final chestplate in the chest-rig
thumbnail_2016-04-24_08-08-36_453.jpg
Attachment detail of the "lip" it sits in with the tacs holding it. This is what I came up with for that piping/trim look around the plate.
It is also backed with Velcro to the chest rig,
attachment detail.jpg


And last (sorry for the long post), the pouch for the mole vest
The research thread said it was a mag pouch but as I was looking for the dimensions and reference to make it , I am conviced its a Soft Taco pouch
Here is mine.
soft taco 2.jpgsoft taco1.jpg

Just have to paint up the new chest- piece and I think I can call it done.
 

Attachments

  • plate3.jpg
    plate3.jpg
    137.6 KB · Views: 206
I think I have everything done, the only thing missing from this pic is the coiled wire over the left buckle and some ornamental rivets.
I re did the buckles from foam to foam covered in 65 d, sanded primed and painted silver.
All I have to do is paint up the X on the chest. and this is ready for next weekend.
Here it is before I tweaked the buckles and with the coil.
unpainted armor 2.jpg

with new buckels
unspecified.jpg 3.jpg
 
Final suit up before this weekend.
Also realized I hadn't posted pics of the back of the set up, it took some time to get everything spaced right.
had to size the back armor and the triangle outer vest to fit together and make sure it lined up in the front.
Captain_America_Civil_War_Crossbones_Frank_Grillo_Vest-750x1100.jpgback1.jpg

Also a couple with the full gauntlets
crossbones7.jpgcrossbones8.jpg
 
This thread is more than 6 years old.

Your message may be considered spam for the following reasons:

  1. This thread hasn't been active in some time. A new post in this thread might not contribute constructively to this discussion after so long.
If you wish to reply despite these issues, check the box below before replying.
Be aware that malicious compliance may result in more severe penalties.
Back
Top