You are using an out of date browser. It may not display this or other websites correctly.
You should upgrade or use an alternative browser.
You should upgrade or use an alternative browser.
1:1 Millennium Falcon Cockpit Replica - Group Build
- Thread starter SteveStarkiller
- Start date
Not looked for a while been busy but now I'm all up to date my wife is annoyed at me !!! I can't stop showing her your pics !!! " yea, nice, " is all I got from her !!! she cannot understand or see a craftsman at work, your greeblies and CNC work is outstanding, all the small finer details you don't notice but see being built just adds that little bit more of a dimension for your eyes, they are not just chairs you sit in, they are nav chairs with outstanding details that your eyes are drawn to every time you look, the panels, the wiring, buttons, it's eye candy through and through, if I lived closer I would have loved to have lent you my hands every weekend,
best build on the RPF
Ben
Hi Ben,
WOW... thank you so much for the very kind words! I'm doing my best to stay as screen accurate and life authentic with everything from the chairs to the panels. And in those unseen areas its the few times I get to stretch my imagination and have fun with. All the CNC work goes to Daniel - he really knows how to work the machine. I just take orders.
")
I'm hoping for another productive weekend. I only have the standard 2 days but it will be interesting to see what I can accomplish!
Thanks again and as always... Stay Tuned!
Excellent job there big G!, the new arches look great. We knew it was going to be a big undertaking to get them all refitted. But you nailed it! Now you can get back to doing the fun stuff again.
Thank you, my friend! The path I took never would have happened w/o your input. The long holiday weekend and those extra days I took off inspired me to just knock it out! Hunker down and get it done! As I mentioned above, this weekend will be interesting. I've been working on the PC designing a few things but it all rests upon if/how this weekend turns out. That's all I'm going to say!
Fingers crossed
- - - Updated - - -
I used to spray with a small gun and had a cup of acetone beside me as to clean the gun between each spraying. Faster that way and no clogging!
Hey J,
I stay away from oils as much as I can. I'm an artist by nature and all during school I could never get a feel for oils - ever. Model paints is a bit different (probably only in my mind) lol
IzzyMel
Sr Member
SofaKing01,
Thanks to Wavey, I have the dimms and Awesome closeup photos of the TRM Greeblie for the side of the NAV chair. Let me know what you think of these so far.
Izzy
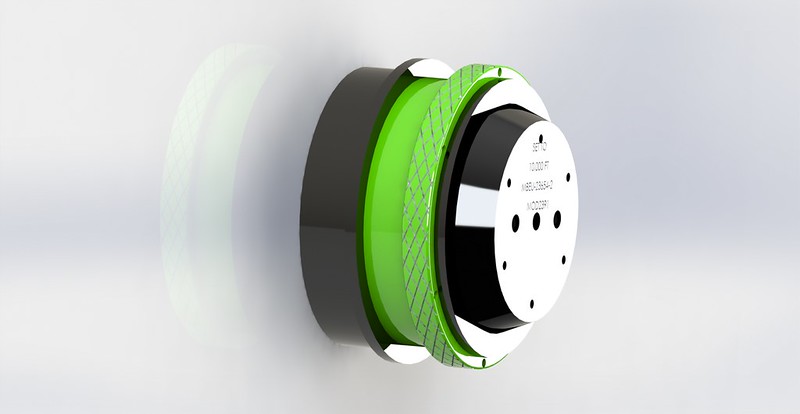 Accurate Cirlce TRM 2 by Izzy Mel, on Flickr
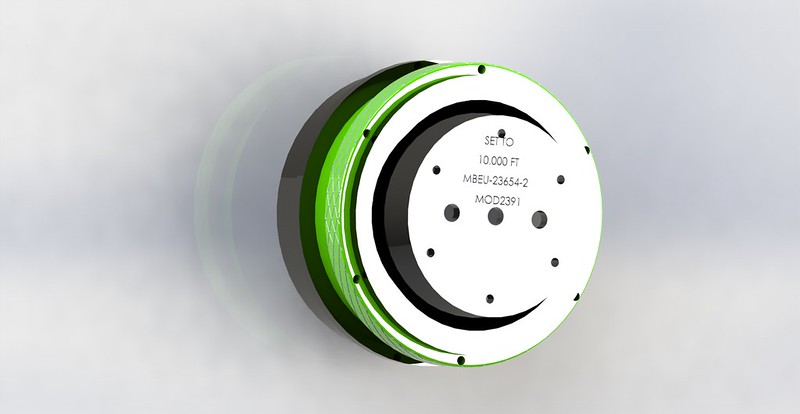 Accurate Cirlce TRM 1 by Izzy Mel, on Flickr
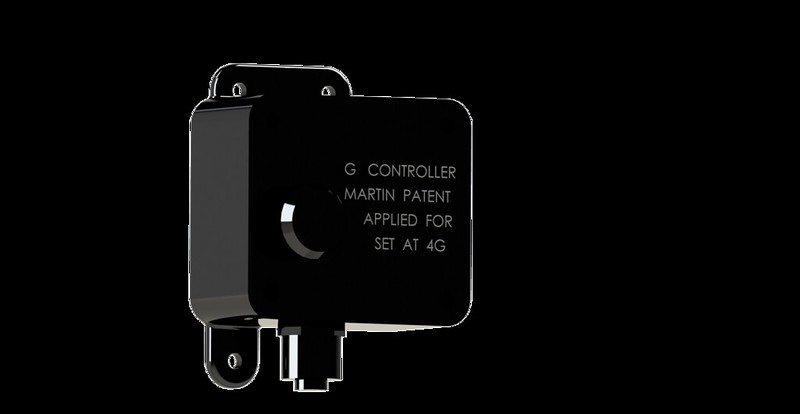 G controller box TRM by Izzy Mel, on Flickr
Many thanks to Wavey.
Thanks to Wavey, I have the dimms and Awesome closeup photos of the TRM Greeblie for the side of the NAV chair. Let me know what you think of these so far.
Izzy
Accurate Cirlce TRM 2 by Izzy Mel, on FlickrAccurate Cirlce TRM 1 by Izzy Mel, on FlickrG controller box TRM by Izzy Mel, on FlickrMany thanks to Wavey.
Iz,
Those are gorgeous - as always! I hope we can print with same level of detail. Question: where is the controller box located. Is that a hidden detail?
Those are gorgeous - as always! I hope we can print with same level of detail. Question: where is the controller box located. Is that a hidden detail?
Last edited:
Hi Gang,
Time for the end of the weekend update!
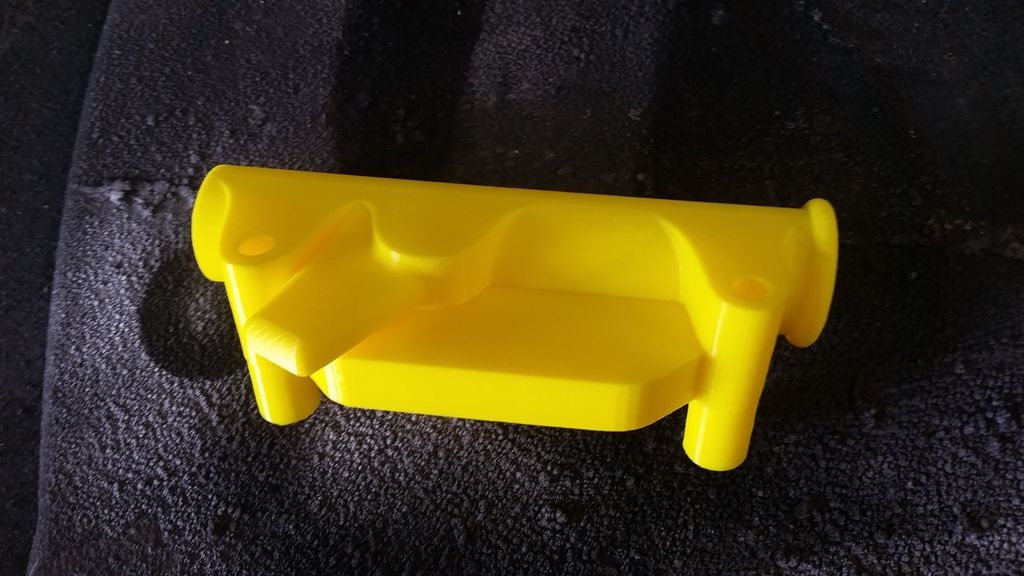
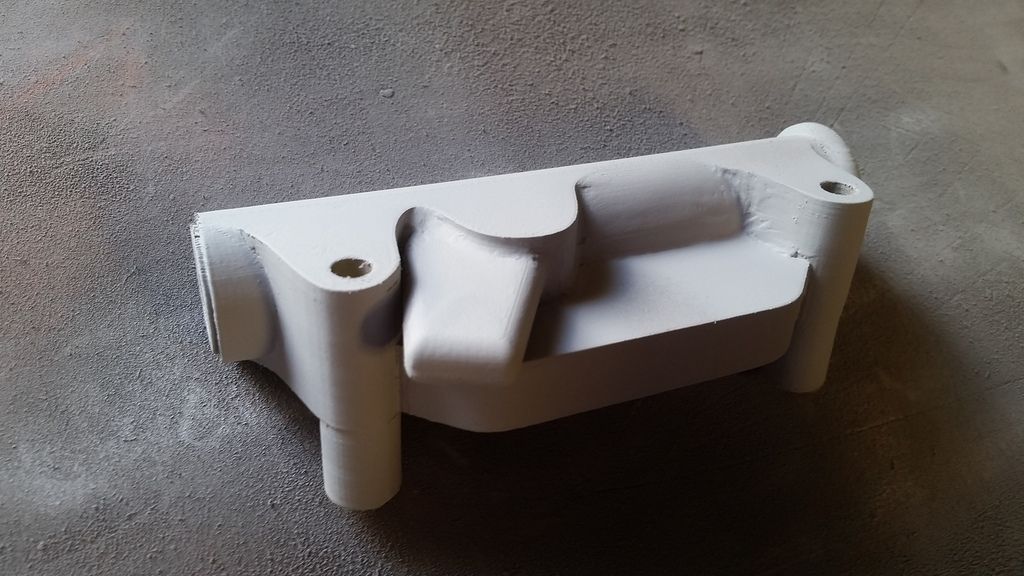
Jake had some down time and 3D printed some greeblies for me!
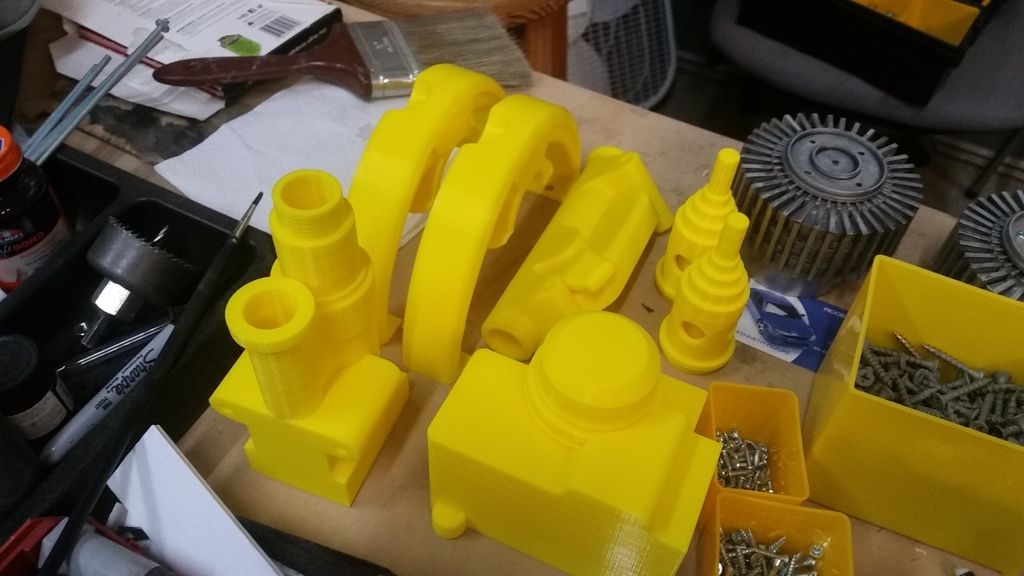
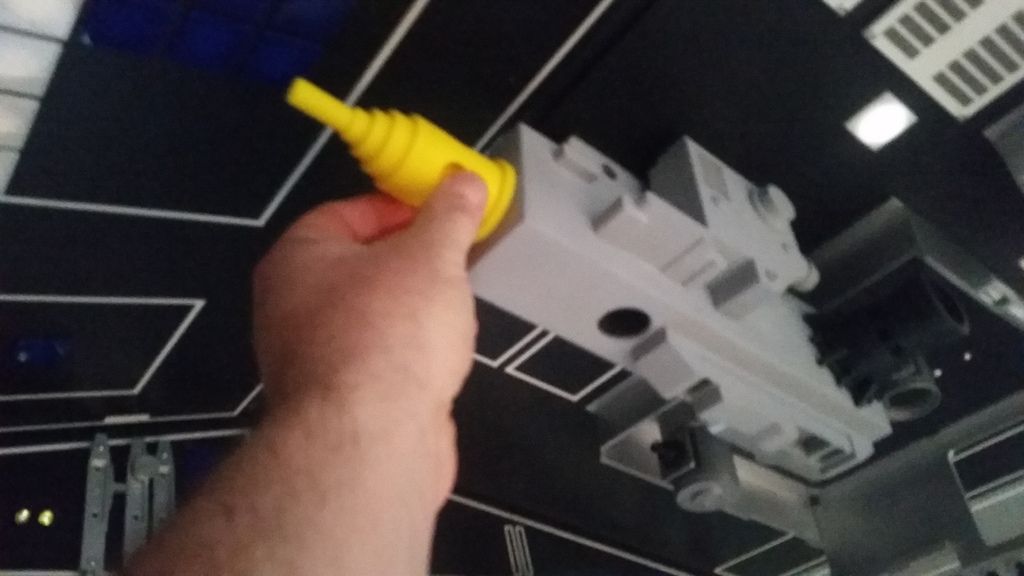
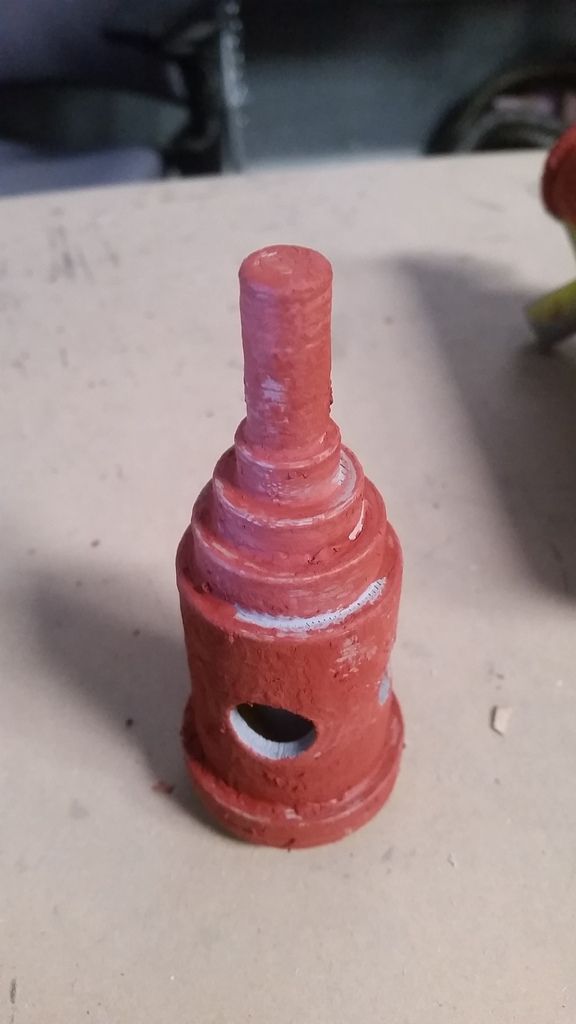
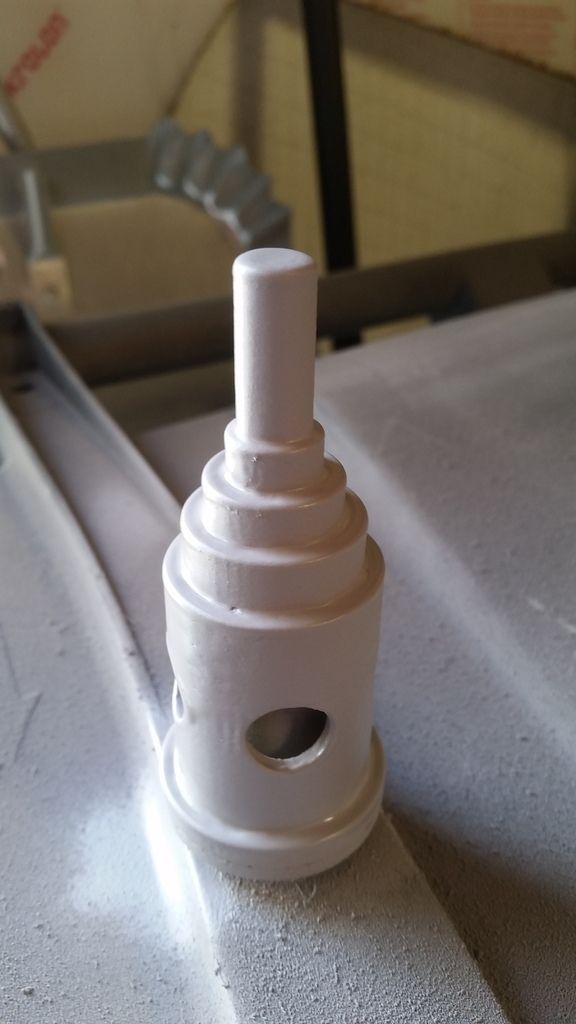
One of these greeblies is the tip of the cockpit laser gun greeblie (that's what I call it)
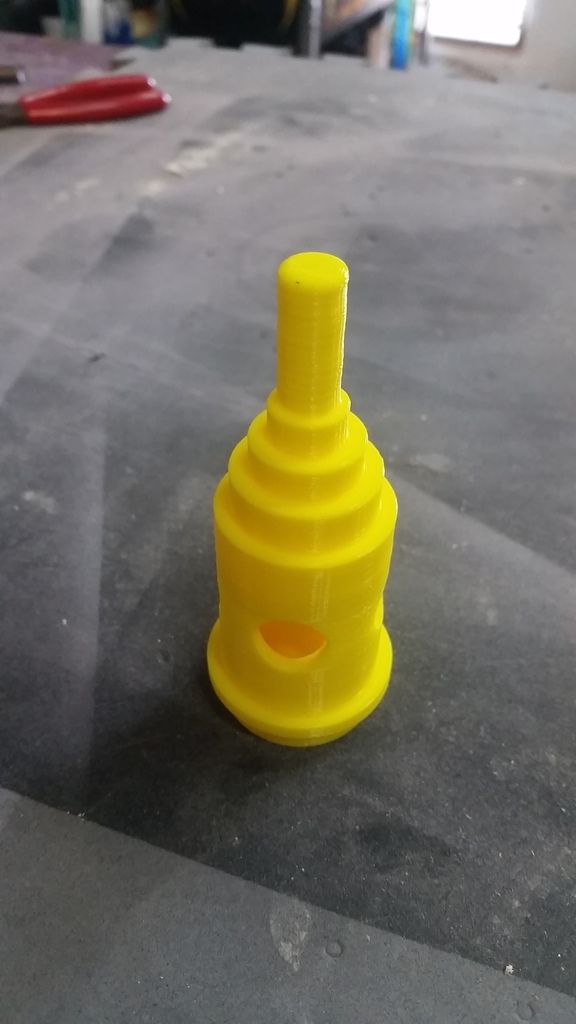
I removed material from the bottom
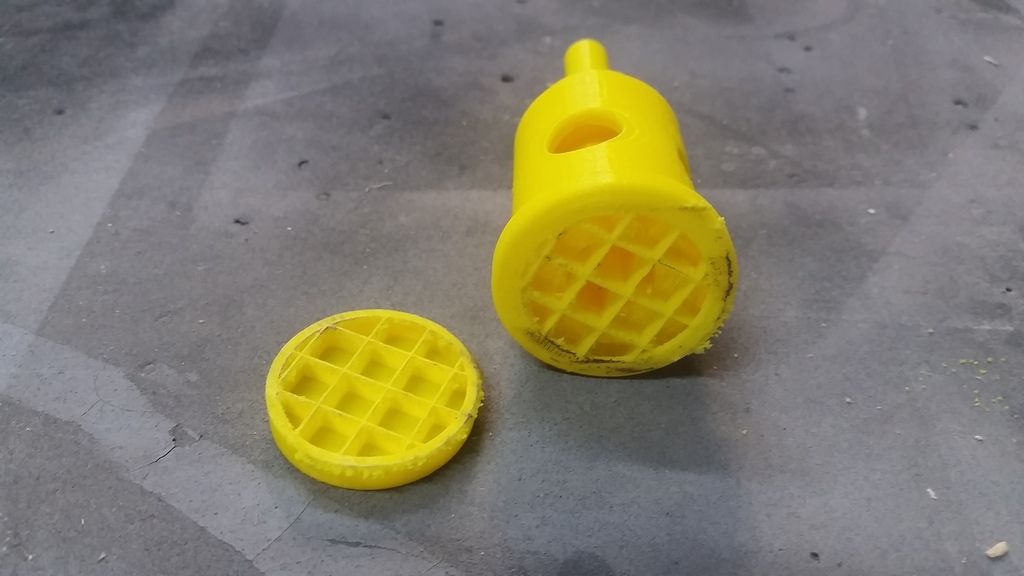
It fits here
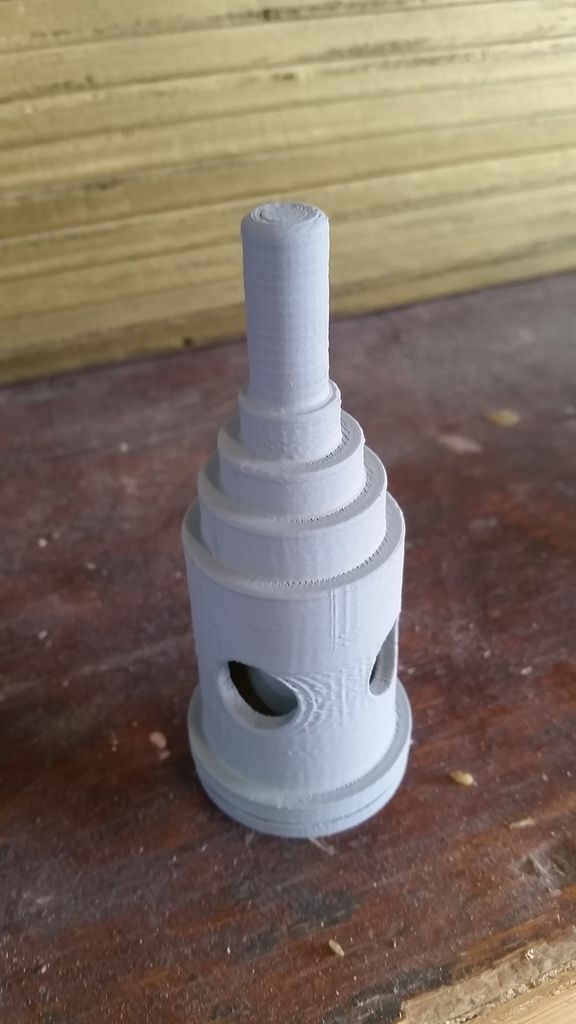
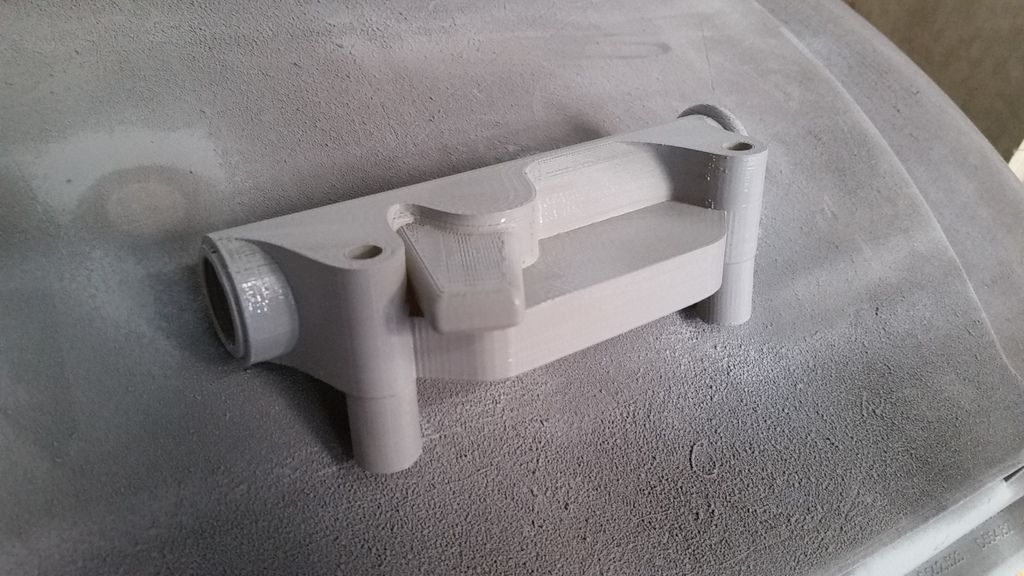
Added some MDF

And then primer... still lots of filler and sanding to do!
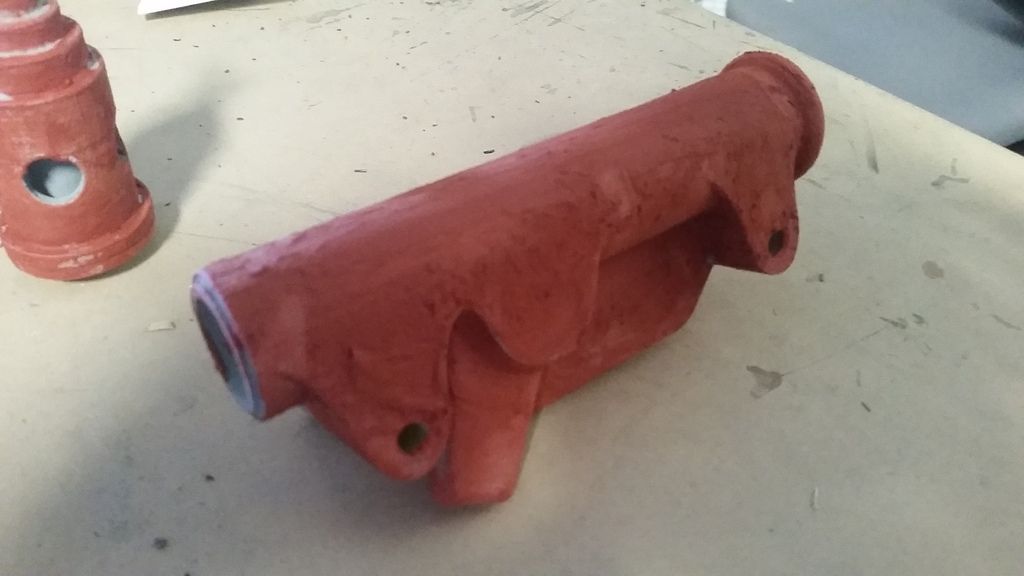
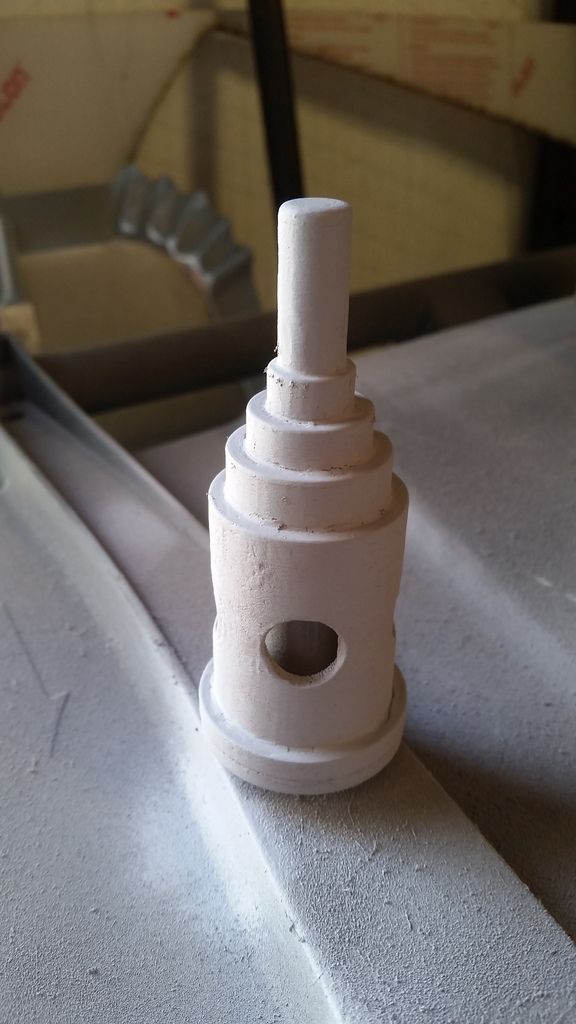
Another greeblie is this Nav Chair piece! Izzy did a fantastic job modeling and a HUGE thanks to Jake for once again printing this piece
Primer added and again... lots of filler and sanding coming up!
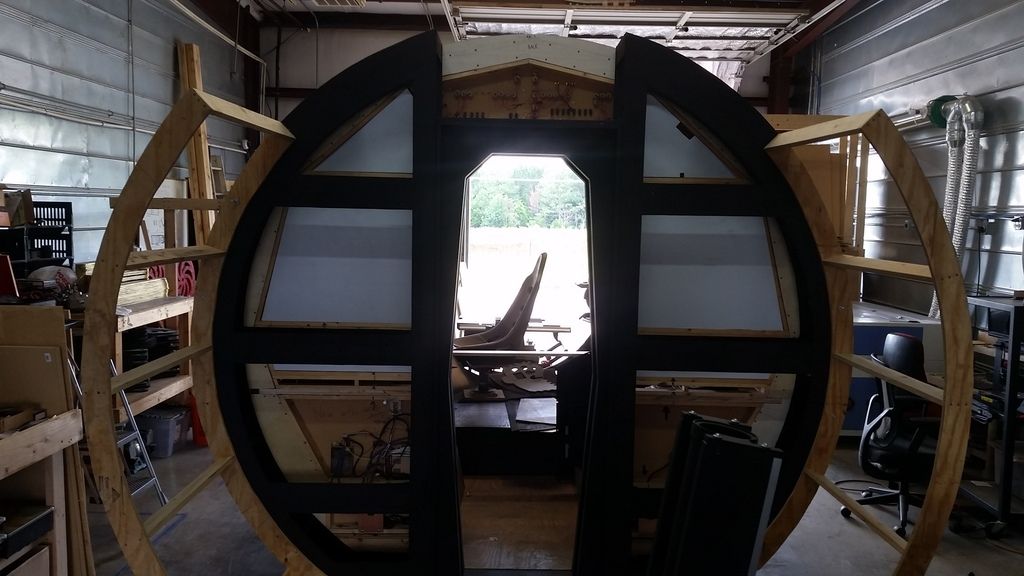
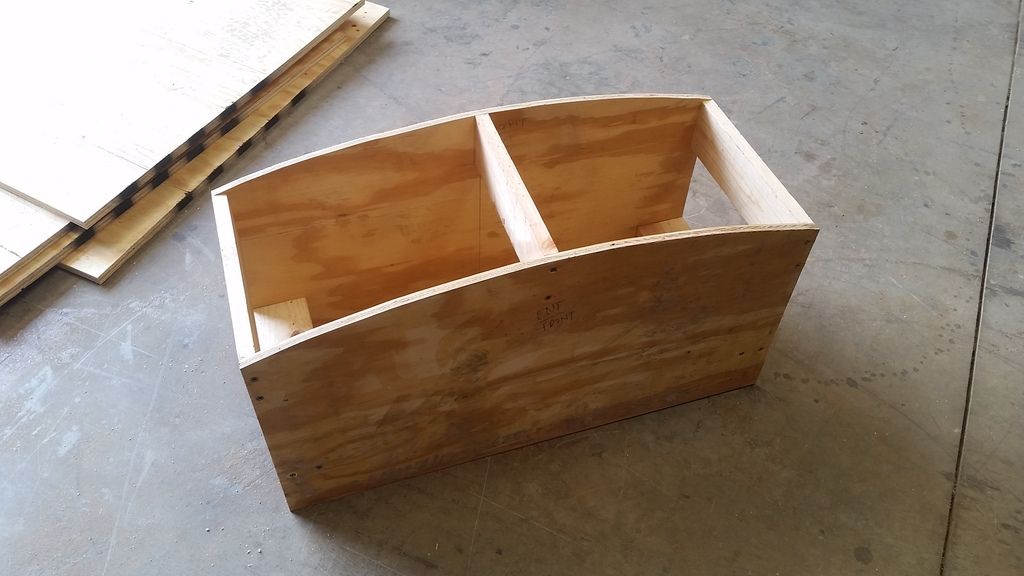
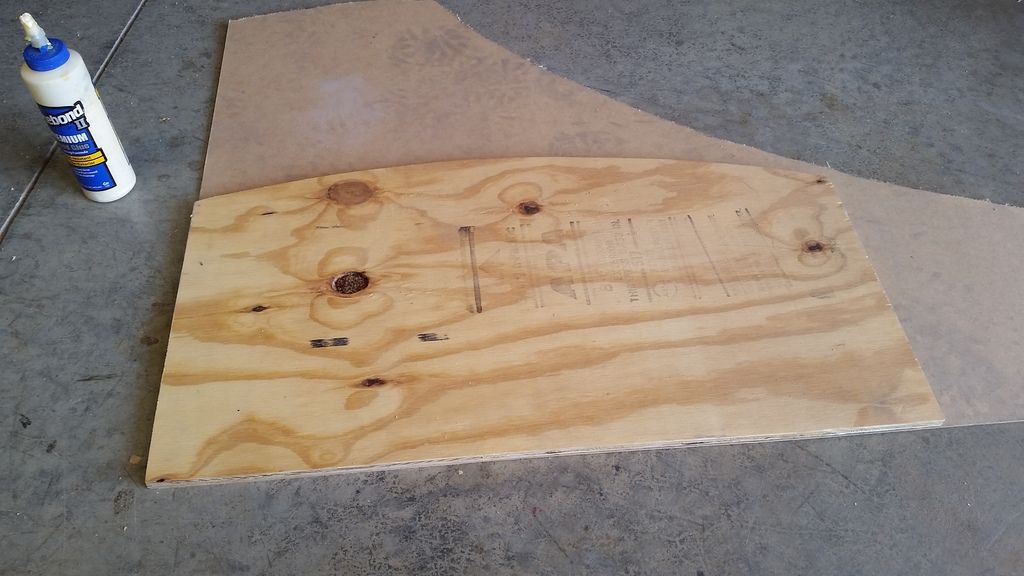
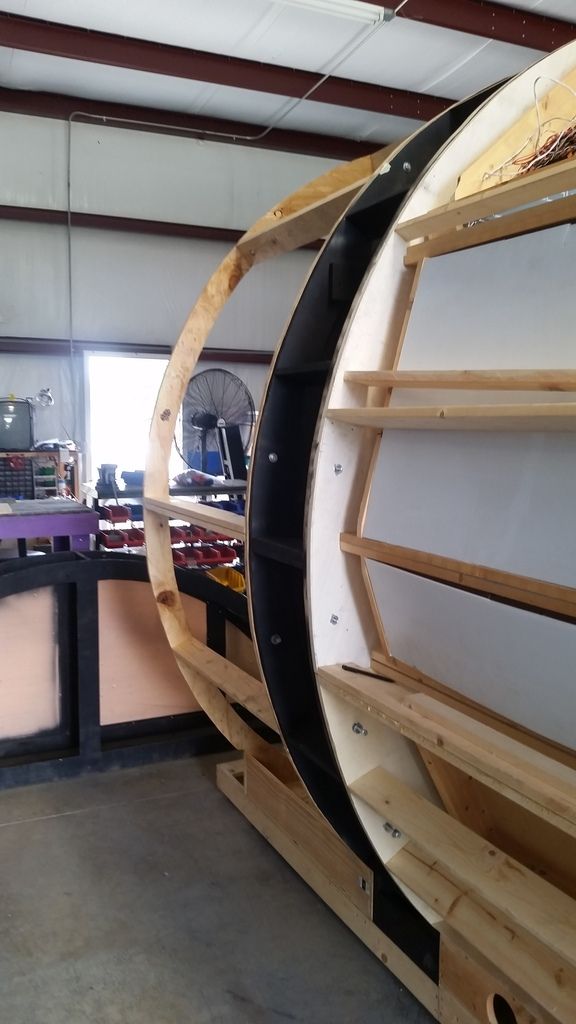
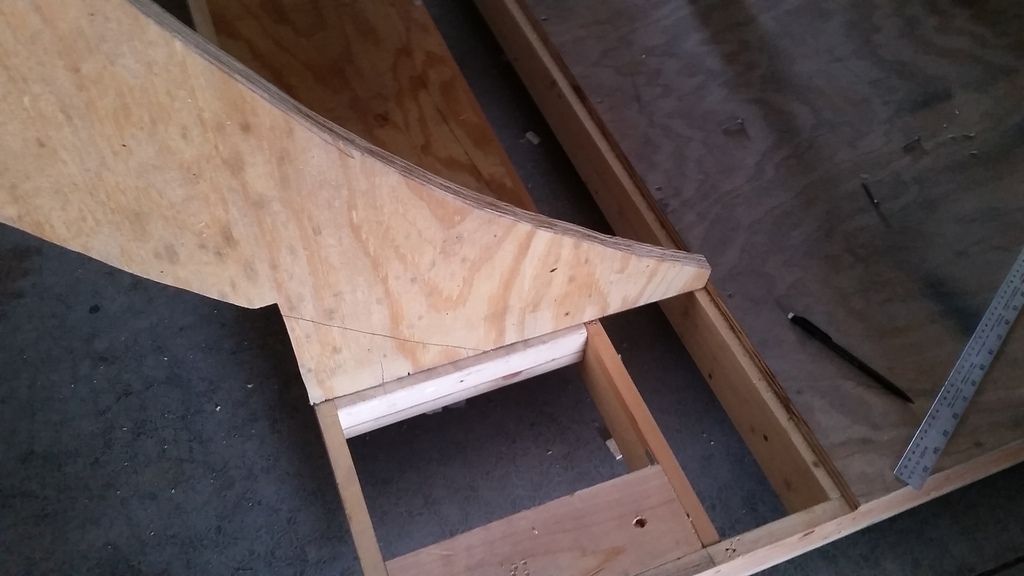
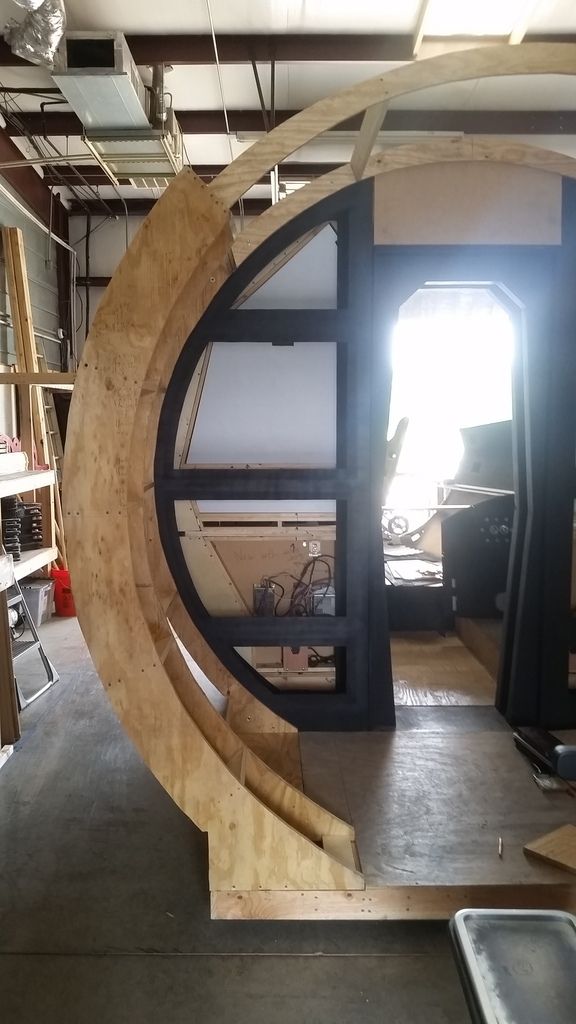
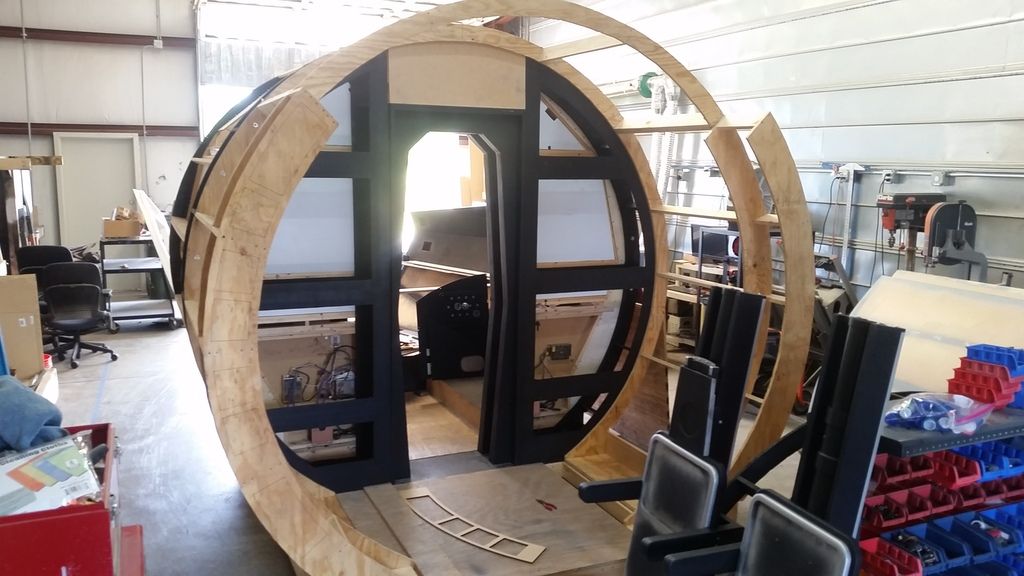
Let's get to the big update! I traced the exterior curve of the cockpit entrance and then used the interior curve of the half corridors to...
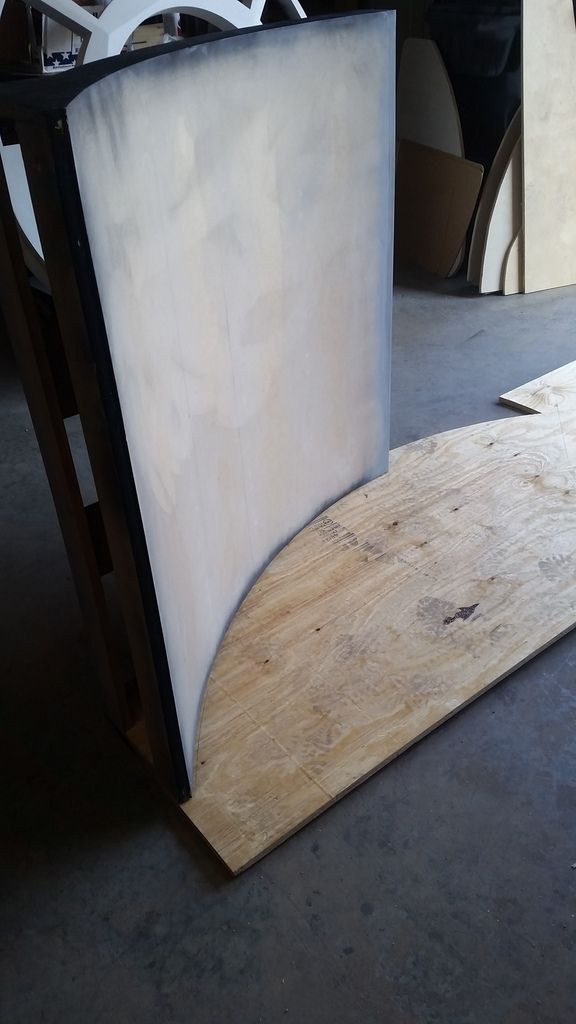
Cut these pieces
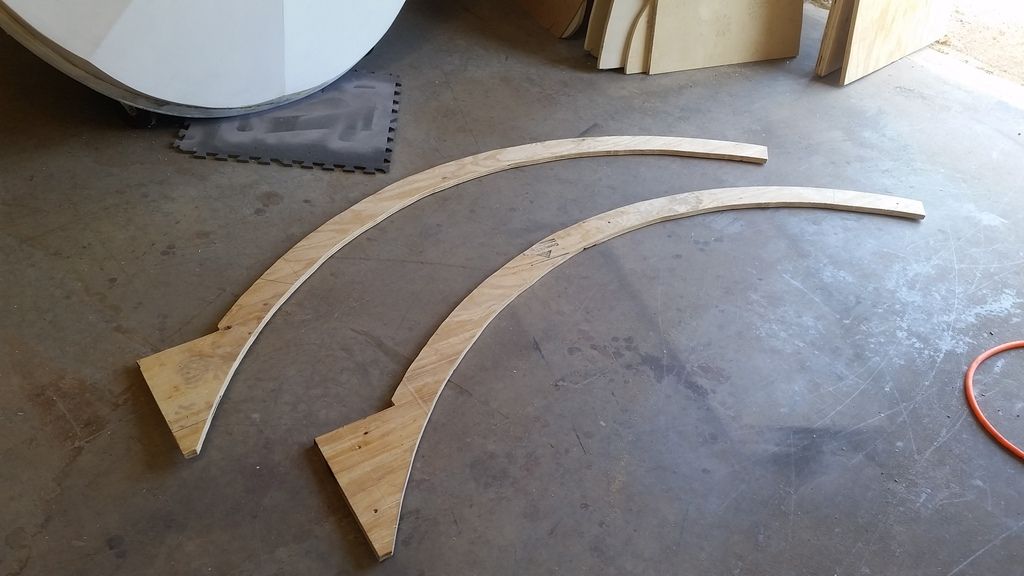
That arch seems a LOT taller than a half wall?
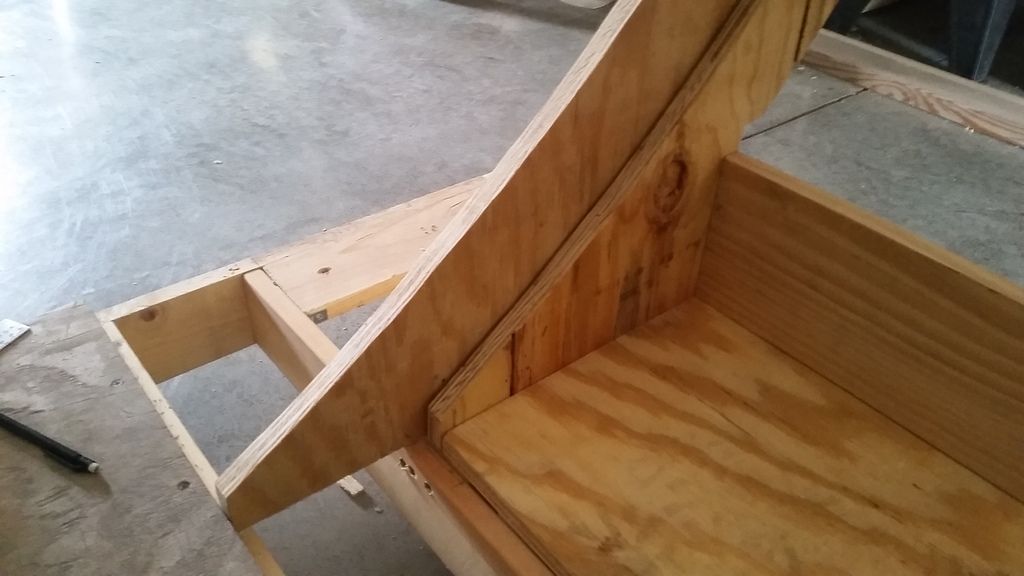
Cut the mounting platform
Start putting everything together
That's a big wall!
12" space left for something else... more on that later!
Let's start Chewie's side
End of Day 1
Day 2 started with my making the capstone piece that mounts above the door
Traced the MDF cover piece
Adhered
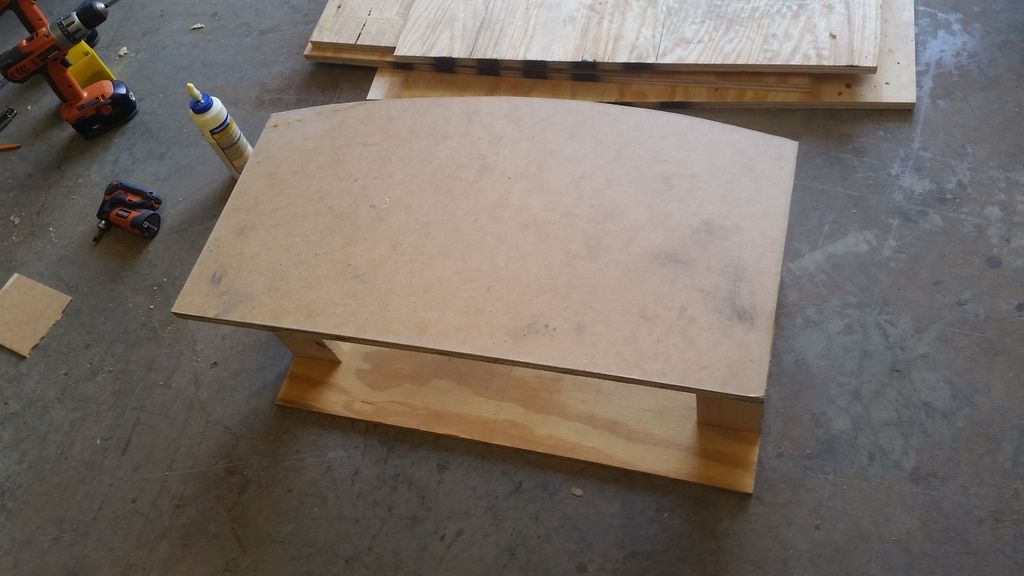
Fitted
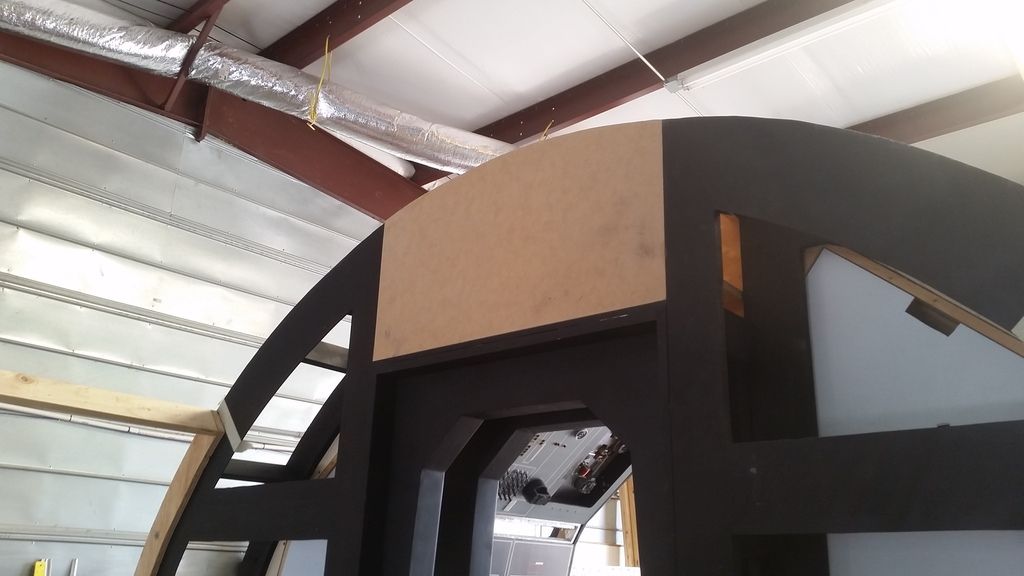
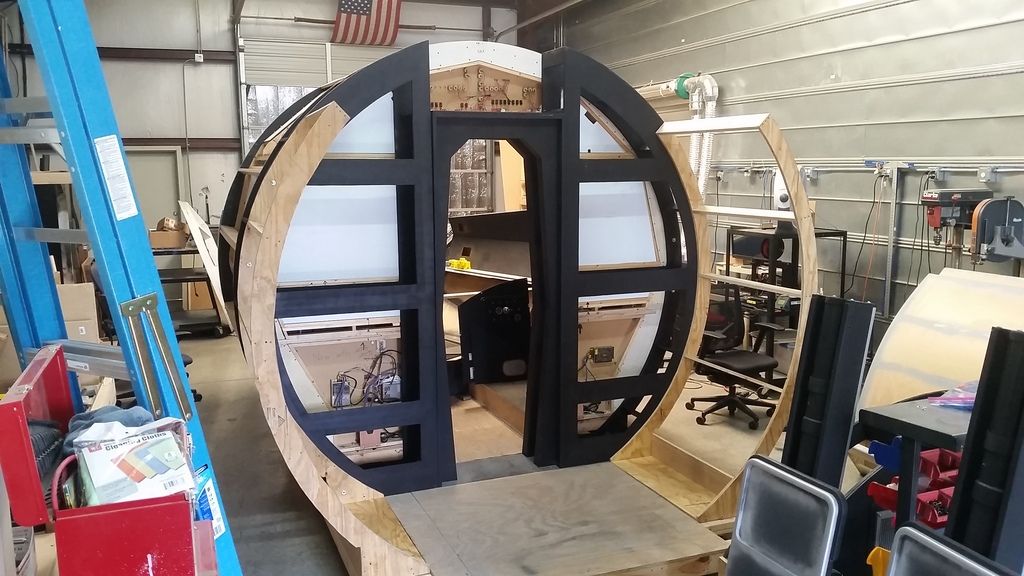
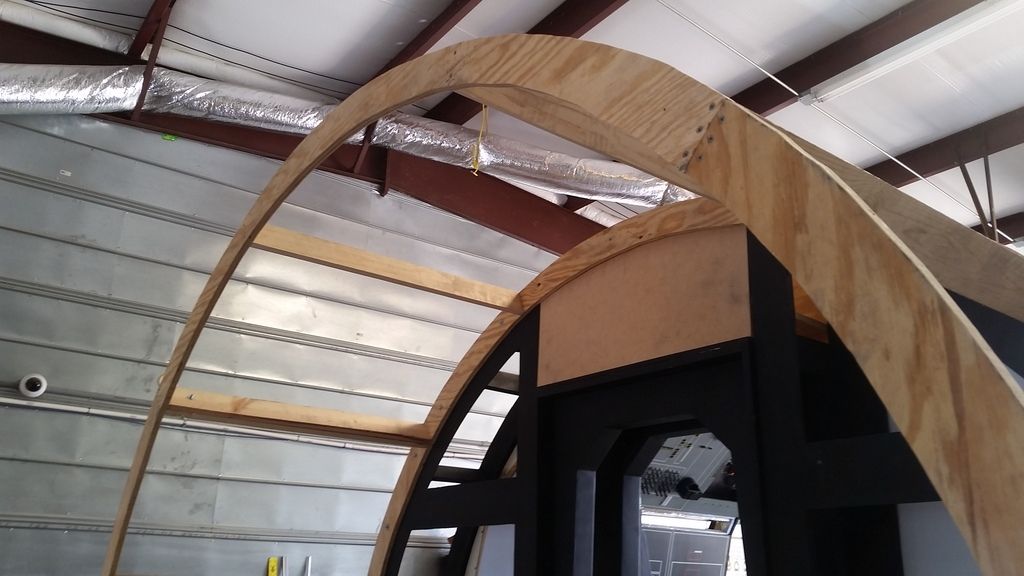
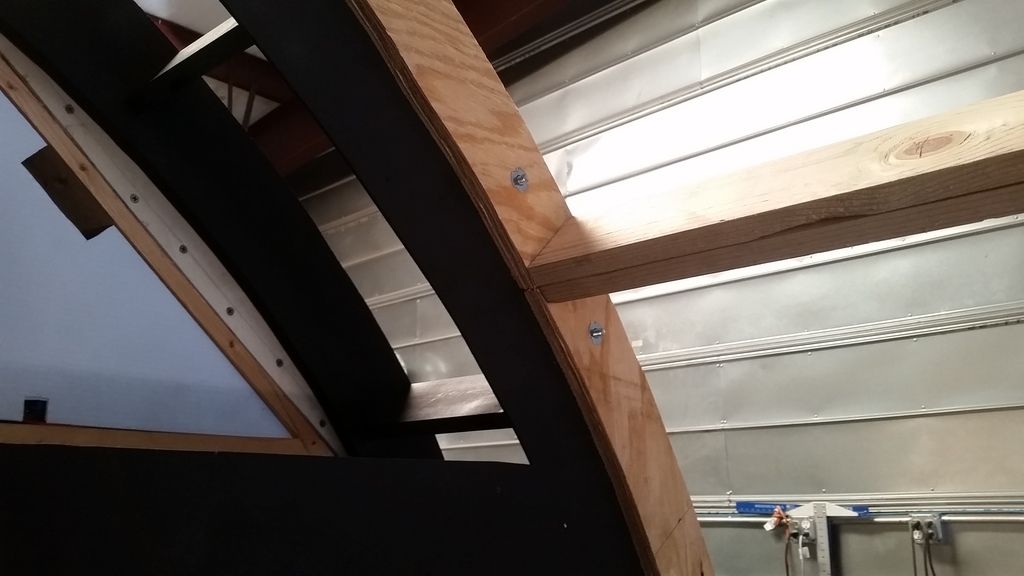
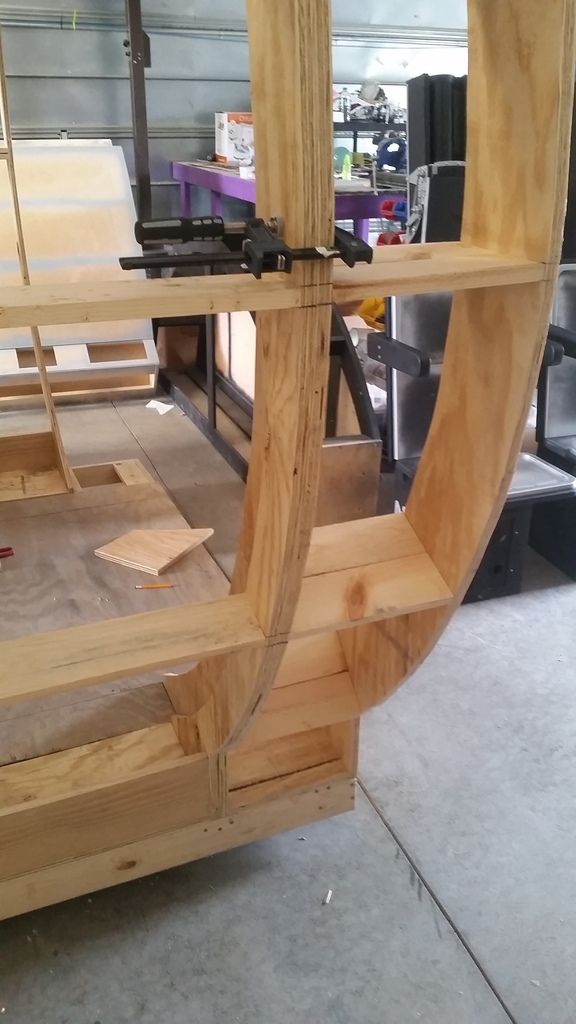
It was then time to tackle the upper arch! This was tough to do with only one person!
The cuts are far from perfect but they match the exterior curve perfectly! The interior side will be hidden and smoothed by the skin
In place!
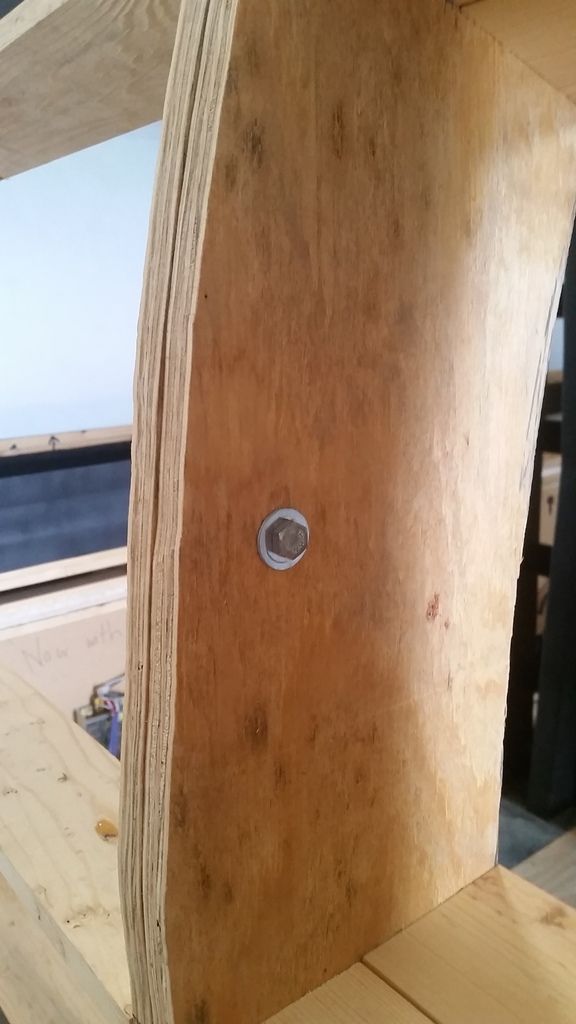
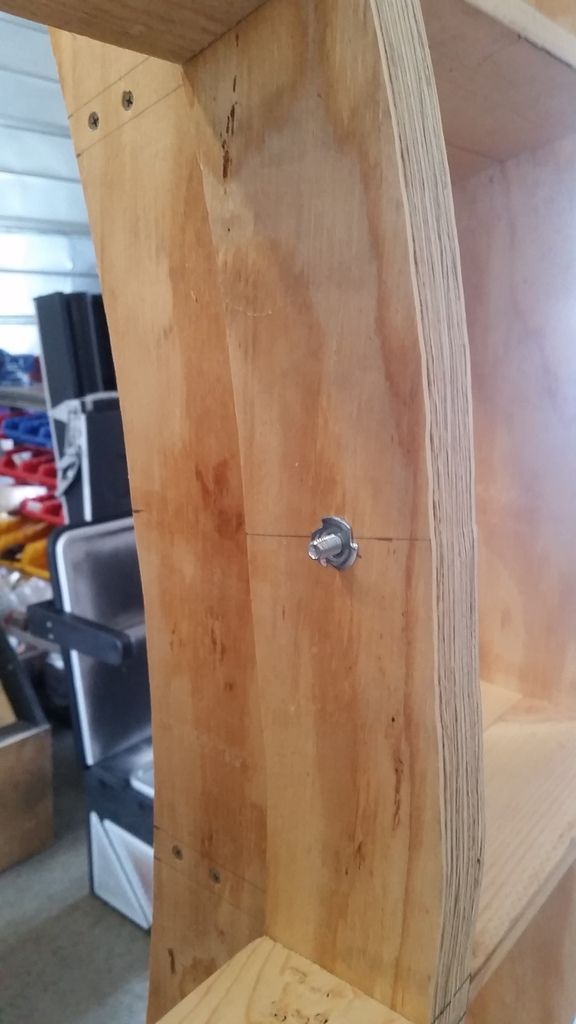
"T" Nuts
All of the "T" Nuts are mounted so I can access them from the cockpit entrance frame(s). Since all the entrance panels come off for access to the electronics, this makes assembly MUCH easier!
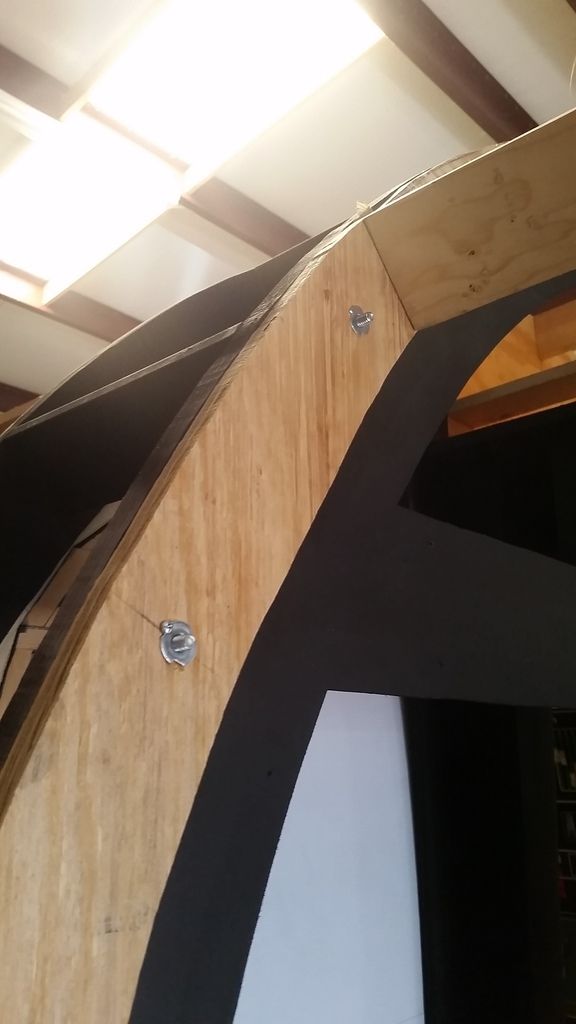
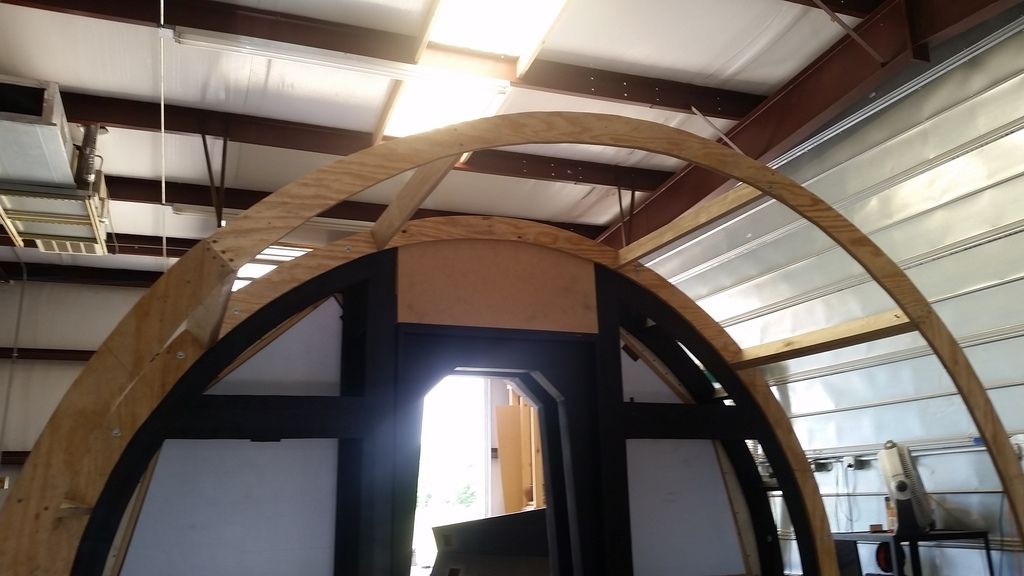
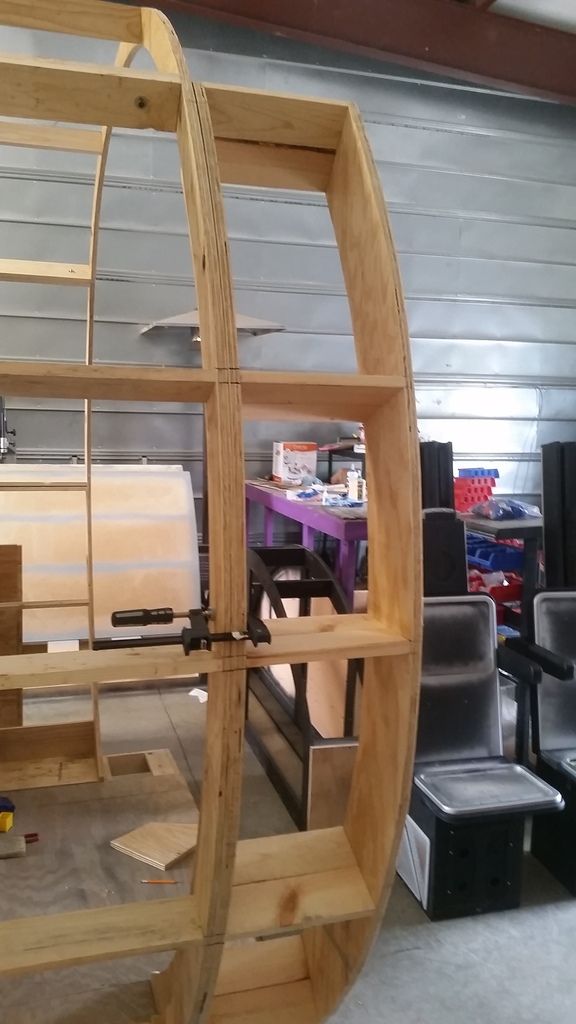
Still some light sanding and trimming to do to make the arch transition between panels smooth
And this is where we are!

Another HUGE thanks to both Jake and Izzy for the 3D models and prints!
Stay Tuned. More to Follow.
Time for the end of the weekend update!
Jake had some down time and 3D printed some greeblies for me!
One of these greeblies is the tip of the cockpit laser gun greeblie (that's what I call it)
I removed material from the bottom
It fits here
Added some MDF
And then primer... still lots of filler and sanding to do!
Another greeblie is this Nav Chair piece! Izzy did a fantastic job modeling and a HUGE thanks to Jake for once again printing this piece
Primer added and again... lots of filler and sanding coming up!
Let's get to the big update! I traced the exterior curve of the cockpit entrance and then used the interior curve of the half corridors to...
Cut these pieces
That arch seems a LOT taller than a half wall?
Cut the mounting platform
Start putting everything together
That's a big wall!
12" space left for something else... more on that later!
Let's start Chewie's side
End of Day 1
Day 2 started with my making the capstone piece that mounts above the door
Traced the MDF cover piece
Adhered
Fitted
It was then time to tackle the upper arch! This was tough to do with only one person!
The cuts are far from perfect but they match the exterior curve perfectly! The interior side will be hidden and smoothed by the skin
In place!
"T" Nuts
All of the "T" Nuts are mounted so I can access them from the cockpit entrance frame(s). Since all the entrance panels come off for access to the electronics, this makes assembly MUCH easier!
Still some light sanding and trimming to do to make the arch transition between panels smooth
And this is where we are!
Another HUGE thanks to both Jake and Izzy for the 3D models and prints!
Stay Tuned. More to Follow.
Last edited:
Friendly flyer
Well-Known Member
Your half walls have grown up!
Your half walls have grown up!
They grow up so fast...
- - - Updated - - -
Looks amazing Sofaking01
Thank you, Sir! This weekend is going to be fun!
- - - Updated - - -
Wow, this is going to look so much cooler this way, the immersion will be much better. Then you just need to add speakers that play the engine rumbling in loop and it will really feel like you're boarding a real space ship
Hey OC,
I agree 100% I would love to add part of the angled corridor we see when looking through the cockpit door but this configuration will be just as exciting. There are 2 or 3 different designs I can do. Still thinking that approach.
We're DEF adding more speakers to the build. The rumble of the engines is DEF on the list
So Sofa, when you do something like reconstruct the entrance hallway because you decide to go with a full hallway and not the half height hallway, what do you do with the previous hallway? Do you rob it for parts, or keep it for a "traveling" version?
Hey Kev,
9/10 times I'll keep the extra panels and simply set them aside. I DEF need to get them out of the shop to give me more room. But to be honest, I don't know what I'll do with these panels. If the new 360 deg corridor looks like I hope it's going to then I'll probably never use the half panels leaving me with the decision when its time to simply toss them out.
Which kinda hurts in a way...
- - - Updated - - -
Can I Cry Like NOW??? LOL
You've been full 360 corridor entrance for your 360th page!!! LOL
LOL! Dang... Perfect timing or happy accident?
Lt Washburn
Sr Member
I know you said you're sharing the space, but from looking at the ceiling height in the pictures....maybe you can build a platform, and let them have the second floor, and you can build more Falcon.
I'll say happy accident makes it the perfect timing
Thanks, J! Let's hope this weekend is a productive one!
- - - Updated - - -
new printed greebs look fantastic!! the corridor looks like a fantastic piece of wood working in progress!!
sending love from the UK 1:1 falcon cockpit team ^^
Hi S,
Thanks so much! Izzy continues to do a fantastic job on those 3D models! I'm really looking forward to the next round of printing. Hope Jake is up for it!
Hi Gang,
Time for another weekend update!
Added more filler to the new 3D prints
3D printing is amazing but there sure is a LOT of work to do make the surfaces smooth
4th coat of filler
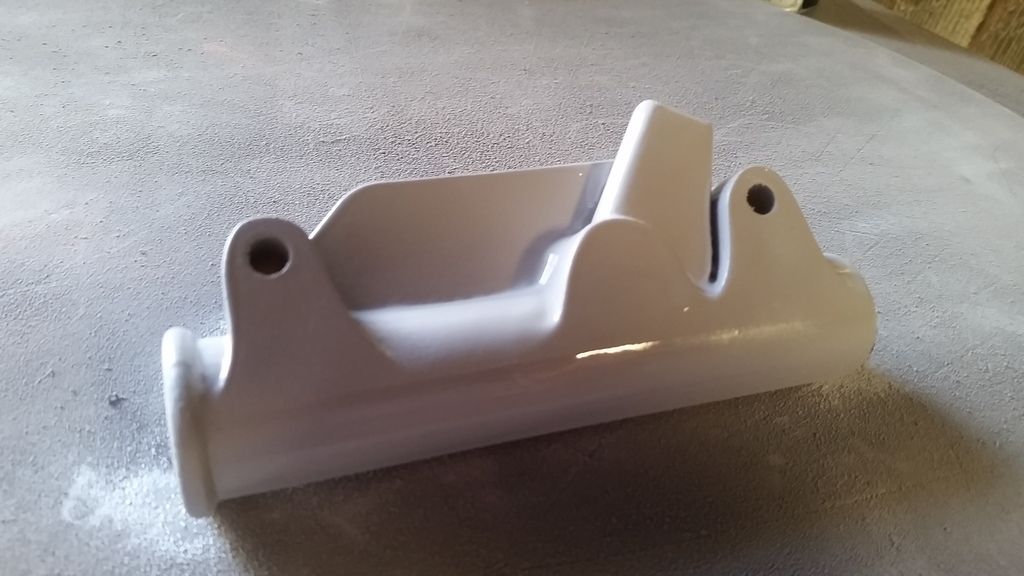
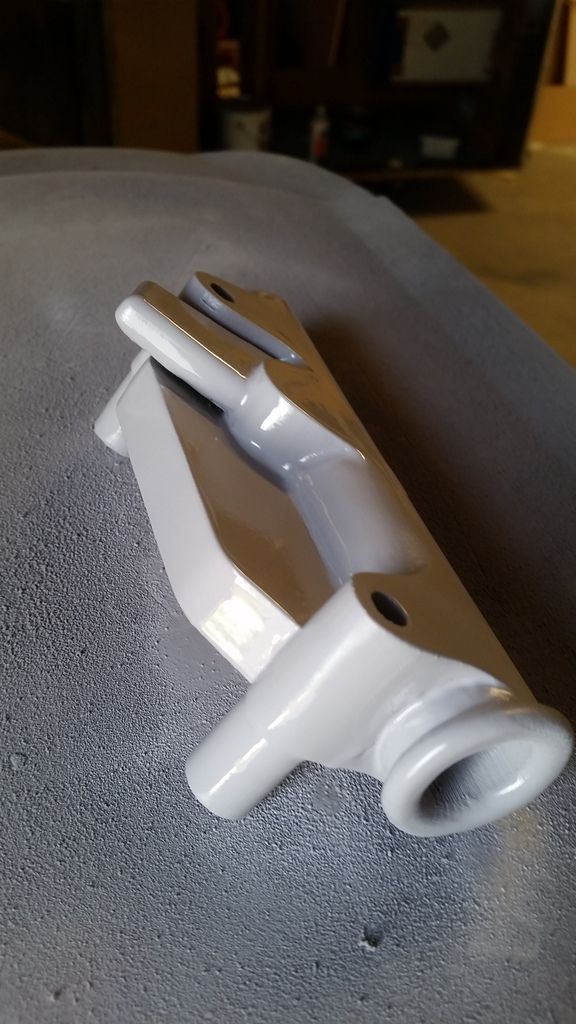
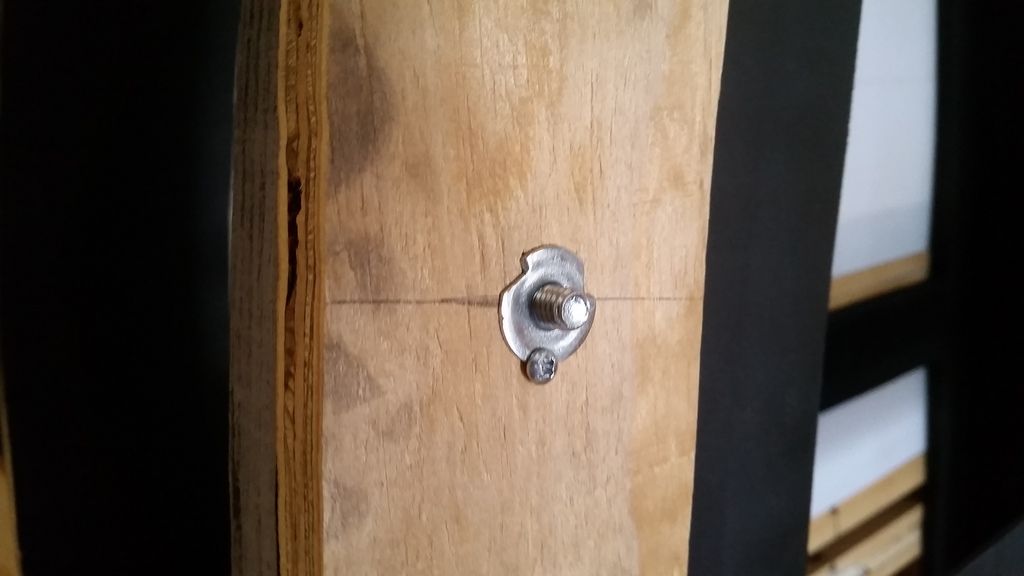
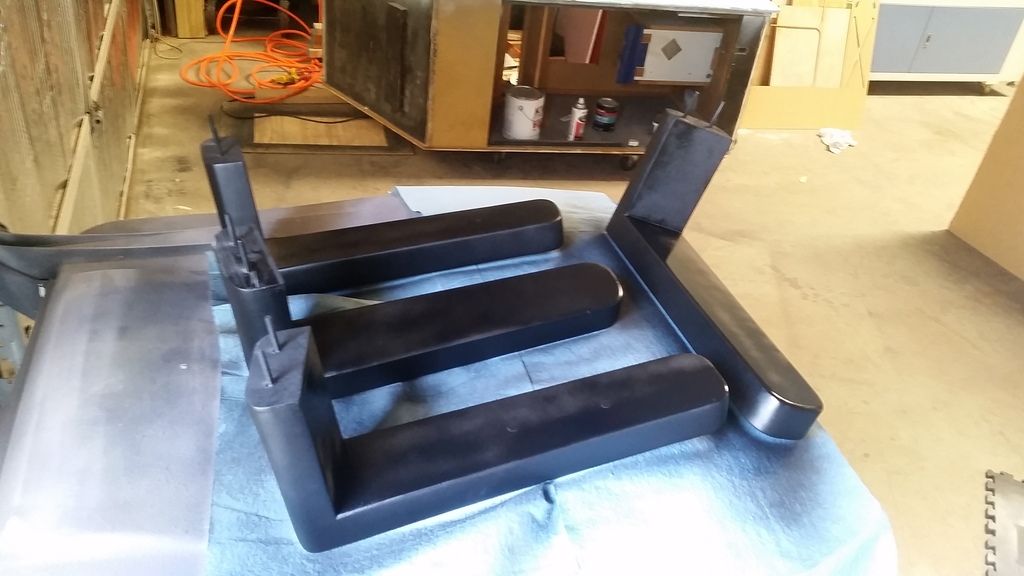
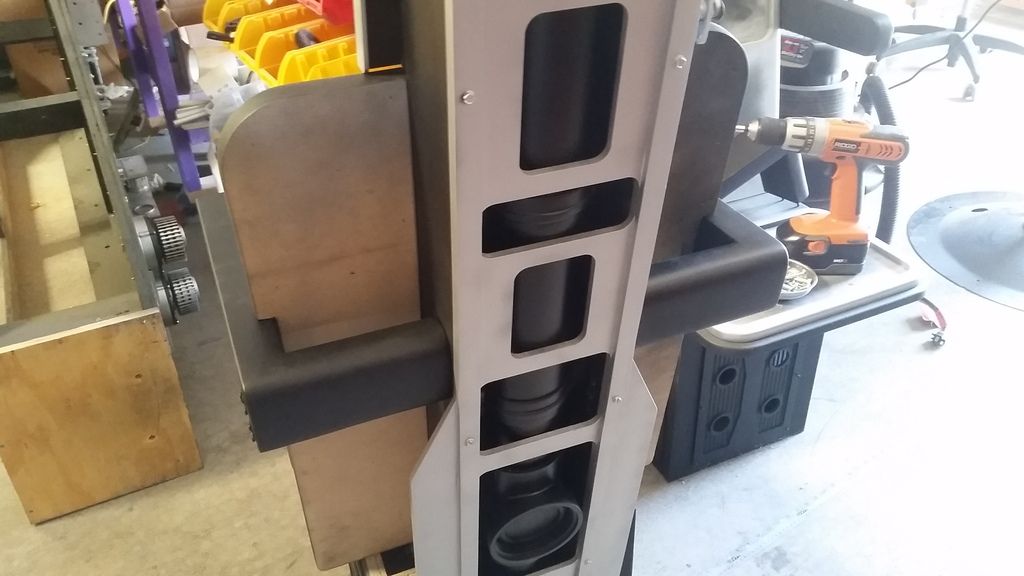
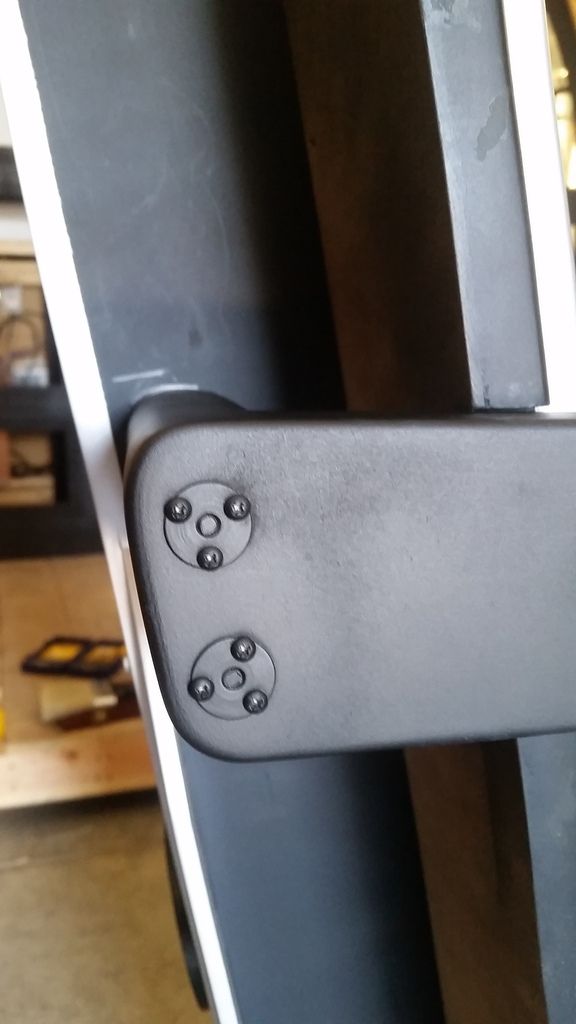
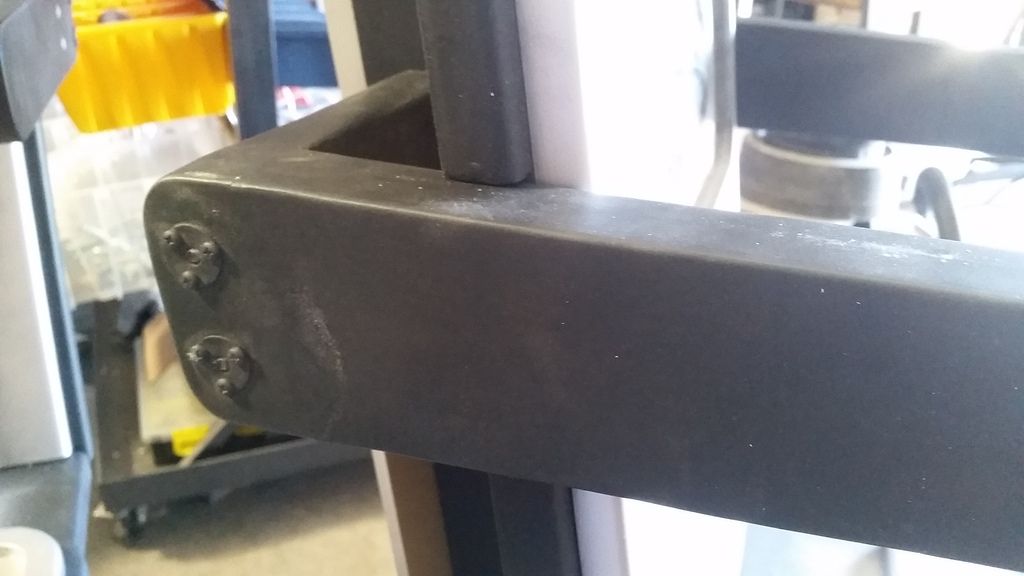
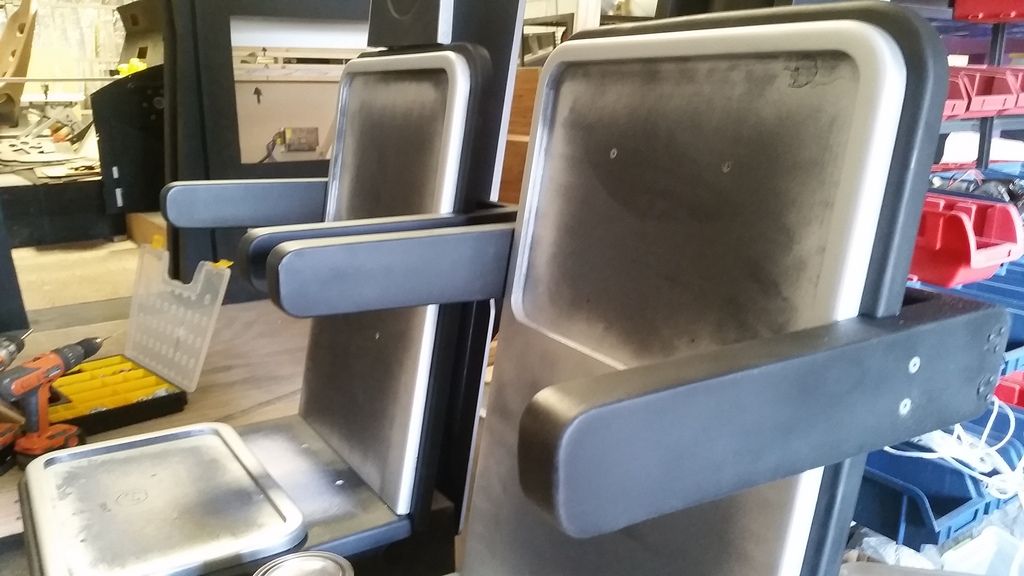
While the filler dried I changed my attention back to the nav chair armrests - I changed out the old "T" nuts
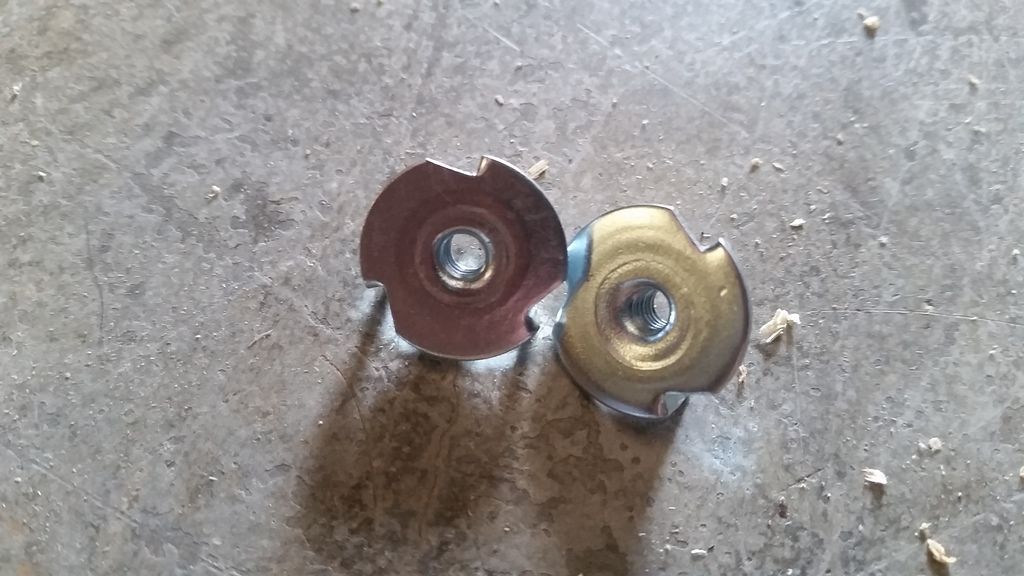
For these
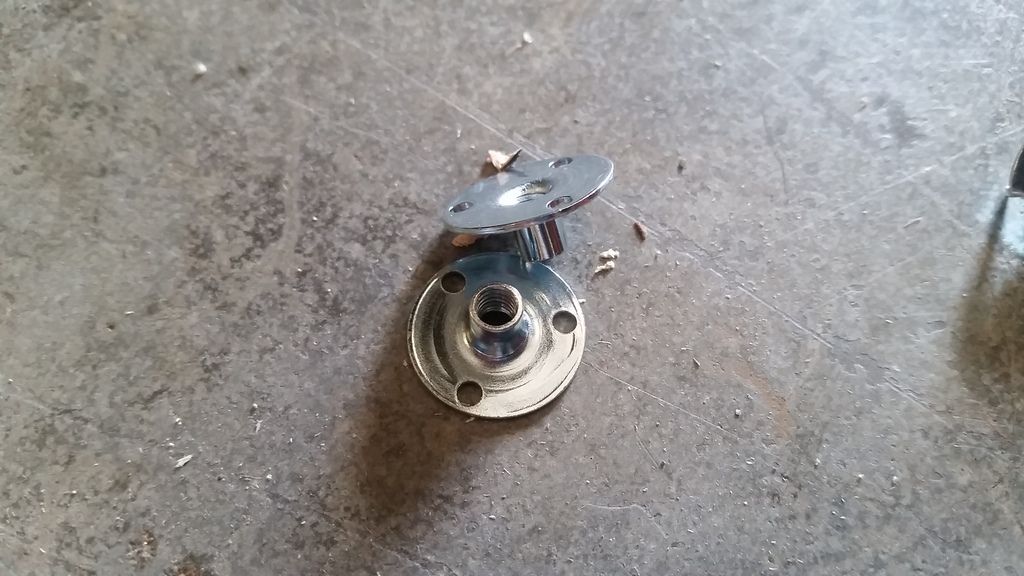
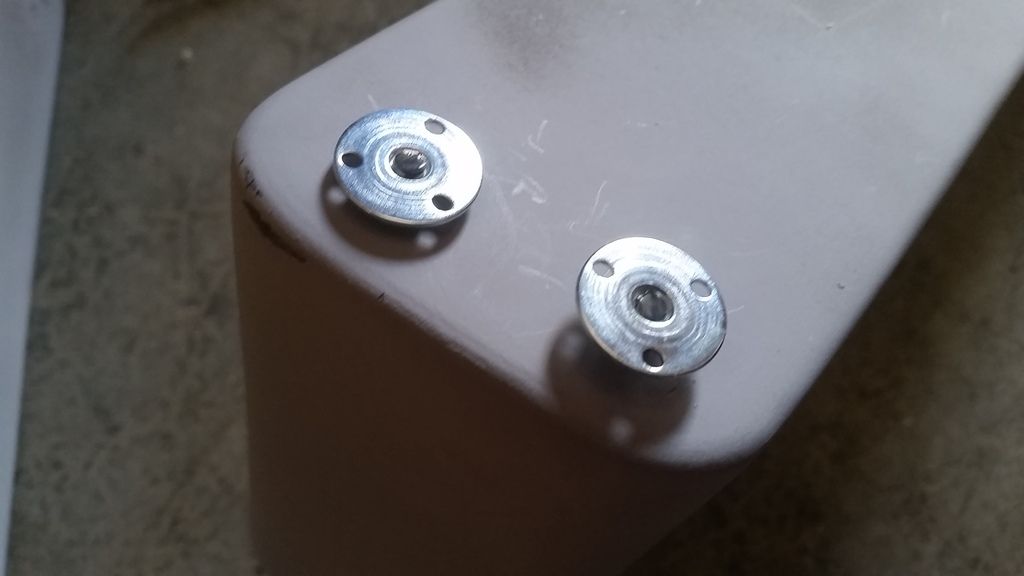
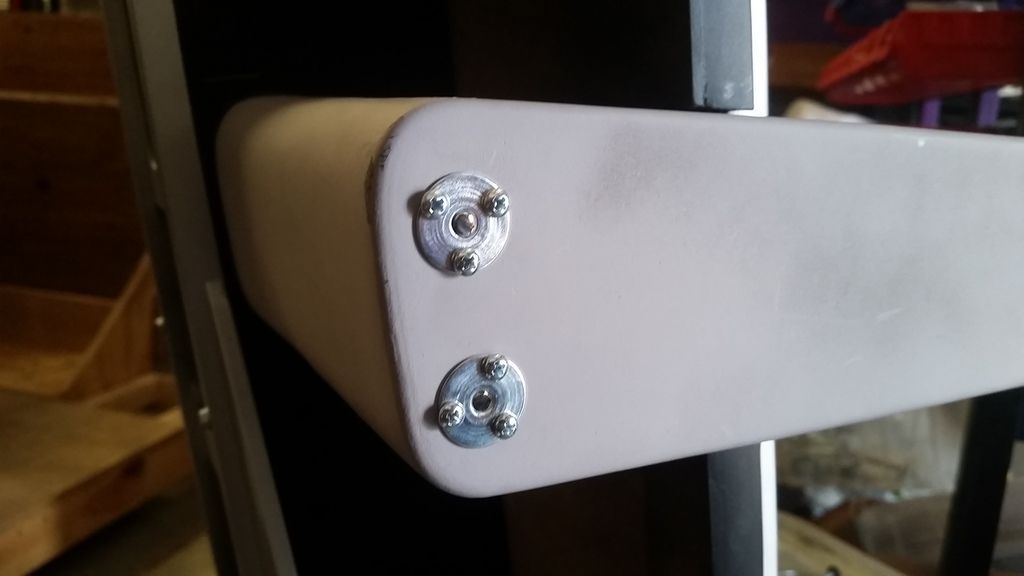
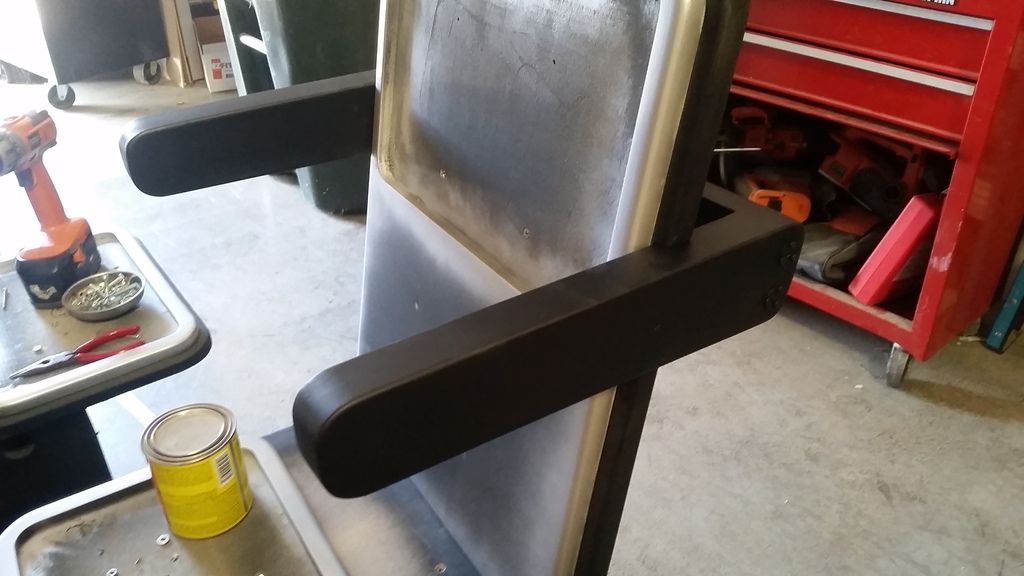
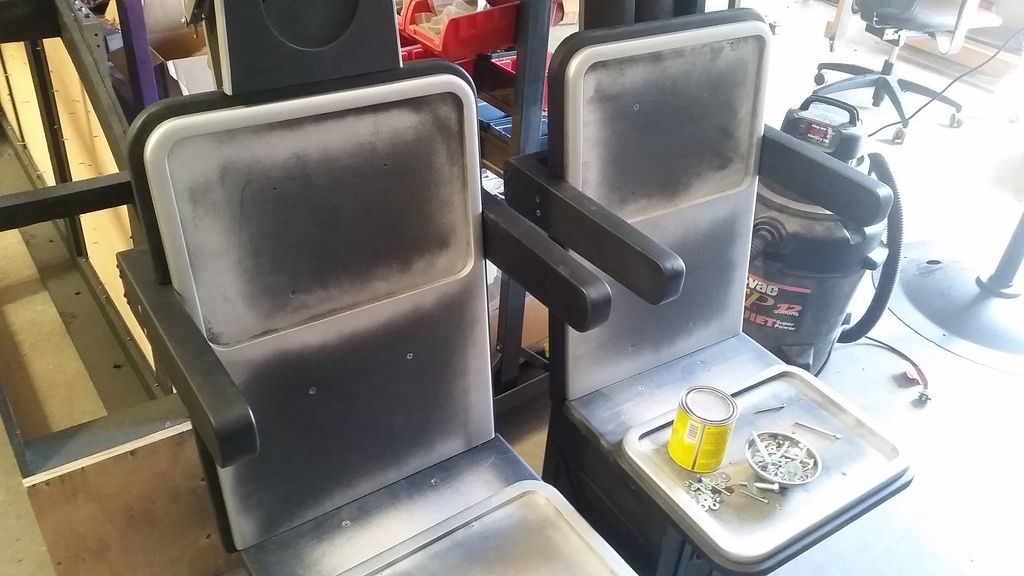
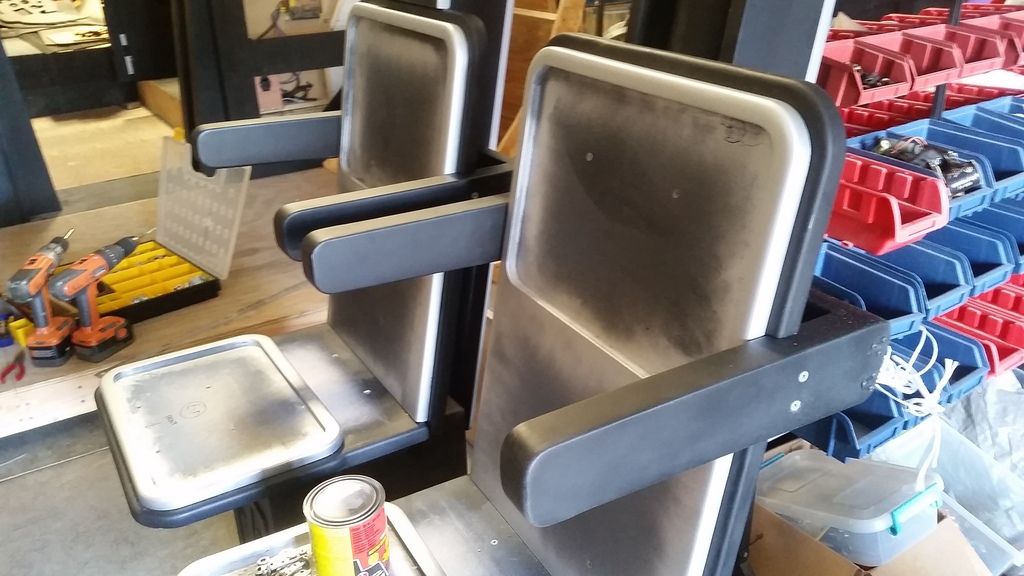
Time to get these all sanded, painted and mounted!
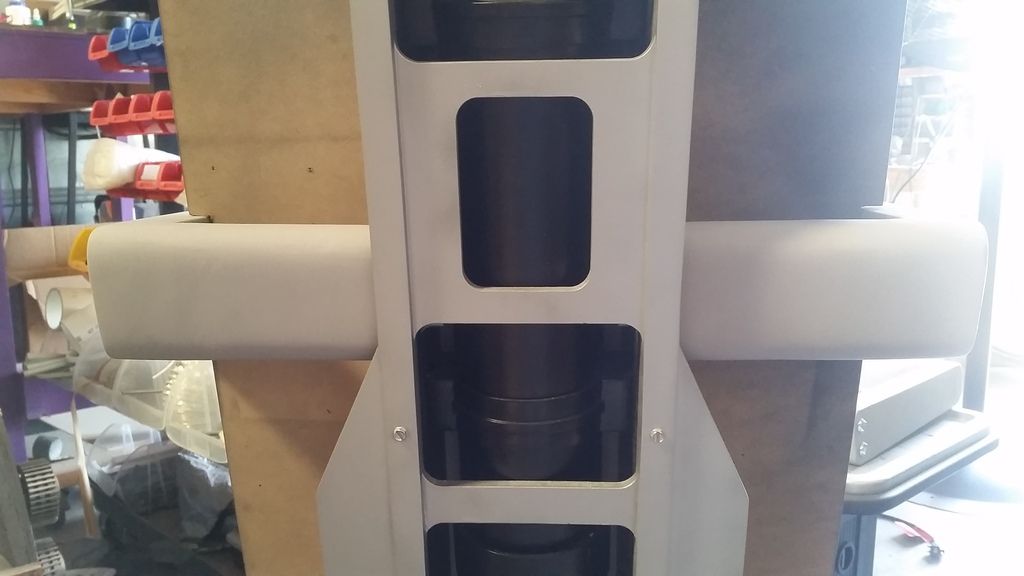
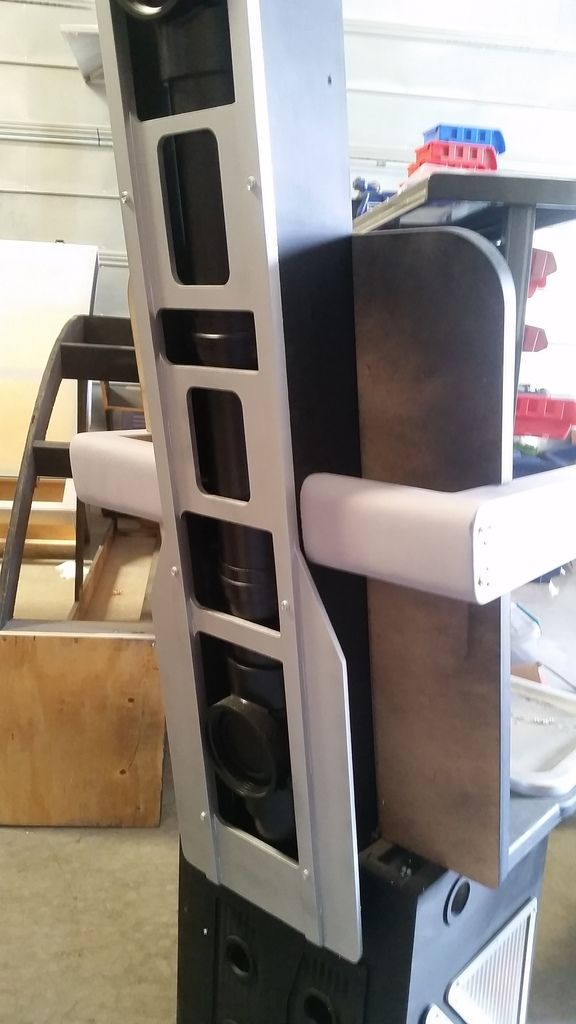
Primer / Filler
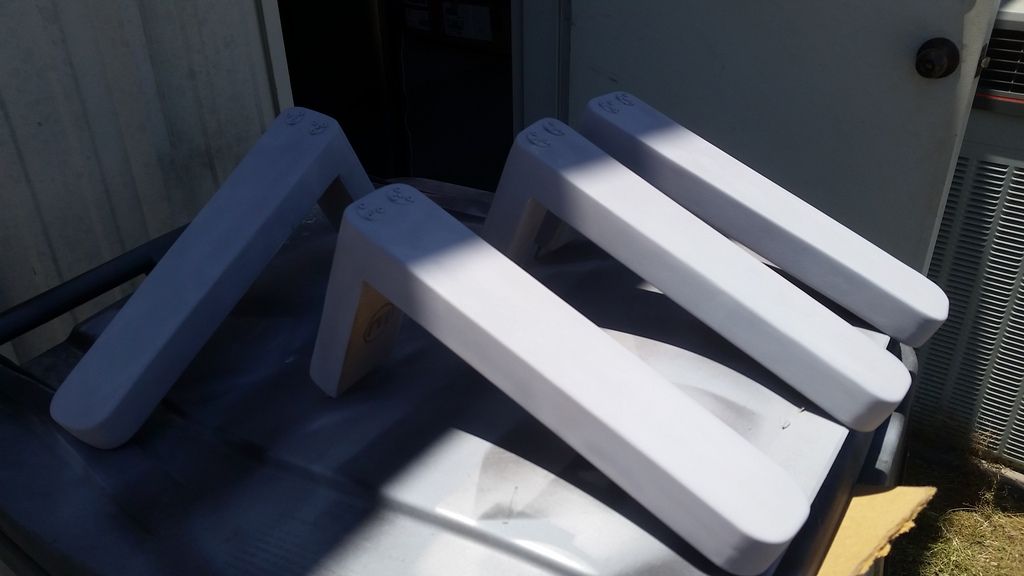
Lots of paint!
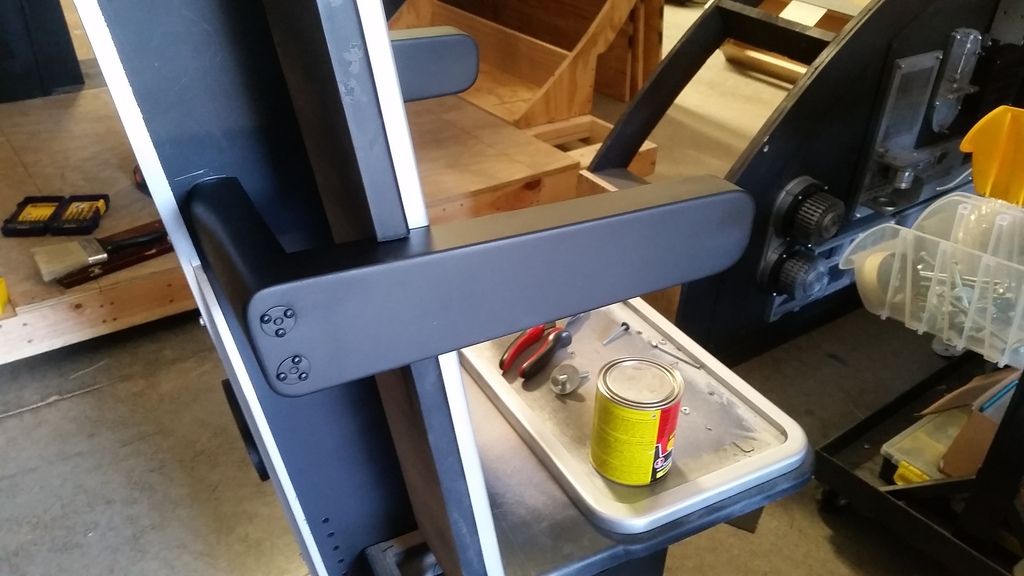
Mark this task off the list!
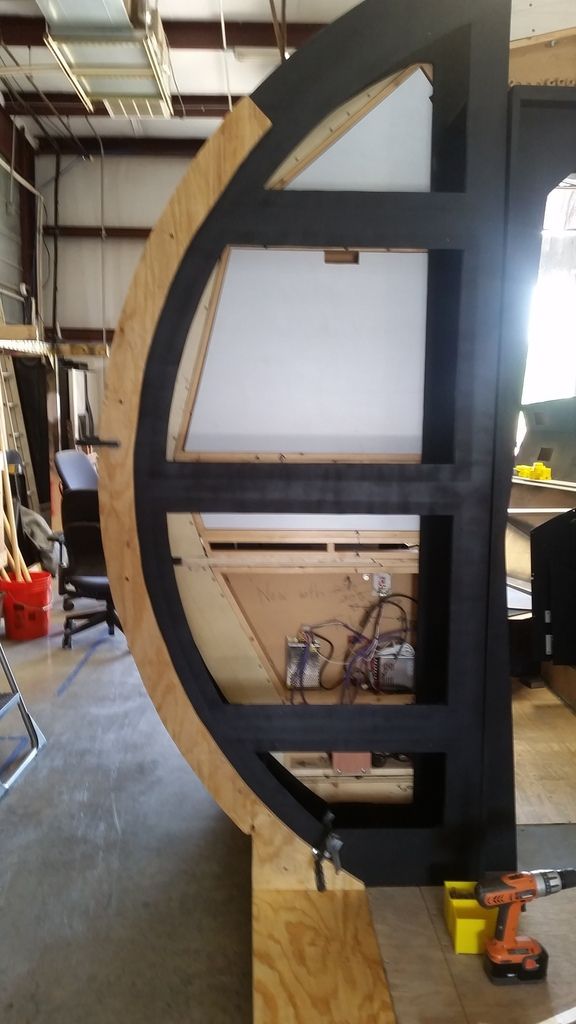
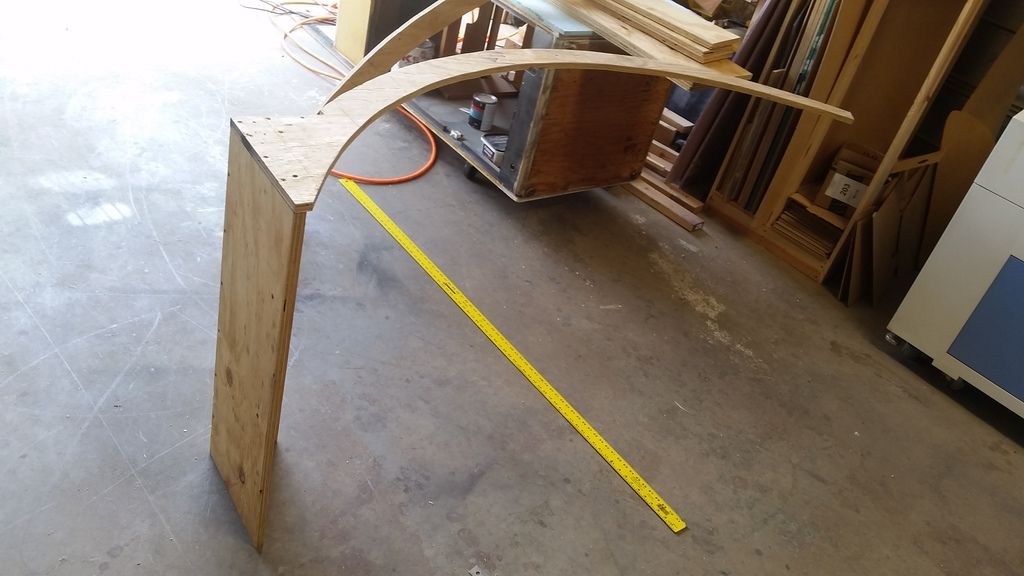
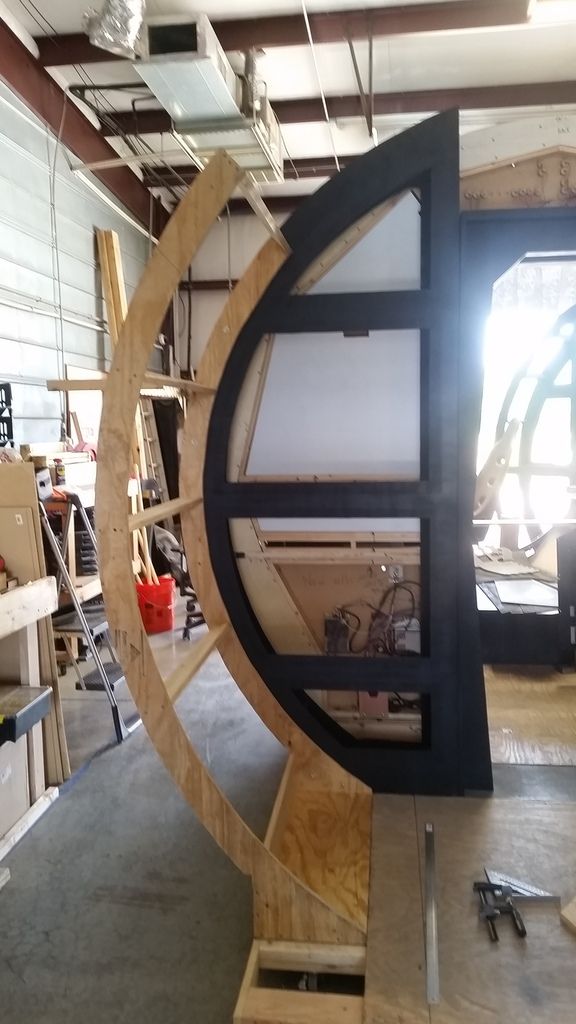
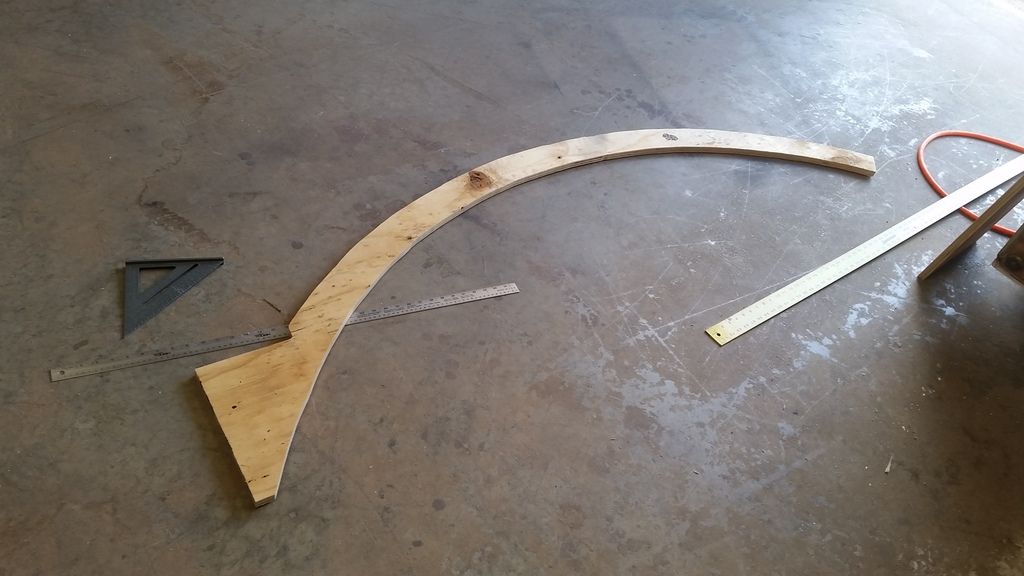
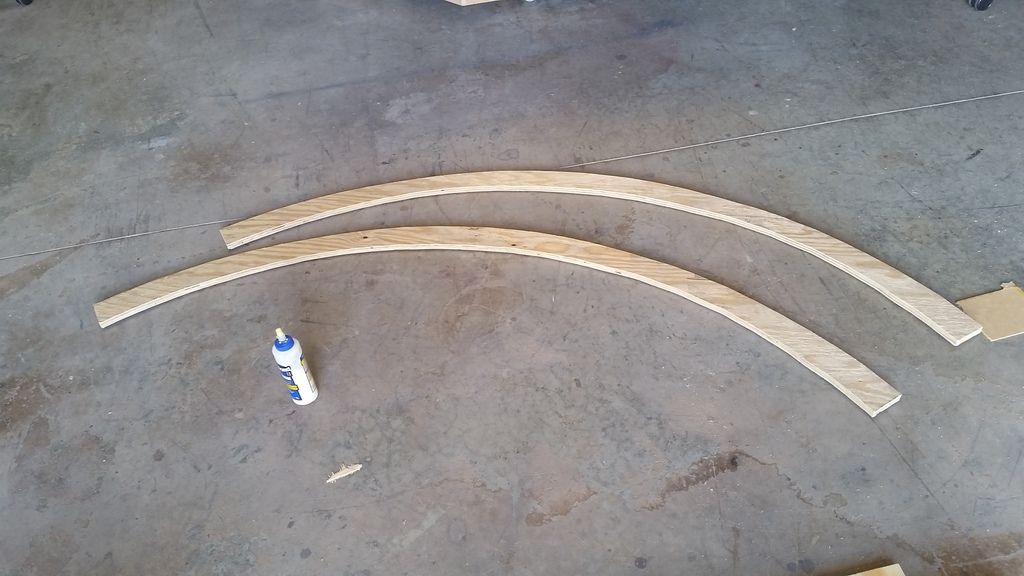
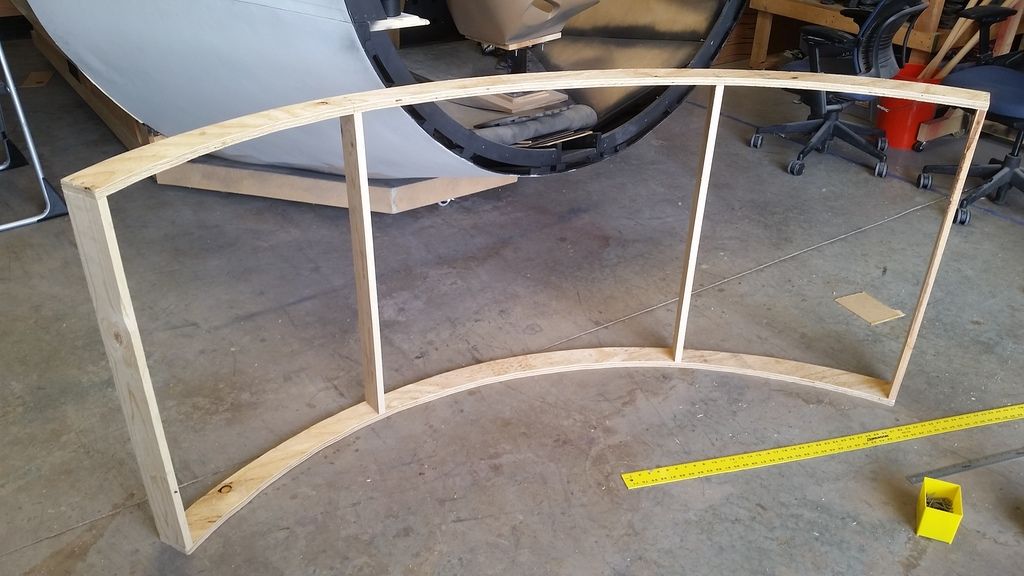
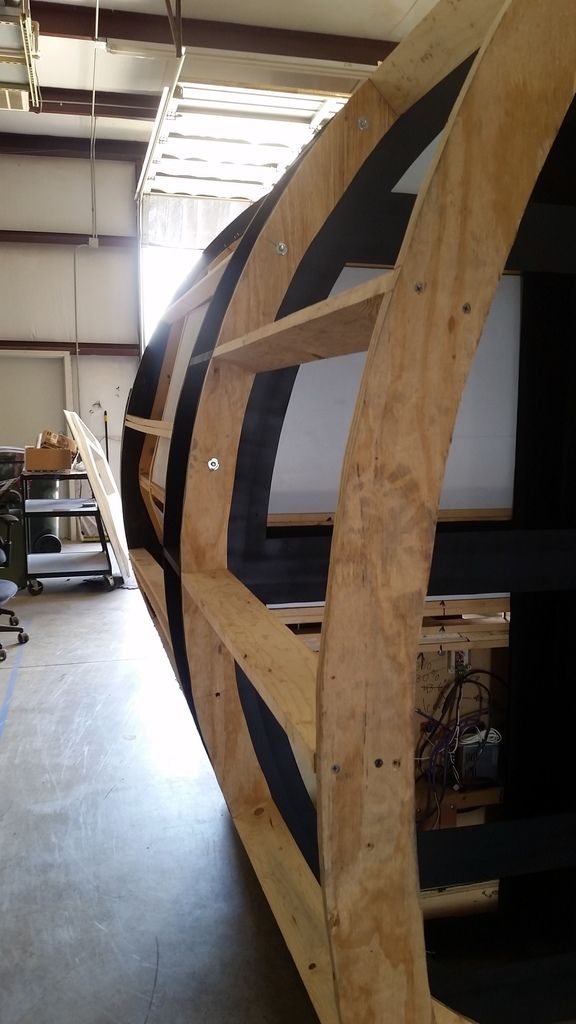
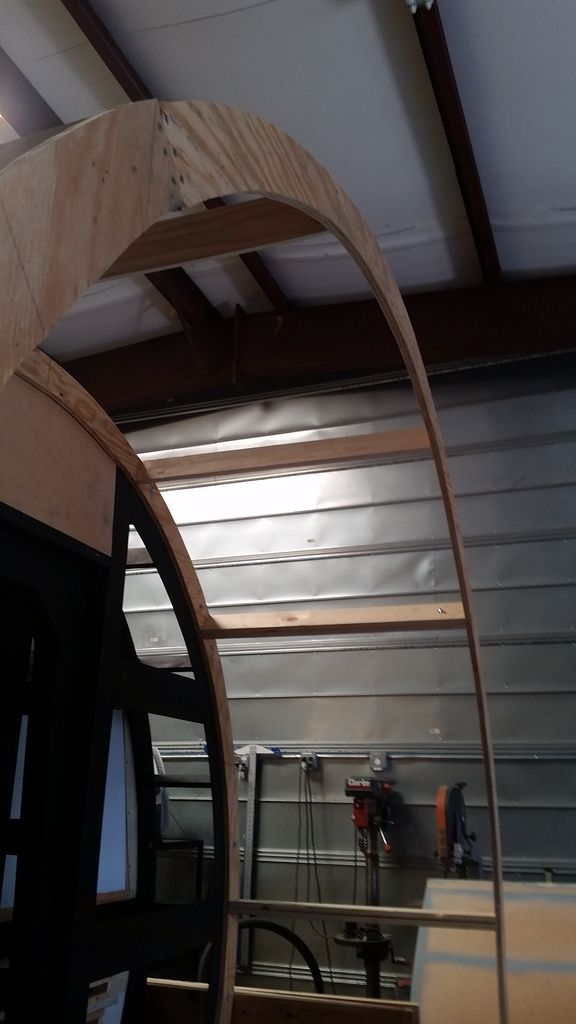
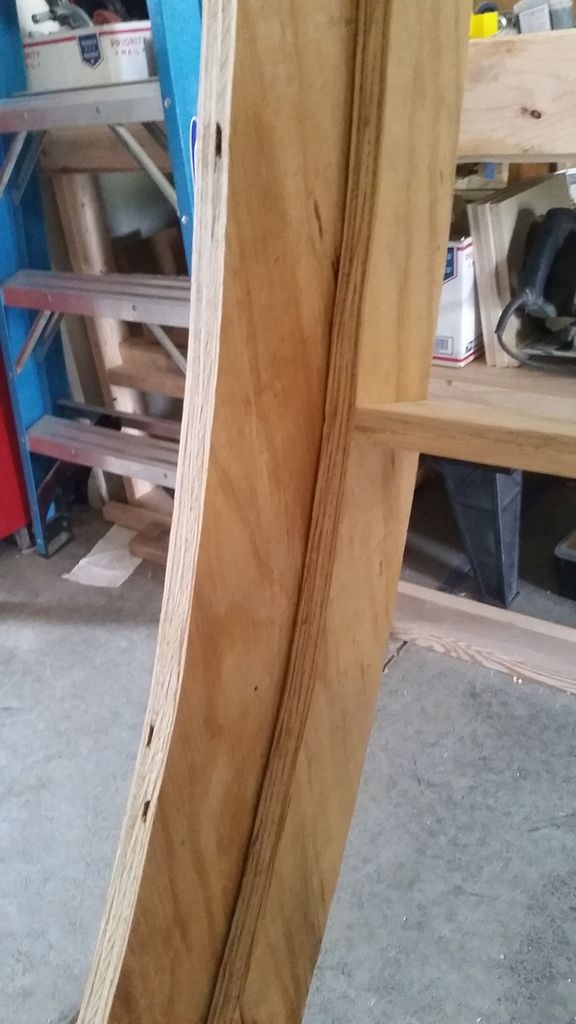
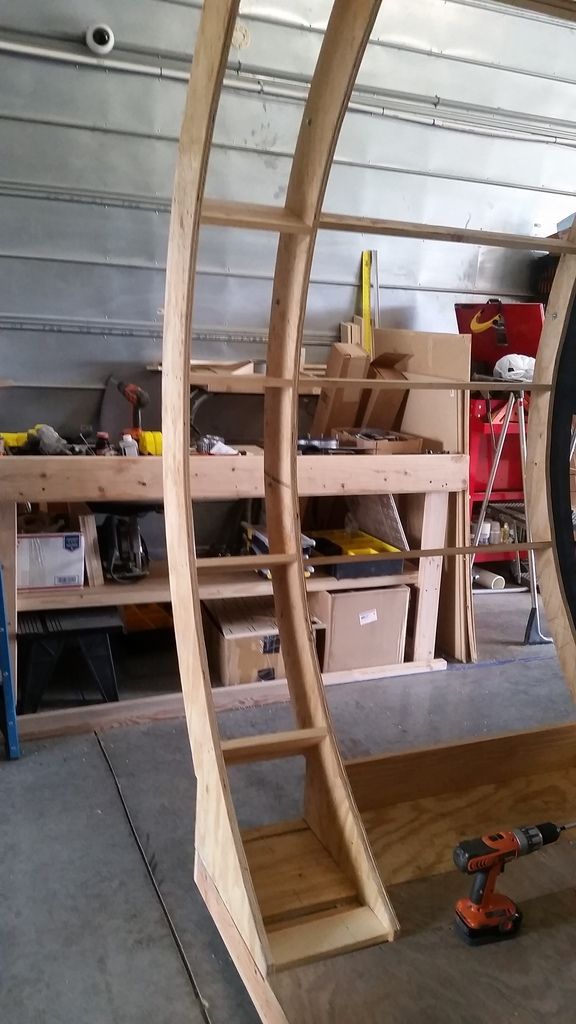
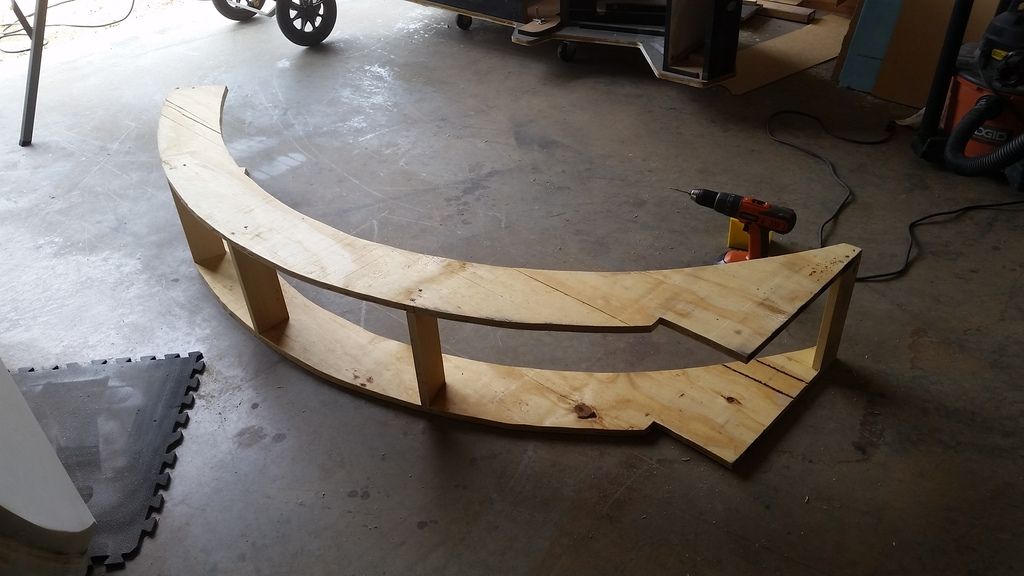
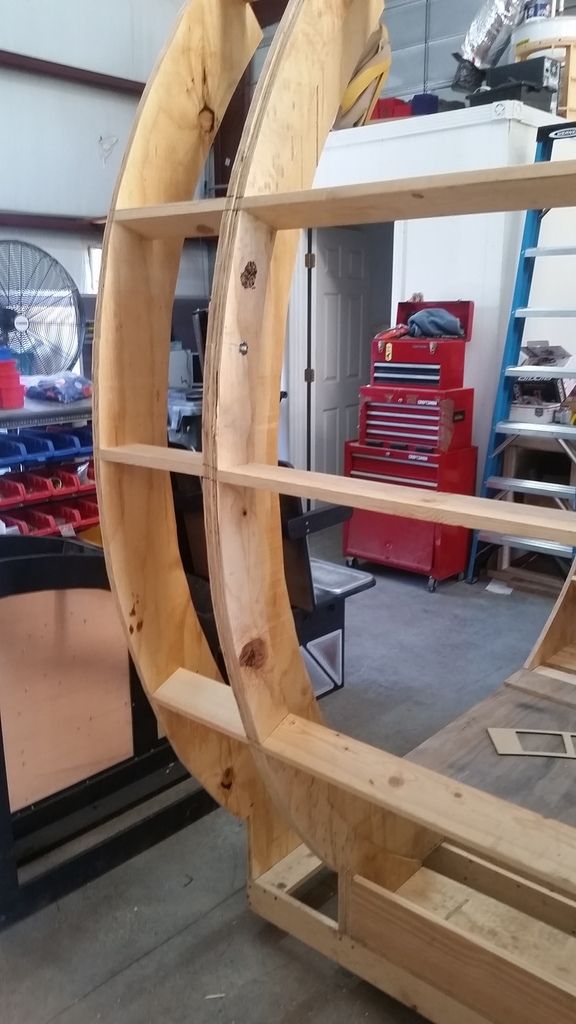
It was a rough weekend! The humidity is here and it is brutal! But I fought through it and cut a new corridor arch!

This arch is much wider than the others

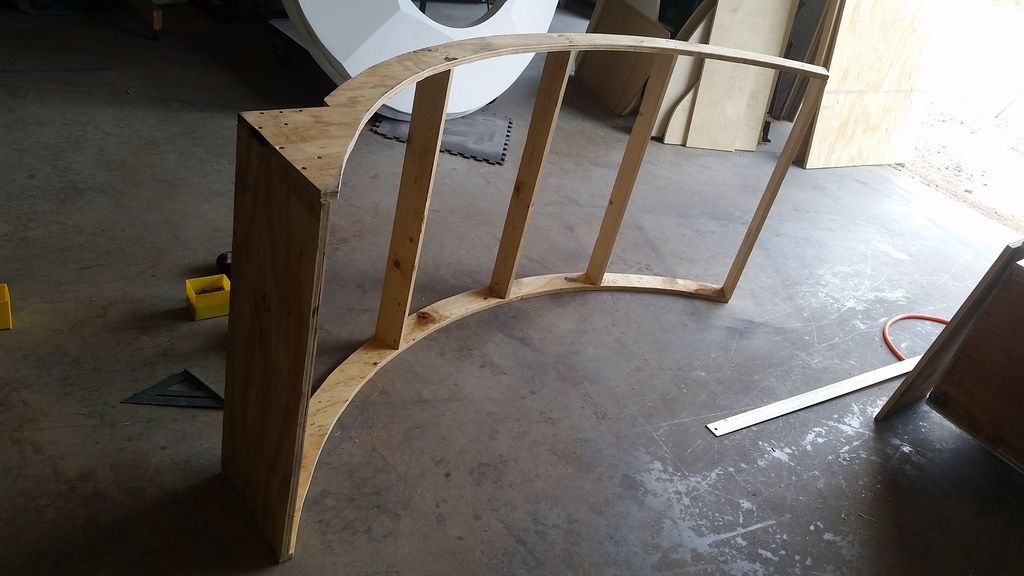
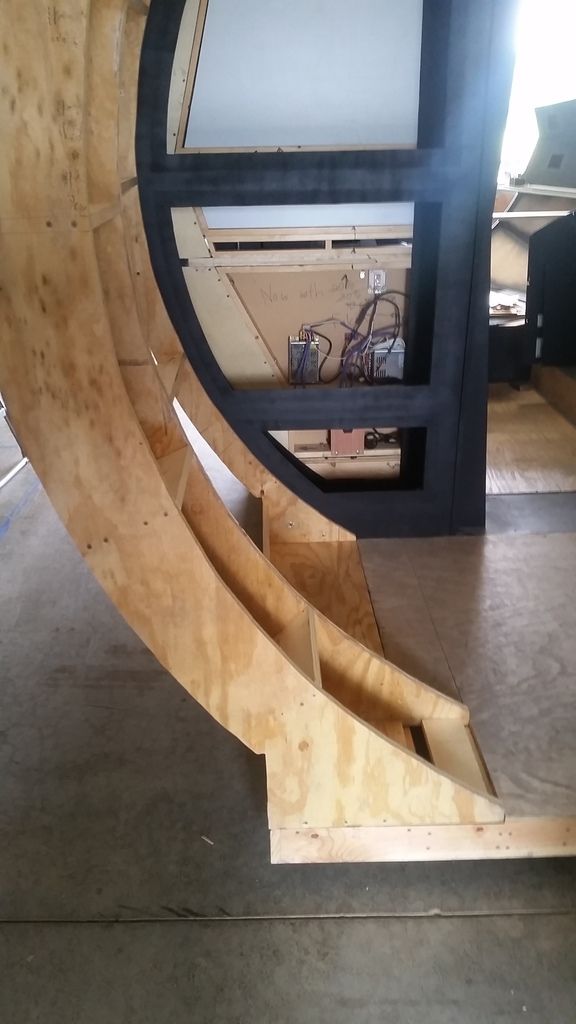
Fits perfectly!
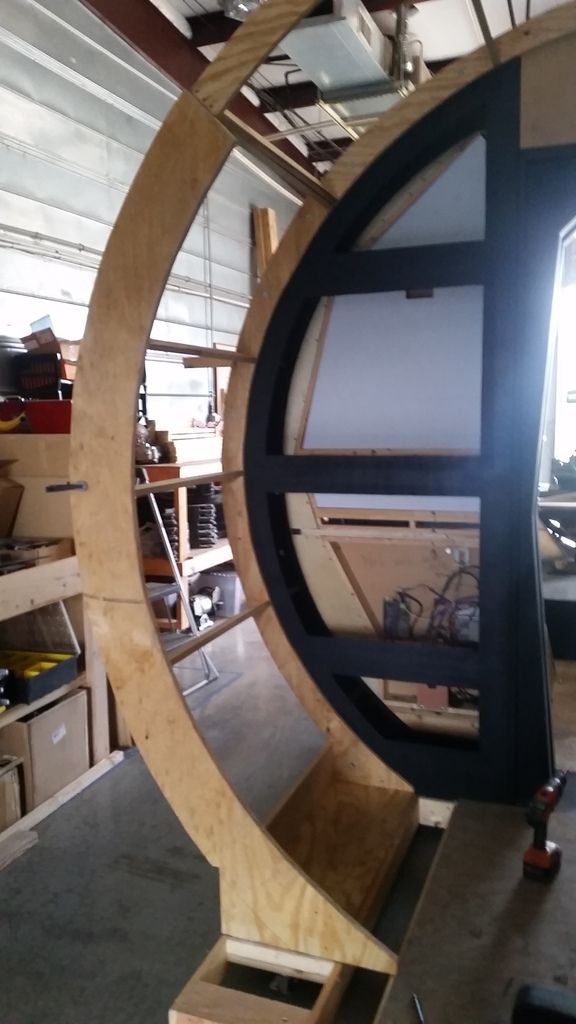
The new arch will rest in this spot
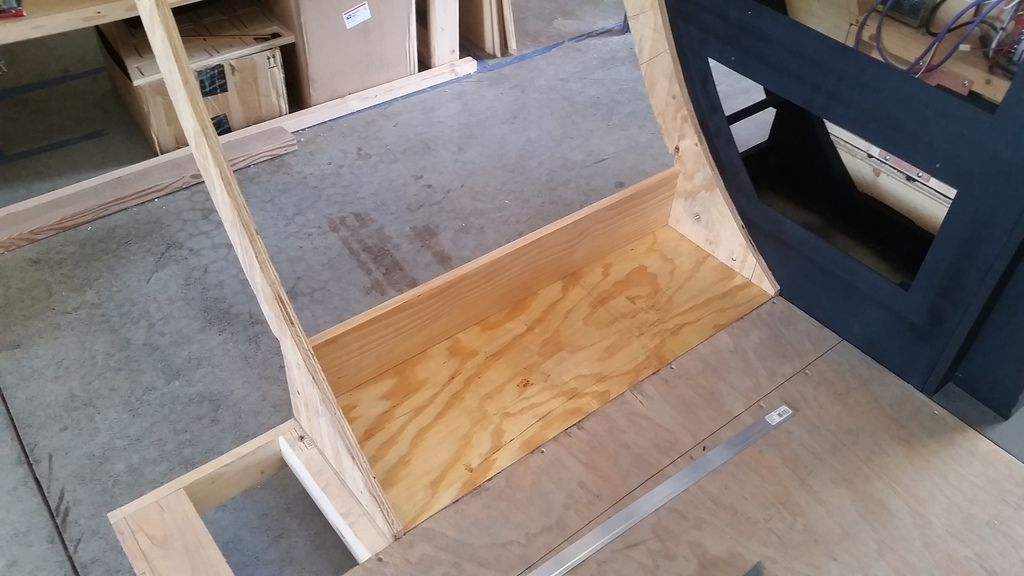
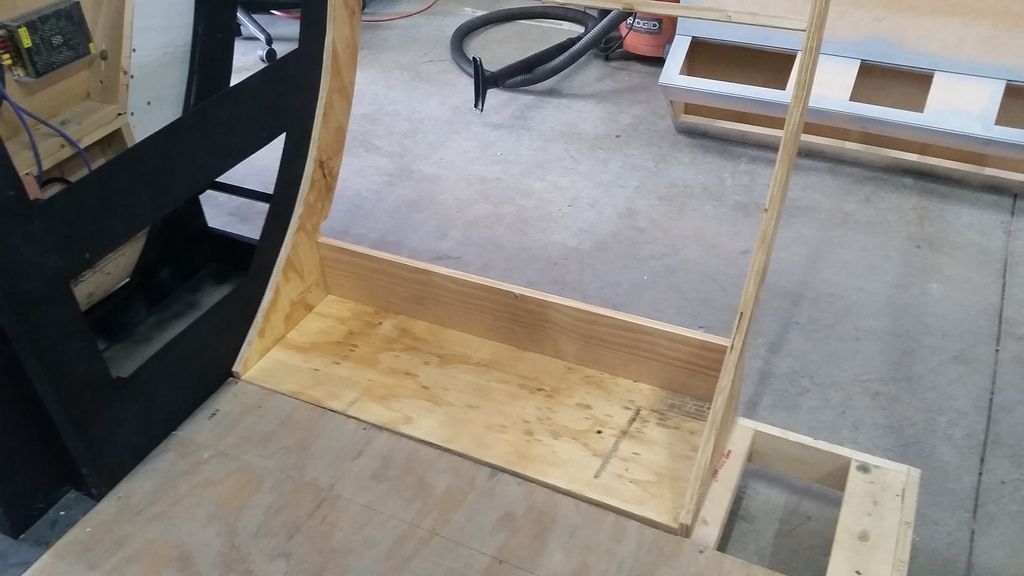
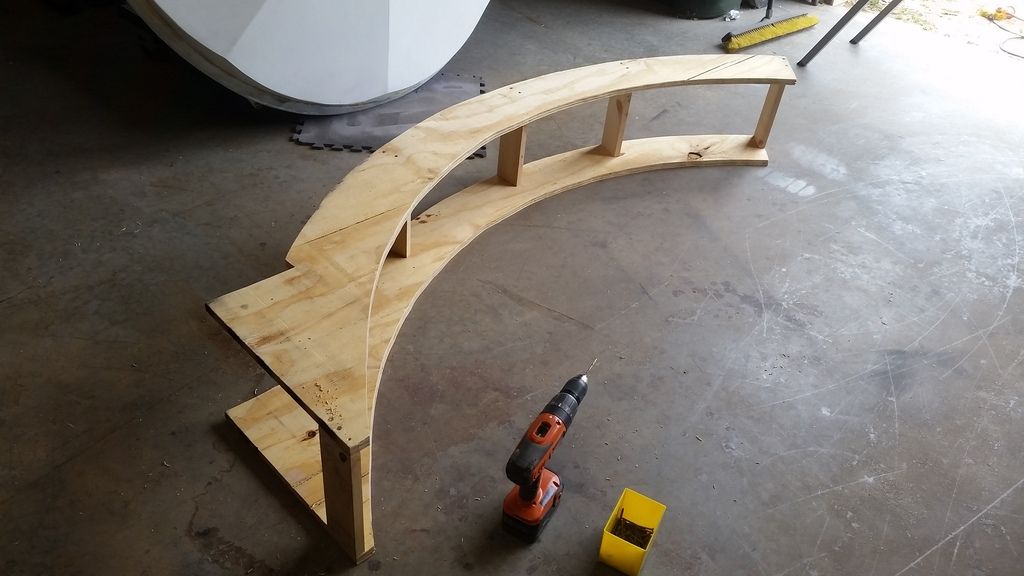
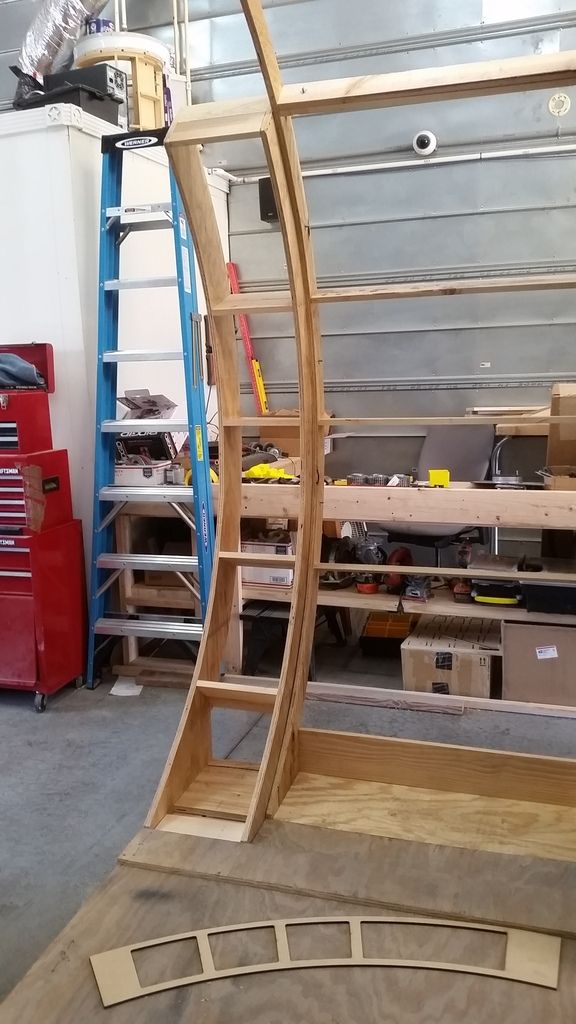
All framed up!
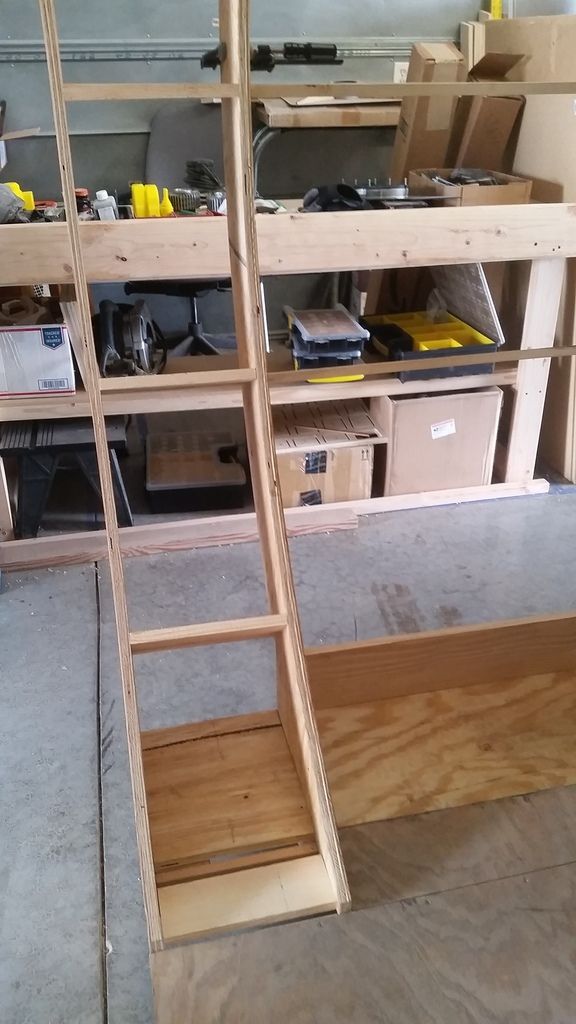
Mounting point
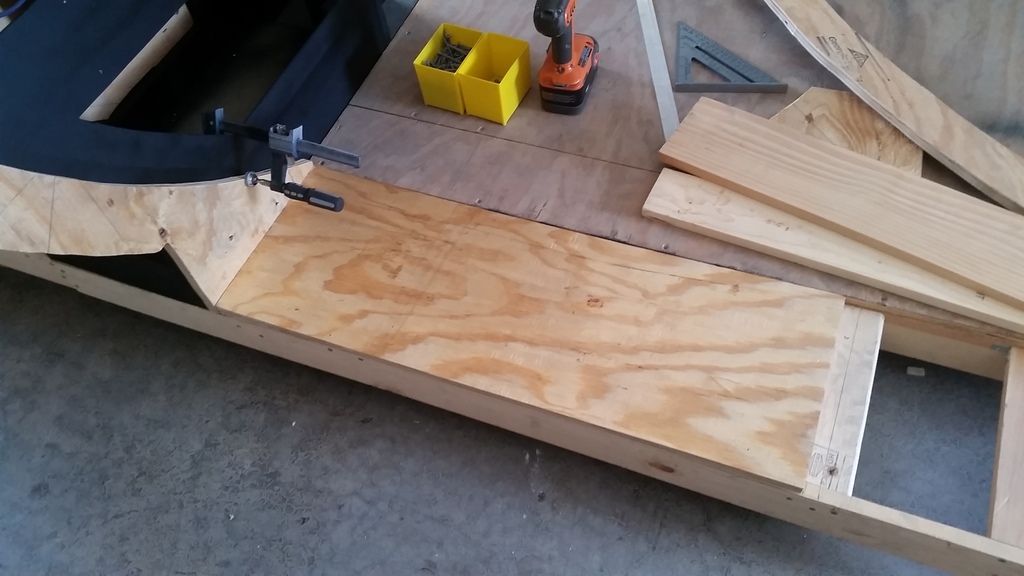
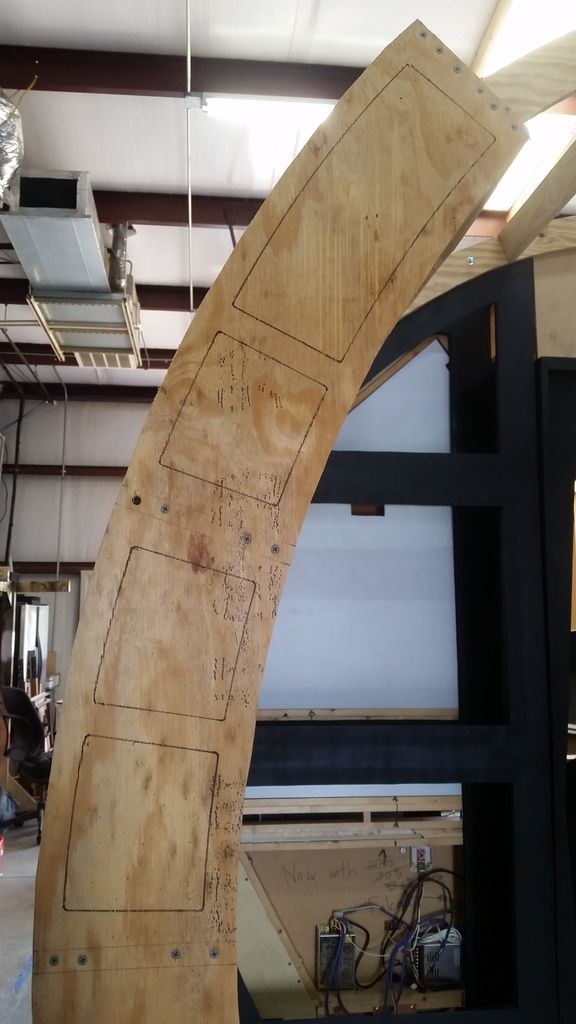
I then laser cut this template
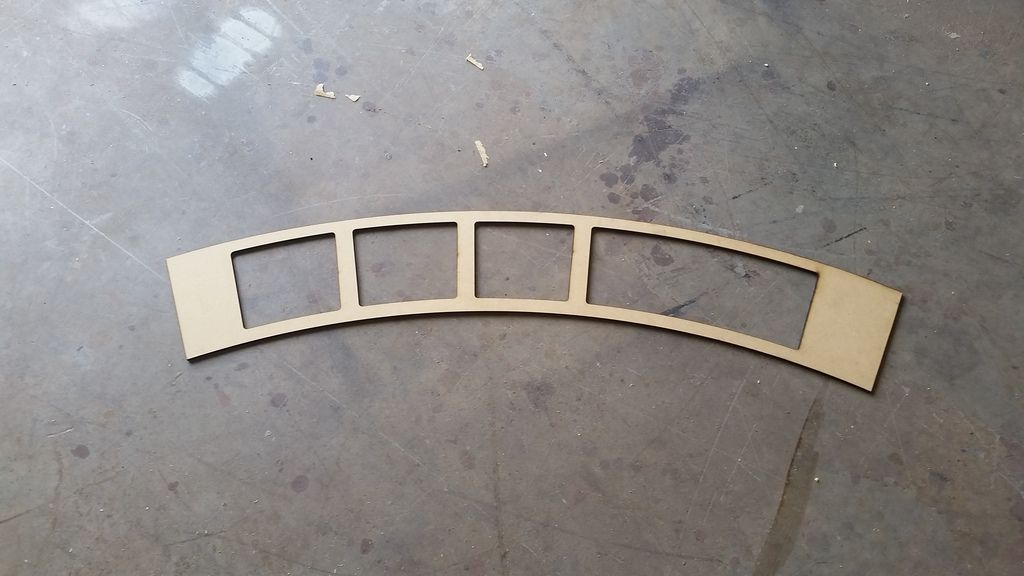
And marked out the holes I'm going to cut - I'll add tubes and wiring to the inside
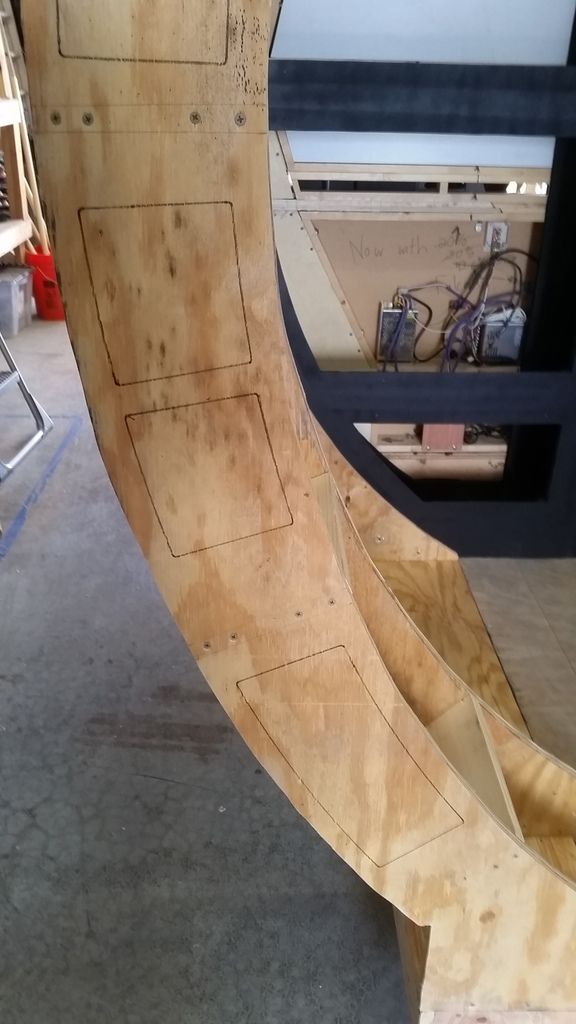
These holes will also allow me to mount the frames together
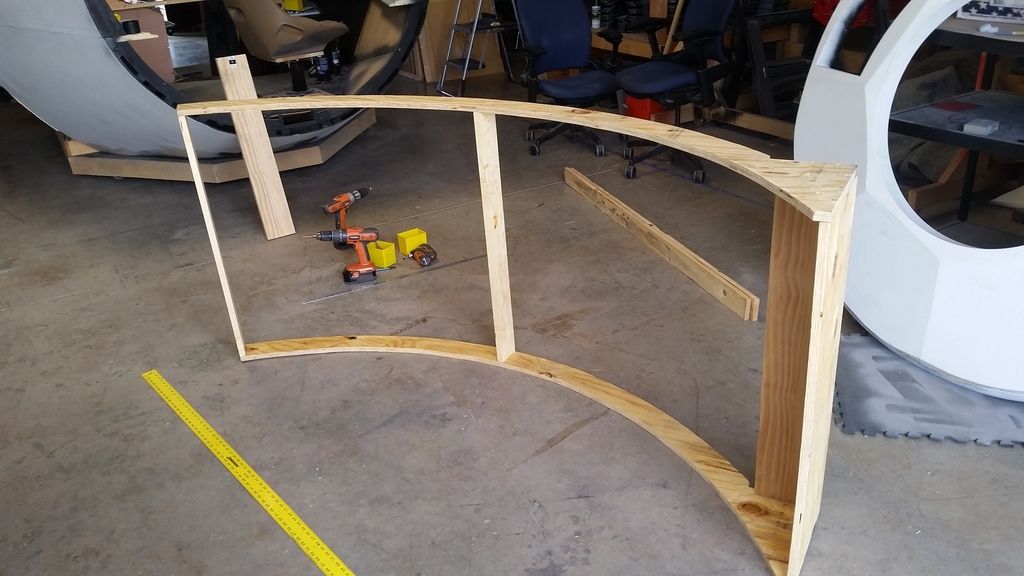
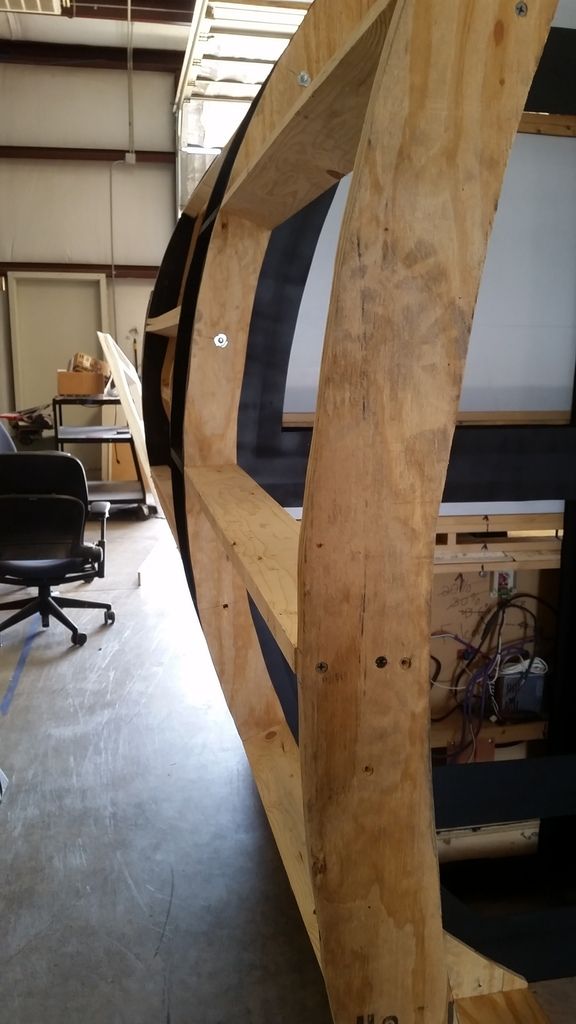
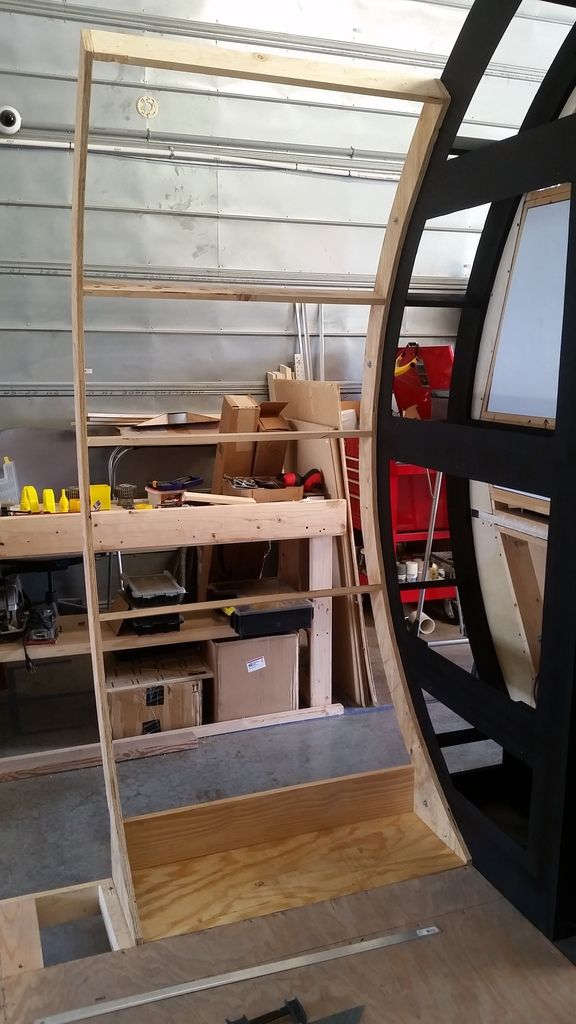
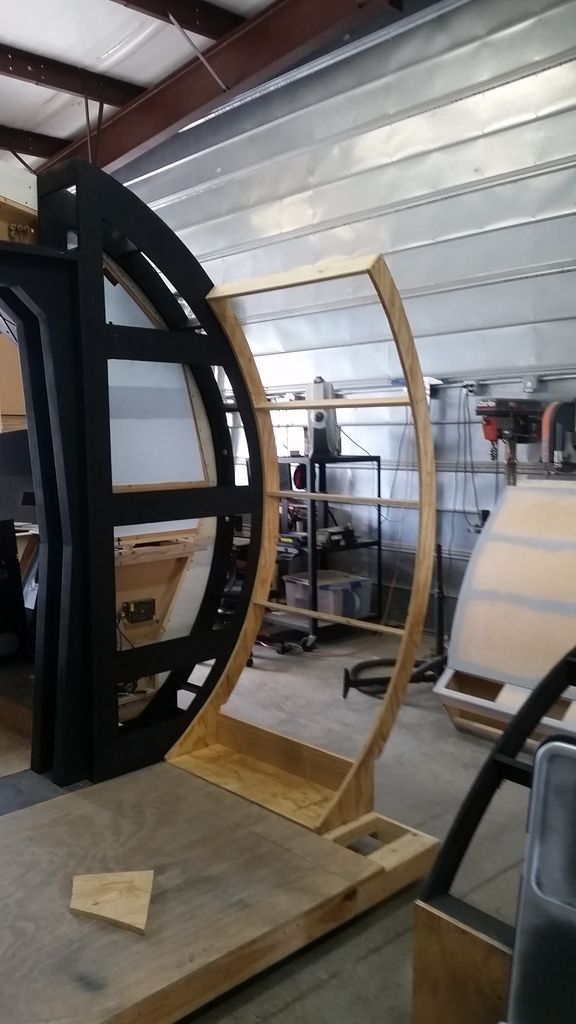
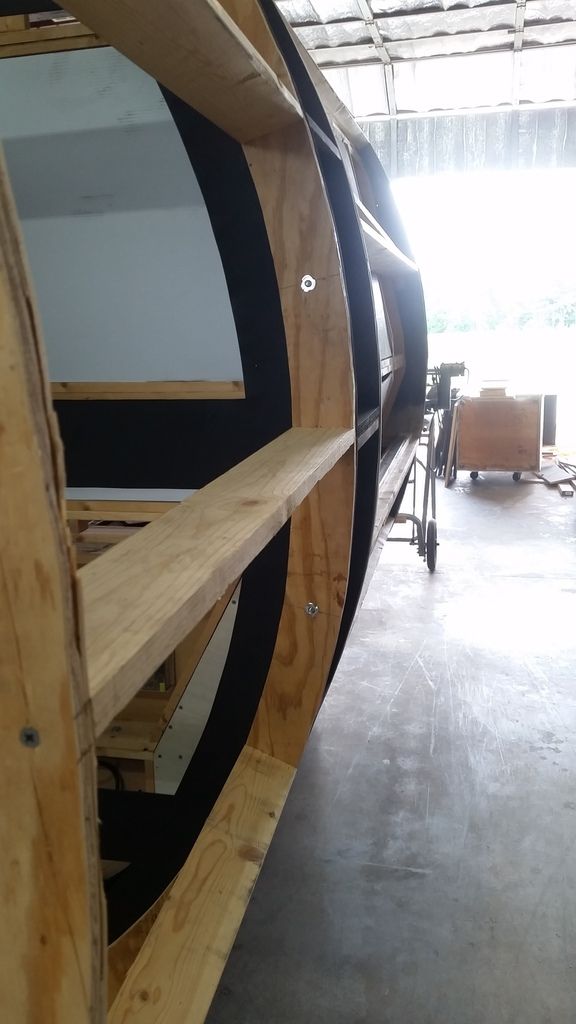
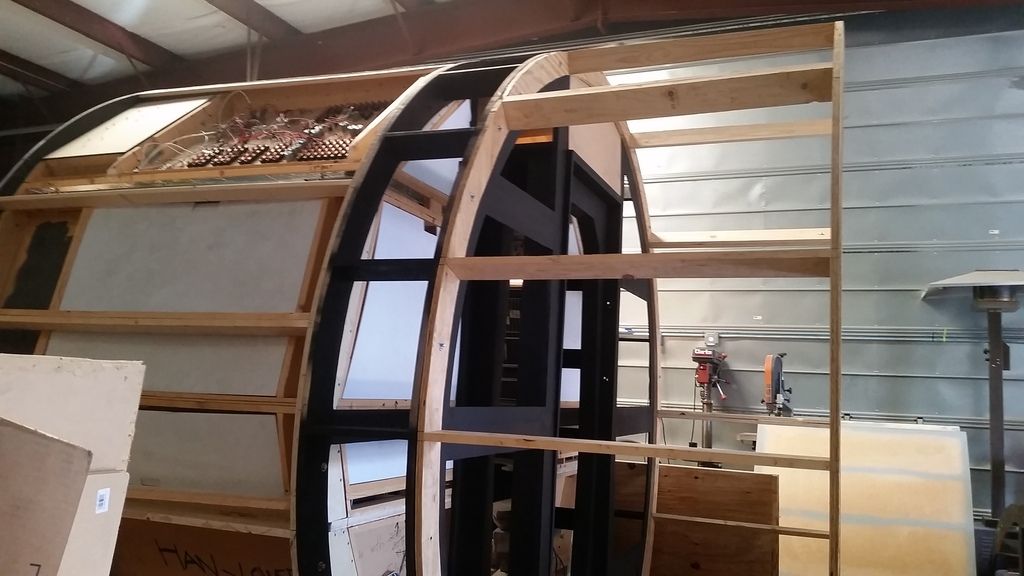
The weather got bad and started to rain. The humidity shot WAY up and was a killer! But I did manage to get Chewie's side partially framed
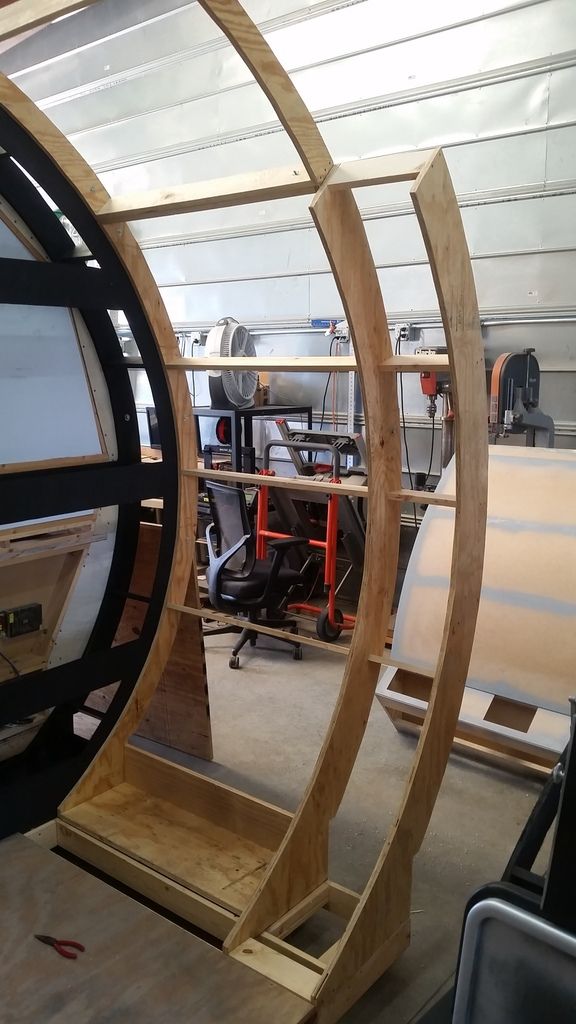
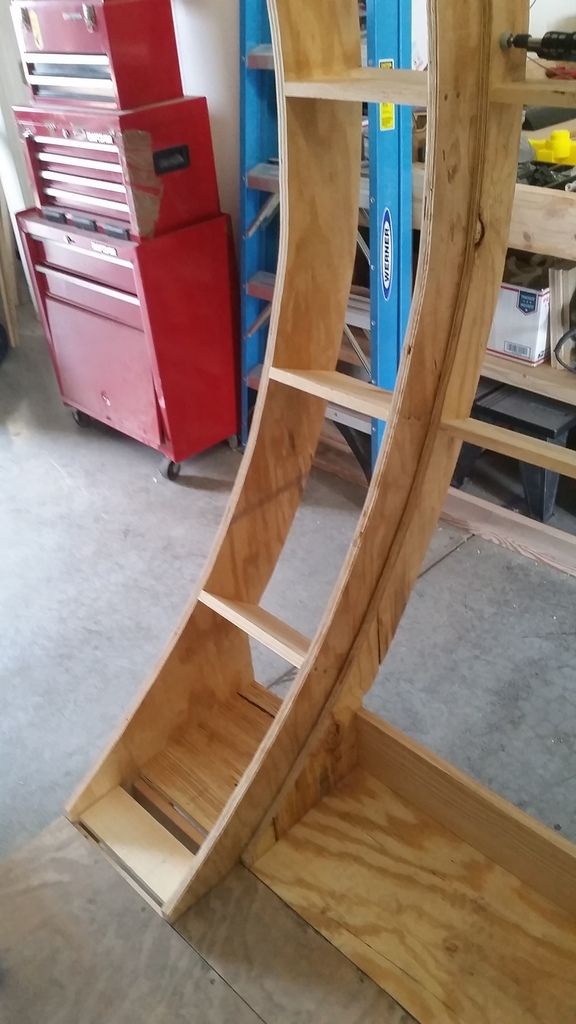
I'm going to add 1/8" MDF to the sides to help hide the wood grain. This will require me to take the frames apart and remove some material from the horizontal supports
Still have to fabricate the upper arch
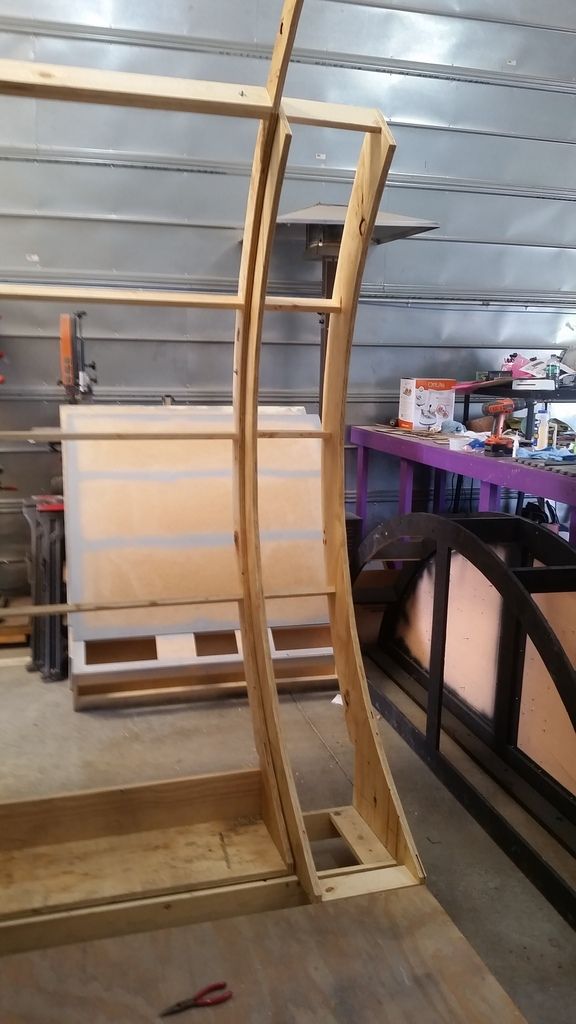
And this is where we are!
More to Follow!
Time for another weekend update!
Added more filler to the new 3D prints
3D printing is amazing but there sure is a LOT of work to do make the surfaces smooth
4th coat of filler
While the filler dried I changed my attention back to the nav chair armrests - I changed out the old "T" nuts
For these
Time to get these all sanded, painted and mounted!
Primer / Filler
Lots of paint!
Mark this task off the list!
It was a rough weekend! The humidity is here and it is brutal! But I fought through it and cut a new corridor arch!
This arch is much wider than the others
Fits perfectly!
The new arch will rest in this spot
All framed up!
Mounting point
I then laser cut this template
And marked out the holes I'm going to cut - I'll add tubes and wiring to the inside
These holes will also allow me to mount the frames together
The weather got bad and started to rain. The humidity shot WAY up and was a killer! But I did manage to get Chewie's side partially framed
I'm going to add 1/8" MDF to the sides to help hide the wood grain. This will require me to take the frames apart and remove some material from the horizontal supports
Still have to fabricate the upper arch
And this is where we are!
More to Follow!
Daboudzi
New Member
With the door closed and a full entrance corridor.. i guess it will created a great suspense and undescribable feeling just before the door opens and you get in the cockpit. The immersing experience is gonna be out of the charts!!! I'm really getting excited!! Can't wait for the next posts... Cheers!!
Similar threads
- Replies
- 2
- Views
- 863
- Replies
- 6
- Views
- 624
- Replies
- 8
- Views
- 556
- Replies
- 8
- Views
- 954
- Replies
- 4
- Views
- 2,326