You are using an out of date browser. It may not display this or other websites correctly.
You should upgrade or use an alternative browser.
You should upgrade or use an alternative browser.
Thorssoli's First Order Builds - Captain Phasma FINISHED on Page 21!
DizzyStrmtroopr
Well-Known Member
Re: Thorssoli's Episode VII Builds (TIE Pilot Test Fitting Page 11)
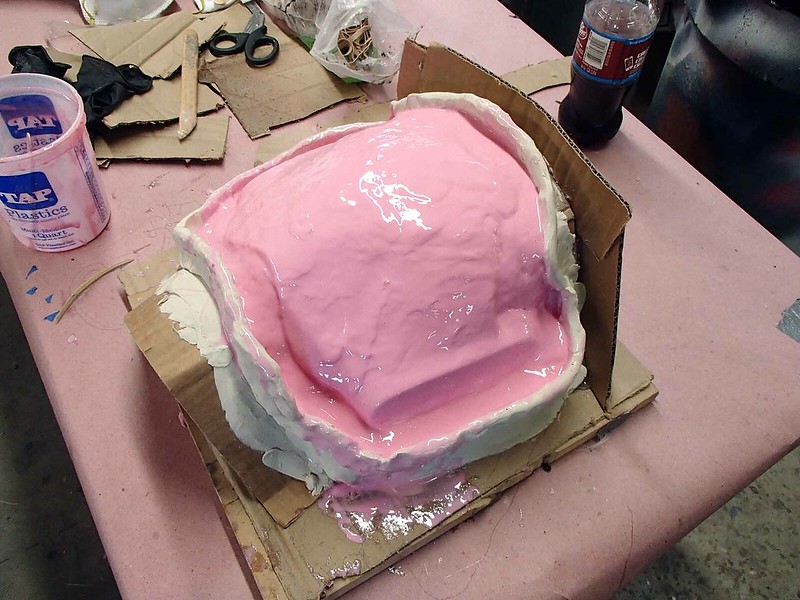
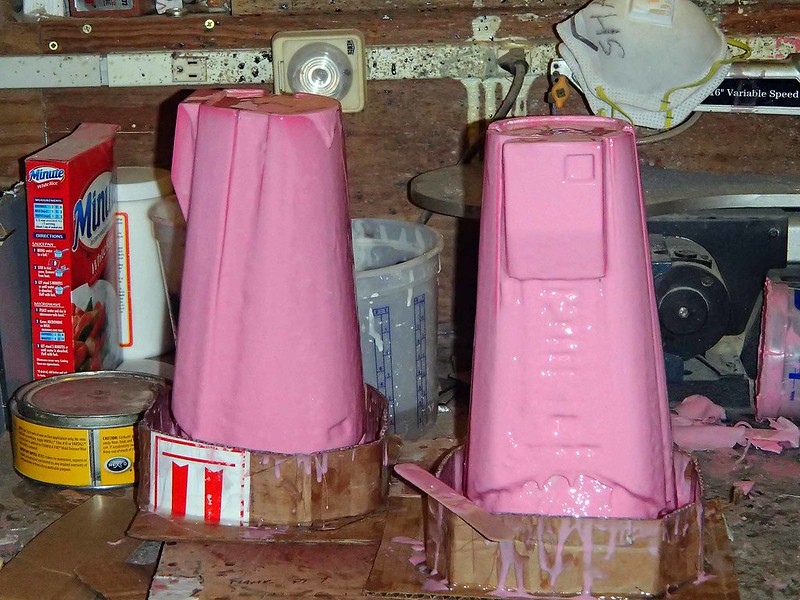
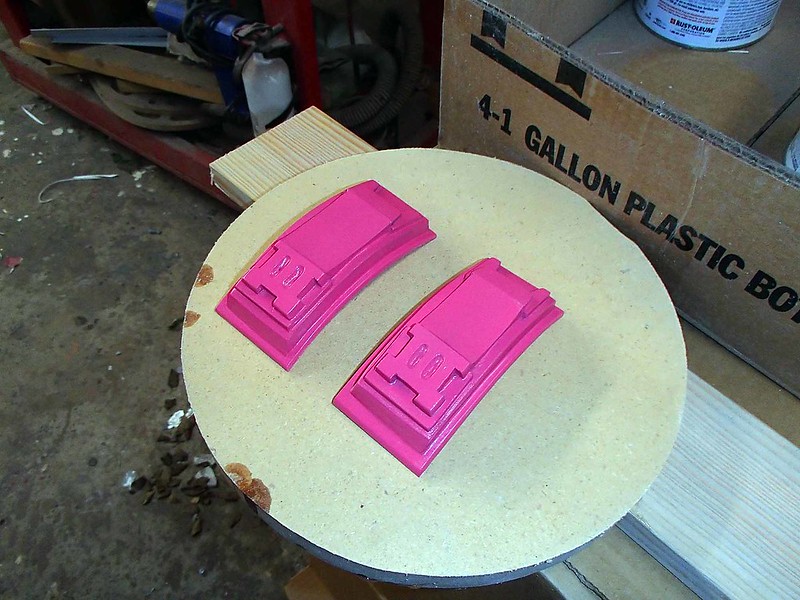
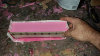
pink silicone on pink paint, why not have used contrasting colors to identify thin spots in the mold?
pink silicone on pink paint, why not have used contrasting colors to identify thin spots in the mold?
mmhnc
Well-Known Member
Pacman117
New Member
Re: Thorssoli's Episode VII Builds (TIE Pilot Test Fitting Page 11)
Looking great! Have you given any thought as to what you will use for the flight suit? I am starting a TIE pilot build as well and I honestly have no idea what I am going to do about the flight suit. I know absolutely nothing about sewing and piecing together pieces of fabric. Any insight would be greatly appreciated. You are doing an amazing job with your project! I'm excited to see more updates!
Looking great! Have you given any thought as to what you will use for the flight suit? I am starting a TIE pilot build as well and I honestly have no idea what I am going to do about the flight suit. I know absolutely nothing about sewing and piecing together pieces of fabric. Any insight would be greatly appreciated. You are doing an amazing job with your project! I'm excited to see more updates!
Re: Thorssoli's Episode VII Builds (TIE Pilot Test Fitting Page 11)
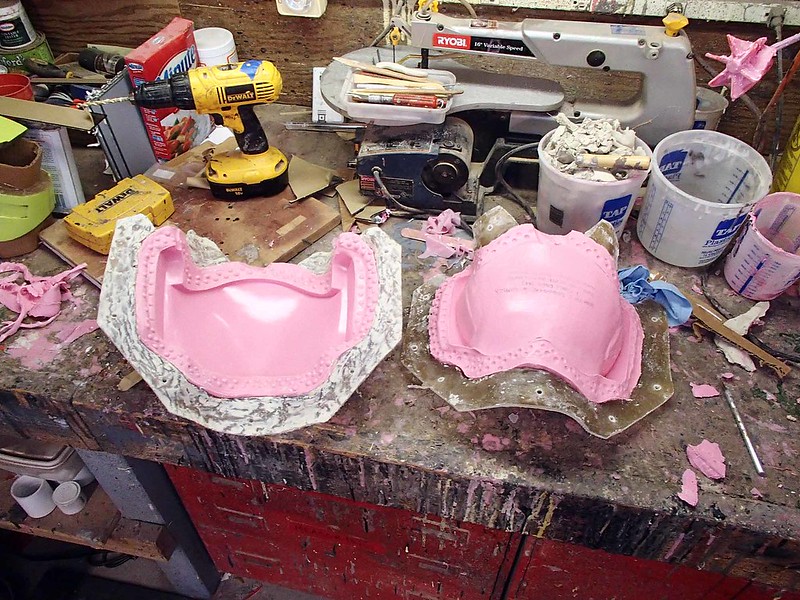
I usually lay up at least three layers of 3/4-oz. chopped strand mat. Then the edges will get at least one or two layers more since they'll end up being bolted together or holding the bottom of the mold straight.
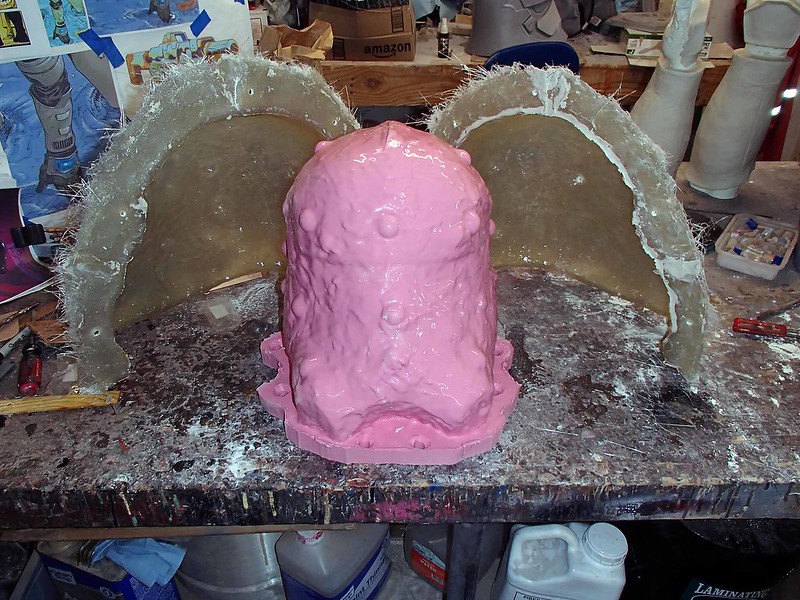
The paint is a really dark pink and the silicone is a pretty bright pink. At this point, I tend to rely on other than visual cues. Realistically, after the second layer of silicone goes on I wouldn't be able to see the color of the prototype unless it was some kind of ridiculously bright glow-in-the-dark. Instead, I usually insert a few of my 1/2" thick registration keys into the silicone where I'm worried there will be a thin spot (i.e. any protruding areas or high points) and then make sure to pile on enough thixotropic silicone to completely bury them. The end result is usually pretty successful.
I've got a seamstress friend who has made one for me. It came out way too big though, so now I just need to corner her long enough to get it redone. She's insanely busy, so who knows when that will happen.
UPDATE:
The other day I popped the mothermold open:
After making a relief cut up the back side of the rubber jacket, I pulled the prototype and then poured the first cast. Sadly, the silicone refused to let go of the prototype in a few places under the chin. As a result, it came out with a couple of warts:
It's a pretty quick fix with a Dremel and a sanding block, but I'm in the process of making a 2nd generation mold anyway.
In any case, here's the first casting with a bit of cleanup sitting next to the prototype:
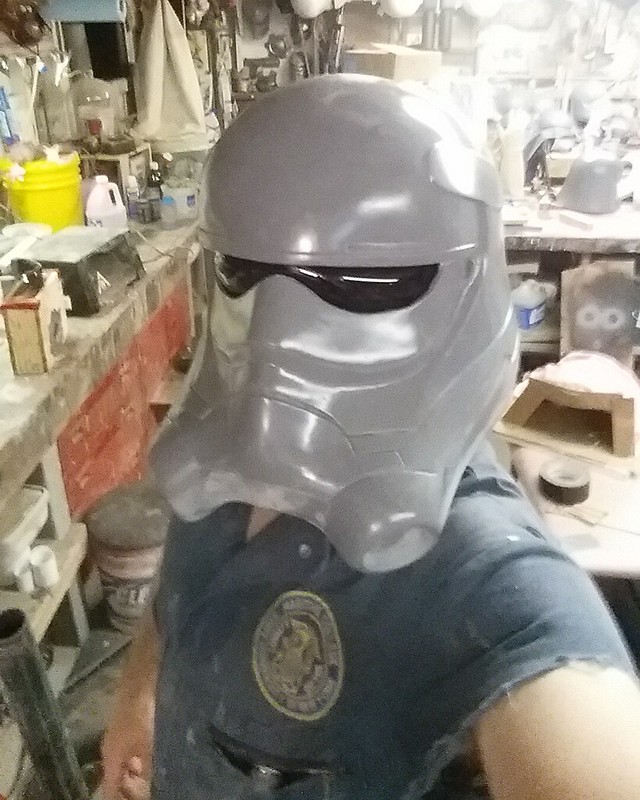
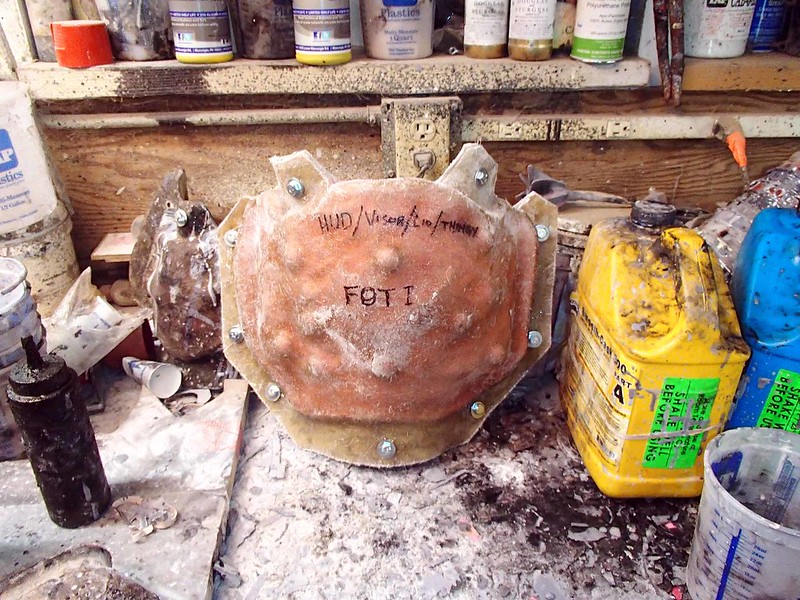
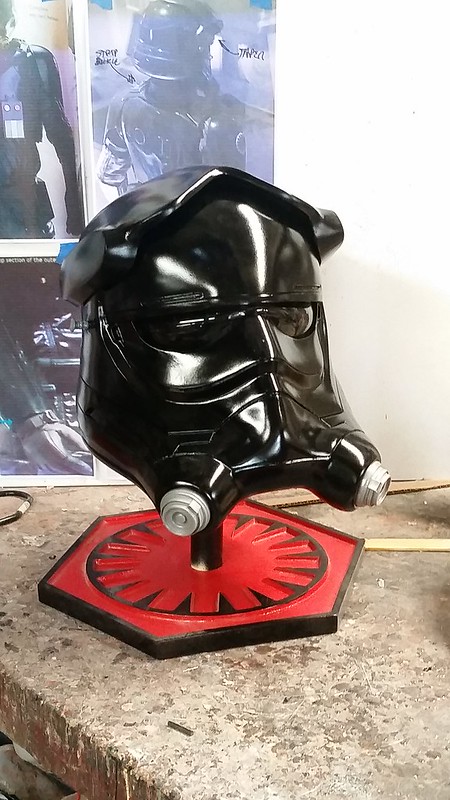
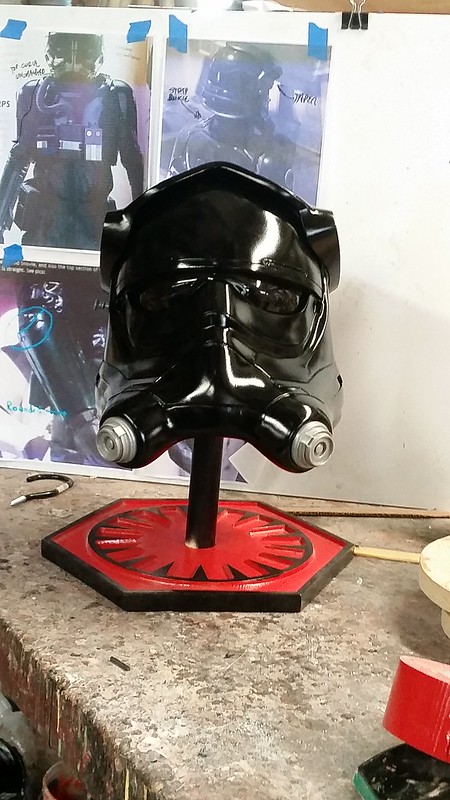
After cutting out the eye hole and popping the HUD/Visor/Lid/Thingy prototype back on, I took a selfie:
Then I made a lens forming box:
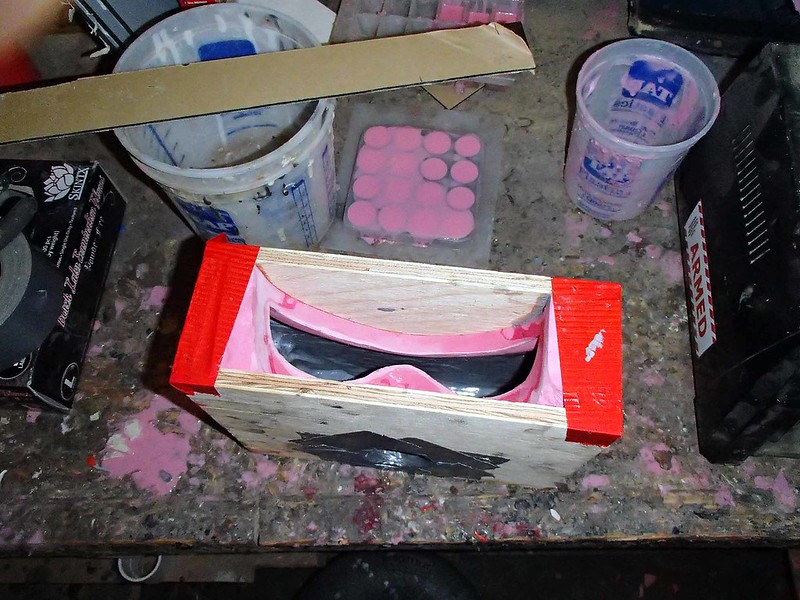
After pulling a few sets of lenses, I installed a set in the first helmet and took another selfie:
Then I cast a few more:

This will give me something to sand while I'm waiting for the silicone to cure on the new mold.
I've also made some progress on the gauntlets:
Here's the HUD/Visor/Lid/Thingy prepped for molding:
And the print coat:
At this point, the first half has its mothermold done and yesterday I poured the print coat on the inside half.
So that guy's coming right along.
How many layers of fiberglass do you need for the mothermold?
I usually lay up at least three layers of 3/4-oz. chopped strand mat. Then the edges will get at least one or two layers more since they'll end up being bolted together or holding the bottom of the mold straight.
pink silicone on pink paint, why not have used contrasting colors to identify thin spots in the mold?
The paint is a really dark pink and the silicone is a pretty bright pink. At this point, I tend to rely on other than visual cues. Realistically, after the second layer of silicone goes on I wouldn't be able to see the color of the prototype unless it was some kind of ridiculously bright glow-in-the-dark. Instead, I usually insert a few of my 1/2" thick registration keys into the silicone where I'm worried there will be a thin spot (i.e. any protruding areas or high points) and then make sure to pile on enough thixotropic silicone to completely bury them. The end result is usually pretty successful.
Have you given any thought as to what you will use for the flight suit?
I've got a seamstress friend who has made one for me. It came out way too big though, so now I just need to corner her long enough to get it redone. She's insanely busy, so who knows when that will happen.
UPDATE:
The other day I popped the mothermold open:
After making a relief cut up the back side of the rubber jacket, I pulled the prototype and then poured the first cast. Sadly, the silicone refused to let go of the prototype in a few places under the chin. As a result, it came out with a couple of warts:
It's a pretty quick fix with a Dremel and a sanding block, but I'm in the process of making a 2nd generation mold anyway.
In any case, here's the first casting with a bit of cleanup sitting next to the prototype:
After cutting out the eye hole and popping the HUD/Visor/Lid/Thingy prototype back on, I took a selfie:
Then I made a lens forming box:
After pulling a few sets of lenses, I installed a set in the first helmet and took another selfie:
Then I cast a few more:
This will give me something to sand while I'm waiting for the silicone to cure on the new mold.
I've also made some progress on the gauntlets:
Here's the HUD/Visor/Lid/Thingy prepped for molding:
And the print coat:
At this point, the first half has its mothermold done and yesterday I poured the print coat on the inside half.
So that guy's coming right along.
Re: Thorssoli's Episode VII Builds (TIE Pilot Test Fitting Page 11)
Soon. I'll have all of the molds done in a week or so.
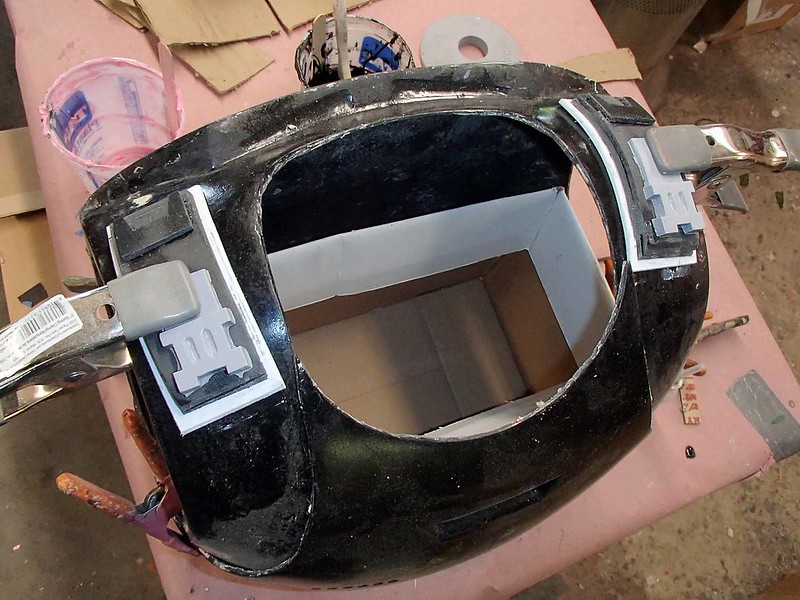
Right now I'm in the process of reworking the "epaulette" details for the shoulder area of the chest armor:
Last night I finished up the 2nd half of the mothermold for the HUD/VIsor/Lid/Thingy:
Now I just need to trim the edges, drill the flanges for bolts, and cast a few copies to go with the handful of helmets I'm cleaning up:
I also need to make new prototypes for the teardrop brackets and the belt boxes. Piece of cake.
Stay tuned...
Love this! You're so close man.
Soon. I'll have all of the molds done in a week or so.
Right now I'm in the process of reworking the "epaulette" details for the shoulder area of the chest armor:
Last night I finished up the 2nd half of the mothermold for the HUD/VIsor/Lid/Thingy:
Now I just need to trim the edges, drill the flanges for bolts, and cast a few copies to go with the handful of helmets I'm cleaning up:
I also need to make new prototypes for the teardrop brackets and the belt boxes. Piece of cake.
Stay tuned...
Re: Thorssoli's Episode VII Builds (TIE Pilot Test Fitting Page 11)
Progress update!
The prototype for the HUD/Visor/Lid/Thingy came out of the mold without any problems. Here's the trimmed mold parts laid open:
Once that was all cleaned up and bolted together, I was ready to start cranking out castings:
Here's the first one before I'd done any cleanup on it:
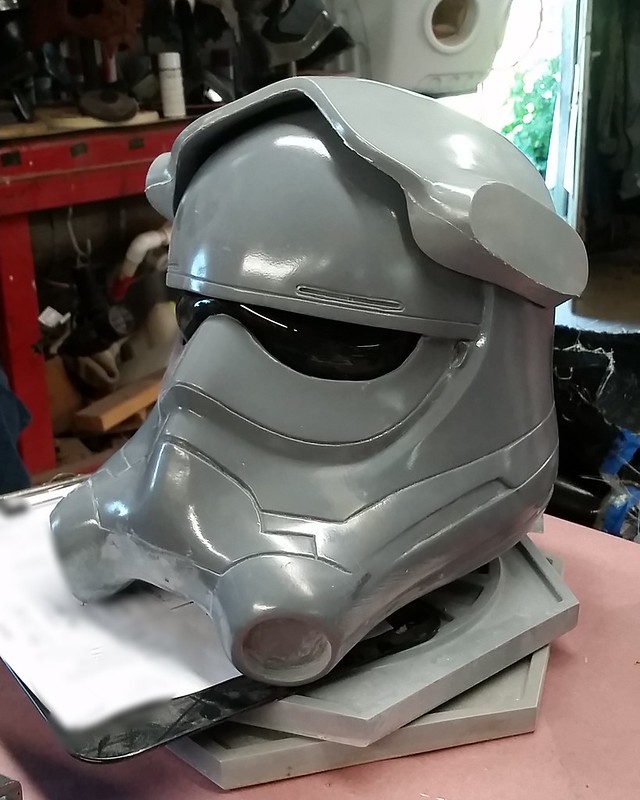
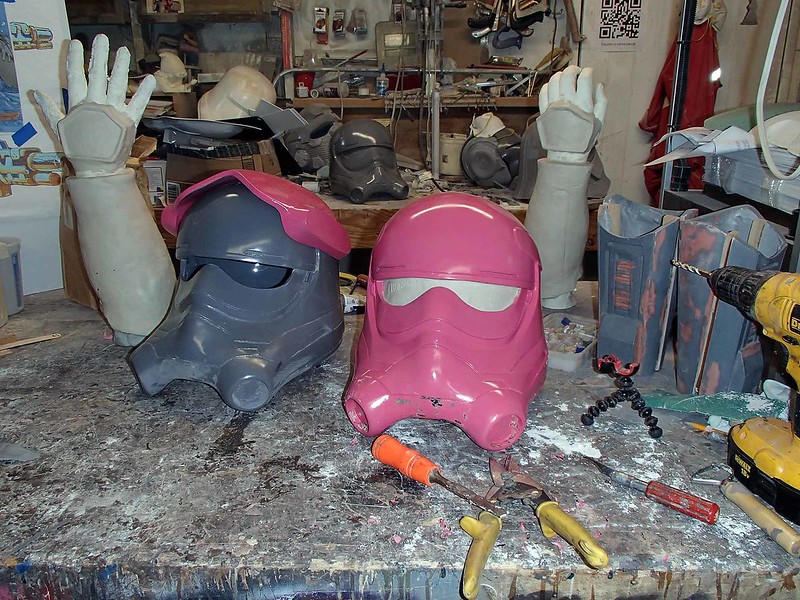
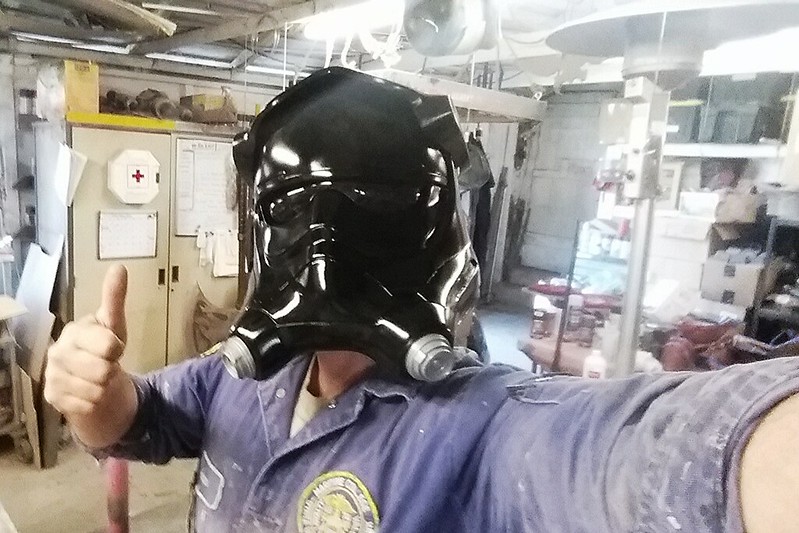
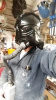
Since I have poor impulse control, I rushed through the process of cleaning up the first helmet casting and gave it a quick gloss black paintjob:
Here's the "money shot" showing the same angle as the first glimpse we all got of this helmet in the trailer:
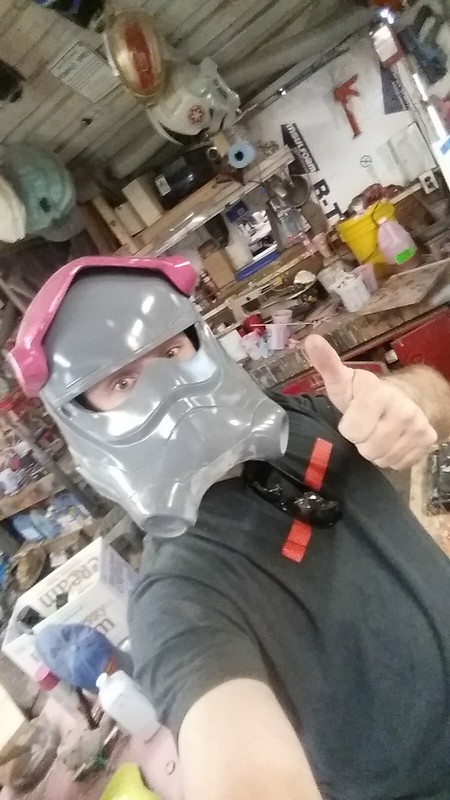
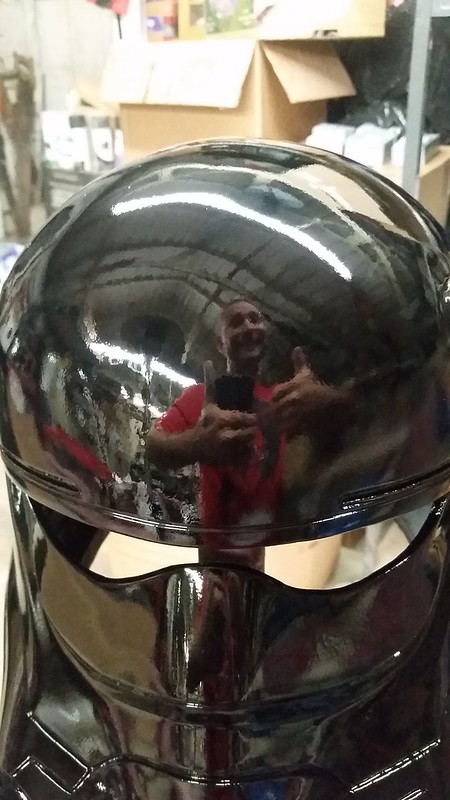
And here's a selfie:
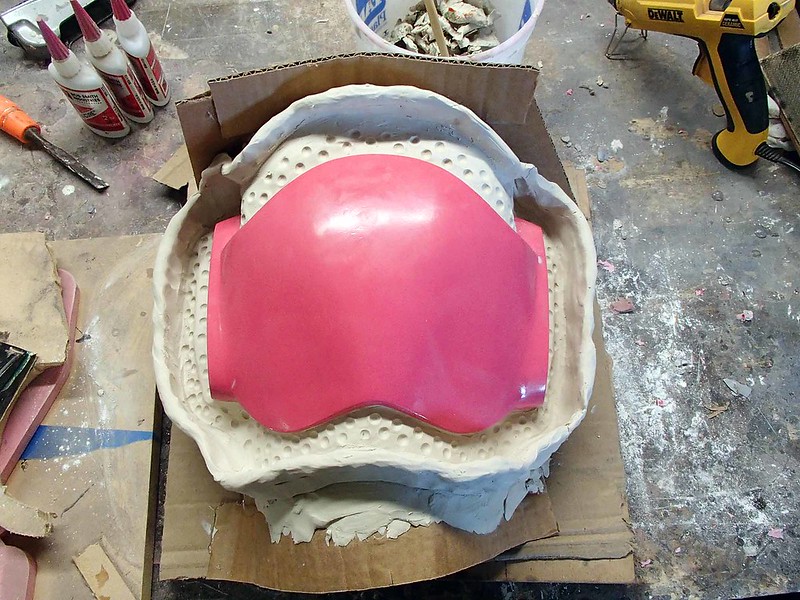
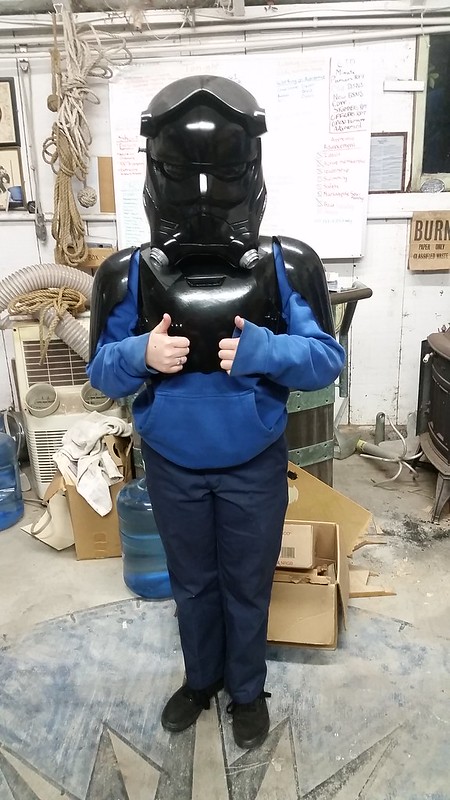
Later that day I trimmed and cleaned the edges of one of the smaller sets of chest armor and had a short kid (5'0" tall) try it on:
In other news, I've finally prepped the TIE pilot (and flametrooper) gauntlets for molding:

Silicone layup started as well:
Finally, I found a guy in Poland who had a bunch of new old stock Russian gas mask hoses that match the screen-used pieces. Those should be arriving early next week so I'll be able to upgrade from the Israeli gas mask hoses I already have.
So the TIE Pilot is very nearly done.
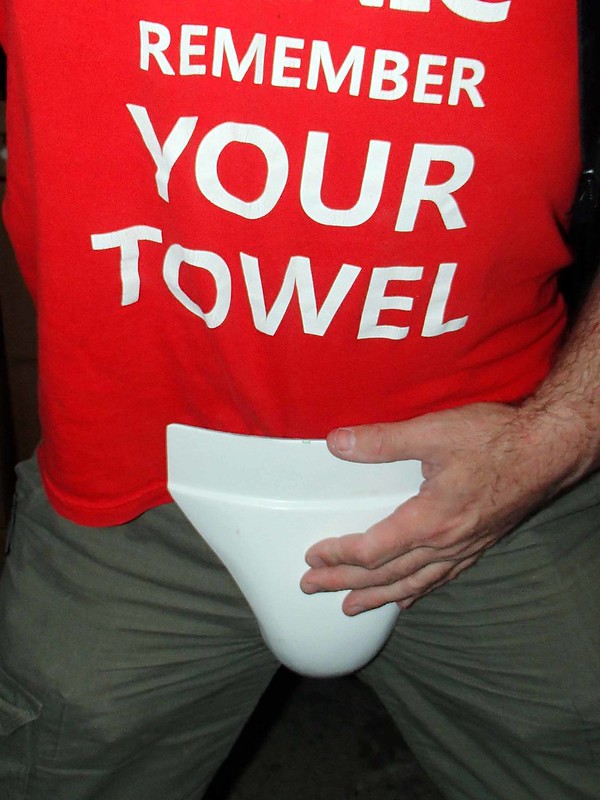
In other news, I've started molding the codpiece for the standard trooper:
On that front, I'm still not sure which part I'm going to start working on next. I've already split up the files so the robots can start carving out this thing:
But then again, I think I might be a tiny bit more excited about one of these guys:
Any thoughts?
Progress update!
The prototype for the HUD/Visor/Lid/Thingy came out of the mold without any problems. Here's the trimmed mold parts laid open:
Once that was all cleaned up and bolted together, I was ready to start cranking out castings:
Here's the first one before I'd done any cleanup on it:
Since I have poor impulse control, I rushed through the process of cleaning up the first helmet casting and gave it a quick gloss black paintjob:
Here's the "money shot" showing the same angle as the first glimpse we all got of this helmet in the trailer:
And here's a selfie:
Later that day I trimmed and cleaned the edges of one of the smaller sets of chest armor and had a short kid (5'0" tall) try it on:
In other news, I've finally prepped the TIE pilot (and flametrooper) gauntlets for molding:
Silicone layup started as well:
Finally, I found a guy in Poland who had a bunch of new old stock Russian gas mask hoses that match the screen-used pieces. Those should be arriving early next week so I'll be able to upgrade from the Israeli gas mask hoses I already have.
So the TIE Pilot is very nearly done.
In other news, I've started molding the codpiece for the standard trooper:
On that front, I'm still not sure which part I'm going to start working on next. I've already split up the files so the robots can start carving out this thing:
But then again, I think I might be a tiny bit more excited about one of these guys:
Any thoughts?
")
Re: Thorssoli's Episode VII Builds (TIE Pilot Test Fitting Page 11)
My vote is for the snowy stuff! Progress is going great!
My vote is for the snowy stuff! Progress is going great!
Re: Thorssoli's Episode VII Builds (TIE Pilot Test Fitting Page 11)
Well okay.
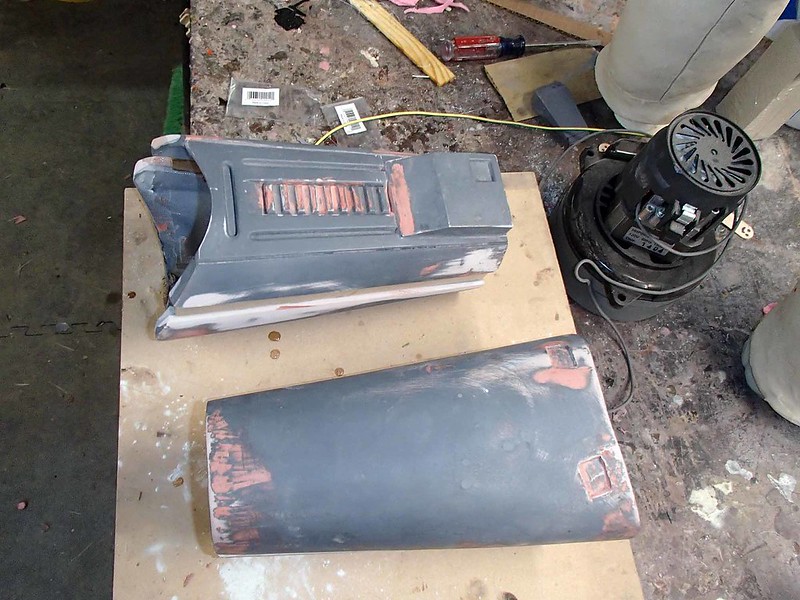
I'm still going to be a bit all over the place though. I've started cutting out the pack parts:
I've also laid up a codpiece for a standard trooper:
But since I'm so very close to having a complete, wearable copy of the TIE Pilot, I've been focusing most of my time on those guys. Yesterday I trimmed a couple pairs of the gauntlets. I started with this cutting wheel on the Dremel:
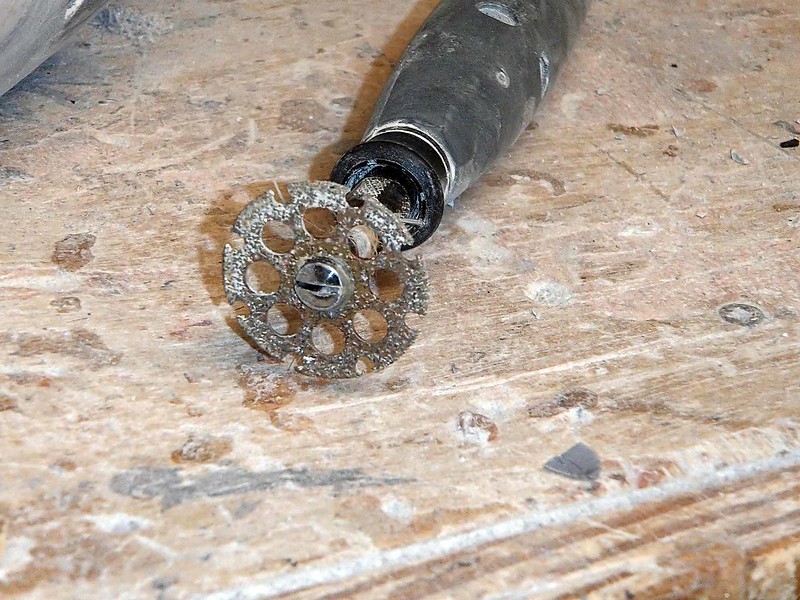
I used it to split the castings along the edge of the outer part:
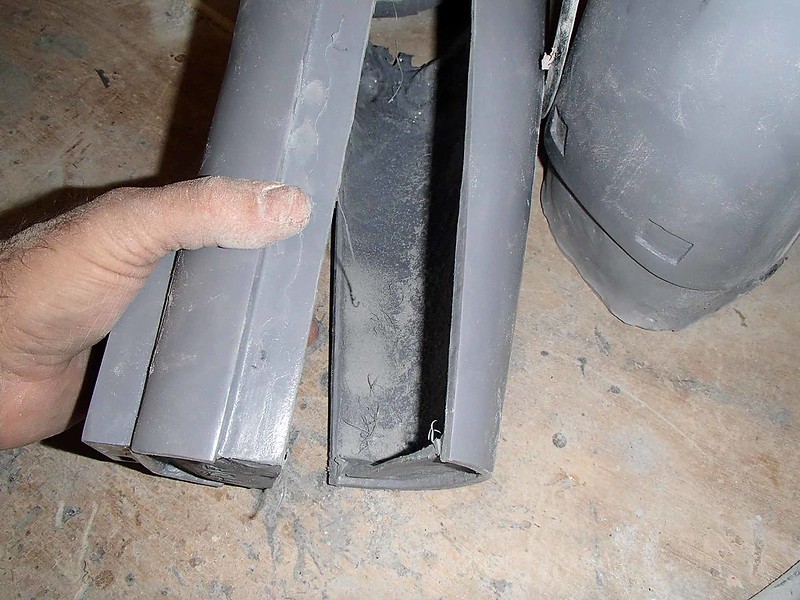
Once they were separated, I rough-trimmed the ends:
Then I used the sanding drum to smooth all of the edges. That's the one that looks like this:

Once that was done, the two halves nested together nicely:
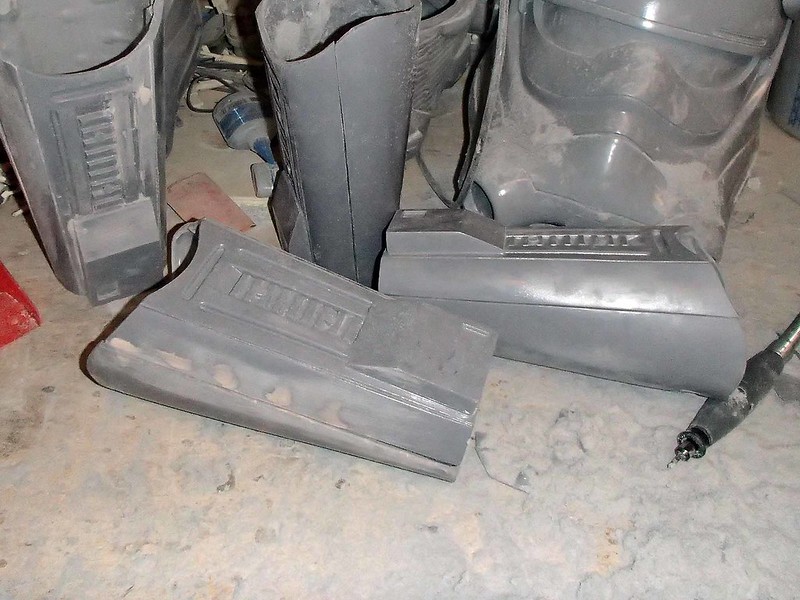
I'll probably end up putting some velcro or elastic on the inside in order to hold them snugly in place when worn. More on that later.
In other news, my friend Matt roughed out all of the belt boxes and the flap cover for the large pouch:
I'm thinking they'll work out pretty well. It's worth noting that these will be the same belt parts used on Phasma and the standard stormtrooper:
Finally, I've finished the prototypes for the epaulette details on the collarbone area of the armor:
I'll be molding these today.
So that's all the latest. Stay tuned...
My vote is for the snowy stuff! Progress is going great!
Well okay.
I'm still going to be a bit all over the place though. I've started cutting out the pack parts:
I've also laid up a codpiece for a standard trooper:
But since I'm so very close to having a complete, wearable copy of the TIE Pilot, I've been focusing most of my time on those guys. Yesterday I trimmed a couple pairs of the gauntlets. I started with this cutting wheel on the Dremel:
I used it to split the castings along the edge of the outer part:
Once they were separated, I rough-trimmed the ends:
Then I used the sanding drum to smooth all of the edges. That's the one that looks like this:
Once that was done, the two halves nested together nicely:
I'll probably end up putting some velcro or elastic on the inside in order to hold them snugly in place when worn. More on that later.
In other news, my friend Matt roughed out all of the belt boxes and the flap cover for the large pouch:
I'm thinking they'll work out pretty well. It's worth noting that these will be the same belt parts used on Phasma and the standard stormtrooper:
Finally, I've finished the prototypes for the epaulette details on the collarbone area of the armor:
I'll be molding these today.
So that's all the latest. Stay tuned...
Re: Thorssoli's Episode VII Builds (TIE Pilot Test Fitting Page 11)
Maybe. But sometimes it gets us all.
I'm overdue for an update, so here goes...
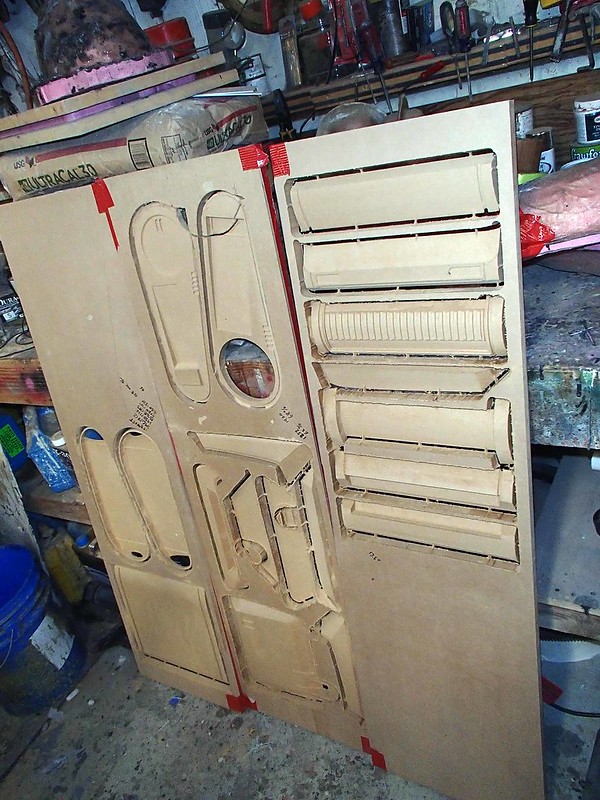
I got tired of having the stack of snowtrooper pack parts kicking around the shop, so I went ahead and stuck them all together:

The detail panels on the sides will be cast separately so they can be added on after the rest of the pack is built:

I'm also going to make the rear hatch as a separate part so it can be hinged:

This way I can use it to carry snacks. Snacks are good.
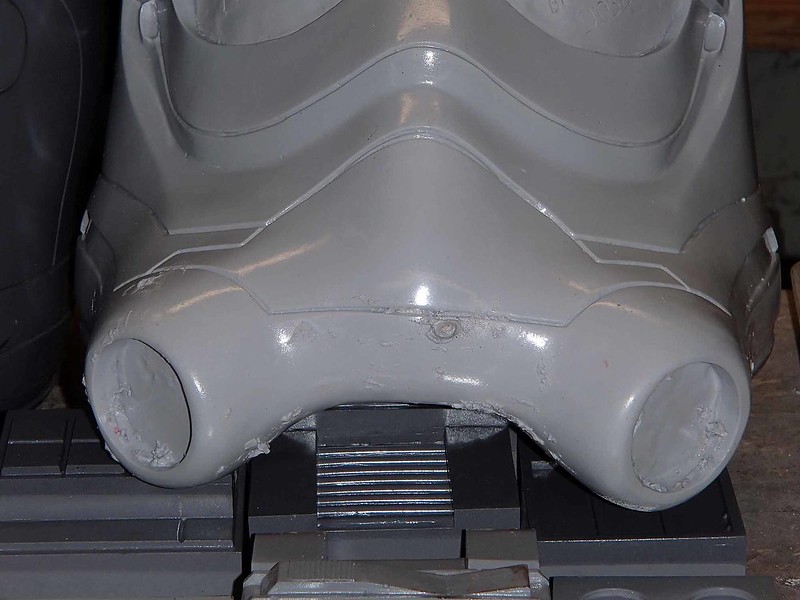
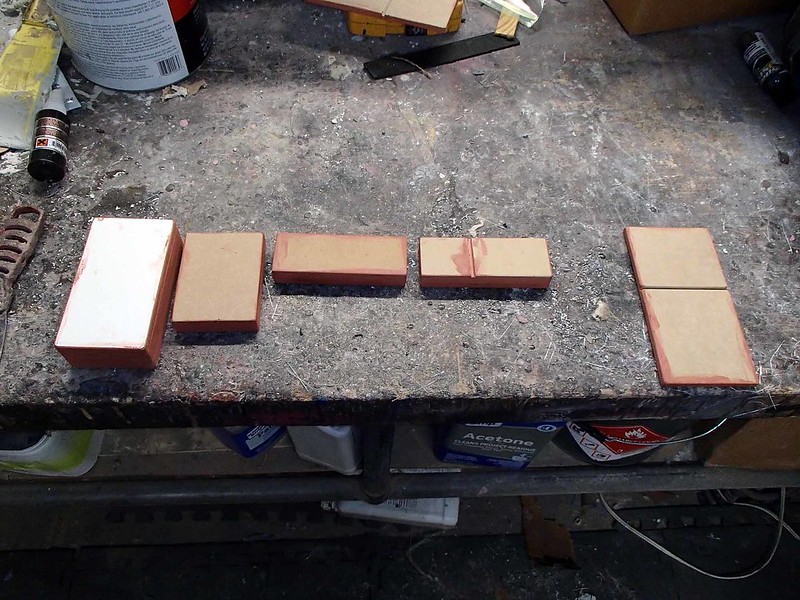
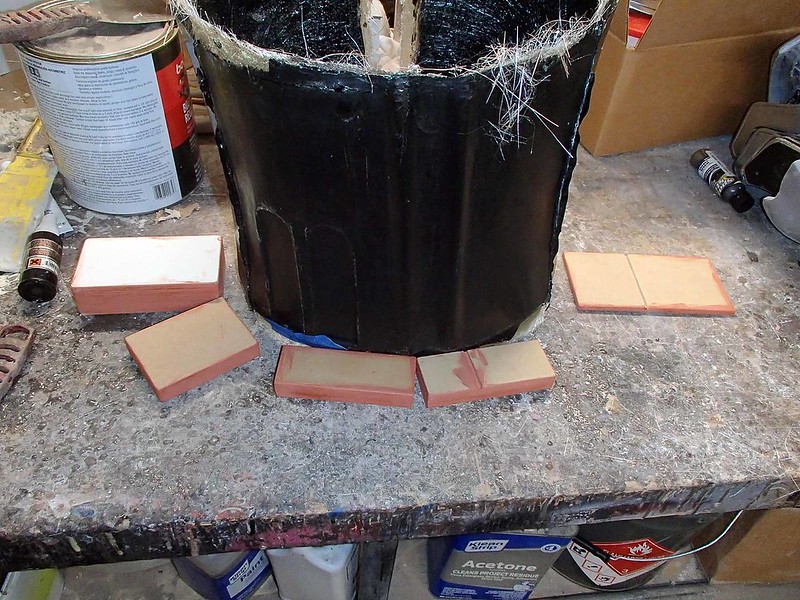
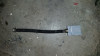
On the TIE Pilot front, I've finally sourced the just-right rubber hose:

After drilling out the middle of one of the aerators, it's perfect:

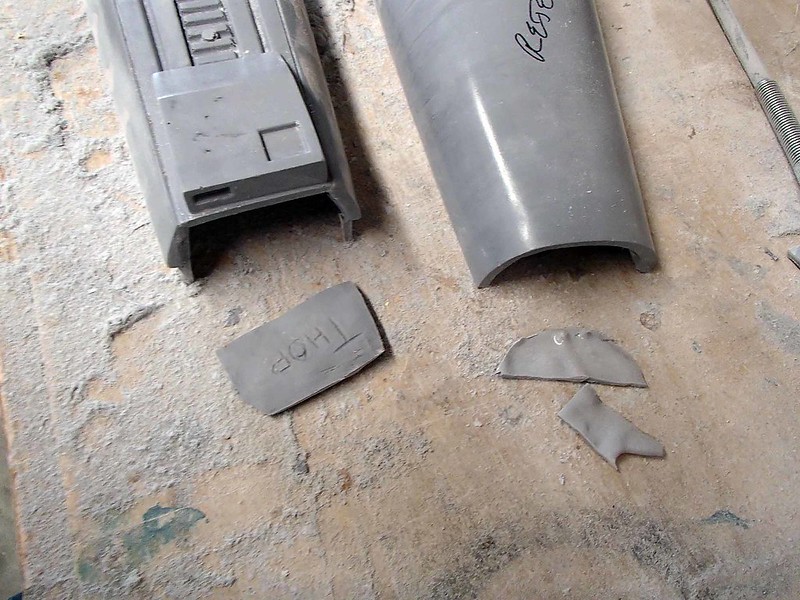
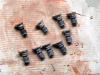
I've also decided that I had the wrong shape for the little earplug knob detail for the right side of the helmet. So I made a handful of castings and adjusted them all accordingly:

Then I stuck them all to a piece of cardboard, built a sprue, and gave them all a glossy coat of paint:

Once the paint was dry, I built up some mold walls and filled them with silicone:

Once the silicone had cured, the cardboard mold box was removed:

Then it was just a matter of cutting out the prototypes and sprues:

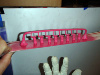
I used two halves from a snapped paint stir stick to brace the rubber and keep everything straight once it was strapped closed again:

Then I filled the mold with resin by injecting it into the fill holes on either end:

The castings came out pretty good:

And once I dust off my helmet and paint the little silver bits, they'll be perfect:

That was the very last mold I needed to make for the TIE fighter pilot. Woot! Time to start something else.
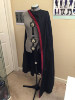
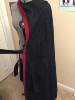
Back to Phasma, my friend Liz (aka Hydra) is helping me out by making the cape. Here's a great shot of her work in progress at this point:

She's been doing a great job of nailing down all of the weird little details that make this piece a much bigger deal than you'd ever expect:

I still have to make a couple more plates for the ankles and the caps for the toes. Then there's going to be two tiny little details (the chest tabs and the boxes on the left calf) and it'll just be a matter of trimming and painting.
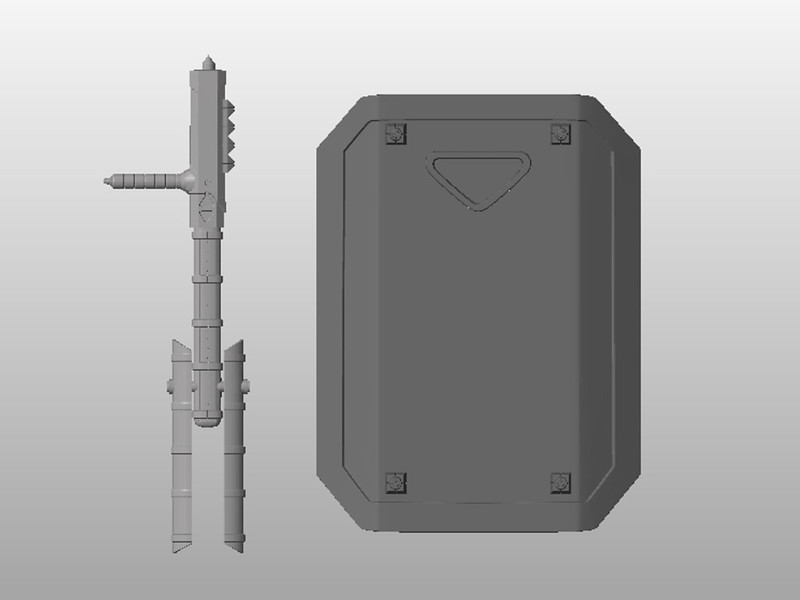
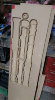
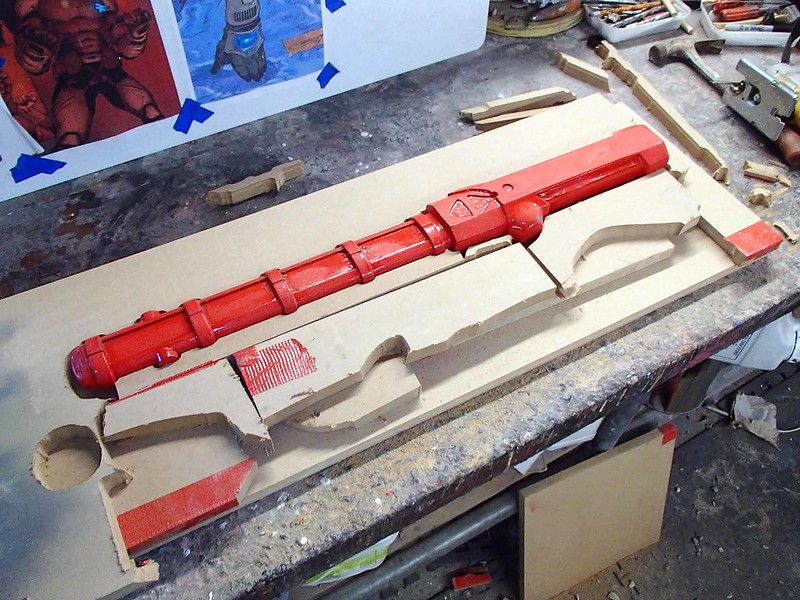
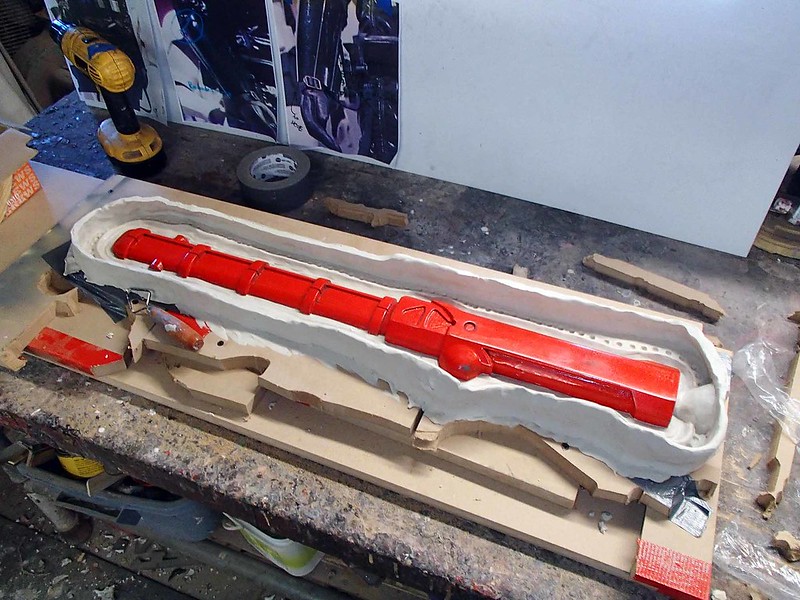
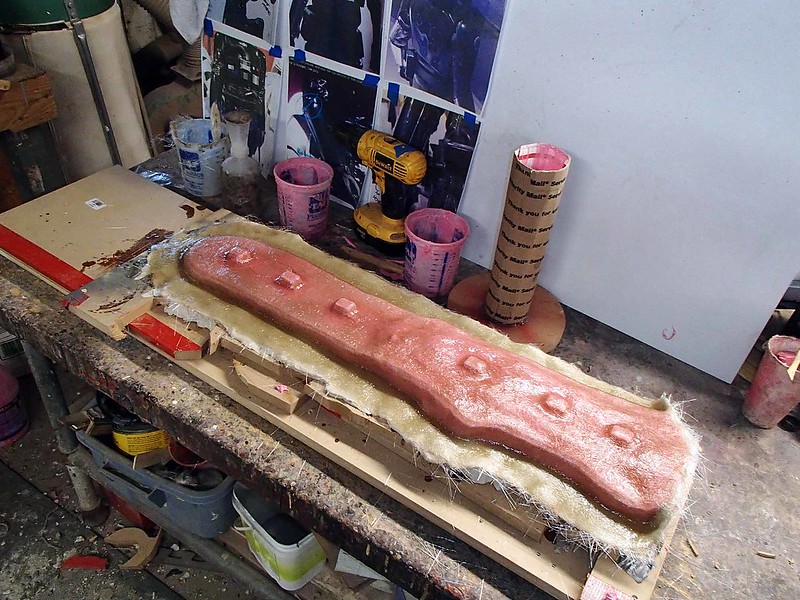
Speaking of starting something else, since I can't leave well enough alone, I've also started making parts for the Z-6 Riot Baton:

This one is going to be a fun build.
Stay tuned...
Amazing work rate bro...sleep is for wimps!
Maybe. But sometimes it gets us all.
I'm overdue for an update, so here goes...
I got tired of having the stack of snowtrooper pack parts kicking around the shop, so I went ahead and stuck them all together:
The detail panels on the sides will be cast separately so they can be added on after the rest of the pack is built:
I'm also going to make the rear hatch as a separate part so it can be hinged:
This way I can use it to carry snacks. Snacks are good.
On the TIE Pilot front, I've finally sourced the just-right rubber hose:
After drilling out the middle of one of the aerators, it's perfect:
I've also decided that I had the wrong shape for the little earplug knob detail for the right side of the helmet. So I made a handful of castings and adjusted them all accordingly:
Then I stuck them all to a piece of cardboard, built a sprue, and gave them all a glossy coat of paint:
Once the paint was dry, I built up some mold walls and filled them with silicone:
Once the silicone had cured, the cardboard mold box was removed:
Then it was just a matter of cutting out the prototypes and sprues:
I used two halves from a snapped paint stir stick to brace the rubber and keep everything straight once it was strapped closed again:
Then I filled the mold with resin by injecting it into the fill holes on either end:
The castings came out pretty good:
And once I dust off my helmet and paint the little silver bits, they'll be perfect:
That was the very last mold I needed to make for the TIE fighter pilot. Woot! Time to start something else.
Back to Phasma, my friend Liz (aka Hydra) is helping me out by making the cape. Here's a great shot of her work in progress at this point:
She's been doing a great job of nailing down all of the weird little details that make this piece a much bigger deal than you'd ever expect:
I still have to make a couple more plates for the ankles and the caps for the toes. Then there's going to be two tiny little details (the chest tabs and the boxes on the left calf) and it'll just be a matter of trimming and painting.
Speaking of starting something else, since I can't leave well enough alone, I've also started making parts for the Z-6 Riot Baton:
This one is going to be a fun build.
Stay tuned...
Attachments
-
 25412797171_b8dc8e78c6_c.jpg202.4 KB · Views: 221
 -
 25412797171_b8dc8e78c6_c.jpg202.4 KB · Views: 232
 -
 25412797171_b8dc8e78c6_c.jpg202.4 KB · Views: 219
 -
 25412797171_b8dc8e78c6_c.jpg202.4 KB · Views: 225
 -
 25412797171_b8dc8e78c6_c.jpg202.4 KB · Views: 213
 -
 25505592305_55ab1bda28_c.jpg226.7 KB · Views: 231
 -
 25505592305_55ab1bda28_c.jpg226.7 KB · Views: 226
 -
 25505592305_55ab1bda28_c.jpg226.7 KB · Views: 238
 -
 25505592305_55ab1bda28_c.jpg226.7 KB · Views: 222
 -
 25505592305_55ab1bda28_c.jpg226.7 KB · Views: 221
 -
 24875049614_3a7362bbf0_c.jpg225.3 KB · Views: 222
 -
 24875049614_3a7362bbf0_c.jpg225.3 KB · Views: 222
 -
 24875049614_3a7362bbf0_c.jpg225.3 KB · Views: 236
 -
 24875049614_3a7362bbf0_c.jpg225.3 KB · Views: 232
 -
 24875049614_3a7362bbf0_c.jpg225.3 KB · Views: 222
 -
 24878980363_73f3f96058_c.jpg101.7 KB · Views: 238
 -
 24878980363_73f3f96058_c.jpg101.7 KB · Views: 224
 -
 24878980363_73f3f96058_c.jpg101.7 KB · Views: 233
 -
 24878980363_73f3f96058_c.jpg101.7 KB · Views: 231
 -
 24878980363_73f3f96058_c.jpg101.7 KB · Views: 229
 -
 25387209702_a842d86407_c.jpg75.4 KB · Views: 223
 -
 25387209702_a842d86407_c.jpg75.4 KB · Views: 212
 -
 25387209702_a842d86407_c.jpg75.4 KB · Views: 199
 -
 25387209702_a842d86407_c.jpg75.4 KB · Views: 227
 -
 25387209702_a842d86407_c.jpg75.4 KB · Views: 239
 -
 25479488476_ff94c53007_c.jpg212 KB · Views: 239
 -
 25479488476_ff94c53007_c.jpg212 KB · Views: 237
 -
 25479488476_ff94c53007_c.jpg212 KB · Views: 233
 -
 25479488476_ff94c53007_c.jpg212 KB · Views: 94
 -
 25479488476_ff94c53007_c.jpg212 KB · Views: 243
 -
 25620397136_6bc7788bd4_c.jpg196 KB · Views: 222
 -
 25620397136_6bc7788bd4_c.jpg196 KB · Views: 219
 -
 25620397136_6bc7788bd4_c.jpg196 KB · Views: 211
 -
 25620397136_6bc7788bd4_c.jpg196 KB · Views: 214
 -
 25620397136_6bc7788bd4_c.jpg196 KB · Views: 210
 -
 25565104531_4b20e9a89a_c.jpg96.6 KB · Views: 225
 -
 25565104531_4b20e9a89a_c.jpg96.6 KB · Views: 171
 -
 25565104531_4b20e9a89a_c.jpg96.6 KB · Views: 217
 -
 25565104531_4b20e9a89a_c.jpg96.6 KB · Views: 228
 -
 25565104531_4b20e9a89a_c.jpg96.6 KB · Views: 228
 -
 25631600446_ac24751196_c.jpg121.5 KB · Views: 240
 -
 25631600446_ac24751196_c.jpg121.5 KB · Views: 227
 -
 25631600446_ac24751196_c.jpg121.5 KB · Views: 228
 -
 25631600446_ac24751196_c.jpg121.5 KB · Views: 224
 -
 25631600446_ac24751196_c.jpg121.5 KB · Views: 232
 -
 25631600446_ac24751196_c.jpg121.5 KB · Views: 226
 -
 25631600446_ac24751196_c.jpg121.5 KB · Views: 209
 -
 25631600446_ac24751196_c.jpg121.5 KB · Views: 211
 -
 25631600446_ac24751196_c.jpg121.5 KB · Views: 227
 -
 25631600446_ac24751196_c.jpg121.5 KB · Views: 216
 -
 25565098081_00e88c7f7a_c.jpg125.7 KB · Views: 222
 -
 25565098081_00e88c7f7a_c.jpg125.7 KB · Views: 237
 -
 25565098081_00e88c7f7a_c.jpg125.7 KB · Views: 218
 -
 25565098081_00e88c7f7a_c.jpg125.7 KB · Views: 225
 -
 25565098081_00e88c7f7a_c.jpg125.7 KB · Views: 219
 -
 25565097691_2fab19388e_c.jpg115.7 KB · Views: 231
 -
 25565097691_2fab19388e_c.jpg115.7 KB · Views: 214
 -
 25565097691_2fab19388e_c.jpg115.7 KB · Views: 219
 -
 25565097691_2fab19388e_c.jpg115.7 KB · Views: 212
 -
 25565097691_2fab19388e_c.jpg115.7 KB · Views: 209
 -
 25031006753_f104bea035_c.jpg156 KB · Views: 233
 -
 25031006753_f104bea035_c.jpg156 KB · Views: 230
 -
 25031006753_f104bea035_c.jpg156 KB · Views: 226
 -
 25031006753_f104bea035_c.jpg156 KB · Views: 225
 -
 25031006753_f104bea035_c.jpg156 KB · Views: 212
 -
 25657778945_7a885af191_c.jpg104 KB · Views: 215
 -
 25657778945_7a885af191_c.jpg104 KB · Views: 71
 -
 25657778945_7a885af191_c.jpg104 KB · Views: 216
 -
 25657778945_7a885af191_c.jpg104 KB · Views: 212
 -
 25657778945_7a885af191_c.jpg104 KB · Views: 229
 -
 25036731043_bf400b131b_c.jpg115 KB · Views: 223
 -
 25036731043_bf400b131b_c.jpg115 KB · Views: 214
 -
 25036731043_bf400b131b_c.jpg115 KB · Views: 230
 -
 25036731043_bf400b131b_c.jpg115 KB · Views: 238
 -
 25036731043_bf400b131b_c.jpg115 KB · Views: 231
 -
 25637313486_4c9ab2433e_c.jpg101.5 KB · Views: 226
 -
 25637313486_4c9ab2433e_c.jpg101.5 KB · Views: 207
 -
 25637313486_4c9ab2433e_c.jpg101.5 KB · Views: 218
 -
 25637313486_4c9ab2433e_c.jpg101.5 KB · Views: 222
 -
 25637313486_4c9ab2433e_c.jpg101.5 KB · Views: 222
 -
 25362693720_6c5ef2700b_c.jpg68.8 KB · Views: 221
 -
 25362693720_6c5ef2700b_c.jpg68.8 KB · Views: 220
 -
 25362693720_6c5ef2700b_c.jpg68.8 KB · Views: 230
 -
 25362693720_6c5ef2700b_c.jpg68.8 KB · Views: 219
 -
 25362693720_6c5ef2700b_c.jpg68.8 KB · Views: 210
Last edited by a moderator:
mmhnc
Well-Known Member
Re: Thorssoli's Episode VII Builds (TIE Pilot Test Fitting Page 11)
HOLY COW PHASMA's CAPE HAS POCKETS!!!!
I had no idea and now going back to look at my reference photos I can just make them out. Well guess I need to add this to the list for my little Phasma I am doing.
Back to Phasma, my friend Liz (aka @Hydra) is helping me out by making the cape. Here's a great shot of her work in progress at this point:
https://farm2.staticflickr.com/1507/25036731043_bf400b131b_c.jpg
She's been doing a great job of nailing down all of the weird little details that make this piece a much bigger deal than you'd ever expect:
https://farm2.staticflickr.com/1527/25637313486_4c9ab2433e_c.jpg
HOLY COW PHASMA's CAPE HAS POCKETS!!!!
I had no idea and now going back to look at my reference photos I can just make them out. Well guess I need to add this to the list for my little Phasma I am doing.
Re: Thorssoli's Episode VII Builds (TIE Pilot Test Fitting Page 11)
Yep. It's a continuing source of aggravation.
Apologies for the lack of updates. It's been a pretty busy couple of weeks.
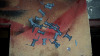
Along the way, I made a mold for this thing:
Here's the clay parting wall and drip lips set up:
Then the silicone rubber jacket mold:

Once that cured, I laid up a fiberglass mothermold:
And flipped the whole thing over and peeled off the clay:

Then I built up a new drip wall and sprayed on a coat of mold release:
And built up the second half of the rubber jacket mold before building the second half of the fiberglass mother mold:
Once that was done curing, I stuck a pair of pieces of aluminum square stock before bolting the mold closed and filling it with resin:
Somewhere along the way I also molded and cast the other pieces:

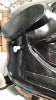
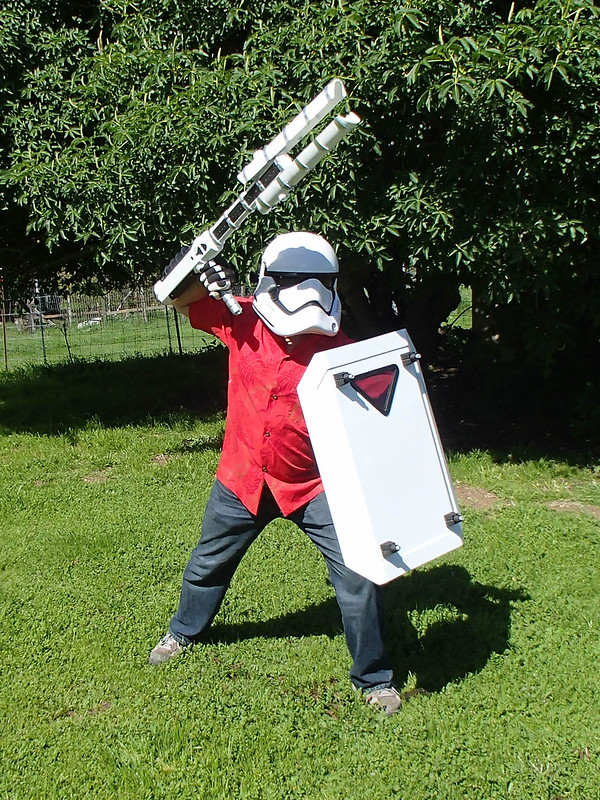
The whole thing was a rush job, but after a bit of paint, it looked pretty good:
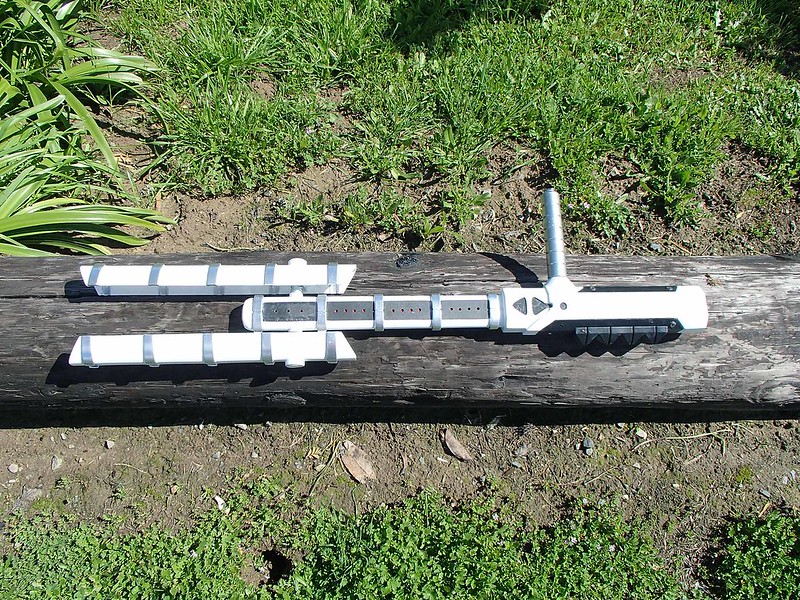
Then I had to test-drive it:

I made a shield to go with it too:
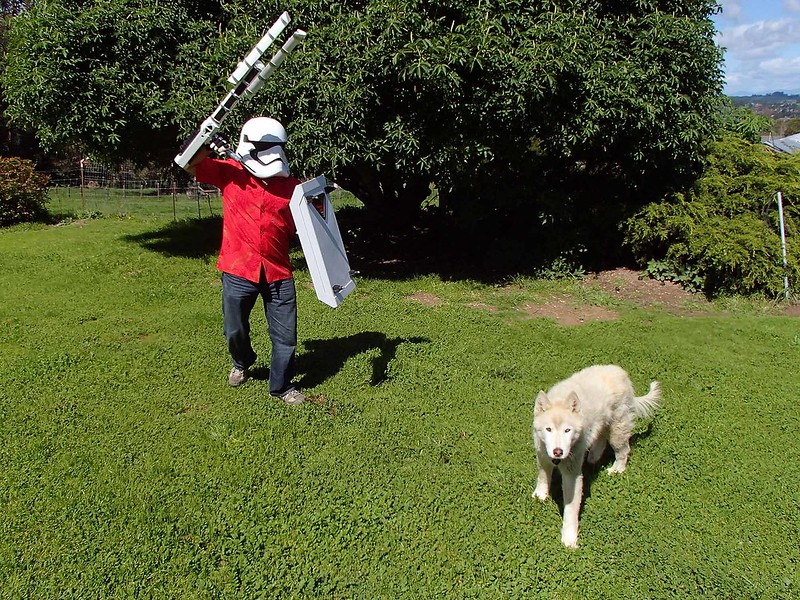
My dog Bain was not impressed:
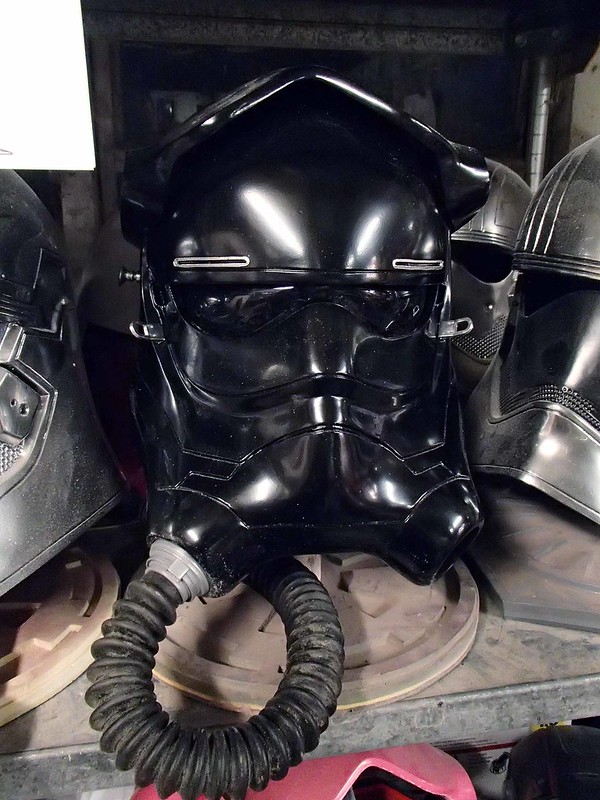
Now I can get back to work on my TIE Pilot helmet:
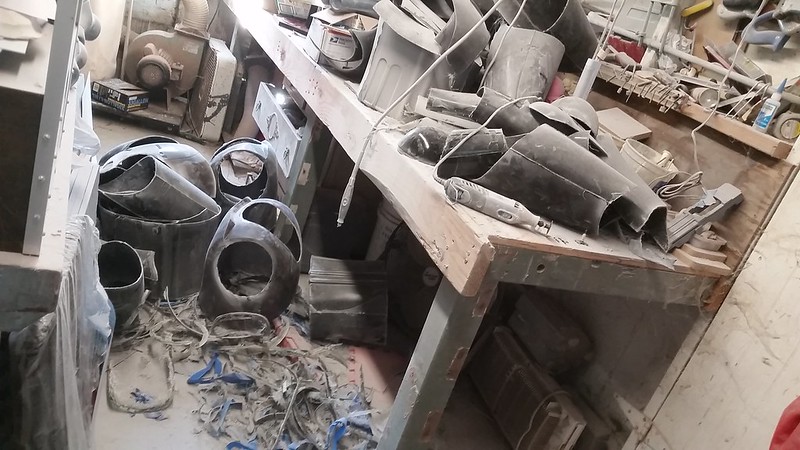
That, and the huge pile of armor I started trimming today:
More progress soon. Stay tuned...
HOLY COW PHASMA's CAPE HAS POCKETS!!!!
Yep. It's a continuing source of aggravation.
Apologies for the lack of updates. It's been a pretty busy couple of weeks.
Along the way, I made a mold for this thing:
Here's the clay parting wall and drip lips set up:
Then the silicone rubber jacket mold:
Once that cured, I laid up a fiberglass mothermold:
And flipped the whole thing over and peeled off the clay:
Then I built up a new drip wall and sprayed on a coat of mold release:
And built up the second half of the rubber jacket mold before building the second half of the fiberglass mother mold:
Once that was done curing, I stuck a pair of pieces of aluminum square stock before bolting the mold closed and filling it with resin:
Somewhere along the way I also molded and cast the other pieces:
The whole thing was a rush job, but after a bit of paint, it looked pretty good:
Then I had to test-drive it:
I made a shield to go with it too:
My dog Bain was not impressed:
Now I can get back to work on my TIE Pilot helmet:
That, and the huge pile of armor I started trimming today:
More progress soon. Stay tuned...
Re: Thorssoli's Episode VII Builds (TIE Pilot Test Fitting Page 11)
<like>
<like>
Re: Thorssoli's Episode VII Builds (TIE Pilot Test Fitting Page 11)
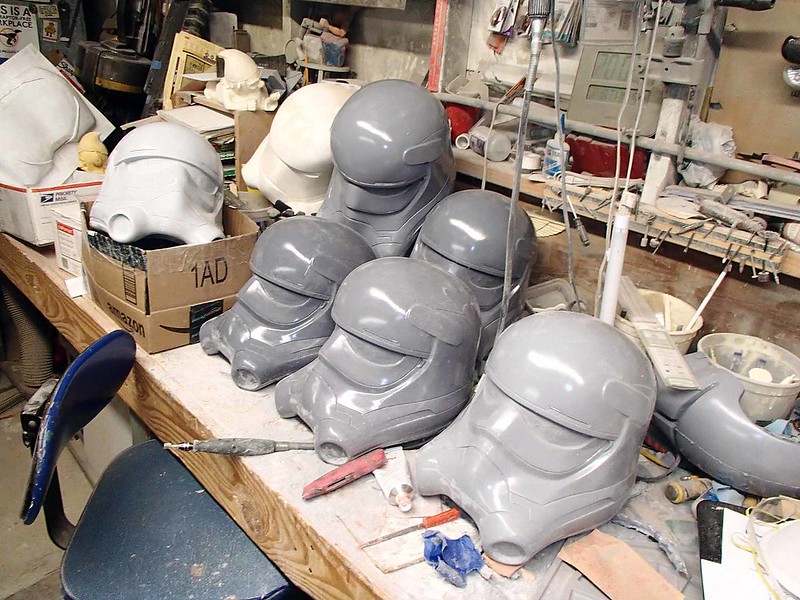
I neglected to mention that I got a handful of part sets into the hands of the SoCal Garrison of the 501st. Some of them managed to clean up all of the pieces and get them together in time for Wondercon last weekend. Here's the end result:
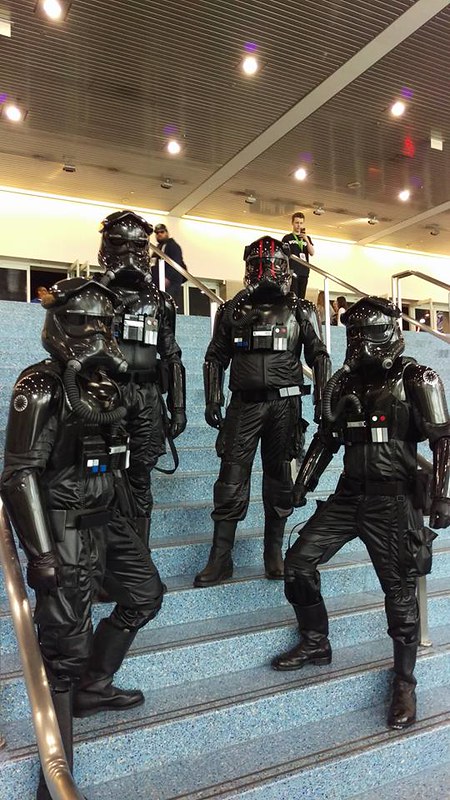
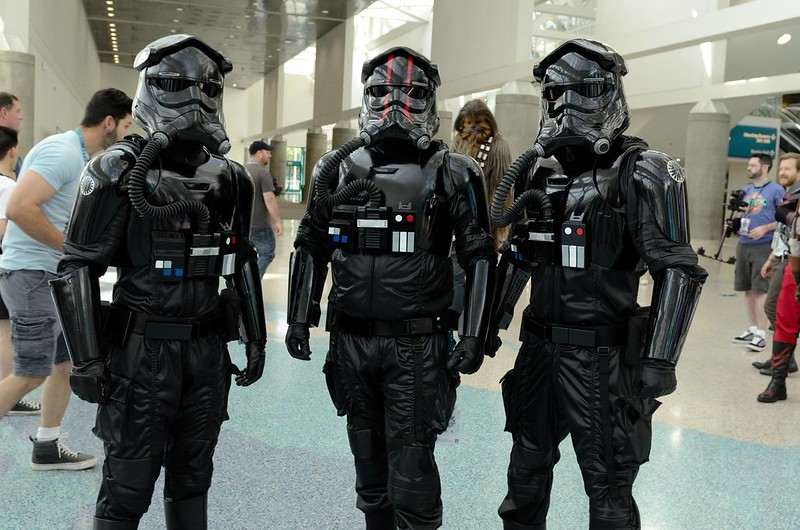

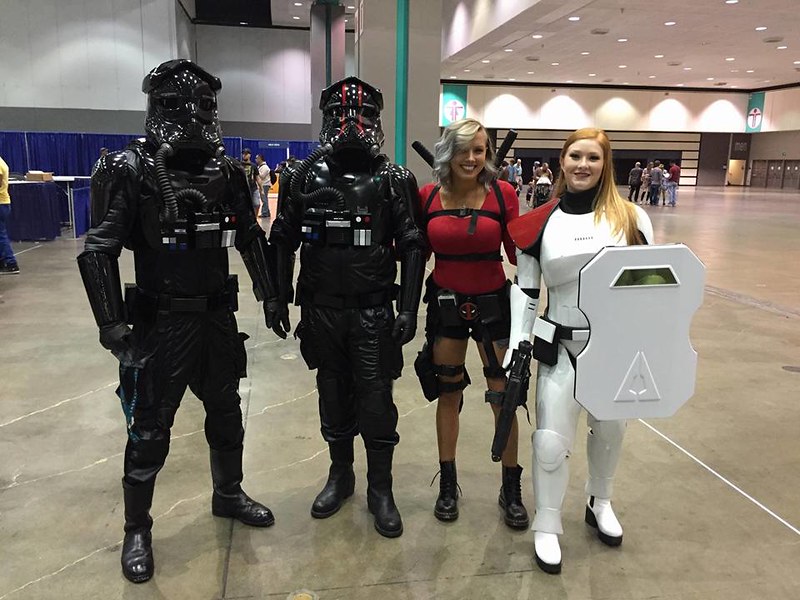
Now I just need to hurry up and finish a set for me. Then I can get to work on the lifesize TIE Fighter...
I neglected to mention that I got a handful of part sets into the hands of the SoCal Garrison of the 501st. Some of them managed to clean up all of the pieces and get them together in time for Wondercon last weekend. Here's the end result:
Now I just need to hurry up and finish a set for me. Then I can get to work on the lifesize TIE Fighter...
Similar threads
- Replies
- 11
- Views
- 818
- Replies
- 2
- Views
- 556
- Replies
- 0
- Views
- 330