New Galactica with battle damage and a twist

opal1970

Well-Known Member
Hi All,

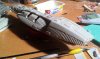
I will be starting a new build with the BSG-75 Galactica from Revell. I have to be honest, the new version never really interested me as much as the TOS version, but it tends to grow on you as time goes by. After working with the 4105 TOS Galactica so long, the first thing that popped into my head when I took the kit out of the box was "damn, this thing is small".

My build will show the Galactica as it is late in the series with all the battle damage and I am planing on doing it with the landing bays retracted. I have the photoetch kits for it and am trying to get my hands on the aftermarket cannons from admiralty models. I have not decided yet if I will get the Acreation decals for it or not. I will be adding alot of detail between the ribs so getting decals in there may cause more trouble than they are worth, that and the shipping/customs costs to Germany.

I did a YouTube video reviewing the kit and going into a bit of what I intend to do with it that you can check out here.

As with all my models I will be going for hyper-detail and also lighting it as extensively as I can, and there should be a couple surprises that will set it apart from all the other BSG75 builds out there, but more on that when the time is ripe. ;)

This is a part-time project, so do not expect any updates soon... I will be busy for quite some time planing the electronics, cleaning her up and getting all the armor plates looking like they are attached to the hull instead of molded to it. On the up side, I have a new camera now, so no more fuzzy iPhone pics. :) I will be putting up some pics as soon as there is something to see.

Thanks for following.
 
Last edited:
Looking forward to seeing this one! Battle damage is going to be cool, I've tried doing it to several ST ships, but I never get around to actually doing it. I dont have the heart to see the damaged I guess. My wife always did accuse me of being too sentimental... oh well. I have to admit I'm not too up on the differences of BSG ships as I didnt get into the new show, and barely remember TOS. haha, but art is art, no matter what genra or series. ive deffinitly subscribed to this and am fascinated by what youre going to do with the lighting. Good luck with your build!!
 
Color me very intrigued! I was too young for the original series, and I came to the new series late, but I am a fan now.
 
Ohhh I feel old now. LOL... I grew up with the classic series, so it was very difficult for me to accept a lot of things with the new series... a female Starbuck, for example. Not saying that I do not like the idea, I just don't think she acted like the starbuck I would have liked to have seen... also I found Apollo was a little wishy-washy in the new series. But that is only my opinion, and in the end has really nothing to do with the Galactica herself, which is then as now, a pretty cool ship.

Anyone who has ever attempted to do the old Revell/Monogram TOS version, will REALLY appreciate the detail. There are still a couple things that need to be corrected but all in all I was quite impressed with it.
 
I've been watching some new-series Galactica episodes lately while working on projects and it's painful to see how much Apollo was emasculated. The show itself is completely feminized in it's orientation. And I've heard Ron Moore say that that is a fair statement to make. (Ron Moore is well known for turning things on their heads and going against conventional expectations.)

I don't mind what they did with the show overall but Apollo in particular comes off like a spineless confused wuss. Must have been hard for Jamie Bamber to play.

Looking forward to seeing your Galactica build, Opal1970. I'm going to start one this year as well.

:thumbsup
Jon
 
Hey Apollo, thanks for stoping by.

@ Jon - I am sure you will like it, there are things here and there where a perfectionist will want to get his hands dirty, but overall, the kit is very well done. I was really amazed at how well most the parts fit together, almost seamlessly.


Below is a cutout of Lee Stringer's mesh and is the type of battle damage that I will be aiming for.

battledamage.png

I have seen a couple builds out there that have gone this direction, 2 problems I have seen with many of them (in my opinion) was either too much damage and wear-n-tear and just getting the color tones wrong with the armor plating vs the hull between the ribs. I have yet to see if I can do it any better but these are 2 points that I will be paying special attention to.
 
Last edited:
I just wanna throw this out there... not really model related... but I'm a fan of both old BSG and new BSG. The key to liking the new one is to realize that it is totally unrelated to the old one. just a totally different universe which happens to share some names. Taken on it's own, it's a pretty interesting show. Taken as something related to the old one... You're probably gonna hate it.

--Alex
 
I started work on creating correct landing bay arms, the detail is more or less correct but it is too 2D for my tastes. I also noticed that the nose section is a bit off...

Galactica-nose.PNG Galactica-nose_build.PNG

The overall detail needs to be a little bit sharper and look less molded, but the biggest problem is that the armor plate that curves from the top around to the front is wrong. To correct this I may have to move the whole nose a bit down to create the curve. Also the side hull after the last rib where it curves around to the front is too sharp.
 
Last edited:
Update

I have been working on correcting the nose section, after a couple tries, I now have a version that I like.


DSC00482a.jpg DSC00483a.jpg

The smaller piece is now a couple centimeters lower than it was on the original kit. The sharp corners of the hull as well as the armor segment that are supposed to curve down have been corrected. Here it still looks a little rough but once it is mounted in its place on the kit, all the cracks and curvatures will be filled and sanded to provide the look that will be very similar to the screen version.

Galactica-nose.PNG

The detail will also be spruced up, the round thingy at the top will be replaced with a bit of brass tubing as well as the rectangular box below it is off from the screen version ie. too big and missing the fins at the top. All these things will also be done later, I have learned that doing too much of this fine detail stuff in the begining tends to make for double work as something is always breaking off.

Here is a comparison to how it looks on the kit:

DSC00490a.jpg DSC00491a.jpg

On my list of things to do is dremeling all the armor plates to make them look like they are attached to the top of the ribs. I am particularily dreading digging the hull out beween the ribs along the top armor plates. One problem that I am anticipating is that once all the armor plates are hollowed out, the overall structural strength will be greatly reduced along the length of the model. I may hold off on this task until all other fumbling with the hull is finished to reduce the risk of breaking it.

Thanks for tuning in.
 
Last edited:
I found a nice engine shot after the Galactica breaks away from the colony ship (after ramming it). I haven't watched the episode yet but I belive the engines are supposed to be down and they are trying to start them. So I am not sure if this is just how it looks when the engines are not at full brightness.

I do like this look and it should not be too hard to rig up some LEDs to get a good simulation of it, lighted circles and all.

Galactica_engines.PNG and here... Galactica_engine_Multiple.png

UPDATE: After further research I believe this engine configuration with multiple nozzles is seen exclusively in the Colony episodes, I am guessing they pimped up the engine CGI soley for these closeups. All previous shots are a singular engine nozzle as seen here in the Zoic picture:


Galactica_engine_Single.gif
 
Last edited:
Hollowing out under the armor plating

I was down with the flu the last week so I haven't done as much as I would have liked.
After a bit of trial and error, I found a method that works pretty good for hollowing out the armor plating. This pertains to the plating on the engine nacelles, but I am assuming at this point that this process will work on most or all other parts of the ship. The pictures below are before the Bondo clean-up, but none the less, you can see that the hollowing out turned out quite well.

DSC00493a.jpg DSC00495.JPG


  1. Using a small Dremel drill bit, go back and forth, covering the entire area that you want to hollow out. Don't drill holes or stay in one area longer than others otherwise the result will not be as smooth and the chances of breaking your drill bit is higher. I tried to go a little deeper as necessary in order make clean-up a little easier, but in areas like in the second picture above the angle just does not allow you enough space to go very deep (without damaging the armor plating on the other side of the opening).
    .
  2. After I was done with the drill, the openings already looked fairly decent and a guy could stop here and consider it a job well done, but I wanted to clean it up further and make sure all edges are sharp and straight. For this I took a chisel exacto blade and cut it so that it would fit between the ribs. after that it was a relative easy process to chisel away at everything that did not belong. Here you will also need a pointed tip exacto blade to cap the trimmings as far back as you can get them, so it is best to have two exactos to avoide switching blades every 10 seconds. [UPDATE: Instead of using the chisel exacto blade I am using a chisel from Micro Tools (see my post below), this works MUCH better and MUCH cleaner.]
    .
  3. Next, I wanted to further enhance the illusion that the armor is a separate unit. Using the chisel exacto blade again, I made a cut exactly where the armor meets the rib with as flat an angle as I could manage and then cut again at about a 45° angle until a sliver of plastic could be removed.
    .
  4. I found out too late, it is better to drill away somewhat less than necessary on the inner hull and use the chisel exacto blade to get a clean removal of the rest. The last clean-up step is to Bondo in any areas that were cut too deeply and to create a smooth hull surface. To apply and work the Bondo I took a wooden mixing stick and cut it to fit between the ribs and sanded it to a flat wedge.


I will get a picture up of the tools later today.

DSC00493a.jpg


DSC00495.JPG
 
Last edited by a moderator:
Nothing much to report on. It is amazing how much work I am putting into just hollowing out under the armor plates. I am not 100% happy with some areas, but some areas you just cannot get anything in there without destroying the neighboring armor plating. Nevertheless, It is going along good, just do not ask me how many drill bits I have broken in the process. :facepalm

I just ordered the Acreation decals from Cultmann, as well as a set of very well detailed after market flak cannons from Admiralty. I considered the update kit from Moebius, but I do not think there is anything there that I do not already have from other sources.

I have mixed feelings about the decals. They really make the detail pop out, but on the down side... all the other WIPs I have seen that used the decals looked much to dark for my tastes. I ordered the deluxe set, so I may just end up using the decals for between the ribbing and not the ones for the armor, but I will decide once they make it the long way to Germany.
 
Last edited:
Ok, I am almost done with hollowing out under the armor plating. Had I known how much work this was going to be, I am not quite sure if I would have started this or not. :)

I still need to do a lot of cleaning up but here are a couple shots of the work that has been done so far...
IMG_2252.JPG IMG_2259.JPG


I think the hardest part was carving out between the ribs on the neck....
IMG_2255.JPG IMG_2257.JPG

Here is another shot of both upper engine pods...
IMG_2256.JPG


In quite a few places, carving out the armor plates would weaken the structural integrity. To aviod breaking a piece in two, I filled many of the parts with resin to add stability...
IMG_2258.JPG

All of the hollowing out was done with a 0.5mm drill bit and steady nerves. :) For those of you who do not know, that is the extension attachment for Dremel. I can really really really recommend it to anyone who has or wants to work with a Dremel (or an other brand equivilant). It is light, it allows you to get a shallow angle and just makes life so much more easier.
IMG_2260.JPG

To clean up between the ribs after drilling them out, I cut a flat exacto blade so that it was just wide enough to fit between the ribs. This was working very well until it broke.
IMG_2251.JPG

Well that is all for now, I still have a couple armor plates to do and of course the right side of the neck needs to be carved out (as soon as I get around to fashioning a new exacto blade to replace the one that broke), but all in all, the worst is done with. The next steps will be to get a lighting plan done and code a micro-controller to do everything that I want to be done. I haven't made it back state-side yet, so I am still missing the photo-etch and decals, so I am in no hurry to get too far.

Thanks for tuning in.
 

Attachments

  • IMG_2253.JPG
    IMG_2253.JPG
    898.4 KB · Views: 246
Last edited:
That's looking really good, kinda reminds me of the work I did on mine!

...now where is that "follow thread" button?:)

Thank you! It is a really nice kit, I am enjoying working on it, even though it is slightly demotivating to drill and drill and drill out those armor plates... and then when you get a section done you realize how much more you have to go. The next big job I have coming at me is cleaning up all the collateral damage, sanding in those ribs and cleaning out the rest under the armor is going to be real fun. ;)

Did you post any pictures of your big G? I always enjoy seeing other's work.
 
Believe it or not, I finally got all the armor plating hollowed out. I broke a total of 12 drill bits getting it done but she is looking so much more realistic, it was worth every cent.

More out of curiosity as anything else, I bought a micro chisel recently, which turned out to be a hole in one. It is just a bit smaller than the space between the ribs and sharp as heck. I works beautiful for cleaning up the cut under the armor as well as getting rid of the rounded corners. It is the F2 from Master Tools and I bought it for about 6 Euros. I believe there is another company called Micro Tools out there that makes an even better version, but I could not find it here in europe.
microchisel.jpg

I was also able to sand out the landing bay alcoves so that the bays can actually fit inside the hull. Here are some more pics:
IMG_2263.JPG IMG_2265.JPG


IMG_2266.JPG IMG_2267.JPG
 

Attachments

  • IMG_2264.JPG
    IMG_2264.JPG
    884.4 KB · Views: 221
This thread is more than 7 years old.

Your message may be considered spam for the following reasons:

  1. This thread hasn't been active in some time. A new post in this thread might not contribute constructively to this discussion after so long.
If you wish to reply despite these issues, check the box below before replying.
Be aware that malicious compliance may result in more severe penalties.
Back
Top