1/4105 Re-Imagined Battlestar Galactica by Moebius Models

I just realized I've fallen behind on the photographic side of things.

I don't have much for the photo-etch. It's so easy to work with that I tend to fly right through it and forget to take pics. Though I do have a couple.

IMG_5282.JPG


This one really shows how poorly fitting the 'deck' is.

IMG_5283.JPG


The fit issues aside, I have no complaints about the P.E. part. Paragrafix does wonderful work

IMG_5289.JPG


IMG_5287.JPG


IMG_5288.JPG
 
Part 6 is live! https://youtu.be/ZvLsotUgWkU

BSG%2BPT6.jpg


Lighting! Another one of favourite things about scale model building. And there's plenty of lighting to do on the Battlestar Galactica.

In Part 6 I provide a full run down on using LED (light emitting diode) tape, working with magnet wire, pre-tinning (wires and contacts) and soldering.

Despite what some may say, building the Moebius Models Re-Imagined Battlestar Galactica requires much more than just 'painting it gray and putting it on a shelf.'

There are so many little details you can add with the lighting...as well as adding aftermarket accessories like Photo-Etch, decals, etc.

In the case of this build the LED strip tape I used was recycled from another build. As such the adhesive backing was no good. I used hot glue in its place.

I had hoped to do the Battlestar Galactica flight pods as one video, but the amount of footage for doing Photo-Etch and Lighting would have just made it too long.
 
Last edited:
Part 7 is live: https://youtu.be/-Nke4-c4c8Y

BSG%2BPT7.jpg


I really enjoy lighting scale models and the Moebius Models Battlestar Galactica poses some unique challenges in scale model lighting.

Lighting the Battlestar Galactica engines is a two part process. There's the outboard engines and the center engine complex.

The outer ones are easy to light, I use a single blue light emitting diode (LED) for each 'pod'.

The center is a bit different, it's not a self contained unit so there are light blocking considerations to be aware of. Also the engine lens is a clear piece, so you have to light block/detail paint. Not difficult so much as time consuming.

For the center engine I used two segments of LED strip tape, one upper, one lower. This provides indirect light that doesn't 'blow out' the engines.

For anyone building the Battlestar Galactica model kit you have several options as far as lighting the engines. Throughout the series the there was considerable variation in 'engine output'. Sometime it was only the outboards, sometimes it was all, sometimes the smaller ones in the 'center complex' were not on.

Whatever your choice, adding LED lighting to your scale model kit of the Battlestar Galactica is quite rewarding.

I hope you enjoy today's episode and thank you for watching Jason Marshall: Scale Model Artist

Don't forget to SUBSCRIBE and never miss an episode!

https://www.youtube.com/channel/UC5jv2vRZxJOR0ZFqxi89ROg?sub_confirmation=1
 
Part 8 is live! https://youtu.be/pmV2Z59QwFg

BSG%2BPT8A.jpg


More Photo-Etch! And yes, it's still one of my favourite aftermarket accessories for scale model detailing.

In part 8 of my Moebius Models Re-Imagined Battlestar Galactica Scale Model Build I'll be covering the addition of the Photo-Etch gun Turrets.

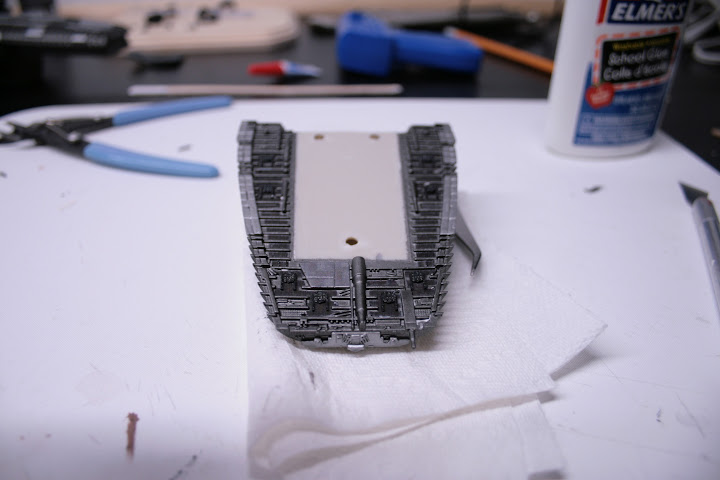
There really are a lot of Photoetch parts!

Paragrafix Modeling Systems (Paragrafix) makes wonderful products and I have never been disappointed. Nor, have I ever received a sub par product.

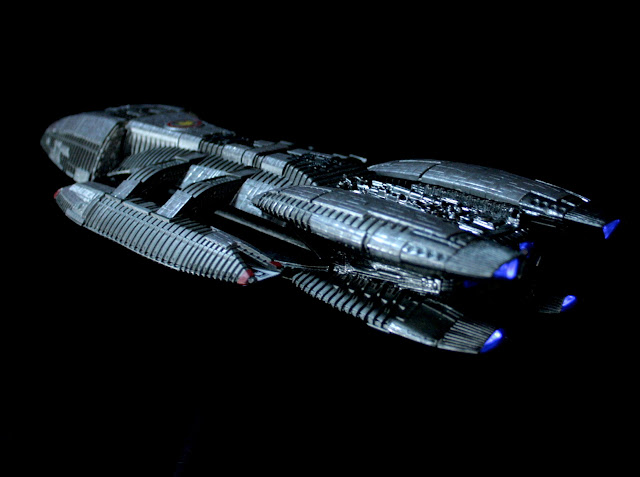
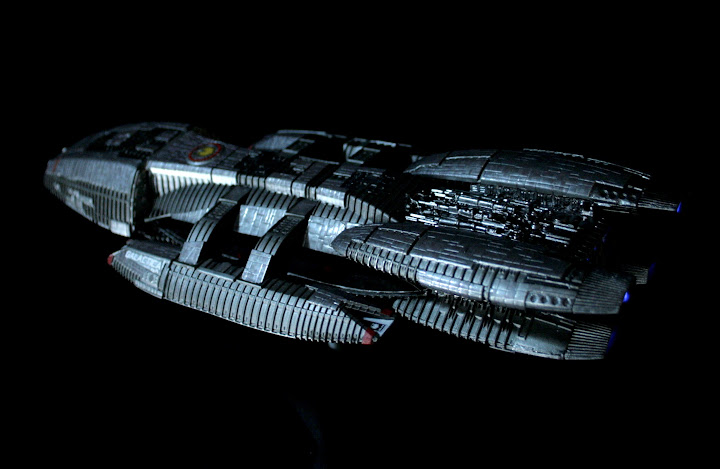
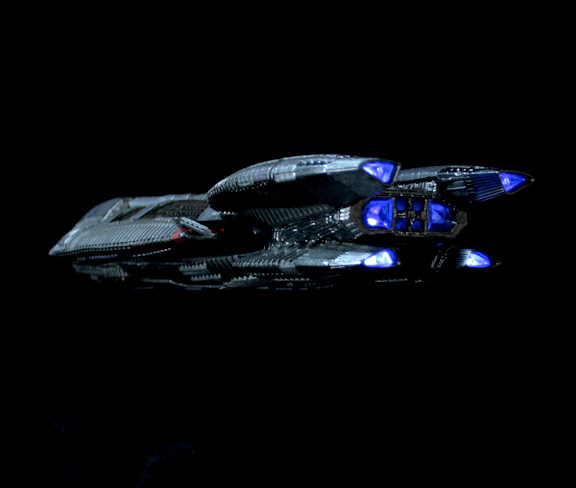
Moebius Models did a wonderful job on their Re-Imagined Battlestar Galactica.The guns, however, are another minor issue. The kit supplied turrets lack detail and are too large.

Moebius Models produces a Battlestar Galactica accessory detail kit with enhanced gun Turrets. More detail but still too large.

I was hesitant to use the gun turrets provided with the ParaGrafix Photo-etch set. The moment I assembled the first one and did a test fit I was sold. The scale is much better and there's decent detail, even if they are flatish (compared to the kit supplied ones)

If you've never worked with Photo-Etch before, this instructional video is definitely for you. In it I detail the tools and techniques used to add more detail to your scale model.

I hope you enjoy today's episode and thank you for watching Jason's Model Shop.

Don't forget to subscribe and never miss an episode!

https://www.youtube.com/channel/UC5jv2vRZxJOR0ZFqxi89ROg?sub_confirmation=1
 
Part 9 is live: https://youtu.be/i7zWBpAp5aI

BSG%2BPT9.jpg


Acreation is, to my knowledge, the only supplier of aftermarket decals for the Moebius Models Re-Imagined Battlestar Galactica. They provide two sets, armour and armour and rib detail.

Having done both, and given the scale of this model kit (1/4105) the rib details are unnecessary. I've found they're also too dark.

That aside, I really enjoy apply decals. It's very satisfying and it tends to signify that the journey is ending soon.

In this build of the Battlestar Galactica I was undecided as to how many decals I was going to apply. In the end I chose only to install the armour decals. The amount of work required to install the rib detail decals wouldn't have justified the end result

In today's video, however, I do show you how to add the rib detail decals. That's more for builders who haven't used aftermarket decals before. As such they may not be aware they have to be cut out of the decal sheet individually.

On top of the decals I also take a few minutes to discuss filling the major gap between the 'gator head' and the rest of the hull. Initially I was going to use some styrene, but decided to use perfect plastic putty. Its ease of use and easy clean up with water were appealing to me.
 
This thread is more than 8 years old.

Your message may be considered spam for the following reasons:

  1. This thread hasn't been active in some time. A new post in this thread might not contribute constructively to this discussion after so long.
If you wish to reply despite these issues, check the box below before replying.
Be aware that malicious compliance may result in more severe penalties.
Back
Top