You are using an out of date browser. It may not display this or other websites correctly.
You should upgrade or use an alternative browser.
You should upgrade or use an alternative browser.
1:1 Millennium Falcon Cockpit Replica - Group Build
- Thread starter SteveStarkiller
- Start date
Hi Gang!
WOW!!!! What an AMAZING couple of weeks! As many of you know we prepped the cockpit for the Escape Velocity Museum of Science Fiction Convention in Wash DC / Maryland. Despite a 2.5 year absence from any convention or event of this size, the show and overwhelming response was nothing short of amazing! BUT...
Before the show we had to get a few things done. All of this is past tense so forgive me if I confuse the overall timeline. Let's get to it!")
PART I:
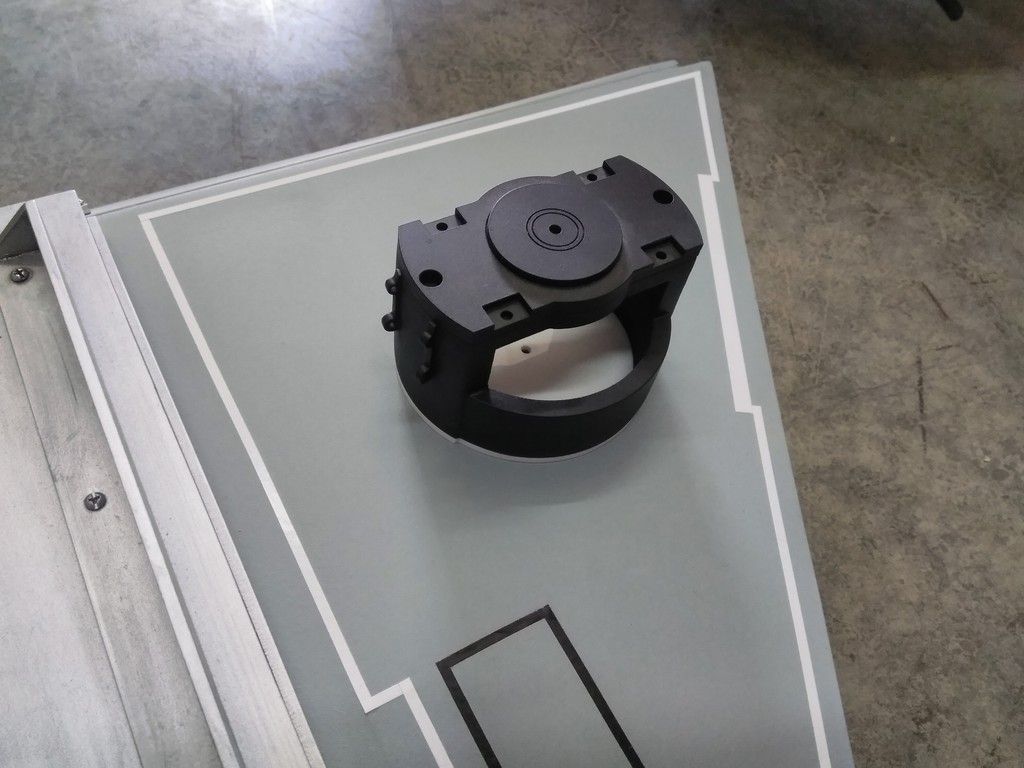
Work on the Nav Chair head piece continued on as usual
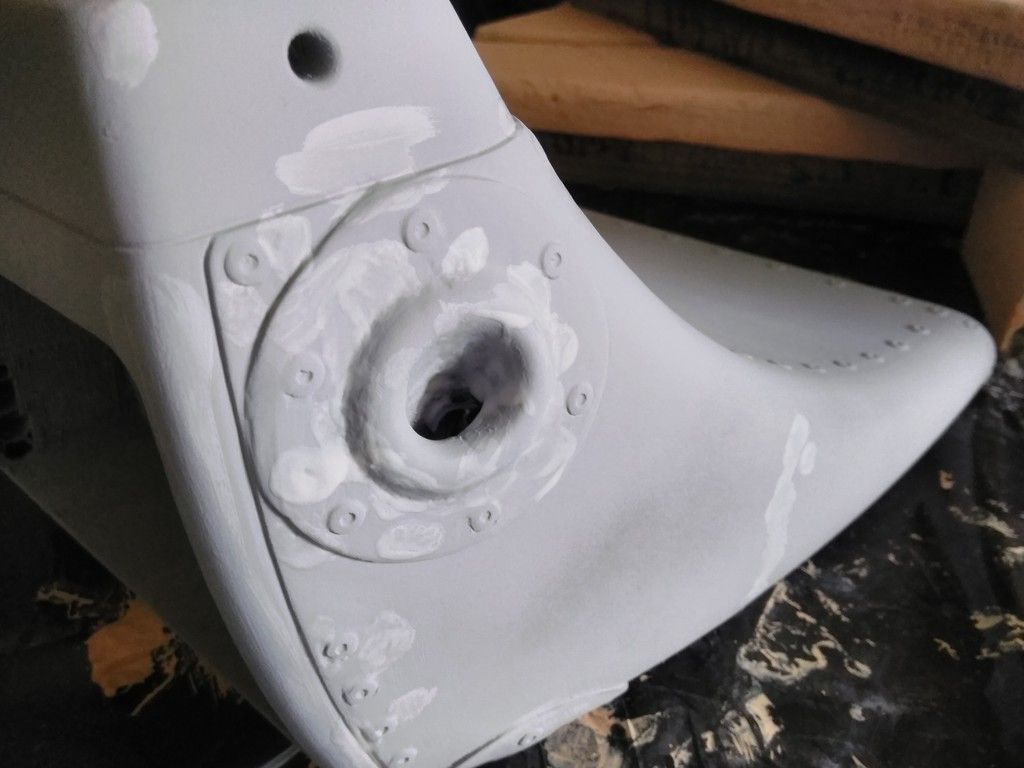
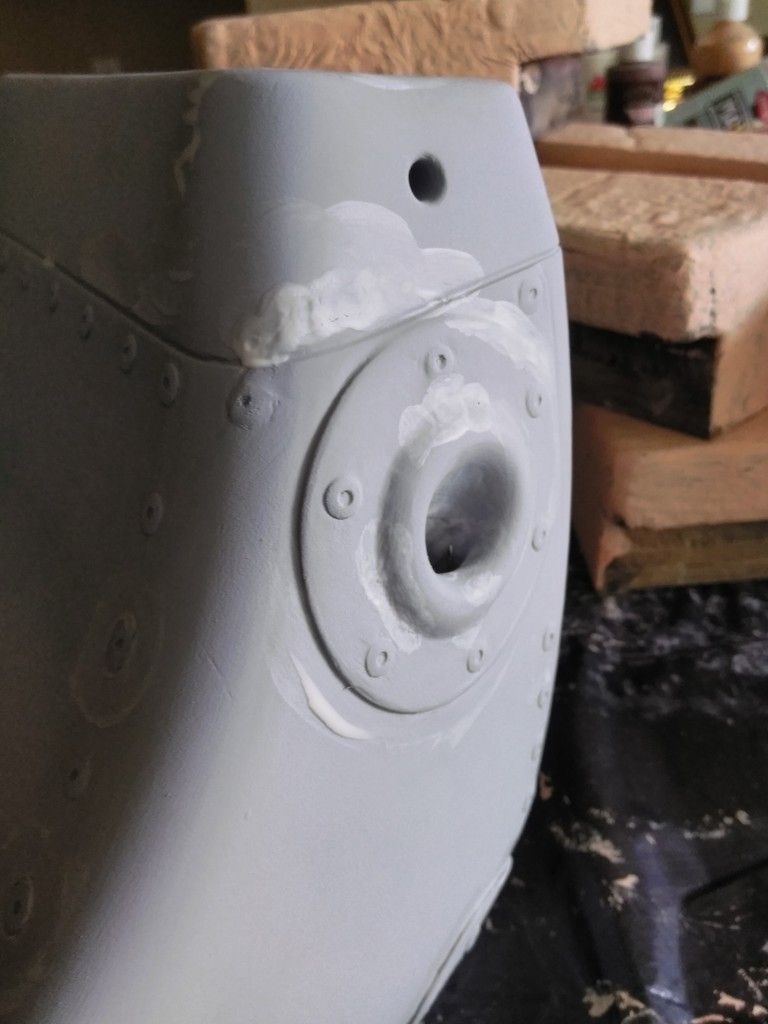
Its not perfect by ANY stretch of the imagination and I was running out of time... Primer added
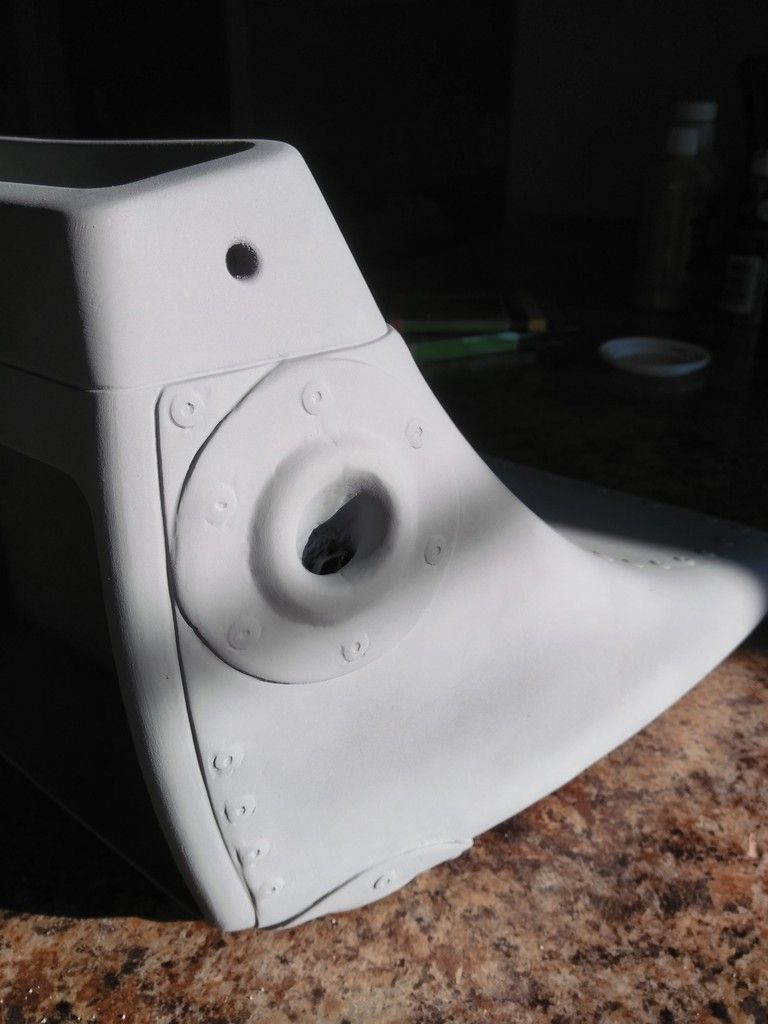
I HAD to add paint and get moving on a few other things. I told myself I would finish up after the show
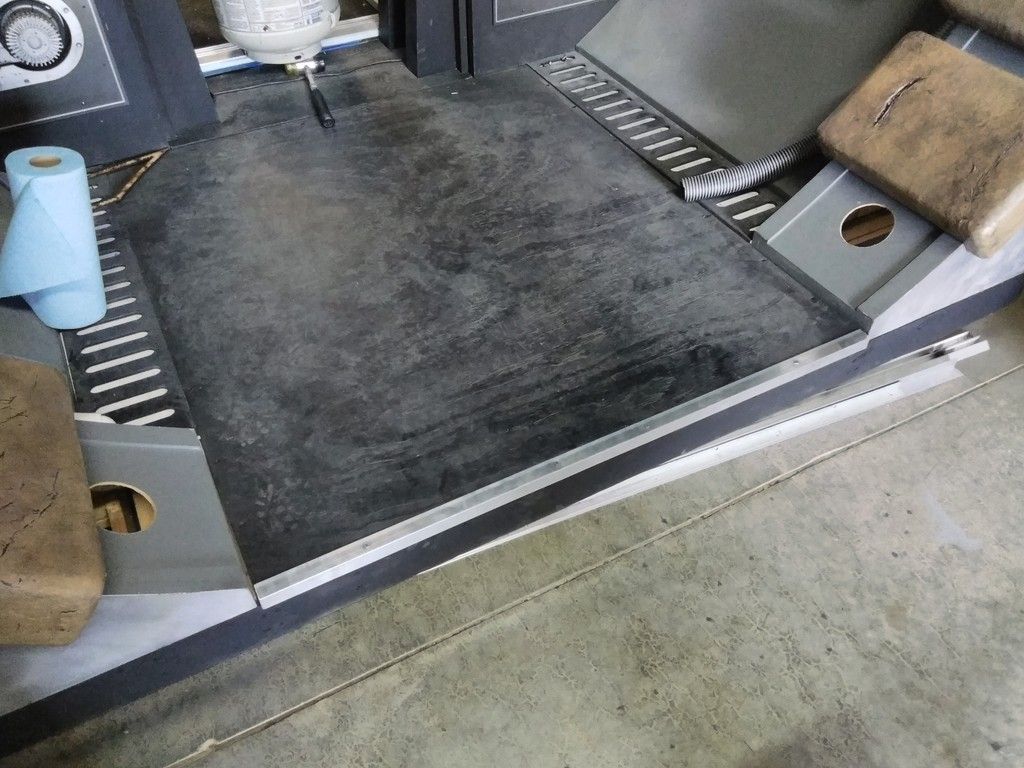
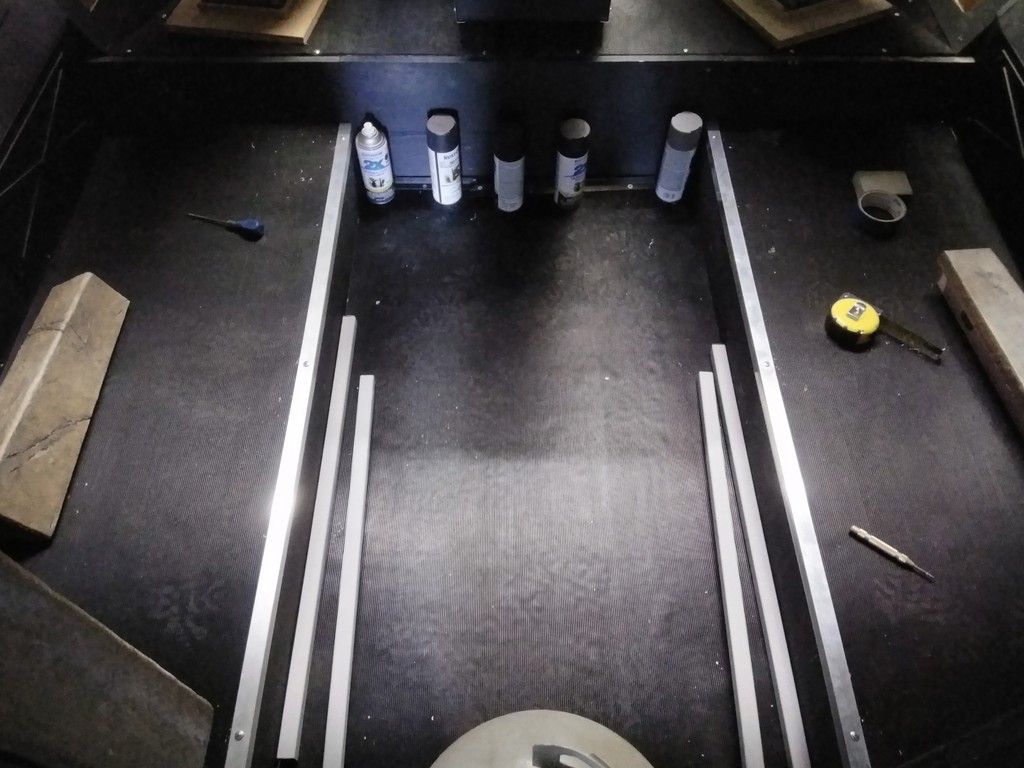
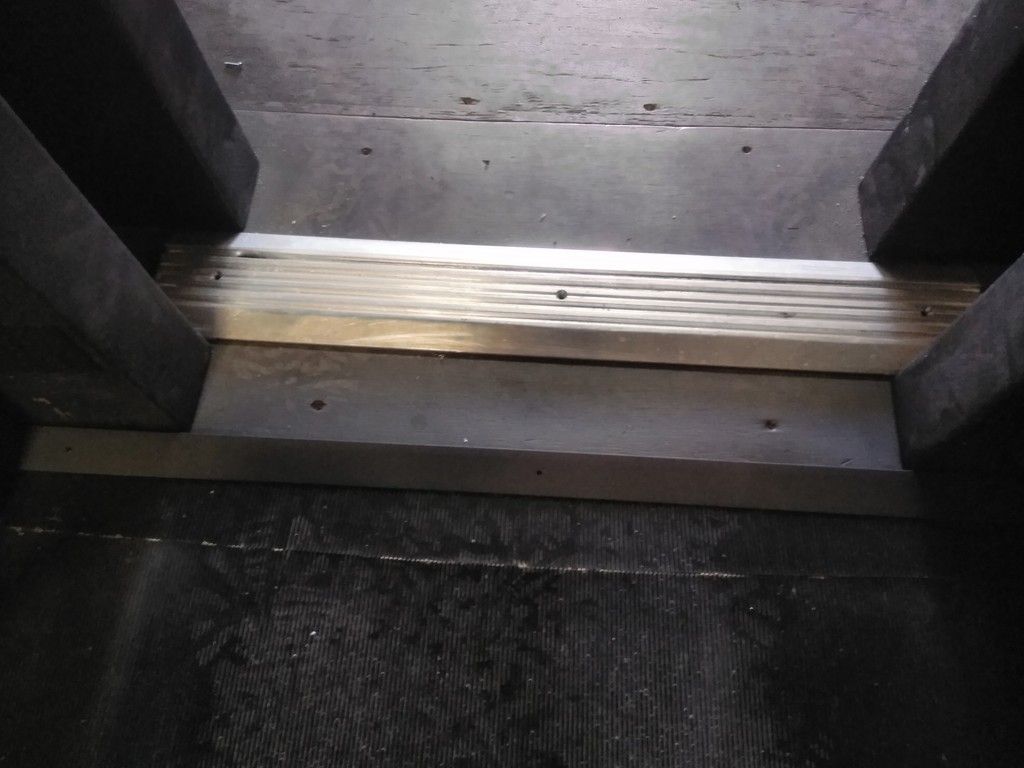
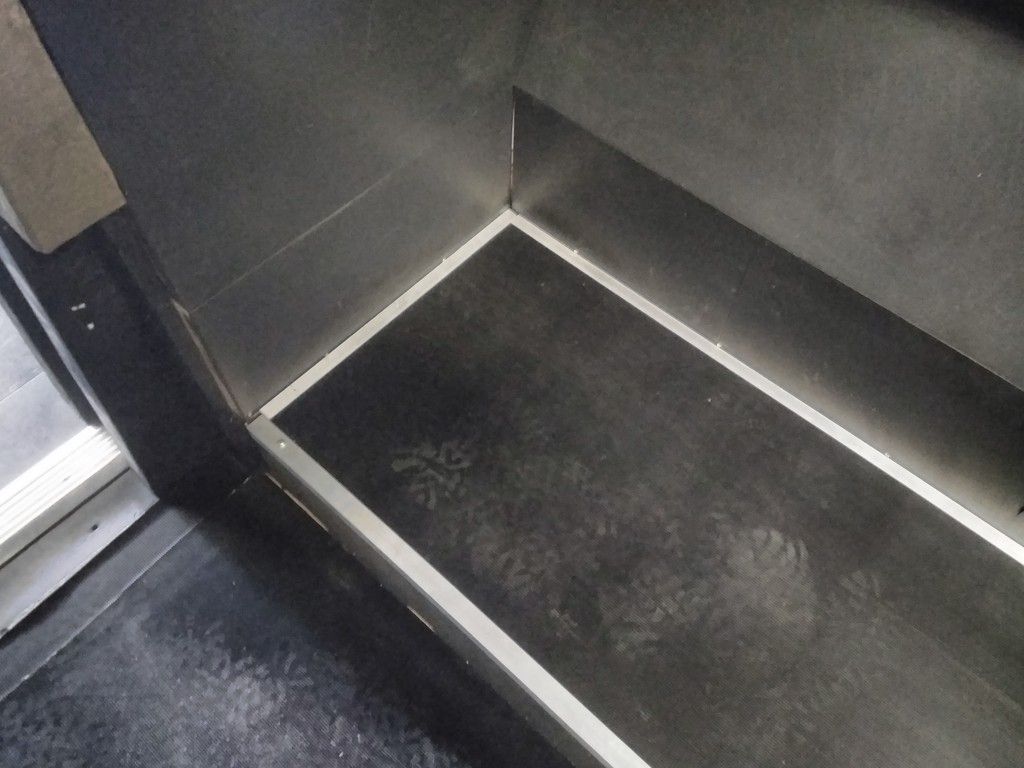
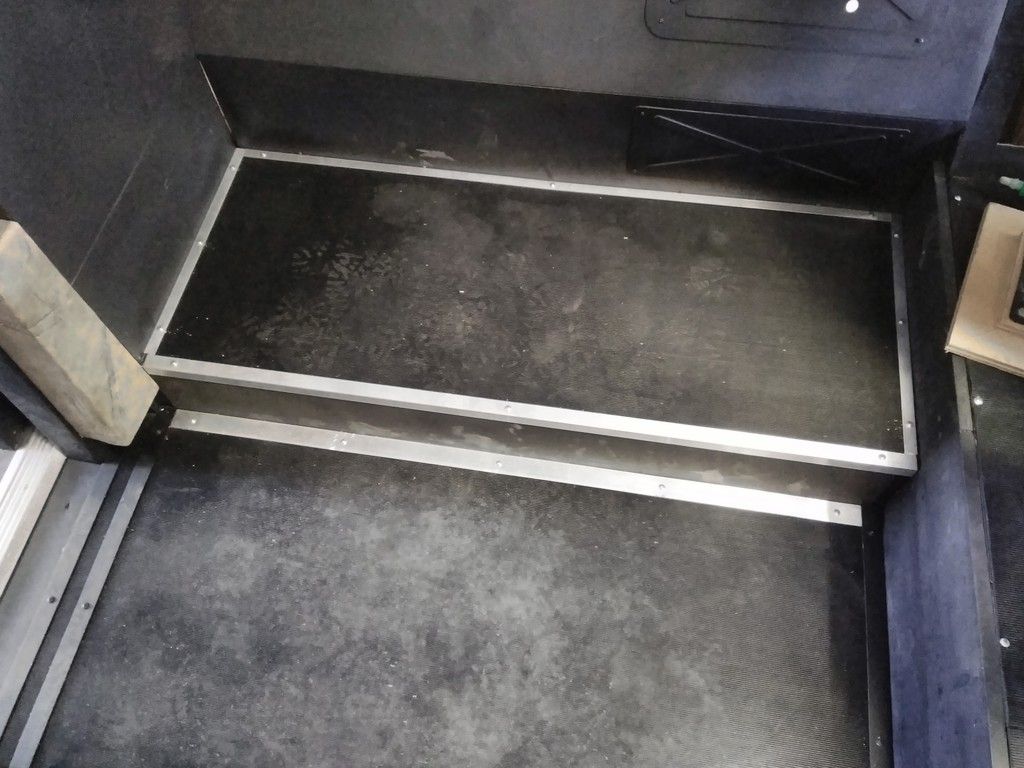
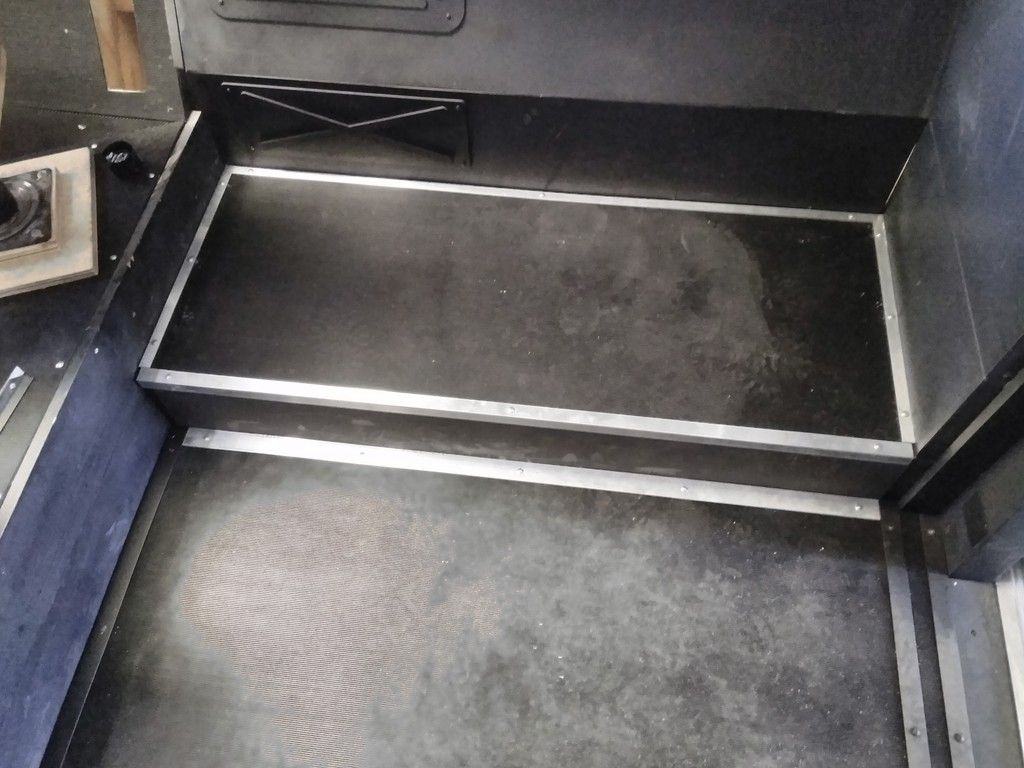
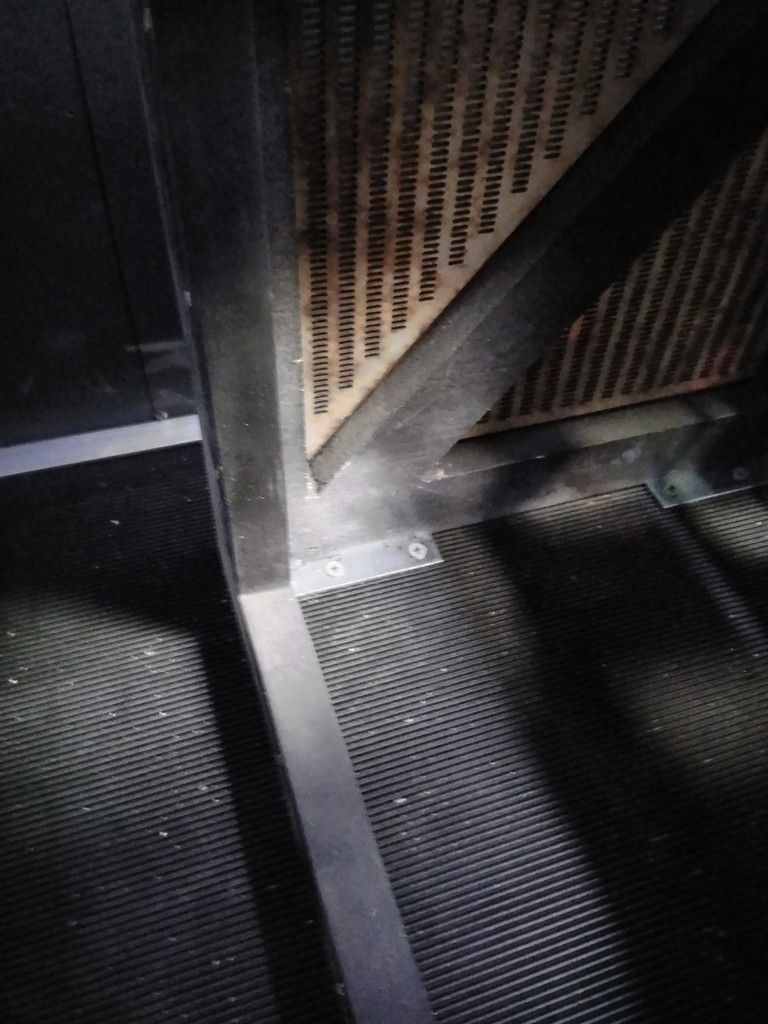
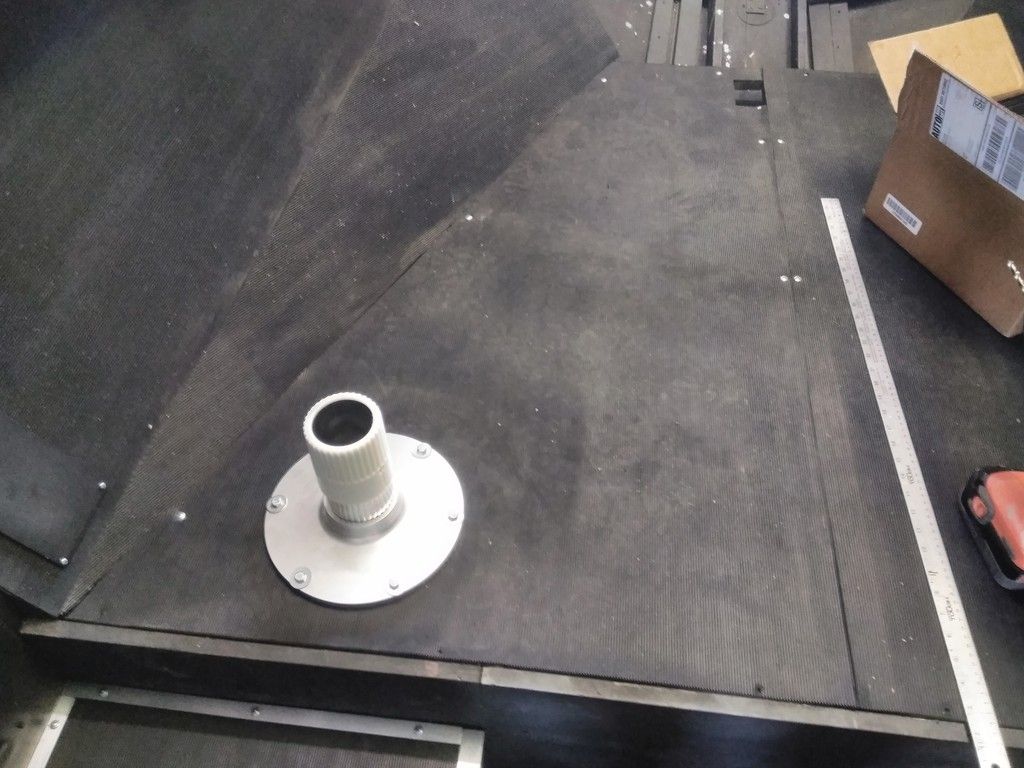
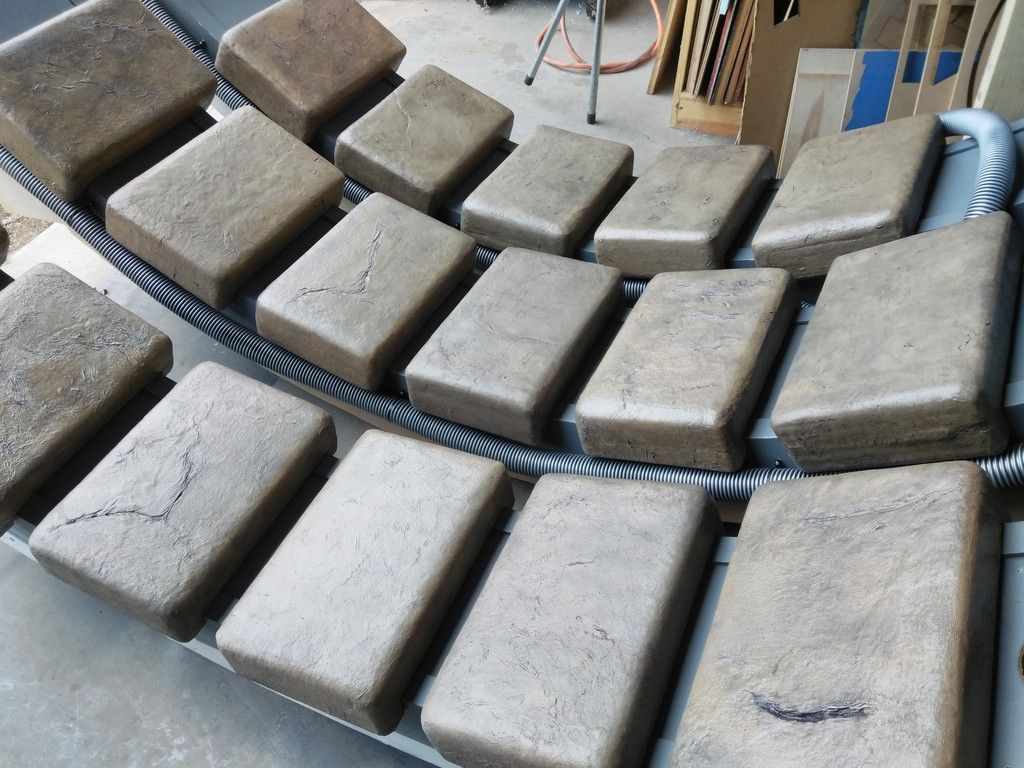
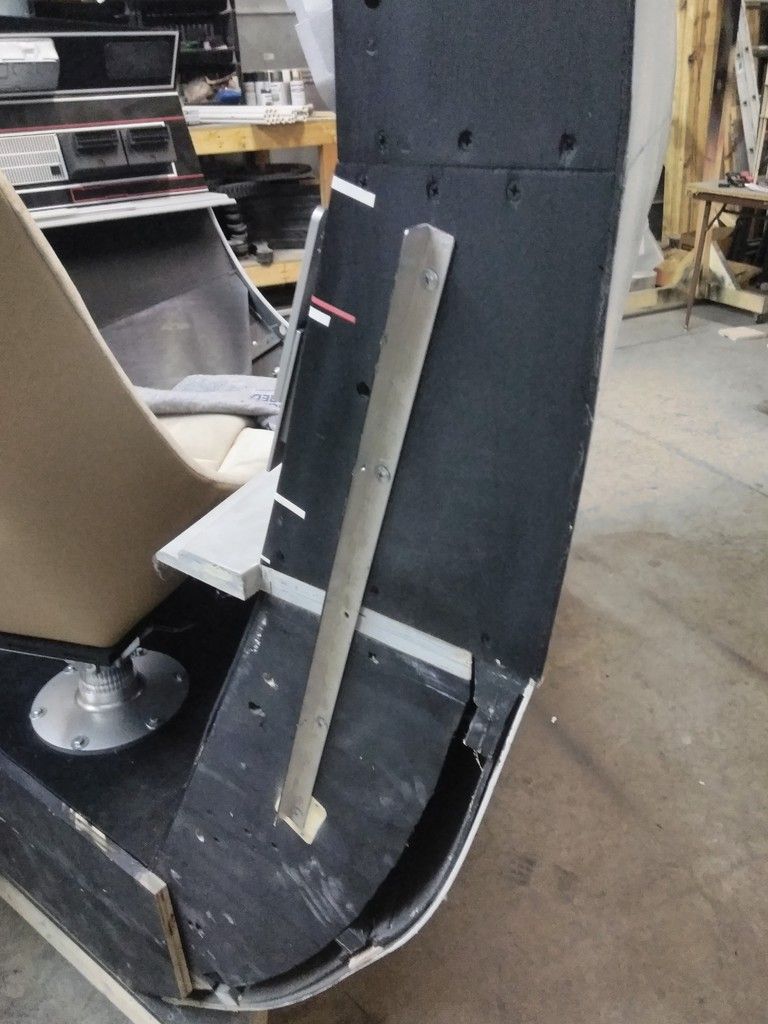
I then changed my attention to the floor. I had to get these edges protected and side walls painted!
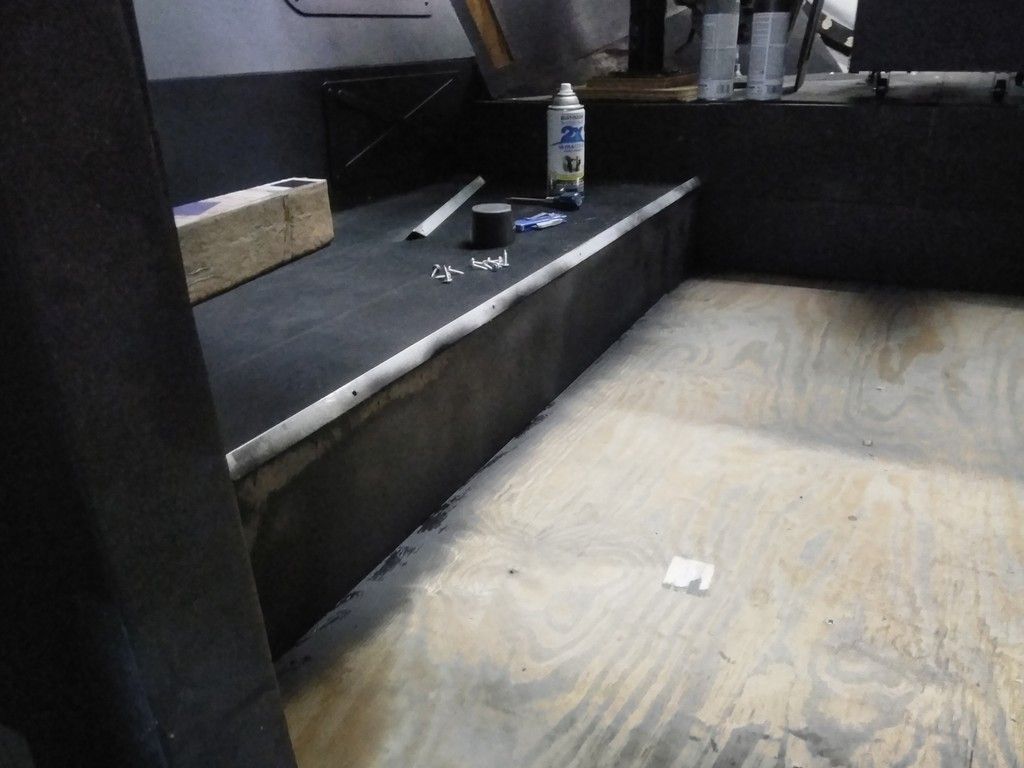
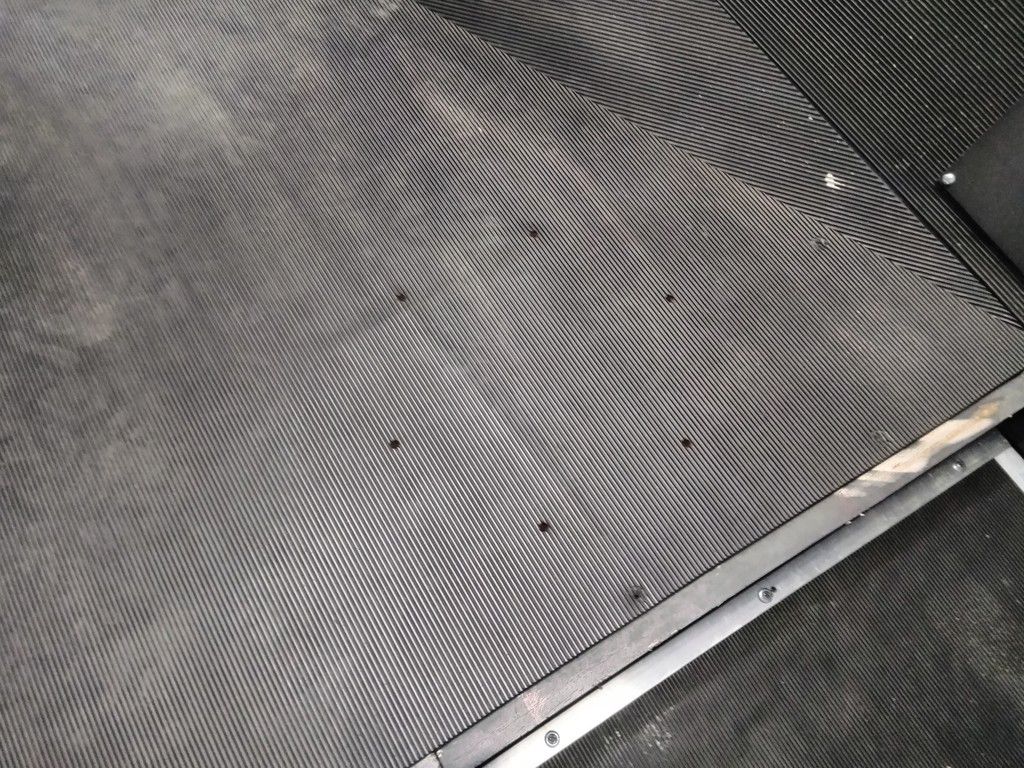
Finally cut and adhered the center floor mat
UGH... I remember this. I was 2 inches SHORT of being able to cover the entire interior floor. No reason to worry. I cut a filler strip and adhered into place
I depleted Lowes of all the their "L" bar
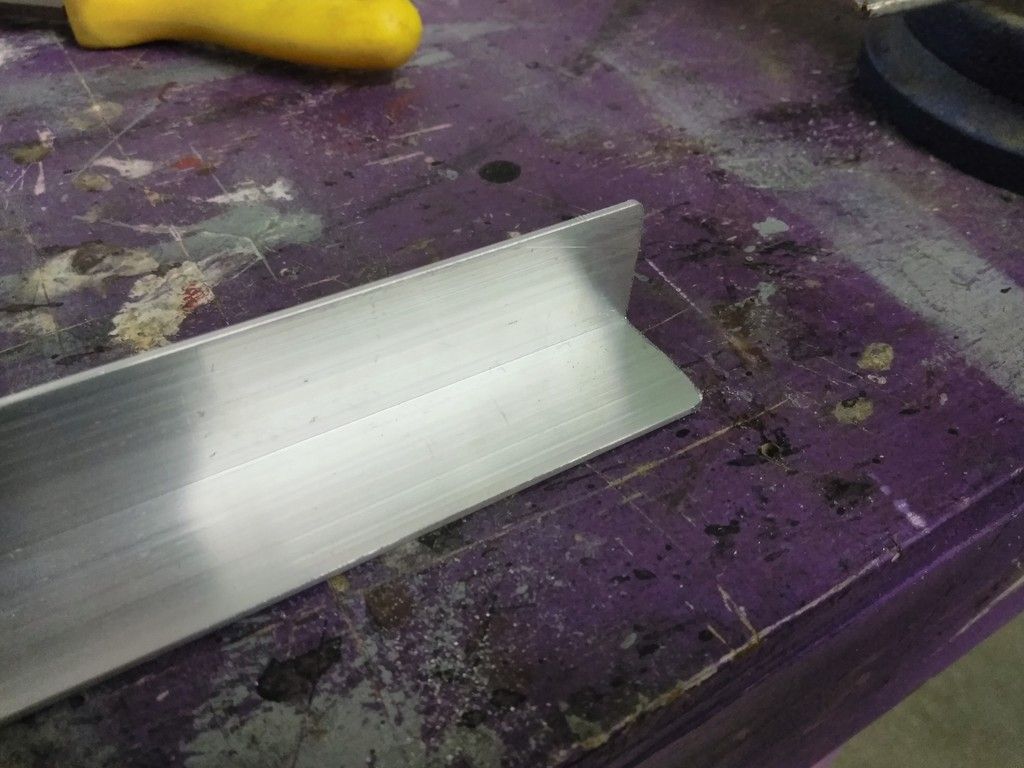
I had to cut down to fit and file the edges
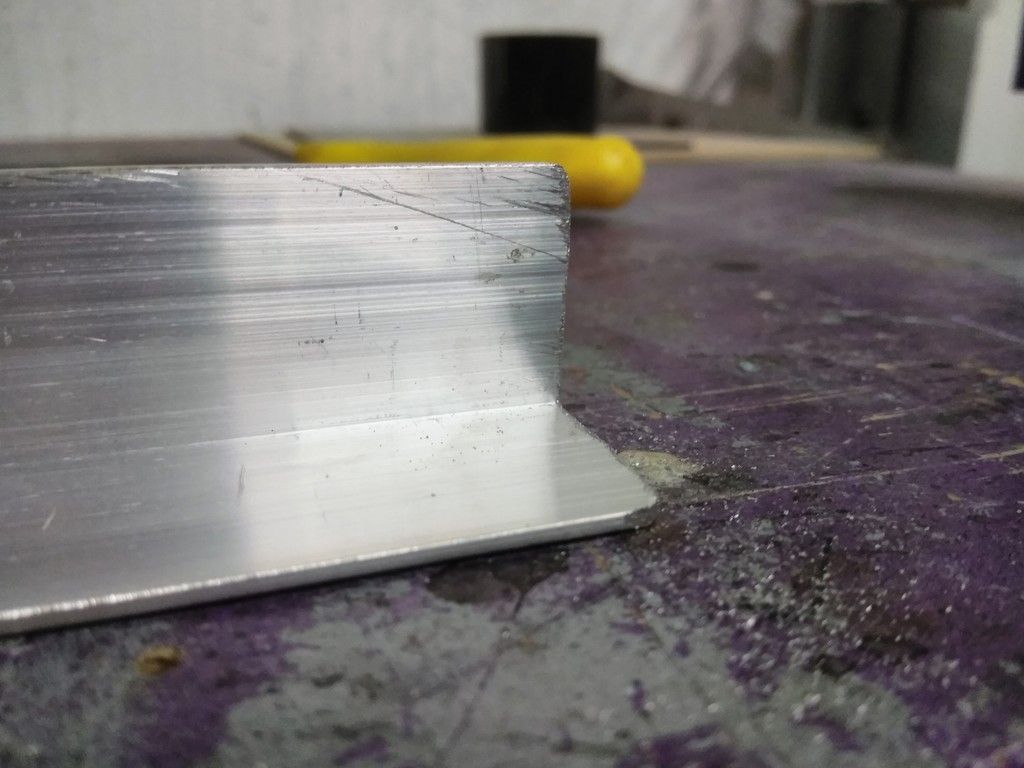
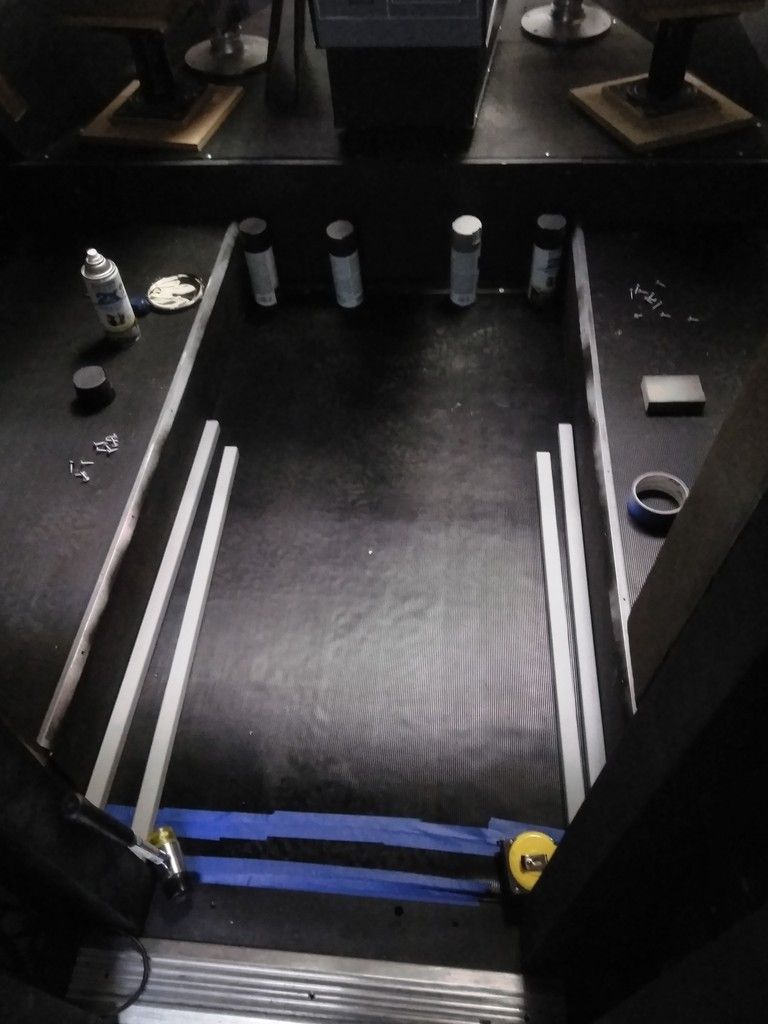
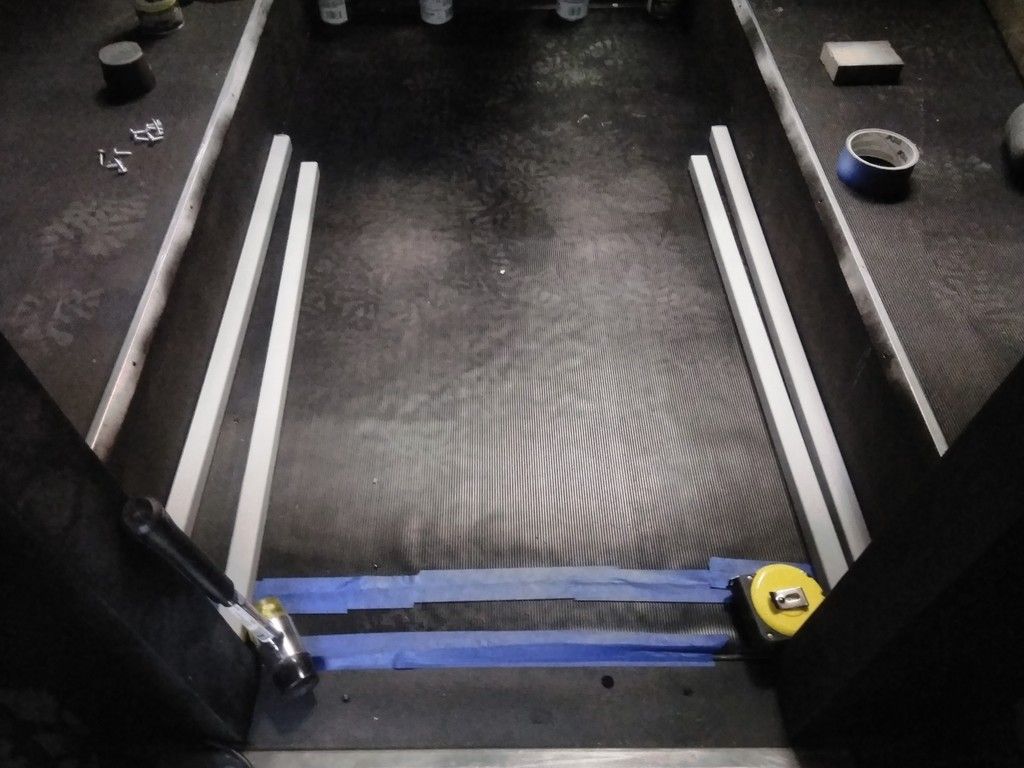
I LOVE that look!
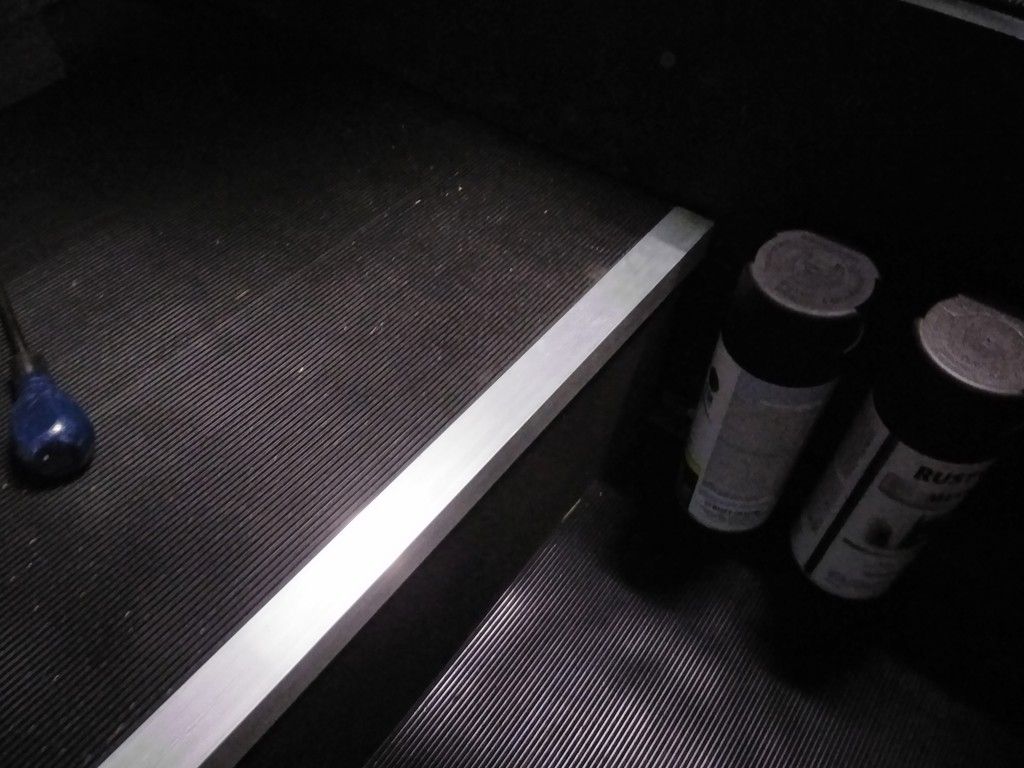
Added one to the front - after those long days the feet do tend to drag up and over the edges
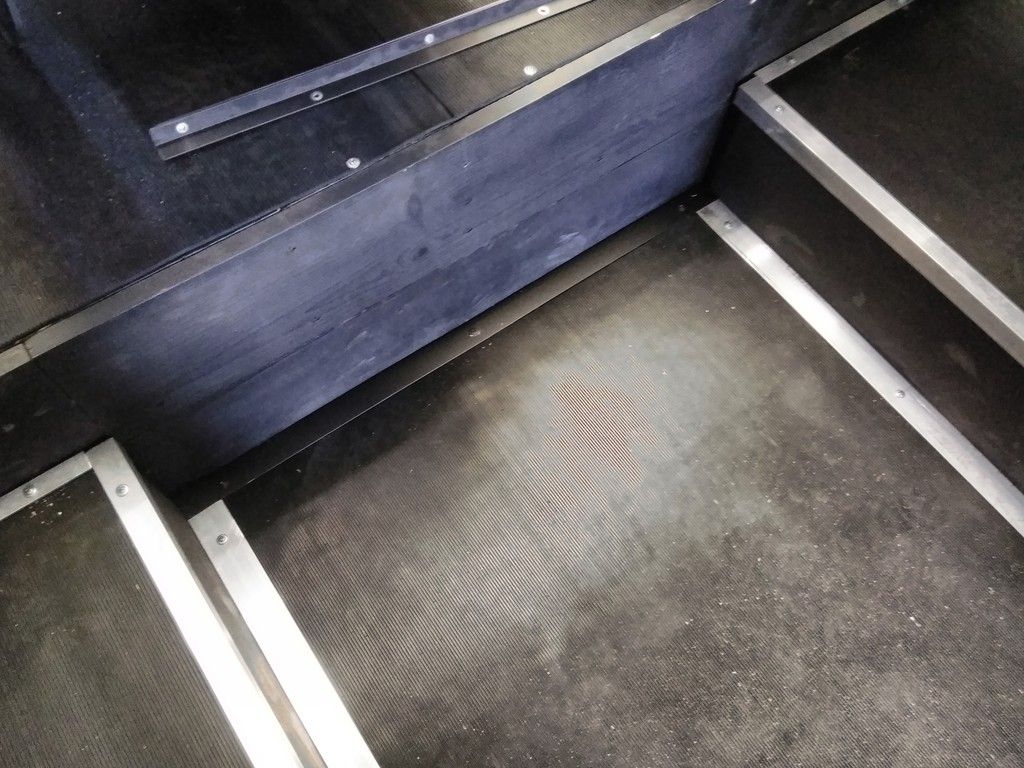
How did I fix this unsightly error?
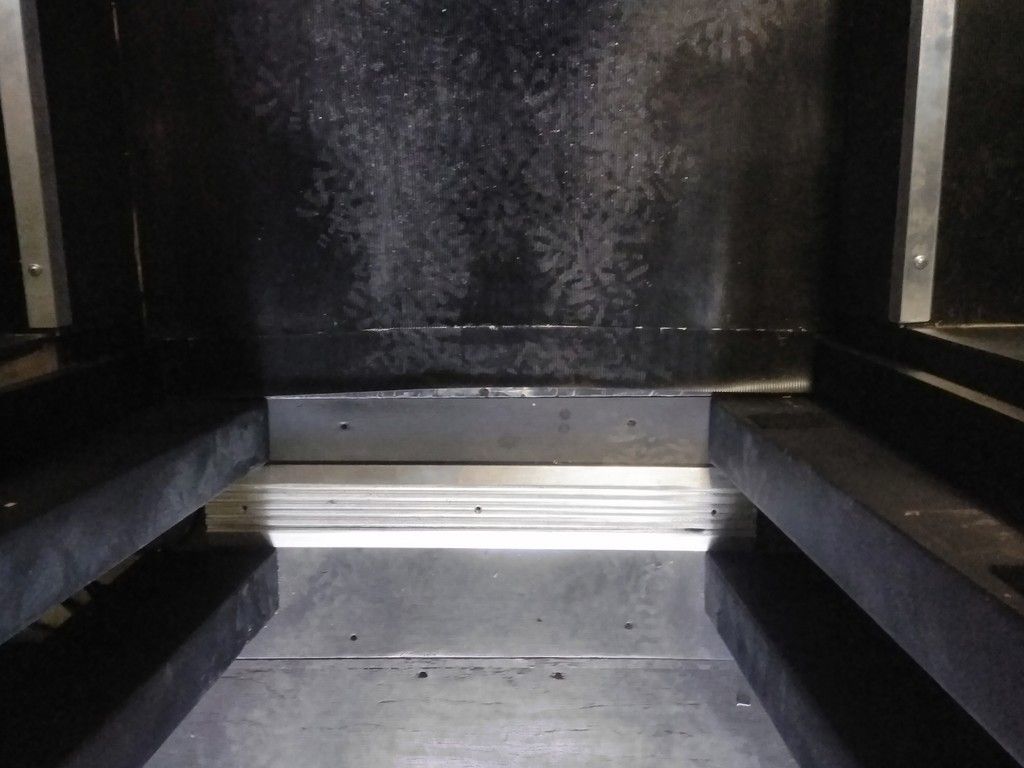
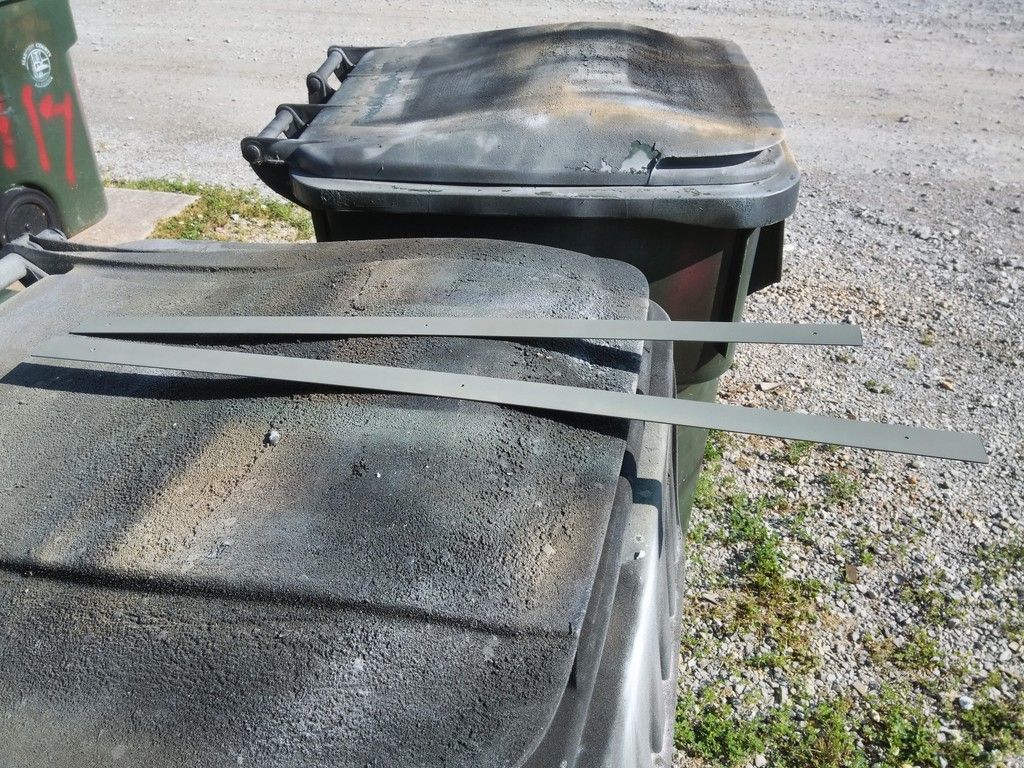
I cut 2 simple strips of aluminum and primed
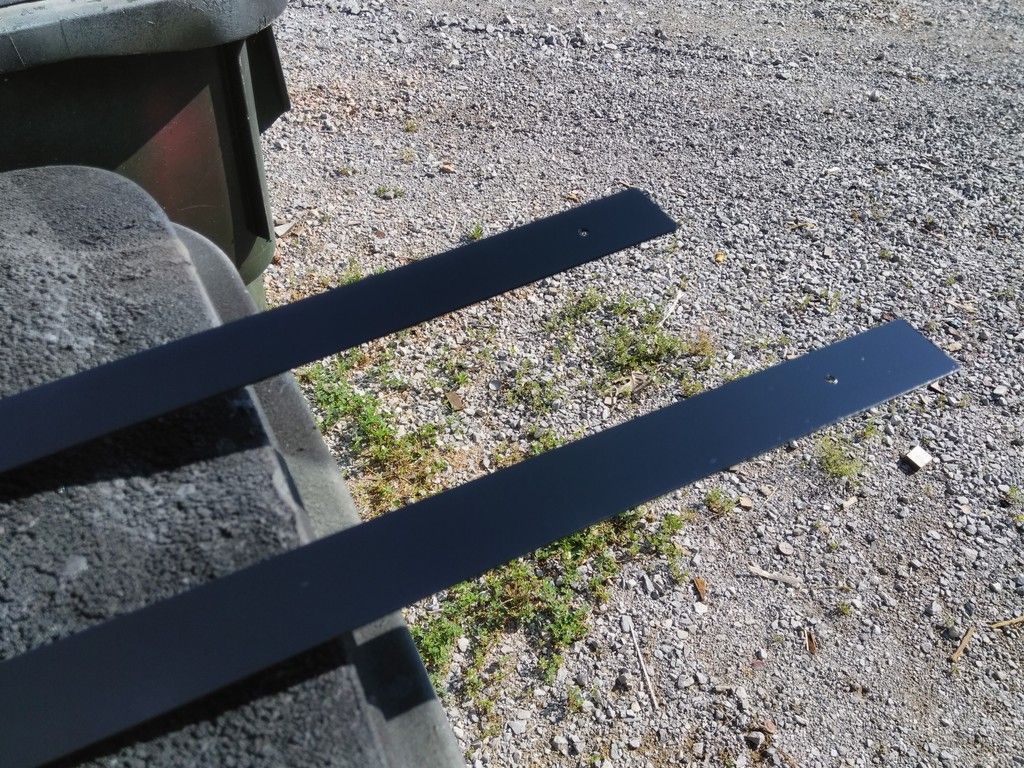
Painted black
Made sure the holes were aligned and drilled into place
I know it looks weird, but over time the double strip actually looks really cool
And it worked perfectly!
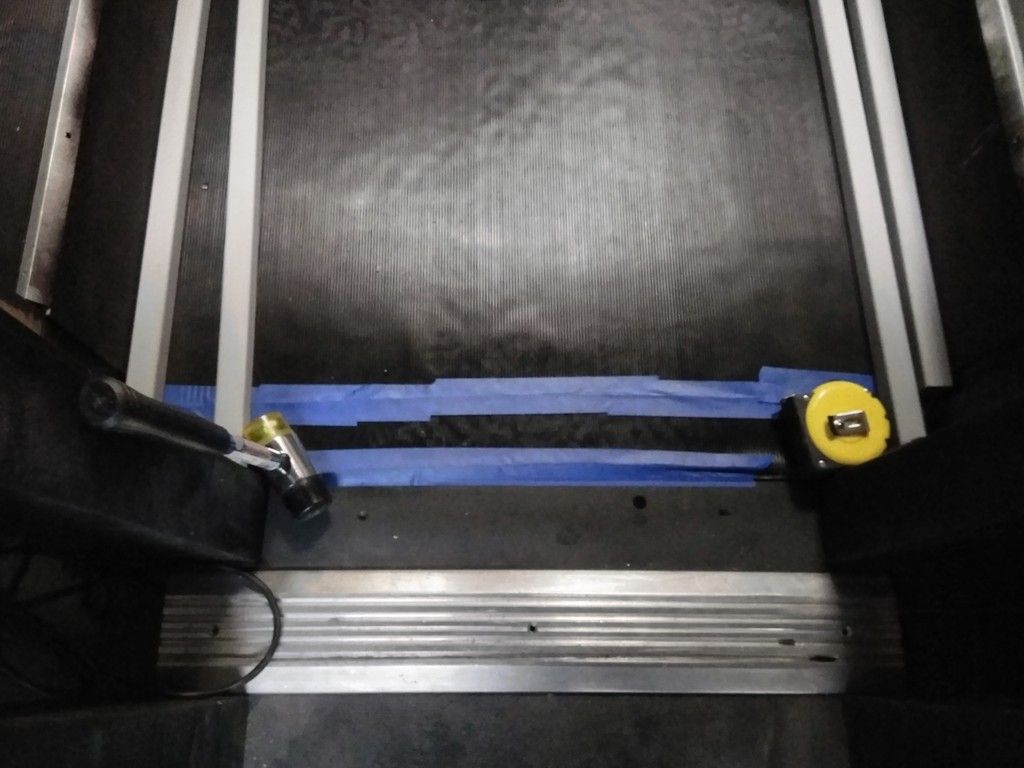
Finishing off the edges
Reminds of my time as a roadie!
I then turned my attention to the Nav Chair pedestals - cleaned them up and repainted black
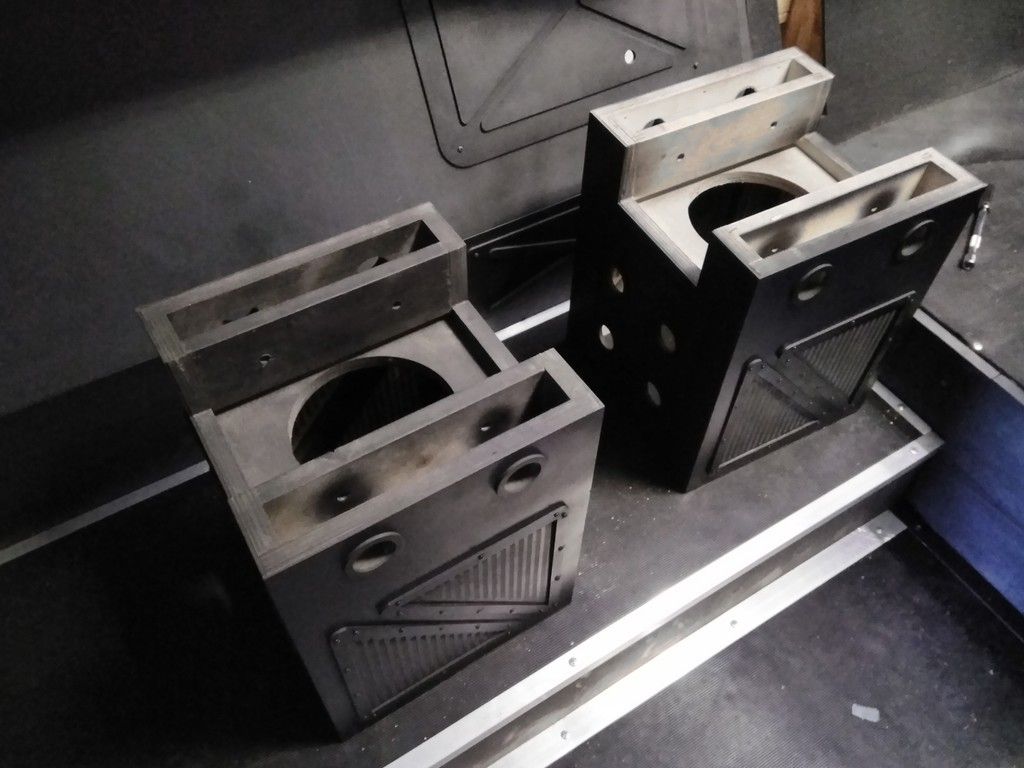
Added a beefy "L" bracket to all 4 corners
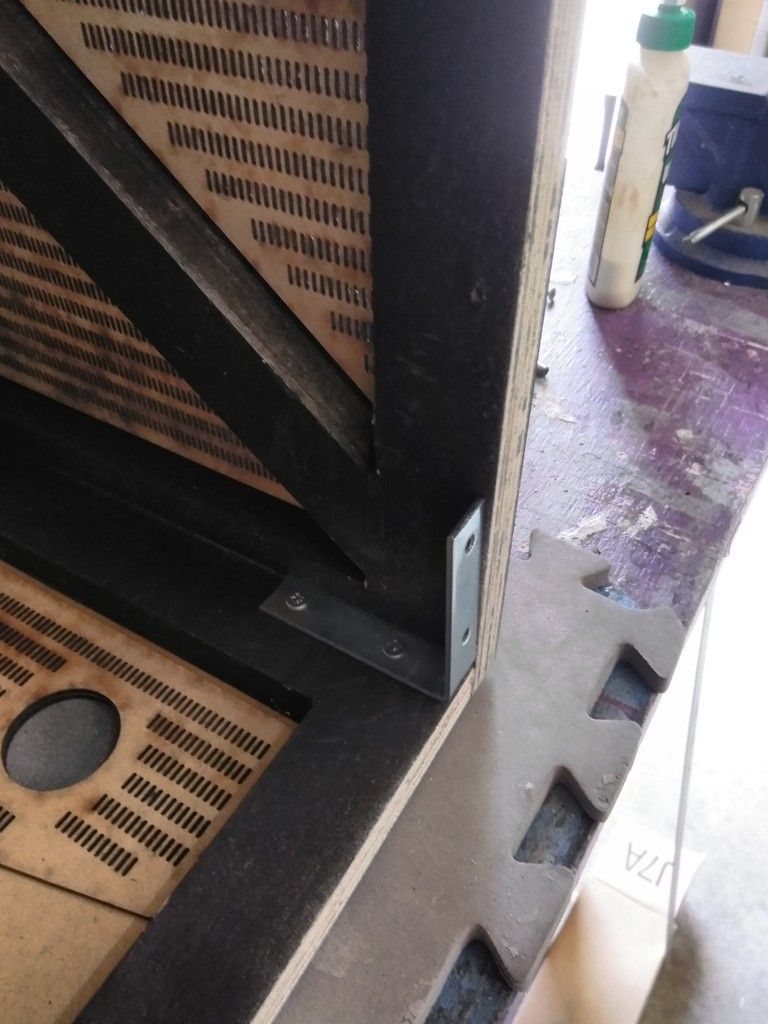
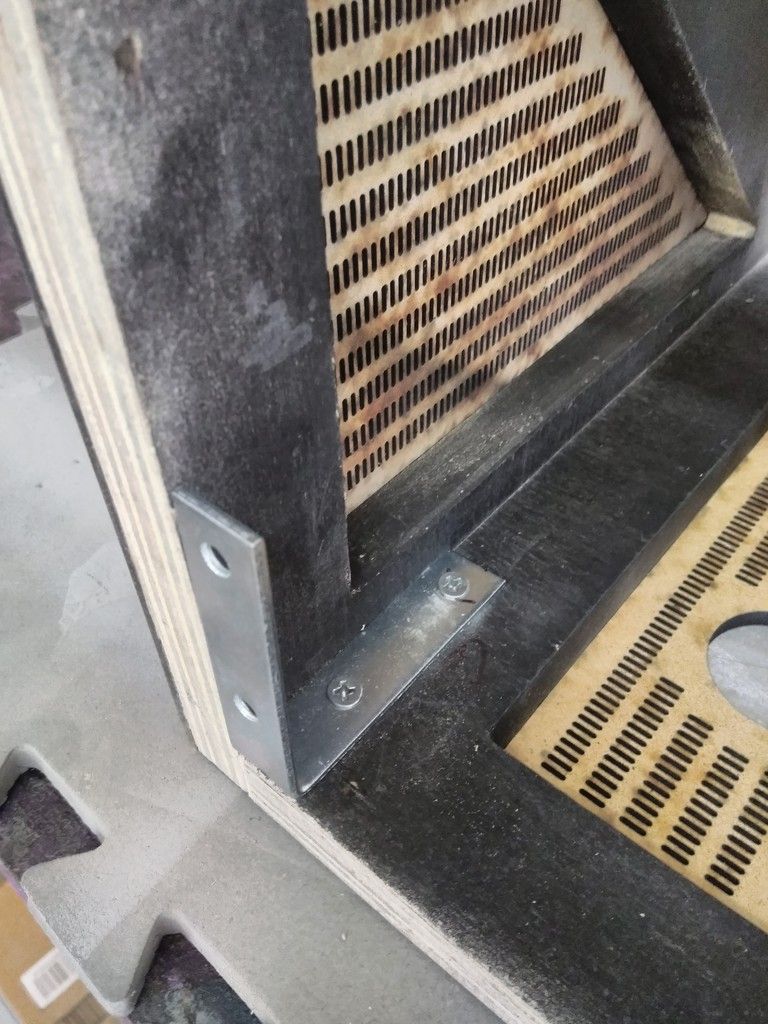
Measured and mounted into place - and there they stayed! They never moved after that!
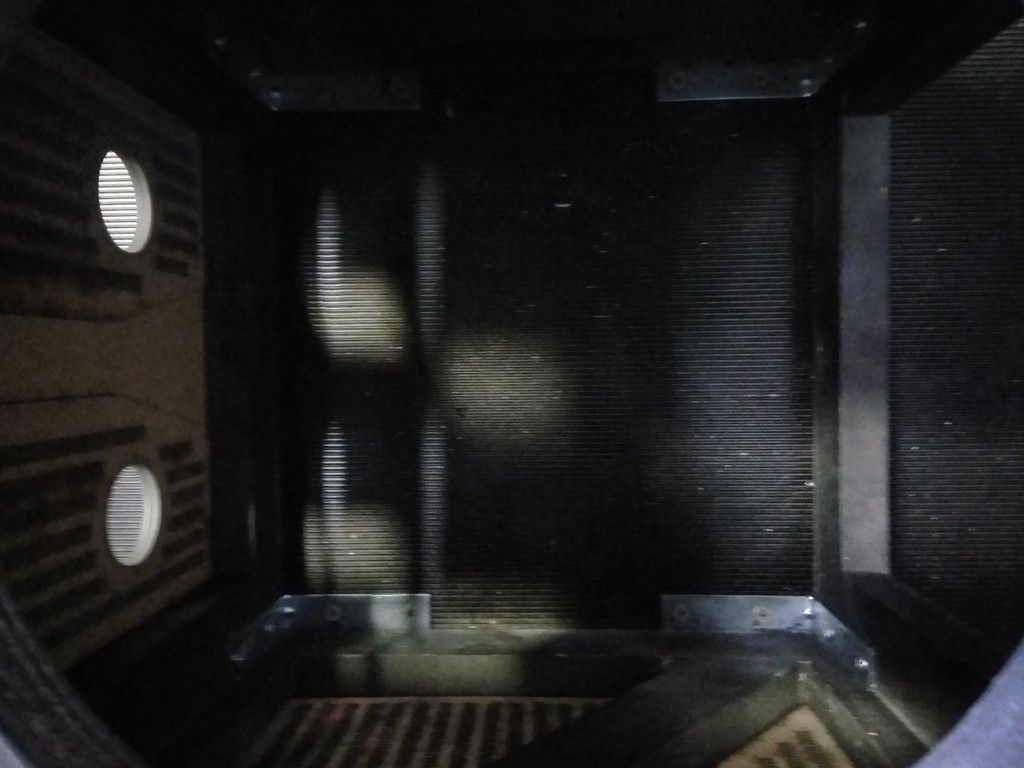
Just enough space for a large bass speaker!
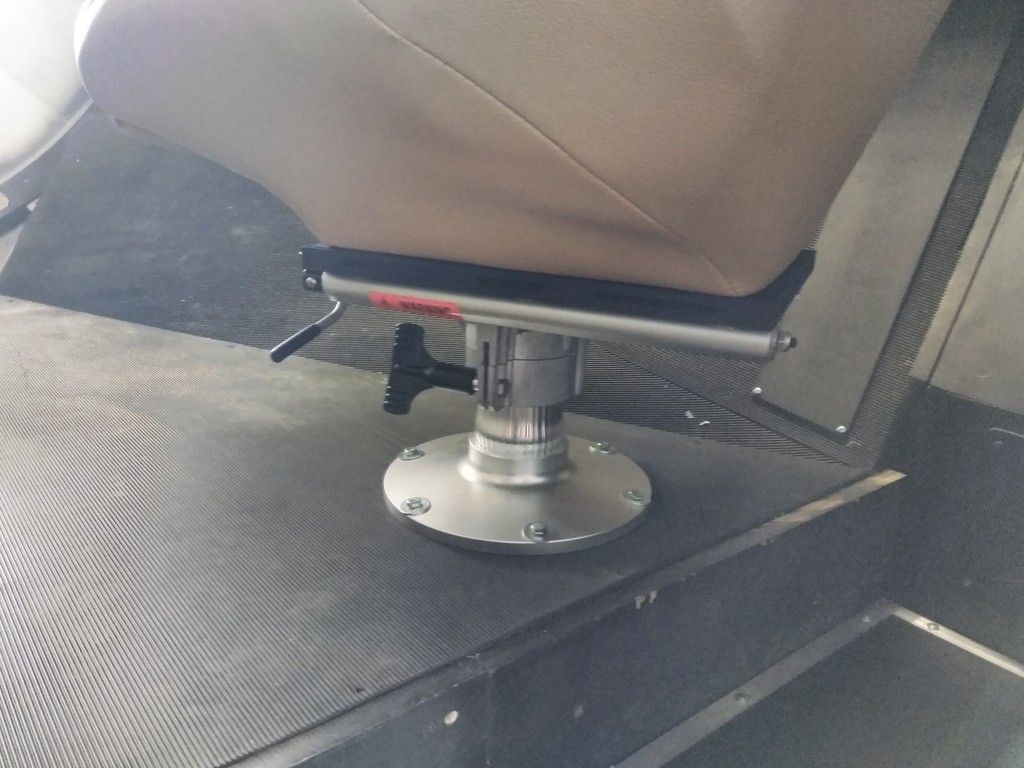
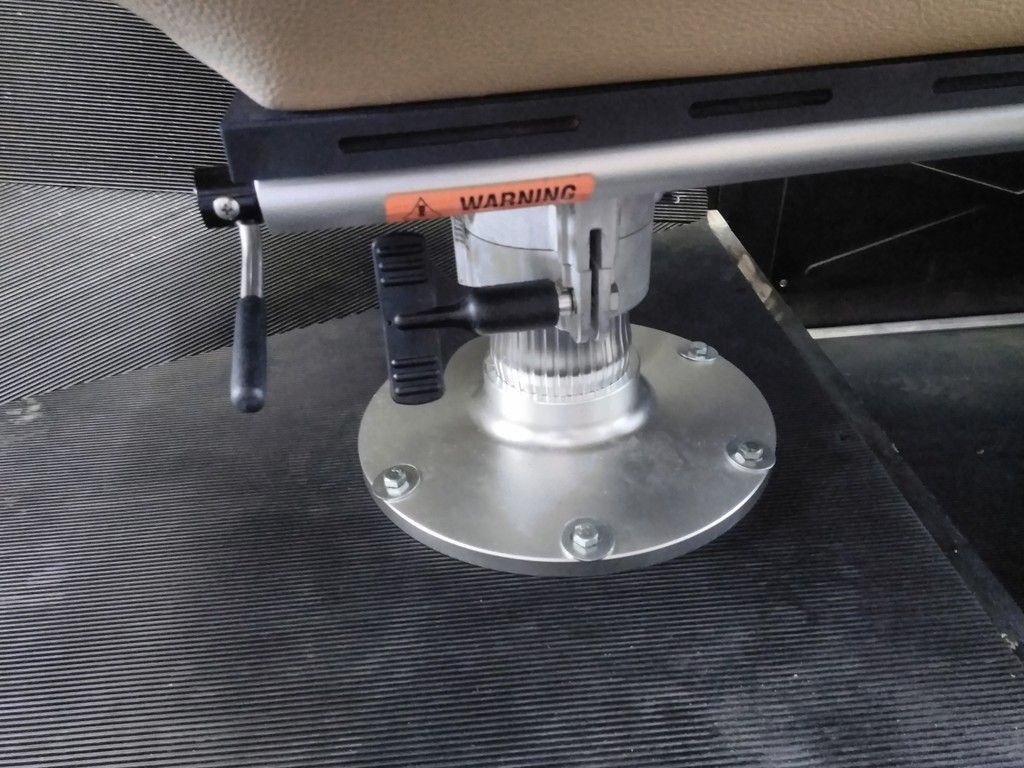
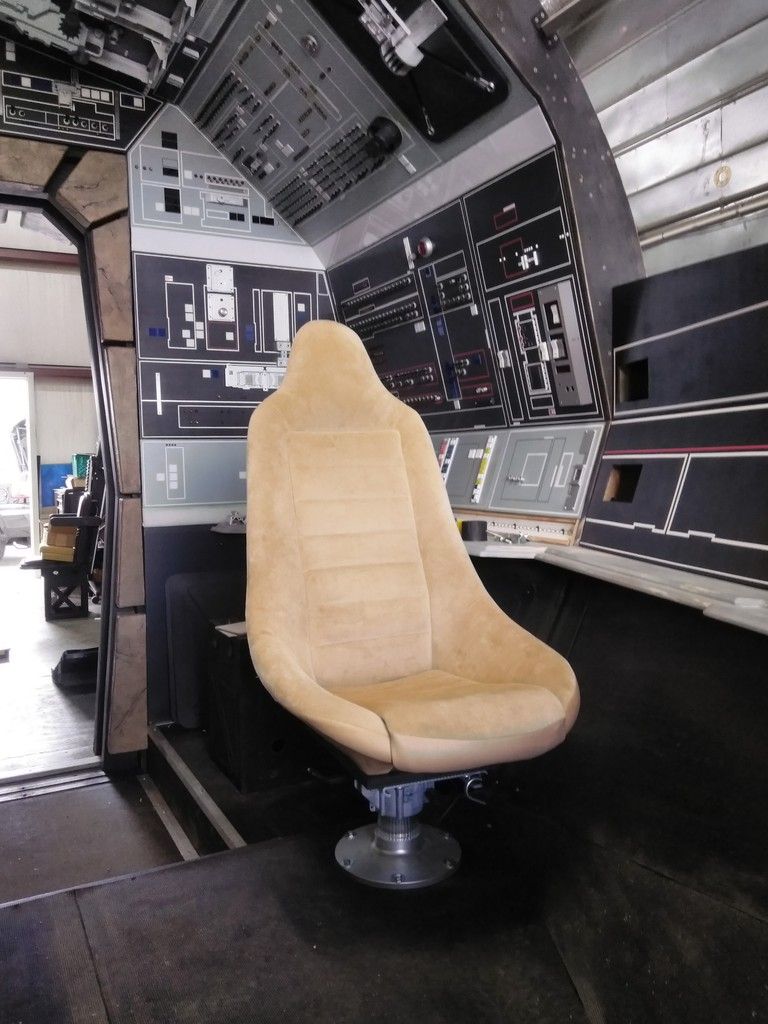
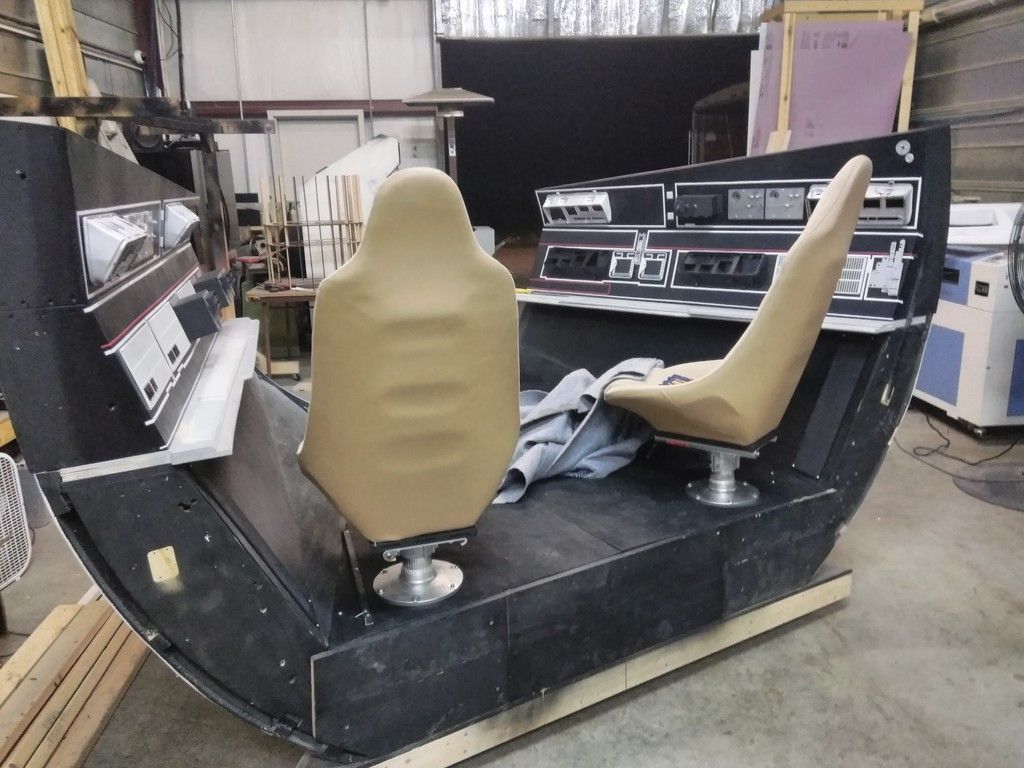
Speaking of chairs. Time to get these captain chairs mounted! With the new pedestals I had to create a new mount
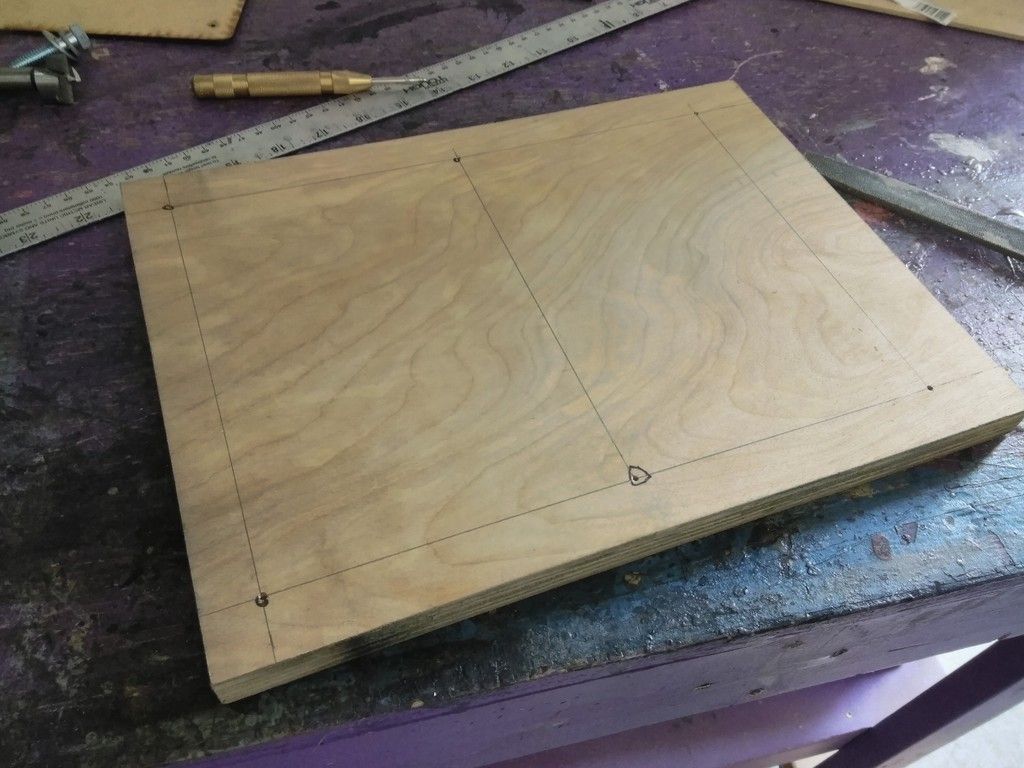
Made sure ALL the holes were aligned between the chair and pedestal
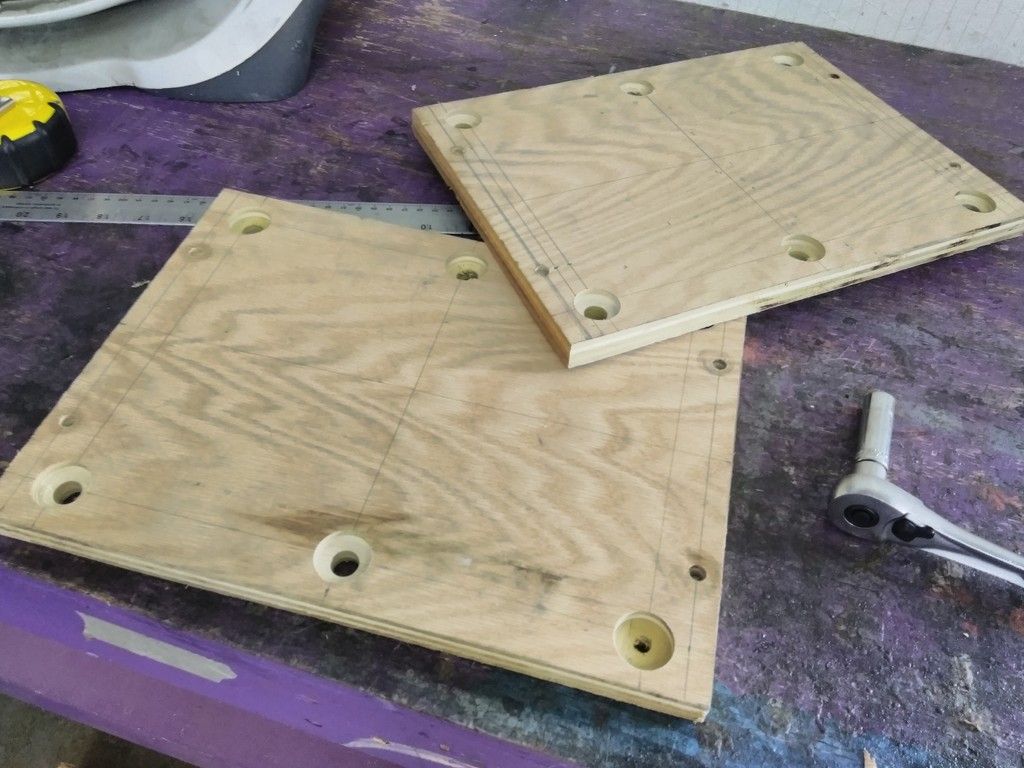
I laser cut these decorative edge pieces
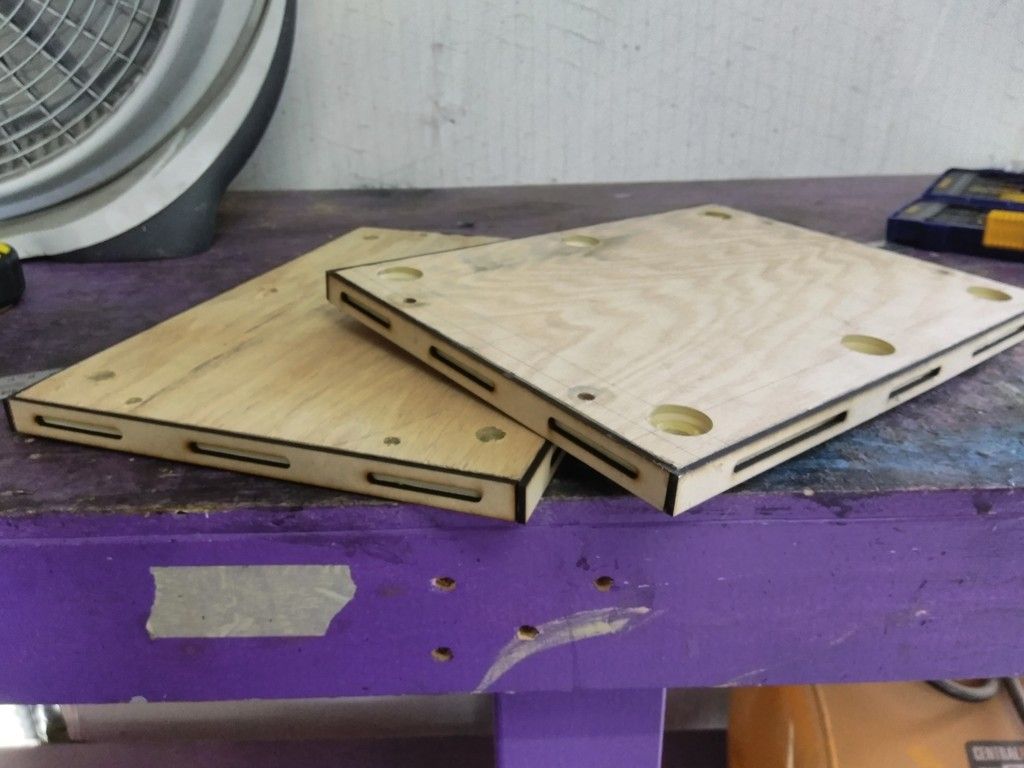
Painted them black and then mounted everything together
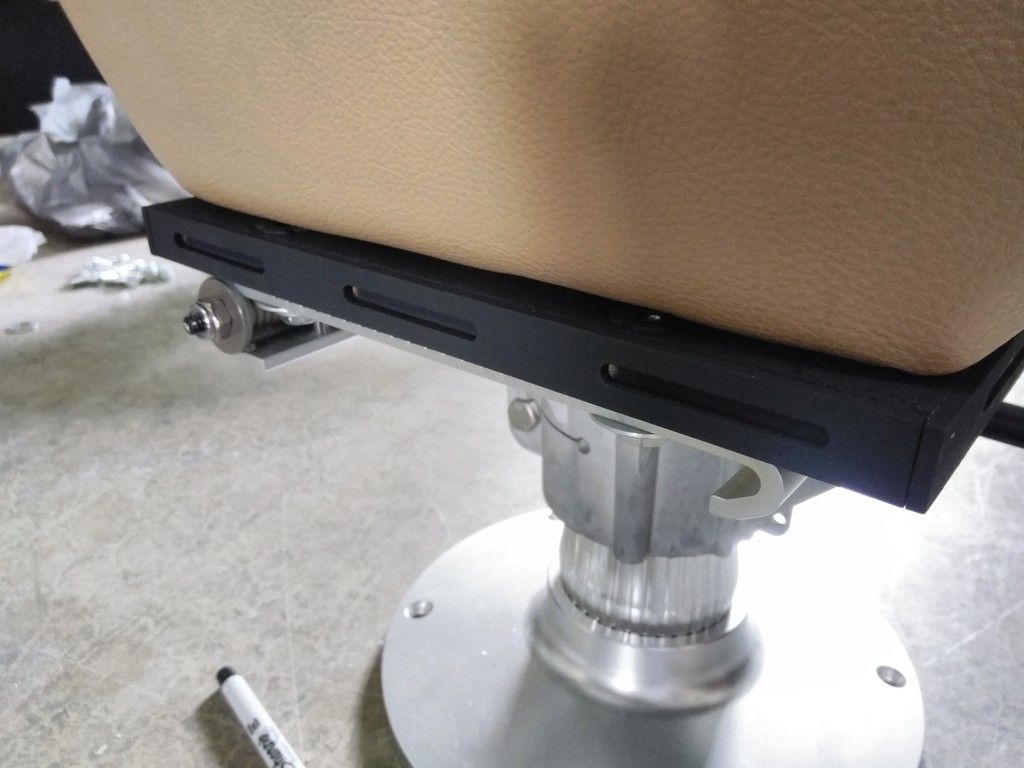
Perfect fit!
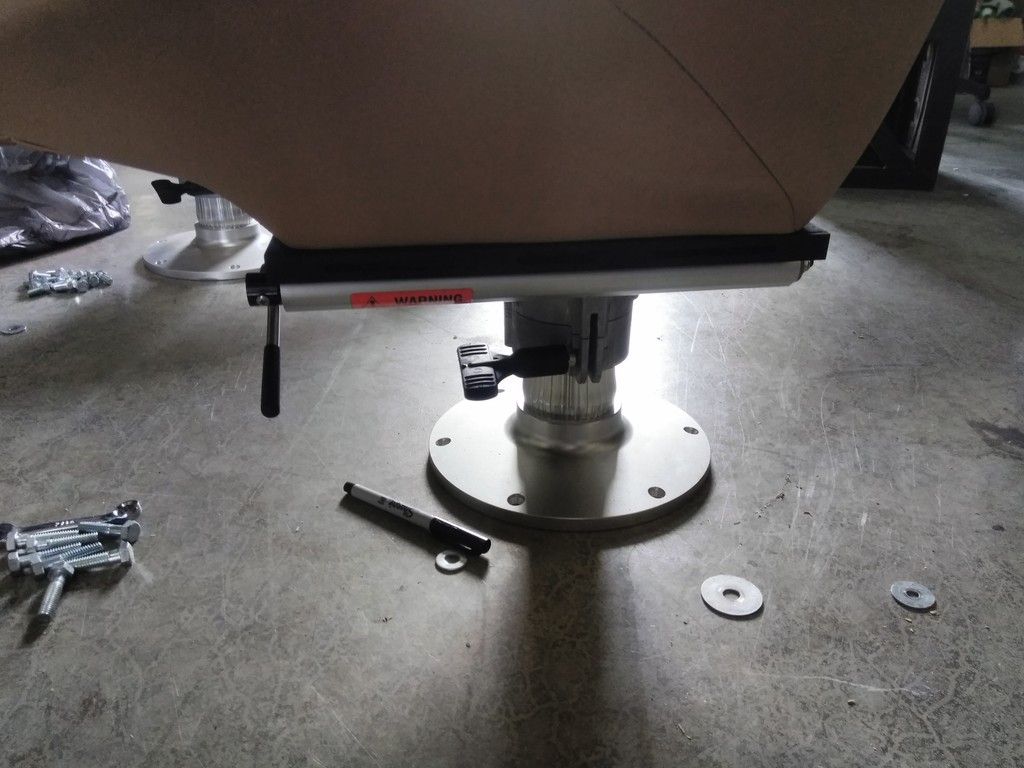
The slider handle was WAY too long so I cut in half and slid the rubber cover back into place
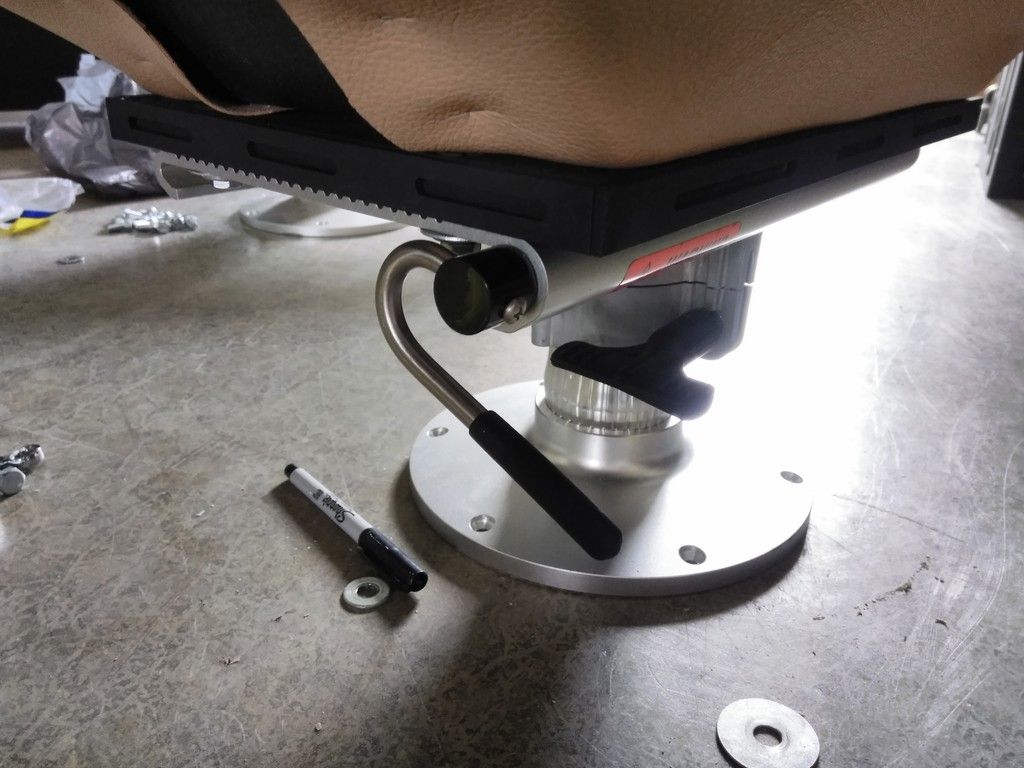
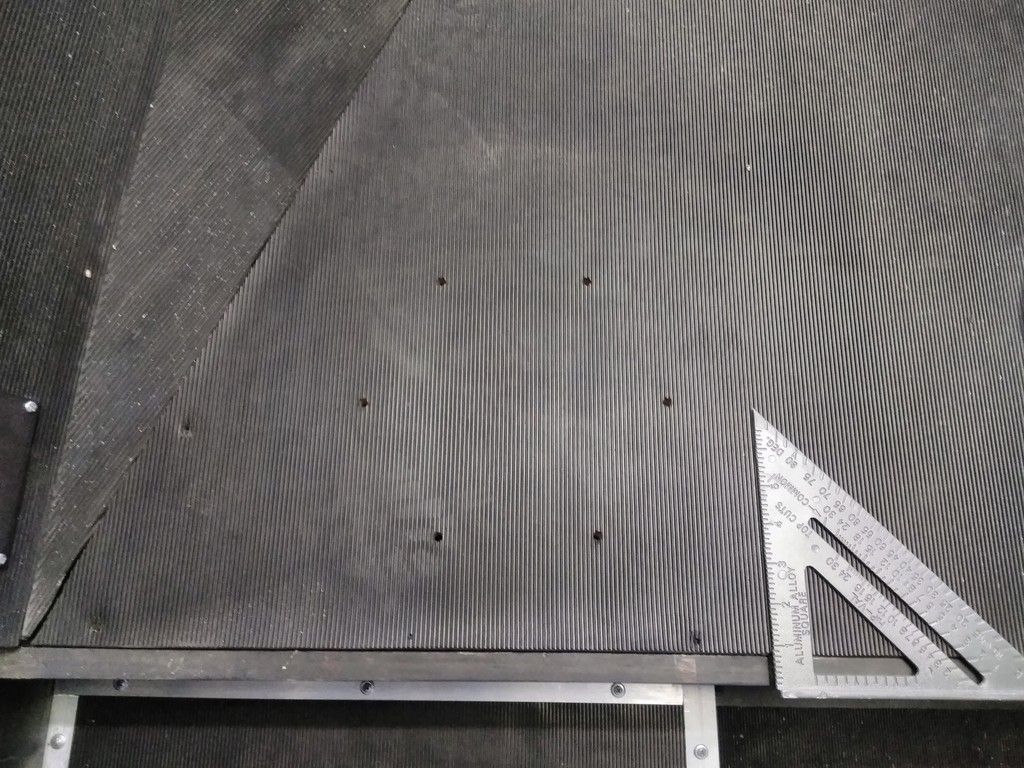
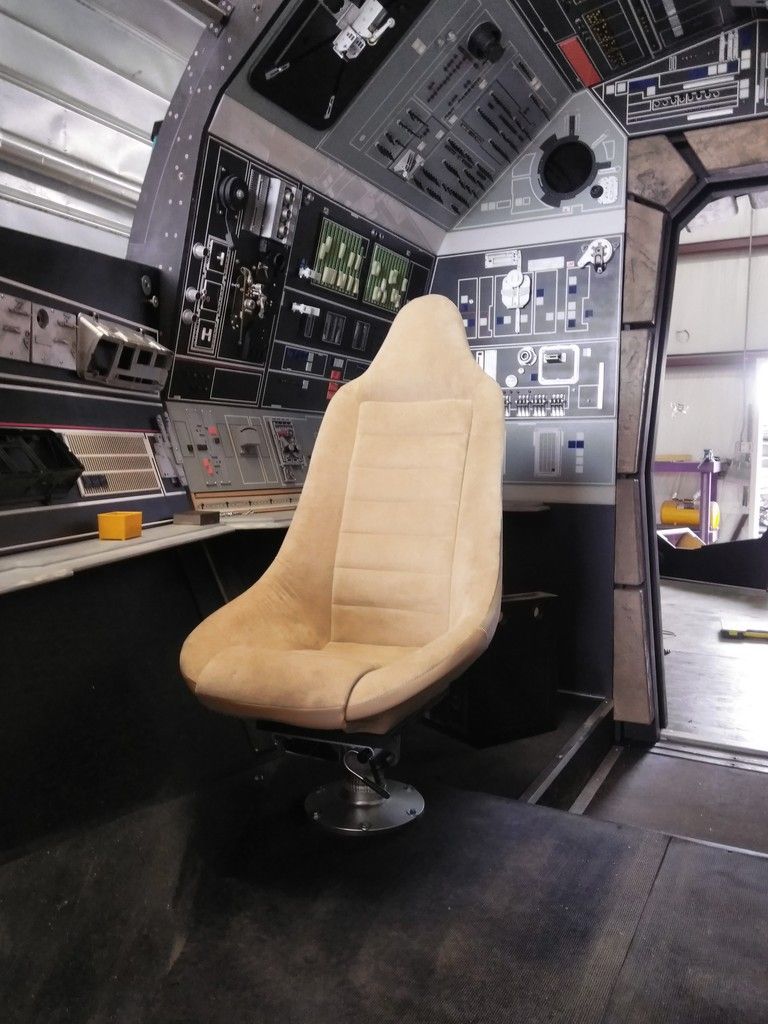
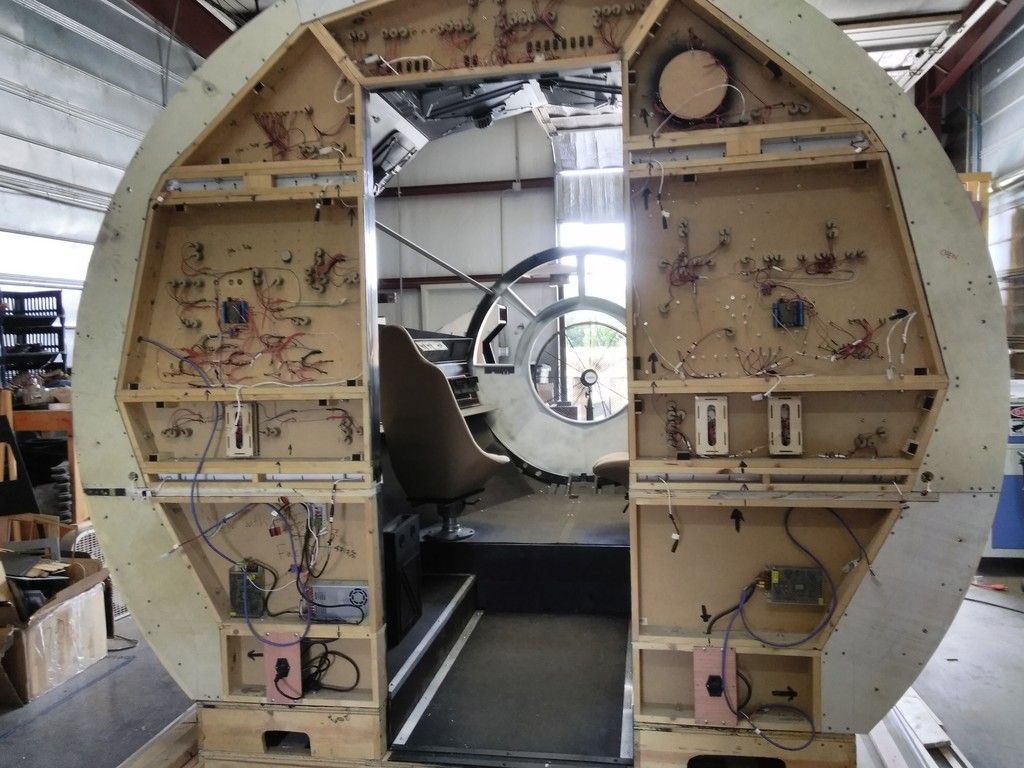
Now came the scary part! I had to lift up the nose platform floor multiple times and take tons of measurements to make sure that, before drilling any holes, I wouldn't hit any of the support structure underneath with the mounting bolts! OperaScot would not be happy with me! SUCCESS!
Absolutely SOLID!
There is virtually no flex in the floor, pedestal or chair
Han's side
BINGO!
So pretty!
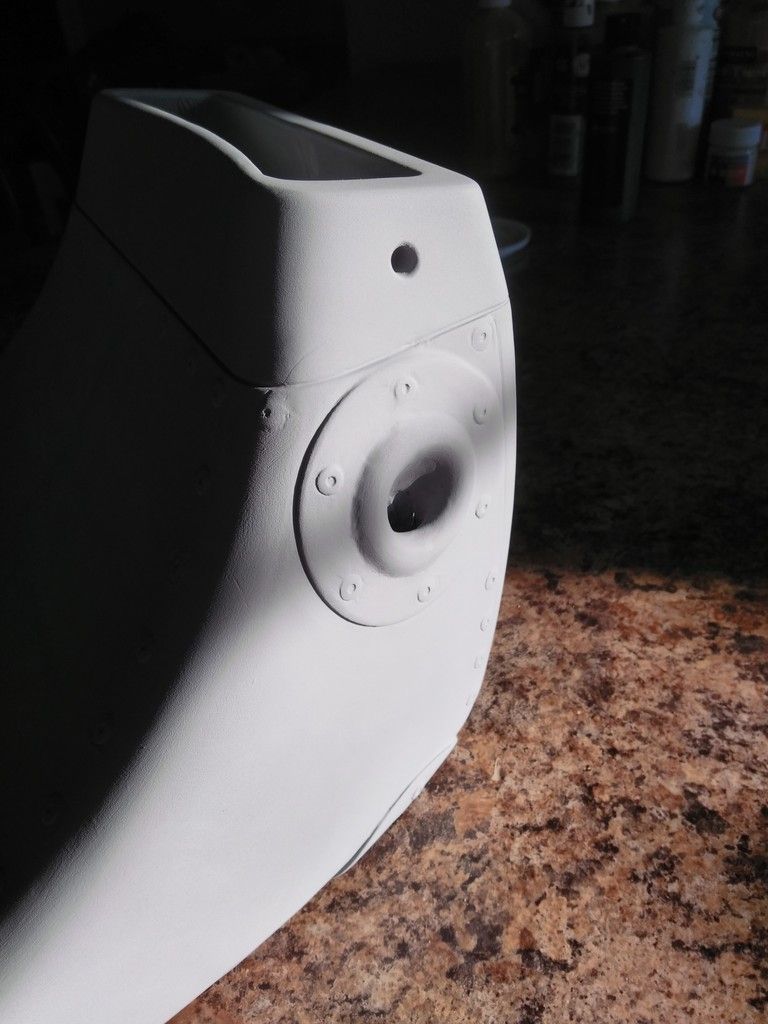
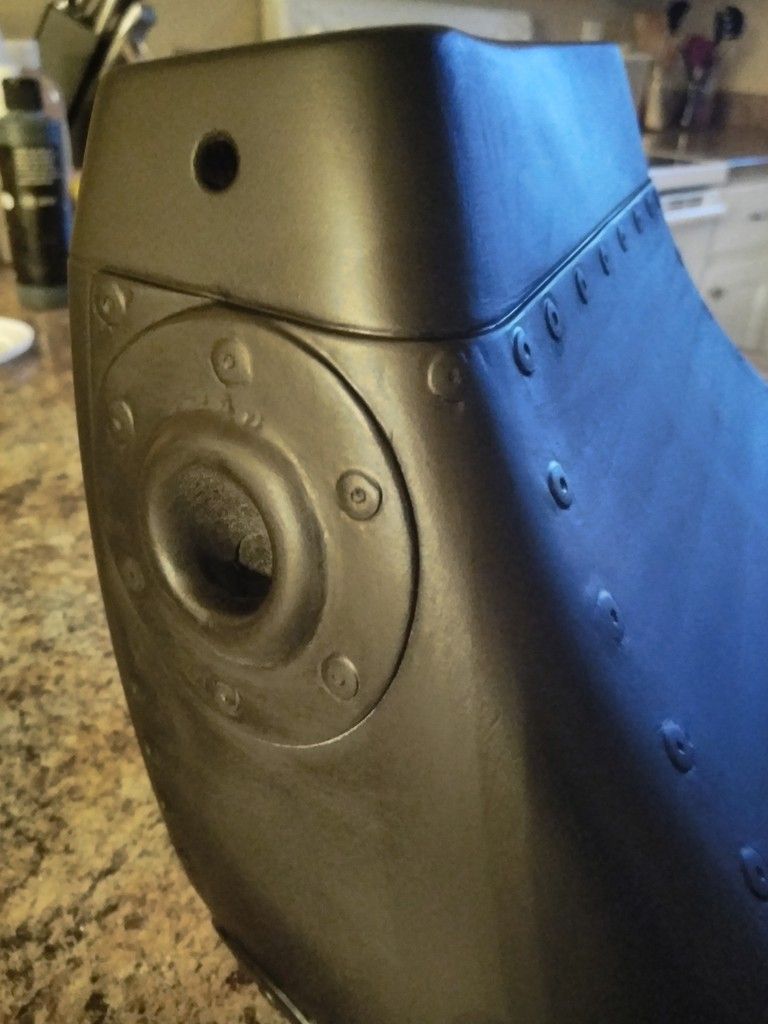
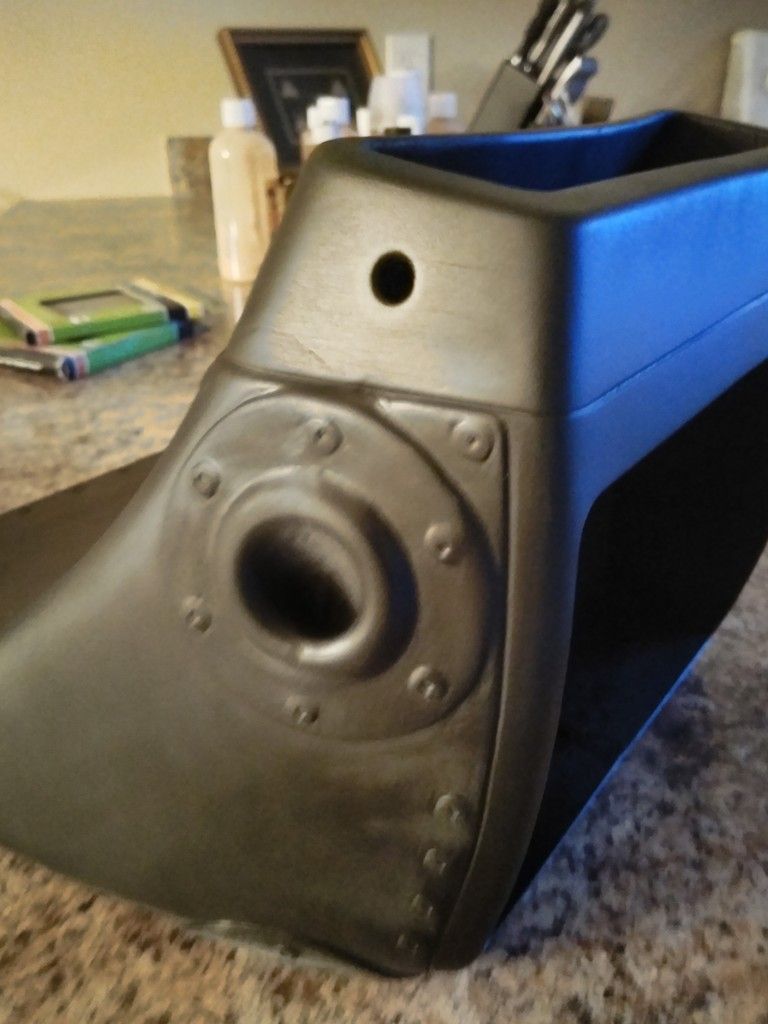
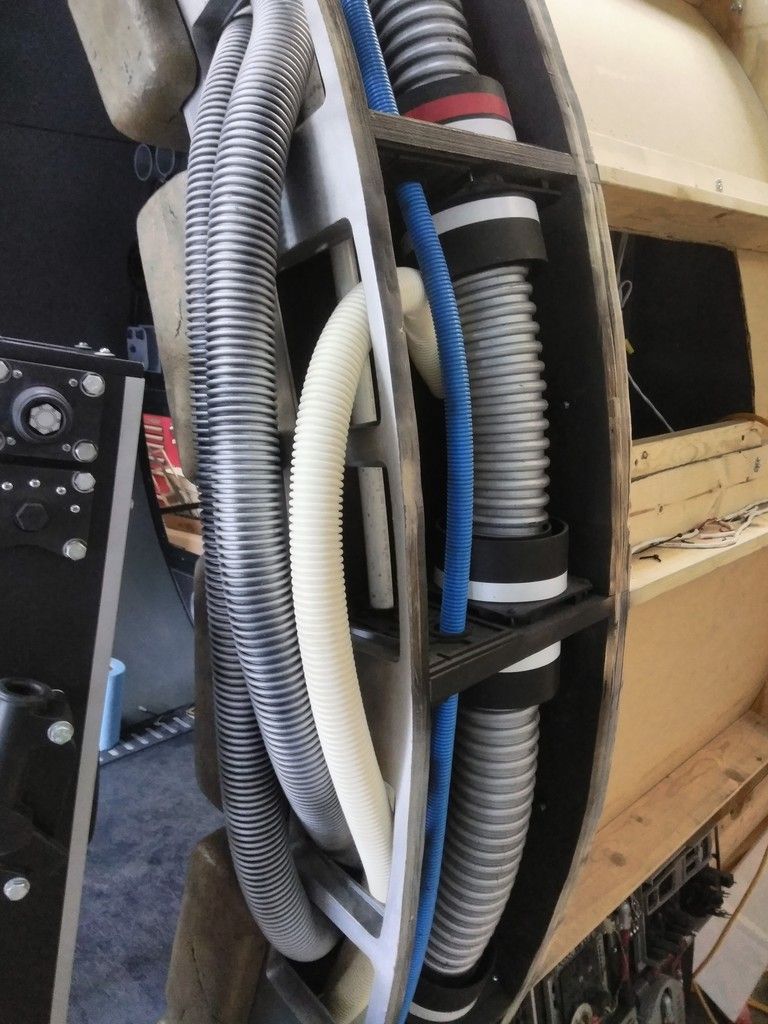
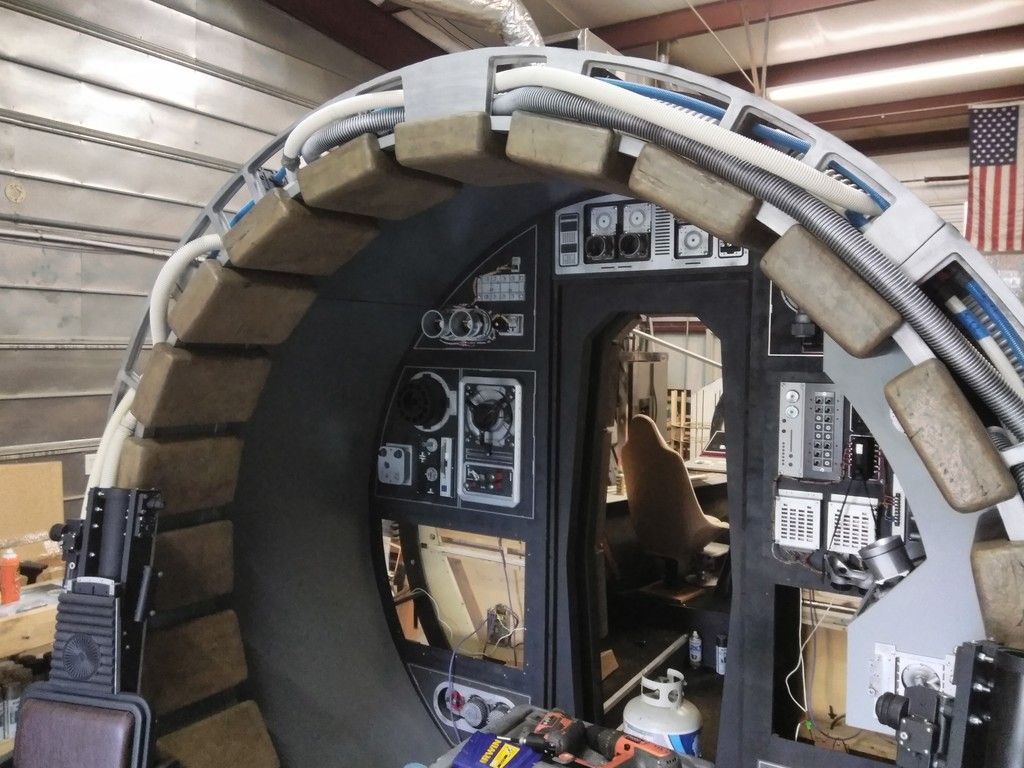
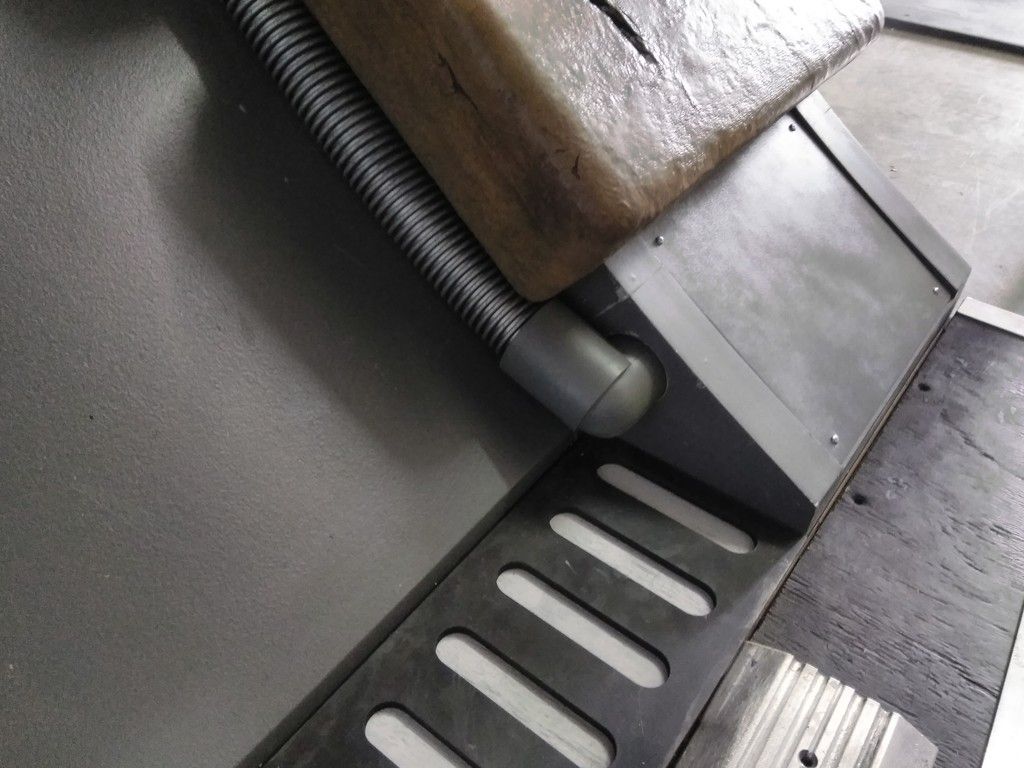
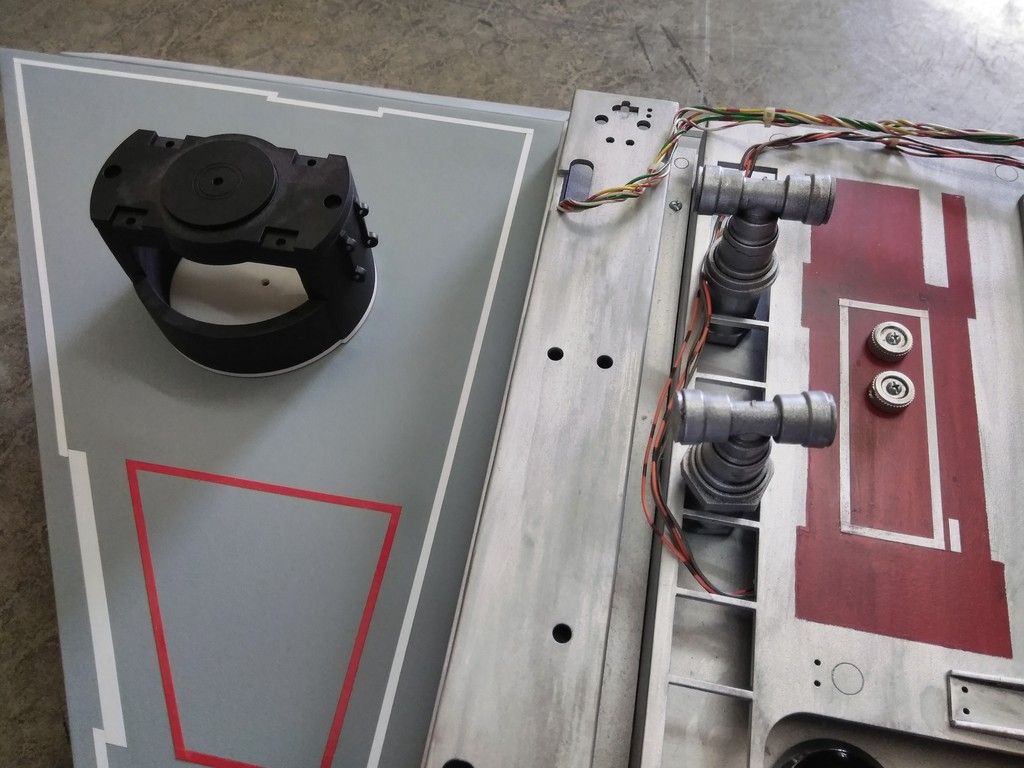
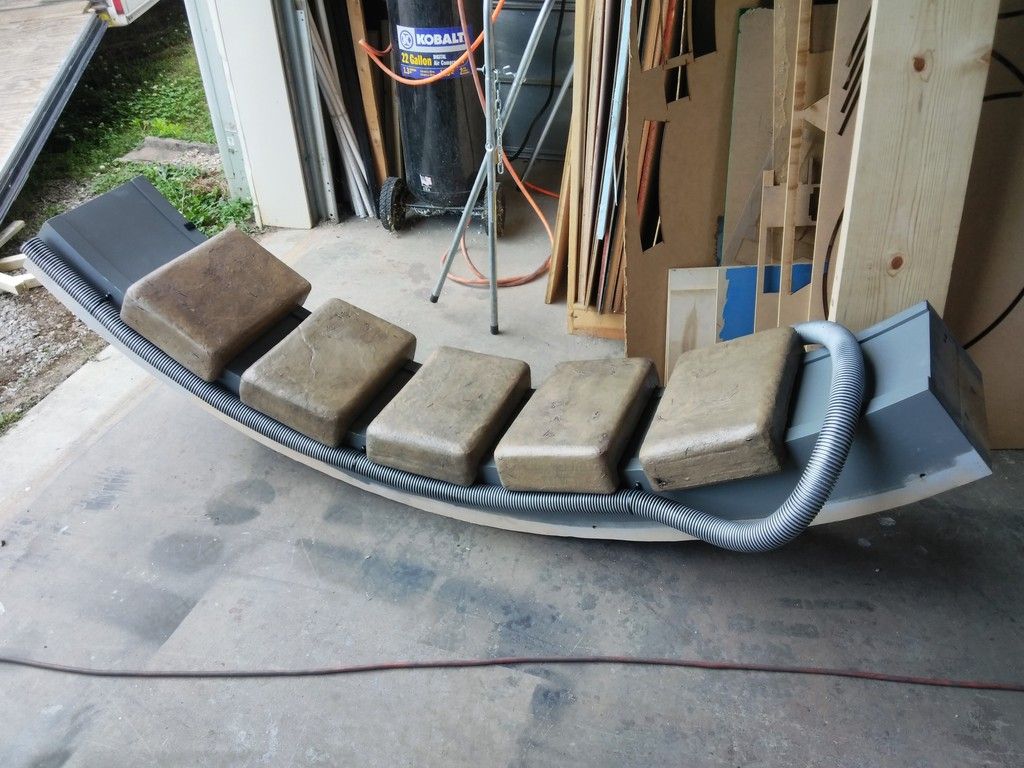
I then changed focus to the hoses... I just had fun with it!
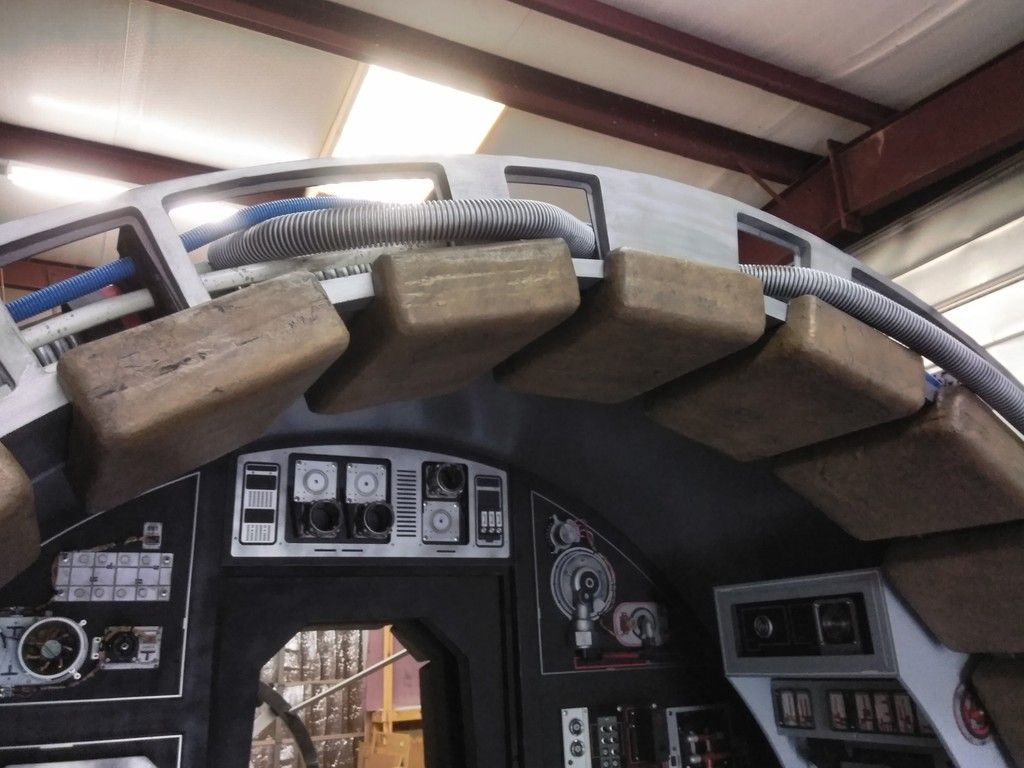
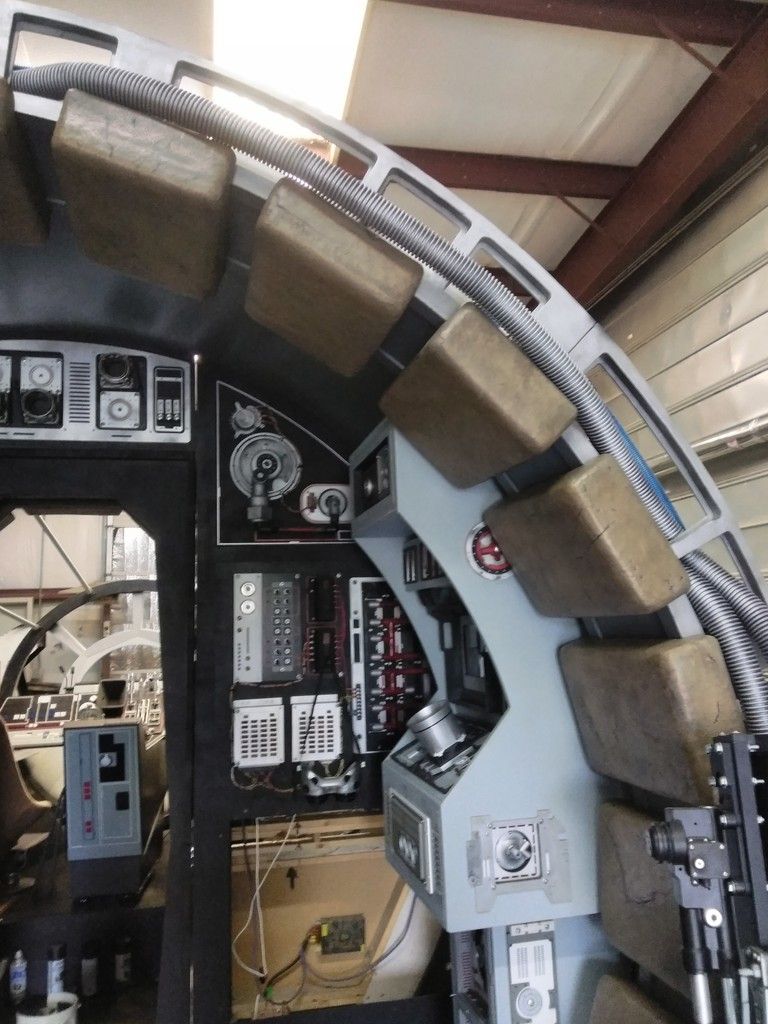
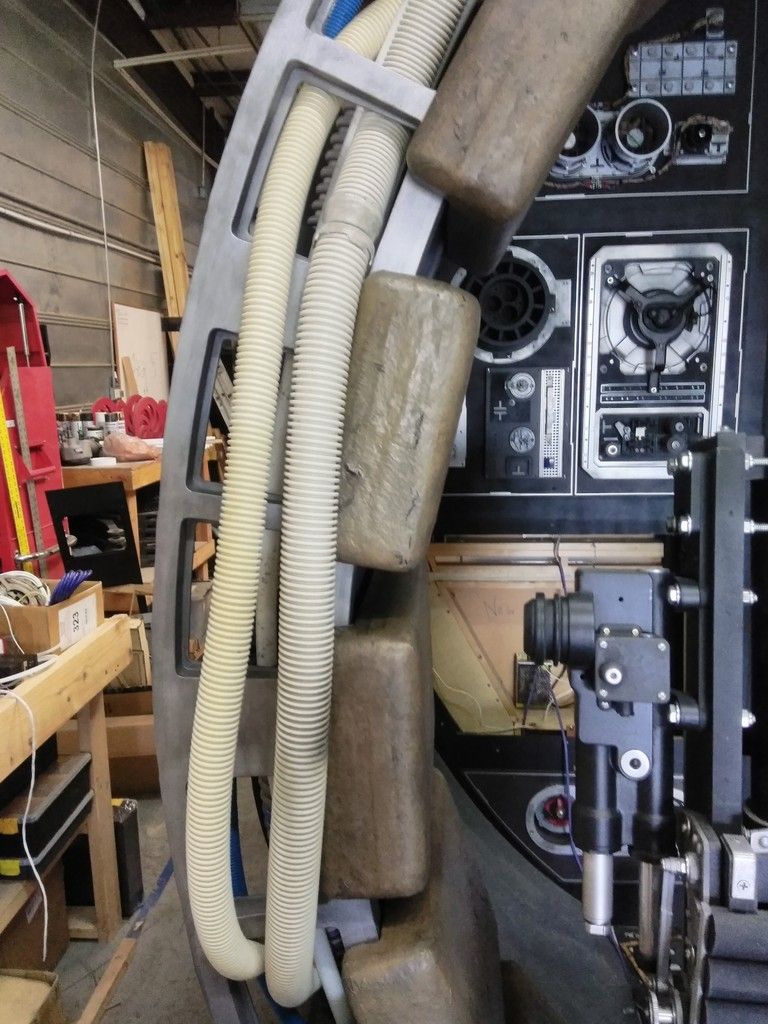
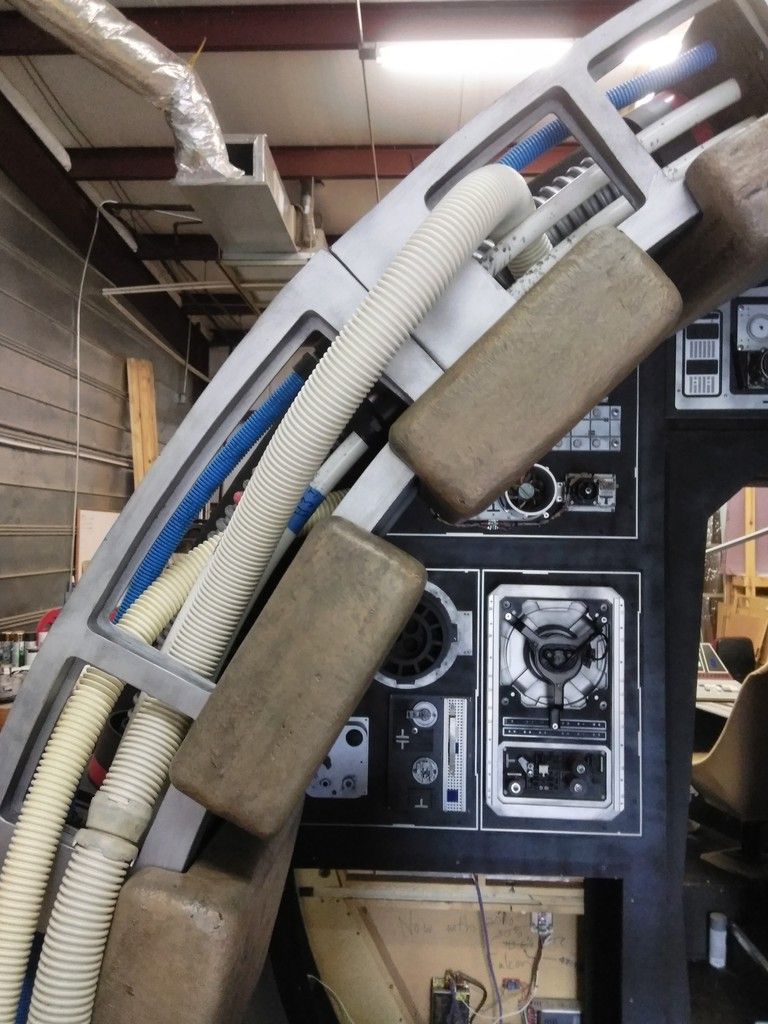
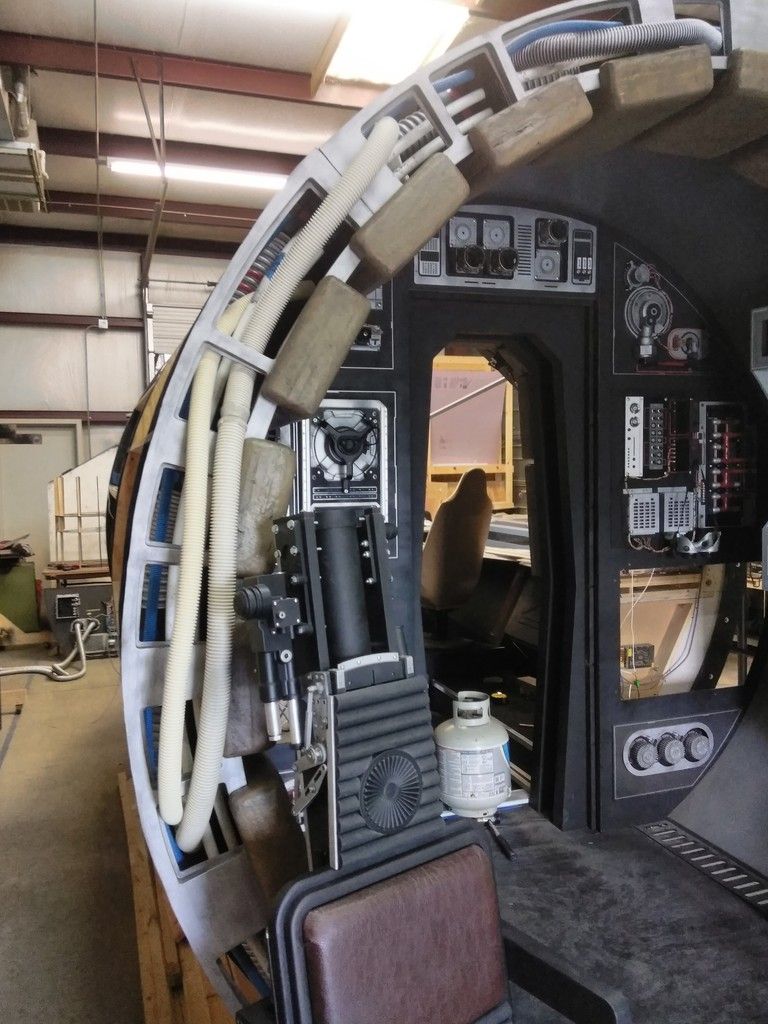
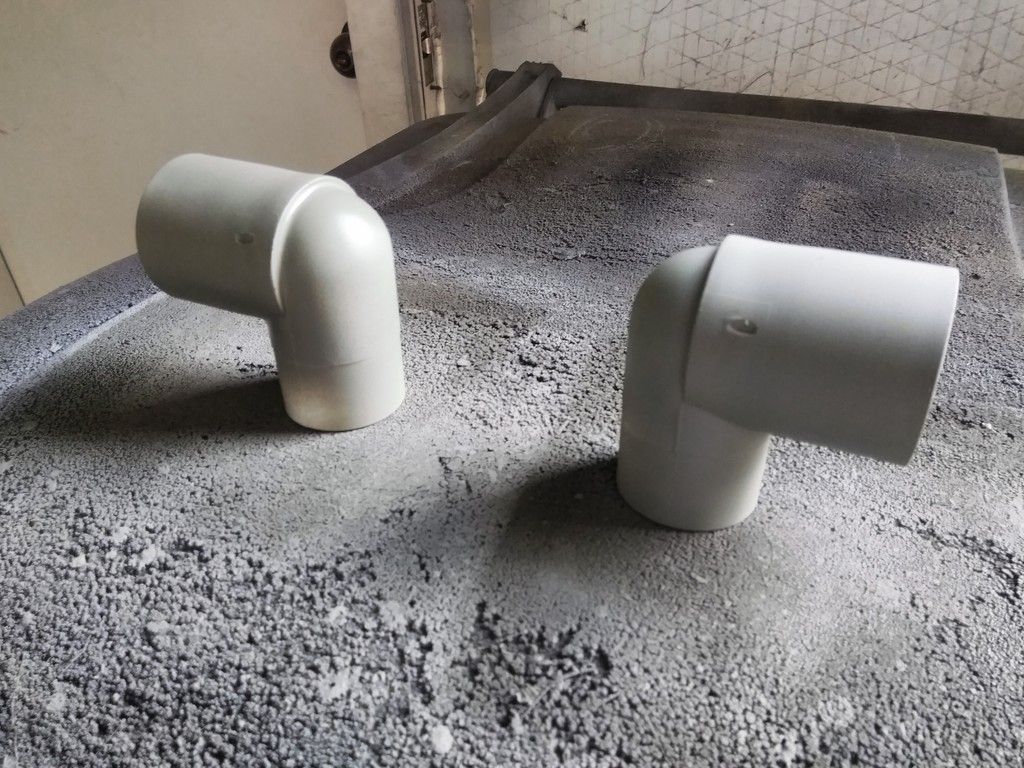
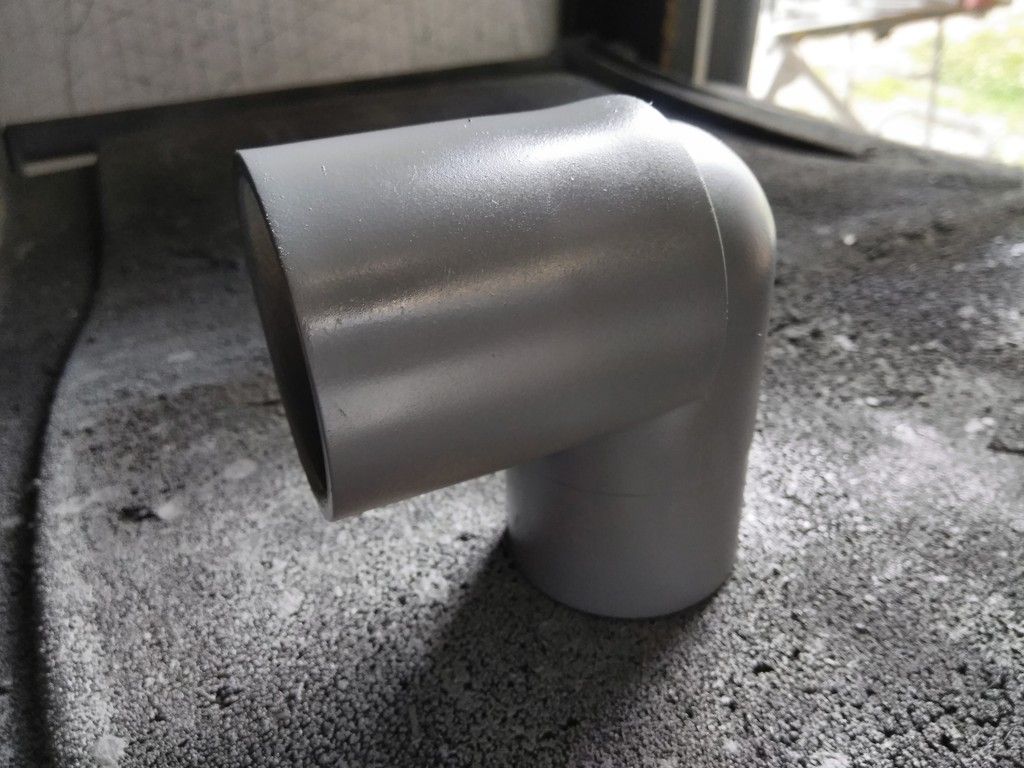
Sanded, primed and painted these 90 deg elbows
I dont think anybody will actually notice this hose. But we know its there.
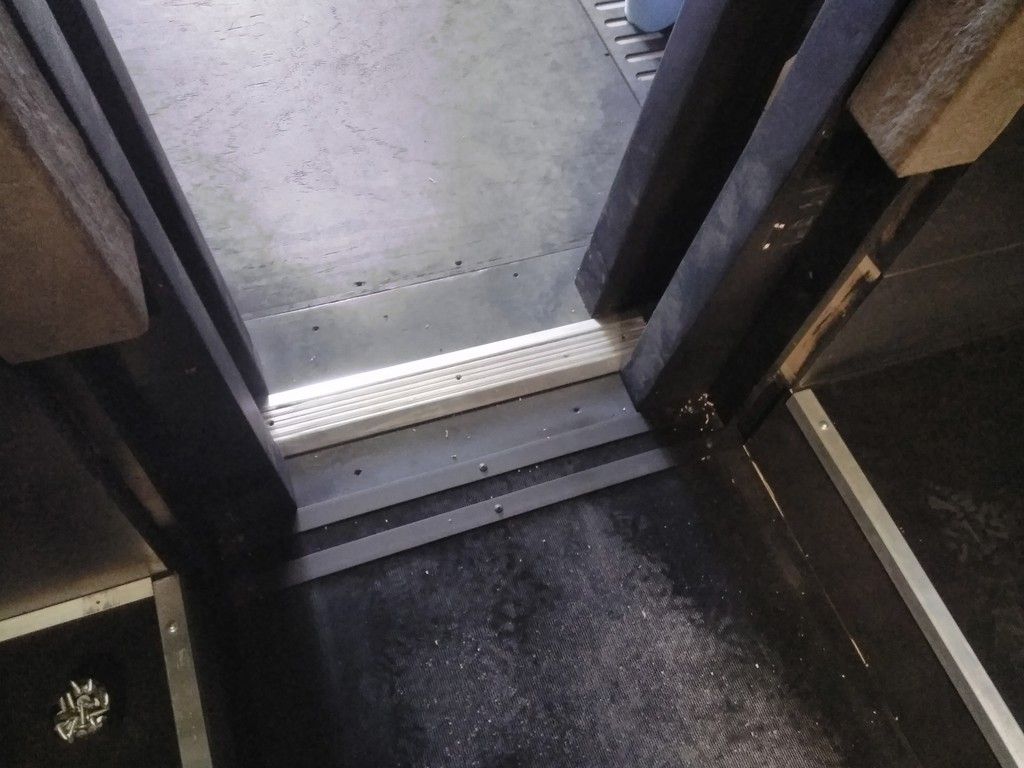
Finished up the cockpit entrance pads... I might as well admit now... I forgot to make ONE pad. Can you believe it? :facepalm
Cockpit side is complete and the older Velcro was removed and replaced

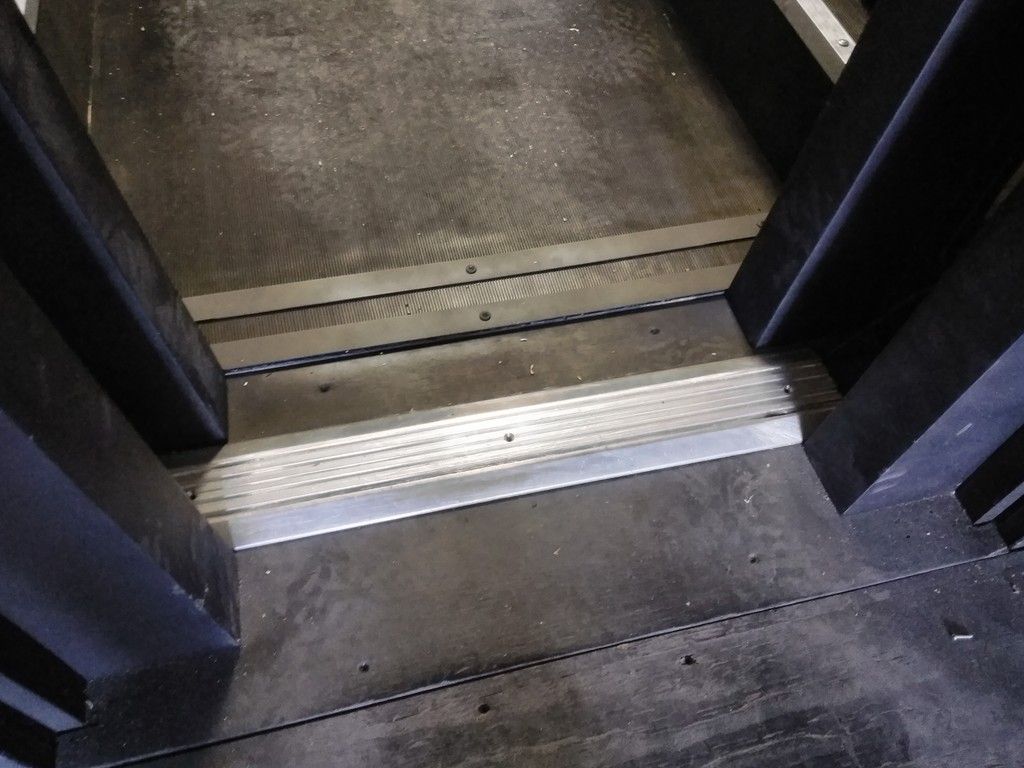
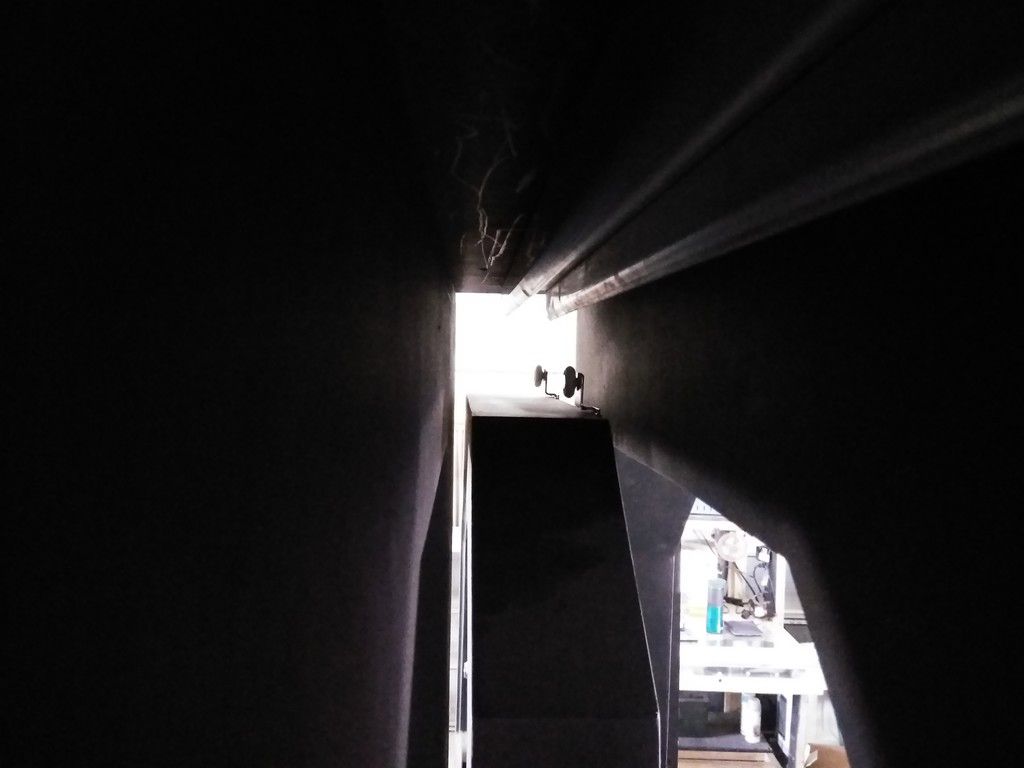
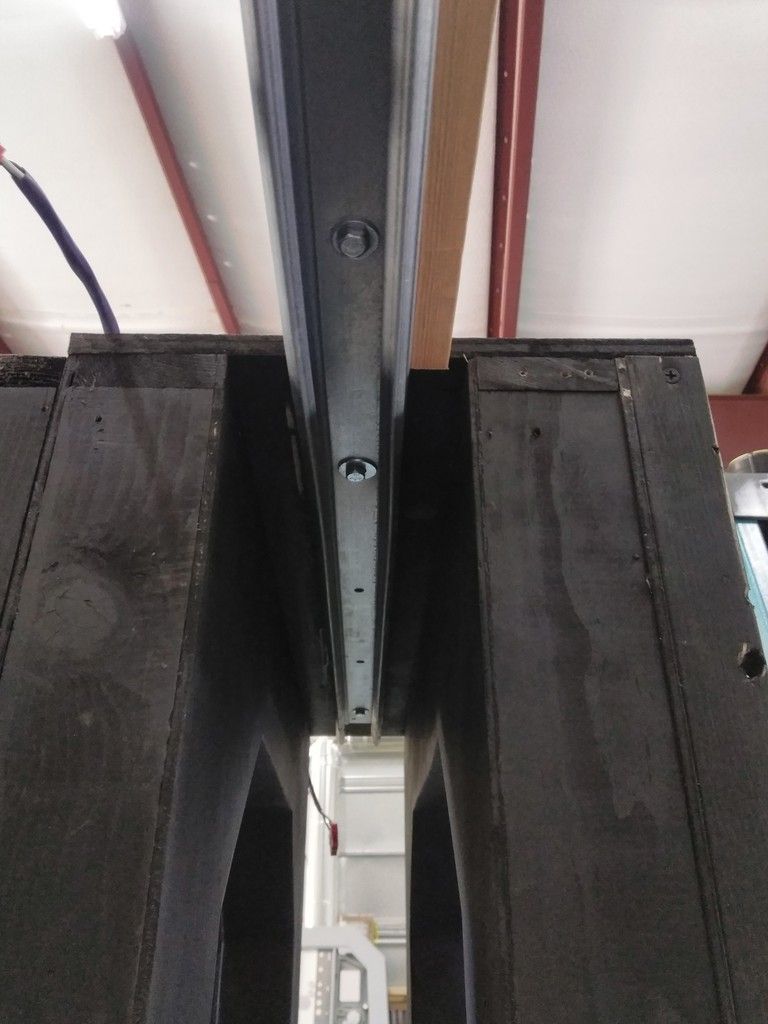
Speaking of door frame... The door slider track was mod'd and remounted to the "new" frame
We have a door again!
Its been too long since we've seen her in place!
Slider track from inside frame
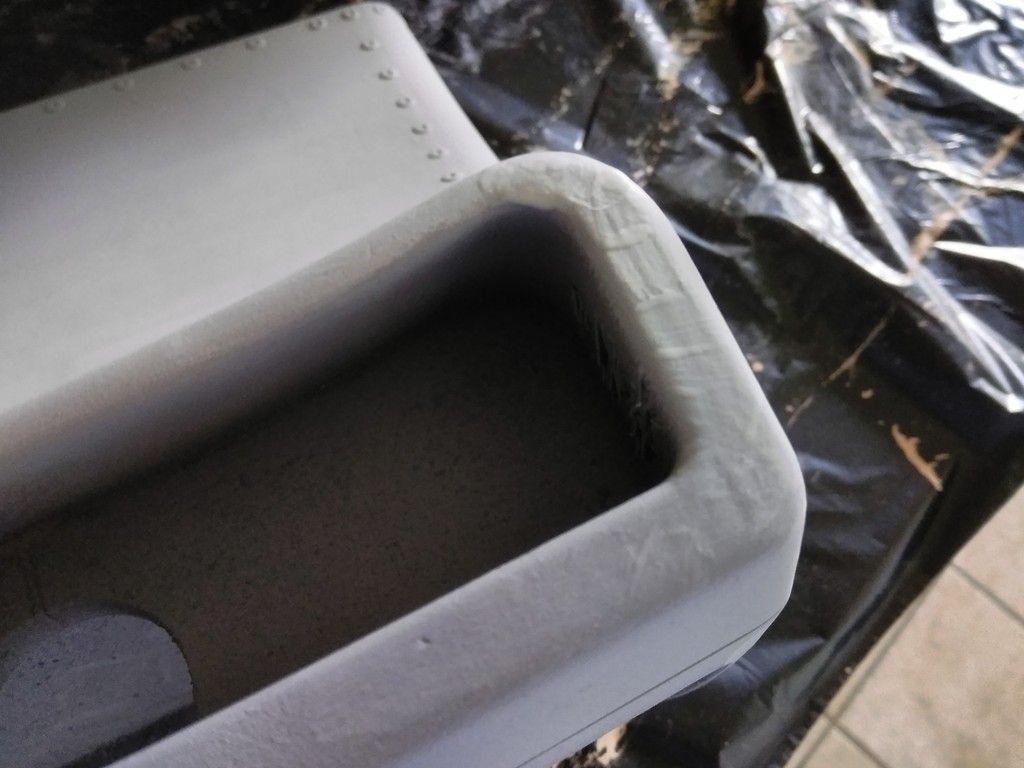
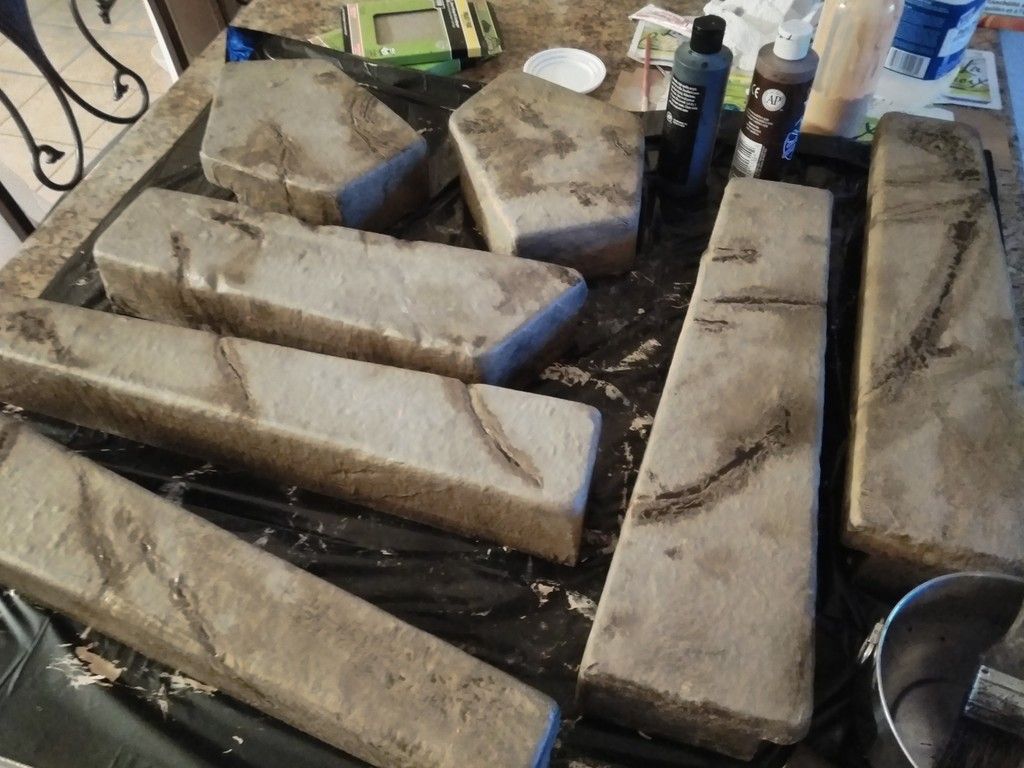
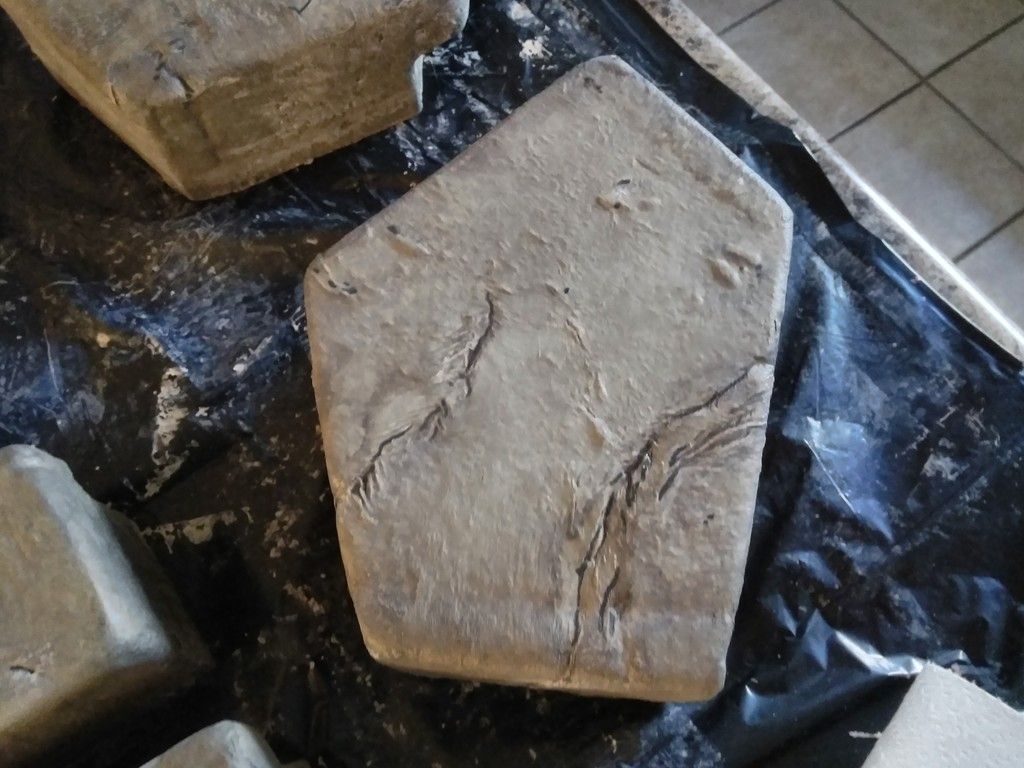
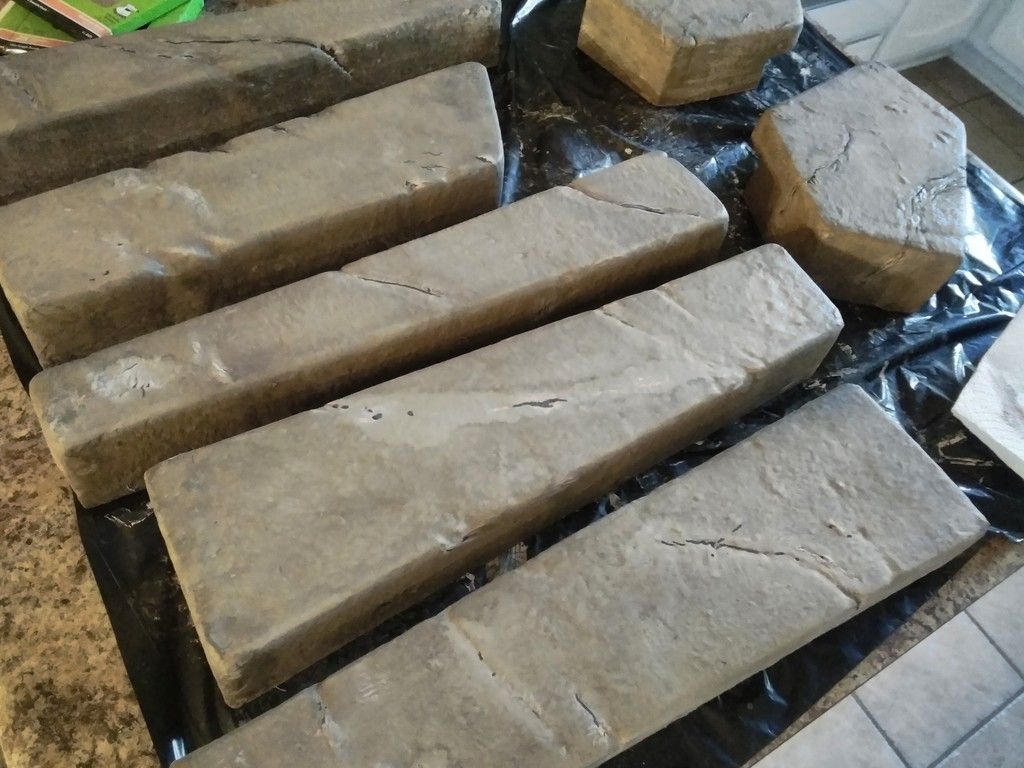
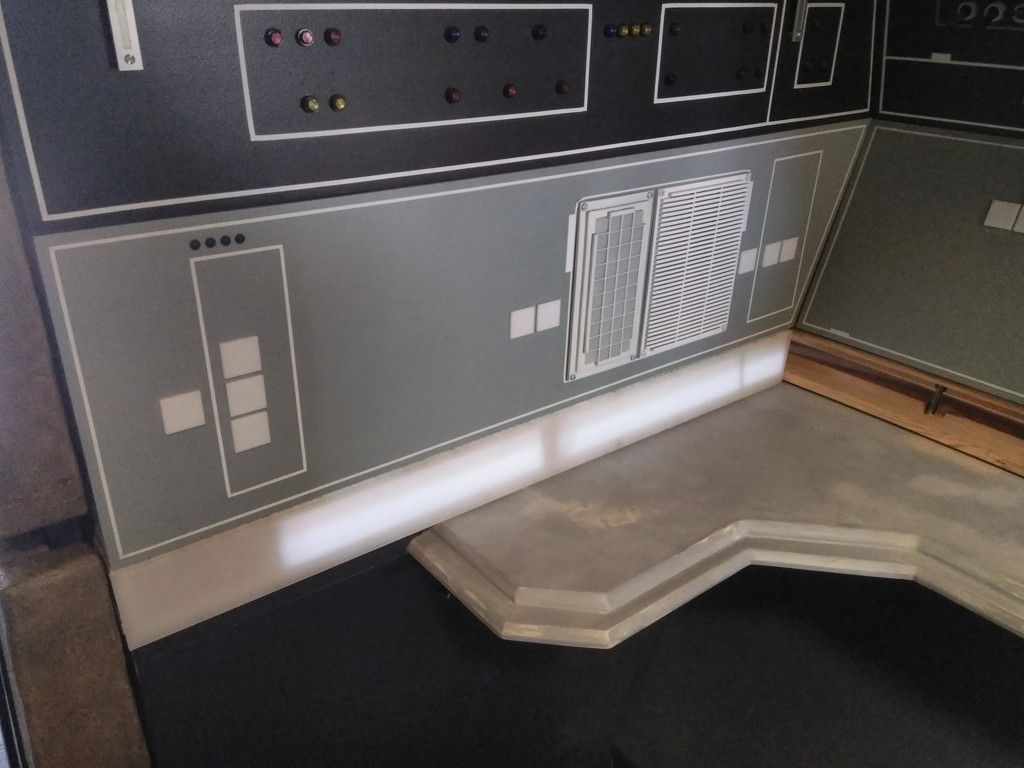
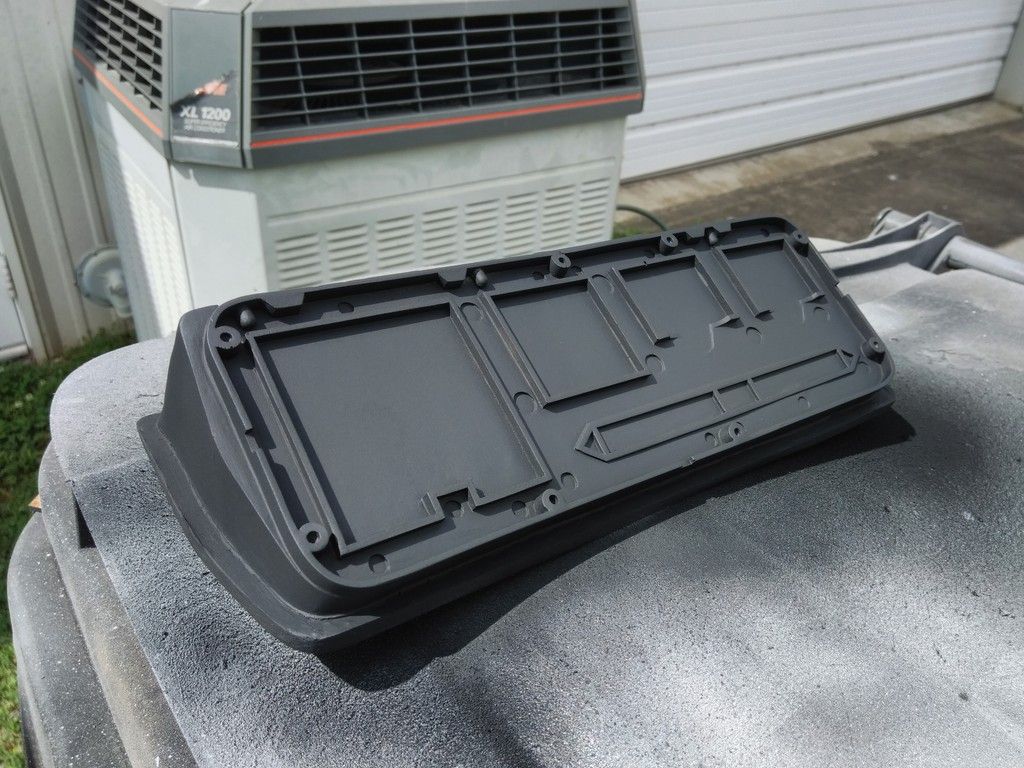
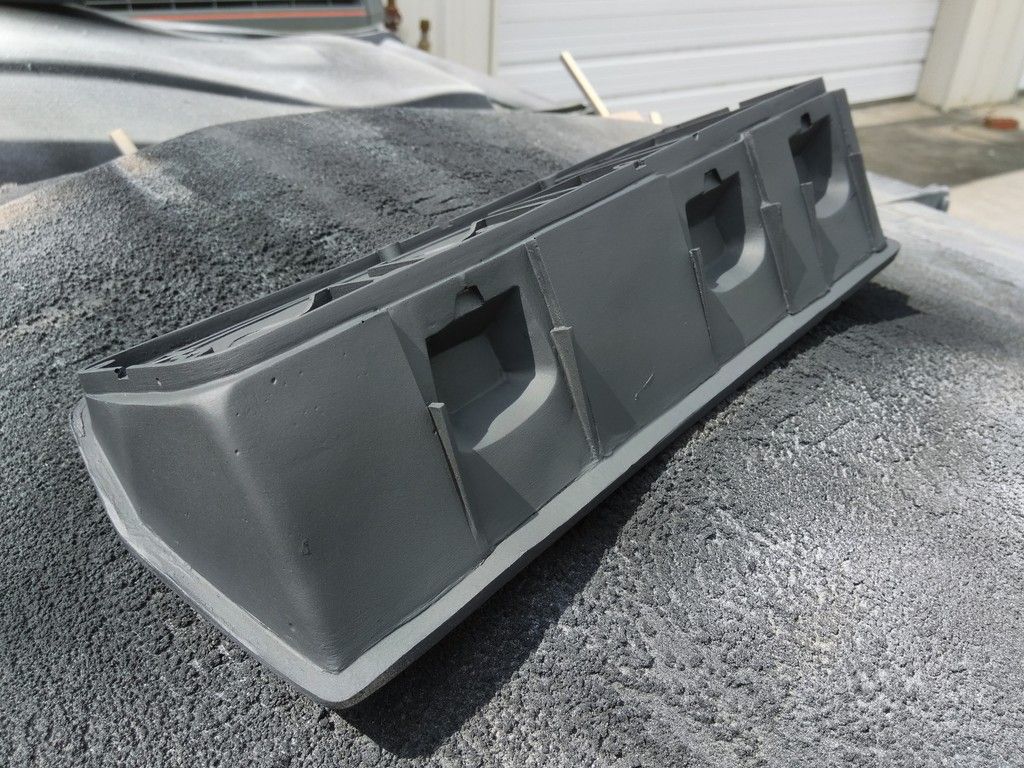
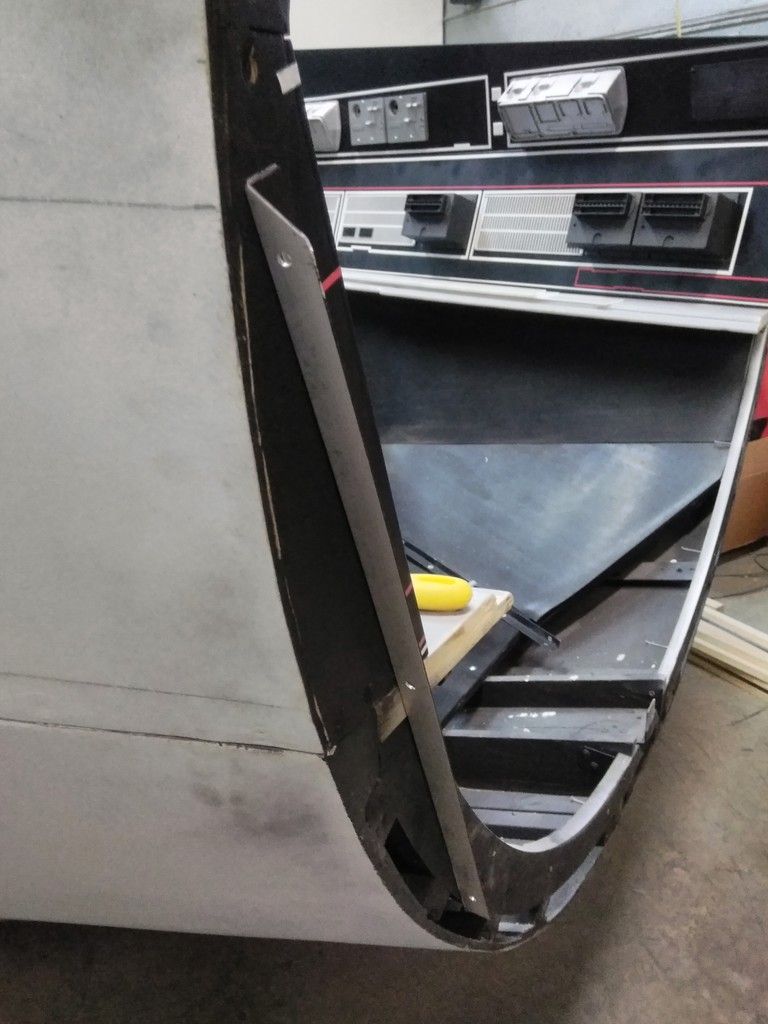
Finished off the foot well piece

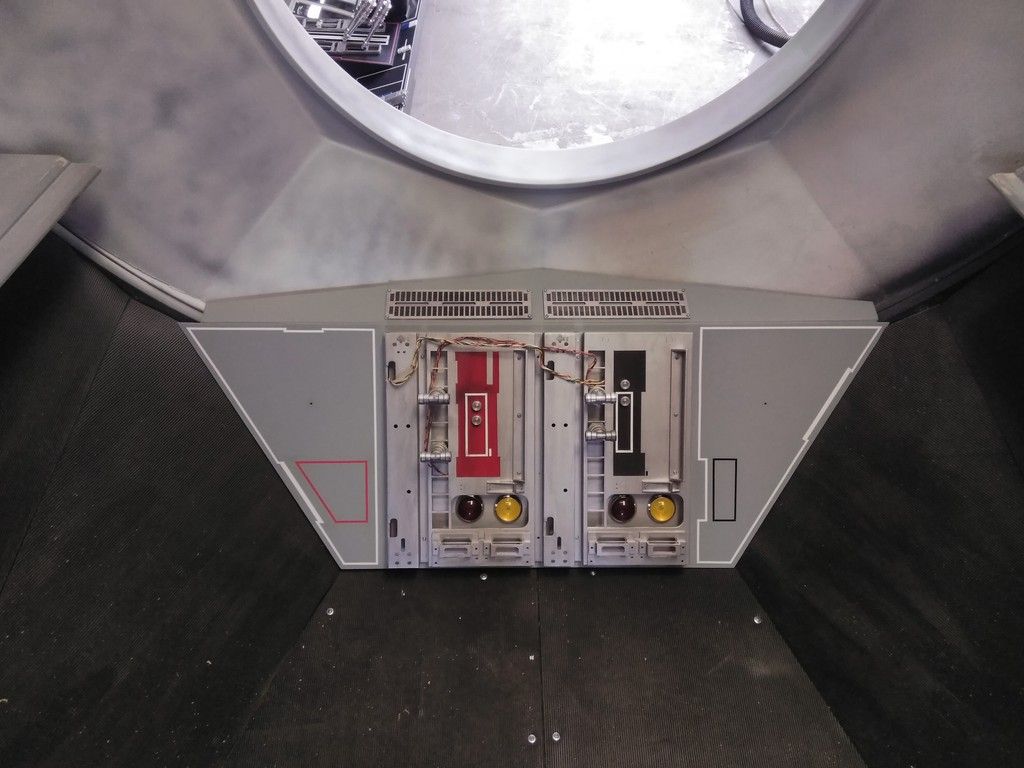
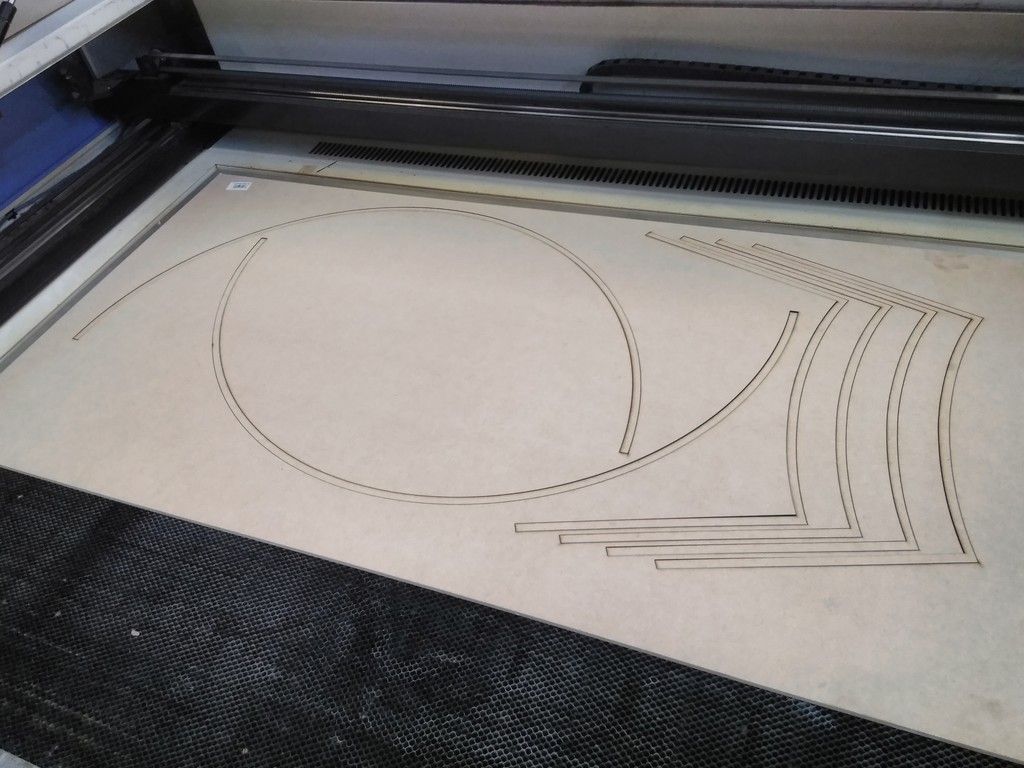
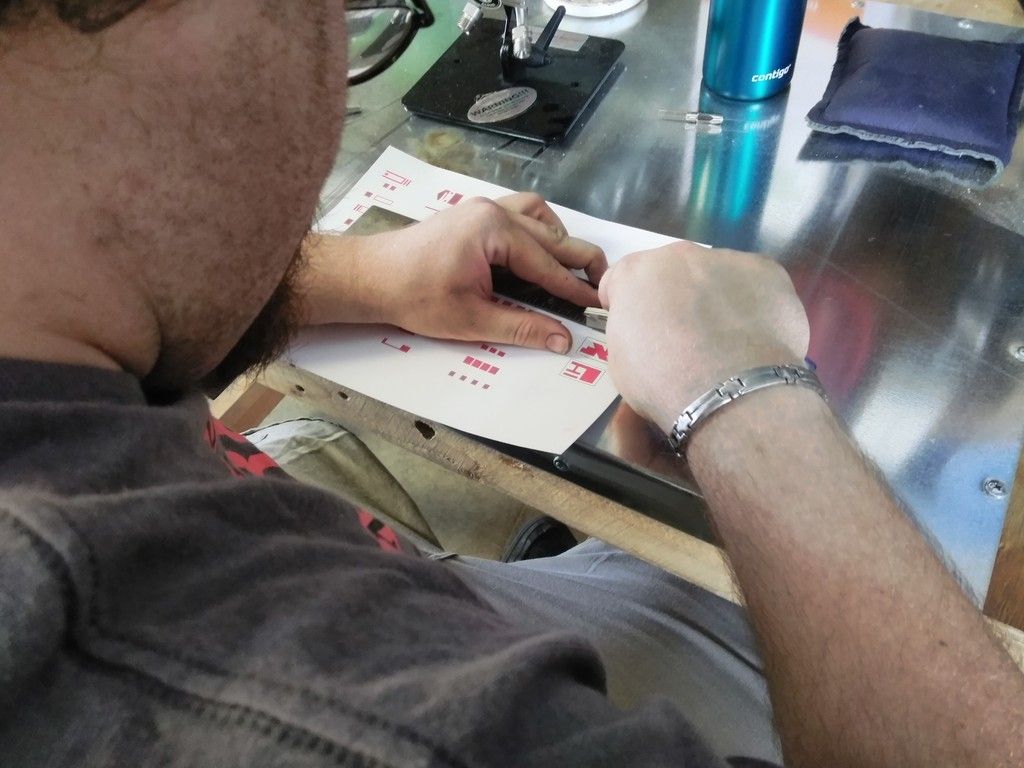
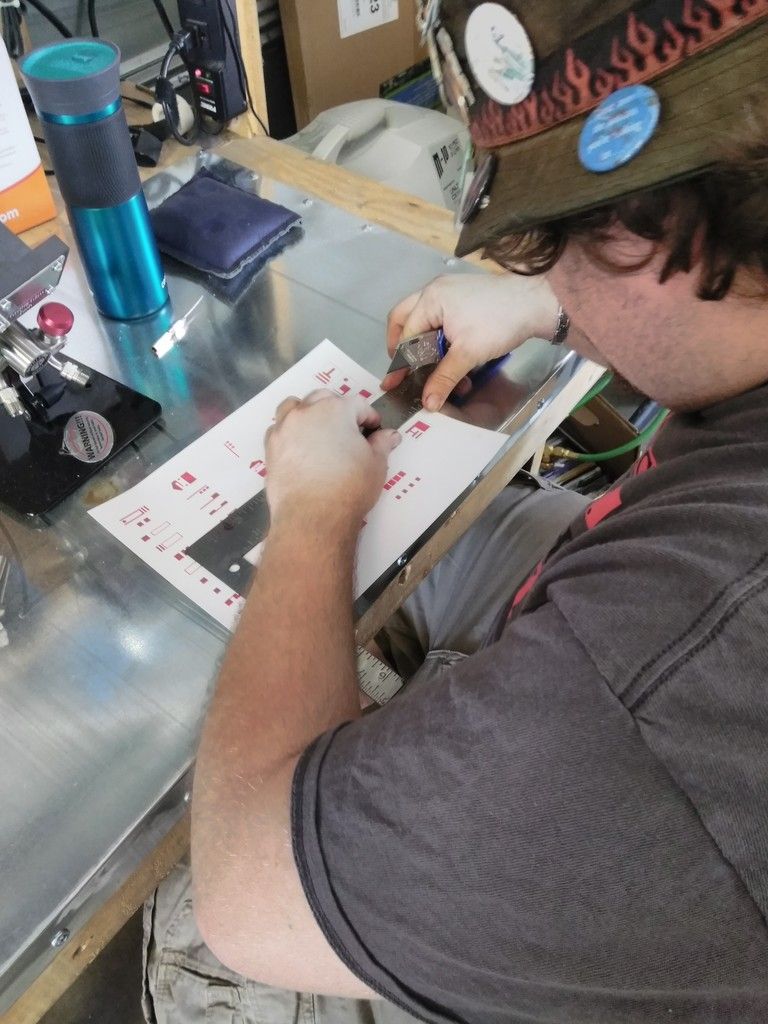
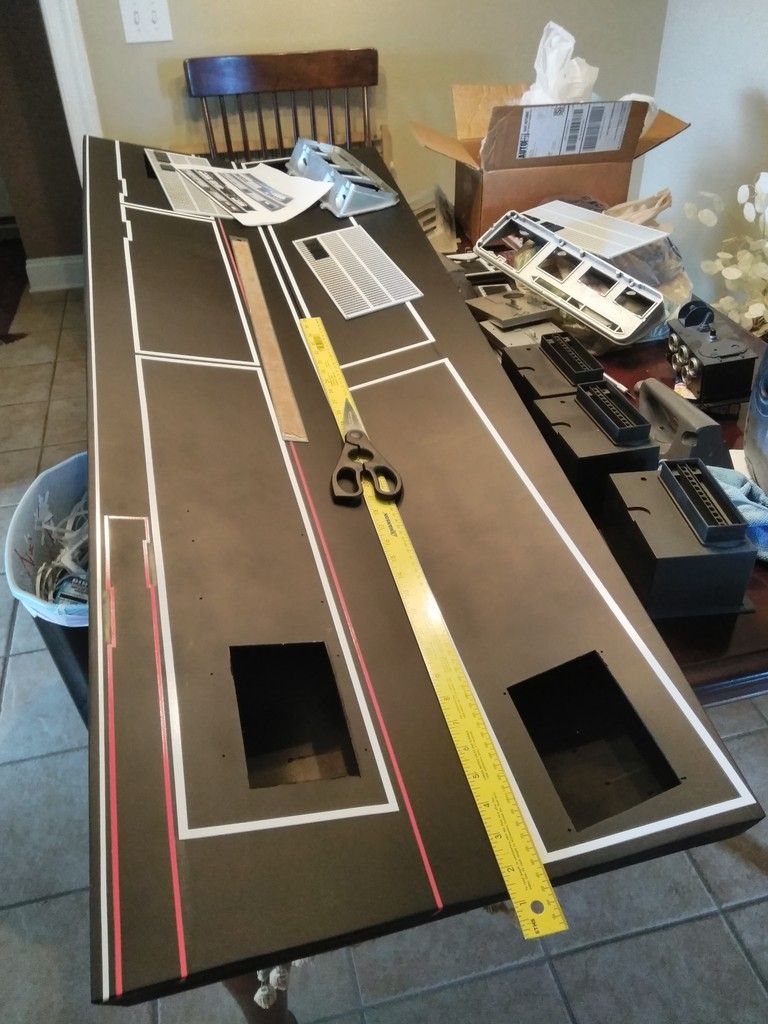
I then designed and laser cut these odd shapes
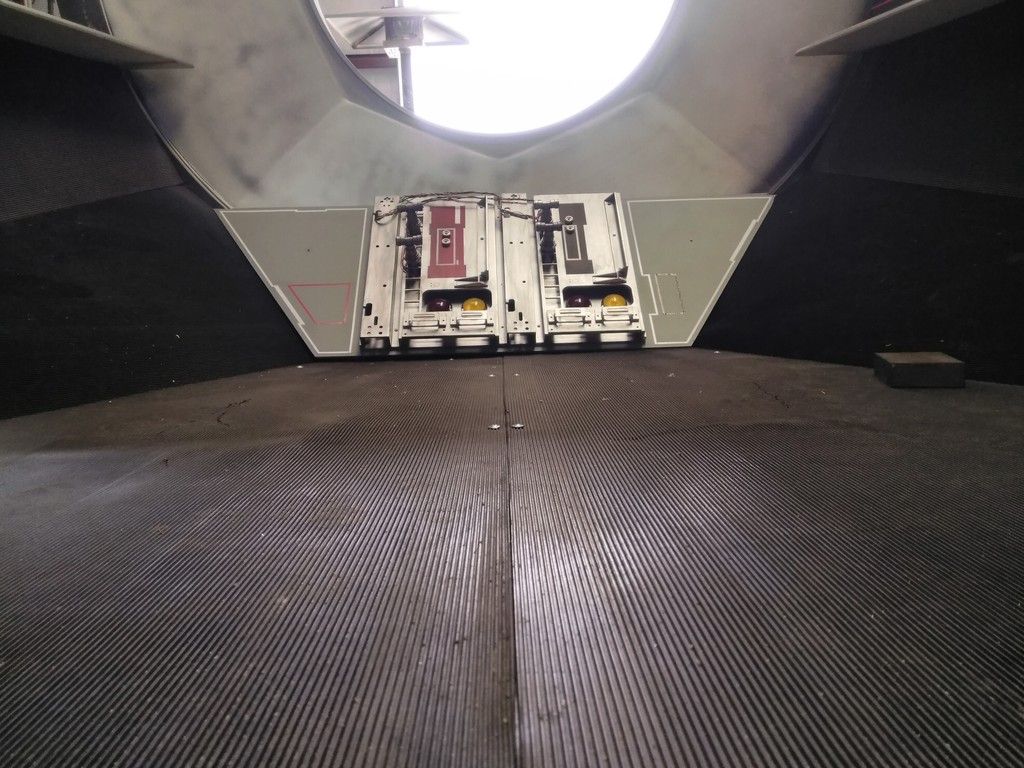
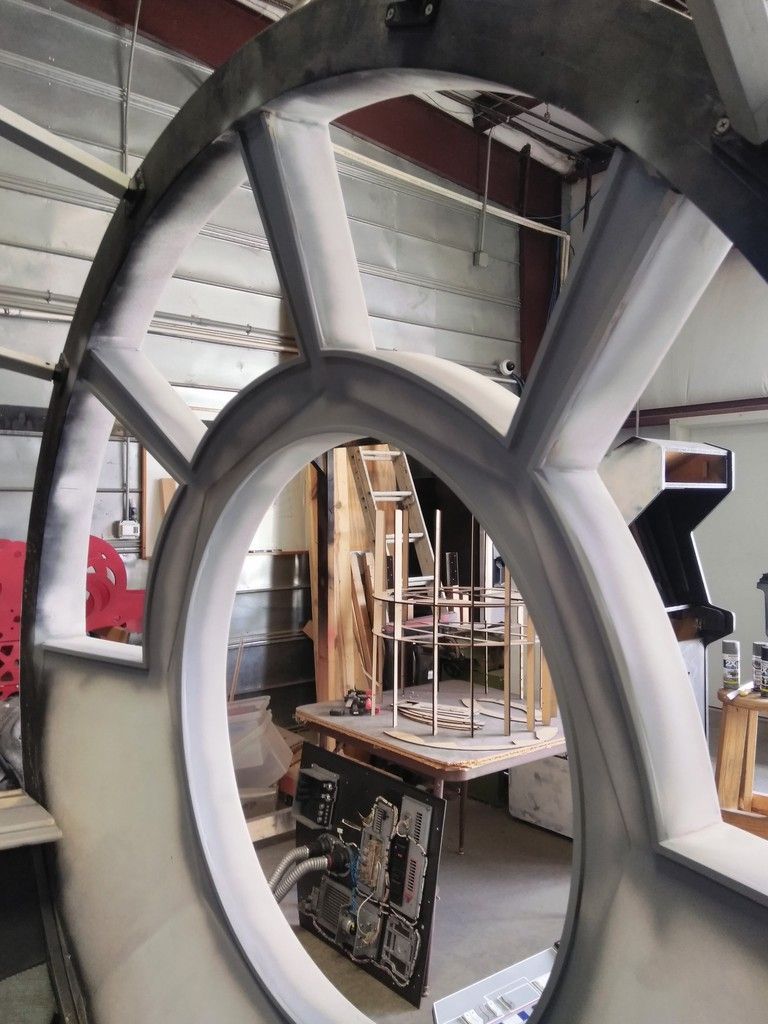
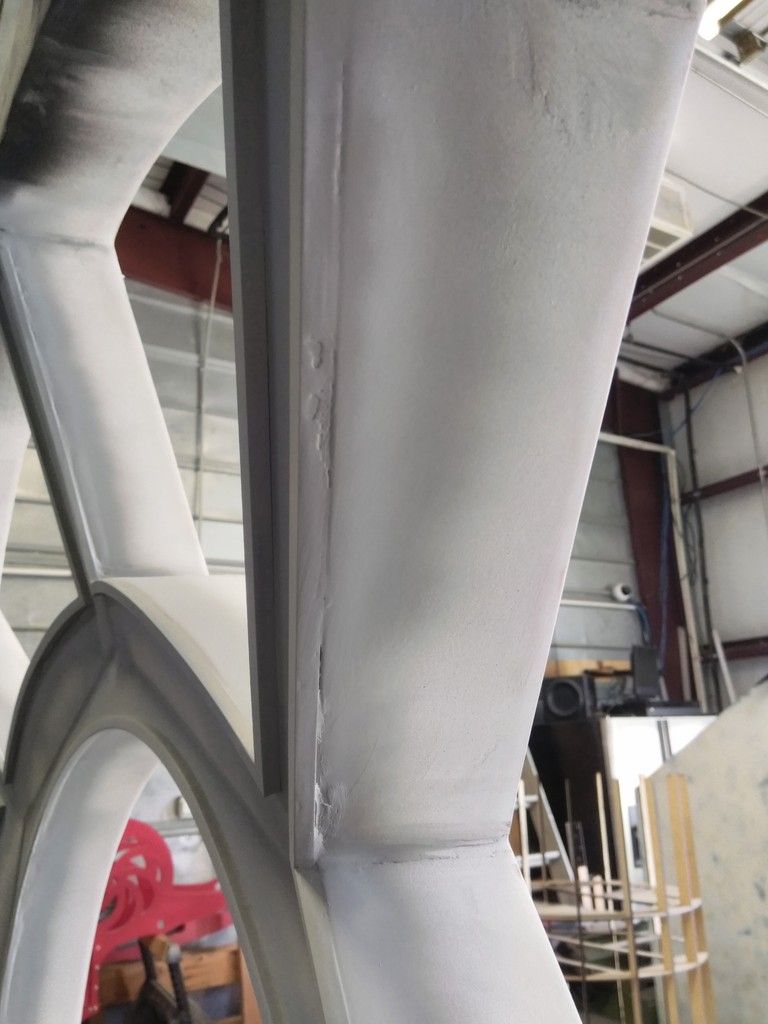
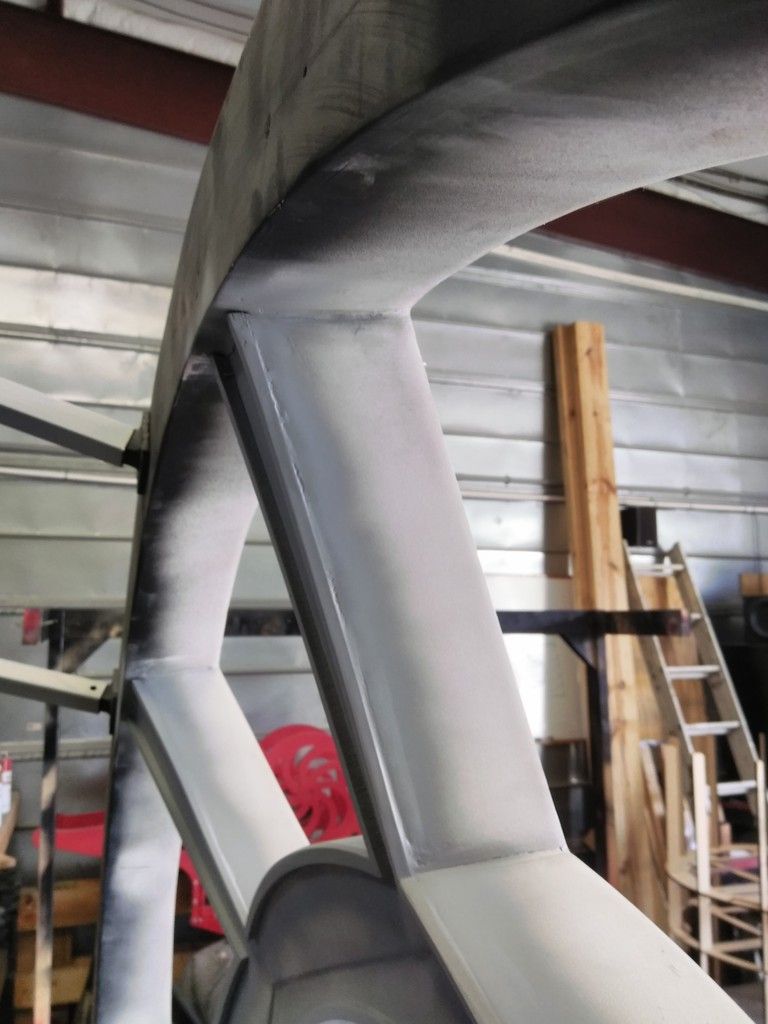
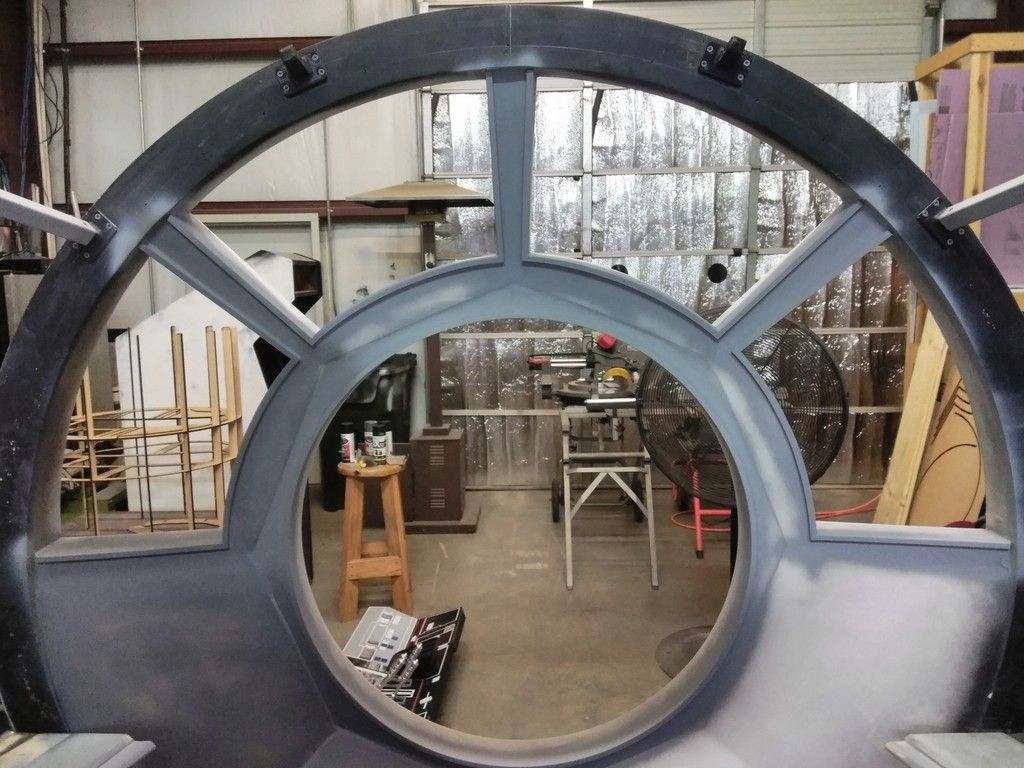
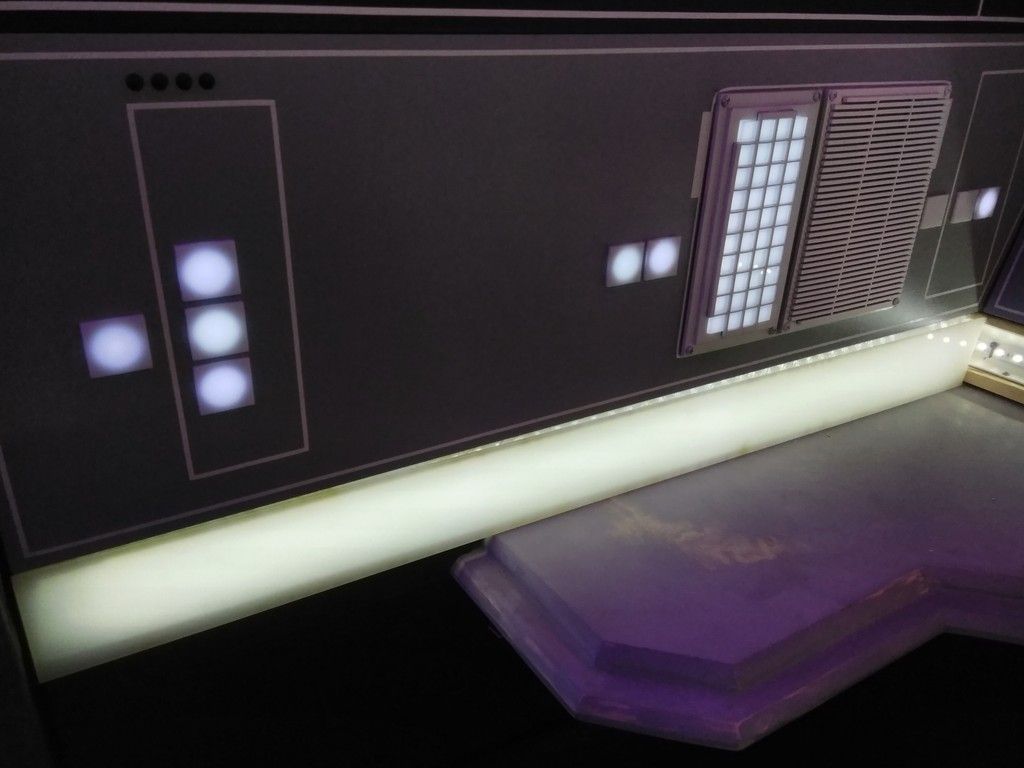
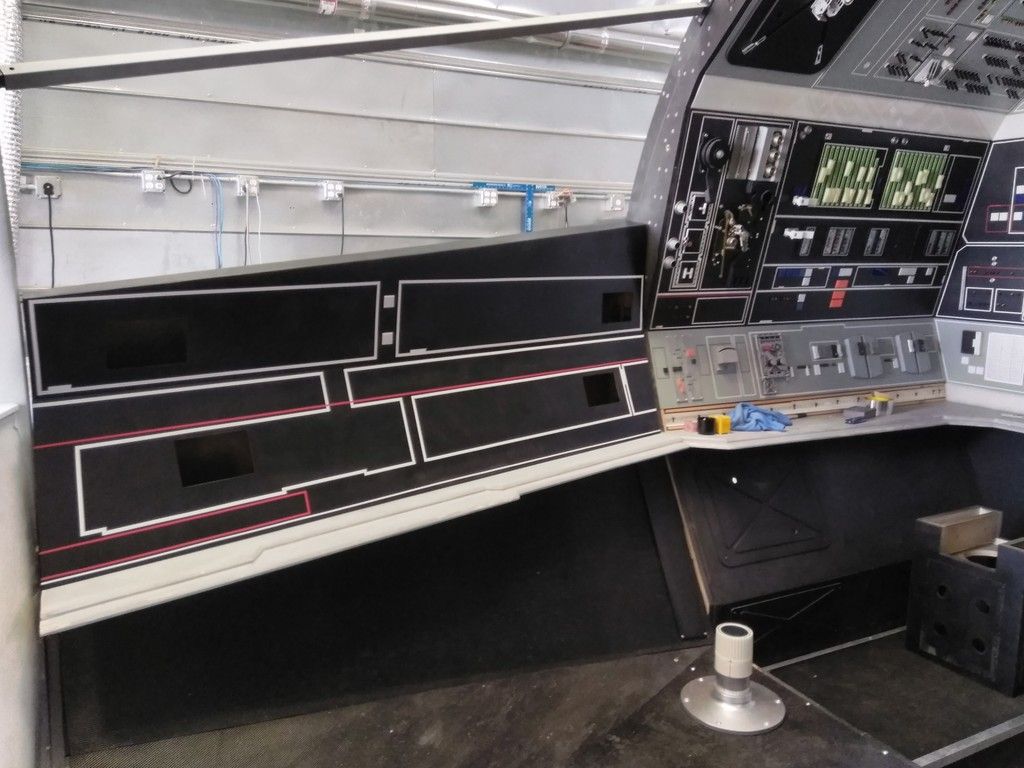
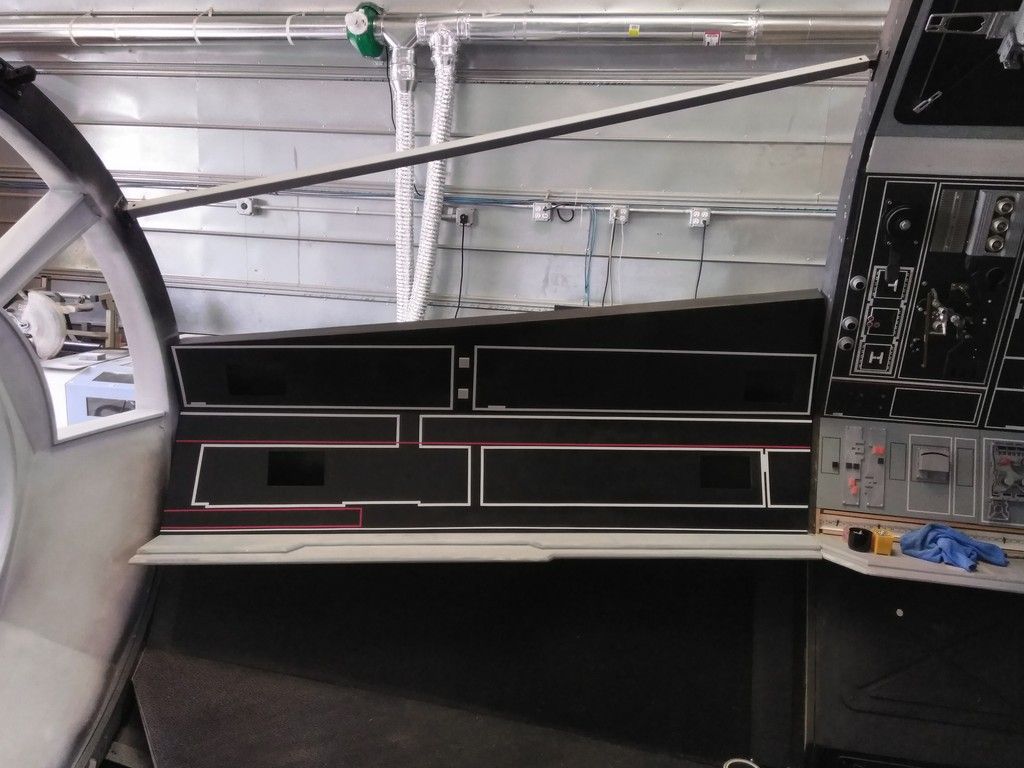
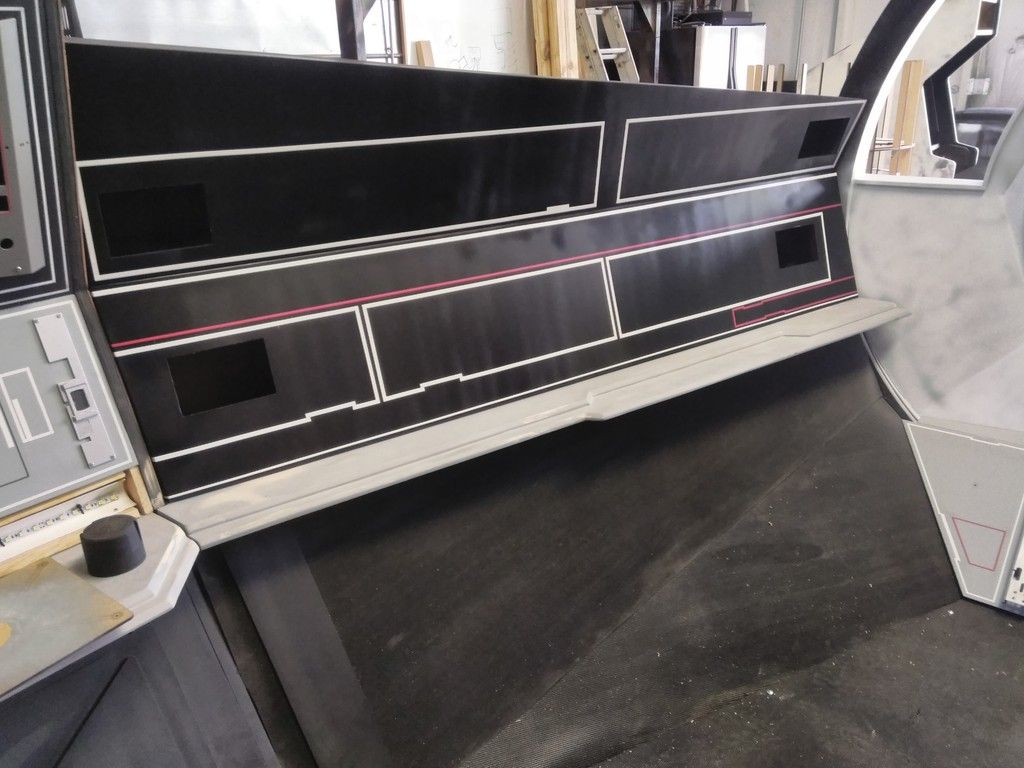
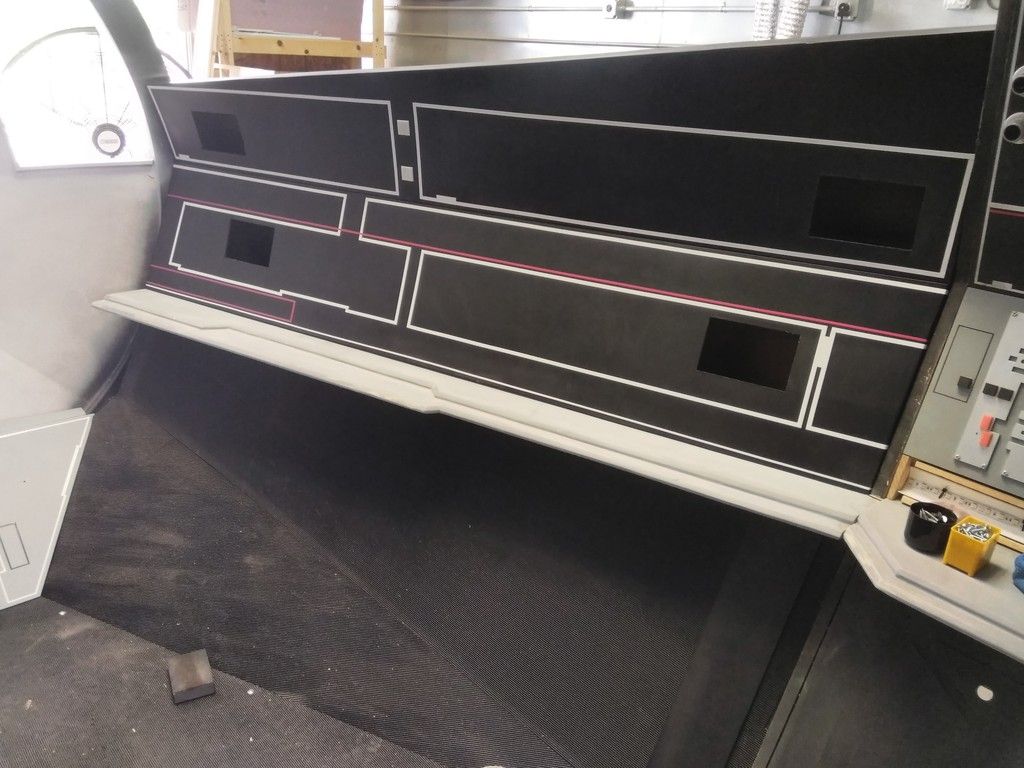
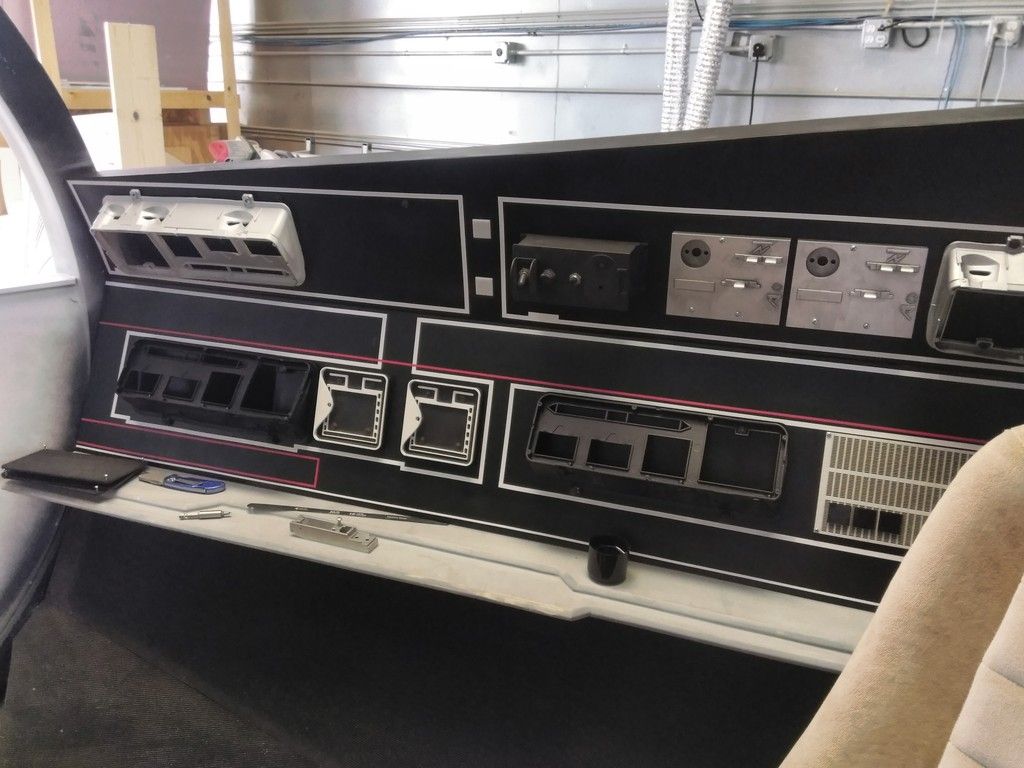
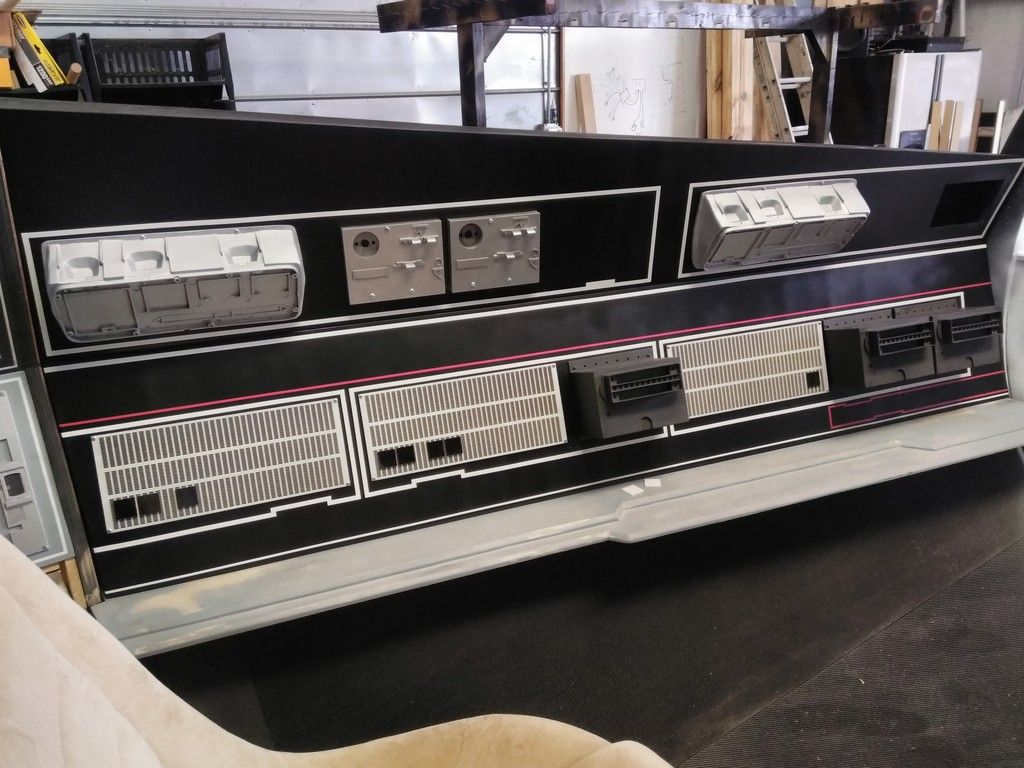
Nothing major but we finally have some window details!
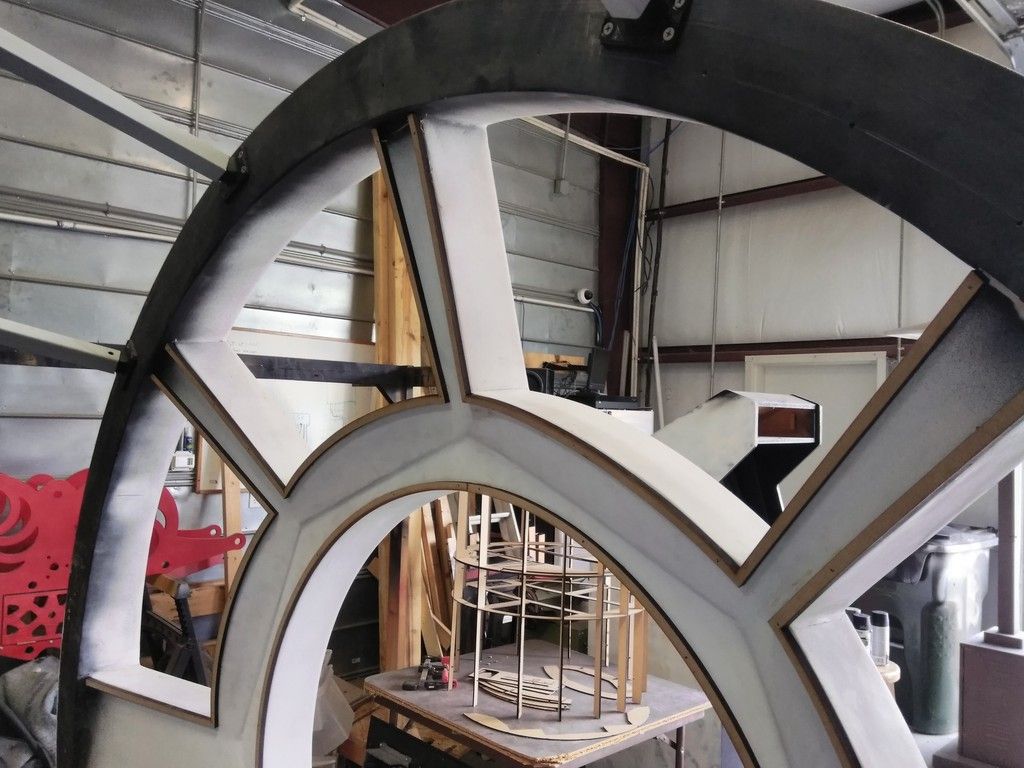
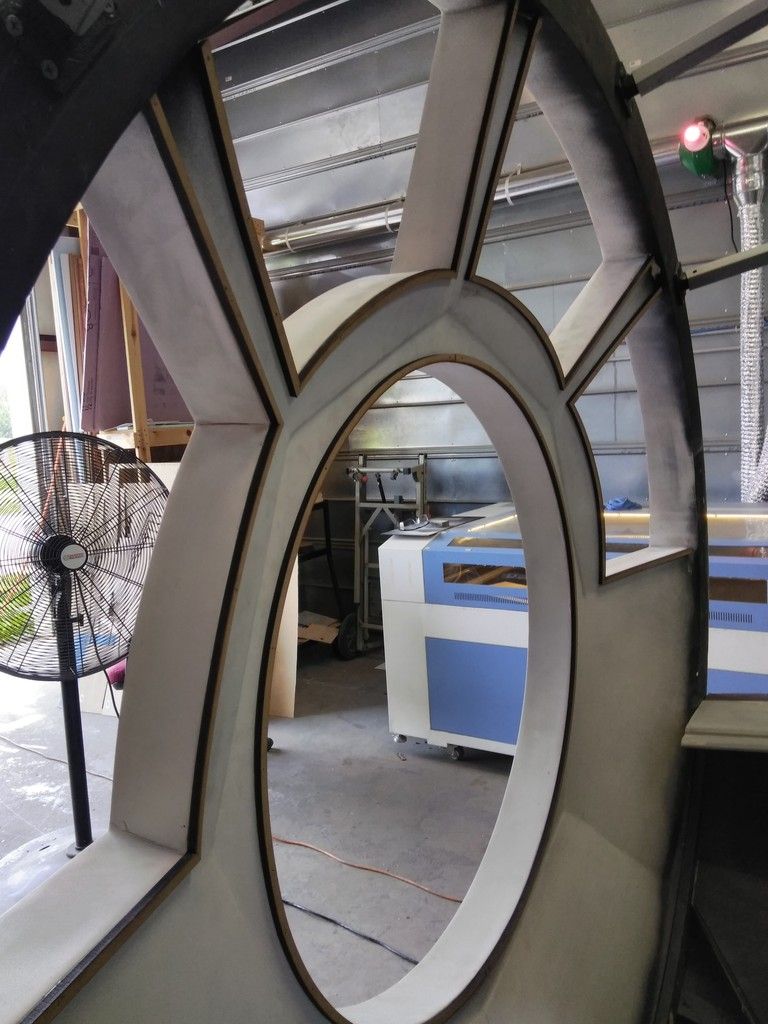
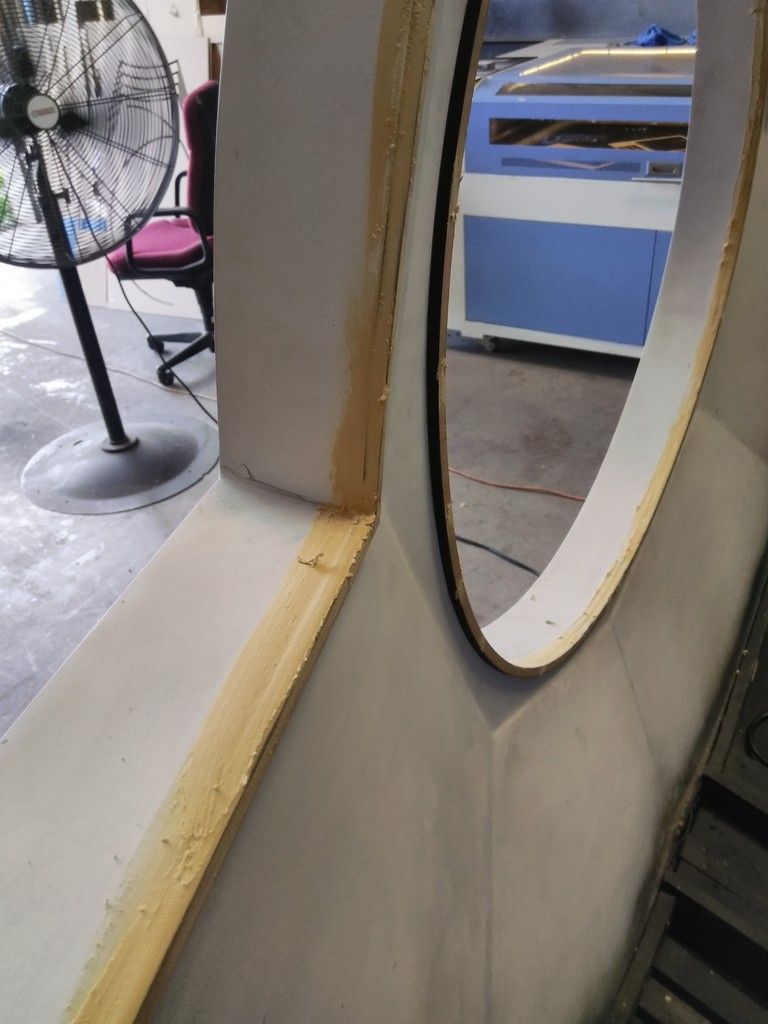
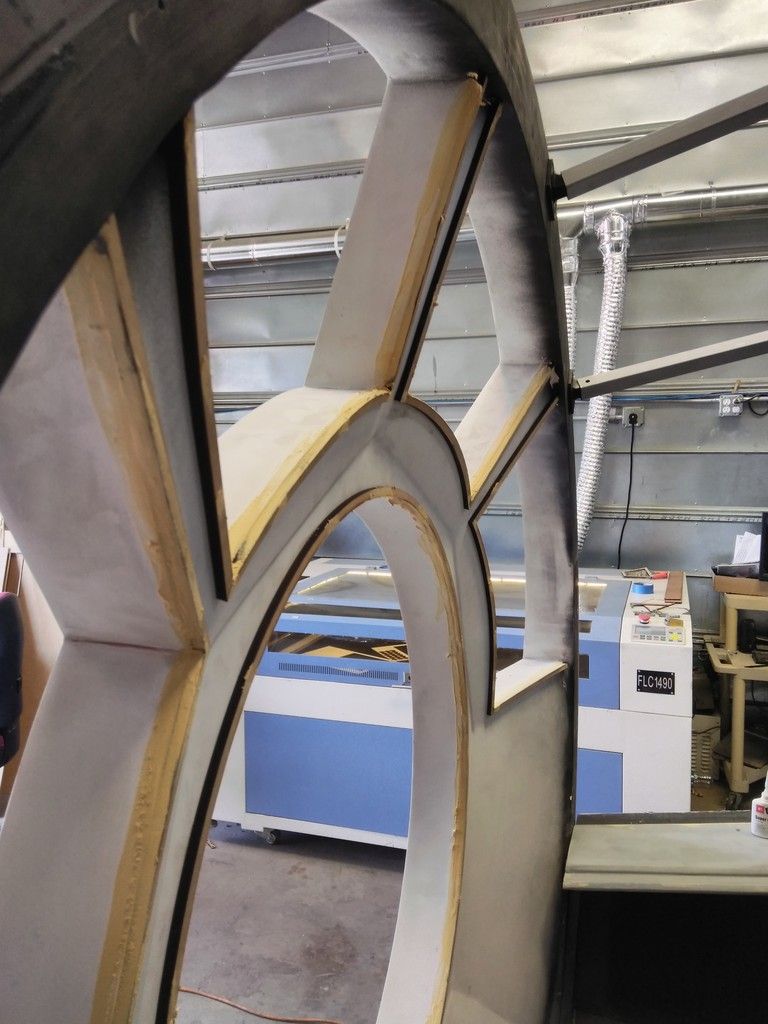
First round of sanding and primer
YUCK!
That is so pretty!
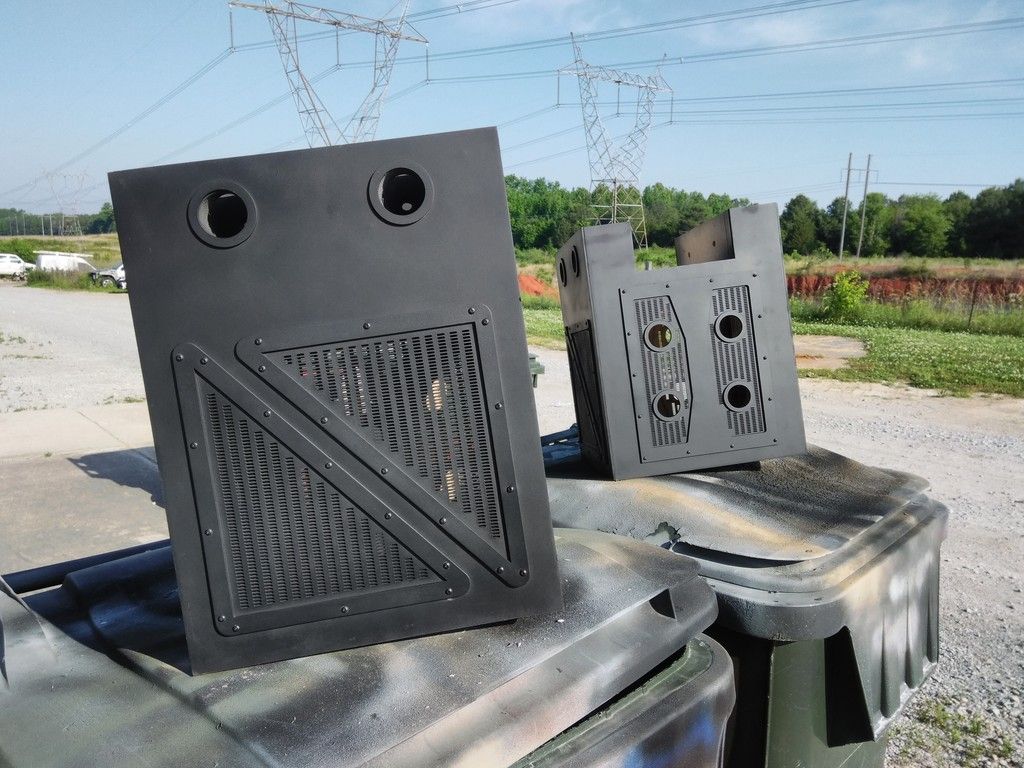
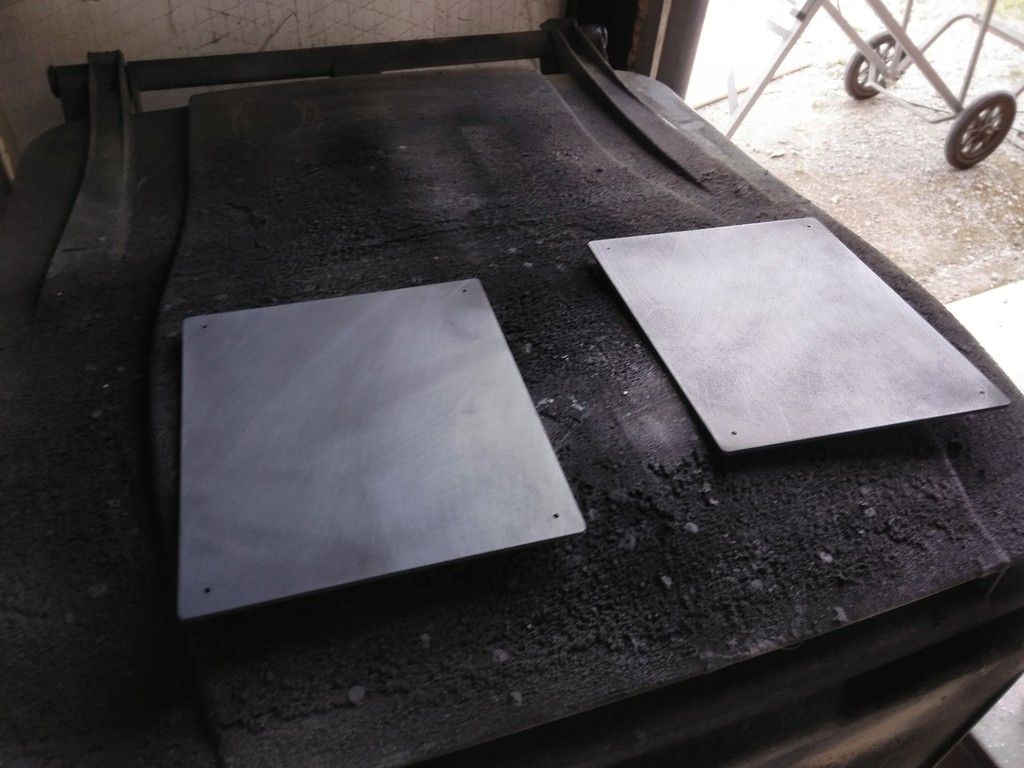
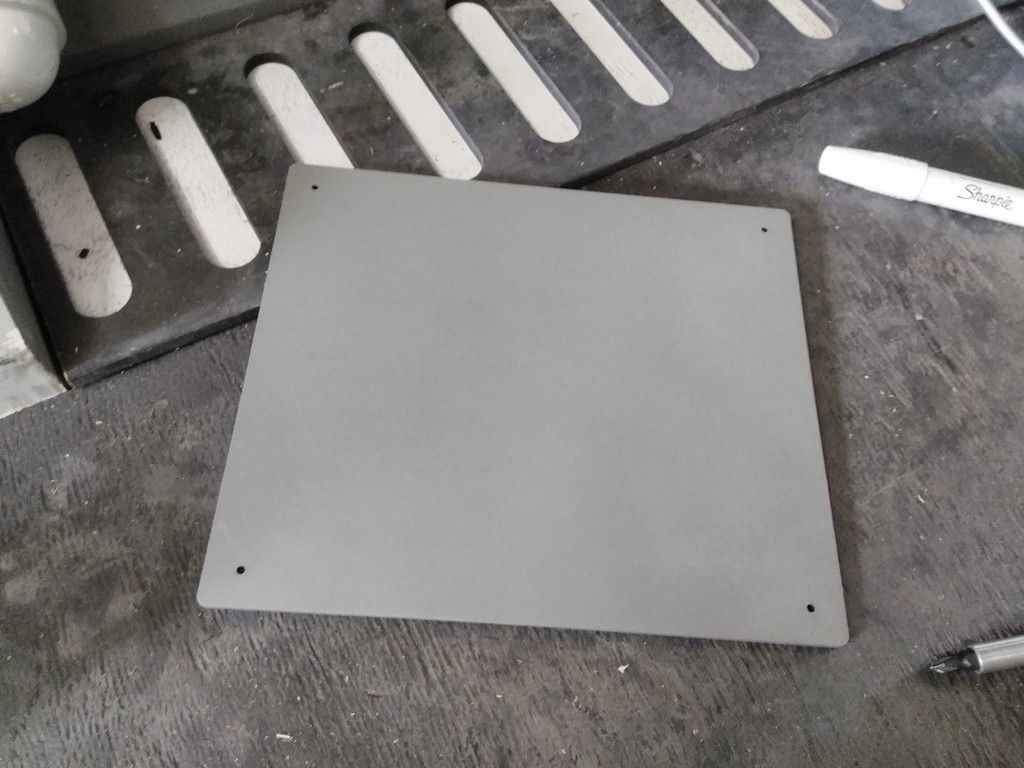
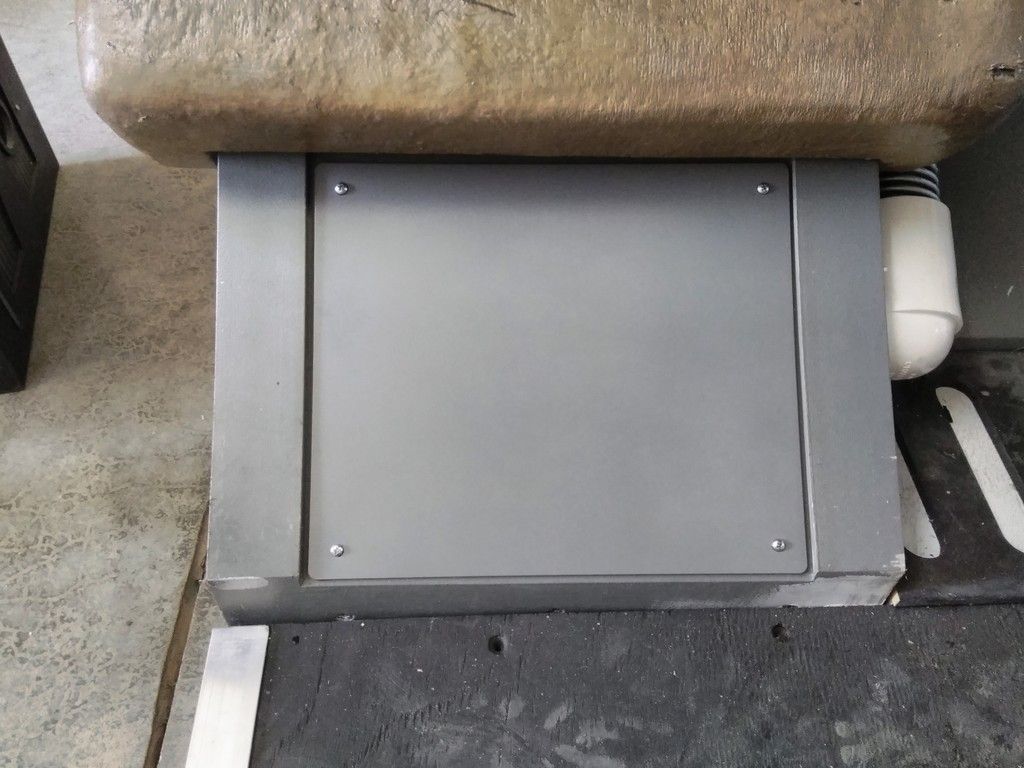
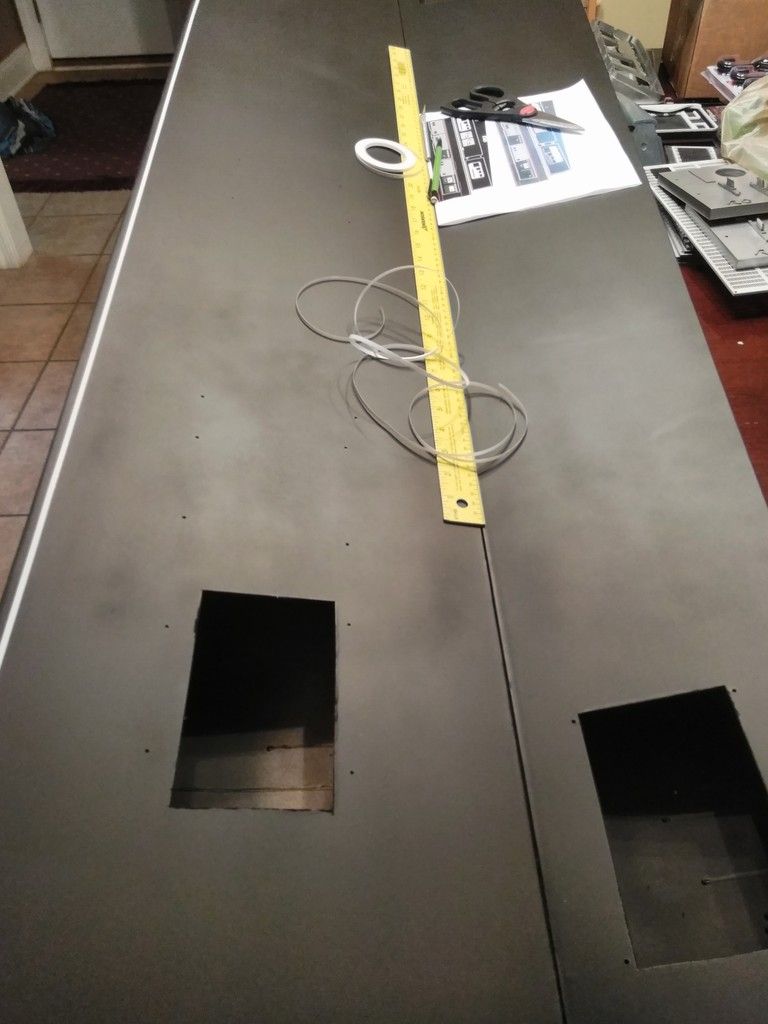
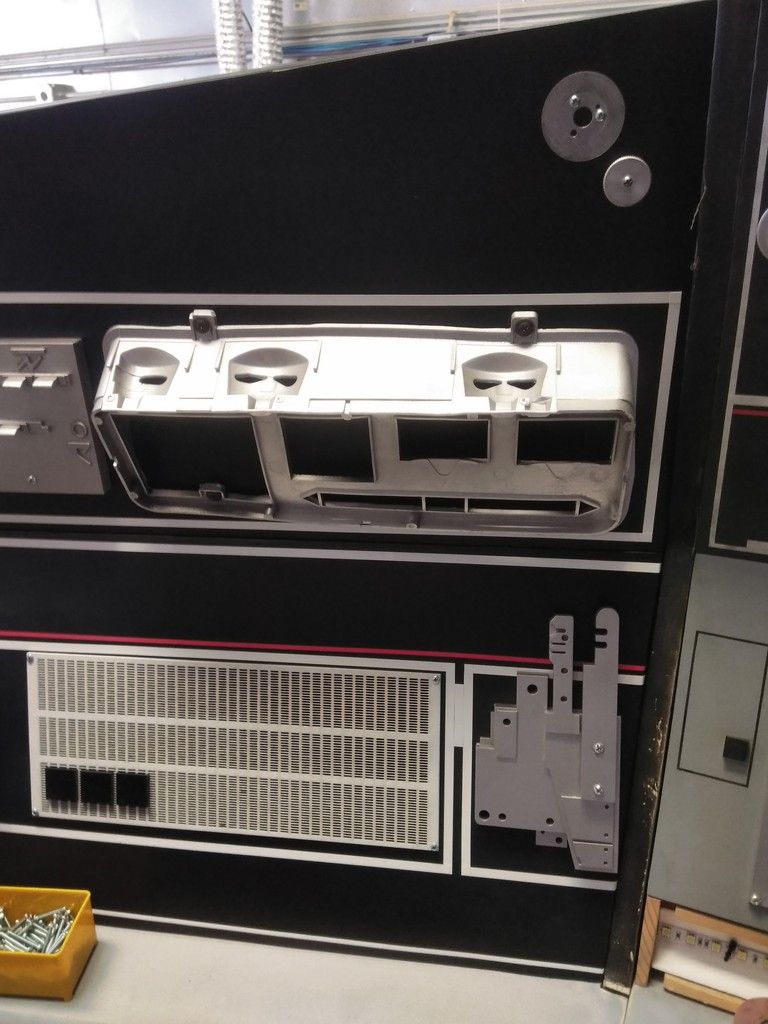
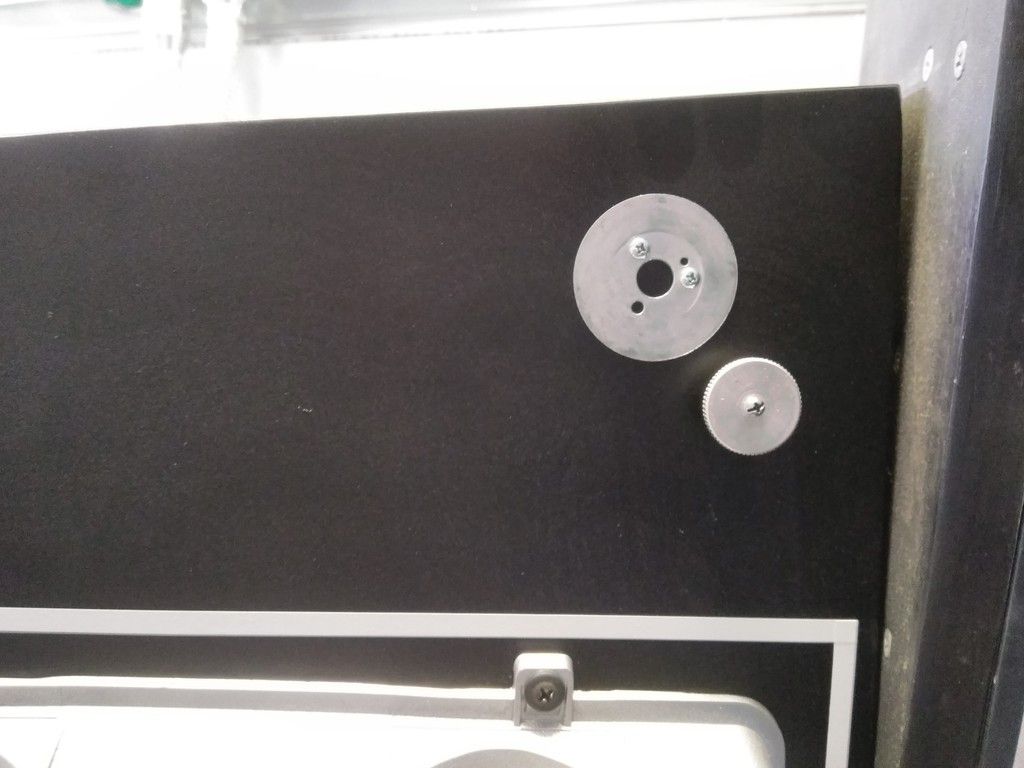
Time to cover these holes
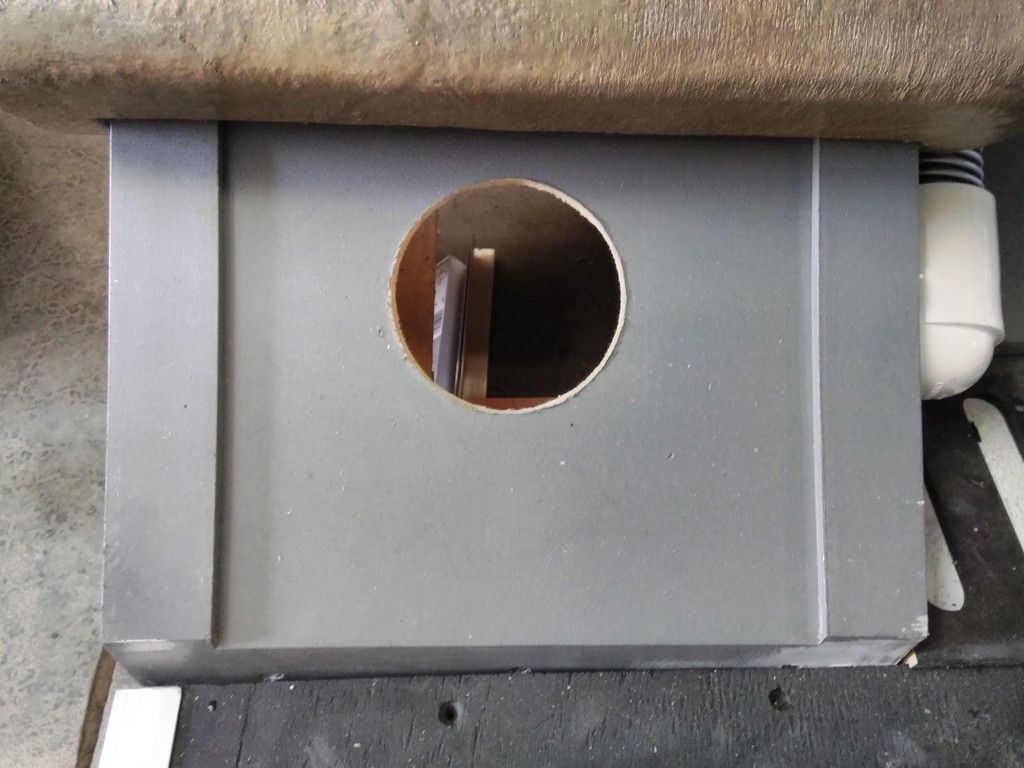
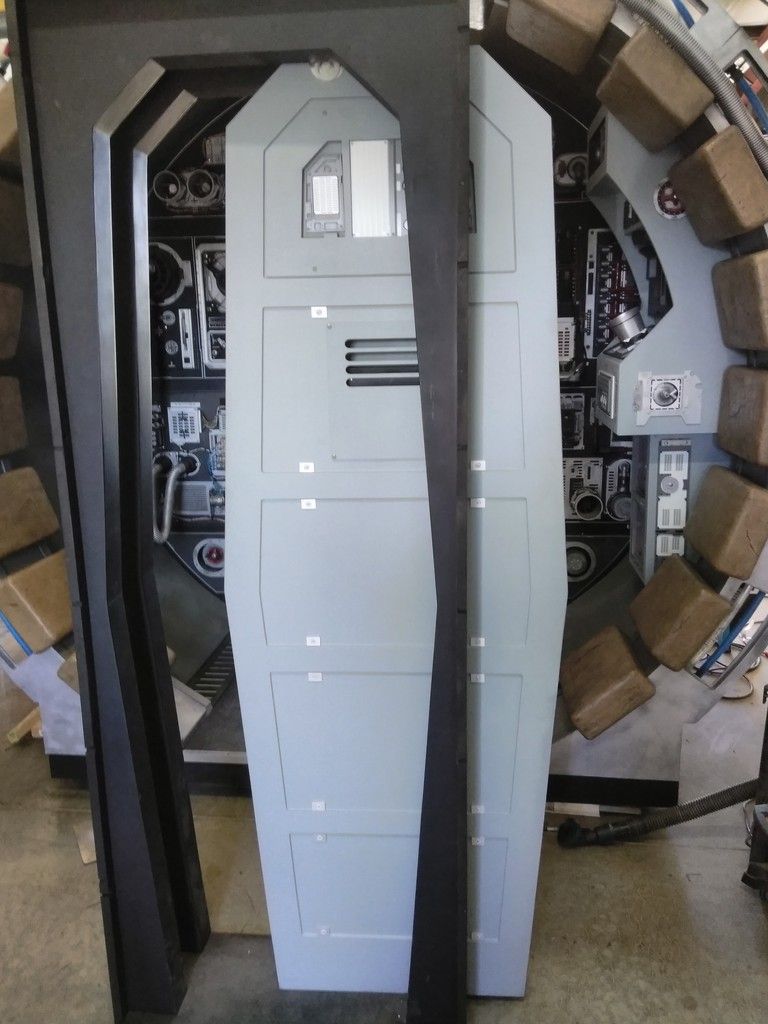
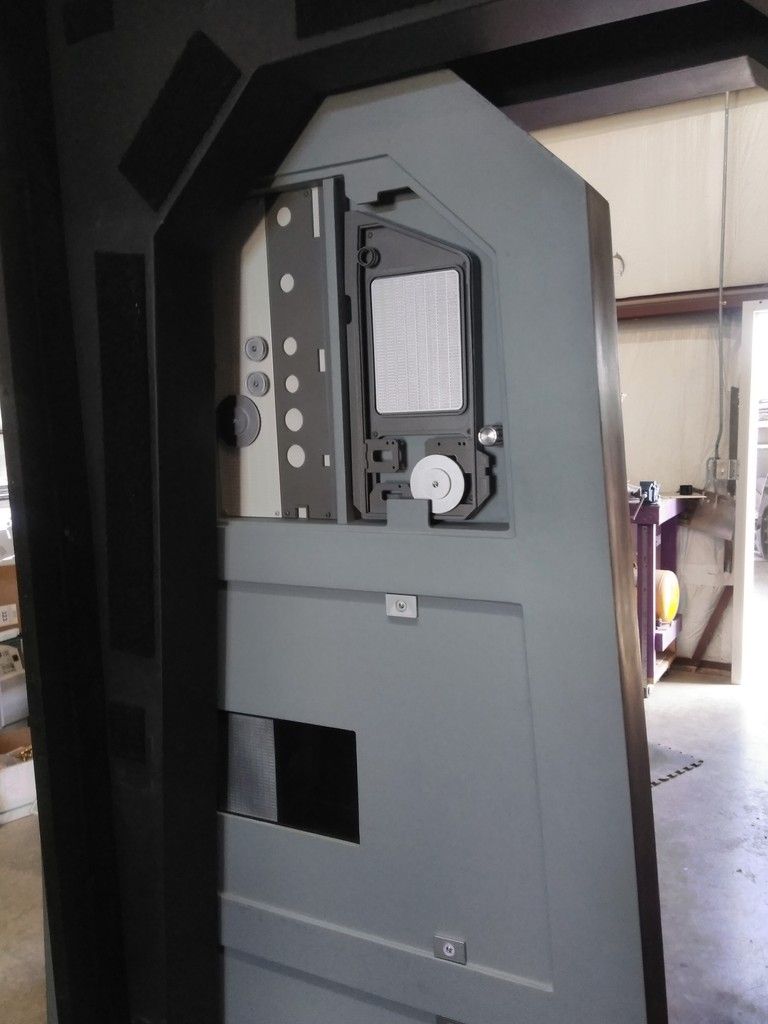
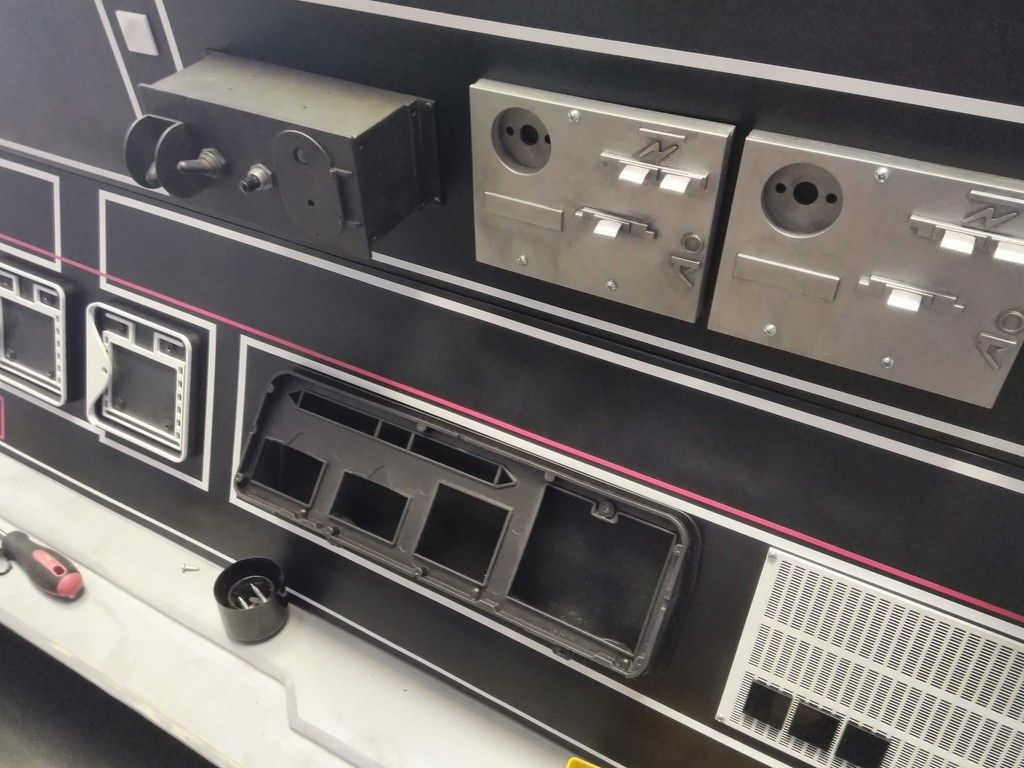
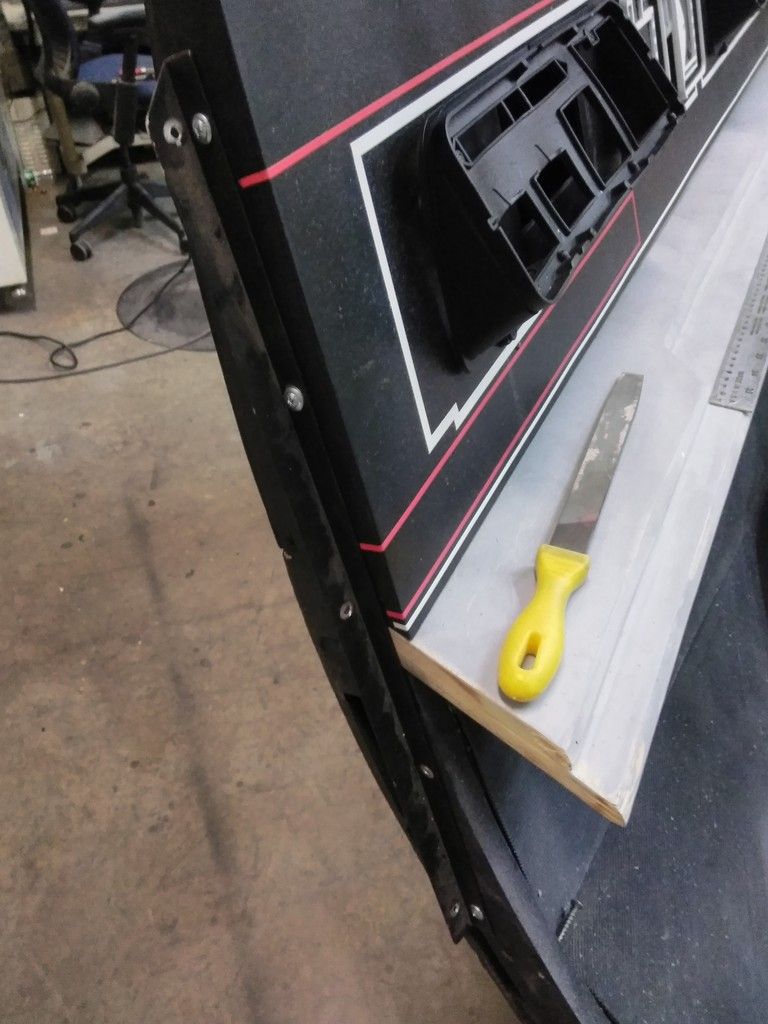
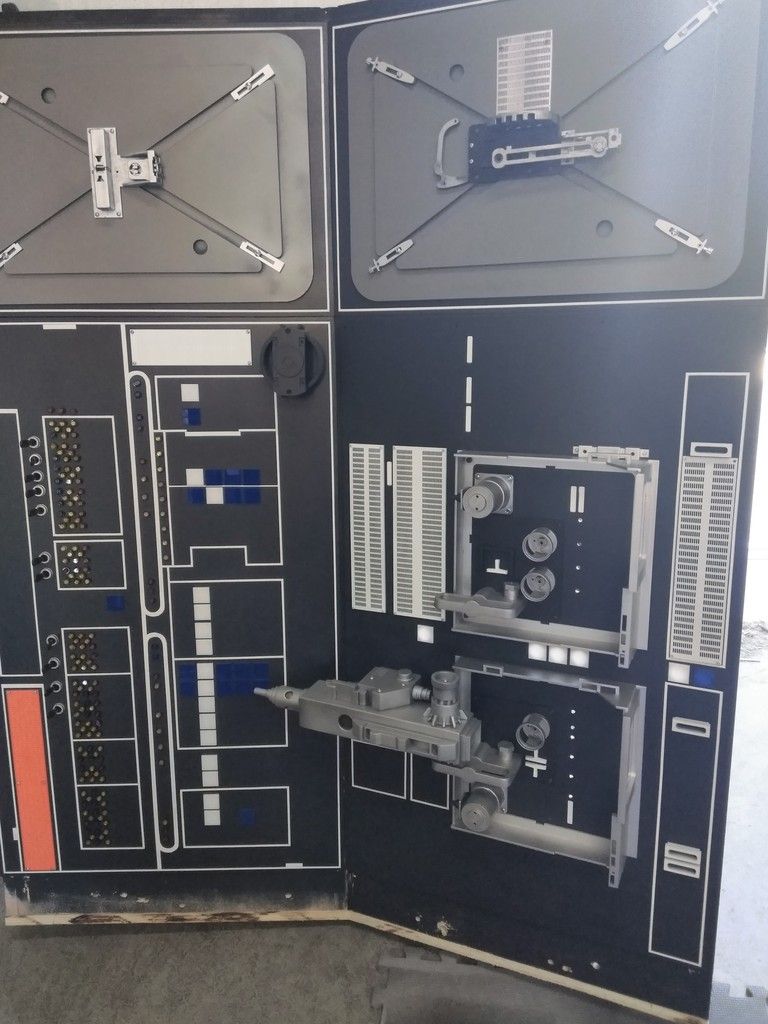
I designed, laser cut, primed and painted these access panel covers
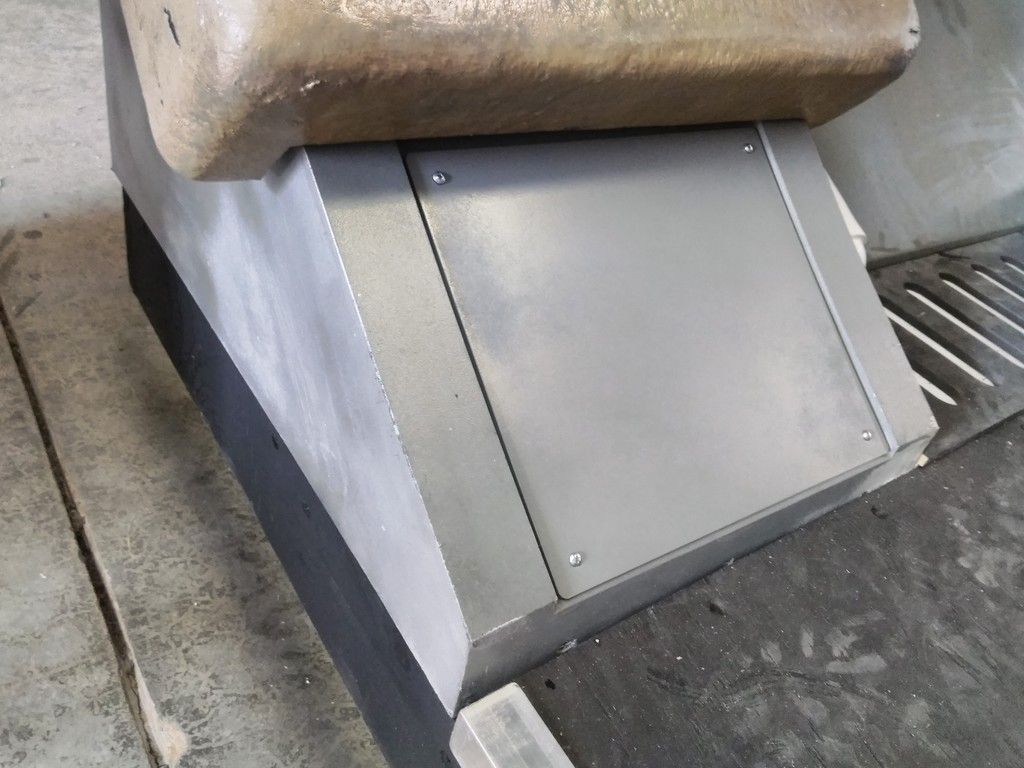
This is awesome! Mike stopped by the shop with some prints he had done for me in hand! Time to get a few of these cut and in place!
I'm going to let you all find them!
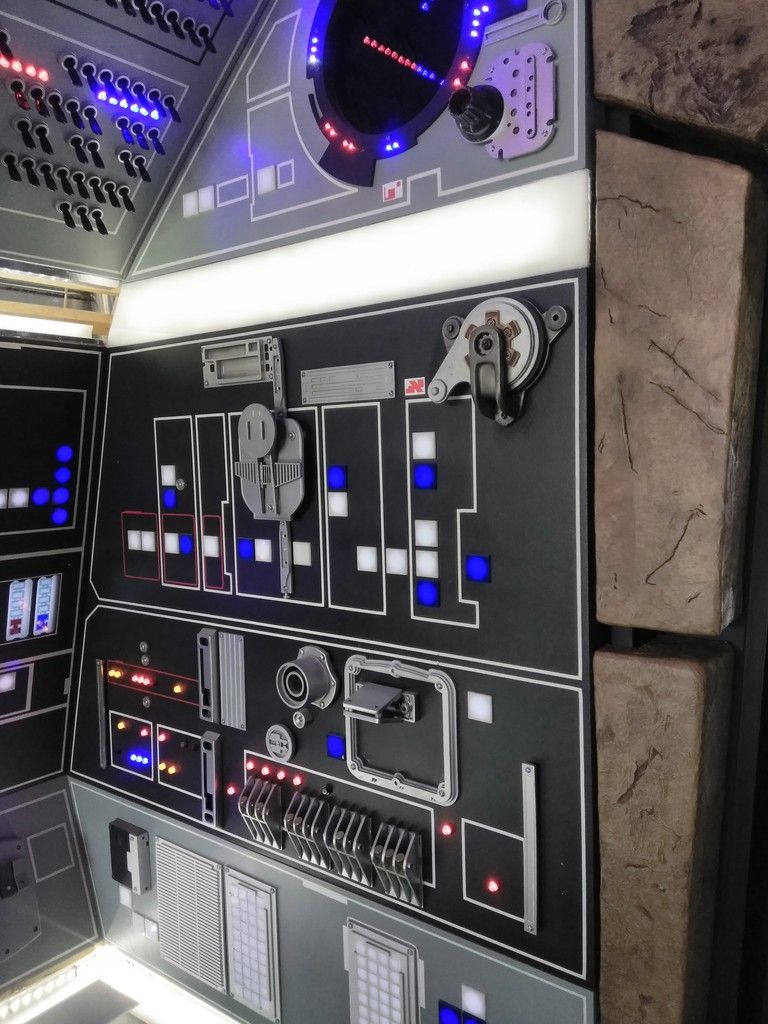
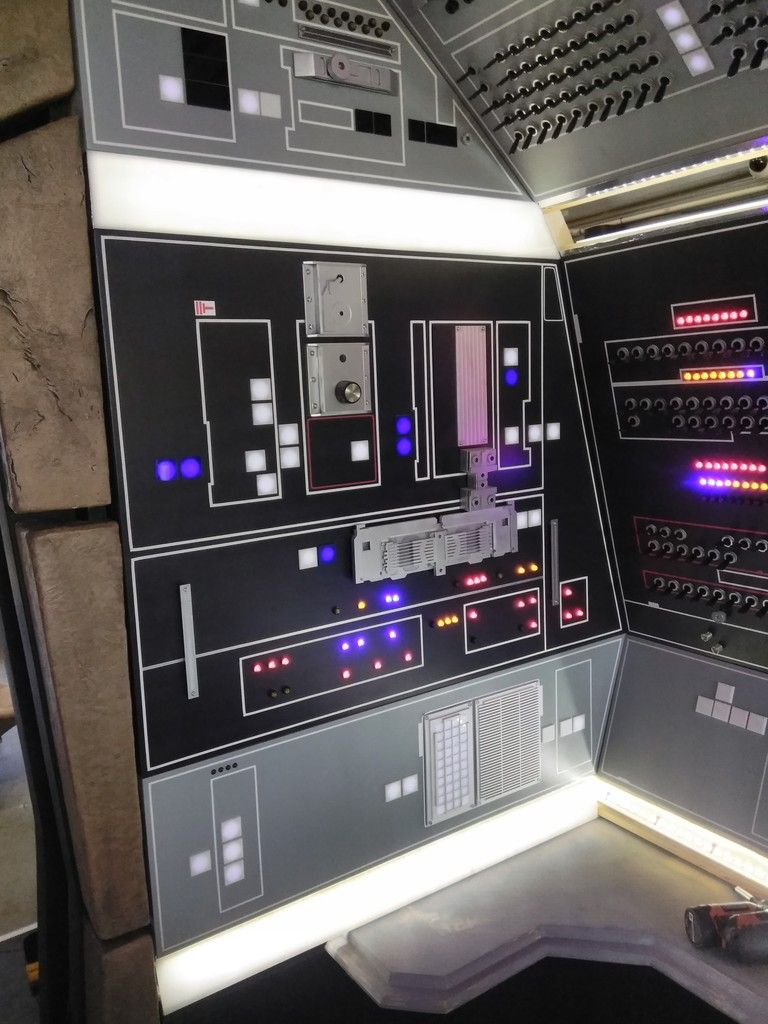
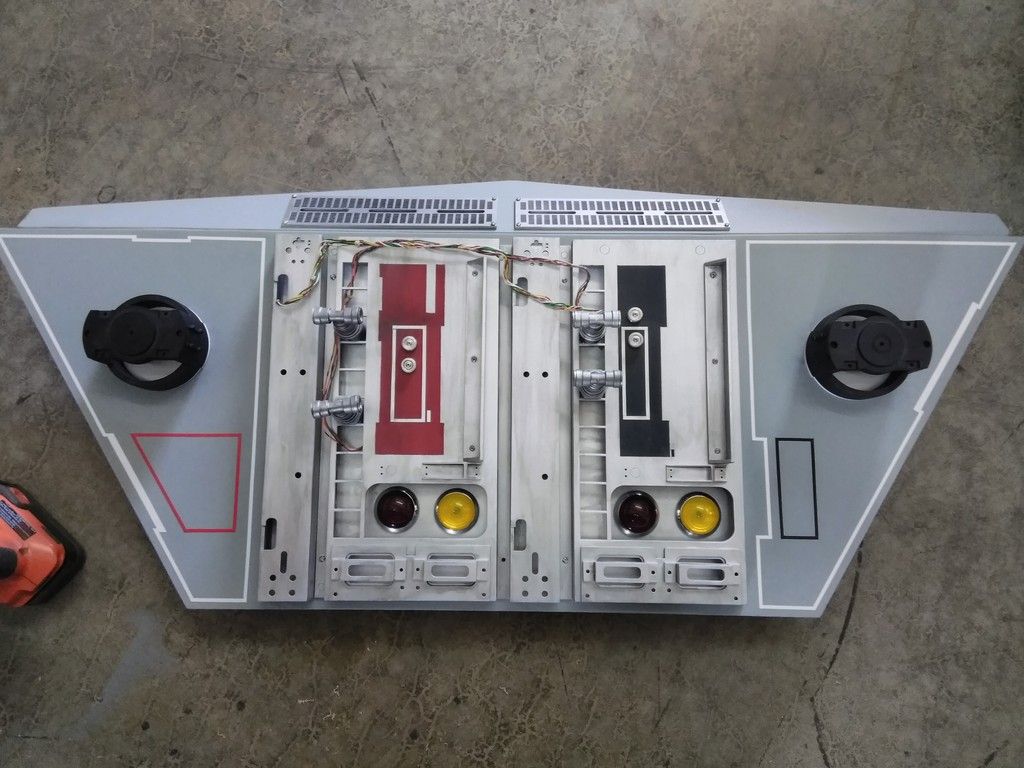
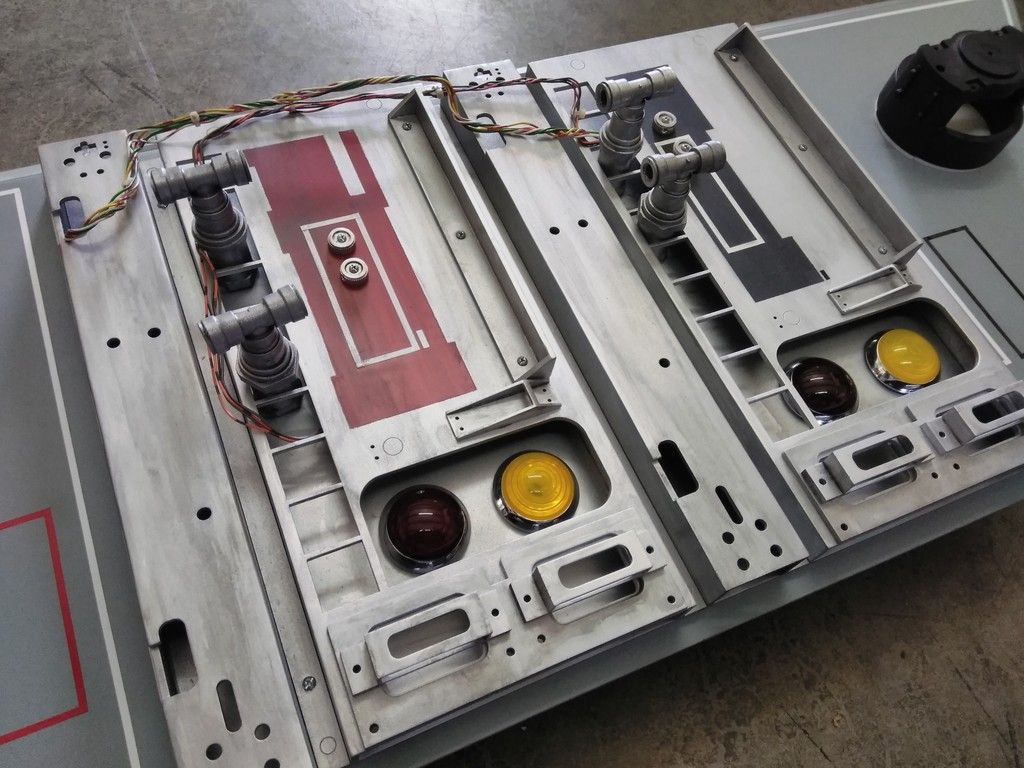
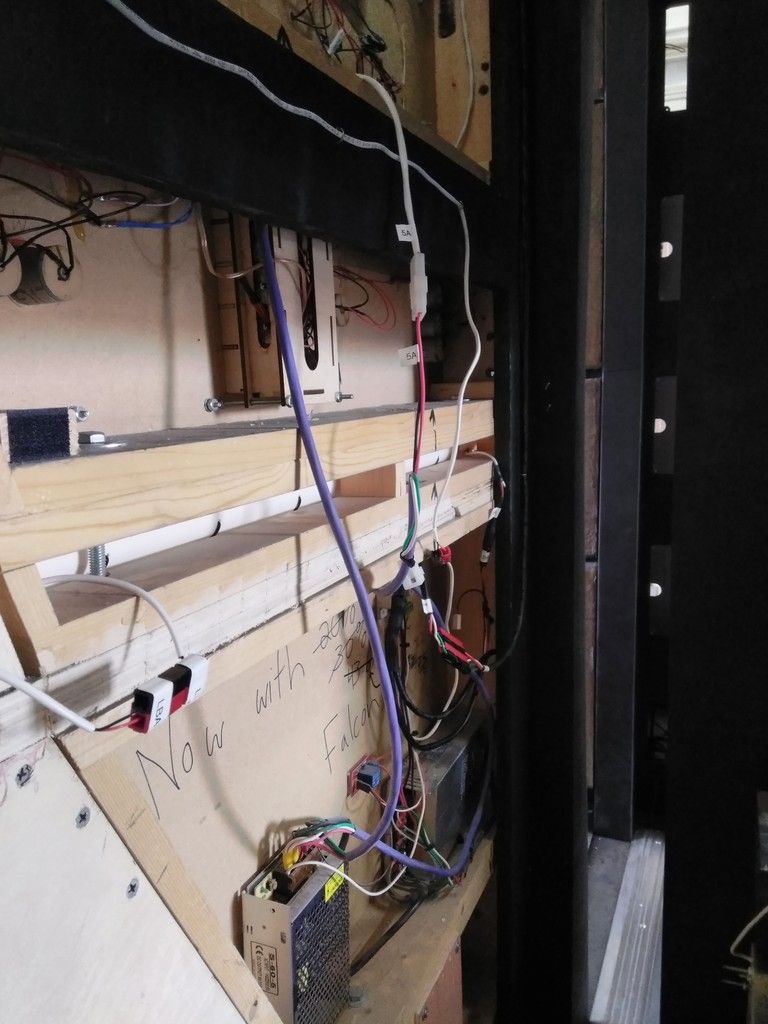
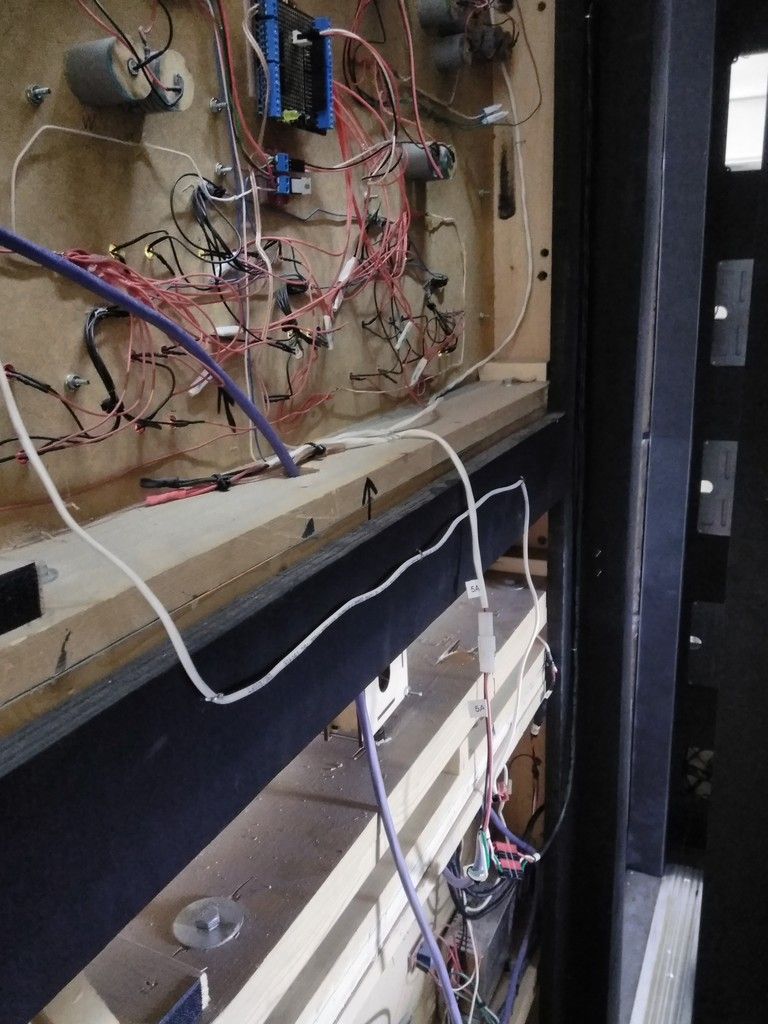
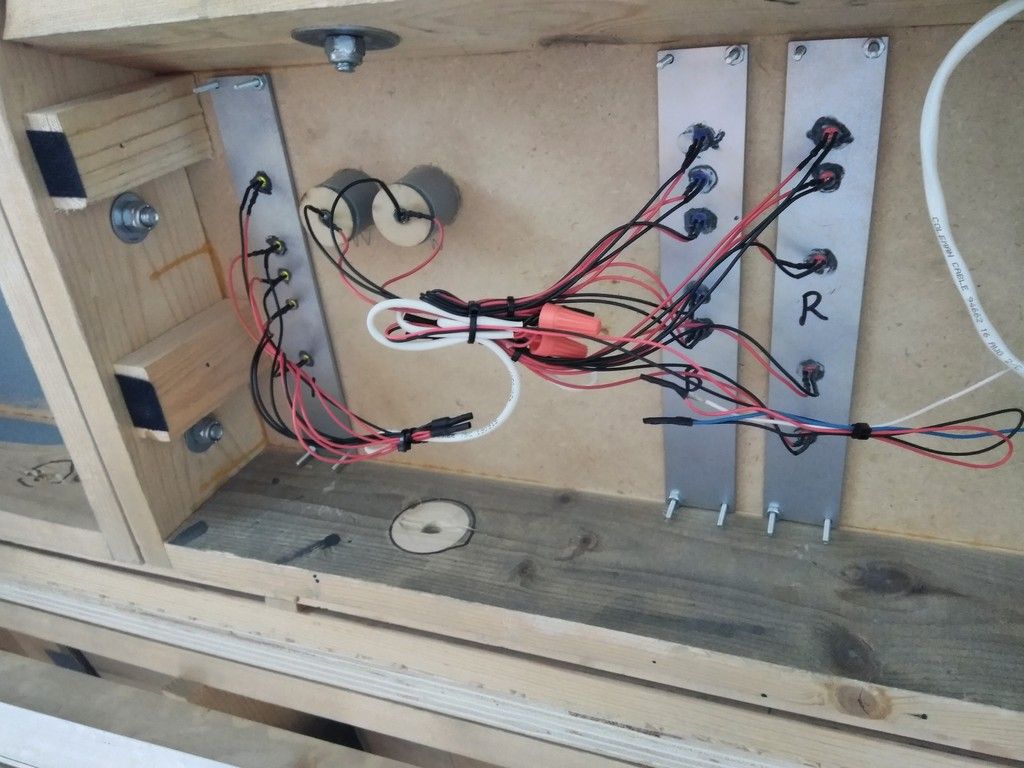
Jake spent a LOT of time finishing up and labeling the last of the wiring to include the light bars! THANK YOU, my friend!
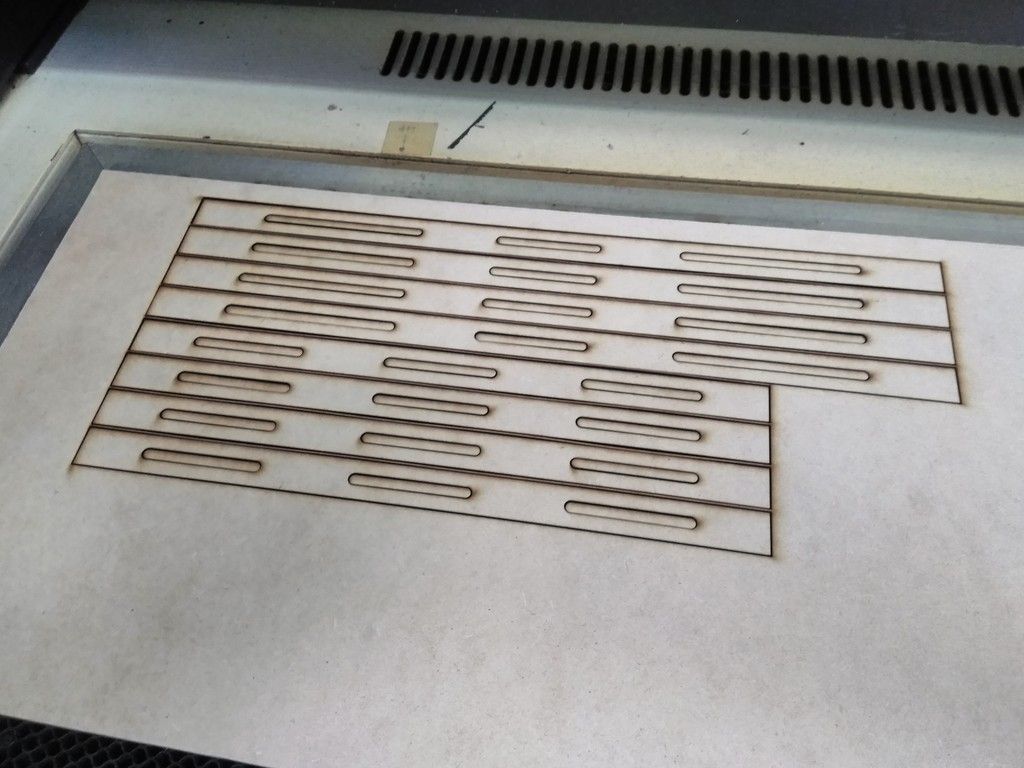
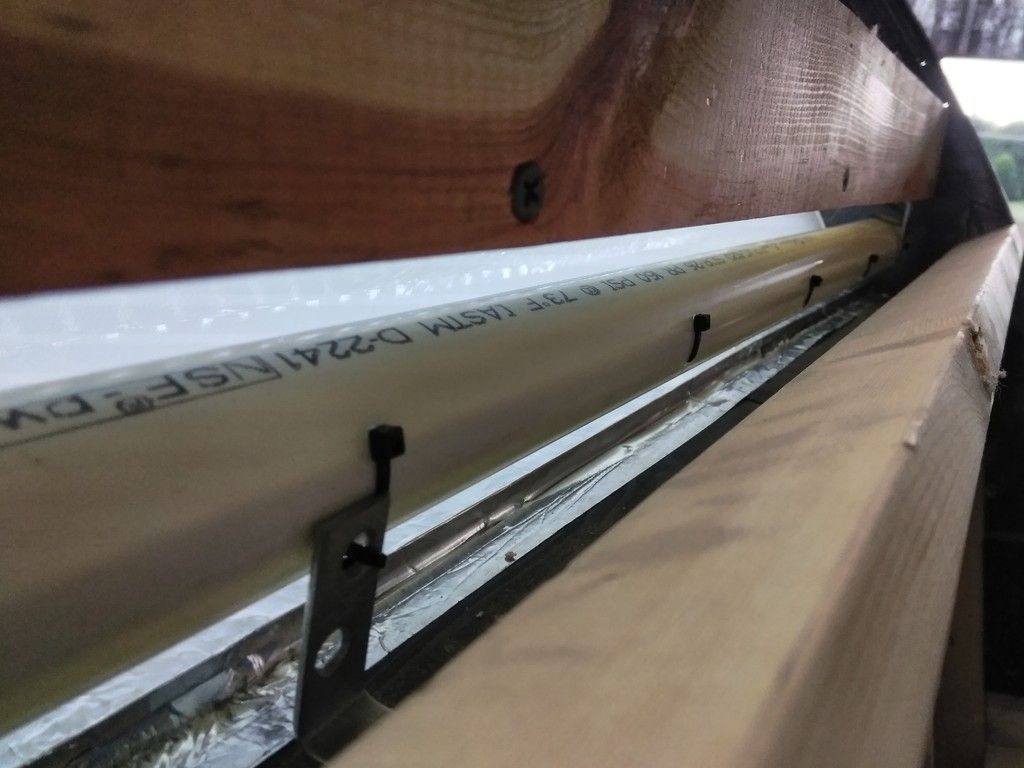
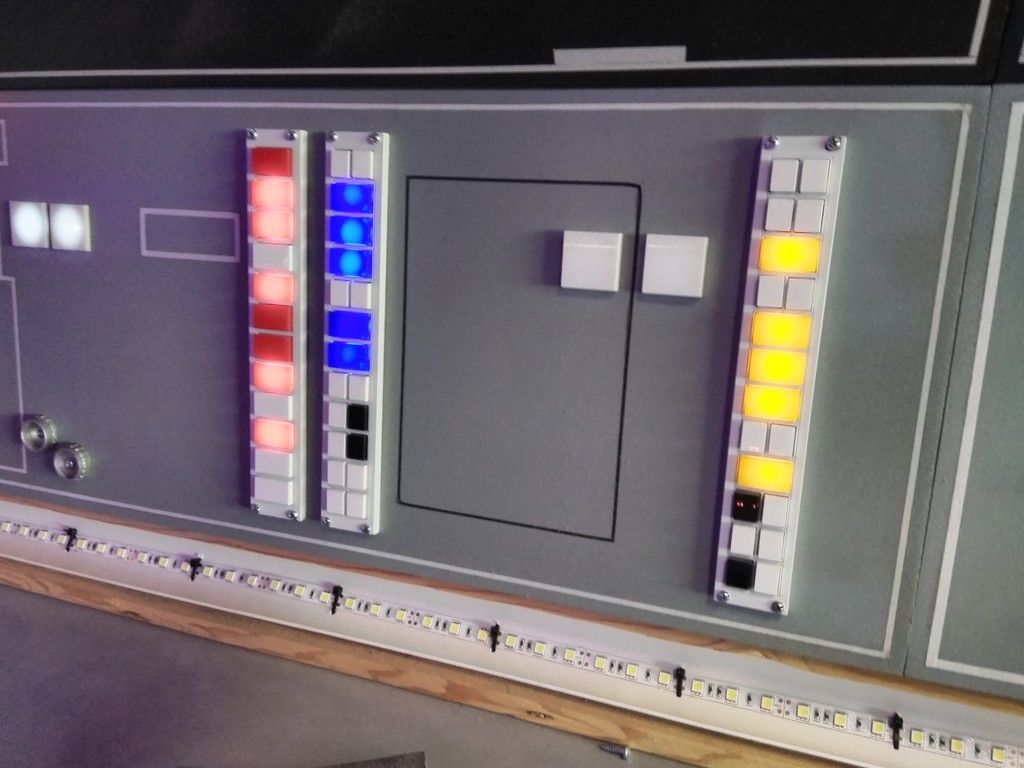
Let's get these DANG light bars finished! Added the reflective tape
We mounted to the LED strips / PVC with "L" brackets to help center them against the acrylic cover plate
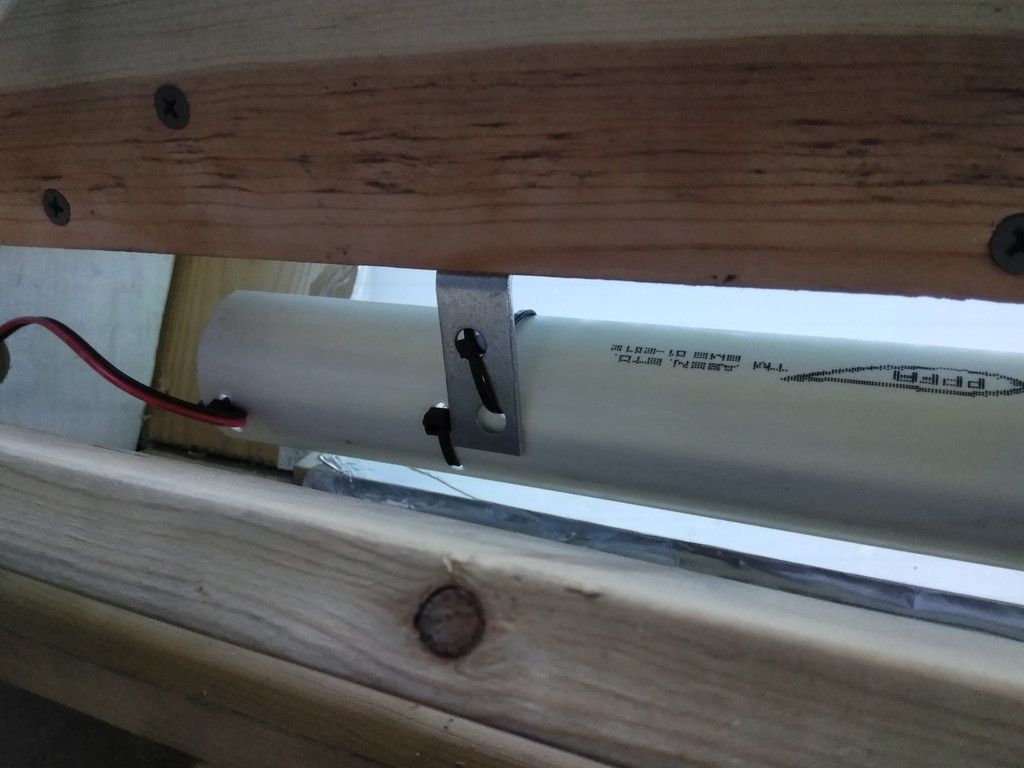

Top side done!
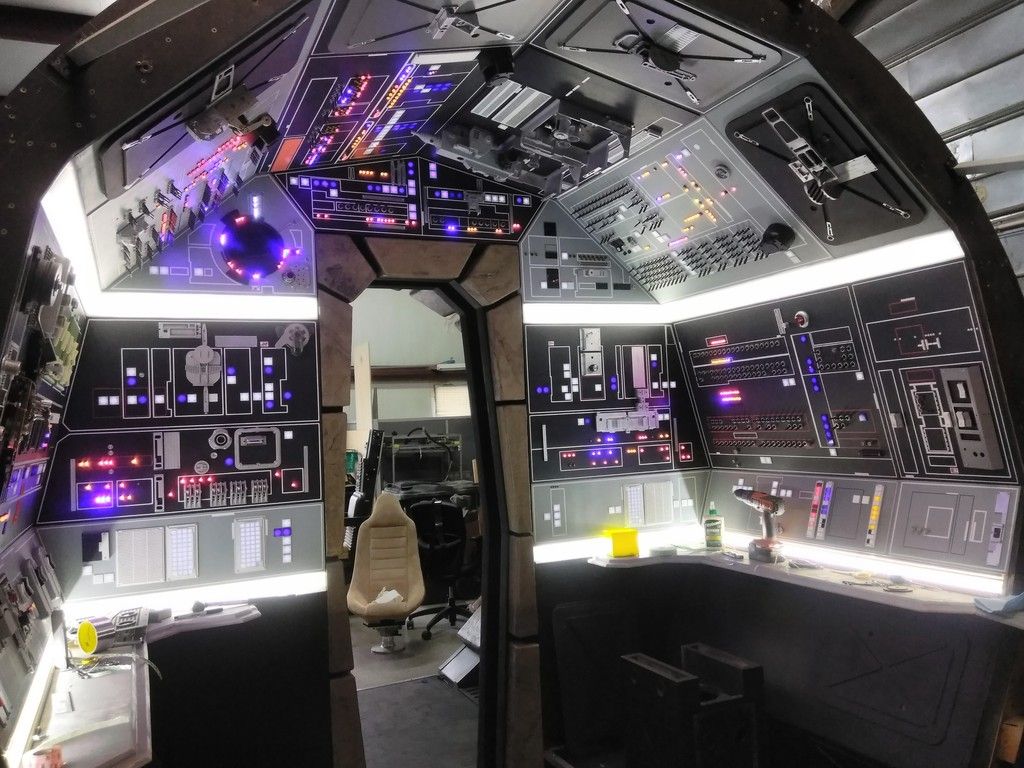
Now for the bottom bars
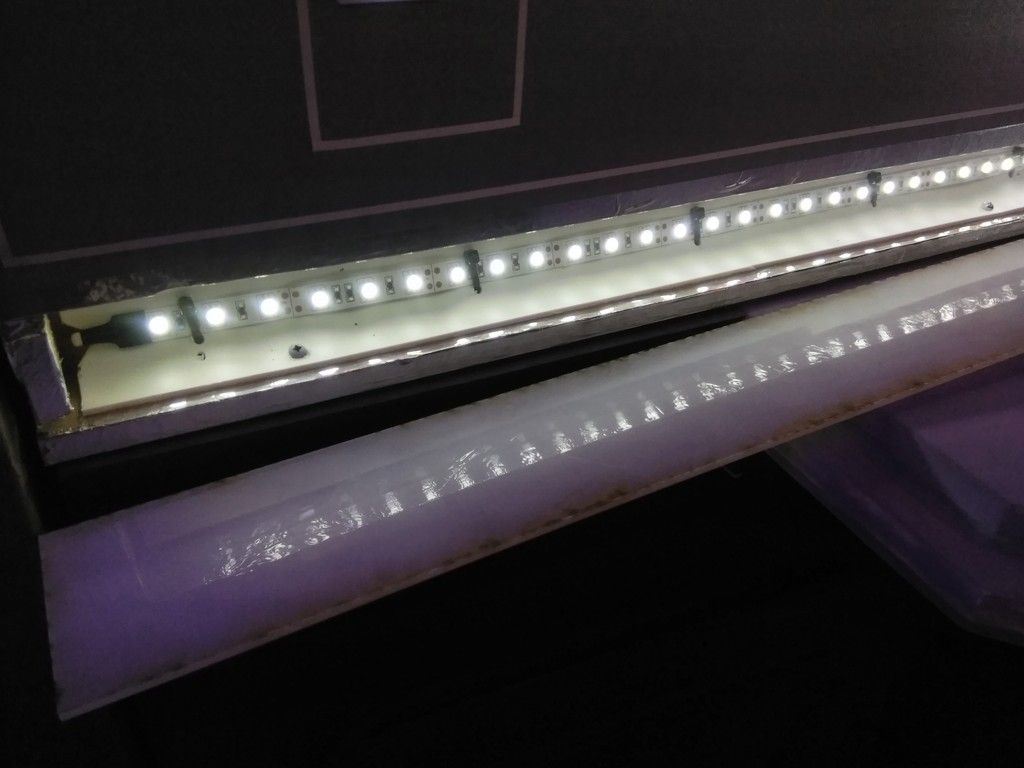
A simple screw held these in place
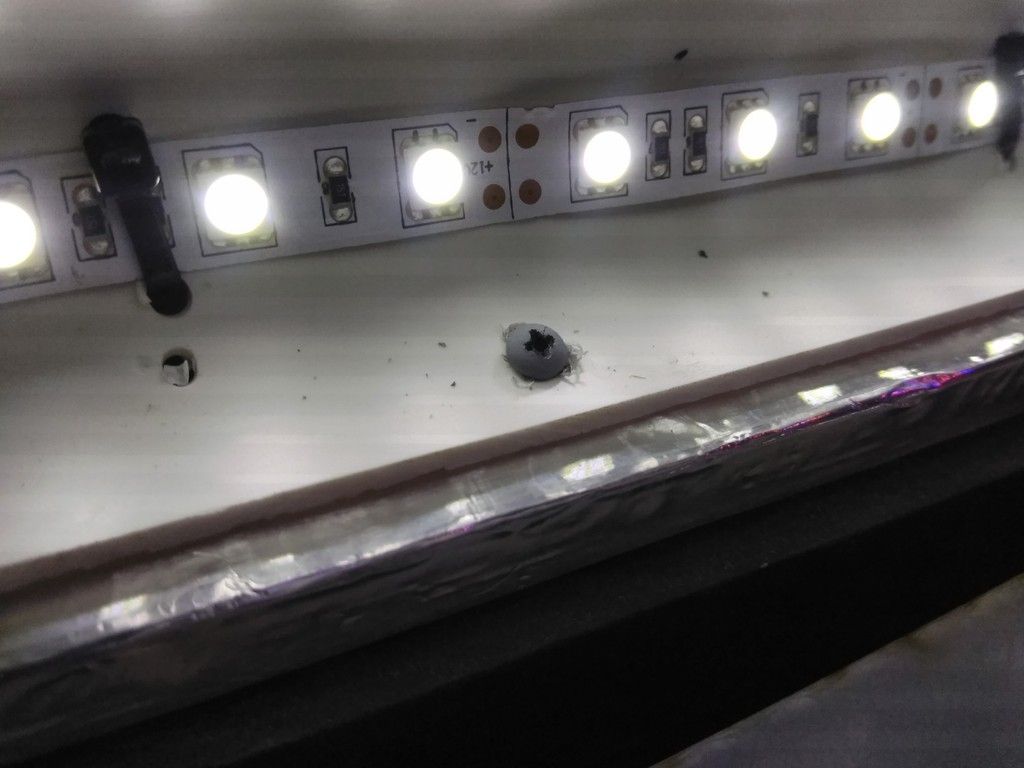
Laser cut the acrylic
I held off adding any tape and permanently covering the bars until we arrived on the convention
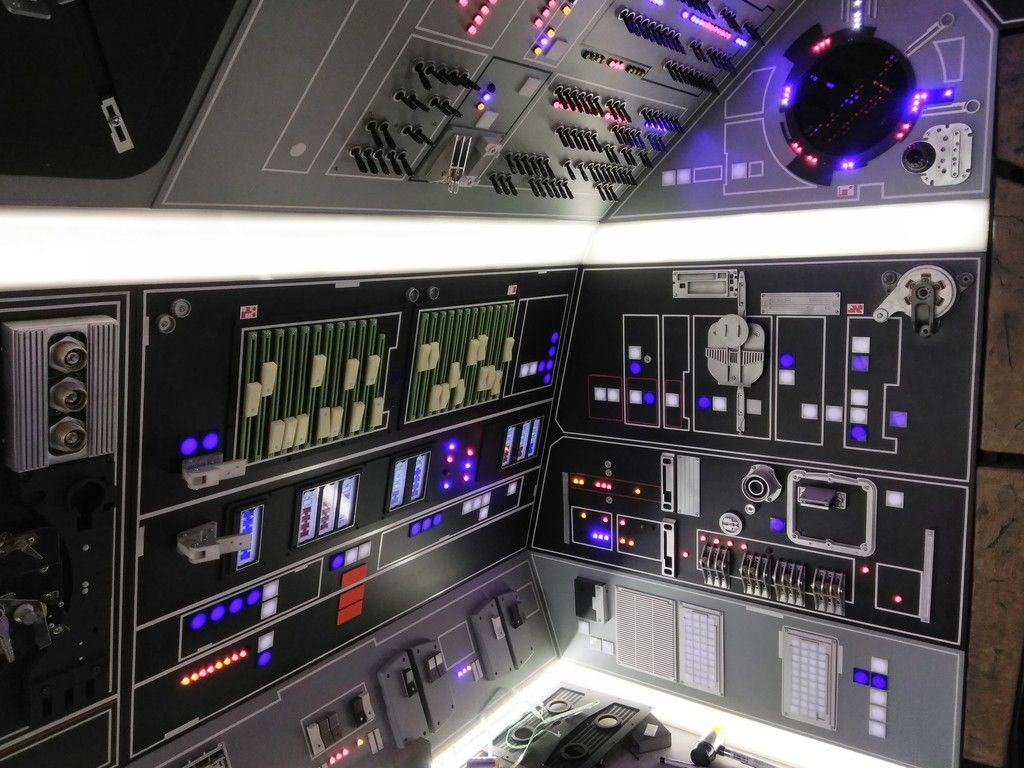
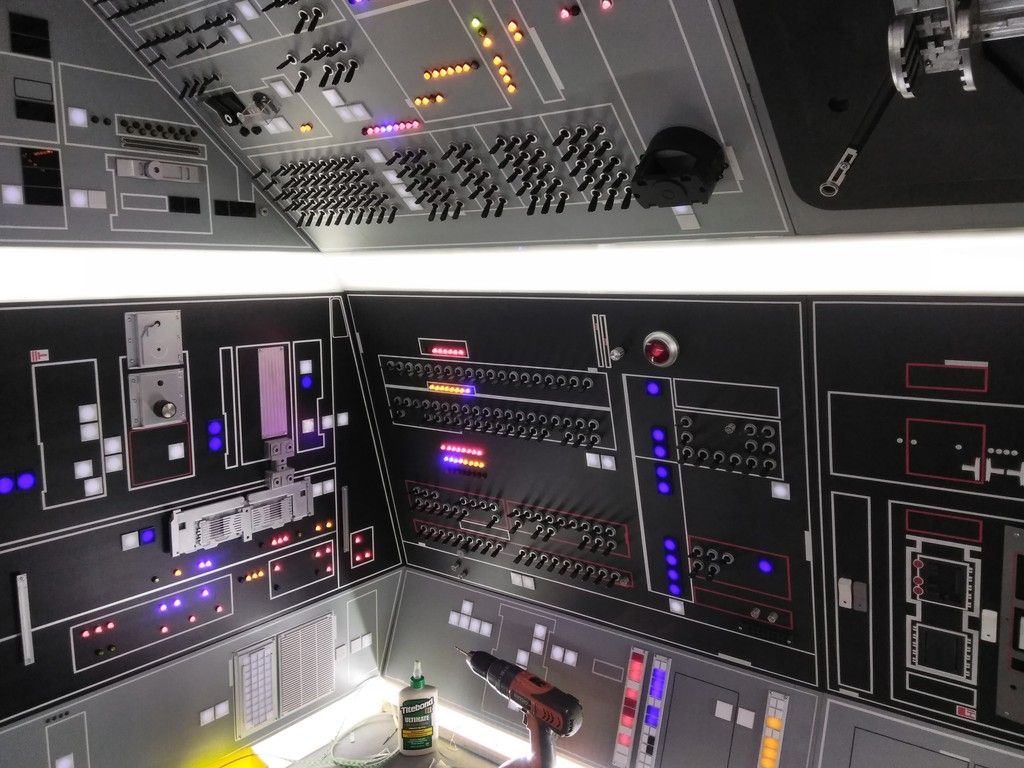
Finished off these LED bars
So... We meet again...
Furry butt shot!
At this point, Mitch Rogers from Real Movie Toys arrived all the way from Texas with a 24 foot trailer in tow! He and his brother Ken are now officially part of the project and will helping out with both the skin and... a new canopy! BUT... they were nice enough to bring two Volvo ICs to finish off the panels

Done!!
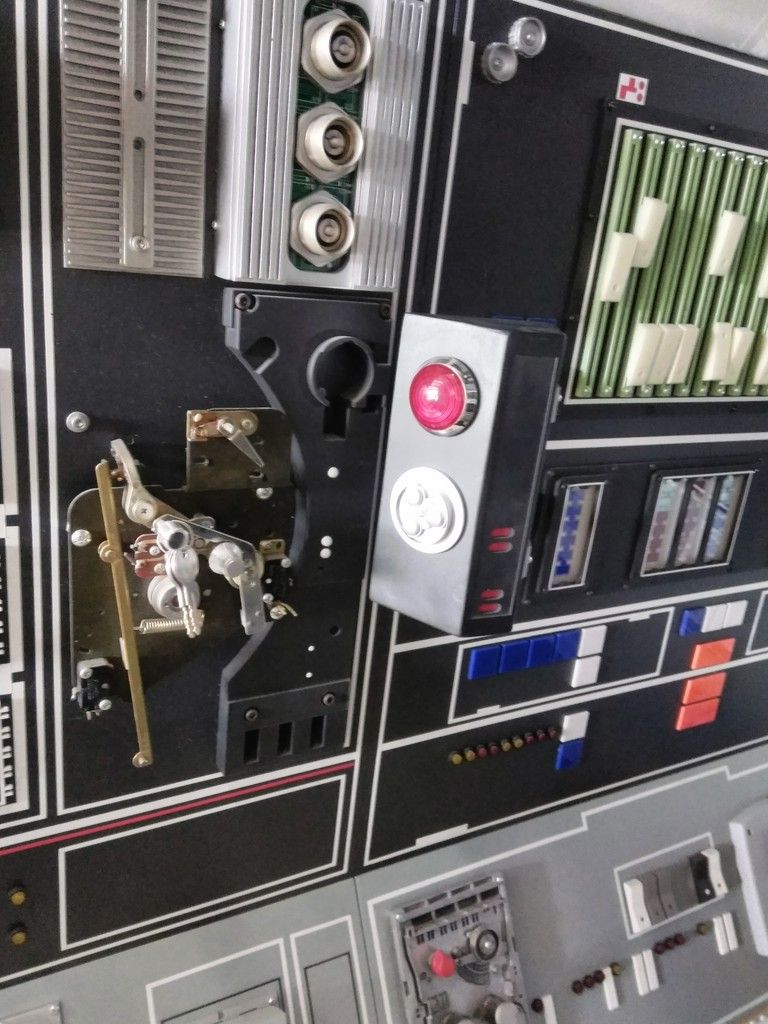
Finally... I installed this little guy who has been in hiding for years!

TEAR DOWN!!! As I mentioned above, Mitch arrived with a 24 foot trailer. Let's load up and head to Wash DC!
I was SO thrilled to see that the new modular panels worked. But would they fit back together?


During transport we decided to ship the Volvo Panels in place so we rigged up a simple bracket system
We worked well into the night!
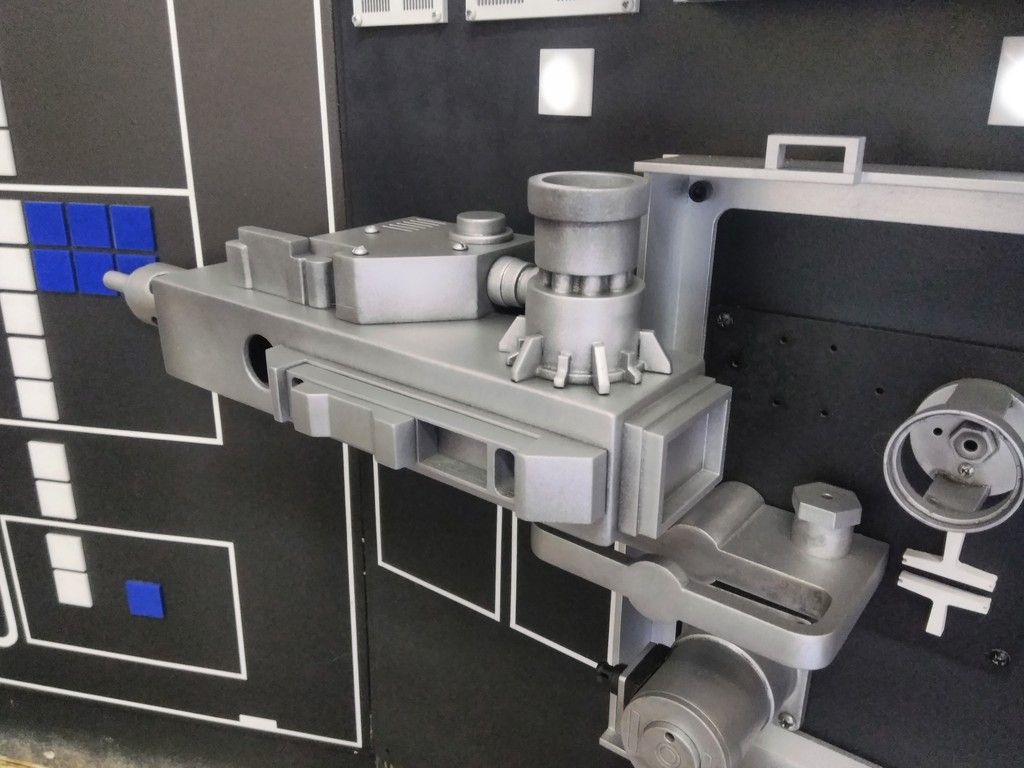
With the upper panel finally off I could paint the Cockpit Laser Gun
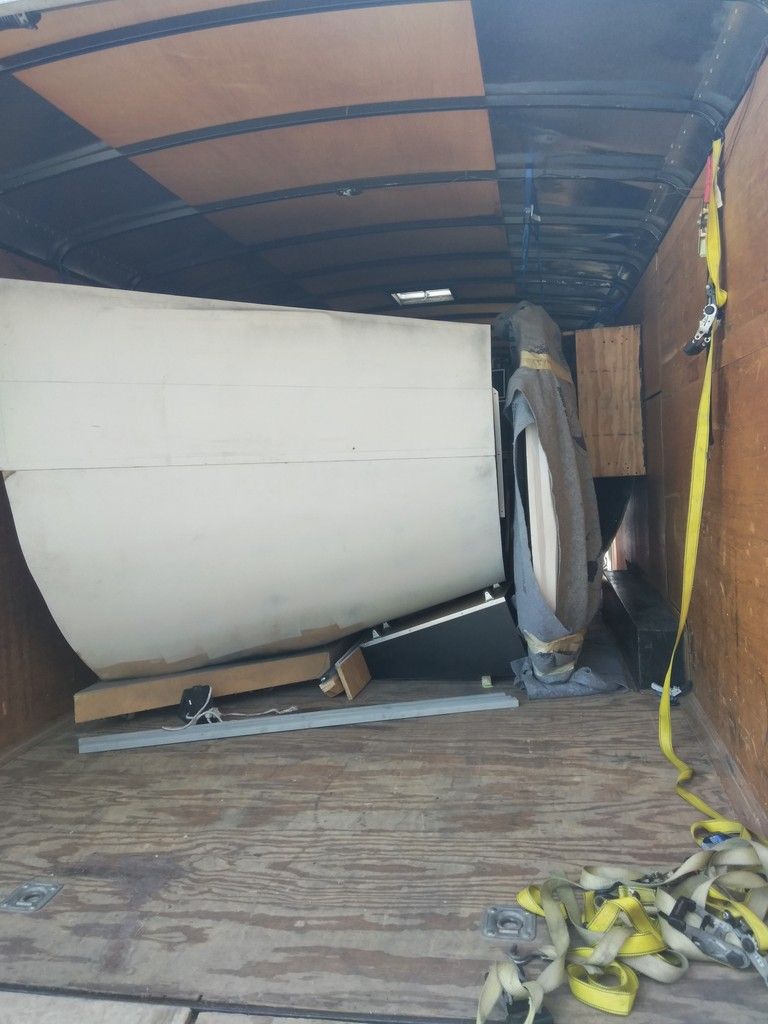
Loading up! The entire "cockpit entrance" section fit under/above the "bunk bed" at the front of the trailer

Cramped! The nose was a BEAST! She took up the most space

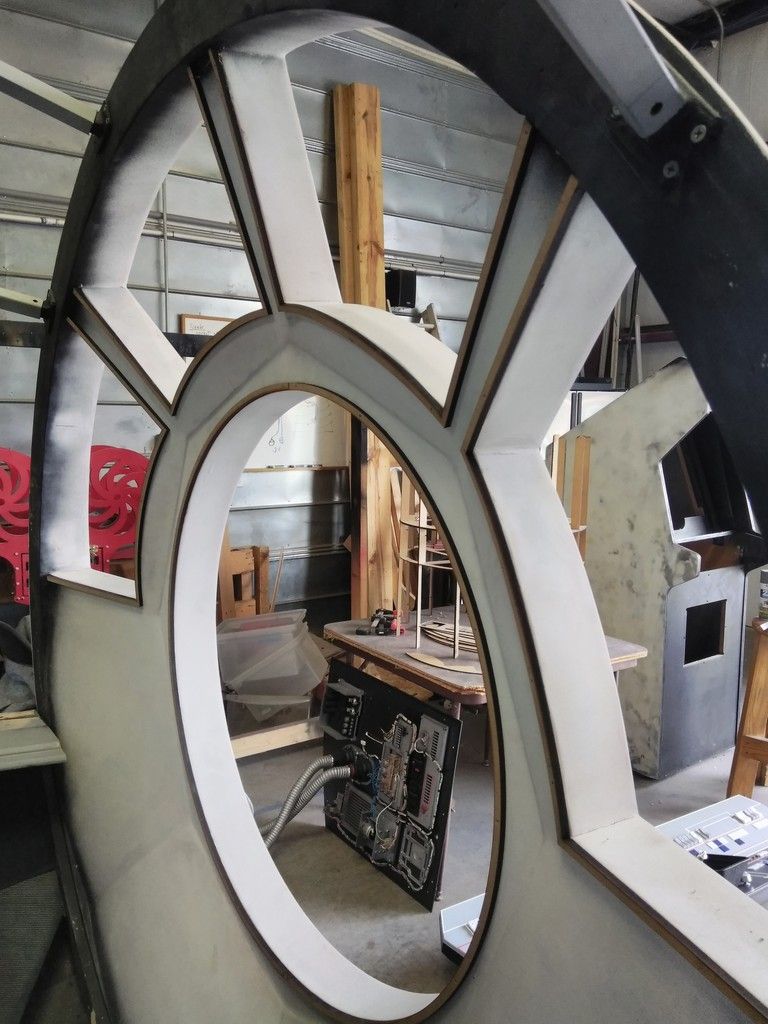
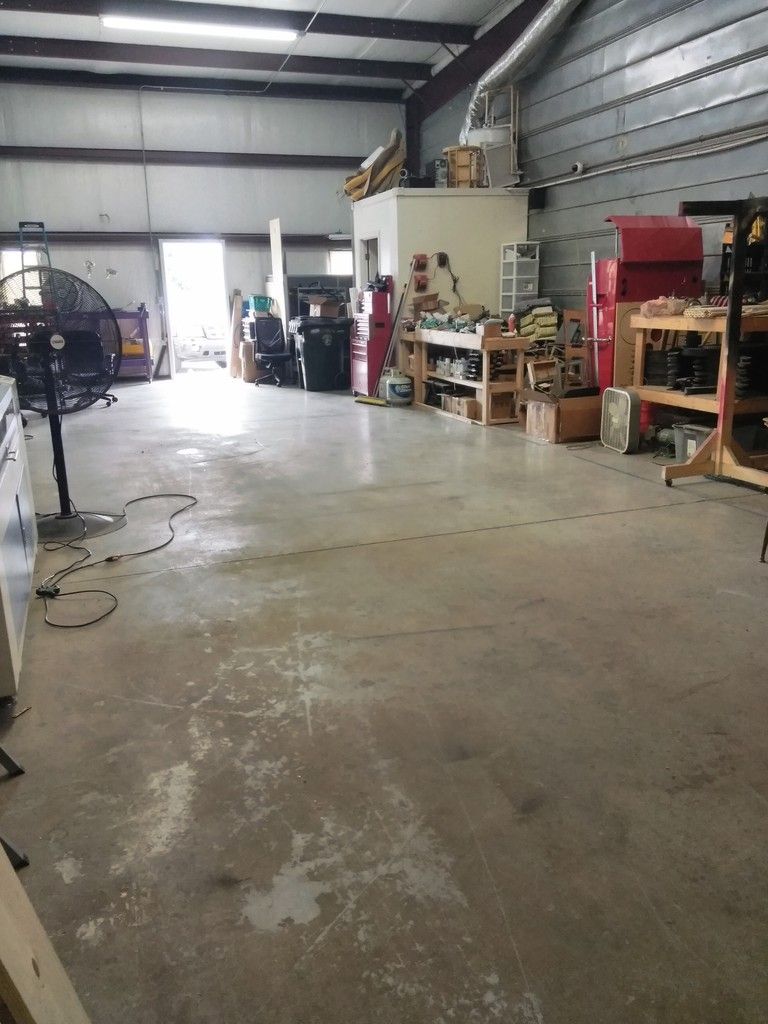
And this is where we are... I wonder what will go there now?
Let me give a huge thanks to Jake, Mike and especially Mitch for the heavy lifting and trailer! THANK YOU ALL for your help! Jake did an awesome job on the lighting and wiring - stand by to see all his hard work finally pay off!
Stand by for Part II!
WOW!!!! What an AMAZING couple of weeks! As many of you know we prepped the cockpit for the Escape Velocity Museum of Science Fiction Convention in Wash DC / Maryland. Despite a 2.5 year absence from any convention or event of this size, the show and overwhelming response was nothing short of amazing! BUT...
Before the show we had to get a few things done. All of this is past tense so forgive me if I confuse the overall timeline. Let's get to it!
PART I:
Work on the Nav Chair head piece continued on as usual
Its not perfect by ANY stretch of the imagination and I was running out of time... Primer added
I HAD to add paint and get moving on a few other things. I told myself I would finish up after the show
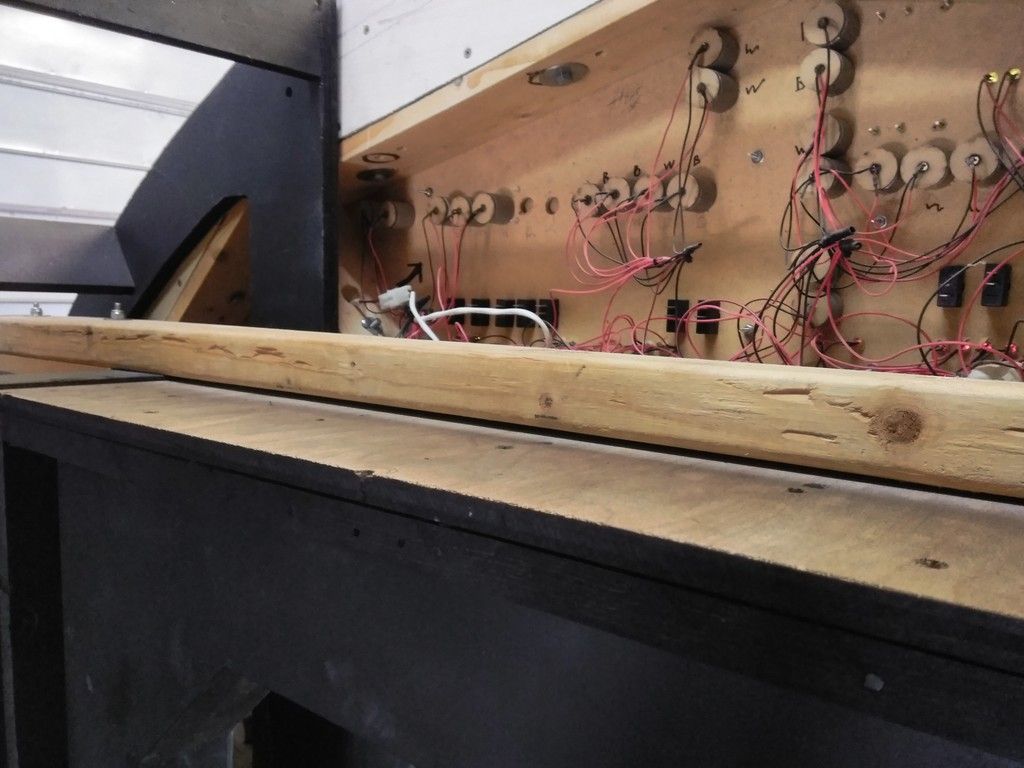
I then changed my attention to the floor. I had to get these edges protected and side walls painted!
Finally cut and adhered the center floor mat
UGH... I remember this. I was 2 inches SHORT of being able to cover the entire interior floor. No reason to worry. I cut a filler strip and adhered into place
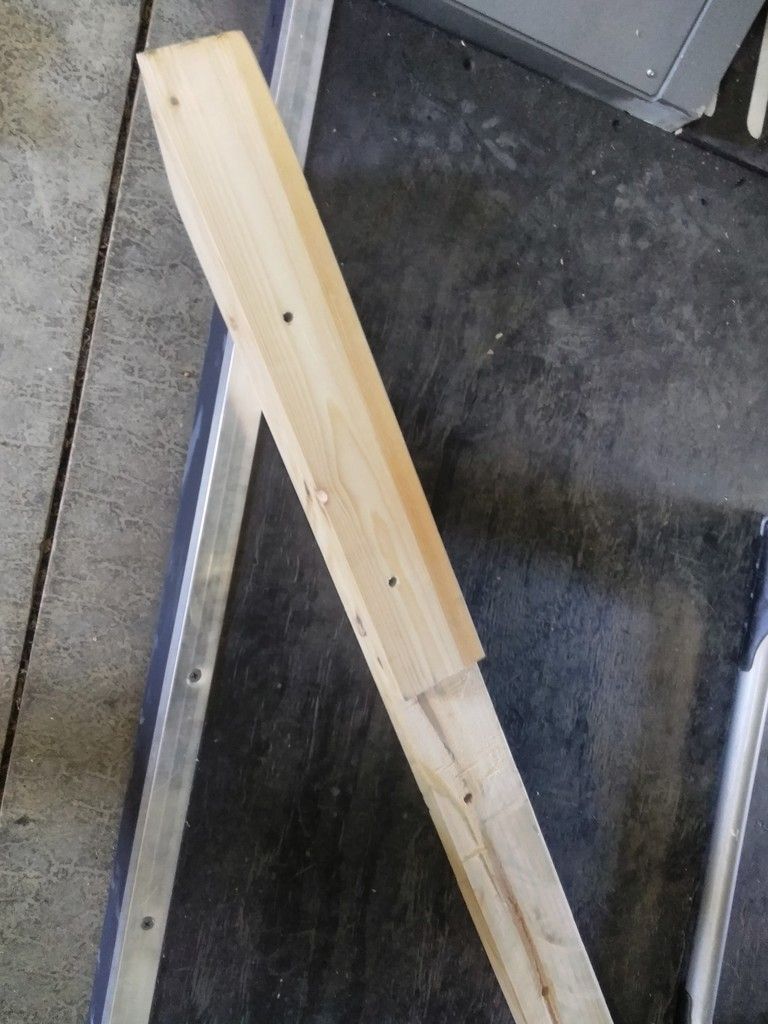
I depleted Lowes of all the their "L" bar
I had to cut down to fit and file the edges
I LOVE that look!
Added one to the front - after those long days the feet do tend to drag up and over the edges
How did I fix this unsightly error?
I cut 2 simple strips of aluminum and primed
Painted black
Made sure the holes were aligned and drilled into place
I know it looks weird, but over time the double strip actually looks really cool
And it worked perfectly!
Finishing off the edges
Reminds of my time as a roadie!
I then turned my attention to the Nav Chair pedestals - cleaned them up and repainted black
Added a beefy "L" bracket to all 4 corners
Measured and mounted into place - and there they stayed! They never moved after that!
Just enough space for a large bass speaker!
Speaking of chairs. Time to get these captain chairs mounted! With the new pedestals I had to create a new mount
Made sure ALL the holes were aligned between the chair and pedestal
I laser cut these decorative edge pieces
Painted them black and then mounted everything together
Perfect fit!
The slider handle was WAY too long so I cut in half and slid the rubber cover back into place
Now came the scary part! I had to lift up the nose platform floor multiple times and take tons of measurements to make sure that, before drilling any holes, I wouldn't hit any of the support structure underneath with the mounting bolts! OperaScot would not be happy with me! SUCCESS!
Absolutely SOLID!
There is virtually no flex in the floor, pedestal or chair
Han's side
BINGO!
So pretty!
I then changed focus to the hoses... I just had fun with it!
Sanded, primed and painted these 90 deg elbows
I dont think anybody will actually notice this hose. But we know its there.
Finished up the cockpit entrance pads... I might as well admit now... I forgot to make ONE pad. Can you believe it? :facepalm
Cockpit side is complete and the older Velcro was removed and replaced
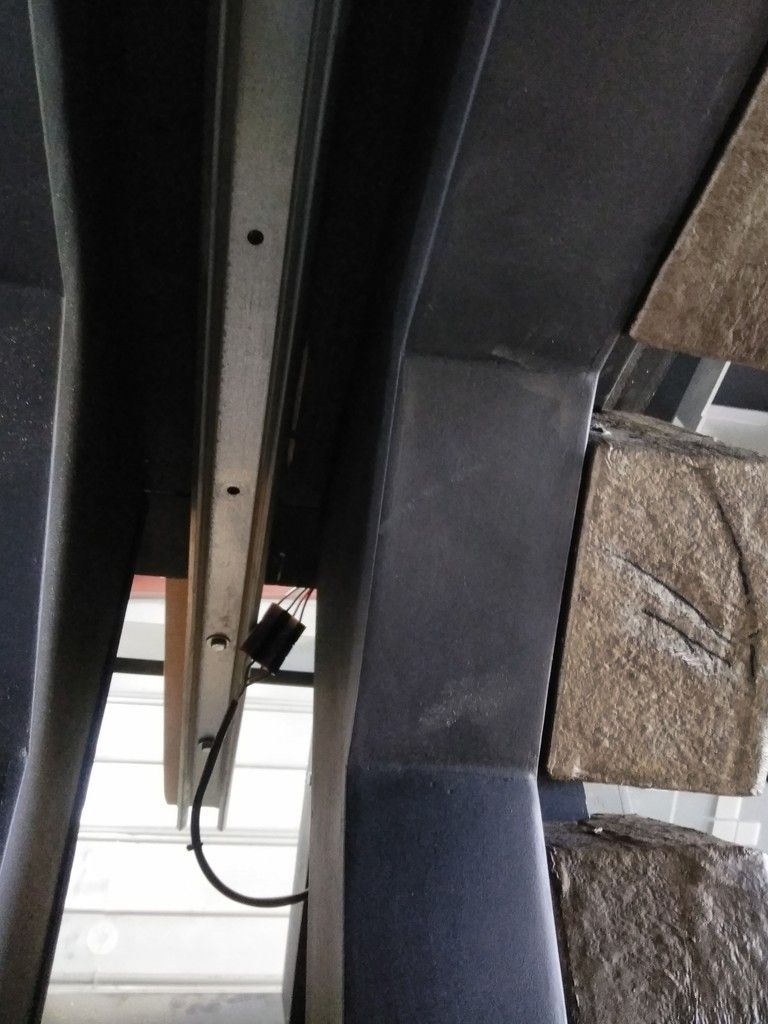
Speaking of door frame... The door slider track was mod'd and remounted to the "new" frame
We have a door again!
Its been too long since we've seen her in place!
Slider track from inside frame
Finished off the foot well piece
I then designed and laser cut these odd shapes
Nothing major but we finally have some window details!
First round of sanding and primer
YUCK!
That is so pretty!
Time to cover these holes
I designed, laser cut, primed and painted these access panel covers
This is awesome! Mike stopped by the shop with some prints he had done for me in hand! Time to get a few of these cut and in place!
I'm going to let you all find them!
Jake spent a LOT of time finishing up and labeling the last of the wiring to include the light bars! THANK YOU, my friend!
Let's get these DANG light bars finished! Added the reflective tape
We mounted to the LED strips / PVC with "L" brackets to help center them against the acrylic cover plate
Top side done!
Now for the bottom bars
A simple screw held these in place
Laser cut the acrylic
I held off adding any tape and permanently covering the bars until we arrived on the convention
Finished off these LED bars
So... We meet again...
Furry butt shot!
At this point, Mitch Rogers from Real Movie Toys arrived all the way from Texas with a 24 foot trailer in tow! He and his brother Ken are now officially part of the project and will helping out with both the skin and... a new canopy! BUT... they were nice enough to bring two Volvo ICs to finish off the panels
Done!!
Finally... I installed this little guy who has been in hiding for years!
TEAR DOWN!!! As I mentioned above, Mitch arrived with a 24 foot trailer. Let's load up and head to Wash DC!
I was SO thrilled to see that the new modular panels worked. But would they fit back together?
During transport we decided to ship the Volvo Panels in place so we rigged up a simple bracket system
We worked well into the night!
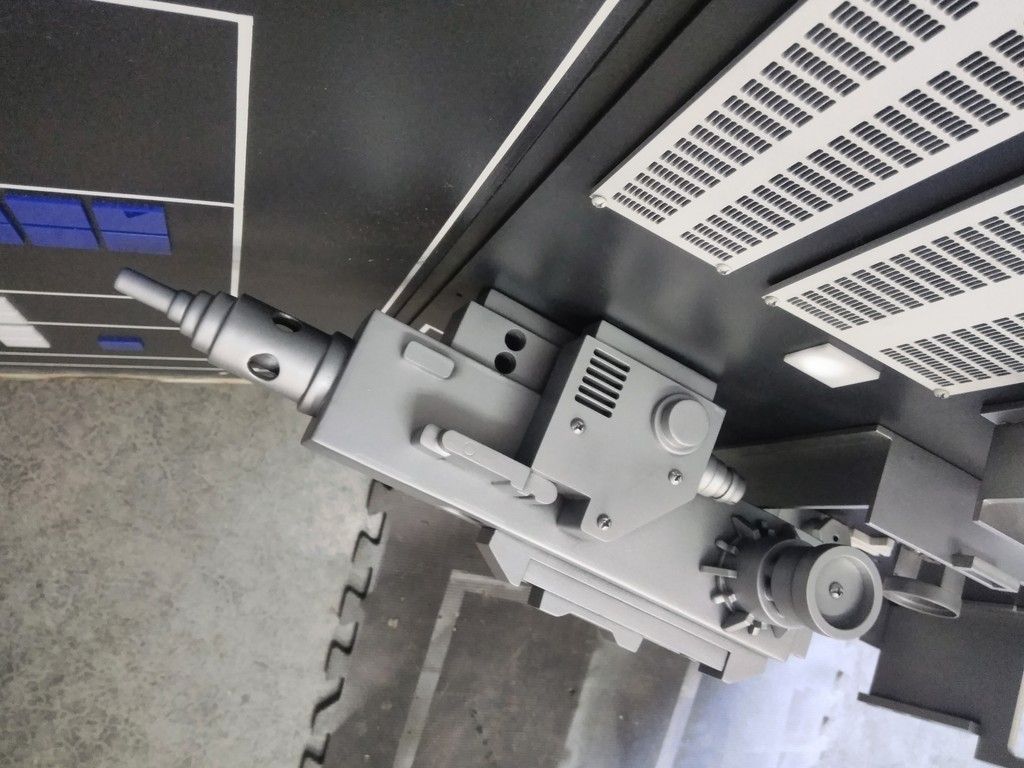
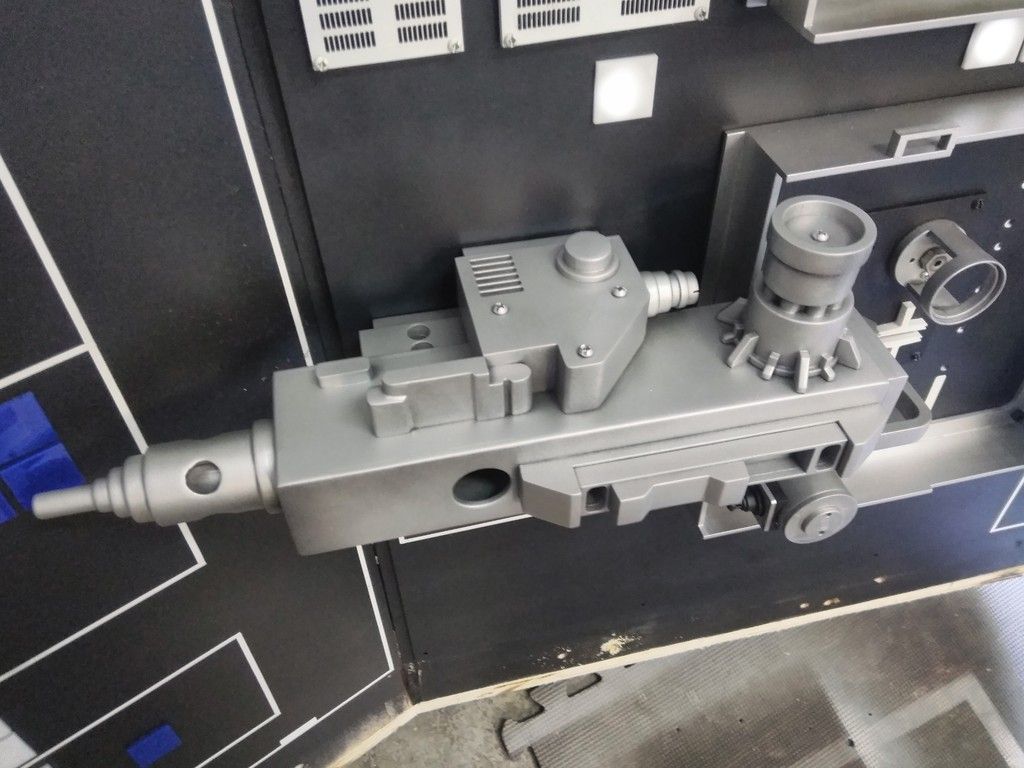
With the upper panel finally off I could paint the Cockpit Laser Gun
Loading up! The entire "cockpit entrance" section fit under/above the "bunk bed" at the front of the trailer
Cramped! The nose was a BEAST! She took up the most space
And this is where we are... I wonder what will go there now?
Let me give a huge thanks to Jake, Mike and especially Mitch for the heavy lifting and trailer! THANK YOU ALL for your help! Jake did an awesome job on the lighting and wiring - stand by to see all his hard work finally pay off!
Stand by for Part II!
Last edited:
Lt Washburn
Sr Member
Amazing effort and such a fun update. Crazy deadlines really make one accomplish so much. I'm really looking forward to part 2.
Friendly flyer
Well-Known Member
Amazing! It's so nice to see how well thought out this whole build has been! I'm looking forward to some convention picks!

Fantastic update! Everything looks beautiful.
Gunslinger21
New Member
This is one of the most amazing build threads I have ever read! Outstanding work!
Sent from my iPhone using Tapatalk
Sent from my iPhone using Tapatalk
JediMichael
Master Member
Crazy project for sure. Bet you are so glad you only decided to built the cockpit and not the whole Falcon.
Seeing so many different pieces and how they fit together really makes you appreciate the original movie and how those guys made it work so well, when most of them probably didn't even understand at all what they were making or what Star Wars even was.
Seeing so many different pieces and how they fit together really makes you appreciate the original movie and how those guys made it work so well, when most of them probably didn't even understand at all what they were making or what Star Wars even was.
Amazing effort and such a fun update. Crazy deadlines really make one accomplish so much. I'm really looking forward to part 2.
Thanks, LtW! It was a CRAZY last couple of days. We scrambled round and round getting things ready. I can't believe I forgot to make the one door frame pad for the cockpit entrance side. It was a total "Er-Der" moment and we just had to laugh it off. Nobody noticed.
- - - Updated - - -
Mind.... Imploded!!!
Updates don't get much better than that, it just aint possible, it aint! Then rounded off with the ol'crew in the pit, perhaps a few years after Jedi, going to the fair - brilliant!!
Hey W,
Mission: Accomplished!
Still a LONG way to go before we can stand back and label as finished. HANG ON... Things are about to get UNREAL! Amazing! It's so nice to see how well thought out this whole build has been! I'm looking forward to some convention picks!
Hey FF,
Thanks so much! That's probably one of the nicest things I've heard considering I had NO IDEA what I was doing when I started this adventure. We've got a LOT of pics from the convention but I can't post them all. I'm going through what we have to include more coming from friends and event photographers. It was nothing short of amazing.
- - - Updated - - -
Pics look awesome, and I’m gonna try to have some more of those prints for you soon. https://uploads.tapatalk-cdn.com/20180529/04ac49b394629f7781c5e5e231469e62.jpg
Sent from my iPhone using Tapatalk
Thanks, W Looking forward to working together. Let's do some great things!
Fantastic update! Everything looks beautiful.
Thanks so much, SB! It turned out better than I ever could imagine. Still a long way to go, and a few things to fix, update but I think we got pretty close.
- - - Updated - - -
This is one of the most amazing build threads I have ever read! Outstanding work!
Sent from my iPhone using Tapatalk
Hey G,
Thank you for the very kind words! There are a LOT of unsung heroes who have and continue to contribute to the build!
Crazy project for sure. Bet you are so glad you only decided to built the cockpit and not the whole Falcon.
Seeing so many different pieces and how they fit together really makes you appreciate the original movie and how those guys made it work so well, when most of them probably didn't even understand at all what they were making or what Star Wars even was.
Thanks, JM!
Crazy is an understatement!
We DEF want to build the entire ship. At least that's the plan. Whether or not a bunch a crazy fans can actually pull it off... only time will tell.I don't think most of the original set designers knew what they were building but I think they appreciated "what" they were building. As with any job, you know the "what to do's" and "what not to do's" of the trade. These guys / gals knew to make the entire ship as modular as possible for easy assembly / break down for different camera shots / angles etc...
The hardest thing is seeing parts of the OT Falcon being tossed away in the Elstree Studios backlot!
BEAUTIFUL work! I know it's supposed to be a replica, but you've got enough wiring in that to actually fly, I think.
I hope I get to see this in person some day - just fantastic!
Dan
Hi D,
Thank you very much! A lot of blood sweat and tears have gone into the build. But the wiring caused more burns...
I think there are a few cons / events in CO that we're looking into! Would enjoy meeting, greeting and geeking out. Stay tuned!
Here is a quick walk through of the Falcon and some pics of the Falcon. Thanks again to Sofaking01. it was a fun weekend. It was great to meet you Sofaking01. We will have to do it again.
https://www.youtube.com/watch?v=IweXMsPISB8
Hey Iz,
THANKS SO MUCH for posting the vid! Awesome!
CONGRATS Sofa on 400 pages of awesome!!!
WOW! Holy Moly! Thanks to all for the continued support!
Part II Coming!
IzzyMel
Sr Member
Hey Iz,
THANKS SO MUCH for posting the vid! Awesome!
No problem. It was my pleasure. We will have to meet up again
Similar threads
- Replies
- 2
- Views
- 860
- Replies
- 6
- Views
- 609
- Replies
- 8
- Views
- 550
- Replies
- 4
- Views
- 775
- Replies
- 4
- Views
- 2,304