1:1 Millennium Falcon Cockpit Replica - Group Build

Hi Gang,

The End of the Weekend Update is here! GREAT NEWS! Although the new laser cutter power supply isn't here yet, the laser does in fact work at 75% power. And its cutting through acrylic like butter.

It was HOT! With Summer finally coming to an end... the heat and humidity didn't get the memo! ;)

Finally got the rest of the cockpit entrance door pads finished up and shipped to Dallas!

After a bit more Podge and paint

Adding / painting those dirty details

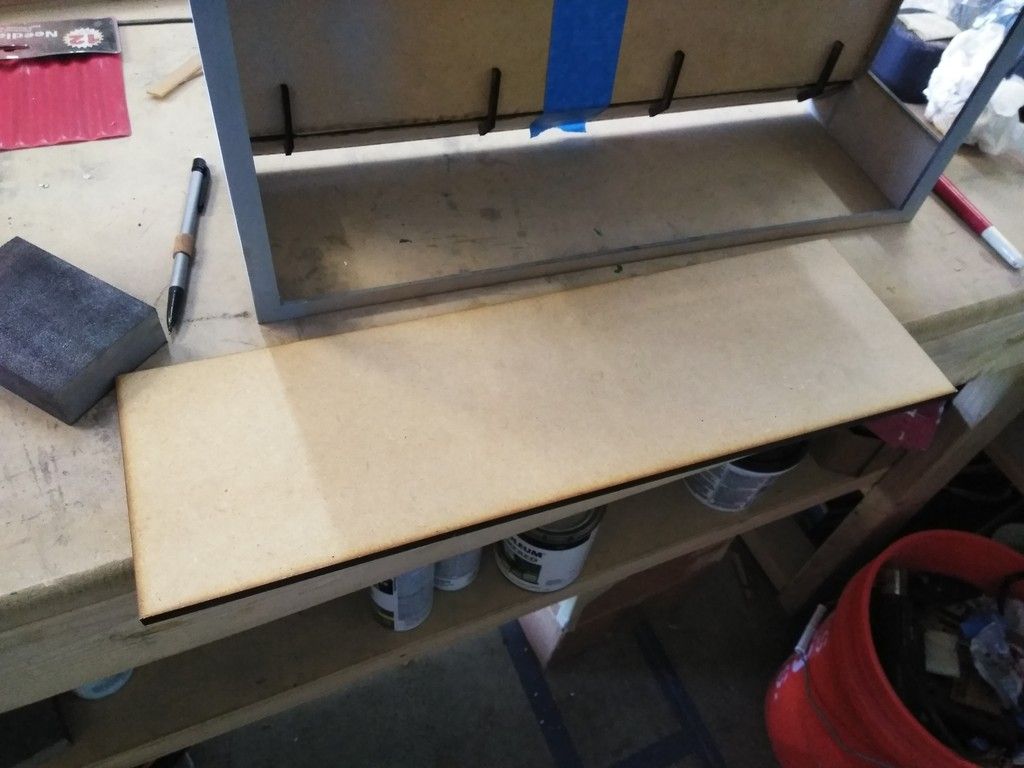
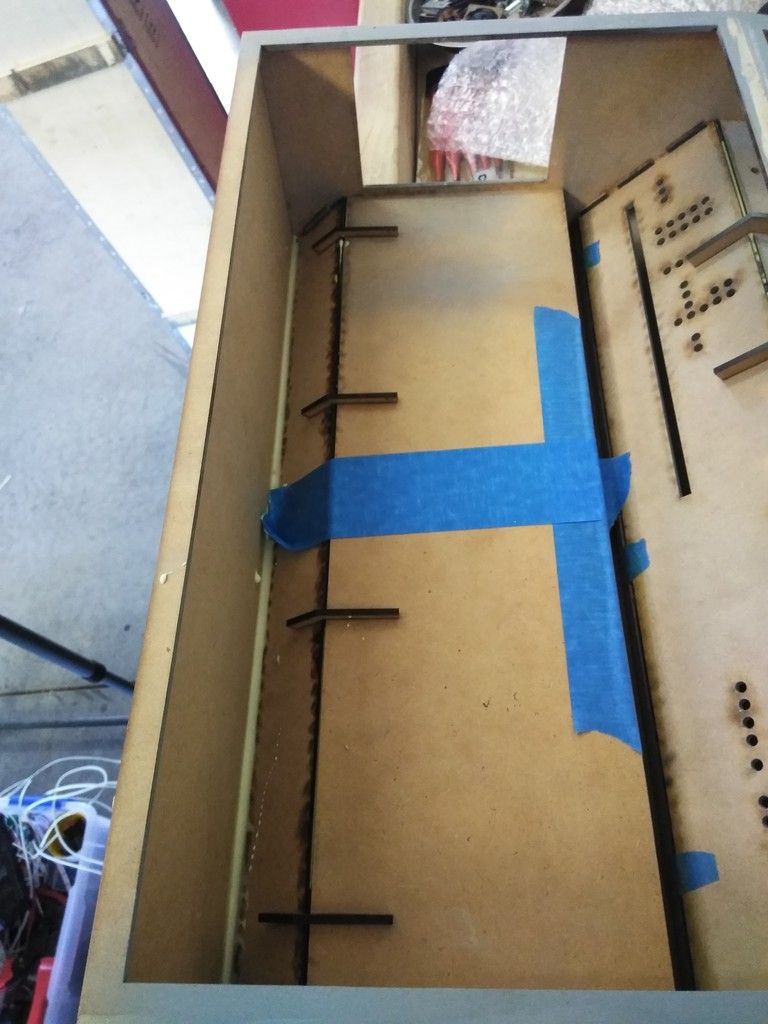
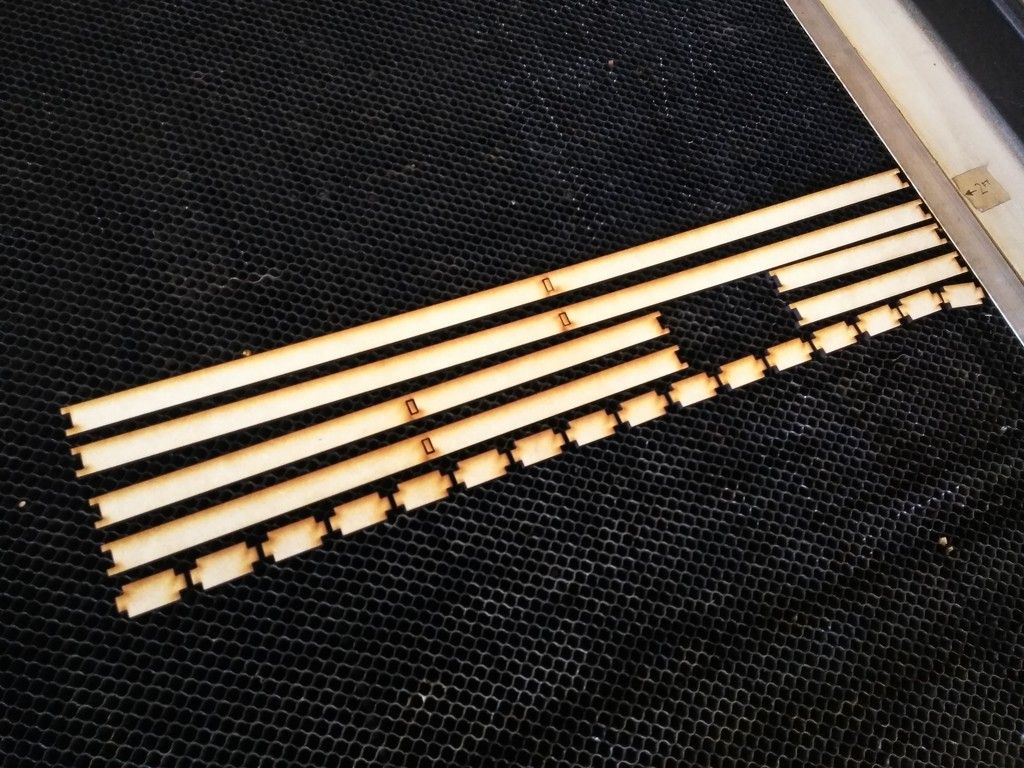
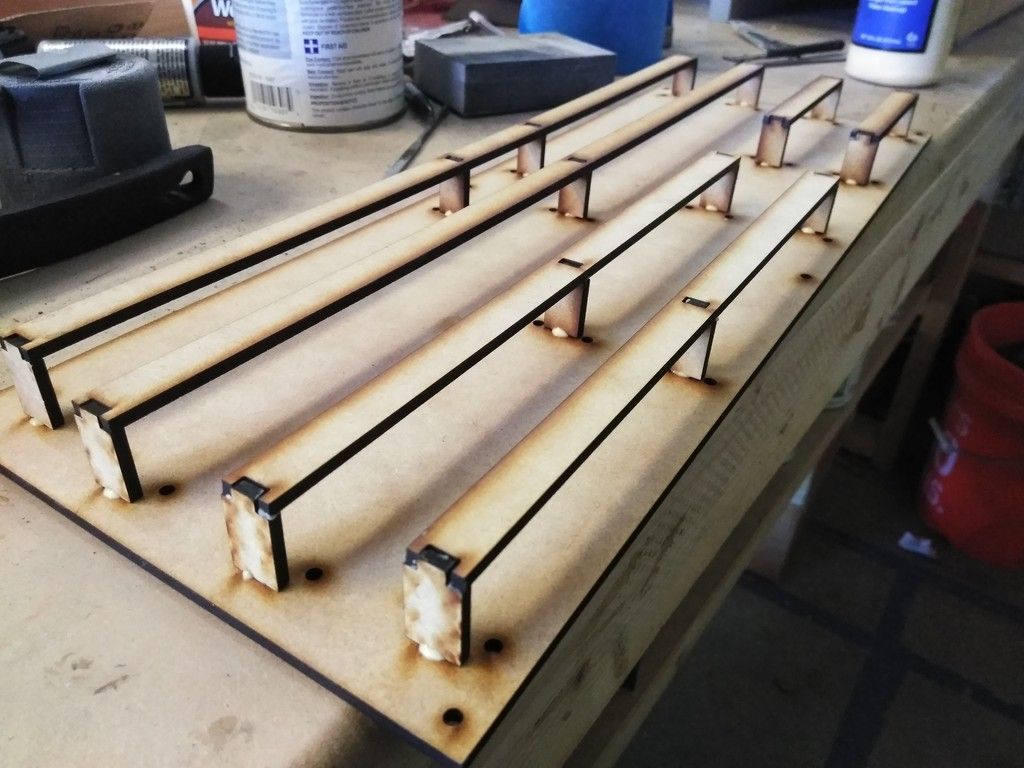
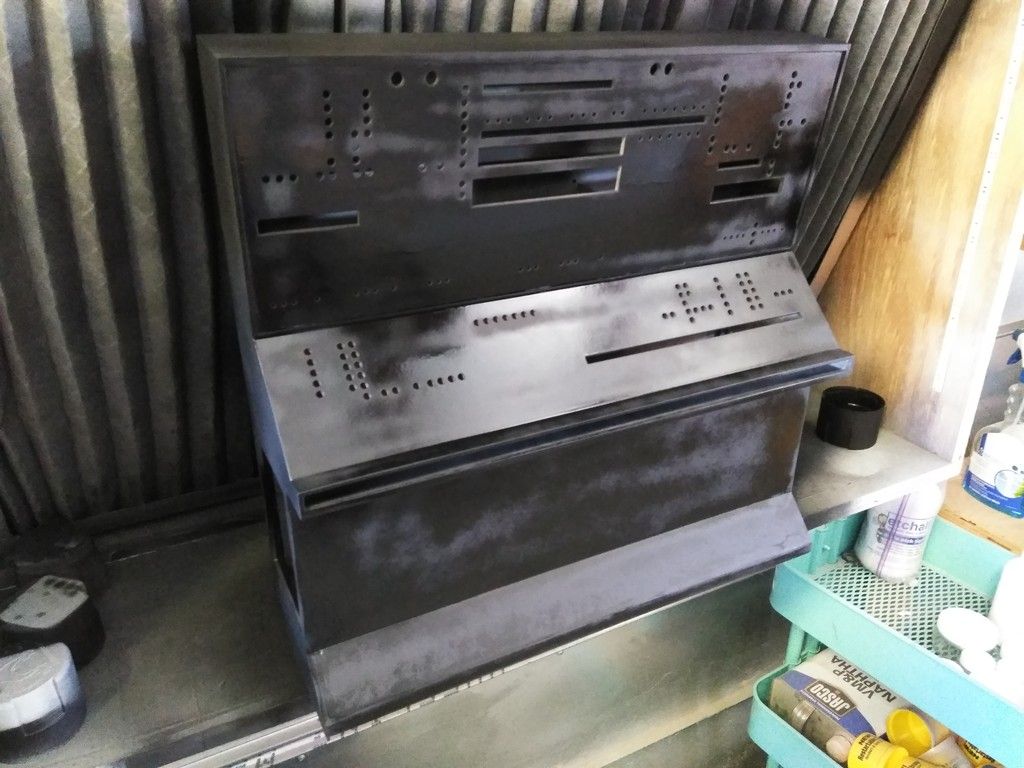
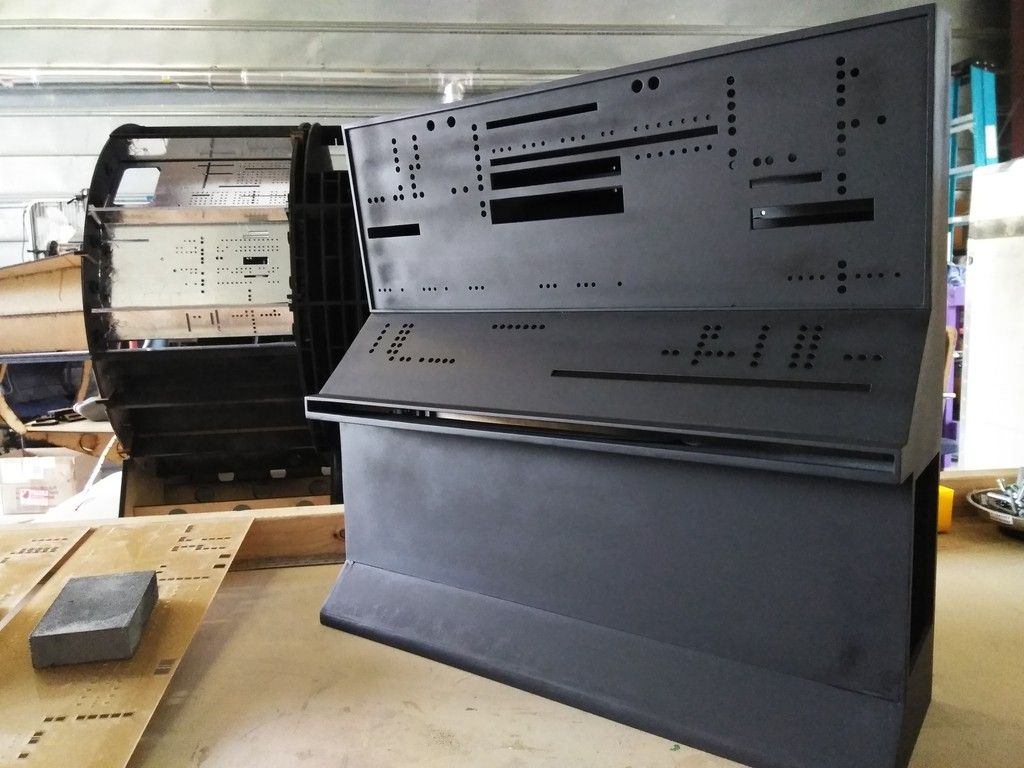
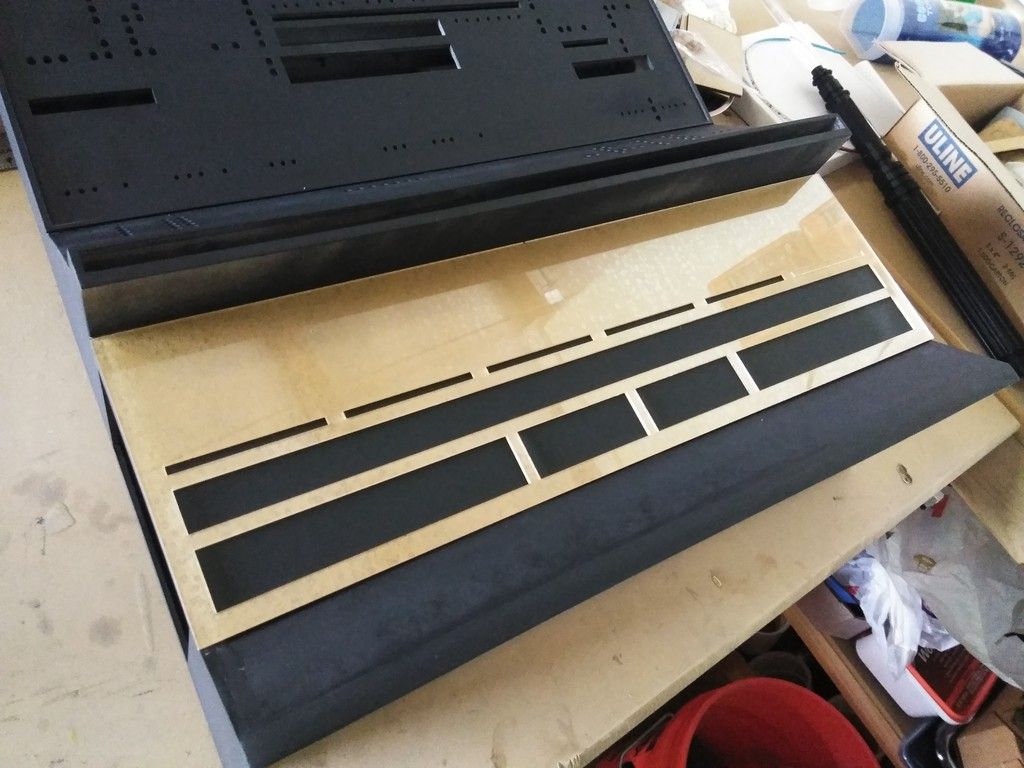
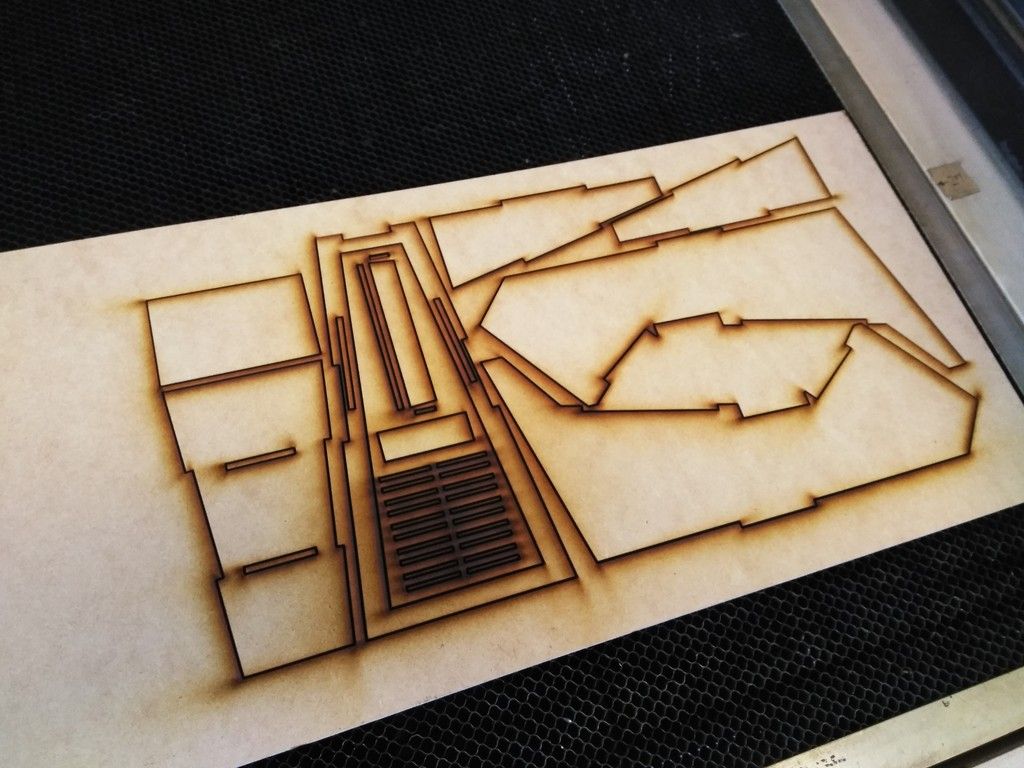
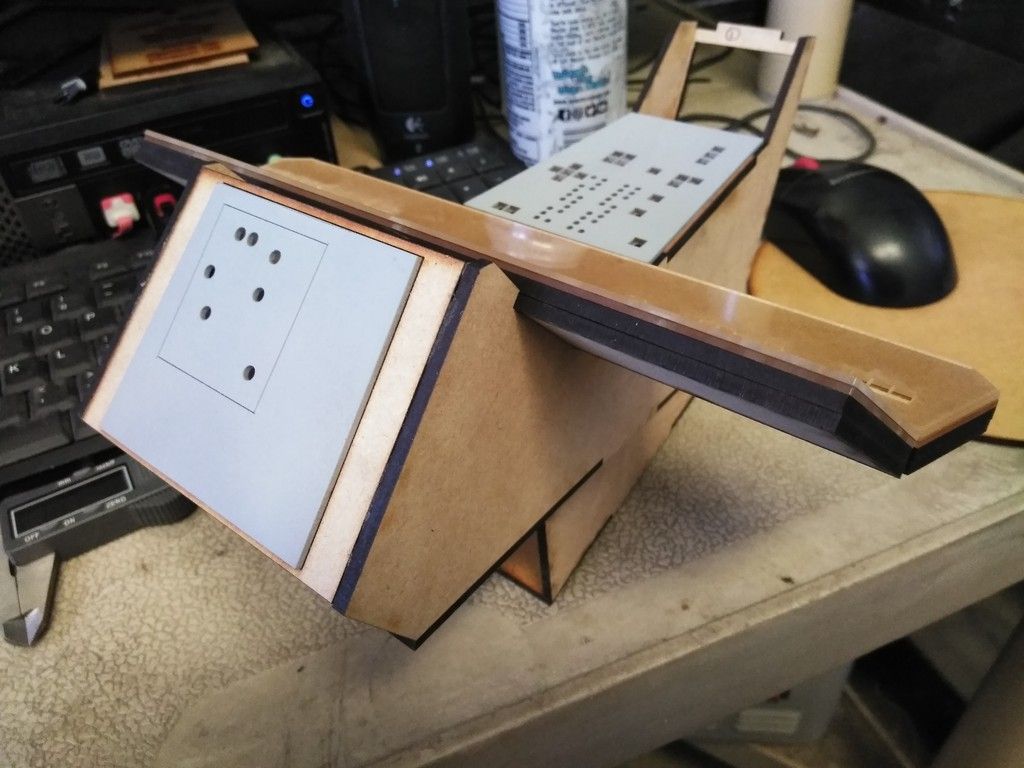
I worked on the Nav Computer - I laser cut the main panels and trim piece - for ref... the Nav Computer is almost 18 inches long

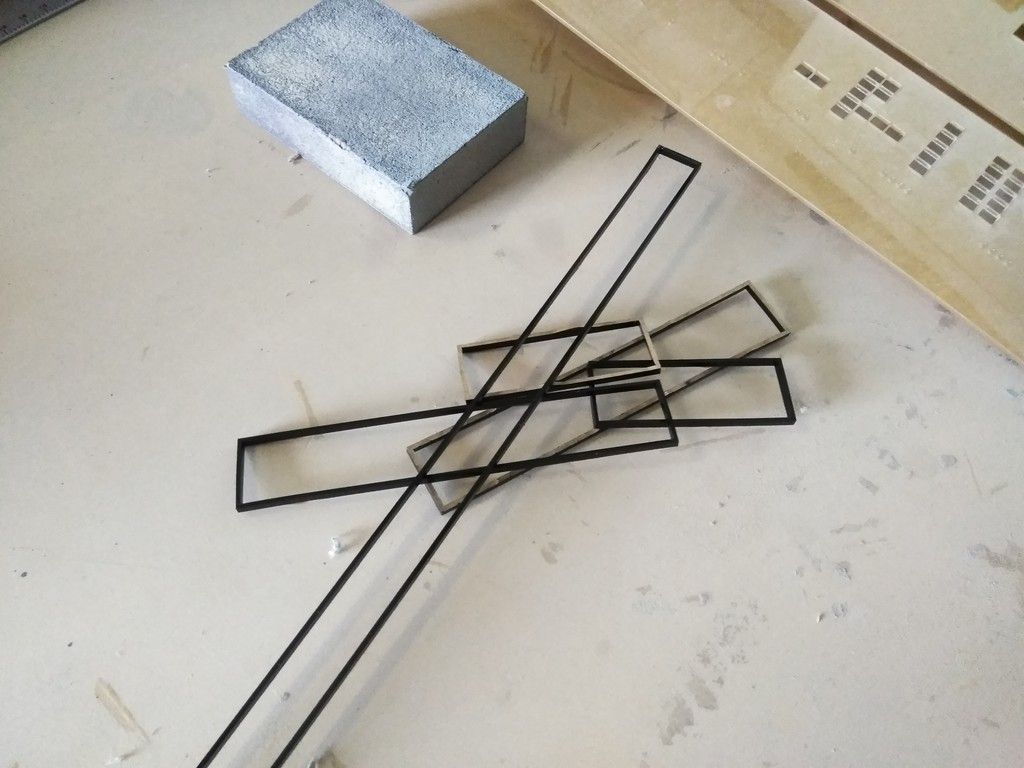
Trim piece is a bit short...

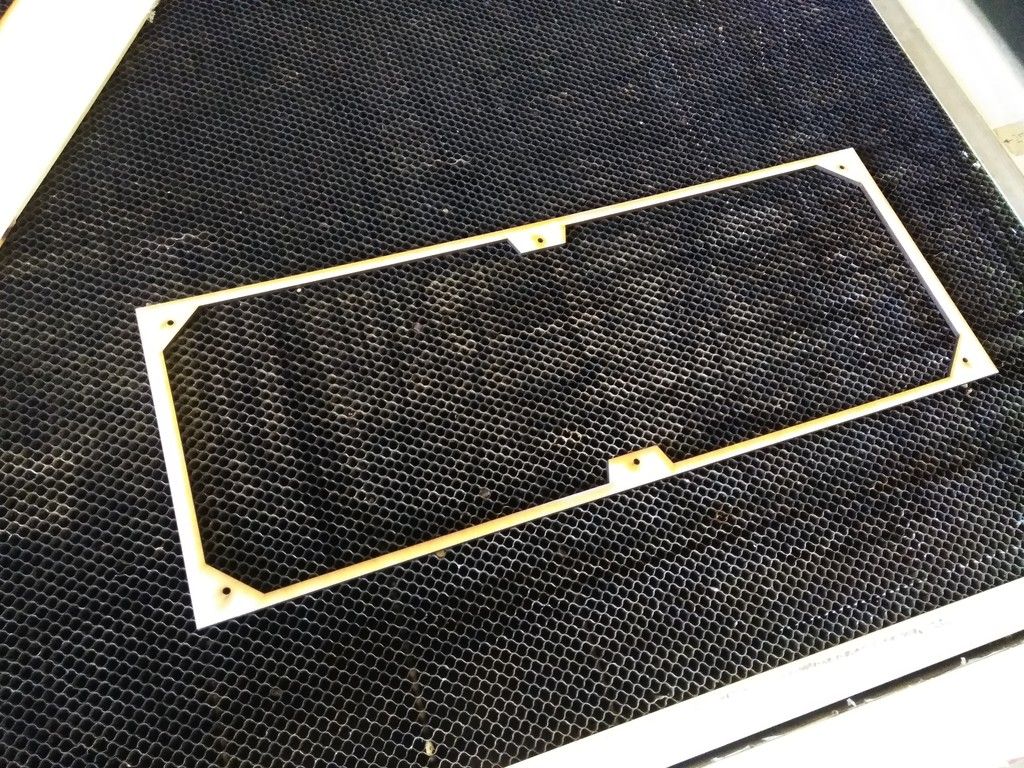
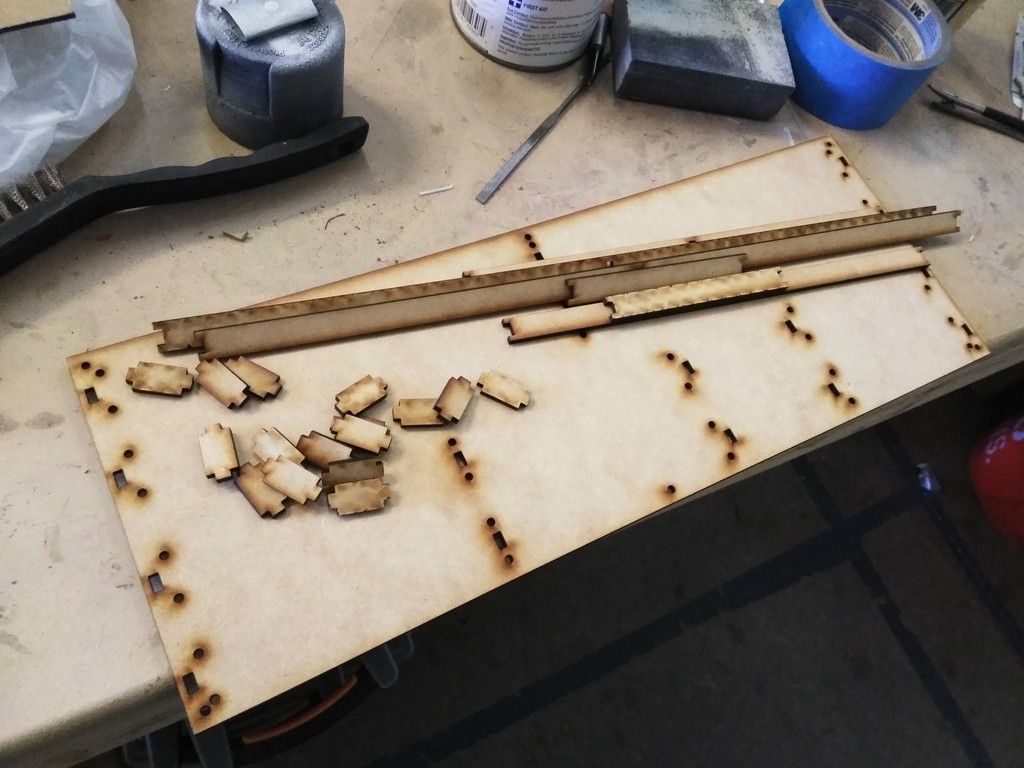
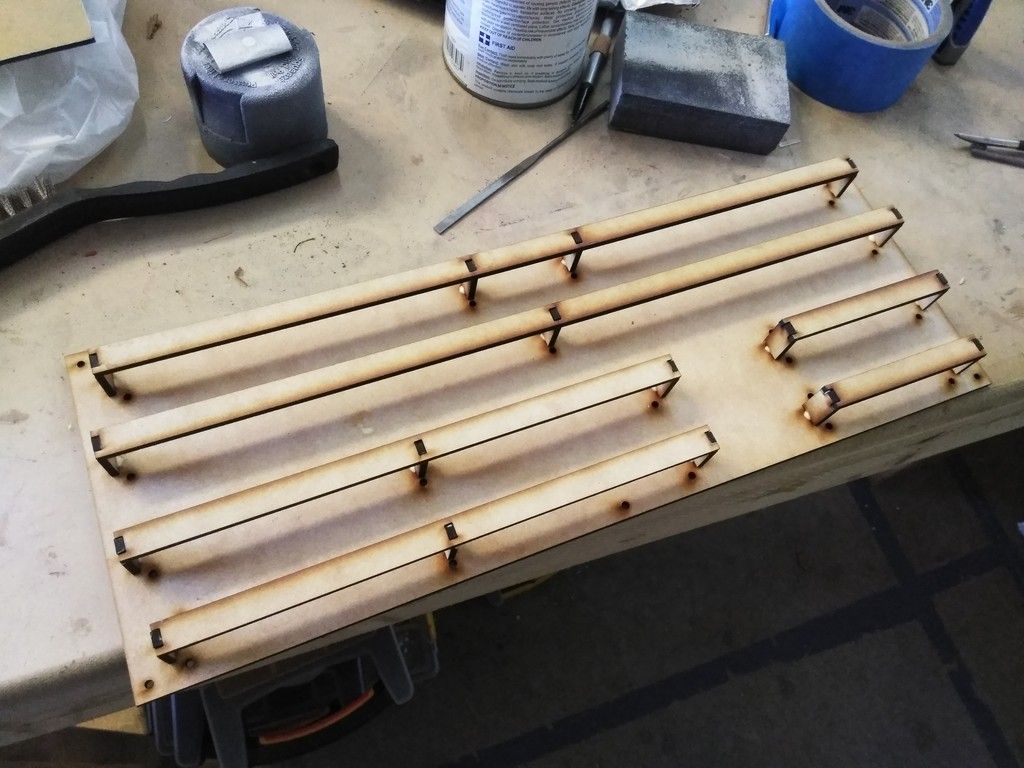
I measured 30 more times and recut

Perfect!


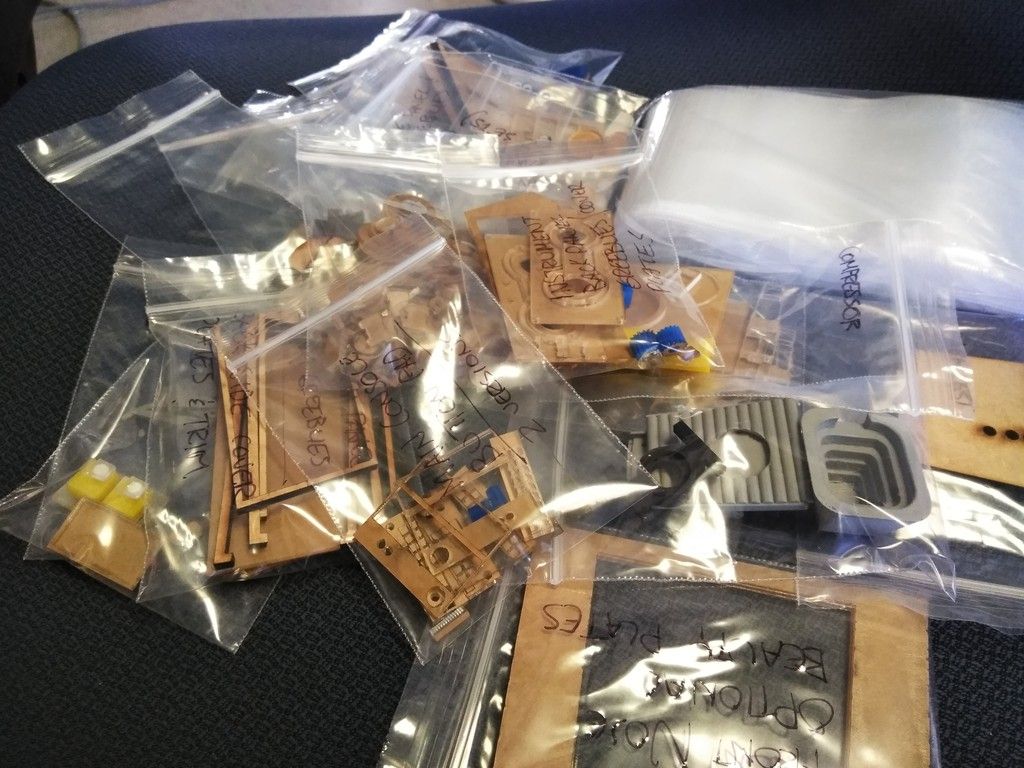
Lets make some greeblies for this Nav Com!


Sanded and adhered together


More greeblie goodness!

I picked up a pack of 1 inch Googly Eyes

???

I cut off the back and removed the eye leaving the convex "lens"

Sanded and adhered


Primer

Paint

Weathering

Hello, Dave

Adhered the trim piece

Filler

Sanded and Primer

More details


On to the console... I tried reprinting the decals and this continues to happen... :facepalm

This is a BRAND SPANKING NEW PRINTER!


I removed the old decals from the instrument panels

Why? The panels had cracked and I needed to fix
Sanding and filling

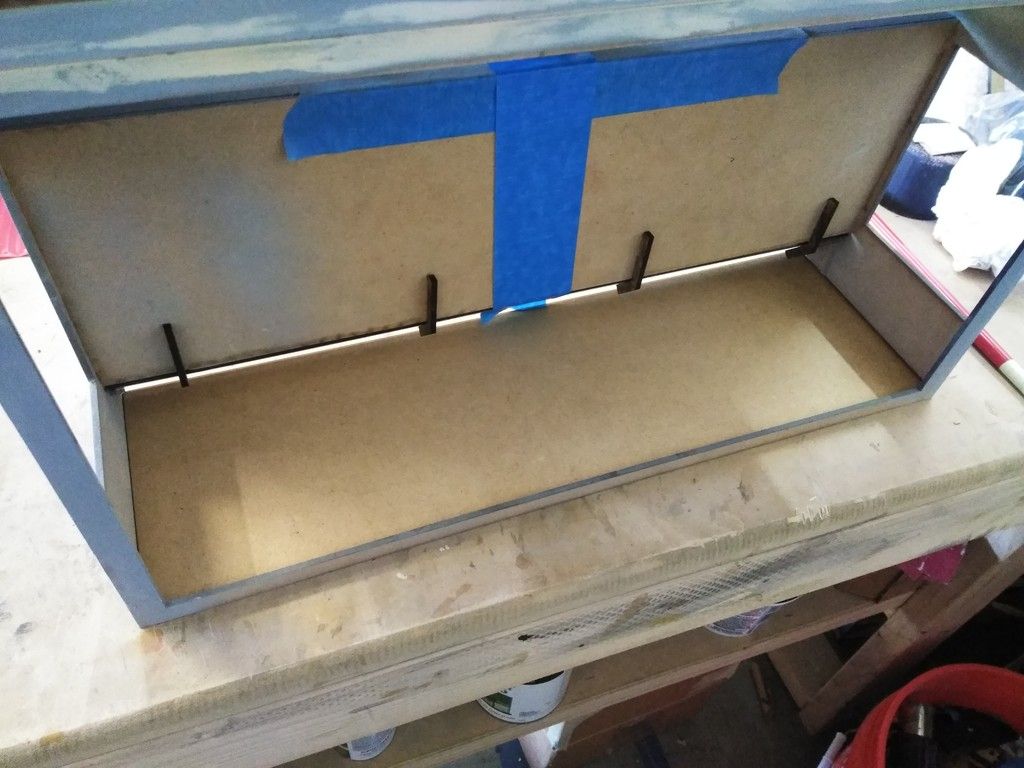
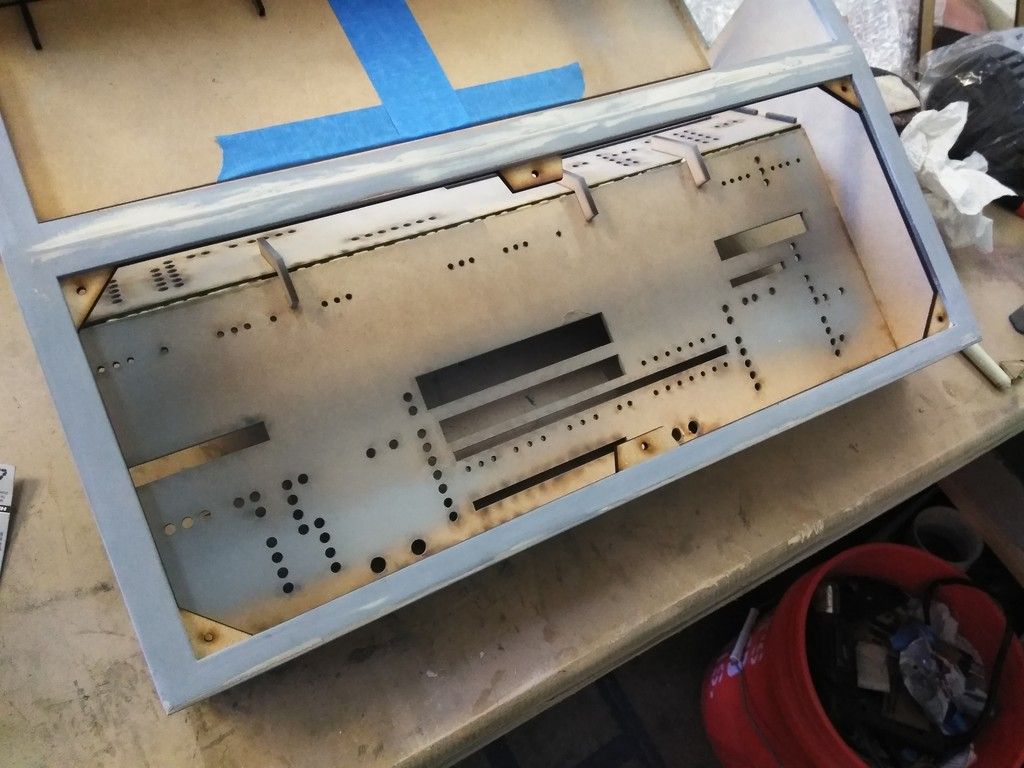
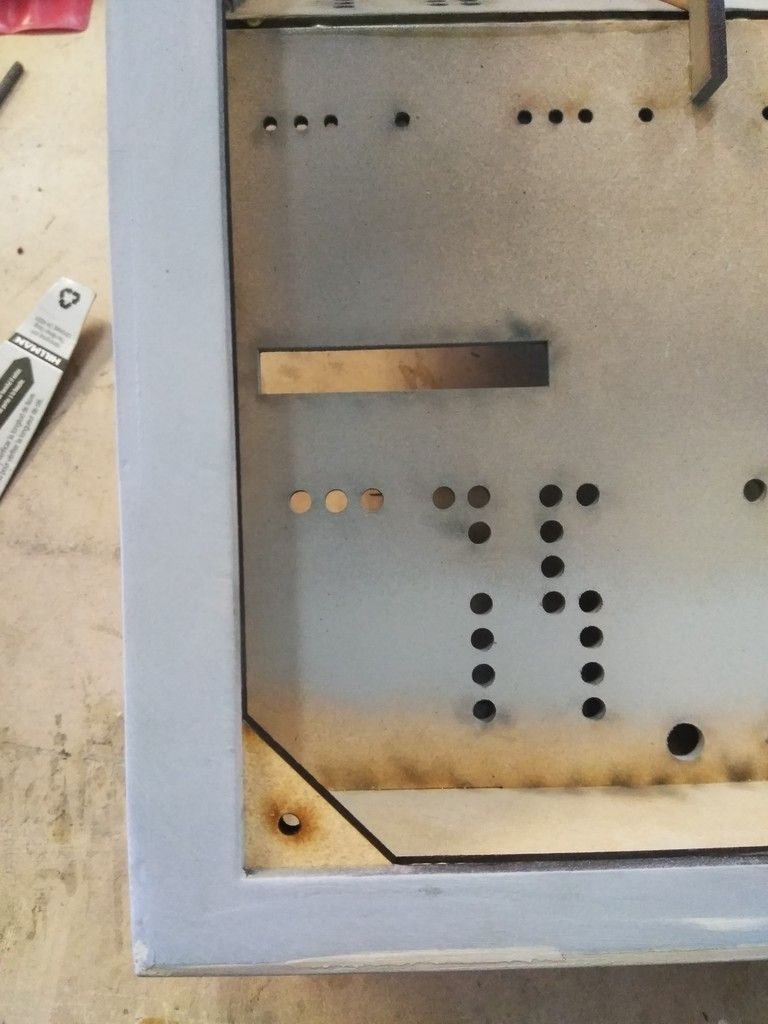
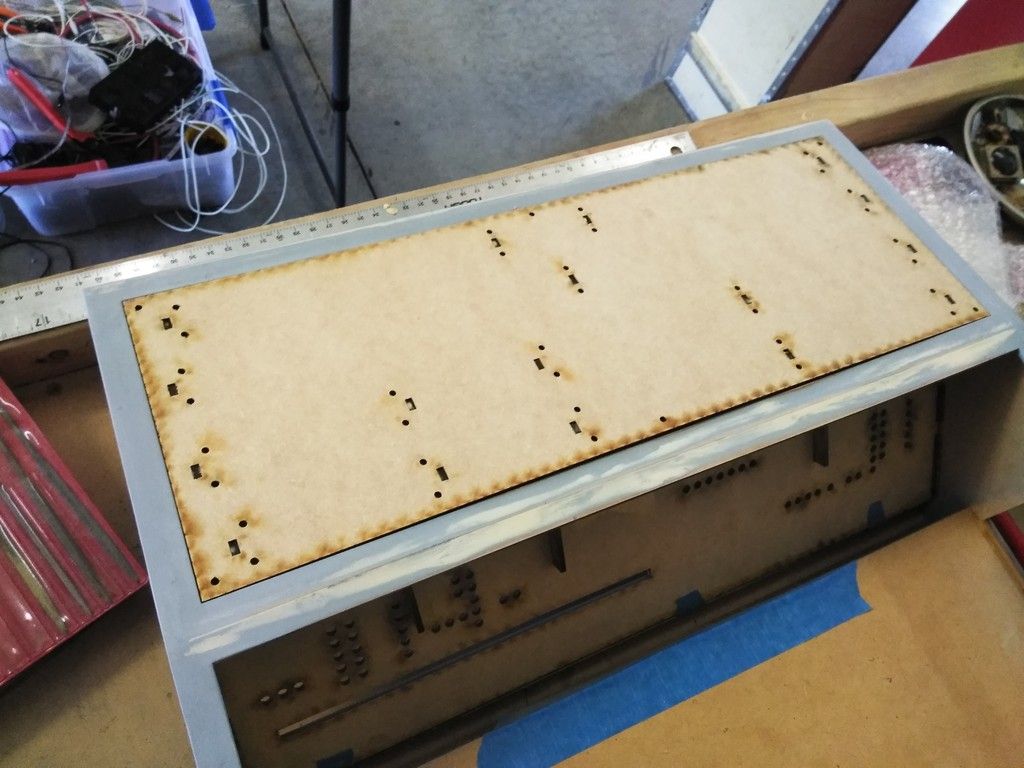
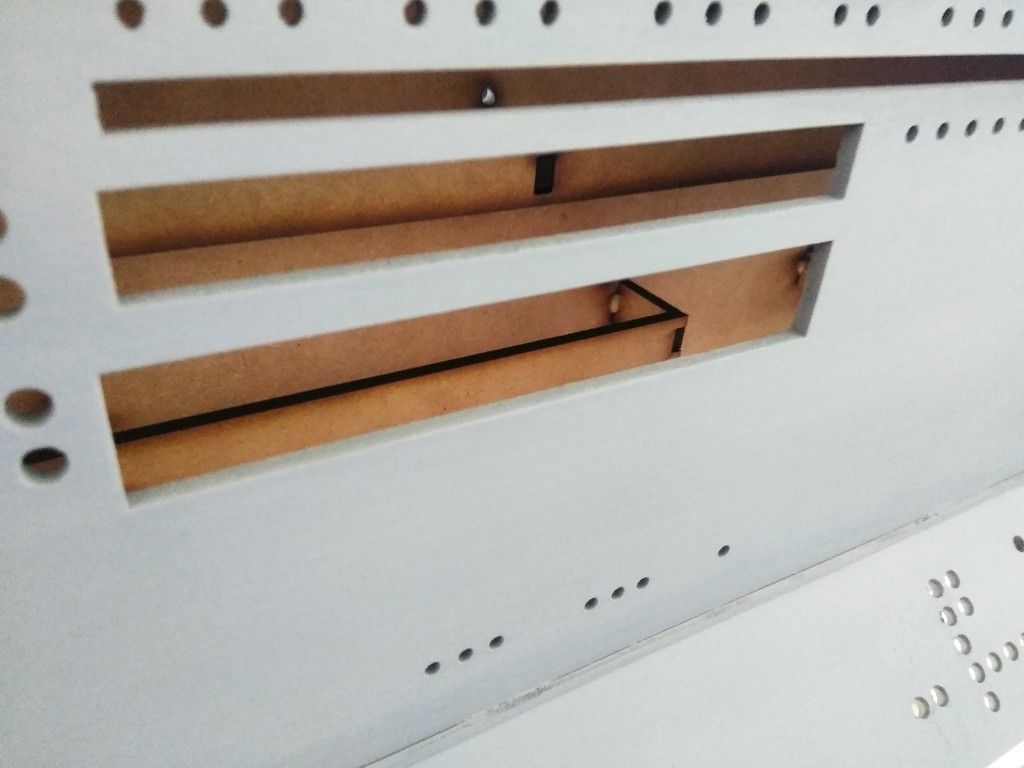
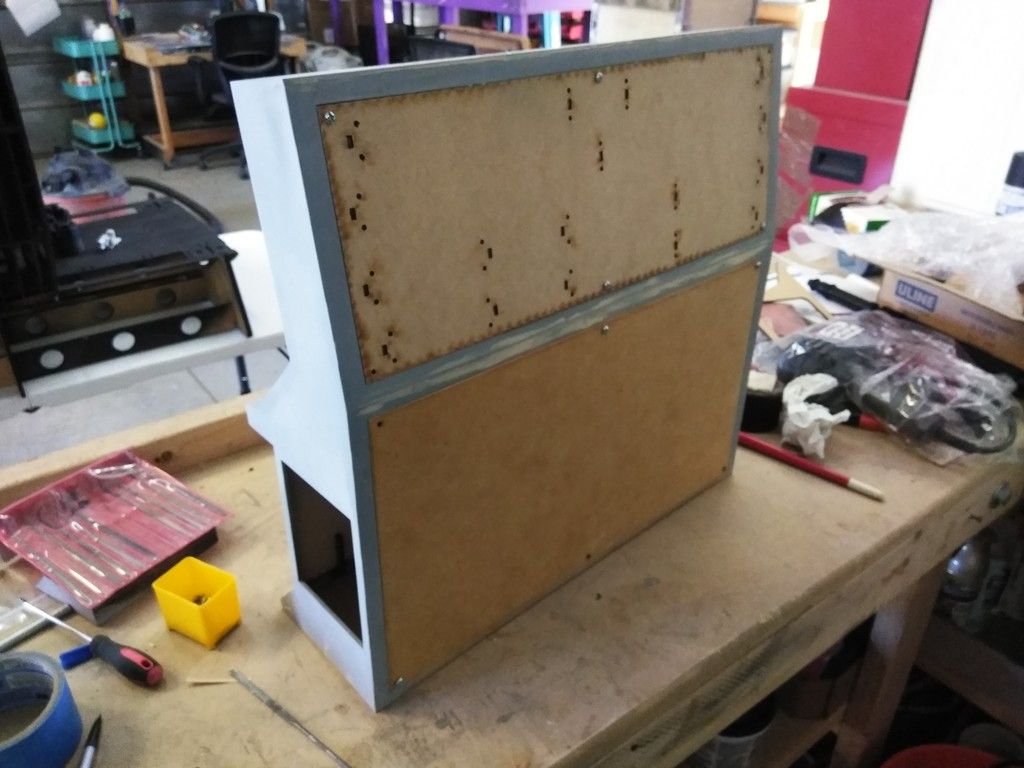
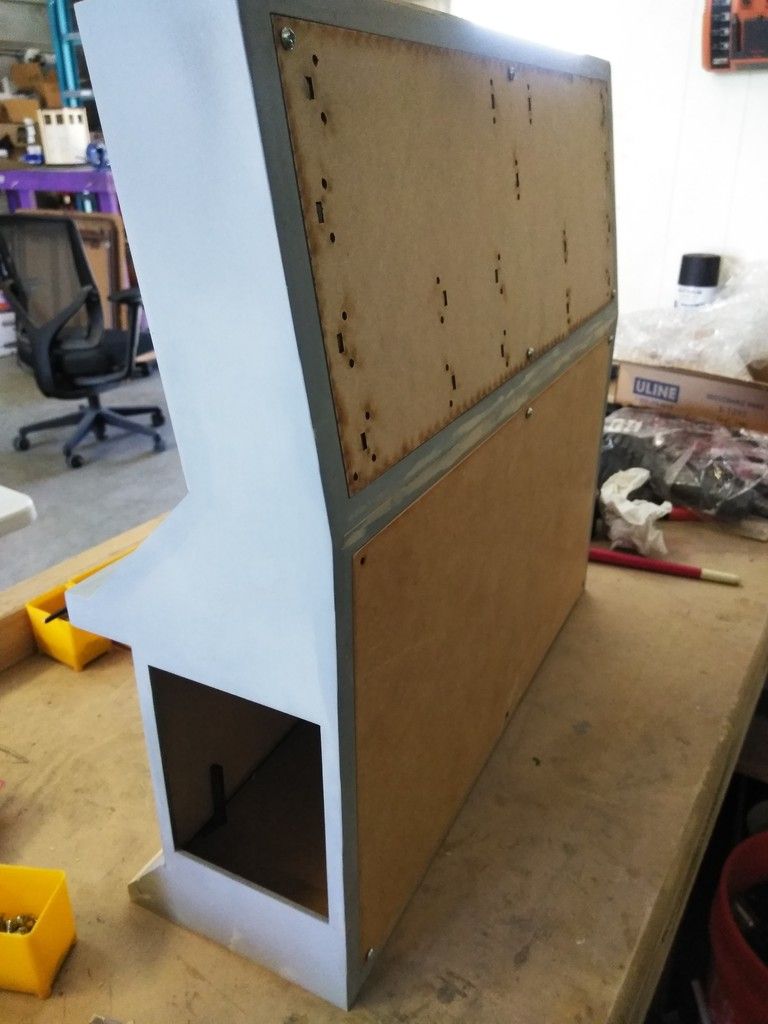
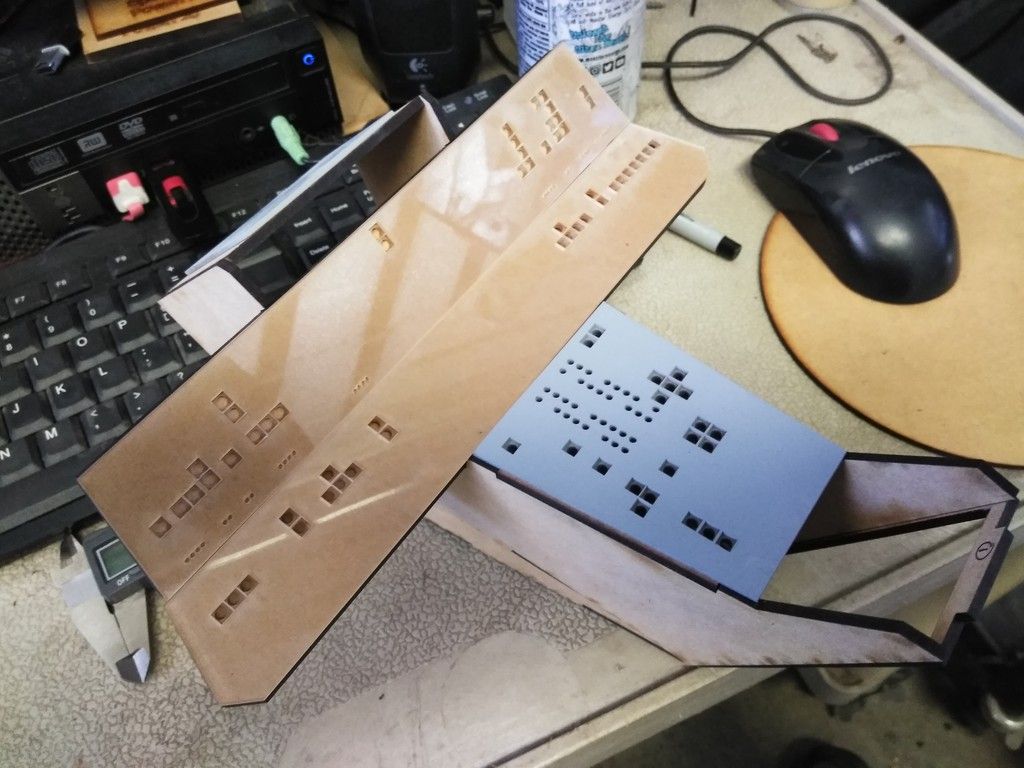
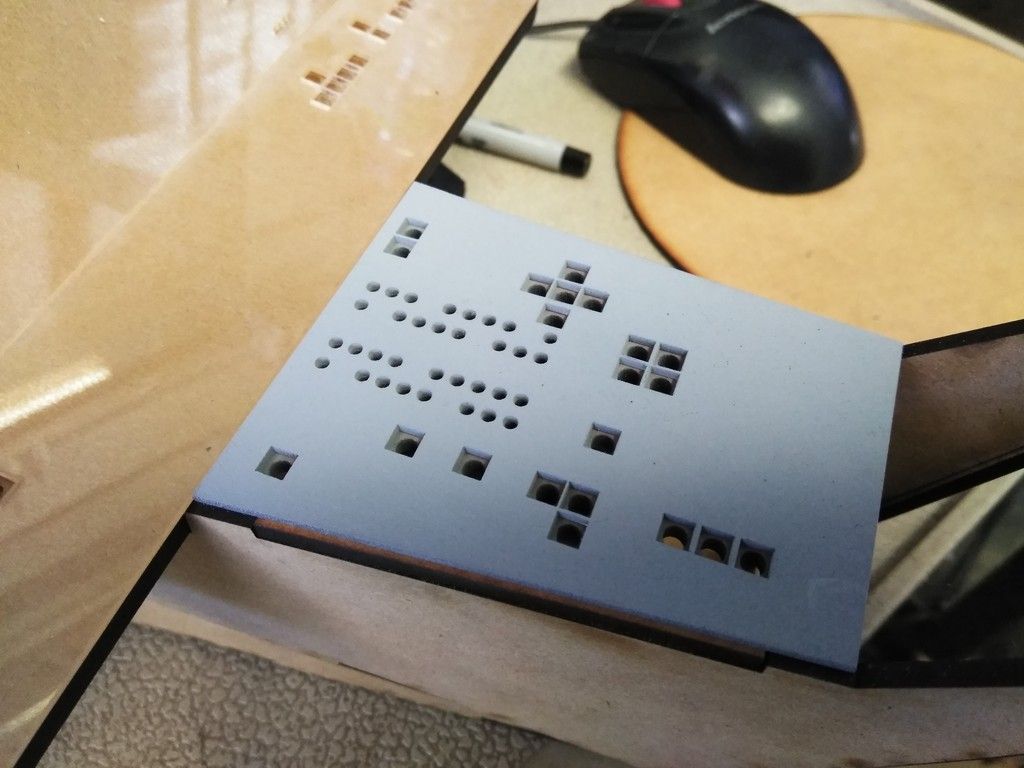
I had some fun with the upper instrument panel back plates
Template / mounting guide
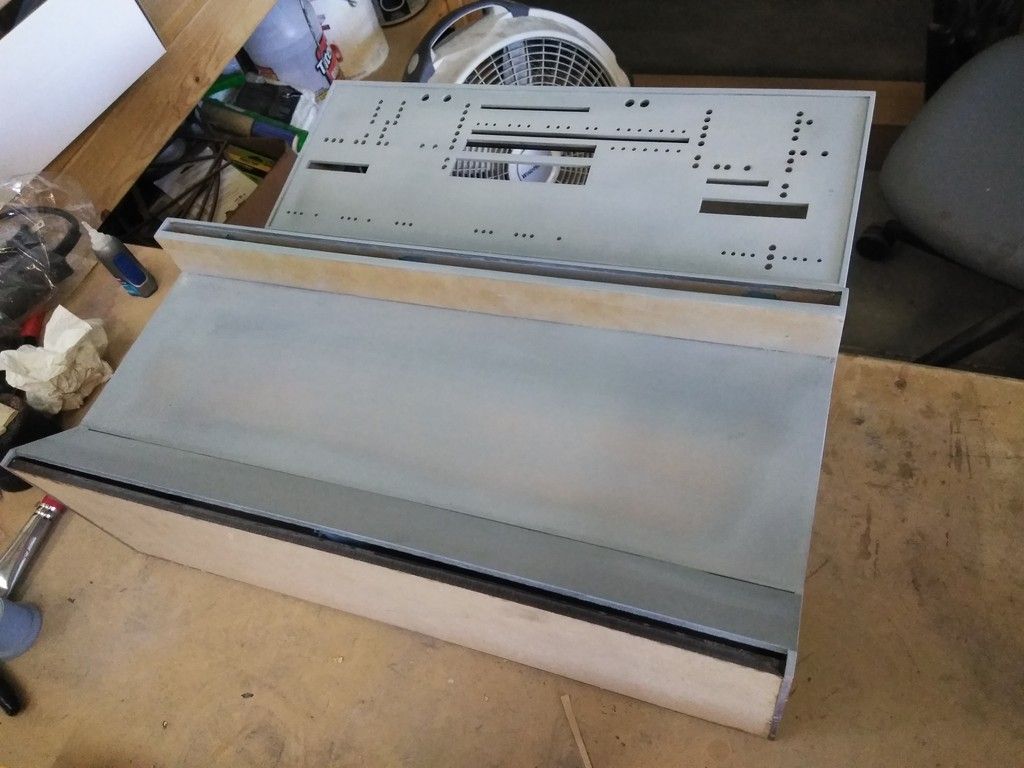
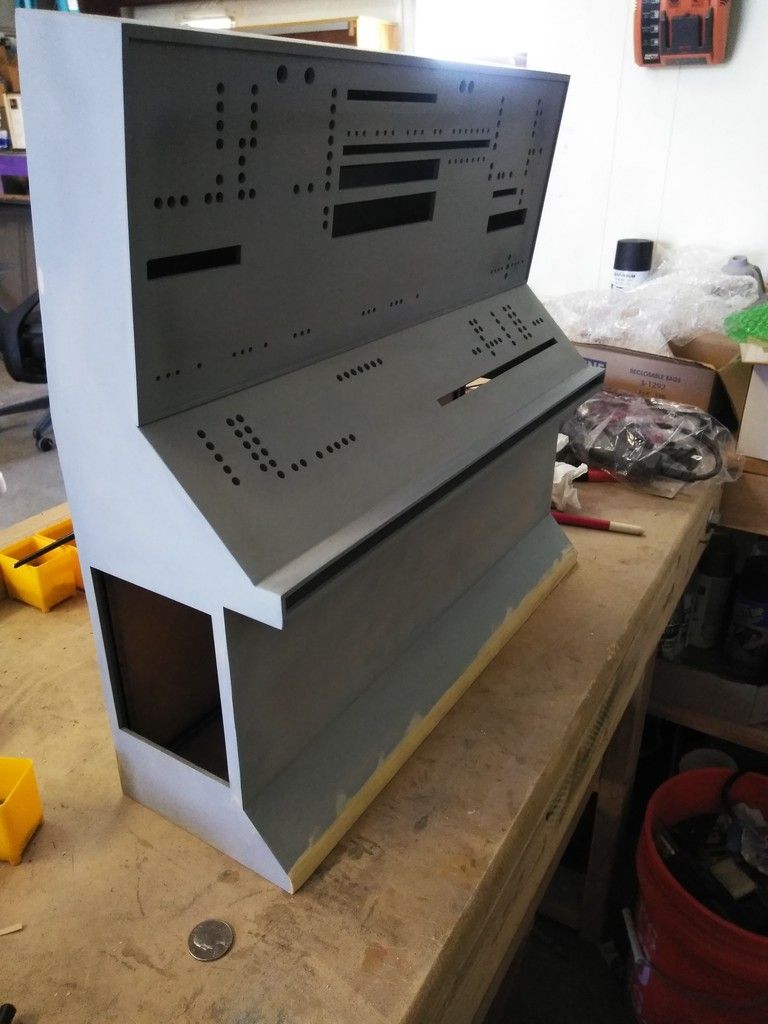
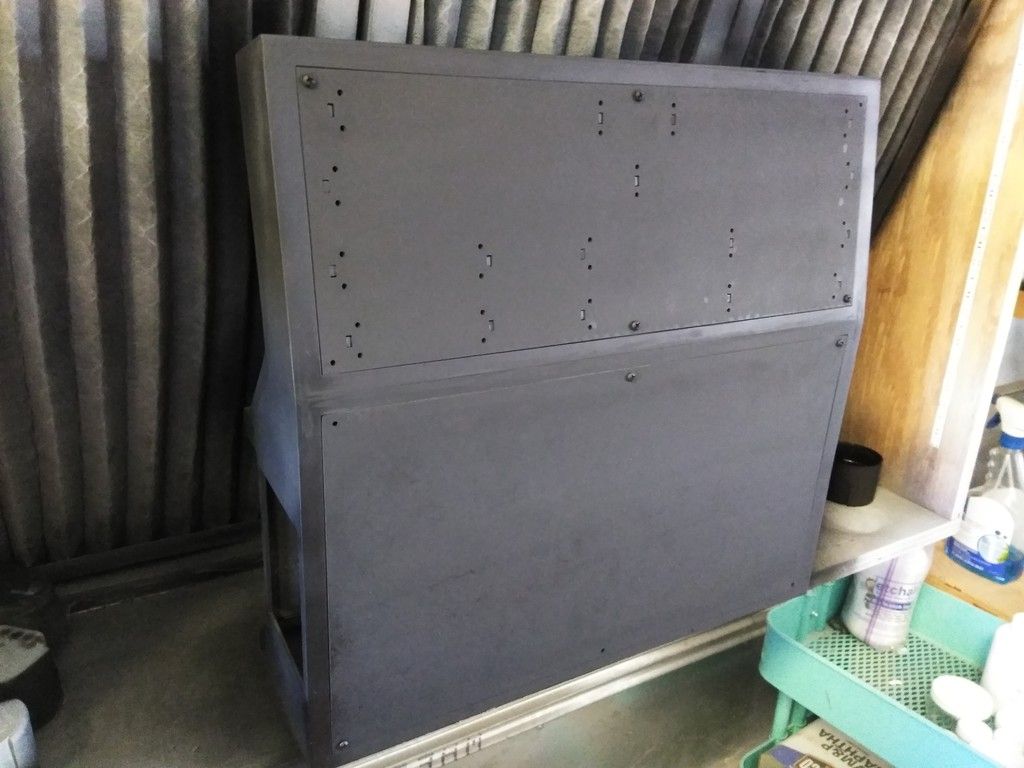
MMMMMM Primer!

Paint

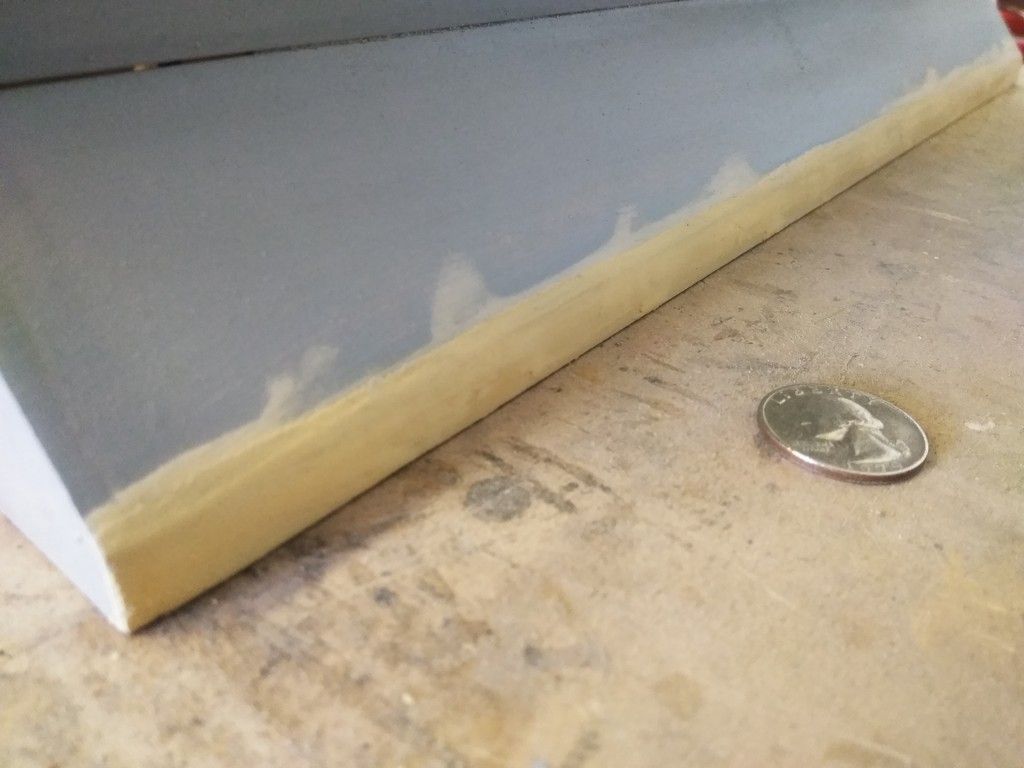
Little bit of weathering


I might add a white and or red pinstripe around the edges of the main panel

Worked on the console nose greeblies

X-ACTO for scale (qtr coming!)


Filler

Nose boxes
Vents

More greeblies

Take these pieces

Stack them all up and prime!

Paint

Light weathering - just dust and paint brush

Laid on top of the decal for ref

Instrument panel greeblie(s)

Test piece

Side by Side

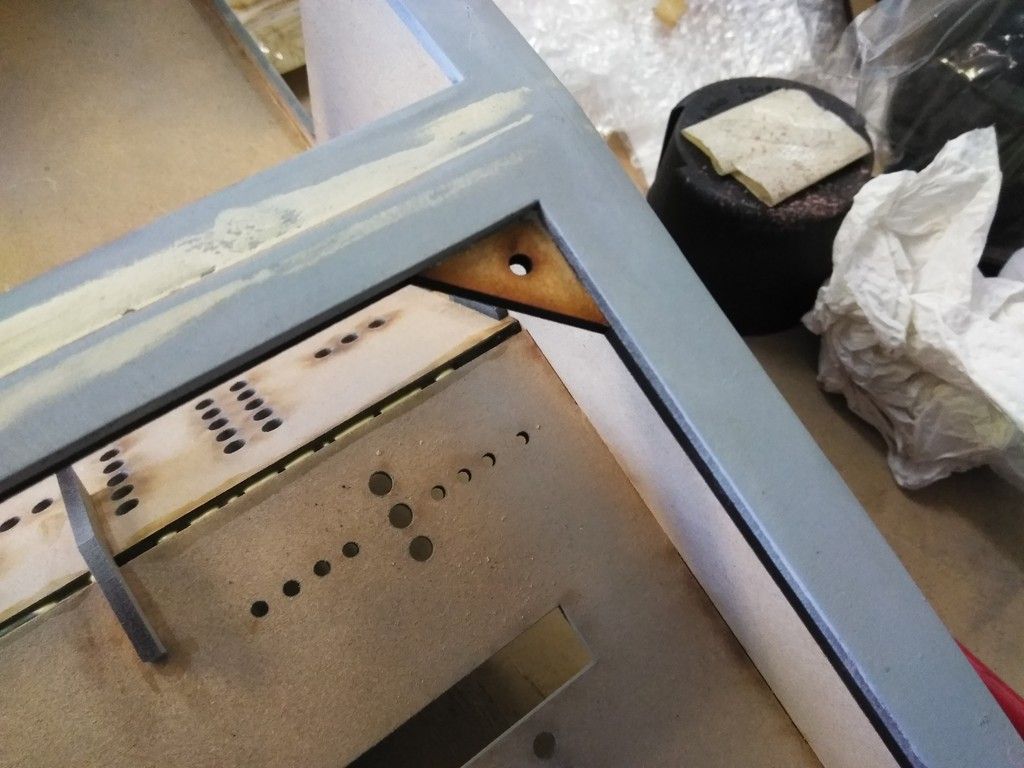
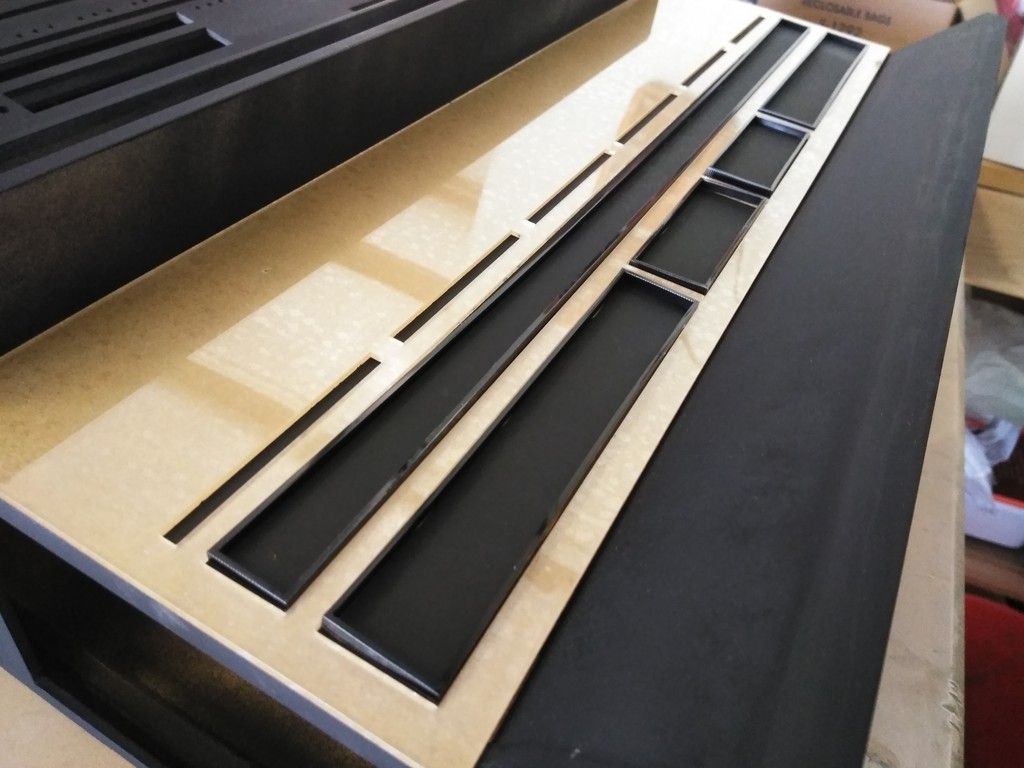
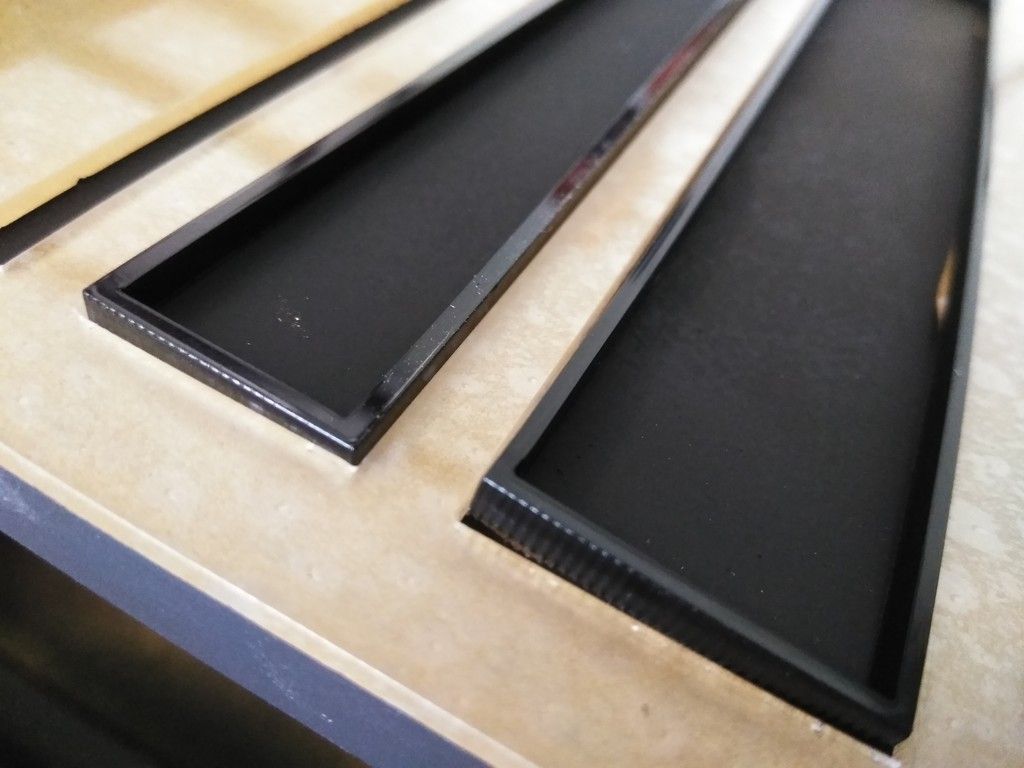
Throttle housing trim pieces

Throttle housing!


When the throttle housing was laid in the place... the pin stripes didn't quite align...

But the angles were almost perfect!

UGH! I have NO IDEA where this extra holes came from! :facepalm

It does look cool!

Decal removed


More instrument panel greeblies!

As you can see... I wasn't happy with the angle of the throttle housing

Button panel

Chewie side

Sanded and adhered together

I then laser cut all these little buttons... Sadly, they were a bit too small for the button panel openings

White paint

It looks cool but the buttons were a bit small and they just wanted to bounce around and not fit snug...


The holes will get the black switches

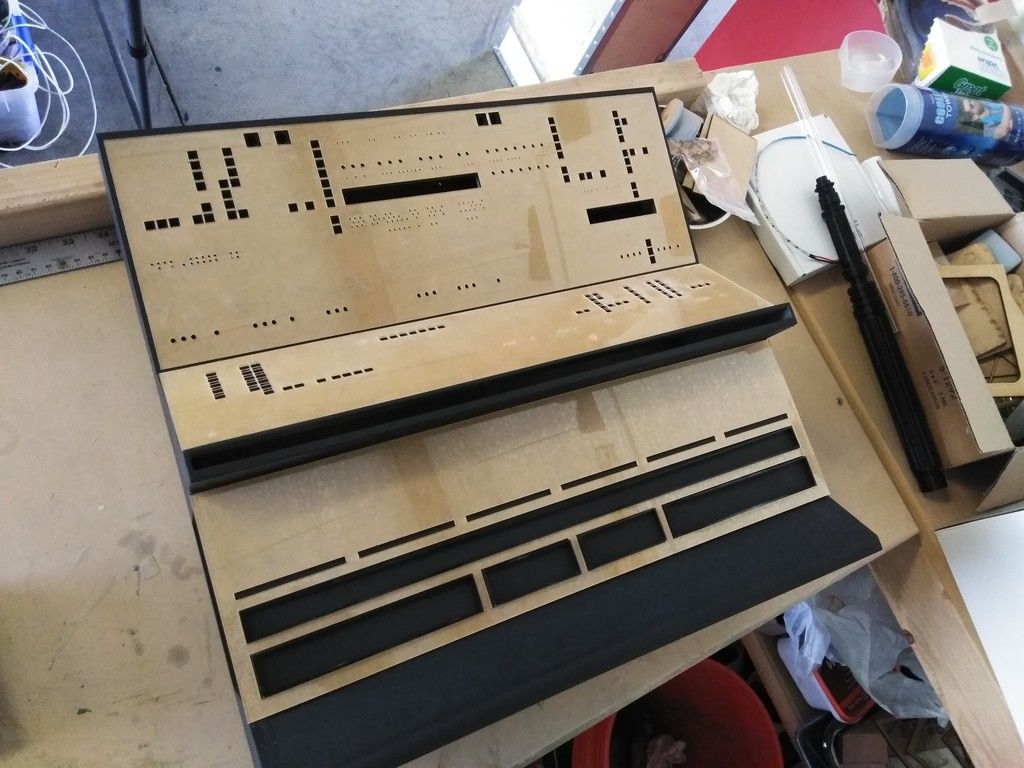
With the throttle housing and trim

I then laser cut a NEW housing and this one fit MUCH better


PERFECT!

I laser cut this filler piece
Sanded the edges and pushed into place

Filler
http://i778.photobucket.com/albums/...ep/03 Sep/IMG_20180903_100752_zps0nv9zdwp.jpg

New housing - no more double hole!
http://i778.photobucket.com/albums/...ep/03 Sep/IMG_20180903_100928_zps3e33nosi.jpg

Filler added to the edges
http://i778.photobucket.com/albums/...ep/03 Sep/IMG_20180903_110025_zpslc4zqhpg.jpg

I then added more details to the throttle trim pieces
http://i778.photobucket.com/albums/...ep/03 Sep/IMG_20180903_104900_zpstigrcejg.jpg

http://i778.photobucket.com/albums/...ep/03 Sep/IMG_20180903_105107_zpsoy5fuvyw.jpg

http://i778.photobucket.com/albums/...ep/03 Sep/IMG_20180903_110102_zpsnldzmkwc.jpg

http://i778.photobucket.com/albums/...ep/03 Sep/IMG_20180903_110107_zpscrq7ecbd.jpg

http://i778.photobucket.com/albums/...ep/03 Sep/IMG_20180903_110121_zpsgtgc9dk7.jpg

Need to add a bit more filler
http://i778.photobucket.com/albums/...ep/03 Sep/IMG_20180903_123441_zpsa11x9yil.jpg

And this...
http://i778.photobucket.com/albums/...ep/03 Sep/IMG_20180903_183046_zpsn4o2xqsz.jpg

Is where we are!
http://i778.photobucket.com/albums/...ep/03 Sep/IMG_20180903_183120_zpsgav98i0d.jpg

I'm headed to Dallas, TX this Thursday for the Forth Worth, TX Galactic Swag Expo this weekend!
https://www.galacticswagexpo.com/

I hope to see many of you there! And not to worry... Lots of pics from the show will be coming!

Stay Tuned!

Mate Your builds are like being on drugs, totally addictive!

regards,

Alberto
 
Hi Gang,

Time for that "End of the Weekend Update"...

On one hand it was a complete disaster... On the other... we made the best of it. Let me explain...

I arrived at the hanger in TX Thursday afternoon
IMG_20180910_082725_zps2xdzjybf.jpg


What's lurking behind these hanger doors?
IMG_20180910_082718_zpsh1nkne9w.jpg


Rey's, Luke's and a Snow Speeder
IMG_20180907_232838_zpsqbshueml.jpg


IMG_20180907_232905_zpsyexi0tfe.jpg


The start of a Star Fighter from Buck Rogers
IMG_20180907_232854_zpsc2dj3qt8.jpg


This is what greeted me when I arrived! Let's see what has been done / updated
IMG_20180906_211348_zpskedyip9a.jpg


Mitch was hard at work at getting the canopy ready for the show!
IMG_20180906_211405_zpssoav5xau.jpg


The new latching mechanism(s) that connect each sections of the cockpit
IMG_20180906_211513_zpsbi5jvyup.jpg


Back side of the mech
IMG_20180906_211518_zpsoghpunyb.jpg


Latching mech
IMG_20180906_211738_zpsqhvhw8gz.jpg


Locked!
IMG_20180906_211752_zpsoq3qip2q.jpg


Again... Mitch was hard at work at the canopy
IMG_20180907_004915_zpsrkhcsllx.jpg


IMG_20180907_004950_zpsutubuibg.jpg


IMG_20180907_005033_zpsu0fmbu9j.jpg


With the body now in 3 complete sections I had to consolidate all the wiring
IMG_20180907_005050_zpshhjujge7.jpg


Ken added sliders to the console making it easier to get and out of the seats
IMG_20180907_100144_zpsqs79ruyx.jpg


More work on the canopy
IMG_20180907_104304_zps38vmb37x.jpg


IMG_20180907_104319_zpstwv6hhks.jpg


So pretty!
IMG_20180907_104332_zpscgnbvfyj.jpg


IMG_20180907_104430_zpsqidd027g.jpg


Using a hot wire, Ken and Mitch then slowly cut away the excess foam
IMG_20180907_110728_zpsyihpebus.jpg


IMG_20180907_110736_zpsztrlz1m0.jpg


IMG_20180907_110851_zpsqgqu5ldl.jpg


IMG_20180907_110855_zpsoqqomsyx.jpg


IMG_20180907_110913_zps4iqqakoa.jpg


End of Thursday's adventure
IMG_20180907_121109_zpsphcdf0fa.jpg


Day 2
IMG_20180907_121134_zpslfdchw2j.jpg


Sanding the foam smooth
IMG_20180907_122043_zpsrlj7cmlb.jpg


IMG_20180907_122051_zpslkkbk66q.jpg


Ken switched gears and started work on the exterior skin
IMG_20180907_142032_zpssqihs2at.jpg


IMG_20180907_142042_zpsf266nhcb.jpg


IMG_20180907_144759_zpsqf6k0ush.jpg


IMG_20180907_144805_zpsex4anh26.jpg


IMG_20180907_144815_zps9zbmacbi.jpg


IMG_20180907_164146_zpsydbk08zi.jpg


IMG_20180907_232918_zpsa8beo7dh.jpg


Canopy
IMG_20180907_144855_zps73pmbrew.jpg


IMG_20180907_144900_zpsnteyhfjj.jpg


IMG_20180907_164204_zpsjwirgw9j.jpg


IMG_20180907_164214_zpsidapo3qz.jpg


IMG_20180907_164219_zps70fsp6op.jpg


IMG_20180907_164230_zpsjjqx1xzl.jpg


IMG_20180907_232925_zpsgjconrm2.jpg


IMG_20180908_081004_zpsflco6j4a.jpg


We applied a PVC sheet to the exterior side of the canopy
IMG_20180908_081016_zps0ulekys2.jpg


Cut out the windows... AWESOME!
IMG_20180908_093722_zpsyu75a7vy.jpg


Now we head to the show and this is where it gets ugly...
IMG_20180908_071317_zpsnu5teiai.jpg


We loaded up onto the flatbed
IMG_20180908_071324_zpstw72ape3.jpg


IMG_20180908_094346_zpsmtyny4da.jpg


I'm going to stop here... The nose cone and cockpit corridor sections were loaded up and about 15 miles into the journey... DOWNPOUR! We got caught in a MAJOR storm and had to turn around. Needless to say there was a LOT of damage. Fortunately, we had already delivered / setup the main body section at the convention so no damage there. but, it rained ALL DAY and Saturday was a total bust! But that's that...

We came back to the shop, assessed the damage and regrouped. Could the weekend be salvaged?

To hide some of the bad areas I created faux paneling
IMG_20180908_144203_zpsfzyyaje9.jpg


IMG_20180908_144550_zpsz8mtwrt5.jpg


IMG_20180908_151337_zpscwjawtys.jpg


The exterior MDF skin is going to removed and replaced with either PVC sheeting or alumiclad
IMG_20180908_151346_zpsgfl7codb.jpg


The lower areas of the corridor entrance saw the most damage and the MDF blistered. I added some greeblies and really dirtied up these areas
IMG_20180908_154327_zps3ex5lovd.jpg


IMG_20180908_164521_zpsubiblhp9.jpg


IMG_20180908_164529_zpsus1su98x.jpg


IMG_20180908_164538_zpsxwae4sxk.jpg


I added more dirt and grime to the interior hoses
IMG_20180908_164543_zpscho3qrjh.jpg


IMG_20180908_164549_zps1e6uqbui.jpg


YIKES!
IMG_20180908_164604_zpsp2inzkes.jpg


Once we calmed down we took everything apart. All the work the guys had done to create 3 separate sections had to be reversed engineered and taken apart. We decided to load up the enclosed trailer and save the weekend! We weren't going to let this spoil the con!
IMG_20180908_182106_zpsfux3kucz.jpg


We loaded up, headed to Ft Worth, assembled and by late Saturday evening / Sunday morning... BINGO!
IMG_20180909_003942_zpsfxh7kbqg.jpg


IMG_20180909_003955_zpsf4pjsjxt.jpg


IMG_20180909_004009_zpsrahm80lx.jpg


IMG_20180909_004036_zpsh3crvkj6.jpg


Making sure the lights still work
IMG_20180909_110446_zpssz3gpjxr.jpg


IMG_20180909_110456_zpsertedbqw.jpg


IMG_20180909_110503_zps7kxt2dal.jpg


IMG_20180909_110511_zps3hltdsyt.jpg


IMG_20180909_112753_zpsfraqxxxn.jpg


IMG_20180909_112801_zpspvfqlb0w.jpg


IMG_20180909_112809_zpsp2n7oluf.jpg


IMG_20180909_112818_zpss5hdkoh4.jpg


IMG_20180909_112826_zpss9sv7f6w.jpg


Sunday morning... Show time!
IMG_20180909_134231_zps8xo6drvt.jpg


IMG_20180909_134236_zps38ckif3b.jpg


IMG_20180909_134328_zps6si6tqbd.jpg


IMG_20180909_134417_zpsgnwokqjo.jpg


IMG_20180909_163744_zpshiu8ljn6.jpg


8 hours later... Breakdown...
IMG_20180909_183007_zpsl0hemzsp.jpg


Two trips later we're back at the shop...
IMG_20180910_000325_zpsbfhemj32.jpg


IMG_20180910_000333_zpsijxabqur.jpg


IMG_20180910_000349_zpscjp1gzik.jpg


And this is where we were...
IMG_20180910_000408_zpsfzxjuhki.jpg


UGH... It was a rough weekend! Things happen and that's that. Gotta brush it off and move forward. :)

More images from the show coming! Stand by!

QUICK EDIT: I had a "Bad Me" moment. I was so exhausted when I posted these images... A HUGE thank you to Ken and Mitch for their hospitality during this weekend's chaos! There were some rough moments but we got through them. More importantly, their desire to continue marching forward to finish up the cockpit has been unwavering.

Thanks, guys! :)
 
Last edited:
Wouldn't be the fastest hunk of junk without the junk! Really like the mechanics of the seperate pieces. I see this thing being able to make some serious con rounds. Seems fairly cut-and-dry once you've done it a few times.

Sent from my LGLS775 using Tapatalk
 
How far was the convention from the hangar? That was unlucky timing with the rain. Sorry about that.

All the hangars are sort of like you were at a studio with soundstages. :)
 
I think the quick fix you made to hide the damage at the bottom actually looks really good, you should keep it

Thanks, OC! It literally was a "quick fix"! Fortunately, your eye doesn't stay focused in one area because there is so much much coming at you visually. I think the plan is remove the MDF and replace with PVC sheeting. But if the MDF bubbling goes down over time we'll probably leave it for now. :)

- - - Updated - - -

Still looks great to me!! Don't sweat it too much. The real falcon has been through a lot worse! lol

LOL! You are correct! A few times during all the fixes we did say she was a piece of junk... ;)
 
Wouldn't be the fastest hunk of junk without the junk! Really like the mechanics of the seperate pieces. I see this thing being able to make some serious con rounds. Seems fairly cut-and-dry once you've done it a few times.

Sent from my LGLS775 using Tapatalk

Hey ST,

The modular sections work perfectly! Once we get the wiring "realigned", mount the rest of the new recessed latches and of course raise the top of the enclosed trailer, it will be a "no-brainer". The 3 sections took less than 5 min to clip into place - there is some struggling to get the pieces aligned. But no more countless bolts, screws, T-Nuts, etc...

It works! It's going to be awesome! :)
 
How far was the convention from the hangar? That was unlucky timing with the rain. Sorry about that.

All the hangars are sort of like you were at a studio with soundstages. :)

Hey LtW,

We were about 45 min from the Con. It was literally the perfect storm. A very stressful weekend was had by all. Unfortunately, the rain also put a damper on the con itself. We're all hoping they return next year.

The hanger, and the amount of working space, was awesome! They should put a a huge "EP V" on the hanger doors! ;)

I'm really looking forward to seeing all the ships on display.
 
Hey, I'm glad I finally got to meet you and at least help unload a bit. I'm so sorry you guys had so much trouble and I'm super bummed I didn't get to see the whole thing in all its glory. Saturday was pretty dead and I heard Sunday was even worse. I packed R2 up and left just as I was hearing that you guys were on your way with the remainder of the cockpit. Hopefully you'll be back out next year and the con will improve a bit.
 
Some of those bits you guys made look like a bit like a camera wind-age knob of some description, and the inside of an old video cassette?
 
I remember a few months back it was discussed but dont recall anything even semi recent being mentioned...

Is the full scale MF this was planned originally to be a part of still happening or under way?

Sent from my LGLS775 using Tapatalk
 
Thanks for the awesome pics Sofa...love the bubbling MDF on the sides: looks lived-in;) I see that you all make lemonade out of those lemons Mother Nature was throwing at you.
I hope it was a success for everybody involved! Question: any thoughts about the greeblies outside of the cockpit?...you know, for next time convention:D
 
Hey, I'm glad I finally got to meet you and at least help unload a bit. I'm so sorry you guys had so much trouble and I'm super bummed I didn't get to see the whole thing in all its glory. Saturday was pretty dead and I heard Sunday was even worse. I packed R2 up and left just as I was hearing that you guys were on your way with the remainder of the cockpit. Hopefully you'll be back out next year and the con will improve a bit.

Hey T,

It was great finally meeting and I am so sorry things happened the way they did. Thanks so much for help unloading. Hopefully, you were able to see some of the cockpit. Saturday was a total bust. Aside from the repairs and reverse engineering we arrived back at the con around 7:30 to finish setting everything up for Sunday morning. Wish you had hung out a little longer. :)

There is a Con in late Oct in Irvine, TX that we'll be heading to! Hopefully we can meet up, reconnect and geek out. I think the Con is Fan Days?????

- - - Updated - - -

Some of those bits you guys made look like a bit like a camera wind-age knob of some description, and the inside of an old video cassette?

Hi M,

Many of the parts you see did in fact come from Reel to Reel players, movie cameras and other electronic devices. Using screen grabs, I did design and laser cut the cassette deck looking greeblie. We're still not sure of the real world object but we're always looking!
 
I remember a few months back it was discussed but dont recall anything even semi recent being mentioned...

Is the full scale MF this was planned originally to be a part of still happening or under way?

Sent from my LGLS775 using Tapatalk

Hey ST,

Although I no longer have any association with the Full Scale Falcon Project, as far our team, The Falcon Cockpit, is concerned, the plan to build a full scale replica of MF is still a plan! The project is by no means small. It will be small steps. Disney will certainly beat us when they unveil their full scale MFs at both Disney Land and World. I dont know how screen accurate they will be, but they will exist.

I just have to find a way to deepen my pockets! ;)
 
Thanks for the awesome pics Sofa...love the bubbling MDF on the sides: looks lived-in;) I see that you all make lemonade out of those lemons Mother Nature was throwing at you.
I hope it was a success for everybody involved! Question: any thoughts about the greeblies outside of the cockpit?...you know, for next time convention:D

Hey J,

Dont those pics of the bubbling MDF just send a warm fuzzy all over? UGH! I think that was the worst of the damage. Ken and Mitch haven't gotten back to me so fingers crossed!

The rain really put a damper on the con itself. The line of storms that came through were never ending. But Sunday was a lot of fun. Several people returned they were able to enjoy the cockpit and get photos. The smiles are why we do what we do!

Not sure how the guys are going to proceed with the exterior greeblies or armor plating. I know the original designers used a lot of PVC pipe and real world world items. With that, I'll begin my search for greeblies that closely resemble what's needed.

More Con pics coming!
 
Hey J,


The rain really put a damper on the con itself. The line of storms that came through were never ending. But Sunday was a lot of fun. Several people returned they were able to enjoy the cockpit and get photos. The smiles are why we do what we do!


Be glad you don't live in the north. One weekend, I had to sell at a model train show in minus -25 below zero conditions. Waiting in the car 30 min. for them to unlock the doors so I could set up was brutal! Then, another weekend, we had the worst ice storm in years. You couldn't go more than 10 mph or use your brakes on the roads or you would just slide into the intersections, so I had to pray for green lights all the way there. Not many buyers / lookers ventured out those days!
 
Last edited:
Hi Gang,

Time for an update! I didn't get much done on the project as much as I did on the Izzy's 1/6th scale console kit! We are considering a kit so if anybody is interested please let me know and stand by for more details! :)

However, in between cuts I did some work on the 1/4 scale Nav Computer. I laser cut this new 1/4" MDF interior base
IMG_20180915_083359_zpsiwidowcv.jpg


IMG_20180915_083526_zpsthbwxcnw.jpg


IMG_20180915_085405_zpsvejb24oi.jpg


Time to fill this gap
IMG_20180915_085410_zpsmhq1wdms.jpg


I laser cut a strip and then adhered from the back side
IMG_20180915_090037_zpszceltpml.jpg


The back side has 2 large access panels for all the future wiring. I had to create some mounting tabs
IMG_20180915_091841_zpsmmrlhsu8.jpg


Looking from the back side this mounts behind the upper panel
IMG_20180915_092214_zpsrbv505p5.jpg


IMG_20180915_092220_zps8fhvjcxp.jpg


IMG_20180915_092223_zpsqdvfidn3.jpg


I then laser cut these pieces
IMG_20180915_095414_zpsho8ob4lt.jpg


IMG_20180915_100300_zpsxsovneps.jpg


IMG_20180915_104515_zpsuxzb1py2.jpg


This odd looking panel will be adhered to the back side facing in. The shelf looking bits are for the LED strips that will help illuminate the back panels
IMG_20180915_104520_zpsbpzqlech.jpg


I'll create some decorative panels to hide all the holes
IMG_20180915_104534_zpsi6ii8kix.jpg


Looking in
IMG_20180915_104607_zpsu6hvlplp.jpg


IMG_20180915_122627_zpswlaqe5xh.jpg


IMG_20180915_122631_zpsi0v9r0s3.jpg


IMG_20180915_122650_zpsrnl7dfck.jpg


Filler
IMG_20180915_122659_zpsa4acqzjj.jpg


Black primer
IMG_20180916_135958_zpsdjfwrqgy.jpg


IMG_20180916_140155_zpssxkxpgbs.jpg


IMG_20180916_141220_zpsyw40e6yh.jpg


More decorative paneling
IMG_20180916_145008_zpsosrnvpmd.jpg


Trim pieces
IMG_20180916_145015_zpsryh2l5sh.jpg


IMG_20180916_145117_zpss5jb8xf7.jpg


Laser cutter now works but it needs to be aligned, focused and the bed is now uneven and has to be leveled
IMG_20180916_145133_zpst3k5astf.jpg


IMG_20180916_145158_zpstimlg7tp.jpg


Izzy's 1/6th Scale Console! Again, PLEASE let me know if anybody is interested! :)
IMG_20180916_080327_zpsw64sjzt3.jpg


The kit is VERY complex and is not for a simple beginner
IMG_20180916_112316_zpsb73cs36b.jpg


Body Panels
IMG_20180916_113736_zpsydracuqv.jpg


Console in all her 1/6th scale glory!
IMG_20180916_122415_zpsxpwpc5cu.jpg


IMG_20180916_122430_zpssldtvs28.jpg


And this is where we are!
IMG_20180916_122438_zpszxsjexkj.jpg


Again, please let me know if you're interested in the kit! Lots more coming so stay tuned! :)
 

Your message may be considered spam for the following reasons:

If you wish to reply despite these issues, check the box below before replying.
Be aware that malicious compliance may result in more severe penalties.
Back
Top