Good way to add a small LCD screen with looping video in a prop?

AnubisGuard

Master Member
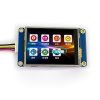
I'm looking for a way to place a small (around 2.5" diagonal at most) LCD screen in a prop and have it loop a single video file when the prop is powered on. I've looked into both Arduino and Rasberry Pi, but neither are quite what I need. Arduino you can't play videos easily if at all, and Pis are too large for the space I'm working in -- plus they have a long bootup sequence when powered on. Ideally, I'd like something like one of those small photo viewer keychains, but for video.

Basically:

•Needs an approximately 2 to 2.5 inch LCD screen
•The controller can't be larger than about 3" diagonal
•Video must begin playing automatically and loop endlessly once power is applied
•Ideally no boot up sequence, it just starts playing immediately

Are there any solutions out there that can accomplish what I'm looking for? Thanks.
 
You didn't mention what the over all size prop you are building.
How much room is available for the screen, video electronics, power supply, etc.?
Do you have pictures to give a better idea as to what direction to go?


.
 
I'm looking for a way to place a small (around 2.5" diagonal at most) LCD screen in a prop and have it loop a single video file when the prop is powered on. I've looked into both Arduino and Rasberry Pi, but neither are quite what I need. Arduino you can't play videos easily if at all, and Pis are too large for the space I'm working in -- plus they have a long bootup sequence when powered on. Ideally, I'd like something like one of those small photo viewer keychains, but for video.

Basically:

•Needs an approximately 2 to 2.5 inch LCD screen
•The controller can't be larger than about 3" diagonal
•Video must begin playing automatically and loop endlessly once power is applied
•Ideally no boot up sequence, it just starts playing immediately

Are there any solutions out there that can accomplish what I'm looking for? Thanks.

A Raspberry Pi Zero with a screen could be made to boot automatically when power is applied, and boot into an endless video loop using a program called omxplayer. This could be done without any input from a keyboard or mouse. You would have to read more than a few tutorials to figure out how to do it and program in the Pi language, PYTHON. But, yes, it could be done.
 
You didn't mention what the over all size prop you are building.
How much room is available for the screen, video electronics, power supply, etc.?
Do you have pictures to give a better idea as to what direction to go?


.

I'm working on a Surface Mapper from Galaxy Quest. The inner dimensions are approximately 2.5" by 5.25" by 1".

My working plan is to install a 555 timer circuit to drive the LEDs; the board for that is 3" by 1". Audio will be provided by the Adafruit Audio FX Sound Board, 1.5" by 0.9". Power will probably be a AAA battery holder of some kind, depending on how much room I have. I'd rather not wire up a rechargeable battery because I have no experience at all with that.

My hope is to find some kind of simple video player to put behind the hood; I want to hook it to a magnetic reed switch so that it activates when the hood is opened. (Barring that, I'll either put in a backlight with a transparency, or go classic Trek-inspired with a bright blue light a la Spock's viewer.) Whatever I do can't take up much room because a lot of it it is already spoken for.

Screen Shot 2017-08-25 at 10.36.22 PM.pngScreen Shot 2017-08-25 at 10.37.19 PM.pngScreen Shot 2017-08-25 at 10.35.42 PM.pngScreen Shot 2017-08-25 at 10.31.24 PM.png
 
A Raspberry Pi Zero with a screen could be made to boot automatically when power is applied, and boot into an endless video loop using a program called omxplayer. This could be done without any input from a keyboard or mouse. You would have to read more than a few tutorials to figure out how to do it and program in the Pi language, PYTHON. But, yes, it could be done.

Thanks, and I've already looked into it. (There's code out there and everything available for use.) I'm not a fan of how long it takes for Pis to boot up; the video tutorials I watched showed a good 20 or 30 seconds of bootup before the video starts looping. It doesn't fit with the "instant on" I want for the project. Unless the Zero is substantially different on that front from the 2 and 3, but I was under the impression that all Pis run Linux, yes?
 
Thanks, and I've already looked into it. (There's code out there and everything available for use.) I'm not a fan of how long it takes for Pis to boot up; the video tutorials I watched showed a good 20 or 30 seconds of bootup before the video starts looping. It doesn't fit with the "instant on" I want for the project. Unless the Zero is substantially different on that front from the 2 and 3, but I was under the impression that all Pis run Linux, yes?

Yes, there is also an OS called PiCore, that could get your boot time down to around 11 seconds....but your picture shows there is no room around the area that it appears you want the screen. All screens that can run from a Pi need a significant border around the screen area for the board the Screen is mounted to.
 
but your picture shows there is no room around the area that it appears you want the screen. All screens that can run from a Pi need a significant border around the screen area for the board the Screen is mounted to.

That part's not a problem. The opening in the hood is about 1.8" across and since I'd be mounting the screen inside the body of the Mapper that would leave at minimum 0.25" all around. I can't put it inside the hood proper because the hood folds shut for storage.
 
You're looking more like a backlit transparency is what is doable.

Or reduce the size of the viewable LCD screen to get the overall size down. You start compromising your overall effect though, by reducing the screen size.
 
You're looking more like a backlit transparency is what is doable.

I figured.

Check out this guy, though. He got his Pi's boot time down under three seconds:

https://www.youtube.com/watch?v=4Fjfqz6FxC8

Or reduce the size of the viewable LCD screen to get the overall size down. You start compromising your overall effect though, by reducing the screen size.

It would be difficult to work around the button in the middle, but it might be possible to put a larger screen in the body, rotated sideways so half of it is hidden under the faceplate. I could make a video file with the animation I want sideways on half the screen.
 
He has multiple links on his YouTube video....not sure which one is the image for the fast boot OS, or if it is even modifiable for what you want.
 
Depending on how much effort you want to apply, the cost and time you have, this might be a satisfactory way to add
a working screen to your prop. I have done this in the past and it is an adequate option.
Sometimes a small video watch would work as well.
This particular version of the MP4 player is the least expensive and minimal quality. The touch screen is problematic
since it is not real sensitive to touch and the screen is not HD. Once you turn it on you will have to go though a little setup
to get the screen image where you want it.
This ECLIPSE player will play video and animated GIFs to give the impression of real functionality at minimal cost.
The screen is only 1.8". If there are players which rely on a button press, rather then touch screen, that might be the best.


https://youtu.be/f1TTP1SsBjk

.
 
Last edited by a moderator:
Thanks but I think I'm going to scrap having a video screen. There's just not enough room and it's too complex. A backlit graphic with some flashing/chasing LEDs will have to do.
 
I think one of the more challenging issues with the 1.8" MP4 video players is the ability to create custom graphics
and converting them to a .AVM video format. GIF images work adequately enough, but the image "sharpness" is sacrificed.
The best way to view an image on this small screen is though video processing.
The software that is installed on the player can convert MP4 to the video it can read (AVM).
If you need to play a graphic of your own design, a program that can create video graphics would be very useful for this purpose.
I have seen several Star Trek props with working screens such as the Tricorder, but in this case there are already pre-made video
graphics that will work well for this purpose.
Here is a video showing such a graphic playback on my 1.8" screen.


So, with all of that being said, going with the backlit graphic would probably be the best in this case and has been done this way
for years. If you have a single graphic designed in such a way as to maybe have a few flashing LED's behind it as well,
with the back light, it would give the impression of function.
(P.S.) I meant to say MP4 player in the video. :)

propmaster2000

.
 
Last edited by a moderator:
If you do decide to go with the back light idea, here is a video showing a good flat light source that can be cut
shorter if needed:

.

I love this. I wish it was a little bigger, but I have a couple projects in mind that I might be able to use this for. Thanks!
 

Your message may be considered spam for the following reasons:

If you wish to reply despite these issues, check the box below before replying.
Be aware that malicious compliance may result in more severe penalties.
Back
Top