Generic ROGUE ONE Rebel Trooper - Find/Modify/Build Thread

Mean Obiwan I like the work on the Andor jacket. You indicate that it feels incomplete to you. I do not know how comfortable you are with a sewing machine but one simple suggestion would be adding the five rows of stitching around the hem of the jacket and the rows on the collar. I would not provide a thread color with too much contrast, it would be just to break up the vertical line of the jacket and provide some new visuals. Adding a non-functional adjustment strap and buckle on each side would be a little more work but might help you close the gap.
 
Last edited by a moderator:
@Mean Obiwan I like the work on the Andor jacket. You indicate that it feels incomplete to you. I do not know how comfortable you are with a sewing machine but one simple suggestion would be adding the five rows of stitching around the hem of the jacket and the rows on the collar. I would not provide a thread color with too much contrast, it would be just to break up the vertical line of the jacket and provide some new visuals. Adding a non-functional adjustment strap and buckle on each side would be a little more work but might help you close the gap.

Not bad ideas at all. I know my way around a sewing machine pretty good. I don't have access to one right away though, but I could my step mom has one, I could make a trip to the folks place and make those additions.
I think you're right too in that anything I add should be something sewed on, because I feel like more greeblies would just clutter it up, and I'm not really wanting to paint stripes on like I did on another jacket. The stripes looks good, but I'm just not feeling it with this one.
 
Last edited by a moderator:
Since my printer is busy on another job and I cannot, for the life of me, find the scope adjustment knobs and ring for the blaster!:wacko:confused
I moved onto the Cassian Vest/Jacket style transponder badge.

I had found mostly compatible parts but I ended up scratch building the little grille thing on the bottom. It was a pain in the butt, but it is done!

IMG_1094.JPG

Once I had that done,I poured some rubber on it and then tried out a few casts. I really have to keep the mix thinned out and pour the grille first to keep from getting bubbles in there but I finally got the hang of it.

IMG_1106.JPG

Now for some paint and weathering!
 
Just an update on that jacket.
I've done a little bit of work on it.
I took about two inches off the bottom, cut off the buttons and added some greeblies.

https://s12.postimg.org/g390t4opp/IMG_0310.jpgimage hosting

I know my captains badge isn't screen accurate, but I'm ok with that.

https://s3.postimg.org/z8ae4mgnn/IMG_0311.jpgupload

I'm really not sure what else to do with it. I don't really want to add stripes on the sleeves, but it still feels incomplete.

It's super accurate (as I think they embroidered the sleeves directly), but you could do what I did and get the Han Solo pant stripes and sew those on. I too just shortened my BDU shirt. In addition to adding a band around the bottom, we also added a hidden zipper down the front to be more accurate. Chalk lines are still present, but those will go away:
l4fOSIi.jpg
 
I finally had a chance to sit down and finish up my Cassian style jacket badge. It also works great as a vest badge if turned upside down. I will continue to use my other trooper badge on the vest though. Just to keep things different.

IMG_1139.JPG
 
image.png What do we think about this as a base in the ways of aesthetic consistency, in universe construction methods and potential for a lived in convincing pseudo prop? Couple of greeblies and badges and this may have the stuff?
 
View attachment 712791 What do we think about this as a base in the ways of aesthetic consistency, in universe construction methods and potential for a lived in convincing pseudo prop? Couple of greeblies and badges and this may have the stuff?

I think it is close but for the money I would go for the grenade vest that has already been identified. It has a similar look to yours but is 100% accurate and is available for cheaper. Just my two cents!

On a related note. I am calling my M69 vest done! I added padding by using spray adhesive to glue two layers of batting together. This gave the batting some structure and more poof. I like the batting better than foam to keep the flexibility and comfort, since I will be wearing this for a couple hours at a time.

IMG_1176.JPG IMG_1178.JPG

I found the lower belt at a gun show and thought it was fun so I ran with it as the lower set of straps.

Now onto the jacket and then the blaster and helmet!
 
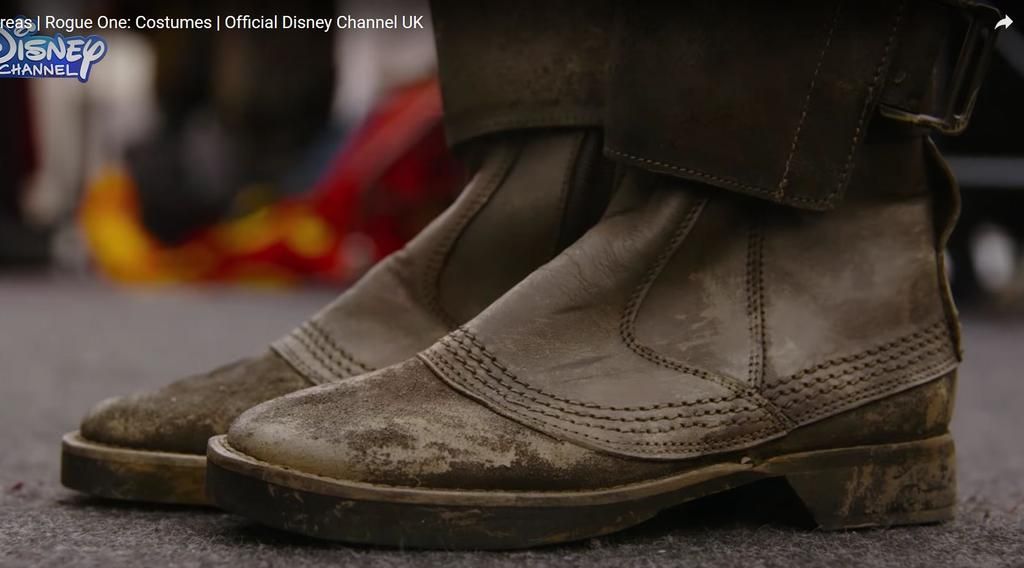
Can't really tell what the base boot, is but it's has a rougher finish than the spat. I'm using Chelsea boots for the base boot and the outer spat (No laces). Here's some shots of the real thing:

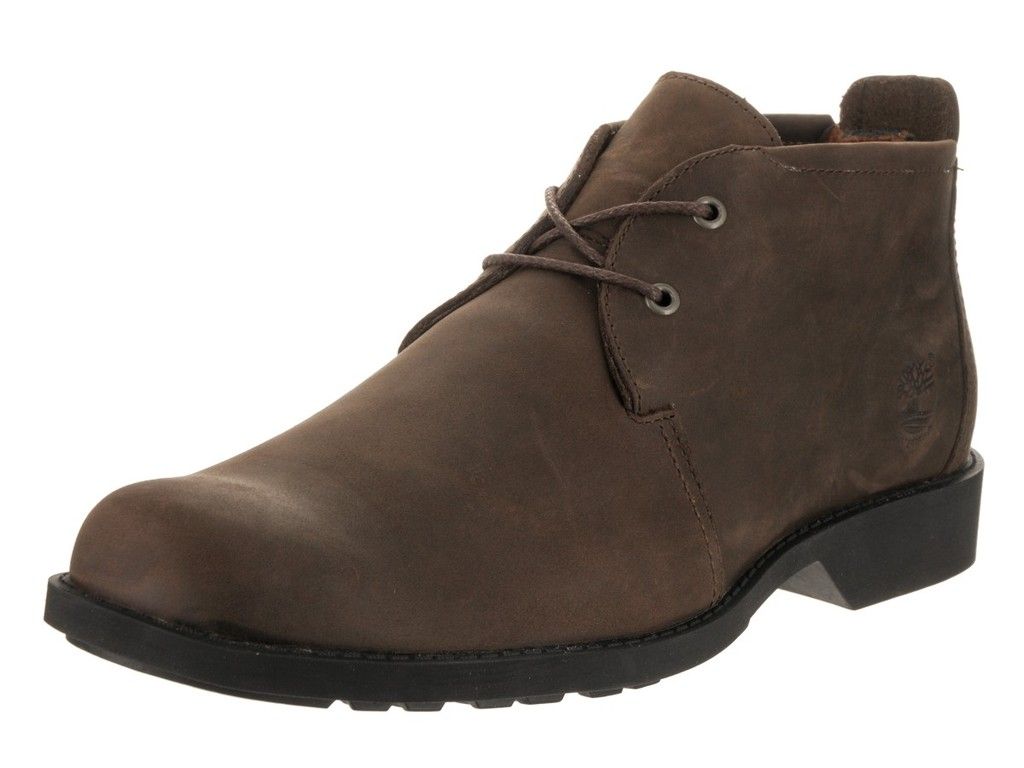
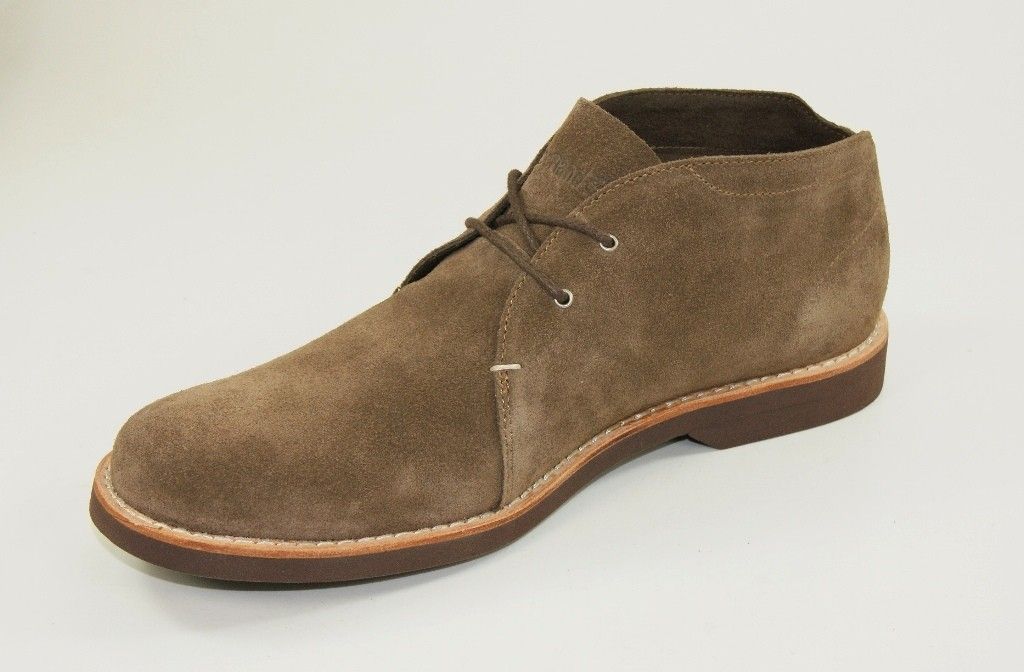
While checking the options for my own costume, I found the Timberland CHukka boots to be very close in design...

This model has the angled heels and proper height, but is missing the lighter band/ layer on the soles (City lite Chukka):


...while this model has the angled heels AND band, but not the correct height (Earthkeepers STormbuck Chukka):


Will look for other models, who -hopefully- combine all features of the R1 boots.

In addition to that I double checked the various Gorka models and while the Gorka 4 is VERY close, it is not totally accurate for the Topps Rebel soldier. Take a special look at the placement of the chest-pocket....totally different to the Gorka 4. Think I will use it anyway, since there does not seem to be any alternative out there atm.
 
After a little friendly nudging from BroadSword, I went back to work on the mods for the NERF blaster. I still have not found the correct windage knobs but I will just fab some soon. What I did do was model up a quick "block" to go in the middle of the scope. I also made a rail that would adapt to the NERF blaster.

IMG_1192.JPG

An overnight printing later and I have the "block" to go with my copper parts! I will add the small strip details on the "block" with thin bits of plastic strip I have left over from the badges.

IMG_1194.JPG

I then printed the rail and mocked up what I had so far. The rear portion of the scope still needs to be raised up on its mounting studs to mate with the hold in the "block". I will also extend the copper barrel when I add the ring and windage knobs. The front copper barrel has a longer bit on the end than needed but I will be using this as the fill hole in the mold and will cut it down on the casts.

The good news is that it fits on the blaster and with a few add-ons it will be ready to go under the rubber!

IMG_1197.JPG IMG_1195.JPG

Time for some filling and sanding....yay!
 
Last edited by a moderator:
After a little friendly nudging from @BroadSword, I went back to work on the mods for the NERF blaster. I still have not found the correct windage knobs but I will just fab some soon. What I did do was model up a quick "block" to go in the middle of the scope. I also made a rail that would adapt to the NERF blaster.

View attachment 716841

An overnight printing later and I have the "block" to go with my copper parts! I will add the small strip details on the "block" with thin bits of plastic strip I have left over from the badges.

View attachment 716844

I then printed the rail and mocked up what I had so far. The rear portion of the scope still needs to be raised up on its mounting studs to mate with the hold in the "block". I will also extend the copper barrel when I add the ring and windage knobs. The front copper barrel has a longer bit on the end than needed but I will be using this as the fill hole in the mold and will cut it down on the casts.

The good news is that it fits on the blaster and with a few add-ons it will be ready to go under the rubber!

View attachment 716843 View attachment 716842

Time for some filling and sanding....yay!

Looking good!!! Following with great interest.
 
I did a little work on the barrel for the sniper rifle. I made a 3d model and print of the front of the barrel this fits on a 2" PVC pipe.

IMG_1202.JPG

It also fits a 3/4" PVC pipe on the inner ring. That way I can still fire NERF darts from the rifle. The base of the barrel is printing tonight so tomorrow I can try the whole rig out and see if it works as designed.

IMG_1201.JPG
 
I was not happy with the look of the "block" so I remodeled it and scaled it down a bit. I also looked through more photos and mine was too wide so I changed that too.
The new is on the left and old is on the right.

IMG_1203.JPGIMG_1204.JPG

The whole mock-up looks better in my opinion.

IMG_1205.JPG

After finishing this print I ran into a calibration issue and my barrel base came out of spec.so the printer needed adjustment. A few turns of the screw and the new base is printing. Fingers crossed!
 
Not sure if anyone has noticed this, but I was watching RO for details today and I noticed that the "Code Cylinders" that they wear in their vests are actually communicators that light up. Curious if these are existing items or props made for the movie.

prTe4uL.jpg

G1lB4Gk.jpg

Tk0pZYM.jpg
 
I had a good build day today! I started by marking all the holes for the barrel to be drilled. Since it is on a cylinder I used the dremel to make small drill marks to keep the larger drill bit from slipping off.

Then it was on to the drilling, and drilling, and drilling...and 60+ holes later I had a vented barrel!

IMG_1208.JPG IMG_1209.JPG

The print was finished for the barrel base and with a few tweeks it fit on the Nerf blaster. I did have to trim just a bit (about a 1/4") from the top cylinder on the blaster for the base to sit flush.

IMG_1210.JPG IMG_1211.JPG

The last step was to cut the inner barrel for the darts and fit it to the base and nose. It all snugged up nice and tight, even without glue. The best part is that the Nerf functions just fine and the darts still shoot straight!

IMG_1213.JPG

I also printed out this little guy for the chin strap.

IMG_1214.JPG
 
While i work on endless rounds of sanding and filling on the 3D printed parts, I did some work on the metal parts of the scope.
First a mock-up.

IMG_1218.JPG

To make the lens on the end of the scope I filled the plug with EVA foam. I then poured in some 5-min epoxy to get a nice smooth glass-like "lens" effect.

IMG_1217.JPG

Since I was never able to find the windage knobs I made my own with a couple of stainless rings and a threaded "T" bolt. I drilled holes in the copper pipe and the splicing fitting to insert the threaded rods.

IMG_1219.JPG

That's it for now, until I get the block and rail smoothed and add the detail bits on the block. The molding materials are on their way so, hopefully, I get this all done when they arrive.
 
I had some time today so I finished hemming up the jacket and adding the details to the left and right breast. I am not yet happy with the stripes and might have to tried the embroidered tape.

IMG_1232.JPG
 

Your message may be considered spam for the following reasons:

If you wish to reply despite these issues, check the box below before replying.
Be aware that malicious compliance may result in more severe penalties.
Back
Top