My first build (deago ESB SS Falcon!)

Check out on page 8 where I show this same correction, that was done only a small wood chisel and some 320 sand paper, this plastic is pretty easy to shape and sand.
That's a sweet table router set up you have going on there!

you See That i remove the pannel.? That is Not on the Studio Model.
tmp_16394-20170123_0146011997925738.jpg
 

Attachments

  • tmp_16394-20170123_013923658735710.jpg
    tmp_16394-20170123_013923658735710.jpg
    828.1 KB · Views: 178
Last edited:
Oh shoot! I hadn't noticed that!! Hm yeah that's gonna be tough with a chisel and sand paper:) hmmm I haven't removed a panel from a curved surface yet. I have had luck with using my chisel as a scraper (like you would a cabinet scrapper) I guess I'll try that, will take a while but I should be able to remove the material that way, slowly : /
Thanks for pointing that out!!
 
Last edited:
Got a bit further down the road on the rear engine deck, I have a couple kits on order that I'm waiting on before I finish it off, I am slowly working though that rear center mess that is below the center engine vent, I'll post some pics of layering up the parts I have so we can see how it all goes together, and you guys can hopefully help me figure out if I have it right! haha more to come!

It's finally starting to look like something! For the most part all of this seems to be lining up correctly, there are a couple things pushing some of it around here and there by about an 1/8 of an inch, I'm trying to track down exactly what it is but its tough to figure out, I THINK it has to do with the placement DeAgo has of the 6 round engine vents, I think they are placed a tad too low. I'll post back with some photo shop work to try and illustrate where I'm seeing issues...

IMG_2122.JPGFullSizeRender.jpgFullSizeRender002.jpgIMG_2123.JPG
 
Thanks! been using that exact pic, great shot of it, especially for the parts up at the top! I'm about 2/3 of the way through this part now, still looking for that little part at the bottom right of the bay, the rectangle pieces with the round hole on the right side. Looks familiar, just can't place it.

IMG_2193.JPG
 
Thanks again Layrich, looking at that pic again I just realized that I got a part wrong! That part at the top between the ship part on the left and the p34 part on the right is actually from the scorpion and not the flack38 that I used, I just noticed that the hole in it is square and not round!
 
Thanks! been using that exact pic, great shot of it, especially for the parts up at the top! I'm about 2/3 of the way through this part now, still looking for that little part at the bottom right of the bay, the rectangle pieces with the round hole on the right side. Looks familiar, just can't place it.

View attachment 702256
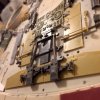


I am not share what that part is. In the shot I fond. It look like tow parts. And thanks for the tip on the part at the top
.
 
Last edited:
I thought it would be a good idea to document the rear engine build up, its pretty dense and can be difficult to figure out exactly how stuff lines up even with all the great maps. This is still a WIP but wanted to bounce it off you all and try and further vet the alignment and placement of everything. Check it out would love feedback, will add more images as it progress, need that Sheridan trailer hitch looking part that goes under the Hanomag top and rests on the tank deck, I might scratch it as It looks like a pretty simple part, not sure yet...

I had removed the M16 pieces before taking that last pic, sorry..there was no reason for other than keeping up with parts as I am not gluing anything down yet in this area until I can see it all line up correctly.

RearEngineAssembly.jpg

deck.jpg
 
Last edited:
Love the idea of showing how the parts are laid out on the lower engine deck, I'm sure everyone who is building a studio replica using kit parts will find it very helpful...thank you for posting it.

If I may ask, could you tell me what the part is that sits on the Panther deck just below the engine ring? Been trying to ID that one...

unknown_part.jpg
 

Your message may be considered spam for the following reasons:

If you wish to reply despite these issues, check the box below before replying.
Be aware that malicious compliance may result in more severe penalties.
Back
Top