You are using an out of date browser. It may not display this or other websites correctly.
You should upgrade or use an alternative browser.
You should upgrade or use an alternative browser.
Obi ANH Sabers: What do you have?
- Thread starter Tan Djarka
- Start date
Were did you source your parts? Is it all custom fabricated, assembled from found parts, or made with molds? Looks BEAUTIFUL! :love
Avolow.
If you're asking about valcrow's, it was made on a 3-D printer. And yes, very sweet looking indeed!
")
I hope you're let the paint stay on the grenade. I don't know why, but I like that. :thumbsup
I agree, the paint on the grenade is my favorite part of course it all looks good, but the grenade paint is killer! That saber definitely looks like it was neglected(in a good way).
Don't worry guys... for that particular grenade I have no intention whatsoever to mod it... it's absolutely gorgeous as is and I couldn't bring myself to strip it or alter it :thumbsup

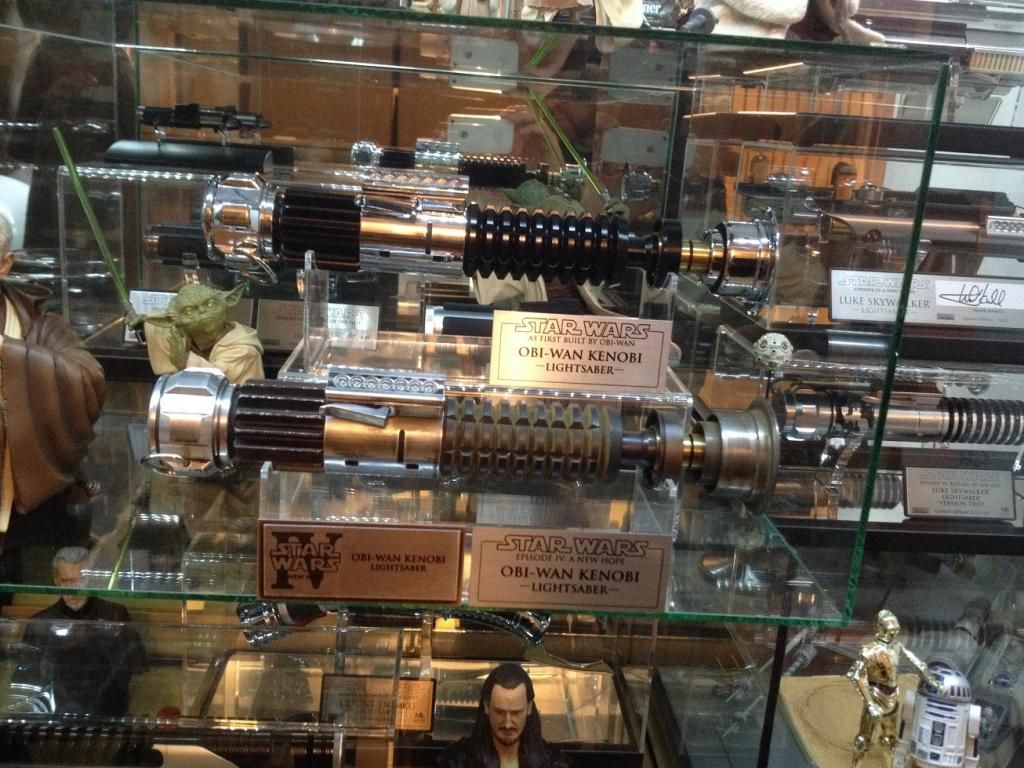
Nice find!!! Did someone with better res images decide on those? I've seen them around lately, but I can't shake seeing that space underneath the logo on the chronicles pic..
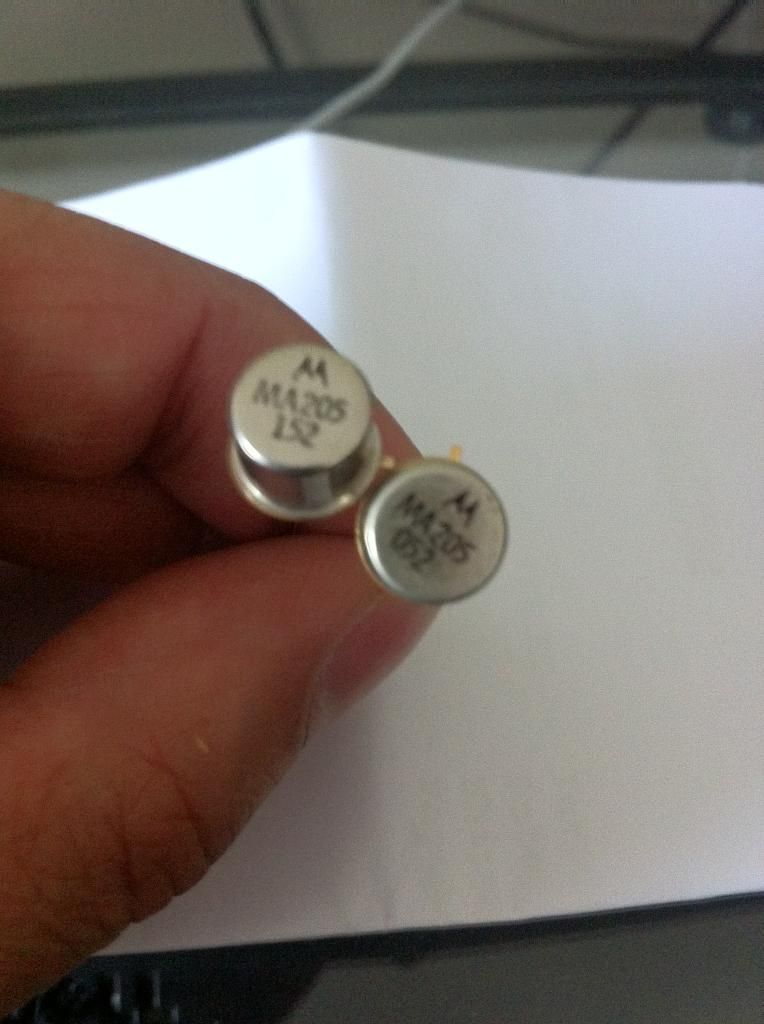
I don't think there will ever be a definitive answer to which transistors were actually used, but based on all of the old threads on here, the general consensus seems to be a Motorola transistor with either "MA2" or "MA9" as the starting number...
forcesensitive
Active Member
Romans Empire AFBB and weathered

Tan Djarka
Sr Member
Still rocking a very early RE version. The only update to it was one of RE's improved sink knobs.
Pretty cool. I've still got what was sold to me as being a "two piece" old Roman's pommel. It'll do. That and the emitter with the old school flat "ring of holes".
As hinted earlier in a post above...
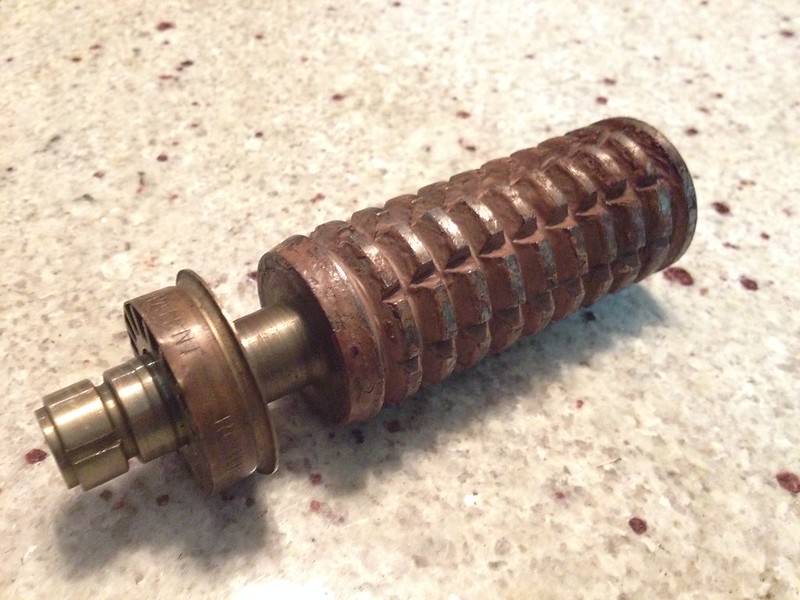
Chris (TeeCrooz) helped me finally lock down a grenade, and set me on the path to a real parts Obi ANH! The man is a saint I tells ya. Since I live in the same area as Edraven, We will BOTH have to take you for a beer if in our neck of the woods.
There's a thick coat of paint on it, that Chris already took down a bit to check out the shape of it. I'm thinking the next move is to use the paint stripper I have to take it down to steal and blu it. I have a couple bottle of bluing I bought for a blaster project, but as I've never used it before, I'm a little hesitant... I'll probably test it out on a steel grenade I have from Roman first...
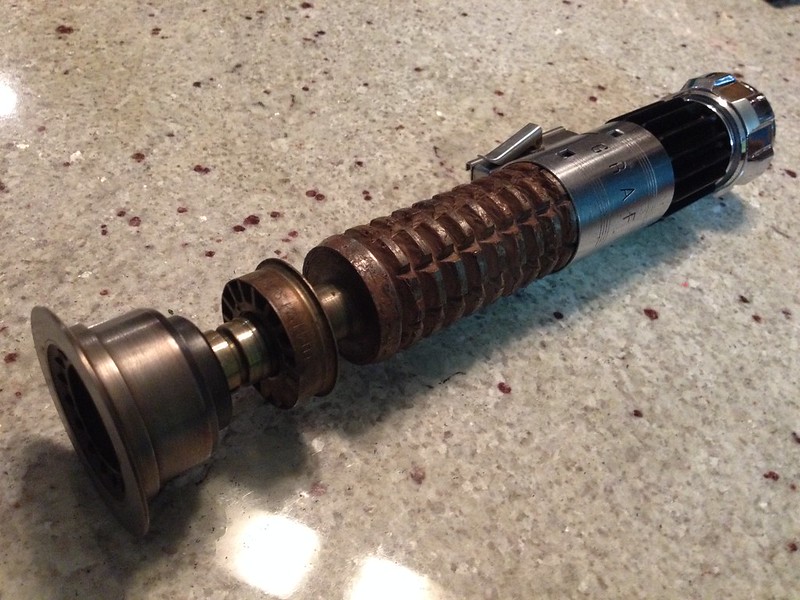
On top of the grenade, I picked up a couple of other vintage parts from Chris at the same time... the clamp, a bubble strip, transistors, and the AS Handwheel.

I was always a fan of the more brown/rusted look of the grenades, and while this sort of appears to have that look, up close it just looks like it was dipped in a cream colored paint (it was...).
Also, when it arrived I found Chris had added on a nicely weathered emitter, and an anodized booster (that I will likely beat the hell out of). These were an awesome addition, and am very thankful as it will take the edge off the time it may take to find the other parts...
But then the search for the parts is half the fun...
So as far as weathering up the grenade, I am open to hearing any ideas or thoughts on it.
Chris (TeeCrooz) helped me finally lock down a grenade, and set me on the path to a real parts Obi ANH! The man is a saint I tells ya. Since I live in the same area as Edraven, We will BOTH have to take you for a beer if in our neck of the woods.
There's a thick coat of paint on it, that Chris already took down a bit to check out the shape of it. I'm thinking the next move is to use the paint stripper I have to take it down to steal and blu it. I have a couple bottle of bluing I bought for a blaster project, but as I've never used it before, I'm a little hesitant... I'll probably test it out on a steel grenade I have from Roman first...
On top of the grenade, I picked up a couple of other vintage parts from Chris at the same time... the clamp, a bubble strip, transistors, and the AS Handwheel.
I was always a fan of the more brown/rusted look of the grenades, and while this sort of appears to have that look, up close it just looks like it was dipped in a cream colored paint (it was...).
Also, when it arrived I found Chris had added on a nicely weathered emitter, and an anodized booster (that I will likely beat the hell out of
). These were an awesome addition, and am very thankful as it will take the edge off the time it may take to find the other parts...But then the search for the parts is half the fun...
So as far as weathering up the grenade, I am open to hearing any ideas or thoughts on it.
I'd strip it and talk to James about getting the proper look. His I believe has been dipped in old oil, etc. and in person looks fantastic.
OMG get ready for the search for the other two parts. .. the booster will be tough, as will the real balance pipe.
OMG get ready for the search for the other two parts. .. the booster will be tough, as will the real balance pipe.
I'd strip it and talk to James about getting the proper look. His I believe has been dipped in old oil, etc. and in person looks fantastic.
OMG get ready for the search for the other two parts. .. the booster will be tough, as will the real balance pipe.
No Doubt. Good luck with it though. A great project indeed.
Sym-Cha
Master Member
Leave that grenade alone! It's beautiful as is ... or send it to me instead ... should you want the need to use that blue stuff so much onto something use it on the Roman's grenade you have ... let time and handling weather that vintage grenade further, please :wacko
Chaim
P.S. Your vintage clamp is put the wrong way onto your saber
Chaim
P.S. Your vintage clamp is put the wrong way onto your saber
Leave that grenade alone! It's beautiful as is ... or send it to me instead ... I'll hook you up with Roman's Empire he's got some clean steel grenades should you want the need to use that blue stuff so much onto something :wacko
Chaim
P.S. Your vintage clamp is put the wrong way onto your saber
Ha.. yeah I know about the clamp... Other than to pull the grenade off for those pics, I haven't touched it as it arrived.
I see your point on leaving it as is, but really, it's not even close to what you see on screen or in photos... Is it really destroying it's heritage by removing the paint they slopped on to mark it inert?
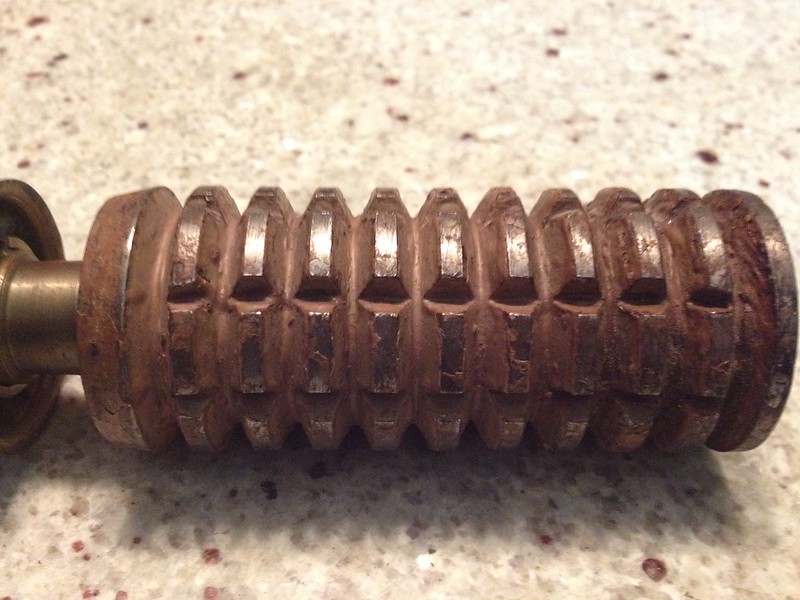
it's like CAKED on, and this is AFTER Chris took some off because you really couldn't tell how the cuts looked under the muck.
I'll still be weighing my options and it will not be a jump the gun decision... I mean I DID take almost 2 years to drill a hole in the bottom of a graflex... and don't get me started on ESB grips screws...
Sym-Cha
Master Member
Well you could always bury it in the garden with the rain and dirt taking care of it ... I know that Parfaitelumiere did it with one of RussReps steel grenades and after more then a year he dug it up and it was exactly as the one on screen ... nice brown rust and all
Chaim
Chaim
I'm with NeoRutty on this one, cleaned up I think you'll get the best out of this grenade it looks in really good shape... My mind boggles at how Chris keeps finding these things!
You want to put one of his bearings in there to hold the booster, they work a treat
You want to put one of his bearings in there to hold the booster, they work a treat
I'm with NeoRutty on this one, cleaned up I think you'll get the best out of this grenade it looks in really good shape... My mind boggles at how Chris keeps finding these things!
You want to put one of his bearings in there to hold the booster, they work a treat
I saw his sale thread... How does that hold the booster?
Well in this case , Chris and I both located this one around the same time, but he was kindly enough to broker the whole deal and let me have it... Thus his saintly stature!
The bearing part goes inside the clamp, the flange (if that's what its called going past the two little tabs, the thread will face out. The booster then simply screws into place. This simply pulls the clamp in close as you do it. All you need do then is run a M6 threaded bar from the tap all the way to the Balance pipe (bold under the cap to hold it). I used a couple of rubber washers at the other end that screwed on to the thread and bunged up inside the BP itself (nothing gets destroyed - nice and simple build up).
Ha.. yeah I know about the clamp... Other than to pull the grenade off for those pics, I haven't touched it as it arrived.
I see your point on leaving it as is, but really, it's not even close to what you see on screen or in photos... Is it really destroying it's heritage by removing the paint they slopped on to mark it inert?
it's like CAKED on, and this is AFTER Chris took some off because you really couldn't tell how the cuts looked under the muck.
I'll still be weighing my options and it will not be a jump the gun decision... I mean I DID take almost 2 years to drill a hole in the bottom of a graflex... and don't get me started on ESB grips screws...
VERY nice! Welcome to the club
You'll have to let me know if you decide to strip and blue the grenade or not... I have one that I'm debating about as well (and no... not the grenade that's been posted earlier on this thread.... that one looks way too good to strip)VERY nice! Welcome to the club
Yeah I'm not sure bluing is the answer, but I'm pretty sure leaving it as is is not. I love how the ring and neck look, but the paint has got to go.
The ideal is getting it to look like they one you posted earlier... If that can be attained naturally leaving it outside in the BC weather for a bit... or maybe if I strip that paint there'll be a look under I could live with...
Similar threads
- Replies
- 24
- Views
- 707
- Replies
- 2
- Views
- 438
- Replies
- 1
- Views
- 407
- Replies
- 14
- Views
- 1,608