Star Trek Enterprise NX-01 Bridge Build 1:10 Sca

I might be able to help you here, oddly enough. I just so happen to have experience at this sort of thing. I might have to work around my schedule, as I am moving and my workshop is kinda "closed for the season", as it were.

I hope we can work something out about the uniforms after you get moved and have more time.
I worked on a Hoshi using the body from Cassandra from The Scorpion King.
Hoshi has pants and a white tee shirt at the moment.
She needs shoes. lol
 
Last edited:
Now we need Sato with the right uniform.
Not sure why they only made her with a space suit.

The sales on the STAR TREK : ENTERPRISE figures completely bombed and Art Asylum got pretty badly burned in the process. Wave three of these figures would have included Hoshi in blue coveralls, Dr Phlox in his daywear, Reed and Myweather in spacesuits and, of course, the helm station.

Darren! I haven't been on nearly enough lately (mainly busy lately with surviving this winter which never ends :unsure ). I've breezed past threads, picking and choosing mainly to use my time wisely. I had no idea this was your build! As usual, you're doing excellent work, and glad you're taking to styrene molding w/hot water.

You're just getting too good at this! :)

If I ever manage to get myself into the new address (new place needed a new roof, all my hard work in the kitchen had to be re-done from a water leak), and away from having to spend every "spare" dime on heating oil and every spare minute chopping firewood (can't tell you how many days and nights here have been single-digit temperatures this winter!!), I'm going to have to work overtime too keep up with your ever-expanding skills. :thumbsup

Good to know that you are fit and well, my friend! I miss our conversations and collaborations. :(


Yeah...especially when they could have made one of her in the 'outfit' she had on when she had to crawl through the duct work! :popcorn

I DON'T REMEMBER THAT!!! bummer.........

]

Wow, talk about coincidence. I was just this weekend buying an extra Reed station to make up the Merryweather helm, and was googleing reference pics and found this thread.

Great work on the helm, looks fantastic.
I too wasn't sure about how to convert the Reed station to make a helm, since the parts don't really match at all. I think the way you are going is the only thing to do.
It is a pity that Art Asylum didn't finish off this line, because at the time, they were producing very good sculpts of the respective actors. I remember asking in a Q&A on their website if they would ever go back and finish this line, but for them it was dead in the water.
Looking forward to more updates on this. :)

Thanks, Spacejunk! :) I must admit, I am eager to finish up the detailing and get it into silicone. The first casting out of the mold is always a wonderful sight!

I hope we can work something out about the uniforms after you get moved and have more time.
I worked on a Hoshi using the body from Cassandra from The Scorpion King.
Hoshi has pants and a white tee shirt at the moment.
She needs shoes. lol

If anyone can help you, LMFAOSchwarz can!

I am scratch building a Hoshi figure as I just cannot justify spending the kind of money people are asking, just so I can use the head and junk the body. I had a friend in Germany take a mold of her head (and one of Dr Phlox, too) and send it to me. I am making her body out of a T'pol figure and a spare Reed figure. I will post a pic or two as I progress.
 
I think we touched on it back along. It's craft foam and comes in thin sheets of about 2mm thick. It's about 80 UK pence / $1.40 for an A4+ sheet. I am also using it on my TOS bridge build. Easy to cut with a knife and glues well. It also wipes clean with a damp cloth. I think it's just a really thin version of those jig-saw floor mats you buy for kids..
 

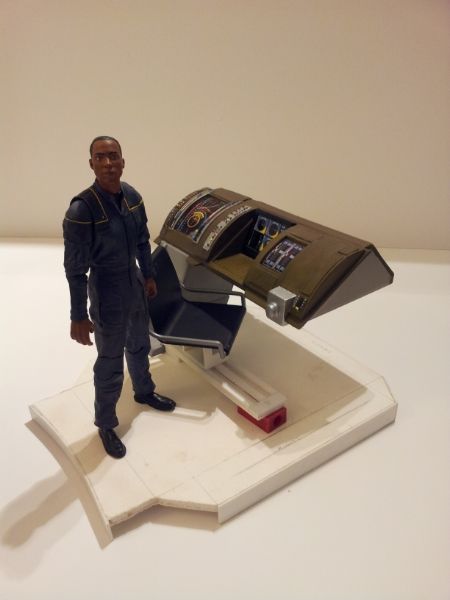
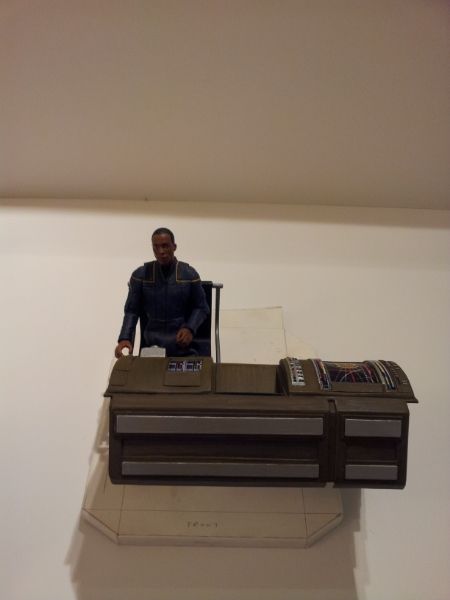
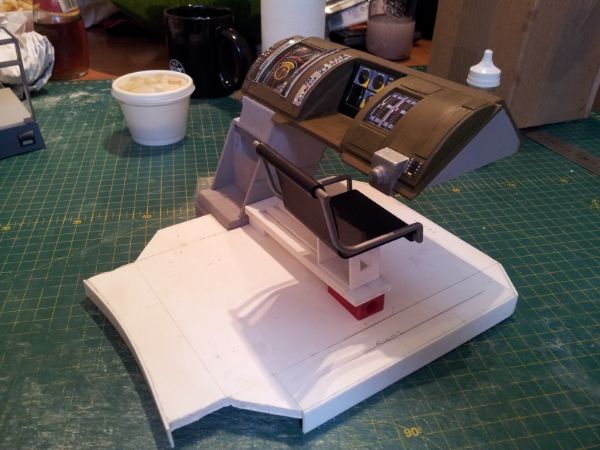
So now that the helm station has been rebuilt in kit form, the old 3/4 built one is redundant. I had the idea of using it as a mixing palette to match that bronzed colour of the other pieces. Each batch that i mixed and the quantities of each colour was noted and i put a dab of that colour next to it. Rather than waste the mixed paint, I used it to paint the old helm - one colour on each panel. so although no two colours match each other exactly, i had a really good test piece to finalise the closest colour to the original. I have also painted up what controls I did actually attach and I added some draft print displays to help bring it to life a little. I think I have pretty much nailed down the final colour and I will spray rather than brush it on. its a little sad that this one will end up in the trash but the new one is going to be so much better. Anyway here are a few pics to show you how it looked. PLEASE REMEMBER! this is NOT the piece you will be receiving. it is just to illustrate how the final stages are coming together. enjoy!

20140410_181605_zpskbnnydf2.jpg


20140410_212646_zpscqi7p9id.jpg


20140410_213343_zpsfqpl7b2t.jpg


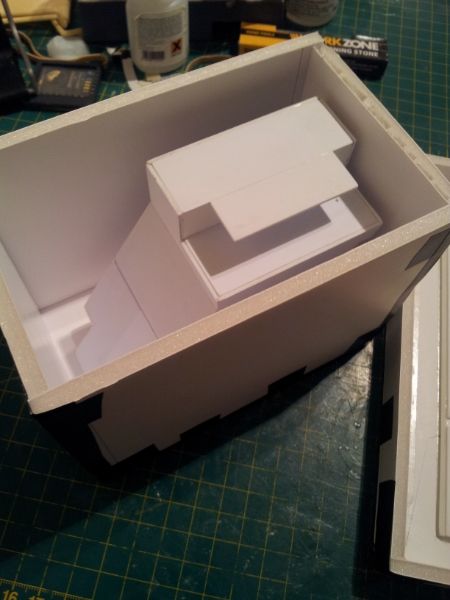
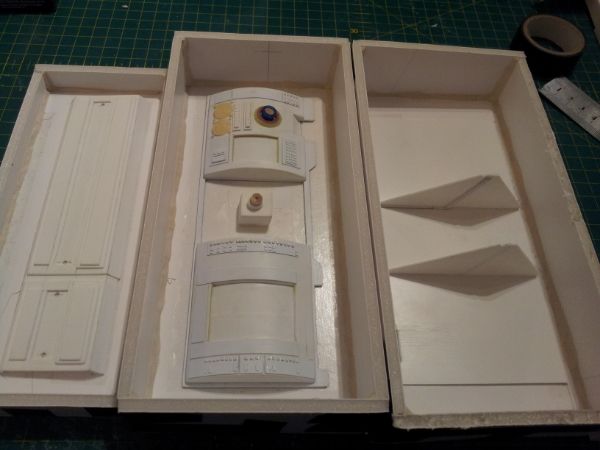
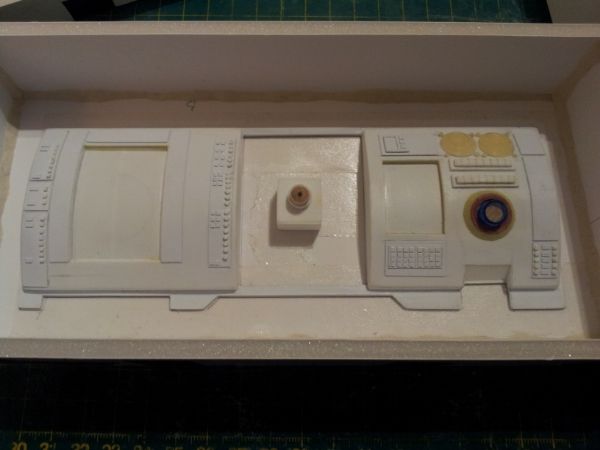
Firstly, my apologies for the two weeks of absence. There are a few issues at this end that I don't really wish to bore you all with. Having said that, I have been having major issues with this build by way of fabricating it in the form of a kit. I could simply mold and cast every seperate piece and throw them in a box and send out a 250 piece jigsaw to you all but that would be a nightmare for you to build and it would leave me feeling like I shortchanged you all. As a result, I have been trying to "part build" the helm into sub sections and then mold those sections as a whole piece. This would cut it down to a kit of 20 or so pieces and will make construction much easier for everyone. Anyway, I am now FINALLY ready to pour some silicone and here are the mold boxes waiting in readiness:


I have really tried to get things as exact as is humanly possible, without computers and steel molds etc...


As for the pigments, it is not going to be possible for me to pre-colour the main sections due to the fact that I cannot mix the exact colour in enough resin in one go to pour before it would go off in the pot. if I do it in sections, there would be colour variation within each kit and that would really suck! I will do all the black parts in black probably grey for all the rest.
hopefully another update in a couple of days!
 
Thanks for the update, looking good. As for the pre-colouring, I don't think it is that necessary, as we would be priming/painting anyway.
 
If you mean the other forum, no. Just keeps on coming up with "You don't have permission to view this forum"

Do you know of any other people outside of the UK joining?
 

Your message may be considered spam for the following reasons:

If you wish to reply despite these issues, check the box below before replying.
Be aware that malicious compliance may result in more severe penalties.
Back
Top