You are using an out of date browser. It may not display this or other websites correctly.
You should upgrade or use an alternative browser.
You should upgrade or use an alternative browser.
1/144th Prometheus scratch build
- Thread starter TheNylonGag
- Start date
IEDBOUNTYHUNTER
Sr Member
Looks great. Keep up as long as your hands allow it.
Al
Al
Caretaker10
Active Member
Looks sooooooo simple. ")
nice job....
nice job....
Ello,
Well guys, this molding thingy is bloomin smashing
I cannot recommend it enough
Your basic, flat sided molds are fairly easy, the hardest part, for me, is mixing the stuff without making a tremendous mess and getting silicon all over me and everywhere.
This is a top tip mate, got a perfect backside now Thanks mate
The next step is with clay and do one of those two piece jobbies, don't need to right now but its in my future for sure.
Thank you for stopping by, and especially to those kind geezers who left a comment.
So, whats been happening in GagsterLand Studios
Made the other engine parts i had made silicon molds of,


Realised that the dome in solid plastic might be a bit heavy, so i tried to reduce this by putting a cut in the back to hollow it out a bit

Both came out ok but the dome is still to heavy
But i have a plan.........


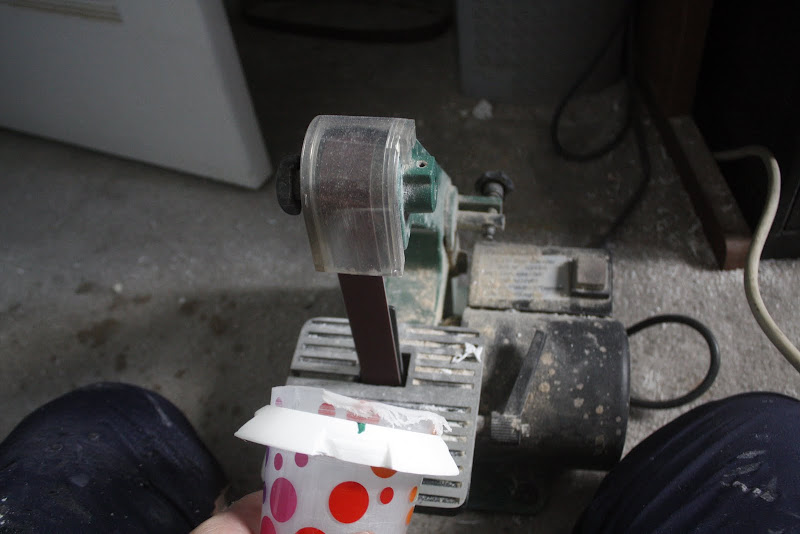
Set about cleaning up my internal bits


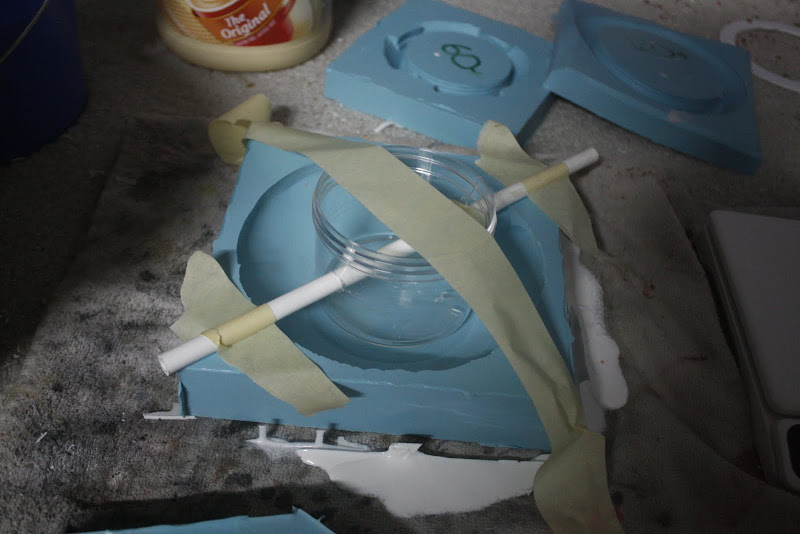
Stuck a ring on the bottom to define the surface and give an accurate circle to cut to
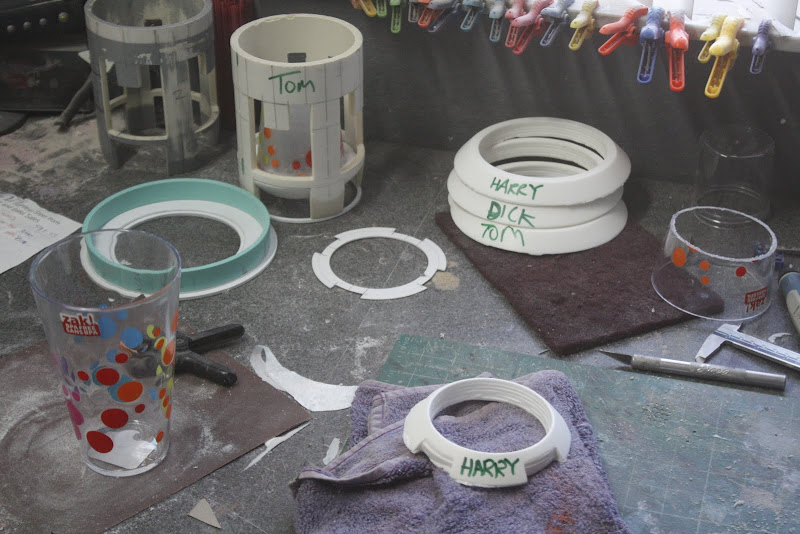
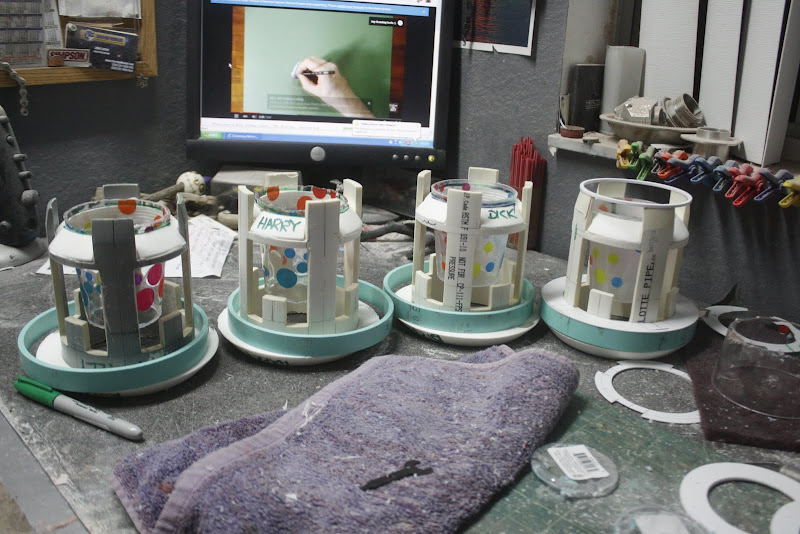
Assembled Tom, Dick, and Harry


Rough cut the internal cup to length
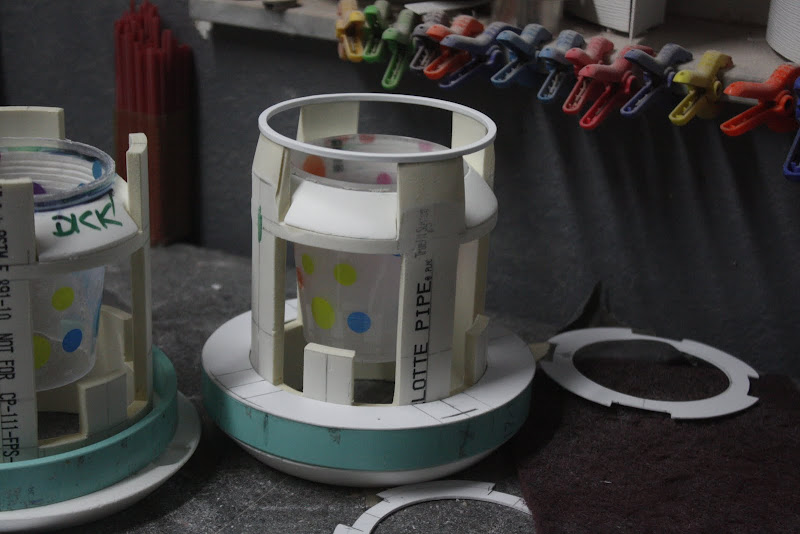
Stacked everything up to get an idea on size, can is for scale............Gulp.
This is going to be huge

Decided to focus on one engine for a while so i could get a bit of a flow going and feel like i was making progress
Started to sheet out the main nozzel with 1mm (0.0394") styrene sheet


Filled it


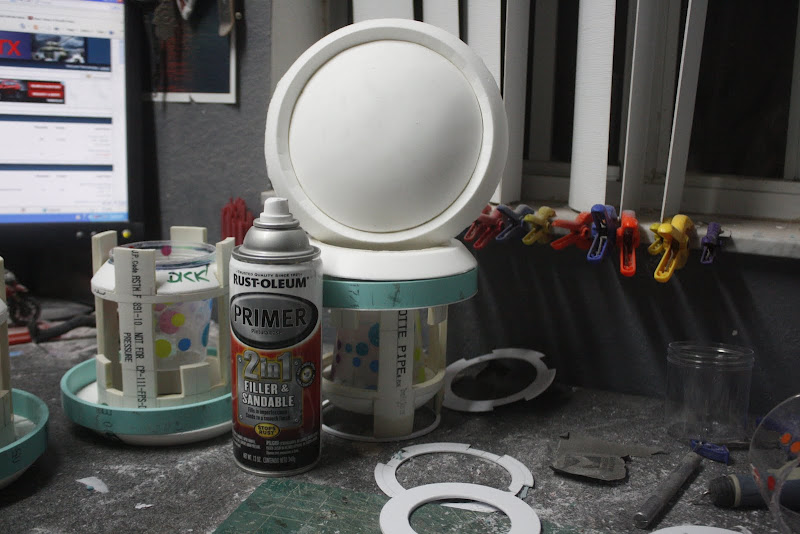
Sand and primer
Mmmmmmmmmmmmmmmm


Glued the first top ring elements on, filled

And sanded

After prooving the shape in card marked out,

Rough cut

Finished

and fitted the sides of the four main pillars

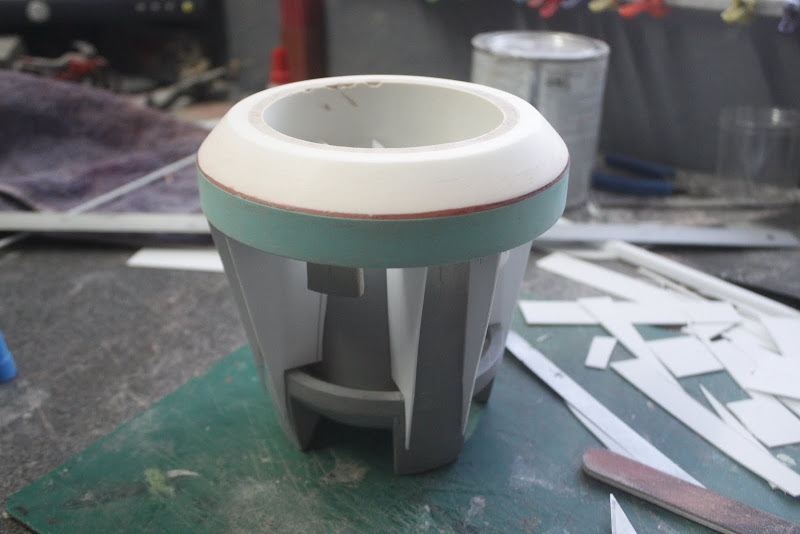
Stuck a top on the whole thing and gave it a clean up

Put a little radiused section to tidy the bottom up

And thats it so far


Everything is progressing as i have forseen
Next time,
3 more like that please
Slush cast the dome?
Stay tuned
Gag
Well guys, this molding thingy is bloomin smashing
I cannot recommend it enough
Your basic, flat sided molds are fairly easy, the hardest part, for me, is mixing the stuff without making a tremendous mess and getting silicon all over me and everywhere.
Good job!
my hint for propper backsides:
Fill in enough resin and cover with non sticky transparent foil (I use overhead projector foil) and gret rid of excess with metal ruler. Or sinply put on another flipped mold - smoooooth backside guaranteed
Keep it coming!
This is a top tip mate, got a perfect backside now
Thanks mateThe next step is with clay and do one of those two piece jobbies, don't need to right now but its in my future for sure.
Thank you for stopping by, and especially to those kind geezers who left a comment.
So, whats been happening in GagsterLand Studios
Made the other engine parts i had made silicon molds of,
Realised that the dome in solid plastic might be a bit heavy, so i tried to reduce this by putting a cut in the back to hollow it out a bit
Both came out ok but the dome is still to heavy
But i have a plan.........
Set about cleaning up my internal bits
Stuck a ring on the bottom to define the surface and give an accurate circle to cut to
Assembled Tom, Dick, and Harry
Rough cut the internal cup to length
Stacked everything up to get an idea on size, can is for scale............Gulp.
This is going to be huge
Decided to focus on one engine for a while so i could get a bit of a flow going and feel like i was making progress
Started to sheet out the main nozzel with 1mm (0.0394") styrene sheet
Filled it
Sand and primer
Mmmmmmmmmmmmmmmm
Glued the first top ring elements on, filled
And sanded
After prooving the shape in card marked out,
Rough cut
Finished
and fitted the sides of the four main pillars
Stuck a top on the whole thing and gave it a clean up
Put a little radiused section to tidy the bottom up
And thats it so far
Everything is progressing as i have forseen
Next time,
3 more like that please
Slush cast the dome?
Stay tuned
Gag
IEDBOUNTYHUNTER
Sr Member
Love it, Those are awesome. Oh by the way. Getting messy with silicone well thats the fun part. Especially when you get it on your cloths.
Look at that! This is coming together beautifully. I like those shots of Tom, Dick and Harry. Good thing Harry isn't spelled Hairy.
Can you guess the movie reference?
Can you guess the movie reference?
Seems too obvious, and I'm sure you're referencing something else, but Tom, Dick and Harry were the names of the tunnels they dug in The Great Escape.
yuumi2891103
Master Member
Gag-san
Thanks for the detailed pics.
Now I know your work is already 10 light years ahead of me...:facepalm
Thanks for the detailed pics.
Now I know your work is already 10 light years ahead of me...:facepalm
Really, truly amazing work!
brandomack
Sr Member
So.....Awesome. :thumbsup
youngtiger1
Member
Great progress and I'm amazed with every update as I learn new tricks of trade. You Sir are a master of scratch building :thumbsup
Mike
Mike
crackerjazz
Sr Member
You've got the magic touch!!!
Similar threads
- Replies
- 34
- Views
- 1,723