You are using an out of date browser. It may not display this or other websites correctly.
You should upgrade or use an alternative browser.
You should upgrade or use an alternative browser.


Let the rejuvenation flow through you! ")
DarthDerf
Member
Well, I guess it's time for a long awaited update. I've been working on things, just a little slow on updates. Progress is moving slowly due to no pre planning at all.. Kind of just winging all of the details. I had an idea and now I'm just building it and hoping for the best.
Remember, this needs to be usable space as well as awesome looking. It also has to be able to be taken down if needed (this is providing headaches)
On to the pictures!!


I added more braces to the back side of the bench and also made the height of the braces the same as the seat height, thus creating a lip for a shelf.
I also saw a bubbling lamp thing on another forum and thought I'd like to have one as well. I figured I could incorporate it into the bench. Perhaps not identical to the falcon but this is a different Corillian cruiser or maybe I got a lower end model. Not as many "bells and whistles"

Starting of the thought process.

Still thinking

Kinda liked this but it changed

Almost happy with it but more things have came up. Nothing crazy but ideas and thoughts change things constantly. On to another part of the puzzle.

Gluing pieces to make the back greeblie area of the bench.
Also bought a "vintage" CD storage container because it resembled vents. I wished I'd have kept my identical CD case.


Had to lightly paint them to let me see what they'd sort of look like when done. Plus the dirtier it gets the better, right?

Test fitting and trying things out.
Also decided to try warping some thin wood to give me a cleaner curve.


I wrapped towels around the wood and then soaked them. I then added a curved weight to it. It worked quite well.

Just a little trim needed to smooth it all out.

Thinking... I have got to hide the top of the canister and where the air pump will be. Hide the under part of the vent as well as the upper gap. Trim the curved panel.

Change where the cover shelf ends. Modify PVC placement.

Right now I'm trying to frame it all out then I'll sand/bondo/trim everything.
That's all I got for now.
Thanks for looking!
Remember, this needs to be usable space as well as awesome looking. It also has to be able to be taken down if needed (this is providing headaches)
On to the pictures!!
I added more braces to the back side of the bench and also made the height of the braces the same as the seat height, thus creating a lip for a shelf.
I also saw a bubbling lamp thing on another forum and thought I'd like to have one as well. I figured I could incorporate it into the bench. Perhaps not identical to the falcon but this is a different Corillian cruiser or maybe I got a lower end model. Not as many "bells and whistles"
Starting of the thought process.
Still thinking
Kinda liked this but it changed
Almost happy with it but more things have came up. Nothing crazy but ideas and thoughts change things constantly. On to another part of the puzzle.
Gluing pieces to make the back greeblie area of the bench.
Also bought a "vintage" CD storage container because it resembled vents. I wished I'd have kept my identical CD case.
Had to lightly paint them to let me see what they'd sort of look like when done. Plus the dirtier it gets the better, right?
Test fitting and trying things out.
Also decided to try warping some thin wood to give me a cleaner curve.
I wrapped towels around the wood and then soaked them. I then added a curved weight to it. It worked quite well.
Just a little trim needed to smooth it all out.
Thinking... I have got to hide the top of the canister and where the air pump will be. Hide the under part of the vent as well as the upper gap. Trim the curved panel.
Change where the cover shelf ends. Modify PVC placement.
Right now I'm trying to frame it all out then I'll sand/bondo/trim everything.
That's all I got for now.
Thanks for looking!
DarthDerf
Member
Small update but an update nonetheless.

Was still thinking about different concepts and decided to put a column to the right with an upper shelf to help hide the upper bubble lamp tubing.


Here's the actual shelf but inverted while I am working on the lower support columns. The hole will be covered by a modified set toilet flanges. (Thanks Fuzzual)


The second time I did the spray foam, I used waxed type paper to wrap around the bottle to allow it to slide in the upper shelf connector. This will allow for any slight miscalculations with measurements... HA!

Now begins the fun and arduous journey into the bondo, sand, repeat...
That's all for now..
Thanks for looking!
Was still thinking about different concepts and decided to put a column to the right with an upper shelf to help hide the upper bubble lamp tubing.
Here's the actual shelf but inverted while I am working on the lower support columns. The hole will be covered by a modified set toilet flanges. (Thanks Fuzzual)
The second time I did the spray foam, I used waxed type paper to wrap around the bottle to allow it to slide in the upper shelf connector. This will allow for any slight miscalculations with measurements... HA!
Now begins the fun and arduous journey into the bondo, sand, repeat...
That's all for now..
Thanks for looking!
Last edited by a moderator:
DarthDerf
Member
Did some sanding and added some more bondo..


I also decided to treat the ends of the mdf.. I can't remember which thread I read it in but they said to add elders glue to the edges to add rigidity. It works as far as I can tell.. plus it is able to be sanded!!

And then this happened...

Got to buy another tube canister.. Oh well...
I also decided to treat the ends of the mdf.. I can't remember which thread I read it in but they said to add elders glue to the edges to add rigidity. It works as far as I can tell.. plus it is able to be sanded!!
And then this happened...
Got to buy another tube canister.. Oh well...
Hey DD,
Loving the forward progress!
The Elmers glue on the edges will DEF help seal the MDF. That's not to say they would survive a direct hit but it DEF helps! Add that to the layers of primer and paint that follows and you should be ok!
Loving the forward progress!
The Elmers glue on the edges will DEF help seal the MDF. That's not to say they would survive a direct hit but it DEF helps! Add that to the layers of primer and paint that follows and you should be ok!
DarthDerf
Member
Hey DD,
Loving the forward progress!
The Elmers glue on the edges will DEF help seal the MDF. That's not to say they would survive a direct hit but it DEF helps! Add that to the layers of primer and paint that follows and you should be ok!
Thanks Sofa. I appreciate your knowledge and am inspired always with your stick-with-it(ness). And yes, it does help a lot, even helps with painting the edges. I mainly stare at the bench now and ask myself what next?
Trying to figure out how I want to do the back wall greeblies, the bubble lamps (coolant tubes) and the back light bar for the opposite side.
Would you or anyone happen to know of a build thread or have better pictures of this light?

I also think I'm going to say I got this couch out of an old YT-2400 freighter.
Thanks Sofa. I appreciate your knowledge and am inspired always with your stick-with-it(ness). And yes, it does help a lot, even helps with painting the edges. I mainly stare at the bench now and ask myself what next?
Trying to figure out how I want to do the back wall greeblies, the bubble lamps (coolant tubes) and the back light bar for the opposite side.
Would you or anyone happen to know of a build thread or have better pictures of this light?
View attachment 703945
I also think I'm going to say I got this couch out of an old YT-2400 freighter.
Hey DD,
Let me take a look and see what I have... stand by!
What I can tell, it appears to be two illuminated canisters with a round 4" tube separating the two. The ESB and TFA versions appear to be a little different from the ANH version.
DarthDerf
Member
Hey DD,
Let me take a look and see what I have... stand by!
What I can tell, it appears to be two illuminated canisters with a round 4" tube separating the two. The ESB and TFA versions appear to be a little different from the ANH version.
Hey SK,
That's what I was kind of thinking but just wanted to be sure before I started trying to figure out how to make a similar one.
Thanks again!!
DarthDerf
Member
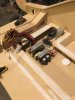
Here comes another round of small updates..
I started messing/thinking about what I plan to do here. I'm looking to make it into a charging station for phones, laptops, tablets, etc.. Plus, give it a feel of an ottoman.


Added a little flare to shelf 1 and also made it hide where the pieces join.


I then started gluing/clamping shelf 2.

Also started covering screw posts.

I also began working on adding a back cover of the seat/back wall.

I then began working on the 3rd and last shelf. That will connect both sides at the top as well.

This is going to be the support column on the left for the 3rd shelf. You'll see it eventually.

Getting some ideas for background greeblies from TFA

Also saw this lamp off to the side in the falcon and thought about putting it somewhere in the build.

That's all for today... Thanks for looking!!
It is growing though....

I started messing/thinking about what I plan to do here. I'm looking to make it into a charging station for phones, laptops, tablets, etc.. Plus, give it a feel of an ottoman.
Added a little flare to shelf 1 and also made it hide where the pieces join.
I then started gluing/clamping shelf 2.
Also started covering screw posts.
I also began working on adding a back cover of the seat/back wall.
I then began working on the 3rd and last shelf. That will connect both sides at the top as well.
This is going to be the support column on the left for the 3rd shelf. You'll see it eventually.
Getting some ideas for background greeblies from TFA
Also saw this lamp off to the side in the falcon and thought about putting it somewhere in the build.
That's all for today... Thanks for looking!!
It is growing though....
Last edited:
Hey D,
In regards to the light... I would create a simple rounded frame, sand to a smooth finish and then wrap thin frosted plexi around the frame - you could wrap the plexi on the interior side of the rounded frame so it doesn't pop out. I think the center tube could be a simple 4" diam PVC pipe?
In regards to the light... I would create a simple rounded frame, sand to a smooth finish and then wrap thin frosted plexi around the frame - you could wrap the plexi on the interior side of the rounded frame so it doesn't pop out. I think the center tube could be a simple 4" diam PVC pipe?
DarthDerf
Member
Happy Valentines Day!!
Update time!
Started working on the 3rd shelf that will be on the left side aligned with the lower bib bubble lamp shelf.


That will be the left side column. I am debating on running LED lights through it.
The right side of the 3rd shelf will also have another exterior corner framed section.


This will be attached to the rear wall of the 3rd shelf. Again, I may add LED lighting to the inner framing. Still debating and may be too bright.
This is the back side wall. It is hideous. It will only be seen by me and maybe some others but I can't have it look this way. This means I need to cover it and find some greeblies to help hide its hideousness.


Also added a 1/4" bolt for stability on both the right single column and the small bubble lamp shelf. I will be adding one from the 3rd shelf to the lower vent shelf.


I also tinkered with some ideas for greeblies and have a few surprises. Also found some Goodwill greeblies in the make your own bag selection. There is always a bunch of misc. items in the bins.


I also did some more spray foam and PVC and toilet flange greeblies.


Here is the monstrosity at the moment without the CD/vent covers.

That's all for now!
Thanks for looking!!
Update time!
Started working on the 3rd shelf that will be on the left side aligned with the lower bib bubble lamp shelf.
That will be the left side column. I am debating on running LED lights through it.
The right side of the 3rd shelf will also have another exterior corner framed section.
This will be attached to the rear wall of the 3rd shelf. Again, I may add LED lighting to the inner framing. Still debating and may be too bright.
This is the back side wall. It is hideous. It will only be seen by me and maybe some others but I can't have it look this way. This means I need to cover it and find some greeblies to help hide its hideousness.
Also added a 1/4" bolt for stability on both the right single column and the small bubble lamp shelf. I will be adding one from the 3rd shelf to the lower vent shelf.
I also tinkered with some ideas for greeblies and have a few surprises. Also found some Goodwill greeblies in the make your own bag selection. There is always a bunch of misc. items in the bins.
I also did some more spray foam and PVC and toilet flange greeblies.
Here is the monstrosity at the moment without the CD/vent covers.
That's all for now!
Thanks for looking!!
DarthDerf
Member
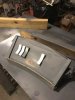
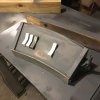
It's been a bit hectic on the homestead and with work. Kids and wife sick and then myself, plus having to fit work in the mess, let alone build time. Well, got some work done though in between and I am finally able to upload some updates..
Enjoy and thanks for looking!!
I started working on the back left wall panel set up and decided to add more support and another boxed in panel for added awesomeness.


Added a wing nut set up to give it a removable look and then test fitted some greeblies.


Painting reveals all the missed spots.


Started painting and building greeblies. Made some fuses and solenoids and rocker switches.


Thread spools could make for some interesting greeblies.. You'll see those soon enough..

I then started working on the rocker switches.


I used a 1/4" bit to make the dots on the buttons because they always looked as if the counter sunk the switches and then covered then and left them with the little dip in the putty that resulted in the dot on the bottom. I dunno, just what I thought. I also just guessed at the size.


I am also curious as to what this part is. It looks like a combination lock front.


Also am working on some fluorescent light covers for my booth to only allow for indirect lighting. More of this to come!


I also started testing out lights and added a panel cover to the back right wall. I'll show more on those next post!!
Enjoy and thanks for looking!!
I started working on the back left wall panel set up and decided to add more support and another boxed in panel for added awesomeness.
Added a wing nut set up to give it a removable look and then test fitted some greeblies.
Painting reveals all the missed spots.
Started painting and building greeblies. Made some fuses and solenoids and rocker switches.
Thread spools could make for some interesting greeblies.. You'll see those soon enough..
I then started working on the rocker switches.
I used a 1/4" bit to make the dots on the buttons because they always looked as if the counter sunk the switches and then covered then and left them with the little dip in the putty that resulted in the dot on the bottom. I dunno, just what I thought. I also just guessed at the size.
I am also curious as to what this part is. It looks like a combination lock front.
Also am working on some fluorescent light covers for my booth to only allow for indirect lighting. More of this to come!
I also started testing out lights and added a panel cover to the back right wall. I'll show more on those next post!!
Attachments
DarthDerf
Member
Hey D,
In regards to the light... I would create a simple rounded frame, sand to a smooth finish and then wrap thin frosted plexi around the frame - you could wrap the plexi on the interior side of the rounded frame so it doesn't pop out. I think the center tube could be a simple 4" diam PVC pipe?
I think I'm going to make mine vertical. Due to lack of space and I think it would fit well.

AWESOME AWESOME AWESOME! Great update! Those rockers brought me back to when I did mine as well! Advice... make a mold of those rocker switches you created so you can knock out a bunch for any future project you might want to do.
DarthDerf
Member
AWESOME AWESOME AWESOME! Great update! Those rockers brought me back to when I did mine as well! Advice... make a mold of those rocker switches you created so you can knock out a bunch for any future project you might want to do.
SK, first thing is I'd need to learn how to make molds. Then auduino.... LOL
and also, thanks.. Your words of encouragement are always appreciated. I would love to come see the build you're involved in one day.
Last edited:
DarthDerf
Member
sweet!!!!! love it!
Thank you kind sir.. This has become quite the project.
DarthDerf
Member
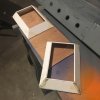
I SWEAR I am still working on things. And here's the proof!
Now, I know things are moving slow but I'm learning new things along the road and I see an endless sea of possibilities!
I decided that the back right wall needed an upper wall to enclose the whole thing in, so I made one.

The plan was for it to fit on top of the already exiting back wall frame.

I made a rectangular box with some extensions that fit over the back frame.

I then did a test fit.


Oh yeah....
I also decided that my curved panel wasn't making me happy, so I modded it.

I added some curved pieces to give it more of a "squared" look? Anyway, it looks a lot better afterwards.


Ha!!?!?! I just realized I don't have a current photo of it! I'll add it soon enough or it is in the background of one of these photos.. If not I'll add one tomorrow or so.
Moving on, (slight pause with exhale followed by large inhale) I took the advice from SofaKing to make mold of my rocker panel switches.

Now, I went with a recessed circle vs the dot because I like the look of it. Ince weathering is added it will give me the black dot look to a degree. I also like the textured feel of it. An "O" engraved in it for easy recognition of OFF. (I mean what if the lights were out and the gravity was out and you were floating upside down and felt the switches and flicked the wrong way because you didn't know which one was off?) Better safe than sorry.
Back to the original thought.... I bought a beginners kit after watching some videos on YouTube of the Molding 101 from Punished props.. Bill seems cool, I learned quite a bit and was happy when the recommendations were to start small.. How convenient, I am making rocker switches. Here's the progress shots with the end results looking awesome!! Thanks again for the advice SofaKing!


Moving on to the next piece..
I started toying around with the back wall greeblies and decided I needed hose clamps. And also notice the fuses in the back ground? Yep, those were in the previous post about making things out of plumbing parts. Pay no attention to the detonator...


to be continued in the next post...
Now, I know things are moving slow but I'm learning new things along the road and I see an endless sea of possibilities!
I decided that the back right wall needed an upper wall to enclose the whole thing in, so I made one.
The plan was for it to fit on top of the already exiting back wall frame.
I made a rectangular box with some extensions that fit over the back frame.
I then did a test fit.
Oh yeah....
I also decided that my curved panel wasn't making me happy, so I modded it.
I added some curved pieces to give it more of a "squared" look? Anyway, it looks a lot better afterwards.
Ha!!?!?! I just realized I don't have a current photo of it! I'll add it soon enough or it is in the background of one of these photos.. If not I'll add one tomorrow or so.
Moving on, (slight pause with exhale followed by large inhale) I took the advice from SofaKing to make mold of my rocker panel switches.
Now, I went with a recessed circle vs the dot because I like the look of it. Ince weathering is added it will give me the black dot look to a degree. I also like the textured feel of it. An "O" engraved in it for easy recognition of OFF. (I mean what if the lights were out and the gravity was out and you were floating upside down and felt the switches and flicked the wrong way because you didn't know which one was off?) Better safe than sorry.
Back to the original thought.... I bought a beginners kit after watching some videos on YouTube of the Molding 101 from Punished props.. Bill seems cool, I learned quite a bit and was happy when the recommendations were to start small.. How convenient, I am making rocker switches. Here's the progress shots with the end results looking awesome!! Thanks again for the advice SofaKing!
Moving on to the next piece..
I started toying around with the back wall greeblies and decided I needed hose clamps. And also notice the fuses in the back ground? Yep, those were in the previous post about making things out of plumbing parts. Pay no attention to the detonator...
to be continued in the next post...
Attachments
Last edited by a moderator:
Similar threads
- Replies
- 9
- Views
- 739
- Replies
- 2
- Views
- 561
- Replies
- 0
- Views
- 333