Back to the Future 3 DeLorean Time Machine (Aoshima 1/24)

JMar

Well-Known Member
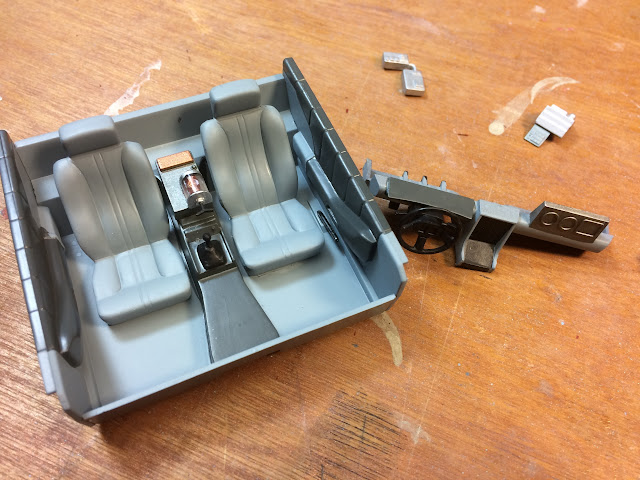
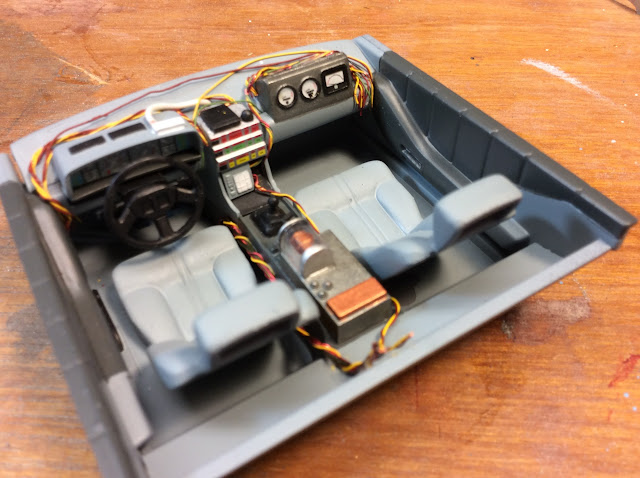
I finally got around to starting my Back to the Future build.


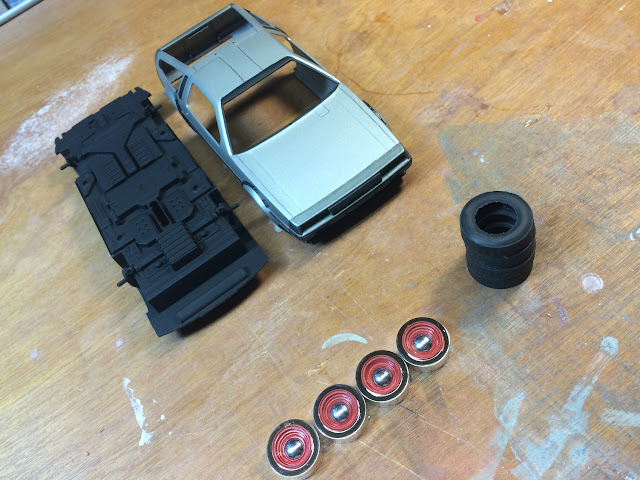
Rather than start with the first one first, I figured I'd start with the third.


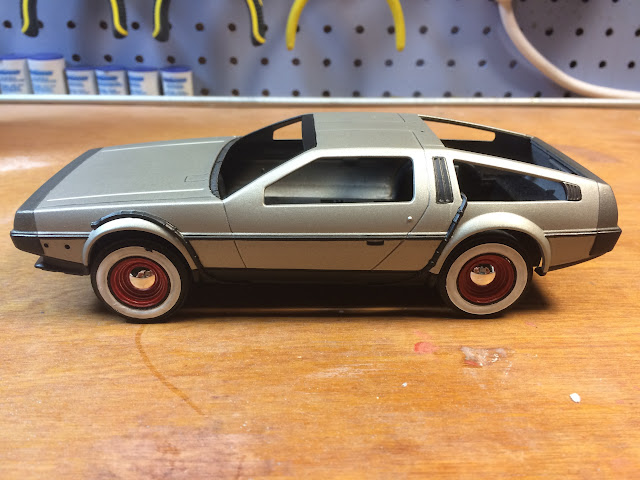
I chose to do the 1950's white walled tires version. I actually prefer the railroad version but the train wheels that come with it are about 30% too large to be accurate.

I used Testors Model Master Steel for the body, Tamiya Metallic Gray for the front and rear fascia and flat black for the various trim.

IMG_5511.JPG


IMG_5509.JPG


IMG_5512.JPG
 
Last edited:
One of the first thing I wanted to tackle was the wiring on the body.


I reviewed a number of screen grabs to get an idea of colours and layout.


To match the time vehicle as closely as possible I added a yellow and red wire bundle.


IMG_5522.JPG


To achieve this I simply painted some magnet wire!

IMG_5523.JPG


IMG_0717.JPG
 
Last edited:
JMar, Excellent work so far!

What Testors paint did you use for the body? Is it Acryl or enamel?

What paint/color did you use for the red wheels?
 
Thanks Vacformedhero The BTTF2 flying version will be lighted. I've got a bunch of fiber optic just waiting to go.

I still haven't figured out the rim lighting yet....
 
Last edited by a moderator:
I've really enjoyed detailing the interior.

The fabric colours aren't exact but I wanted to add some depth. I took a bit of artistic license and made the interior two tone.

IMG_5539.JPG


IMG_5540.JPG


The junction box behind the Time Circuit control switch is inaccurate, but given the small scale I couldn't justify making an accurate replacement part. I did however paint it the correct copper colour.

The rear bulkhead and the reactor pit are painted with Tamiya Metallic Gray

Just a note for anyone who builds this model. Trim the decals for the time circuits as close as possible to the actual graphic. it'll save you a lot of messing around with micrsol.

IMG_5541.JPG


Same goes for the instrument cluster decal!
 
Last edited:
Here's a look at some of the details that'll be on tomorrow's episode!

A bit of wire work on the flux capacitor

IMG_5588.JPG


IMG_0721.JPG


IMG_5621.JPG


A bit of detail work around the headlights

IMG_5595.JPG


IMG_5597.JPG


Reactor pit detail

IMG_5602.JPG


IMG_5603.JPG


IMG_5604.JPG
 
Last edited:
The entirety of this episode focuses on detailing, so much detailing:


The Flux Capacitor/rear bulkhead.
Special attention to the headlights to simulate the chrome tim that held sealed beam bulbs in place.
The overhead console and 'roof liner'.
Lots of detail painting in/on the Reactor Pit, including tiny wire wrapping for some unnamed components:

https://youtu.be/imP-7ZdnPQ0

DeLorean%2BPT3B.jpg
 
Last edited:
I did A LOT of wire work to enhance the look of the interior. Magnet wire is great for scale...painting it is a bit of a pain

Try fly-tying wire! It comes in a wide range of colors and thicknesses, is soft but not brittle. Inexpensive and comes on handy spools, like thread... I get mine at a local Bass Pro Shop, but I'd guess any well stocked fishing supply would be a candidate.

Great job, btw!

Regards, Robert
 
Try fly-tying wire! It comes in a wide range of colors and thicknesses, is soft but not brittle. Inexpensive and comes on handy spools, like thread... I get mine at a local Bass Pro Shop, but I'd guess any well stocked fishing supply would be a candidate.

Great job, btw!

Regards, Robert

That sounds like good advice. I may just look into that when I go into the city tonight!

And thanks!
 
This thread is more than 6 years old.

Your message may be considered spam for the following reasons:

  1. This thread hasn't been active in some time. A new post in this thread might not contribute constructively to this discussion after so long.
If you wish to reply despite these issues, check the box below before replying.
Be aware that malicious compliance may result in more severe penalties.
Back
Top