Fallout 4: T-60 Power Armor - JarmanProps

Yodajammies

Sr Member
Like everyone else, I got bit by the Fallout bug pretty badly in November. I've settled in on building the T-60 armor as my big 2016 project and here looks like as good a place as any to start the build log.

23594556351_78cf3a6f12_b.jpg
23677007775_e81f17474b_b.jpg


The first piece I'm focusing on is the gauntlet / hand. I've wanted to build a direct linkage articulated hand for the longest time now and this build is absolutely perfect for it. My main software for designing this suit will be Rhino5 though Solidworks would be more appropriate for these hand assemblies. Being able to flex and move the mechanism in real-time would be a huge perk but as long as my math is good and the alignment of parts is accurate, Rhino should suffice.

For the wrist articulation I'm using a simple ball and socket mech where the gauntlet will clamshell over the hand and provide for full motion. The springloaded pull triggers will be housed inside the "hand ball" and will be designed to be modular so that repair/replacement won't be a total nightmare.

23360763560_0645cb75f8_b.jpg
23028283264_65eda16920_b.jpg

The finger angles and linkages.

23547891942_e2bfcdccba_b.jpg

One of the most important goals I'm keeping in mind while designing these parts is weight reduction. This first test prototype weighs in at nearly a quarter pound and if we extrapolate this out to the entire hand mech with all of its parts, hardware, cable pulls, etc, we'd be looking at atleast 3-5lbs per assembly. This suit is already going to be a monster and carrying around an extra 5 pounds in just the hands will not fly. I'm currently going back through and shaving down any excess material that I can in order to reduce weight and material cost without sacrificing strength and structural integrity.

23651484876_05029393fc_b.jpg
23595108401_a000ef7c14_b.jpg

The current working design still has some quirks to it that need to be ironed out but I'm liking the direction it is taking. It looks like I'll need another week or so of pushing surfaces around before I'm solidly ready to buy all the hardware on the BOM and start fabricating a working prototype.
23382551020_e3179be6a5_b.jpg
23678222465_4572b25c10_b.jpg
 
I was just thinking the other day how much work it would take to put this together. Expecting amazing things from this build, it's sure to become legendary! Pretty good amount of interesting detail.
 
I will be watching this build. I have to ask what type of 3D printer are you using? I tried to find out on your facebook page but didn't see it.
 
Good Luck with your build, I am looking forward to seeing all the new Power Armor suits that the release of Fallout 4 has inspired.
 
I will be watching this build. I have to ask what type of 3D printer are you using? I tried to find out on your facebook page but didn't see it.

I am very fortunate to have access to a lab full of printers but my main workhorse will be a CubePro. The test print I just linked was run on a ProJet 3500Max.
 
wow it's a serious project! i'm subscribing to this one and wish you good luck!
please share photos as you progress and techniques\materials you use to accomplish :) looks really cool.
i'm about to start making my first cosplay costume for me and my GF, and browsing around learning how people make costumes :)
for now as i understand best material for beginners is EVA foam, can't wait to start crafting stuff :p
 
Monthly photo vomit:

With the 3d model nearly completed, I've started in on keeping a fleet of printers running as close to 24/7 as I can manage. It would be much faster to mill these larger forms from tooling foam but fabrication this way is quite a bit cleaner, less noisy, and I don't have to babysit a printer and they can run overnight and remotely on weekends. If my lead time weren't so long on this project, I might have favored CNC as the main production method. Cost wise, it looks like an even match between the two once I dialed in my infill and perimeter settings.

So far I've logged close to 500 hours of printing time across the 6 machines in the workshop with an estimated 1300-1500 to go. I'd wager at least 100-120 of those hours were due to part fails / rejects due to step shifting, adjusting the machines, etc. so the actual production time for usable parts is about 70-75% of the total time run. Hopefully by the end of this project we'll be hitting at least a 90% success rate on these prints.

The biggest new "Eureka!" moment I've had so far in this project is through ABS welding/patching. By super concentrating an ABS slurry mixture into a runny peanut butter consistency I've been able to patch, seal, and fill some fairly substantial gaps in my print models. Then once the acetone flashes out and the ABS re-hardens, I'm left with a 100% ABS that sands/finishes as if it were a single piece to begin with. It's frustrating to sand seams and areas composed of materials with differing durometer ratings as they sand at different rates and often wear unevenly. By using a single material to build the model as well as patch it, it makes my work much more predictable and ultimately makes sanding and finishing work much less of a pain in the butt.

This section is part of the inner frame of the armor and is mostly for attaching the chest, back, and arms to the body. Since the front plate is never going to be seen, I removed most of the features that are in this piece. This should make the final product more rigid and a bit easier to mold/cast.
24824904391_7583ef06bb_b.jpg
24517681582_8173ed093c_b.jpg
23999226863_be34162b00_b.jpg
24254581584_e80fb3fcf5_b.jpg

A first pass at shoring up a few weak spots and filling the seams in the middle. This model could have used another smoothing interation to cut down on some of the faceting. To avoid punching through the surface when working on these parts I've bumped up my perimeter layers to 4-5 in order to thicken the skin a bit.
24254586514_fa7d6731bc_b.jpg

The "ABS bondo" method was solidified after seeing what a pain trying to patch the forearm piece was. There is a very noticeable step band in the middle of the part that I'm working to correct. Once I started in using bondo and spot putty to finalize this print, I could no longer use an acetone wash to smooth out the surface. The patching and priming top coat should be used only as a last step before prepping to mold. This guinea pig part was a good test case for how to work with large 3d printed armor plates.

23973514739_ce7ab669e6_b.jpg
24754685325_fd04976a38_b.jpg
 
Last edited:
Monthly photo vomit:

With the 3d model nearly completed, I've started in on keeping a fleet of printers running as close to 24/7 as I can manage. It would be much faster to mill these larger forms from tooling foam but fabrication this way is quite a bit cleaner, less noisy, and I don't have to babysit a printer and they can run overnight and remotely on weekends. If my lead time weren't so long on this project, I might have favored CNC as the main production method. Cost wise, it looks like an even match between the two once I dialed in my infill and perimeter settings.

So far I've logged close to 500 hours of printing time across the 6 machines in the workshop with an estimated 1300-1500 to go. I'd wager at least 100-120 of those hours were due to part fails / rejects due to step shifting, adjusting the machines, etc. so the actual production time for usable parts is about 70-75% of the total time run. Hopefully by the end of this project we'll be hitting at least a 90% success rate on these prints.

The biggest new "Eureka!" moment I've had so far in this project is through ABS welding/patching. By super concentrating an ABS slurry mixture into a runny peanut butter consistency I've been able to patch, seal, and fill some fairly substantial gaps in my print models. Then once the acetone flashes out and the ABS re-hardens, I'm left with a 100% ABS that sands/finishes as if it were a single piece to begin with. It's frustrating to sand seams and areas composed of materials with differing durometer ratings as they sand at different rates and often wear unevenly. By using a single material to build the model as well as patch it, it makes my work much more predictable and ultimately makes sanding and finishing work much less of a pain in the butt.

This section is part of the inner frame of the armor and is mostly for attaching the chest, back, and arms to the body. Since the front plate is never going to be seen, I removed most of the features that are in this piece. This should make the final product more rigid and a bit easier to mold/cast.
View attachment 589251
View attachment 589179
View attachment 589180
View attachment 589182

A first pass at shoring up a few weak spots and filling the seams in the middle. This model could have used another smoothing interation to cut down on some of the faceting. To avoid punching through the surface when working on these parts I've bumped up my perimeter layers to 4-5 in order to thicken the skin a bit.
View attachment 589184

The "ABS bondo" method was solidified after seeing what a pain trying to patch the forearm piece was. You can see a very noticeable step band in the middle of the part that I'm working to correct. Once I started in using bondo and spot putty to finalize this print, I could no longer use an acetone wash to smooth out the surface. The patching and priming top coat should be used only as a last step before prepping to mold. This guinea pig part was a pretty test case for how to work with large 3d printed armor plates.

View attachment 589226
View attachment 589227

Just plain awesome can't wait to see how this goes.
 
Whaaaa?! This looks awesome!!! You have certainly hit the ground running. This is going to be a stellar build.
 
Late February progress report:

"Joseph and the Technicolor Dream Armor"
The CAD work for the power armor is nearly complete with only a few fixturing and mounting details to iron out. Now all that's left is the actual printing, sanding, molding, casting, finishing, and painting. Simple right?
25252129606_5a1199cb01_b.jpg

Upper shoulder bells have been printed and are currently being processed.
24406630013_b11ec3d840_b.jpg

Chest cans
25185301281_5eea533093_b.jpg

Chest piece
This one is a good example of the "acetone bondo" method. Mix up a slurry of ABS and acetone to a consistency of runny pudding and just go nuts slathering it in all the voids and warped spots on your print. Once the acetone flashes out and the mix rehardens into solid ABS you have a uniform material to work with. No more fighting products with dissimilar durometer ratings.

24910978069_c5dd4a9500_b.jpg


Whether you're using single material or fancy soluble dual material supports on your prints you're always going to have some level of surface scaring. When setting up print jobs I look for ways to minimize the need for supports as much as possible and this not only saves time both in the print and during clean-up, but also saves material by not having to build support structures along with your part.
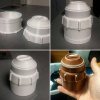
Take for example this handle piece on the front of the power armor chest. I could have simply run it with the sockets face down and dealt with the scaring after a ~2 hour print. By splitting the part through the center and laying everything flat, I avoided using supports and slashed the print time by nearly half! Once printed, the 4 parts were given a quick sanding with 220 grit, welded together using acetone, and then buffed to a high shine with that same acetone rag.
25160246862_144d520c85_b.jpg
 
This weekend saw the design and fabrication of the boot lower side plate. I made the call to modify the leg design so that it had bilateral symmetry which reduced the number of parts/molds required for the legs. By creating a universal left/right pattern, I would then only need to create the smaller attachment parts that were not symmetric (like this one) and attach them after the fact.

25158197273_e74a48a158_b.jpg
 
PropsbyVrogy (www.facebook.com/propsbyvrogy) is up in the shop this week to help mow through a mountain of printed armor parts. I should have a massive build update to show after this week. *fingers crossed*

Shoulder bell "flowers" went through a couple design iterations before I was happy with them.
25558295805_83c9bedb1d_b.jpg

Vrogy knocked out the cod piece and side attachments.
25820579210_993c0cd5c4_b.jpg

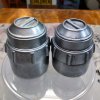
The "chest cans" got a few different paint treatments before settling in on a cold casting technique.
26044706966_8f3ab31834_b.jpg

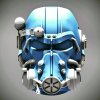
The largest progress jump I made was the helmet which was designed, printed, and assembled in the span of about two weeks. If all of my projects came together as quickly as this one has, I might one day have some of that elusive "free time" I keep hearing so much about.

26161051540_a14b19d39b_b.jpg
26157147614_db462c2e24_b.jpg
26159156063_1e0e86401b_b.jpg

The butt-plate goes under rubber and is followed up with test casting. With a 100g batch of gel coat, 100g epoxy resin, and two layers of fiberglass (I really need to get a roller), I'm barely tipping over the scales at 200g. With the size of the monster, I'm scrapping for every free gram I can.

25978873270_6a6fb4eb30_b.jpg
26695734191_dc9edf29cf_b.jpg
26157150924_47512265a5_b.jpg
 
Last edited:
Test fitting the grab handles on the chest piece master print. Oooo shiny.
These detail bits were cold cast using Smooth-On SC-326, So-Strong pigments, and aluminum powder.


26309119134_6b3f0b4a9a_b.jpg
26652349250_33775c4e43_b.jpg
26857855641_e02174e2c9_b.jpg
 
This thread is more than 7 years old.

Your message may be considered spam for the following reasons:

  1. This thread hasn't been active in some time. A new post in this thread might not contribute constructively to this discussion after so long.
If you wish to reply despite these issues, check the box below before replying.
Be aware that malicious compliance may result in more severe penalties.
Back
Top