You are using an out of date browser. It may not display this or other websites correctly.
You should upgrade or use an alternative browser.
You should upgrade or use an alternative browser.
Build Log: ED-209 Stop Motion Armature
- Thread starter CheesyGrin
- Start date
mrjbarl1
Active Member
This is awesome, you're doing a great job and it's cool to see the type of fabrication work that I can relate to. I look forward to seeing more progress on this. I only browsed through some of the comments and posts but if you have any questions about anything regarding the machining, I'd be glad to help you out in any way I can. I've acquired a few tricks of the trade over time and may be able to help if you come to a bump in the road. Two minds are better than one sometimes lol but really, you're doing a badass job on this. Keep up the great work!
Sent from my iPhone using Tapatalk
Sent from my iPhone using Tapatalk
MonsieurTox
Master Member
Art.
Im amazed by your talent !
Im amazed by your talent !
Yeah, this is making want to final start playing with Sketchup in a serious way. So nice to be able to workout so much of the build beforehand.
robbins98033
New Member
Just stumbled on your thread Nick. Awesome work, I'm really impressed. Definitely going to be following this. I have been working on a digital version of ED and maybe we could share resources. I have a bunch of stuff from the movie and a lot of images that I found online. The screenshots on my blog are a few weeks old and I've added a ton of detail since then. I'll post some new screenshots tomorrow night. Modeling is basically now done except for a few tweaks and details I still need to add around the ankle area. Almost ready to texture!

robbins98033
New Member
btw, click the blog link on my website for more images and info. Robbins Digital Art
Very, very nice work Frank.
One thing I noticed you have retracted the leg 'clamps' in quite significantly from the earlier renders. This is an area of frustration for Chris (Cheesygrin) and myself, as we're working to the dimensions of the Horizon kit. The earlier renders look more accurate to me. What prompted the change? (Apologies in advance for scribbling on your photo - hope you don't mind.)


Here's a head on shot of the puppet for comparison.

PM me if you want access to the archive of high res screen caps of the stop motion puppet.
The 1987 ED-209 Horizon Retread Thread
One thing I noticed you have retracted the leg 'clamps' in quite significantly from the earlier renders. This is an area of frustration for Chris (Cheesygrin) and myself, as we're working to the dimensions of the Horizon kit. The earlier renders look more accurate to me. What prompted the change? (Apologies in advance for scribbling on your photo - hope you don't mind.)
Here's a head on shot of the puppet for comparison.
PM me if you want access to the archive of high res screen caps of the stop motion puppet.
The 1987 ED-209 Horizon Retread Thread
CheesyGrin
Active Member
I can't take any more updates! My brain is fried due to the always steller progress! Keep it coming, though!
Thanks Joe!
Same here Joe, and to know that he had the gall to tell us that this is the first time he's working with machine, lathe and metal...the liar...joking of course: keep up the excellent work and waiting impatiently for the next pics!
Thanks for the kind words! I do have an engineering background and scale model building is my hobby. While it's my first time machining, I think my other skill sets are what's driving the outcomes. Well, that and I'm a recovering perfectionist. :$
This is awesome, you're doing a great job and it's cool to see the type of fabrication work that I can relate to. I look forward to seeing more progress on this. I only browsed through some of the comments and posts but if you have any questions about anything regarding the machining, I'd be glad to help you out in any way I can. I've acquired a few tricks of the trade over time and may be able to help if you come to a bump in the road. Two minds are better than one sometimes lol but really, you're doing a badass job on this. Keep up the great work!
Thanks for that!
Wow, that is truly a thing of beauty, being a rookie to sketchup and just prepped my first model for 3D printing i was impressed with your model, got to say, it looks even better made real
Thanks for that!
Art.
Im amazed by your talent !
A great compliment! Thank you.
Yeah, this is making want to final start playing with Sketchup in a serious way. So nice to be able to workout so much of the build beforehand.
SketchUp has been my goto tool for my last few projects. It's very versatile and easy to use. For me, working through ideas before getting into the shop is the primary contributor to success. It's demoralizing to waste shop time on bad parts and to make scrap.
CheesyGrin
Active Member
Just stumbled on your thread Nick. Awesome work, I'm really impressed. Definitely going to be following this. I have been working on a digital version of ED and maybe we could share resources. I have a bunch of stuff from the movie and a lot of images that I found online. The screenshots on my blog are a few weeks old and I've added a ton of detail since then. I'll post some new screenshots tomorrow night. Modeling is basically now done except for a few tweaks and details I still need to add around the ankle area. Almost ready to texture!
Awesome work!! One of the best I've seen. Vectorzero commented already but I'll add my $.02:
I agree that your earlier render appears more accurate. The hinge of the foot clamp extends beyond the vertical plane of the leg shroud. I've been mocking up the "H" slider today and have something close to what will be fabricated:


I took some liberties with my design and, like Vectorzero said, it's based on the Horizon kit dimensions.
robbins98033
New Member
Ah, good find, thanks! Without actual ed blueprints the proportions were really hard to nail down especially since the movie prop and puppet were fairly different. All the toy models out there were way off so, I decided to not go off those. I had noticed the long metal leg sliders were way too big after I had added a ton of detail so, I had to scale them down. You can see it by comparing the old and new renders. I didn't realize how it affected the clamp position. Consider it fixed!
Super Existence
New Member
I was just watching Robocop the other day when I noticed sort of a design flaw / cheat on the stop motion puppet.
(Robbins I borrowed one of your fantastic renders you should really do more of BTW, is it rigged to move?)
The hydraulic rams that articulate the reverse knee aren't connected to the rest of the leg. They sit on that Yoke (Point B) and you'd think that's the actual turning point of the knee.
If you look at Point A on the diagram. This is the actual point where the 'knee' rotates. You can see it clearly in the scene where Ed209 is on his back having his tantrum after falling down the stairs and robo walks away from him.
The rams are sort of for show in a design sense, as they don't really push the knee up and down (that is to say they aren't connect to any bearings to push the knee through its motion apart from the bearings of the yoke they connect to, they just sort of...rest there.) They do move but independently of the knee e.g. You can keep the knee perfectly still at a 45 degree angle and still have the rams move the yoke.
There is also a thin pillar in between the rams which is fixed all the way down, this would have to be pivoted on the bottom too and it's not it's flush with the circular plate.
You can also see the large vertical gap in the back of the tram that raises the knee along the rails (Point C). It is this size so that when this true point of rotation moves the screw is not caught in the way.
View attachment 283080
Not sure why they did this unless it was an engineering issue, maybe the fake knee couldn't support the weight as right under that you have that circular plate which articulates the leg on the X-Axis.
You could say that the ram driven yoke isn't attached with bearings to the knee itself and rather pushes freely at the knee but this would involve some serious friction and wouldn't be very efficient.
Just a thought... Went off on one this evening.
You are entirely correct. The rams are not at all attached. This is a great close up of the filming miniature (Source: Crop of Ed_60.jpg from Robocop Archive via Frank Robbins), where you can see just how cosmetic those rams are. Note that part of the circular base on which the ram assembly slides as well as half the "H Section" which moves up and down the leg rails are missing. If you watch the film carefully more and more parts of ED disappear as it progresses which I presume was the hard life the miniature got, and a lack of budget and time to effect repairs. (Look out for the shrouds between the feet and the toes, as well as the big shock absorbers front and back of the foot.)

Super Existence
New Member
Yeah I noticed that, don't know why but I'm peeved at this weirdly. Attention to detail is usually perfect with the Tippet guys...
CheesyGrin
Active Member
How easily we're fooled by movie magic.
And I wouldn't have it any other way. :thumbsup
And I wouldn't have it any other way. :thumbsup
CheesyGrin
Active Member
Hi all,
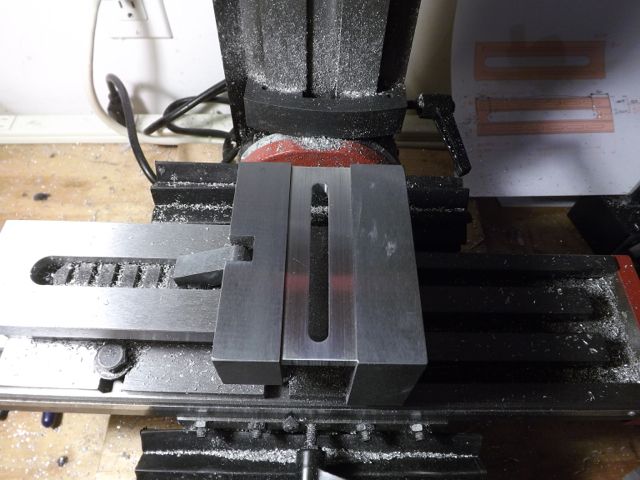
Quick build update - I started the leg rails this weekend. I didn't get much build time, so progress is limited.
First, I modified the dimensions to match the tooling I had. End mills are very expensive. So I chose to live with slightly different dimensions to save dollars. I must also give a huge shout-out to @TheNylonGag! These rails would not be happening without his generosity. Thanks Gag!
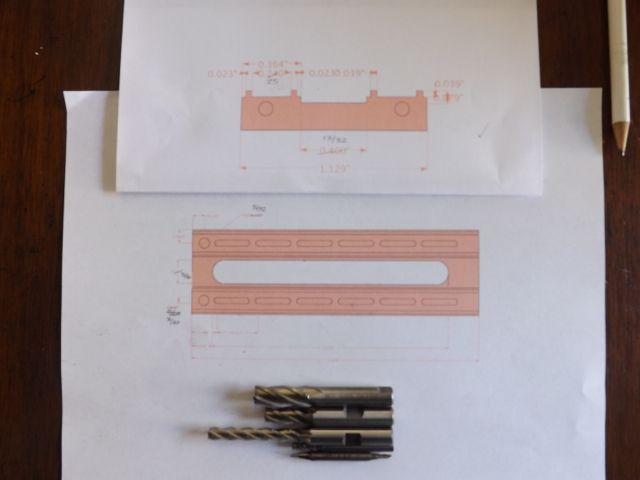
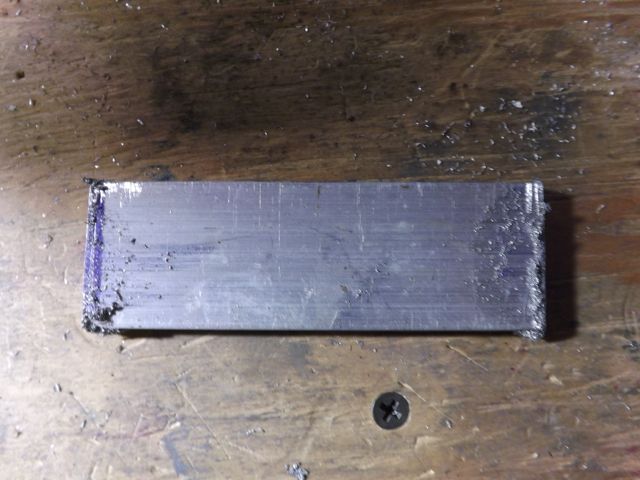
(Very) rough cut:
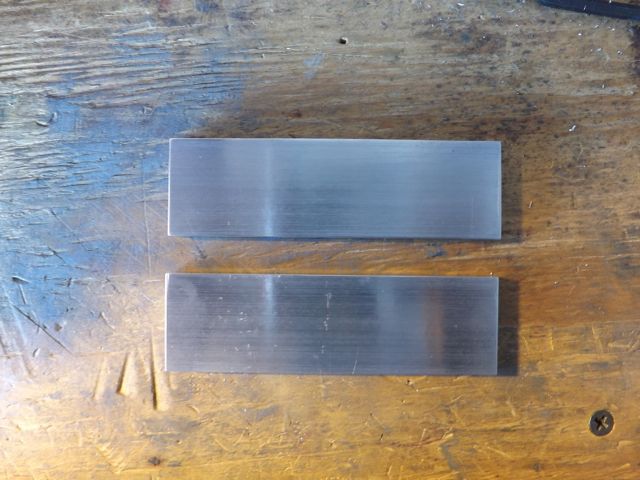
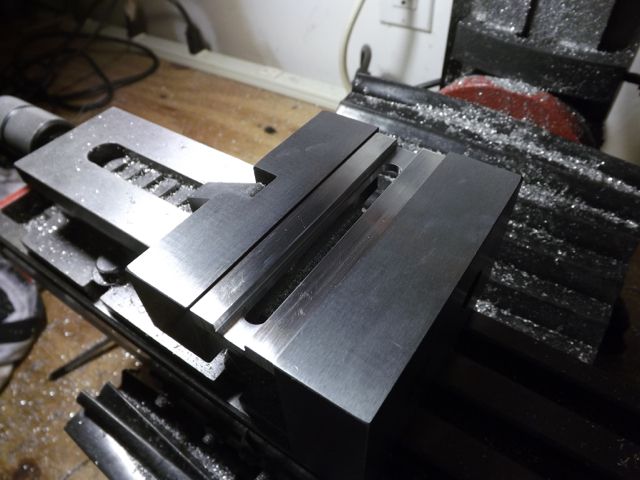
Pieces milled to size and cleaned up:
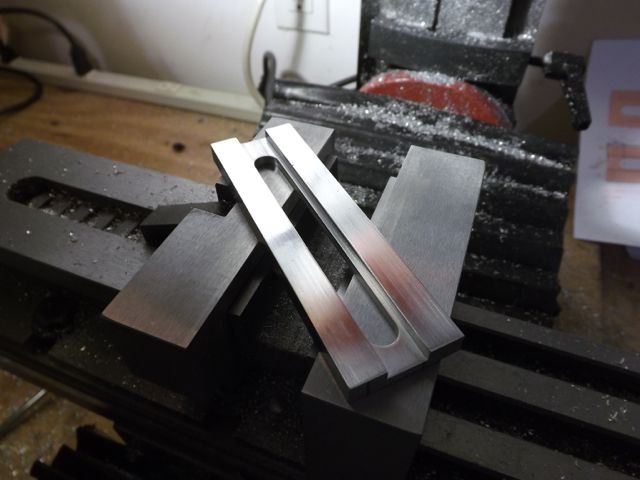
First slots cut in all four pieces:
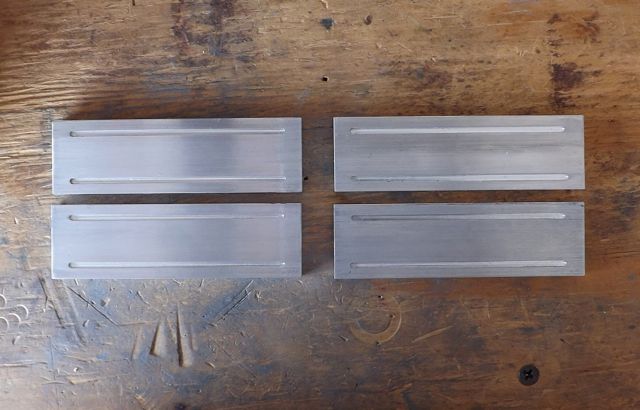
That's all for this update.
Quick build update - I started the leg rails this weekend. I didn't get much build time, so progress is limited.
First, I modified the dimensions to match the tooling I had. End mills are very expensive. So I chose to live with slightly different dimensions to save dollars. I must also give a huge shout-out to @TheNylonGag! These rails would not be happening without his generosity. Thanks Gag!

(Very) rough cut:

Pieces milled to size and cleaned up:

First slots cut in all four pieces:

That's all for this update.
CheesyGrin
Active Member
Build Update! Made some progress on the leg rails:
And the beauty shot:
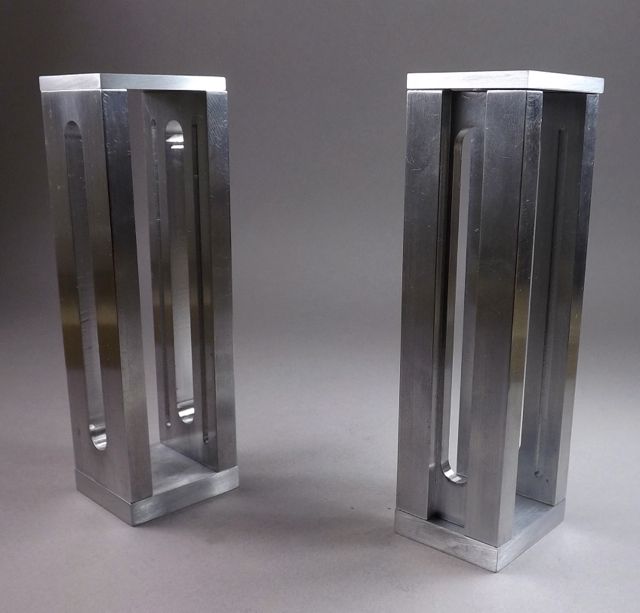
More updates no later than Monday evening!


And the beauty shot:

More updates no later than Monday evening!
Last edited:
robbins98033
New Member
Oh man, this is going to be the sickest thing ever!
Similar threads
- Replies
- 6
- Views
- 1,192
- Replies
- 4
- Views
- 568
- Replies
- 121
- Views
- 8,048
- Replies
- 155
- Views
- 18,650