cannibal869
Well-Known Member
Wow... just saw this thread - that is some seriously BAD ASS work right there! Bravo!
Looks familiar.I can't wait to finish this one up. It's gonna rock!
Wow... just saw this thread - that is some seriously BAD ASS work right there! Bravo!
Hi Everyone!
So, for anyone who was following my last thread, I'm now working on an armored variant of that costume because, apparently, I just can't leave well enough alone.
I'm using the below artwork as reference and want this one to be an original "mash-up" of some of the elements I like from all the various sources and movie versions. The kneeling reference is from the "Living Legend" TPB, the armored rendering is by Guy Bourraine Jr and I do not have a source on the line art. If anyone knows where this originates, please let me know and I'll add a credit here.
I also have to give a shout out to sparton110 for his awesome build and it made me want to do an armored version for myself.
[url]http://smpdesigns.com/smp/wp-content/uploads/2014/11/CAPALL2013002.jpg[/URL] [url]http://smpdesigns.com/smp/wp-content/uploads/2014/11/IMG_0227-193x300.jpg[/URL] [url]http://smpdesigns.com/smp/wp-content/uploads/2014/11/IMG_0512-270x300.jpg[/URL]
The base costume will be very similar to the last one, with some color and torso style changes, and we'll come to that soon. First, I needed to get started on the armor pieces. I'm mix-and-matching some of the templates from two other armor files that I have (Iron Man Mk VI and N7) and working some of it up from scratch. The first thing I needed to come up with was the template for the chest. I began this in poster board. I made this template by making a copy of my Old Republic chest (based on N7 templates) and splicing the brace from the IM Mk VI onto it to create the collar area and the back of the neck. The backpack is from the N7 template.
[url]http://smpdesigns.com/smp/wp-content/uploads/2014/11/chest-paper-front-300x295.jpghttp://smpdesigns.com/smp/wp-content/uploads/2014/11/chest-paper-back-249x300.jpg[/URL]
Once I had the basic shapes and proportions down, it was time to start cutting some foam. The base for all the armor will be 12mm (~1/2") foam floor mats purchased from Lowe's. I will also be using 2mm "foamie" sheets as well as 6mm craft foam sheets, both purchased at Michael's.
Two things that I always like to do when making armor from foam:
1. Use the heat gun to pre-shape curved pieces. You can really cut down on the difficulty of gluing and get much cleaner seams if the pieces are already shaped. It's easy to do and will save a lot of time and effort later in the process.
[url]http://smpdesigns.com/smp/wp-content/uploads/2014/11/heat-shape-1.jpg[/URL]
2. Round off the edges. I use a drum sander attachment for my electric drill to round off and smooth the cut edges of the foam. This can help even out slightly uneven cuts and also gives the edges a nice finish. Once finished sanding, just run your heat gun around the edges to smooth and seal them. This pro-tip comes to you thanks to Bill Doran at Punished Props - check out his amazing books and the rest of his site.
[url]http://smpdesigns.com/smp/wp-content/uploads/2014/11/sanding-edges.jpg[/URL]
Here's the chest piece assembled. The lines on the front are the placement lines for the detail pieces that will go on later.
[url]http://smpdesigns.com/smp/wp-content/uploads/2014/11/chest-back-1.jpg[/URL] [url]http://smpdesigns.com/smp/wp-content/uploads/2014/11/chest-front-1.jpg[/URL]
The details for the chest piece were cut from 2mm foam and contact cemented in place. The bevels are then carefully cut and peeled away. I created a place-holder star from a scrap of foam and tacked it on so that I could always see it in scale. The actual star will be a resin cast.
[url]http://smpdesigns.com/smp/wp-content/uploads/2014/11/chest-front-2.jpg[/URL]
Next, I assembled the backpack. If it looks familiar, that's because it's based on the template for the Mass Effect N7 armor. However, this one will end up being given an much different treatment. I made the center first and added the star motif by cutting the star and circle out of 2mm foam and contact cementing all the layers together.
The great things about making detail pieces like this out of 2mm foam are: it's really easy to cut accurately and smoothly, even if you have 3 layers it shapes around curves really well and it coats and finishes very nicely.
[url]http://smpdesigns.com/smp/wp-content/uploads/2014/11/backpack-1.jpg[/URL]
Once that was in place, I made the side "pods". For the cut out piece in the pods, I thought it would look cool if they were flush at the center and then dipped down at the ends. When the whole thing is finished, I think this will give it a little more sculptural detail and interest and keep it from getting too angular and "stacked".
[url]http://smpdesigns.com/smp/wp-content/uploads/2014/11/backpack-3.jpg[/URL]
Here's how the backpack looks up against the back.
[url]http://smpdesigns.com/smp/wp-content/uploads/2014/11/backpack-4.jpg[/URL]
I went around in a few circles on attaching the pack and decided that I didn't want it to be permanent and fused to the chest piece, but (since I really like the harness look on so many of the Cap versions - like the new movies and the Living Legend art) I wanted it to be a separate piece that's held on by a harness. So, naturally, that needs a template. The template is simply made out of poster board at the right curves to fit over the chest.
[url]http://smpdesigns.com/smp/wp-content/uploads/2014/11/harness-template-1.jpg[/URL][url]http://smpdesigns.com/smp/wp-content/uploads/2014/11/harness-template-2.jpg[/URL] [url]http://smpdesigns.com/smp/wp-content/uploads/2014/11/harness-template-3.jpg[/URL]
I am at a crossroads on how I want to do this. I'm torn between a more classic "leather" look like the one I recently made:
[url]http://smpdesigns.com/smp/wp-content/uploads/2014/09/harness-2.jpg[/URL]
Or creating this new one with a base of red faux that I just bought and making the inner band of the blue cordura. So, the blue all blends but there's a pop of red stripes at the edges of the harness straps. Also, that leads to a decision on silver or black hardware... So many choices...
[url]http://smpdesigns.com/smp/wp-content/uploads/2014/11/swatches.jpg[/URL]
But, that's a bridge I can cross later. In the meantime, I wanted to draft out the shoulders. I did this one by hand with just some poster board and got the scale and shape I wanted. Here's the base in the foam.
[url]http://smpdesigns.com/smp/wp-content/uploads/2014/11/shoulder-1.jpg[/URL]
I then decided to carry the "stealth" stripes motif out to the shoulders. However, I decided to do a more classic Commander Rogers star-and-circle motif rather than the flag and patch from the stealth suit. I made all the details for the shoulders out of the same 2mm and contact cement.
[url]http://smpdesigns.com/smp/wp-content/uploads/2014/11/shoulder-2.jpg[/URL] [url]http://smpdesigns.com/smp/wp-content/uploads/2014/11/shoulder-3.jpg[/URL]
So, here's the upper armor so far:
[url]http://smpdesigns.com/smp/wp-content/uploads/2014/11/upper-armor-1.jpg[/URL] [url]http://smpdesigns.com/smp/wp-content/uploads/2014/11/upper-armor-2.jpg[/URL] [url]http://smpdesigns.com/smp/wp-content/uploads/2014/11/upper-armor-3.jpg[/URL]
The jacket and torso for this version will also be getting a whole new treatment and I'll be covering part of that next. As for the armor, next up is finishing all the detail application, sealing the seams and (if it's not too cold) Plasti Dip and paint!
Stay tuned!
Such a staggering levek of detail!!! Always impressed with your work mate...top notch!!
Thanks! Hopefully we'll be able to get your project underway - I'm still game whenever you are.
Well, after a mad few months I'm back on this guy and trying to get finished up for HeroesCon in Charlotte next weekend. So, picking up where I left off...
The back knee pads are still to come. In the meantime, I decided to get the harness together.
I used my templates for the AoU straps and created the base straps using 2mm EVA foam and covering it with faux leather. I then added a red cordura (also backed with 2mm foam) detail to the upper strap. The two connect under the arms with the same silver side-release buckles that were used on the gauntlets and boots.
http://smpdesigns.com/smp/wp-content/uploads/2016/09/armor-harness-1-300x165.jpg
I decided to use a back piece that had already been playing around with as the base for the 'back pack' that the straps would attach to. This piece was simply a piece of 2mm foam covered with cordura. The straps were fitted and then sewn down.
http://smpdesigns.com/smp/wp-content/uploads/2016/09/armor-harness-2-300x232.jpg
The next step was to create the detail piece that would go over this base. To do this, I traced out the shape and created a template on tracking paper with all the details that I wanted. I used a piece of 2mm foam as the foundation. The first piece to go on was the star.
Cutting the center circle from the metallic blue vinyl, I tacked a 2mm cut out of the star to the center and then mounted them to the foundation. The star detail was stitched in using a teflon zipper foot. I then tacked down all of the other details and made the cover out of cordura with the circle that surrounds the star.
http://smpdesigns.com/smp/wp-content/uploads/2016/09/armor-harness-4-300x197.jpg
The inside edge of the circle was finished and the cover was mounted to the foundation. All of the detail lines were then sewn down with a zipper foot and the edges turned under and sewn down.
http://smpdesigns.com/smp/wp-content/uploads/2016/09/armor-harness-5-300x181.jpg
I then added some grommet details and glued the piece to the back of the harness as well as adding some blue details and hardware to the upper straps.
http://smpdesigns.com/smp/wp-content/uploads/2016/09/armor-harness-6-300x194.jpg
Here's the completed harness on the costume.
http://smpdesigns.com/smp/wp-content/uploads/2016/09/armor-harness-7-267x300.jpg http://smpdesigns.com/smp/wp-content/uploads/2016/09/armor-harness-8-292x300.jpg
I posted earlier about a helmet that I was working on in foam. That needs a lot more experimentation to get where I'd want to be for this suit - so, I was able to procure this beauty from @Graphic Jordan and will be using it with the suit. It's a fantastic fit and looks amazing - I couldn't be more excited to add this to my suit up next week.
View attachment 734597
More to come!
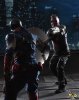
Took Cap and Red Skull to Dragon Con over the weekend and had a great time. More pics coming soon, but here are a few.
You guys look awesome! Outstanding job on both suit.
Sent from my iPhone using Tapatalk
Update time!
The next piece to add was the collar on the new chest. I liked the AoU collar with the split in the front and the red chevrons on the side, so I went with that style.
http://smpdesigns.com/smp/wp-content/uploads/2016/09/armor-cap-chest-8-300x206.jpg
Once that was attached a made a backplate with craft foam and cordura. This will be sewn down on one side, velcro on the other and will cover the zipper in the back.
http://smpdesigns.com/smp/wp-content/uploads/2016/09/armor-cap-chest-10-280x300.jpg
With the chest finished except for some detailing, I decided to get the shoulders underway. I used the pattern for the tactical Batman for the basic shoulder bells. These were also lined with headliner to give them a good amount of structure. I then created an edging piece by covering craft foam with the red faux leather and sewing the main shoulder bell to it.
http://smpdesigns.com/smp/wp-content/uploads/2016/09/armor-cap-shoulder-1-300x209.jpg http://smpdesigns.com/smp/wp-content/uploads/2016/09/armor-cap-shoulder-2-300x208.jpg
Straps were created to hold the shoulders to the biceps by using the same silver fabric on the sleeves and headliner foam. The fabric was backed with the foam and then ribbing was stitched down for some added detail.
http://smpdesigns.com/smp/wp-content/uploads/2016/09/armor-cap-shoulder-4-300x236.jpg
The straps were attached to the front of the shoulder bells. The shoulders will attach to the inner jacket and extend from under the chest piece. Once I get a final fitting, the straps will be attached to the backs of the shoulders. There will also be an molded insignia detail on the shoulders (I'll cover that later).
http://smpdesigns.com/smp/wp-content/uploads/2016/09/armor-cap-shoulder-5-235x300.jpg
At this point, I'm pretty much at a stop on the upper body until I get a few more supplies in and the mold for the shoulders run, so I moved on the gauntlets.
I like the style of gauntlets from the Avengers costume, and decided I want to play around with this version.
http://smpdesigns.com/smp/wp-content/uploads/2016/09/armor-cap-gauntlet-1-269x300.jpg
I began by making a paper template and sketching out the details. Then, I made the base structure out of headliner and craft foam. The craft foam in the center section is 6mm while the sides are 2mm. It's not east to see in the image, but the 6mm pieces are beveled to make molding the fabric and sewing the detail lines easier.
http://smpdesigns.com/smp/wp-content/uploads/2016/09/armor-cap-gauntlet-2-283x300.jpg http://smpdesigns.com/smp/wp-content/uploads/2016/09/armor-cap-gauntlet-3-300x245.jpg
I like the later versions of the MCU costumes for pulling the brown elements into the accessories. While I want to do that as well, I also want the brown to be more of an accent and not base for the pieces. So, this gauntlet base was then covered with cordura that was sprayed with Super 77.
http://smpdesigns.com/smp/wp-content/uploads/2016/09/armor-cap-gauntlet-4-300x267.jpg
I then used my original template to trace out the edging and detail lines in the brown faux leather. This was sewn down using a teflon zipper foot and the edges were trimmed, wrapped to the back and glued down.
http://smpdesigns.com/smp/wp-content/uploads/2016/09/armor-cap-gauntlet-5-300x197.jpg
The inner forearm piece was made using a piece of the brown faux leather detailed with red cordura. It is held in place with two strips of elastic. Red cordura straps and silver buckles were added to the outer gauntlet and it straps on top of the lower piece.
http://smpdesigns.com/smp/wp-content/uploads/2016/09/armor-cap-gauntlet-6-246x300.jpg http://smpdesigns.com/smp/wp-content/uploads/2016/09/armor-cap-gauntlet-8-222x300.jpg http://smpdesigns.com/smp/wp-content/uploads/2016/09/armor-cap-gauntlet-7-220x300.jpg
Next up on the gauntlets are the had guards, gloves and possibly elbow pads - then it's on to finishing the chest/shoulders and the rest of the accessories.
Hi Everyone!
So, for anyone who was following my last thread, I'm now working on an armored variant of that costume because, apparently, I just can't leave well enough alone.
I'm using the below artwork as reference and want this one to be an original "mash-up" of some of the elements I like from all the various sources and movie versions. The kneeling reference is from the "Living Legend" TPB, the armored rendering is by Guy Bourraine Jr and I do not have a source on the line art. If anyone knows where this originates, please let me know and I'll add a credit here.
I also have to give a shout out to sparton110 for his awesome build and it made me want to do an armored version for myself.
http://smpdesigns.com/smp/wp-content/uploads/2014/11/CAPALL2013002.jpg http://smpdesigns.com/smp/wp-content/uploads/2014/11/IMG_0227-193x300.jpg http://smpdesigns.com/smp/wp-content/uploads/2014/11/IMG_0512-270x300.jpg
The base costume will be very similar to the last one, with some color and torso style changes, and we'll come to that soon. First, I needed to get started on the armor pieces. I'm mix-and-matching some of the templates from two other armor files that I have (Iron Man Mk VI and N7) and working some of it up from scratch. The first thing I needed to come up with was the template for the chest. I began this in poster board. I made this template by making a copy of my Old Republic chest (based on N7 templates) and splicing the brace from the IM Mk VI onto it to create the collar area and the back of the neck. The backpack is from the N7 template.
http://smpdesigns.com/smp/wp-content/uploads/2014/11/chest-paper-front-300x295.jpghttp://smpdesigns.com/smp/wp-content/uploads/2014/11/chest-paper-back-249x300.jpg
Once I had the basic shapes and proportions down, it was time to start cutting some foam. The base for all the armor will be 12mm (~1/2") foam floor mats purchased from Lowe's. I will also be using 2mm "foamie" sheets as well as 6mm craft foam sheets, both purchased at Michael's.
Two things that I always like to do when making armor from foam:
1. Use the heat gun to pre-shape curved pieces. You can really cut down on the difficulty of gluing and get much cleaner seams if the pieces are already shaped. It's easy to do and will save a lot of time and effort later in the process.
http://smpdesigns.com/smp/wp-content/uploads/2014/11/heat-shape-1.jpg
2. Round off the edges. I use a drum sander attachment for my electric drill to round off and smooth the cut edges of the foam. This can help even out slightly uneven cuts and also gives the edges a nice finish. Once finished sanding, just run your heat gun around the edges to smooth and seal them. This pro-tip comes to you thanks to Bill Doran at Punished Props - check out his amazing books and the rest of his site.
http://smpdesigns.com/smp/wp-content/uploads/2014/11/sanding-edges.jpg
Here's the chest piece assembled. The lines on the front are the placement lines for the detail pieces that will go on later.
http://smpdesigns.com/smp/wp-content/uploads/2014/11/chest-back-1.jpg http://smpdesigns.com/smp/wp-content/uploads/2014/11/chest-front-1.jpg
The details for the chest piece were cut from 2mm foam and contact cemented in place. The bevels are then carefully cut and peeled away. I created a place-holder star from a scrap of foam and tacked it on so that I could always see it in scale. The actual star will be a resin cast.
http://smpdesigns.com/smp/wp-content/uploads/2014/11/chest-front-2.jpg
Next, I assembled the backpack. If it looks familiar, that's because it's based on the template for the Mass Effect N7 armor. However, this one will end up being given an much different treatment. I made the center first and added the star motif by cutting the star and circle out of 2mm foam and contact cementing all the layers together.
The great things about making detail pieces like this out of 2mm foam are: it's really easy to cut accurately and smoothly, even if you have 3 layers it shapes around curves really well and it coats and finishes very nicely.
http://smpdesigns.com/smp/wp-content/uploads/2014/11/backpack-1.jpg
Once that was in place, I made the side "pods". For the cut out piece in the pods, I thought it would look cool if they were flush at the center and then dipped down at the ends. When the whole thing is finished, I think this will give it a little more sculptural detail and interest and keep it from getting too angular and "stacked".
http://smpdesigns.com/smp/wp-content/uploads/2014/11/backpack-3.jpg
Here's how the backpack looks up against the back.
http://smpdesigns.com/smp/wp-content/uploads/2014/11/backpack-4.jpg
I went around in a few circles on attaching the pack and decided that I didn't want it to be permanent and fused to the chest piece, but (since I really like the harness look on so many of the Cap versions - like the new movies and the Living Legend art) I wanted it to be a separate piece that's held on by a harness. So, naturally, that needs a template. The template is simply made out of poster board at the right curves to fit over the chest.
http://smpdesigns.com/smp/wp-content/uploads/2014/11/harness-template-1.jpghttp://smpdesigns.com/smp/wp-content/uploads/2014/11/harness-template-2.jpg http://smpdesigns.com/smp/wp-content/uploads/2014/11/harness-template-3.jpg
I am at a crossroads on how I want to do this. I'm torn between a more classic "leather" look like the one I recently made:
http://smpdesigns.com/smp/wp-content/uploads/2014/09/harness-2.jpg
Or creating this new one with a base of red faux that I just bought and making the inner band of the blue cordura. So, the blue all blends but there's a pop of red stripes at the edges of the harness straps. Also, that leads to a decision on silver or black hardware... So many choices...
http://smpdesigns.com/smp/wp-content/uploads/2014/11/swatches.jpg
But, that's a bridge I can cross later. In the meantime, I wanted to draft out the shoulders. I did this one by hand with just some poster board and got the scale and shape I wanted. Here's the base in the foam.
http://smpdesigns.com/smp/wp-content/uploads/2014/11/shoulder-1.jpg
I then decided to carry the "stealth" stripes motif out to the shoulders. However, I decided to do a more classic Commander Rogers star-and-circle motif rather than the flag and patch from the stealth suit. I made all the details for the shoulders out of the same 2mm and contact cement.
http://smpdesigns.com/smp/wp-content/uploads/2014/11/shoulder-2.jpg http://smpdesigns.com/smp/wp-content/uploads/2014/11/shoulder-3.jpg
So, here's the upper armor so far:
http://smpdesigns.com/smp/wp-content/uploads/2014/11/upper-armor-1.jpg http://smpdesigns.com/smp/wp-content/uploads/2014/11/upper-armor-2.jpg http://smpdesigns.com/smp/wp-content/uploads/2014/11/upper-armor-3.jpg
The jacket and torso for this version will also be getting a whole new treatment and I'll be covering part of that next. As for the armor, next up is finishing all the detail application, sealing the seams and (if it's not too cold) Plasti Dip and paint!
Stay tuned!
Are the templates availableI have kept the posterboard templates and was planning to make them into a PDF and will post it here with some details on how to put it together. Keep in mind, though, that it's not going to be a pep file so it's not going to be scalable. If you need to resize it, you'll have to do it the old fashioned way.
- - - Updated - - -
Yep! Looking forward to it