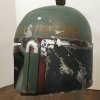
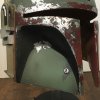
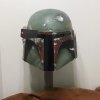
Fettastic Boba Fett Helmet ESB Paintup

Re: Boba Fett Helmet ESB Paintup for NoirShadow

Again. Just wow. Beautiful.

Are you using any one brand of acrylic paint exclusively, and are you custom mixing any of your colors?

Back when I first started my second helmet years back, I bought a bunch of Humbrol enamels, and since then have accumulated a ton of Tamiya acrylics. I suppose one thing that's kept me from continuing is deciding whether to go ahead and use the enamels, even though the acrylics are easier to feed through my airbrush. Any thoughts on this?

Sent from my VS996 using Tapatalk
 
Re: Boba Fett Helmet ESB Paintup for NoirShadow

Hey Fettastic ! That side-by-side shot is AMAZING! Great work so far! Get it wet when you're all done and empty a vacuum bag on it. Let it dry, dust it off, and it'll look just like the real deal with 35 years worth of dust and grime in the paint!

Do you know if that's a crack or a seam-line up the right cheek/earpiece/brow of the original?

Looking forward to seeing it all finished, NoirShadow is going to be getting a beauty of a replica!
 
Last edited by a moderator:
Re: Boba Fett Helmet ESB Paintup for NoirShadow

Again. Just wow. Beautiful.

Are you using any one brand of acrylic paint exclusively, and are you custom mixing any of your colors?

Back when I first started my second helmet years back, I bought a bunch of Humbrol enamels, and since then have accumulated a ton of Tamiya acrylics. I suppose one thing that's kept me from continuing is deciding whether to go ahead and use the enamels, even though the acrylics are easier to feed through my airbrush. Any thoughts on this?

Sent from my VS996 using Tapatalk
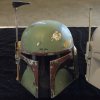
Thanks Dann! I am not using one brand of acrylics exclusively but I am using acrylics exclusively. The reason I use acrylics is mainly because they're non toxic easy to clean and I like that they dry super quick and can by diluted with water. I'm also pretty pot committed being that over the course of 3 years I've made well over 100 different personal swatches of acrylic paints straight from the jar and of custom mixtures. I've spent a ridiculous amount of time and money on acrylic paint. The first Fett Helmet I ever painted I used some Humbrol acrylics because of a thread I found with a Humbrol paint by numbers for the ESB Fett Helmet. Unfortunately I have zero experience with humbrol enamels but personally I'm not a fan of their acrylics (with the exceptions of their gray #79 as a topical paint only). I do not like the way they feed through my airbrush with any amount of thinning.

Paint by numbers link:
https://www.thedentedhelmet.com/for...visual-guide-esb-rotj-helmet-esb-armor.23134/

The helmet below is the first helmet I painted in a layered, masking technique following the list of colors from the link above with the exception of the below listed colors.

Silver: Testors Gloss Metallic Silver (enamel aerosol spray)
Dome Green: Humbrol #73 + Model Master POG 1946 1:1
Mandible Red: Model Master Brittish Crimson

Humbrol Helmet cropped.jpg

Your work is @Fettastic! ;)

Hahaha that never gets old.

Wow! Just...wow!

Thanks I think ;)

Hey @Fettastic ! That side-by-side shot is AMAZING! Great work so far! Get it wet when you're all done and empty a vacuum bag on it. Let it dry, dust it off, and it'll look just like the real deal with 35 years worth of dust and grime in the paint!

Do you know if that's a crack or a seam-line up the right cheek/earpiece/brow of the original?

Looking forward to seeing it all finished, NoirShadow is going to be getting a beauty of a replica!

I love this idea with the vacuum bag of dust :D I save the grime weathering for the very last stage of the paint up. I do want to clarify that this will be an ESB (as seen on screen) paint-up so it won't have quite as much grime, scratches or damage from the accumulated years since it was filmed.

It is most definitely a crack, and it was apparent during the filming >>>

Cheek Crack.jpg

This is the crack that I made for this commission >>>
IMG_0366 cropped.JPG IMG_0362 cropped.JPG
 
Re: Boba Fett Helmet ESB Paintup for NoirShadow

Quick update on the mandible progress...

Fett Face 3.jpg

The Mandibles are probably the section that takes me the longest. So many minuscule scratches that make you go cross eyed. I'll recap a little bit into the process side of how I tackle this.

On this helmet I am doing all the damage layers topically. I Use stencil's to mark out the general region of the damage and then use close up reference photo's to more accurately shape the damaged regions. This part is very very time consuming going back and forth from my computer screen to the helmet. Then I paint all the major silver damage, then the gray, then the dark purple meanwhile going back and forth between reference photo's. Then I'll go back to the silver to do the minor silver damage on top and sharpen out the silver damage previously topically painted.

Fett Face 6 Right Mandible.jpg Fett Face 10 Right Mandible.jpg Fett Face 11 Left Mandible.jpg
 
Re: Boba Fett Helmet ESB Paintup for NoirShadow

Just beautiful... The time and patience for a paint up like this is nothing short of astounding, I'm in awe of your talent.
 
Last edited:
Re: Boba Fett Helmet ESB Paintup for NoirShadow

It is most definitely a crack, and it was apparent during the filming >>>

This is the crack that I made for this commission >>>

Hey Fettastic ! Very COOL! I love that you put the 'crack' in the replica!!!

In that high res. photo it looks to me like the crack even veers over to the lower right corner of the eye slit.

OH! One other 'needs grime' source... dusty shelves! Less carpet fiber, and hair, etc. too! Just wipe it into a Ball glass jar and cap it off until you need it. ;)
 
Last edited by a moderator:
Ok, so let me understand this paintjob. What you’re doing here for the most part is painting the base color (i.e. light green), then the first damage layer (i.e. grey blueish primer) , then the silver “exposed” helmet layer. So actually the “exposed” areas in fact have more paint layers than the rest. Am i correct?

Shouldn’t it be the other way around?

In photos your paintjob looks awesome, but is it consistent in person?

So jealous I want a Boba Fett esb helmet as well!!

Yes, for the most part you are correct. For this helmet I am doing a topical, layered technique. There is really only one extra layer of paint on the base color though because I'm not painting silver over top of the gray like in your example. Instead, I'll typically start with painting the silver damage over the base color and then paint outwards to that silver damage so the layers aren't really overlapping, but rather connecting. The topical layer is very thin and I use 0000 steel wool very lightly over top so there are no evident edges.

There are a lot of different methods and I've tried a few others myself. I've done a strictly layered with practically no topical paint work helmet, painting the base color then using masking fluid to reveal the damage layer beneath. This method is the most practical to real life damage obviously but doesn't yield the best results in my opinion. The first hurdle with this style (from my experience using acrylics) is that the first layer of paint that goes over top of the silver base doesn't cure and adhere nearly as good as it does to a primer or more gritty layer of paint. Silvers tend to be more smooth due to the sheen or shine. The second hurdle is masking fluid. If you've ever worked with masking fluid you'll know that the shape and detail you create using the masking fluid doesn't always turn out exactly as you painted and sometimes need tweaking with topical painting to sharpen or fix the detail.

I've also done a mixture of the two above methods where my Silver damage for the whole helmet was a revealed layer using the masking fluid method and then topically painting the subsequent damage layers around the silver on top of the base coat color layer ie. the dome green, or mandible red. Personally, I think this method is how the original helmet was done by Joe Johnston but I won't get into that here.

So far I really like this topical method for this helmet because I am able to really define edges and spend extra time on detail. In photo's comparing the topical method to the masked method nobody could tell, and even in person, the finished product looks and feels completely realistic and practical.
 
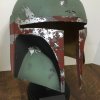
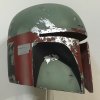
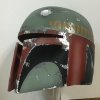
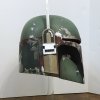
Getting close to finishing the paint on this one. Still need to apply the white thumbprint, and the white smears on the killstripes, grease stains, the spatter, grime, and some other small details like the ear markings.

Boba Fett ESB 17.JPG Boba Fett ESB 7.JPG Boba Fett ESB 6.JPG Boba Fett ESB 8.JPG

Boba Fett ESB 13.JPG Boba Fett ESB 10.JPG Boba Fett ESB 18.JPG Boba Fett ESB 19.JPG

Boba Fett ESB 17.JPG


Boba Fett ESB 7.JPG


Boba Fett ESB 6.JPG


Boba Fett ESB 8.JPG


Boba Fett ESB 13.JPG


Boba Fett ESB 10.JPG


Boba Fett ESB 18.JPG


Boba Fett ESB 19.JPG
 
Last edited by a moderator:
Small update. I added the white finger smudges and details on the killstripe side and added the white arch on the right upper ear cap. The smudges in particularly are kind of stressful since I actually smear white paint on the beautiful paint job.

A Fett 9-6 9 finish balanced.jpg A Fett 9-6 16 finish balanced.jpg

Finger smudge close up.
A Fett 9-6 13.jpg

Weather Spatter close up.
A Fett 9-6 14.jpg

A Fett 9-6 9 finish balanced.jpg


A Fett 9-6 16 finish balanced.jpg


A Fett 9-6 13.jpg


A Fett 9-6 14.jpg
 
Last edited by a moderator:
IMG_11871.JPG

Finally installed the servo and light kit from JC27. It includes the electric servo, wireless receiver and transmitter, LED's for the topper and perspex block, micro switch, and Alco Switches. Amazing kit but I would not recommend for the novice. The Servo is very, very sensitive and absolutely has to come to rest at both the up and down position with support or it will not function. The timing and position has to be perfect. The Servo is operated by the wireless transmitter and receiver. When the servo comes to rest in the down position it activates the micro switch, which then sends power to the topper LED's.


IMG_11871.JPG
 
Last edited by a moderator:
This thread is more than 5 years old.

Your message may be considered spam for the following reasons:

  1. This thread hasn't been active in some time. A new post in this thread might not contribute constructively to this discussion after so long.
If you wish to reply despite these issues, check the box below before replying.
Be aware that malicious compliance may result in more severe penalties.
Back
Top