My First Thread, MPC Millennium Falcon Build

Thanks dude, most appreciated.

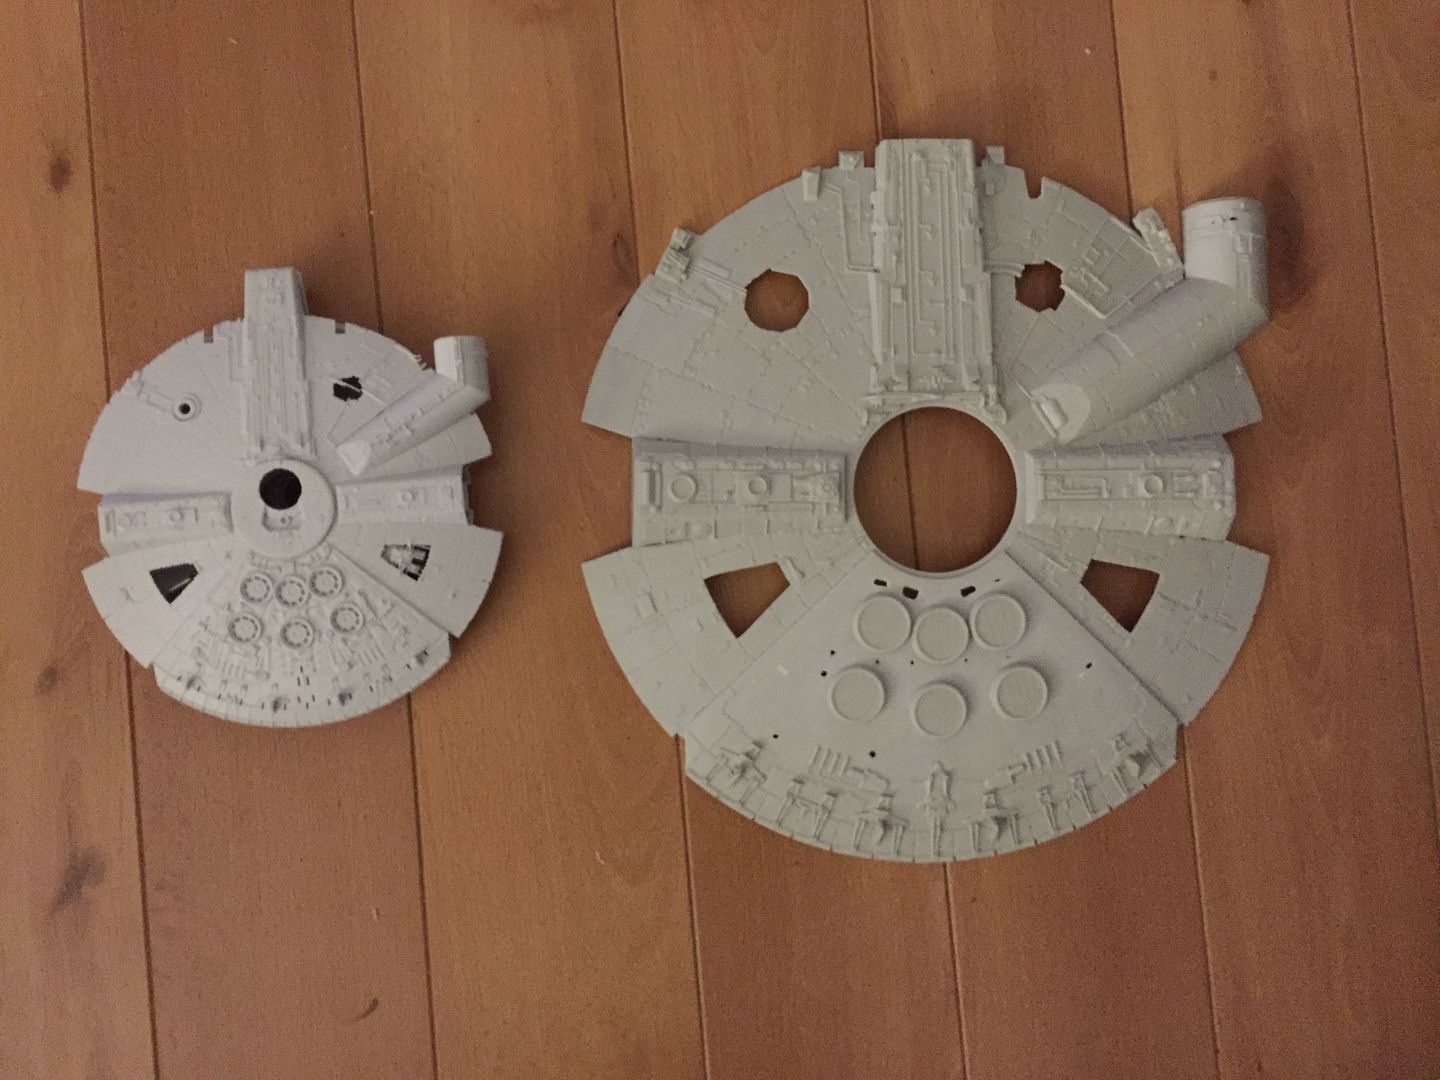
Its crazy when you look at reference how correct some of the MPC kit is,things that even the fine molds got very wrong.

should be fairly accurate once its done. I love the 5 foot falcon the most.

Looking cool.....yes,...the MPC gets a lot of slagging,.....but its really not as bad as people think

I posted this over on my TFA Falcon thread:

The Bandai & its closest relation,.....a mod I'd started on another MPC,...then changed my mind & started on the FM72,....after seeing Hunk a Junks
IMG_3131_zpsog2jqh0w.jpg


J
 
I decided to paint the TonyRR cockpit. i used some blue clear to let the light come through the back wall.

WIN_20151115_16_58_59_Pro.jpgWIN_20151115_16_59_15_Pro.jpgWIN_20151115_17_00_33_Pro.jpgWIN_20151115_17_01_08_Pro.jpgWIN_20151115_17_03_12_Pro.jpgWIN_20151115_17_04_23_Pro.jpgWIN_20151115_17_04_53_Pro.jpg

Im very happy with how it turned out. Cant wait to see it all lit up with the fibre optics :)
 
Okey some updates :)

I Decided to build a hallway leading up to the cockpit instead of just having a closed door which was an option. Also i finished sizing and trimming the cockpit tube and glued it to the saucer. Notice i tapered the the tube to fit the shapeways cone.

The hallway was made from sheet styrene and i used a door from the original kit to close off the hallway, you can hardly see it from any angle.
I cut 20 rings and glued 4 of them per section for 5 rings.

The idea is that i can still run all the fibre optics to the back wall as there is a 90 degree angle of the walls behind the doorway.

I put a coat of dark grey on the cone and primered the hallway, then paint. Im very pleased with the results :)

WIN_20151121_01_28_00_Pro.jpgWIN_20151121_01_16_53_Pro.jpgWIN_20151121_01_20_56_Pro.jpgWIN_20151121_01_21_07_Pro.jpgWIN_20151121_01_22_24_Pro.jpgWIN_20151121_01_23_43_Pro.jpgWIN_20151121_01_25_19_Pro.jpgWIN_20151121_01_26_36_Pro.jpgWIN_20151121_01_27_43_Pro.jpg

And lastly some more work on the engine deck greeblies. Only a few more bits on this section of the model which is good because im getting a bit bored of having to do that area and look forward to not coming back to it. It has been a many month effort, slowly doing the odd bit here and there :)

WIN_20151121_01_16_39_Pro.jpg

I Should have some sidewalls coming to me shortly so will begin the main assembly of the hull. Then i can begin to plan the fibre optics and lighting stuff.

More updates soon, many thanks for viewing :)
 
Last edited:
Superb, I'm envious of your skill! Keep us all updated, also I've got a bunch of casts for various greeblies you might find useful on your Falcon, if you're interested shoot me a PM :D
 
Thanks for the link. they are abit out of my price range. JBOT has a smaller set for $8 plus shipping so il probably end up getting those later on i think. I appreciate your time :)

Goof luck with JBOT.:D I tried many times to order the same decals your talking about. Never been available.

Which is WHY I created the sets currently available. And JBOT's are no way as complete.

best regards.

You get what you pay for.:facepalm
 
Goof luck with JBOT.:D I tried many times to order the same decals your talking about. Never been available.

Which is WHY I created the sets currently available. And JBOT's are no way as complete.

best regards.

You get what you pay for.:facepalm

Oh dear i didnt know that about JBOT, to be fair i havnt looked into them much.

If i can get the funds together i will go for a set off you then. did you have many sets avaliable and would the be avaliable after christmas?
 
Ok, so after seeing HaystackHairs build i decided to bite the bullet and section the saucer. it wouldnt have made sense going the distance and not doing that job.

Haystack very kindly sorted me a sidewall set, minus the inner mandible sections as he is yet to remold them. I will most likely have those from him when they are ready as his resin parts are really great and he prices them fairly.

I cut the saucer the same way as Haystack showed in his thread. I also made a support structure with ribs, to create the ring I softened the styrene in the oven at 200 degrees and wrapped it round a cup of the right diameter.
WIN_20151126_14_34_32_Pro.jpgWIN_20151126_14_34_15_Pro.jpgWIN_20151126_14_33_53_Pro.jpg

I mounted some white LEDs into mandibles and hot snotted them into place.
WIN_20151126_14_44_02_Pro.jpgWIN_20151126_14_41_50_Pro.jpgWIN_20151126_14_36_52_Pro.jpgWIN_20151126_14_36_24_Pro.jpgWIN_20151126_14_35_25_Pro.jpg

More progress posted soon. Thankyou again to haystackhair for the parts and reference material. many thanks for viewing :)
 
If not, don't worry, we can make more.:cool

A little history.

Not to slam JBOT or JTGraphis or ANY other Mill. Falc. Decals. (Ken Rice decals are great, just not as comprehensive, if you can find them buy them)

Having been in the same boat you are I could not find any on line. Having spent almost 30 years creating graphics, I thought why not make my own.

Research. Turned out no one had done a complete eye ball of all the decals on the 5ft. Falcon.

All the other parts had been documented, NOT the graphics. I did a post here asking for input from RPF members.

And of course they came through.;) So I thought why not make them available. As to cost, all I am concerned with is covering my production and handling cost.

Ink, paper, packaging, ect.

SOOOoo,….

Not looking to steal your thread.:)


Considering ALL the work you have done on your MPC/AMT model (Great job, by the way!) WHY would you skimp on the finish?

Best regards,

retiredadguy


AND a HAPPY THANKSGIVING to everyone!!
 
Last edited:
Ok, so after seeing HaystackHairs build i decided to bite the bullet and section the saucer. it wouldnt have made sense going the distance and not doing that job.

Haystack very kindly sorted me a sidewall set, minus the inner mandible sections as he is yet to remold them. I will most likely have those from him when they are ready as his resin parts are really great and he prices them fairly.

I cut the saucer the same way as Haystack showed in his thread. I also made a support structure with ribs, to create the ring I softened the styrene in the oven at 200 degrees and wrapped it round a cup of the right diameter.
View attachment 559493View attachment 559492View attachment 559491

I mounted some white LEDs into mandibles and hot snotted them into place.
View attachment 559499View attachment 559498View attachment 559497View attachment 559496View attachment 559495

More progress posted soon. Thankyou again to haystackhair for the parts and reference material. many thanks for viewing :)


Fantastico-superb-o-licious your Falcon is looking better and better with every update, glad to see you bit the bullet and decided to change the curvature.

I also have the inner mandible parts moulded and I'm pulling casts out the mould as we speak, so if you'd like some those along with a cockpit and any other bits and bobs just shoot me a message over on Facebook.

I'm honestly thrilled to bits to see my parts being used, and on SUCH a great build too...it's going to look better than my own for sure ! :D

Thanks dude, thats an honour coming from you with your skill. your falcon is the boss i could only try to beat lol.

I will hit you up for those parts, so expect a facebook message :)
 
Today i glued the saucer to the newly made ribbing.i started the fillering too.

I had to cut the cockpit tube as it was sitting far too low, im yet to patch in the gaps on that bit.

WIN_20151127_08_52_53_Pro.jpgWIN_20151127_08_53_12_Pro.jpgWIN_20151127_16_24_04_Pro.jpgWIN_20151127_16_24_30_Pro.jpg

You can see the curvature has defintaly increased :)

WIN_20151127_16_25_07_Pro.jpgWIN_20151127_16_25_28_Pro.jpgWIN_20151127_16_25_54_Pro.jpgWIN_20151127_16_26_14_Pro.jpg

Im happy with the results. just waiting for the putty to dry, then i will add some fine surface filler and sort out the cockpit tube. Also the front centre section need some filler peices too. it now has the right amount of gap in reference to the 5 footer.

after that i will start on the lower saucer.

Fun Fun Fun
 
This thread is more than 6 years old.

Your message may be considered spam for the following reasons:

  1. This thread hasn't been active in some time. A new post in this thread might not contribute constructively to this discussion after so long.
If you wish to reply despite these issues, check the box below before replying.
Be aware that malicious compliance may result in more severe penalties.
Back
Top