Making Samurai armor costume.

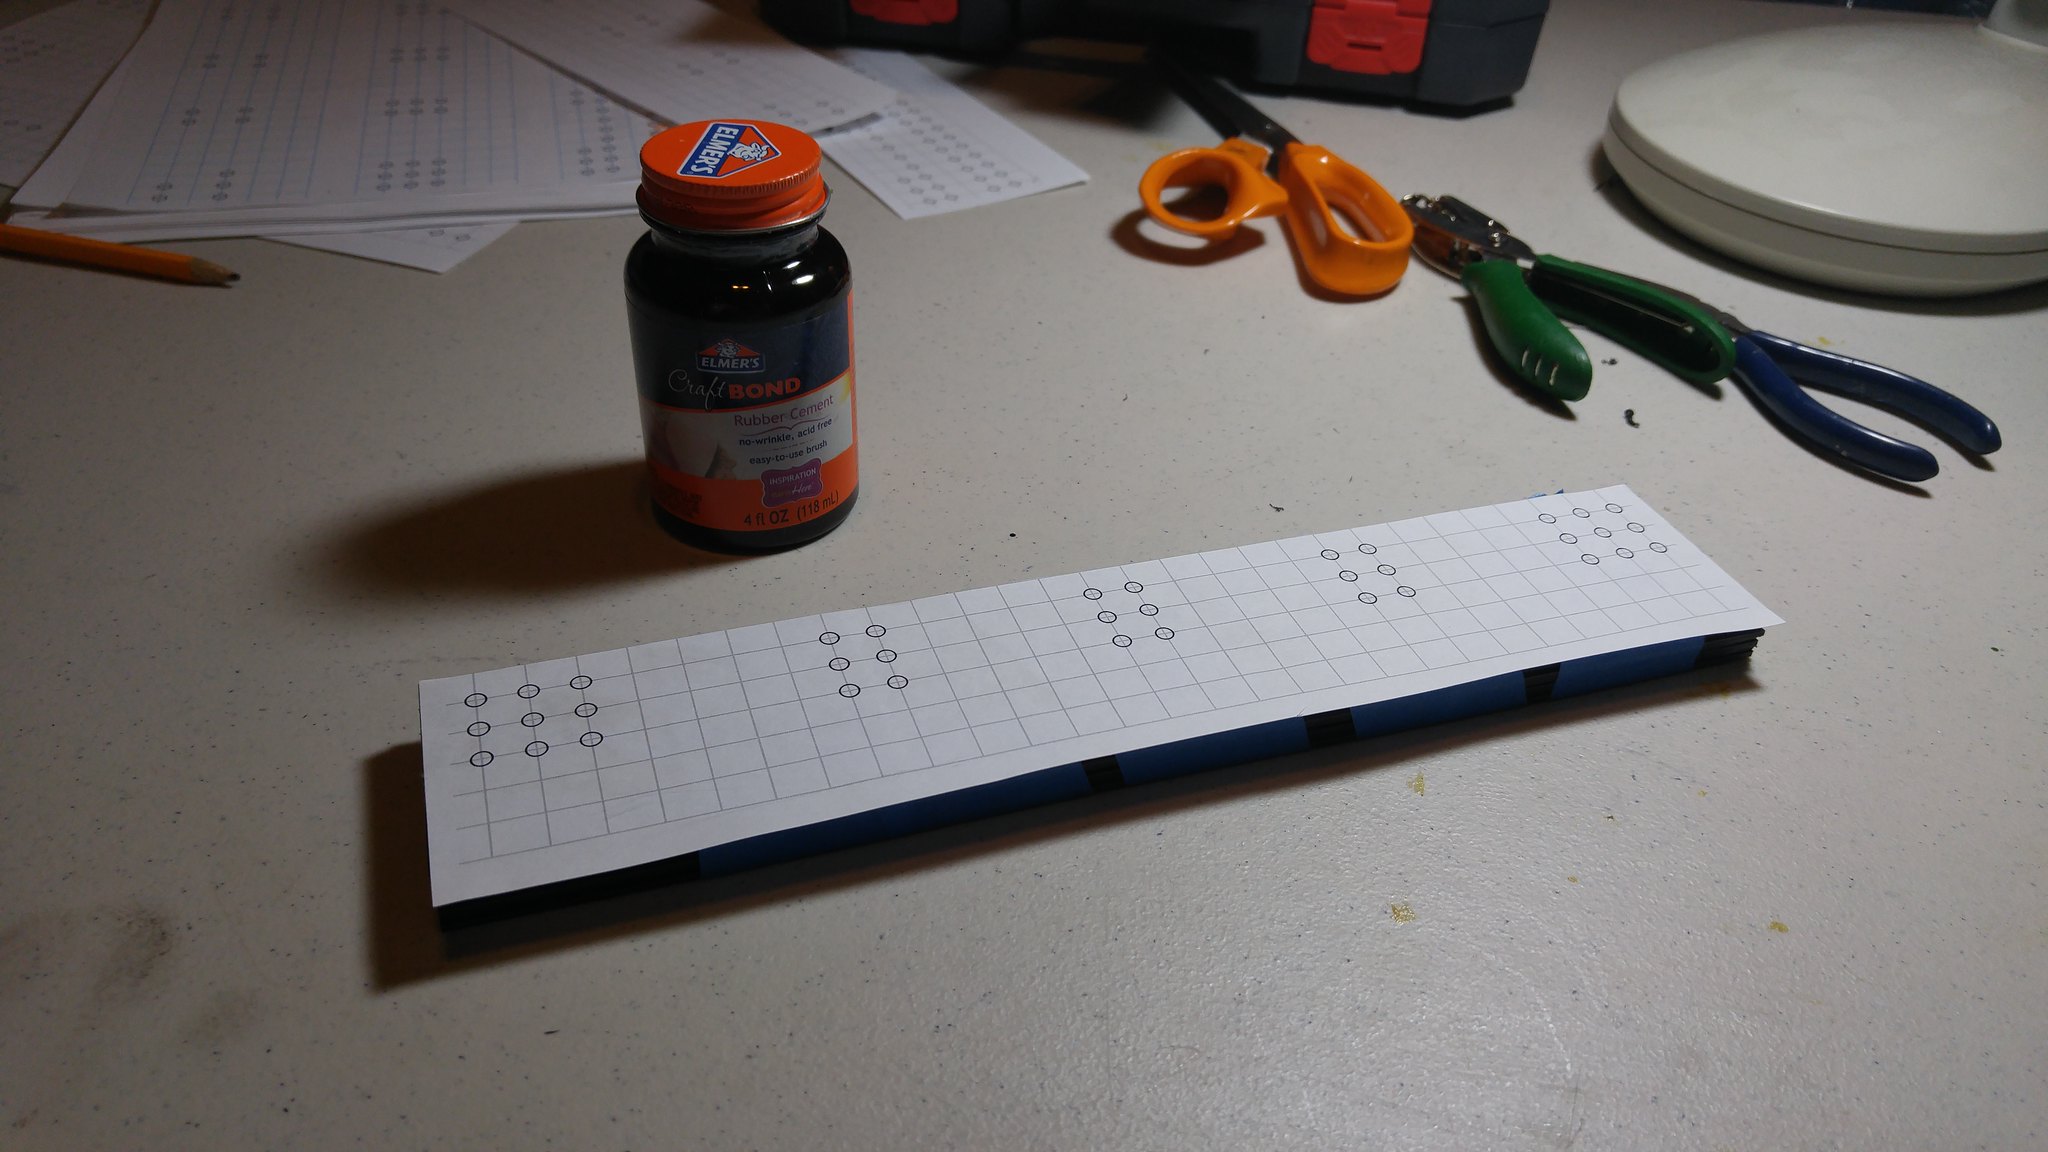
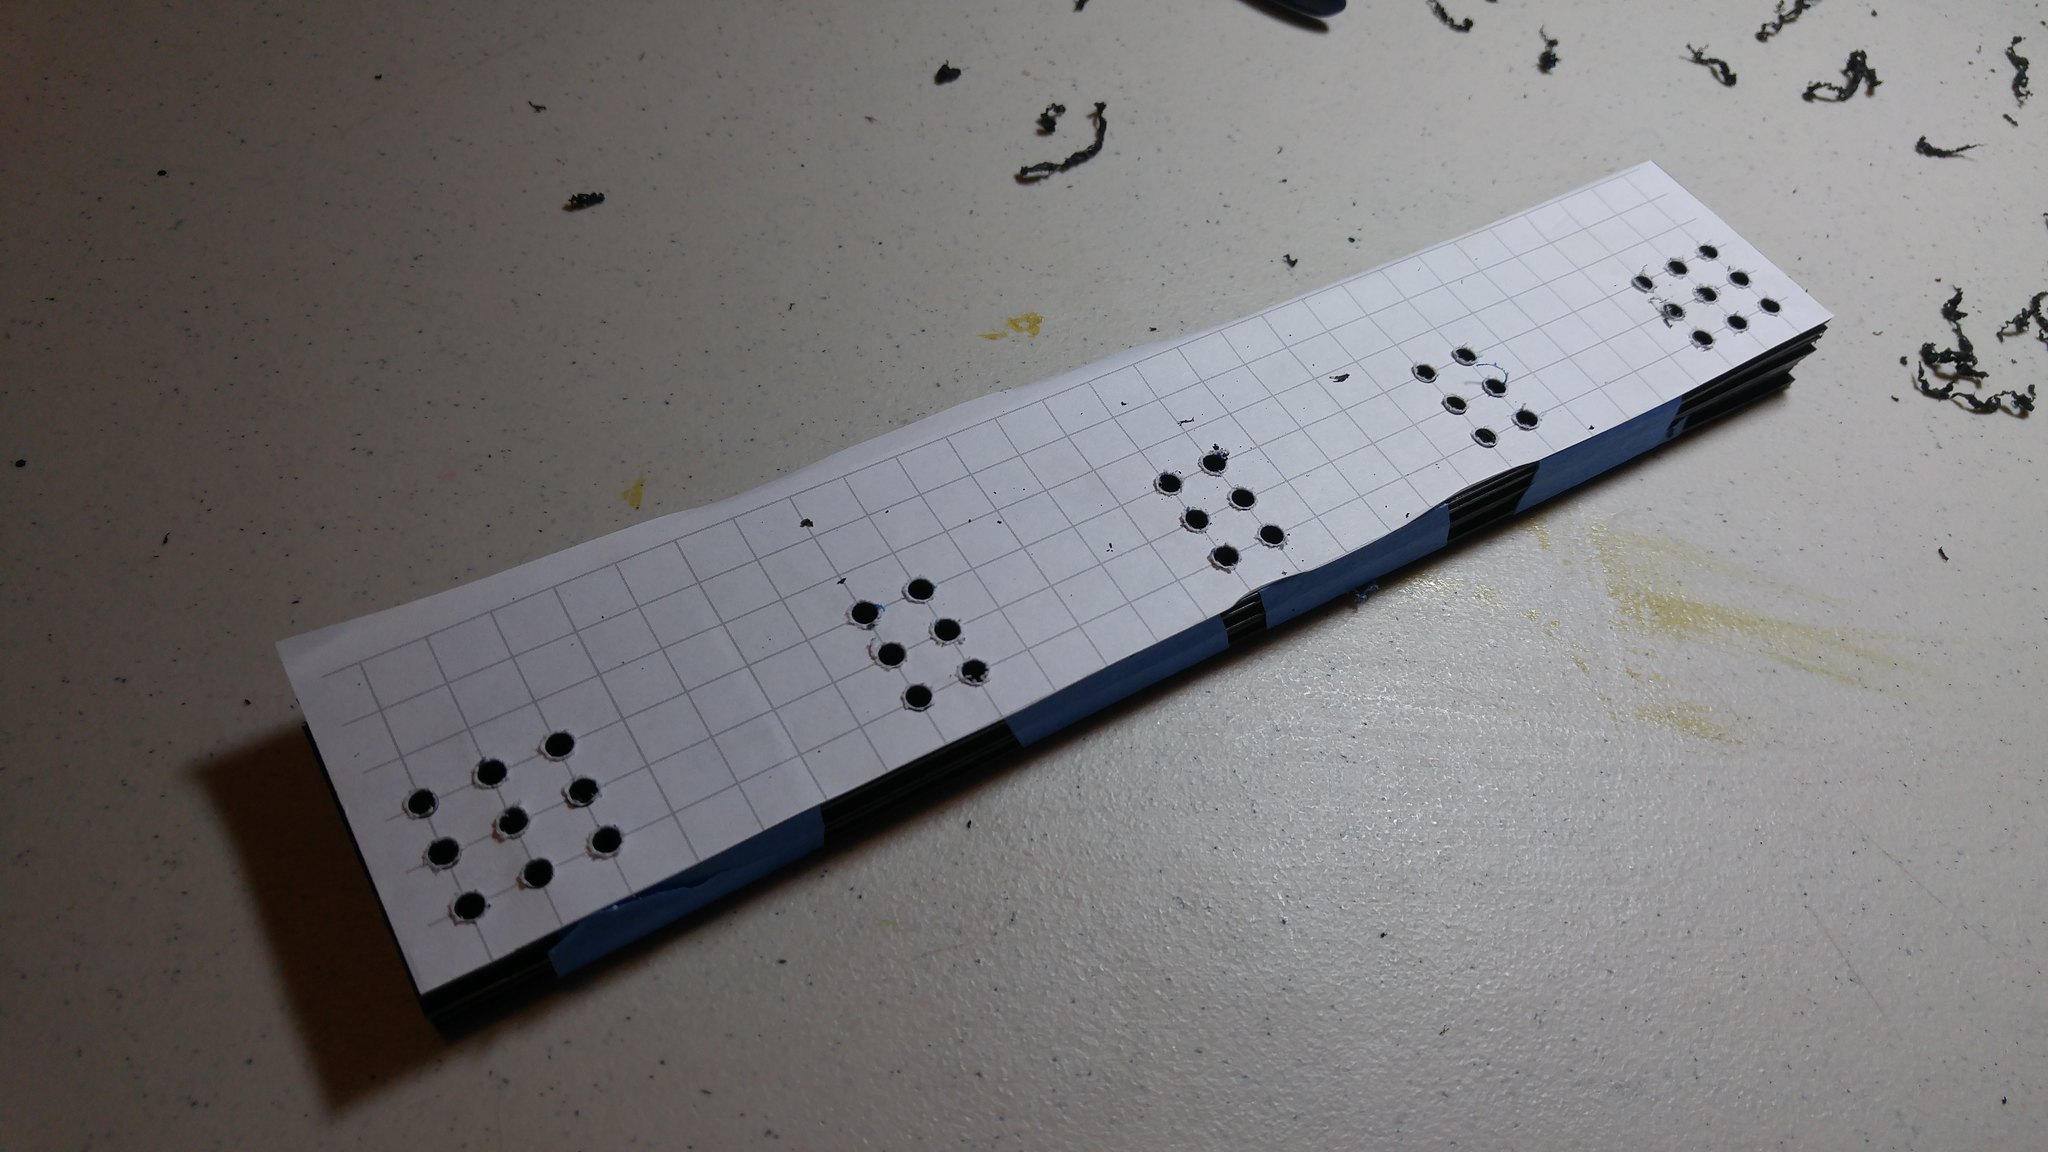
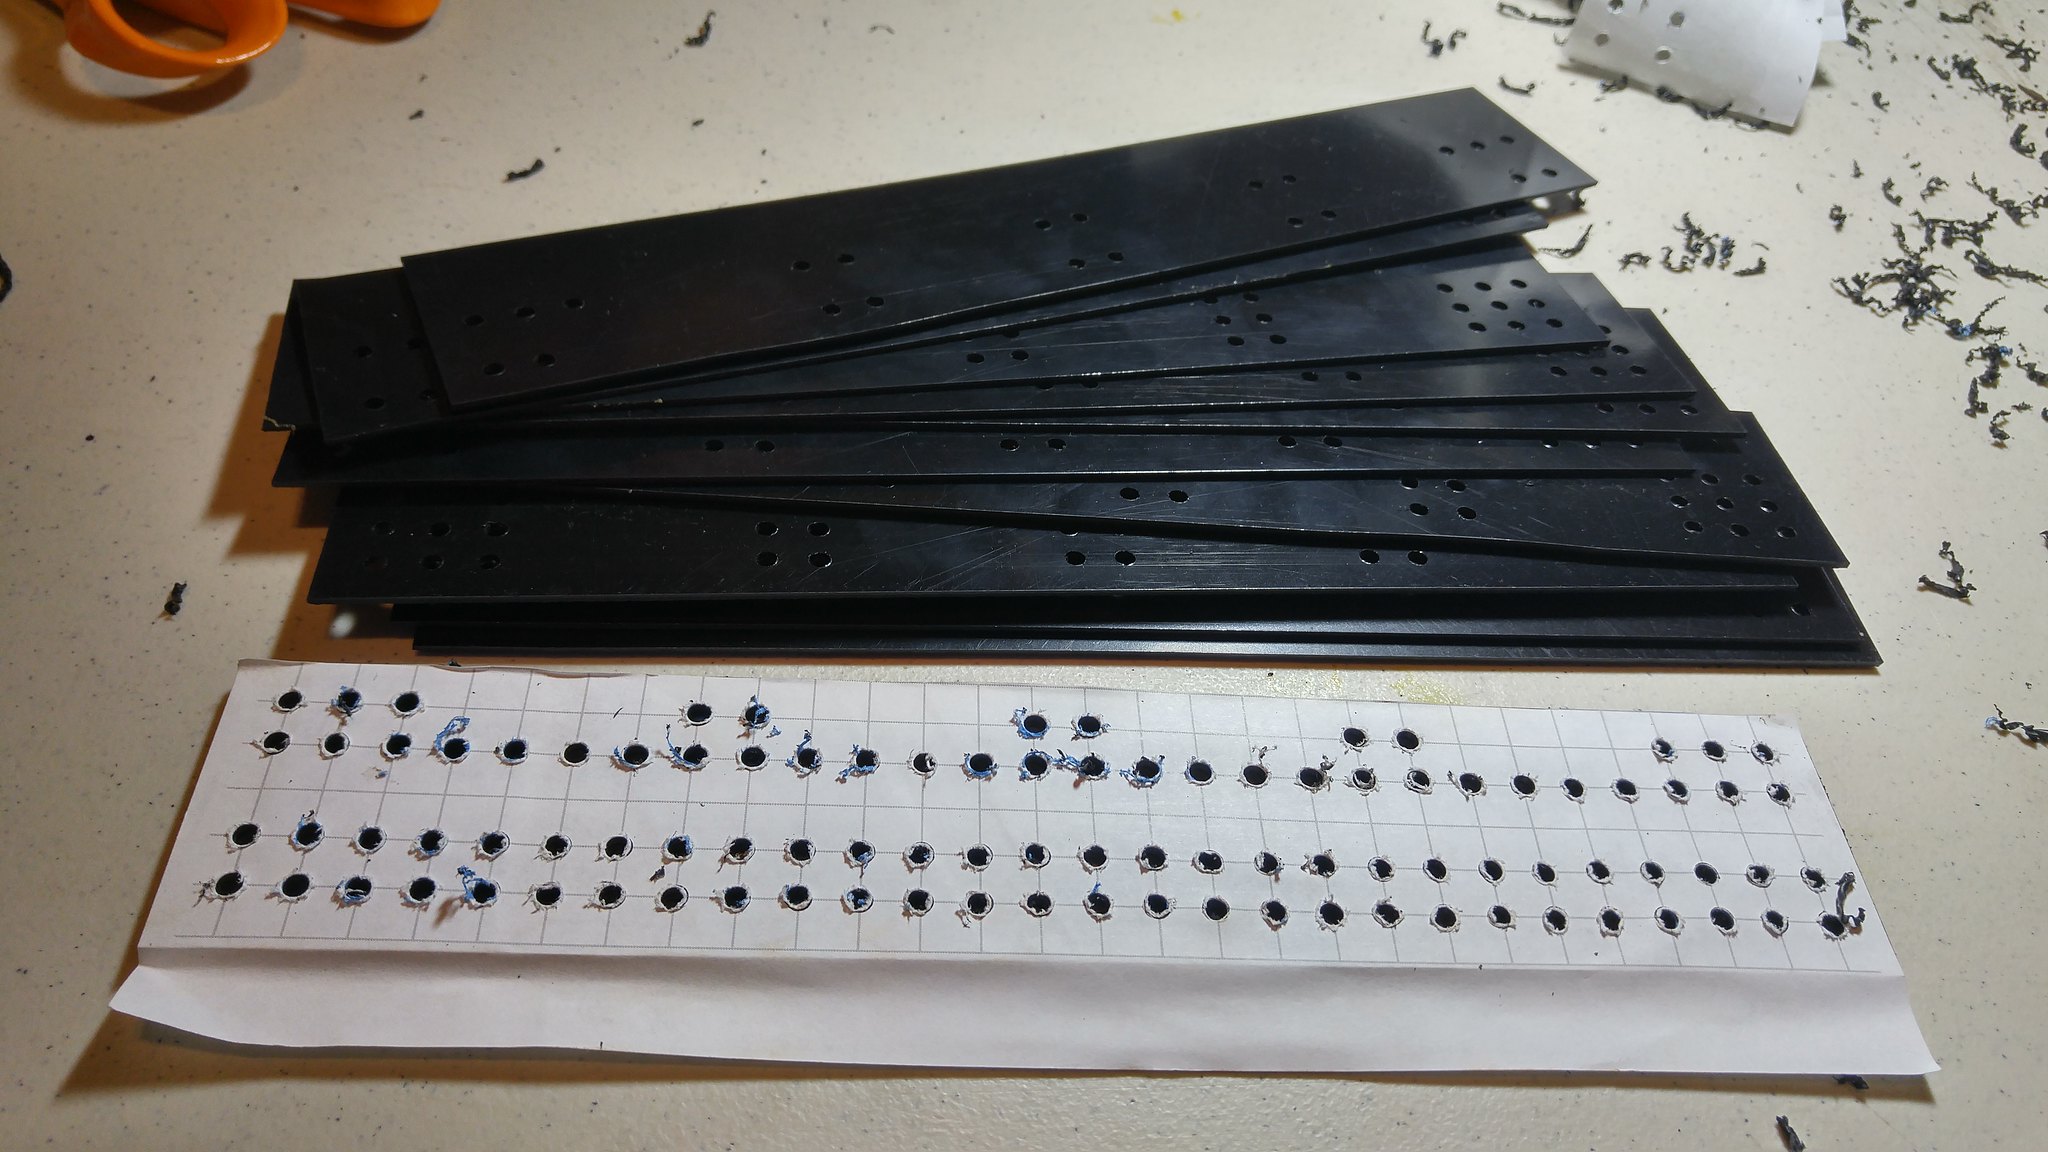
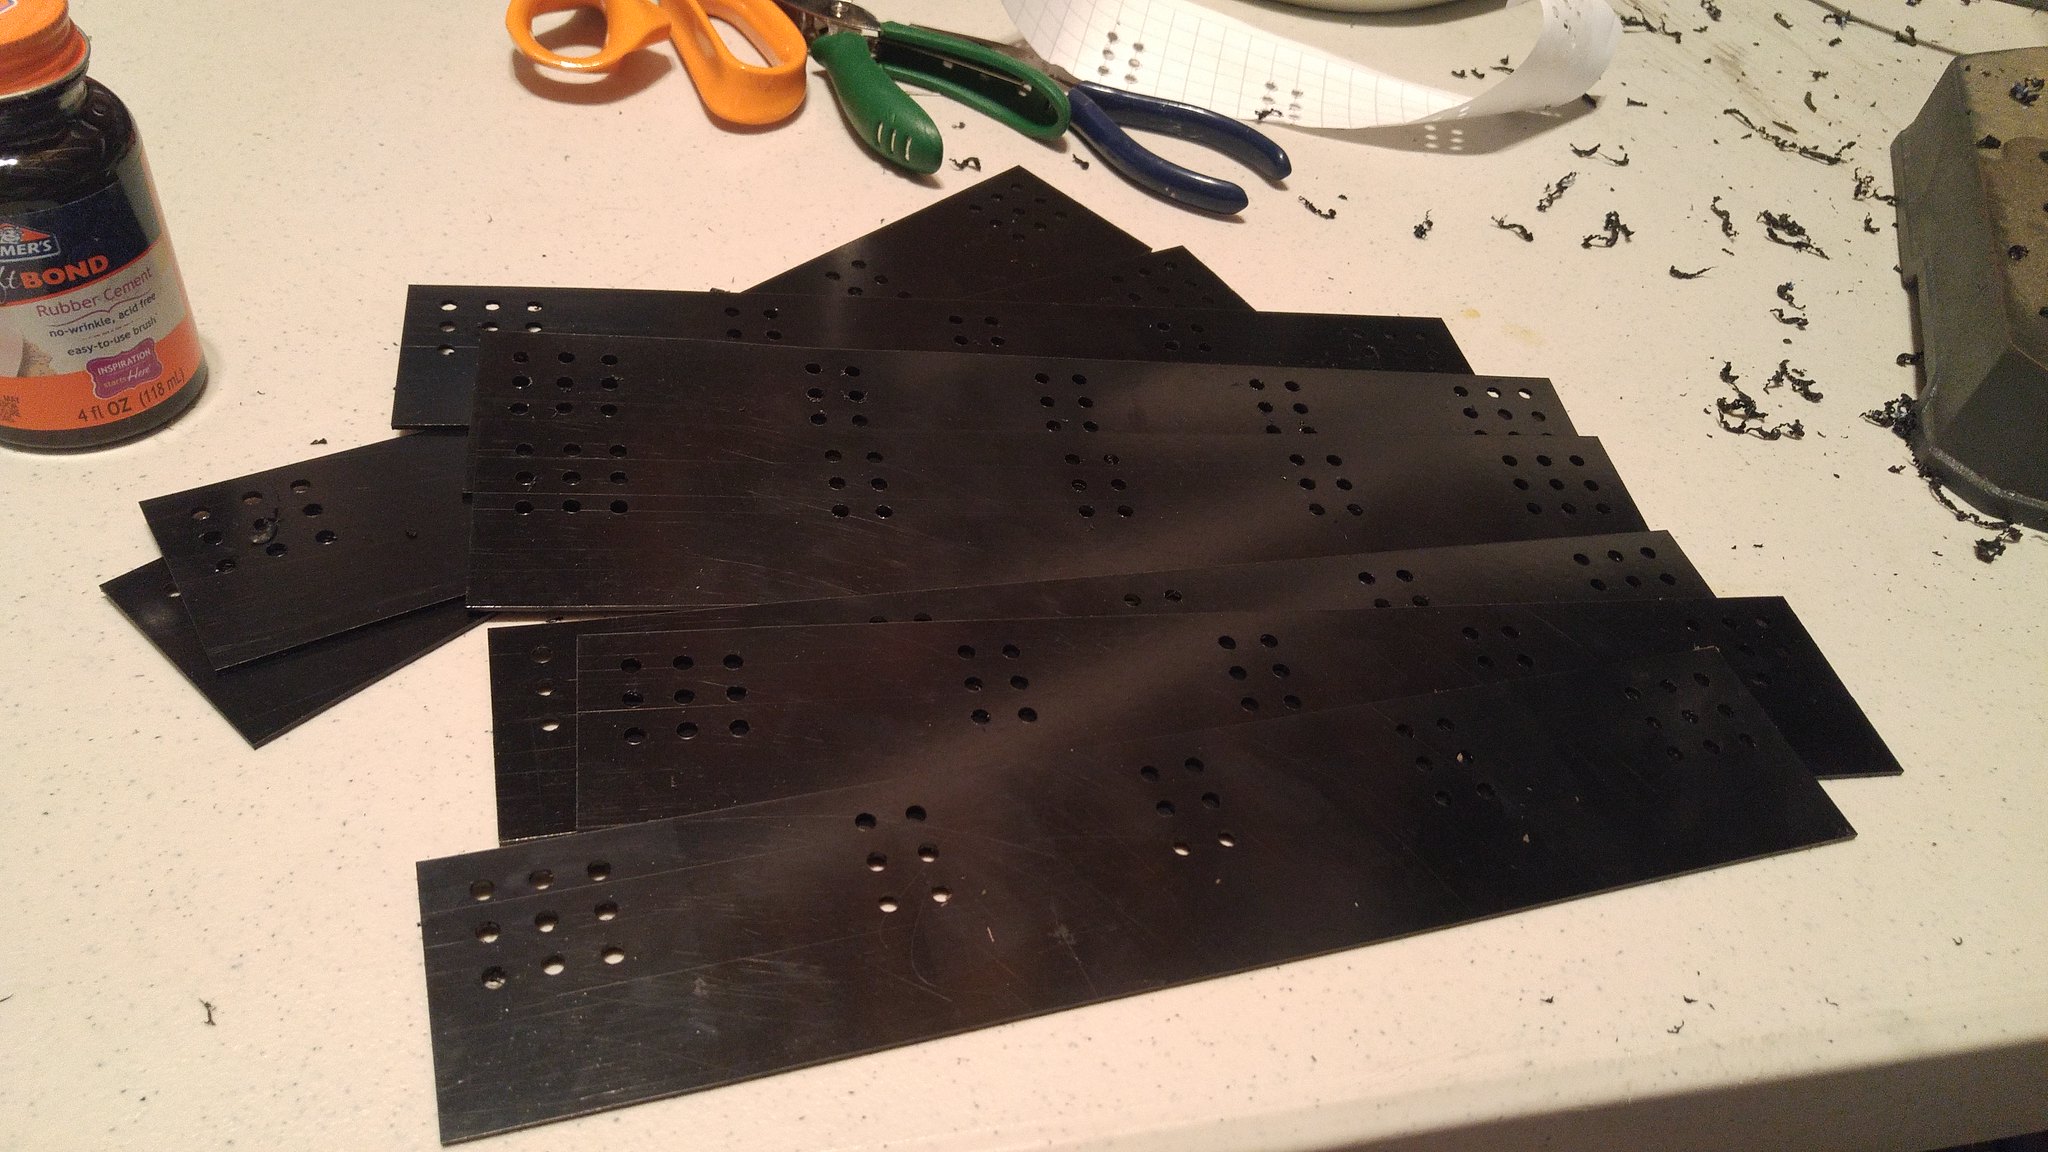
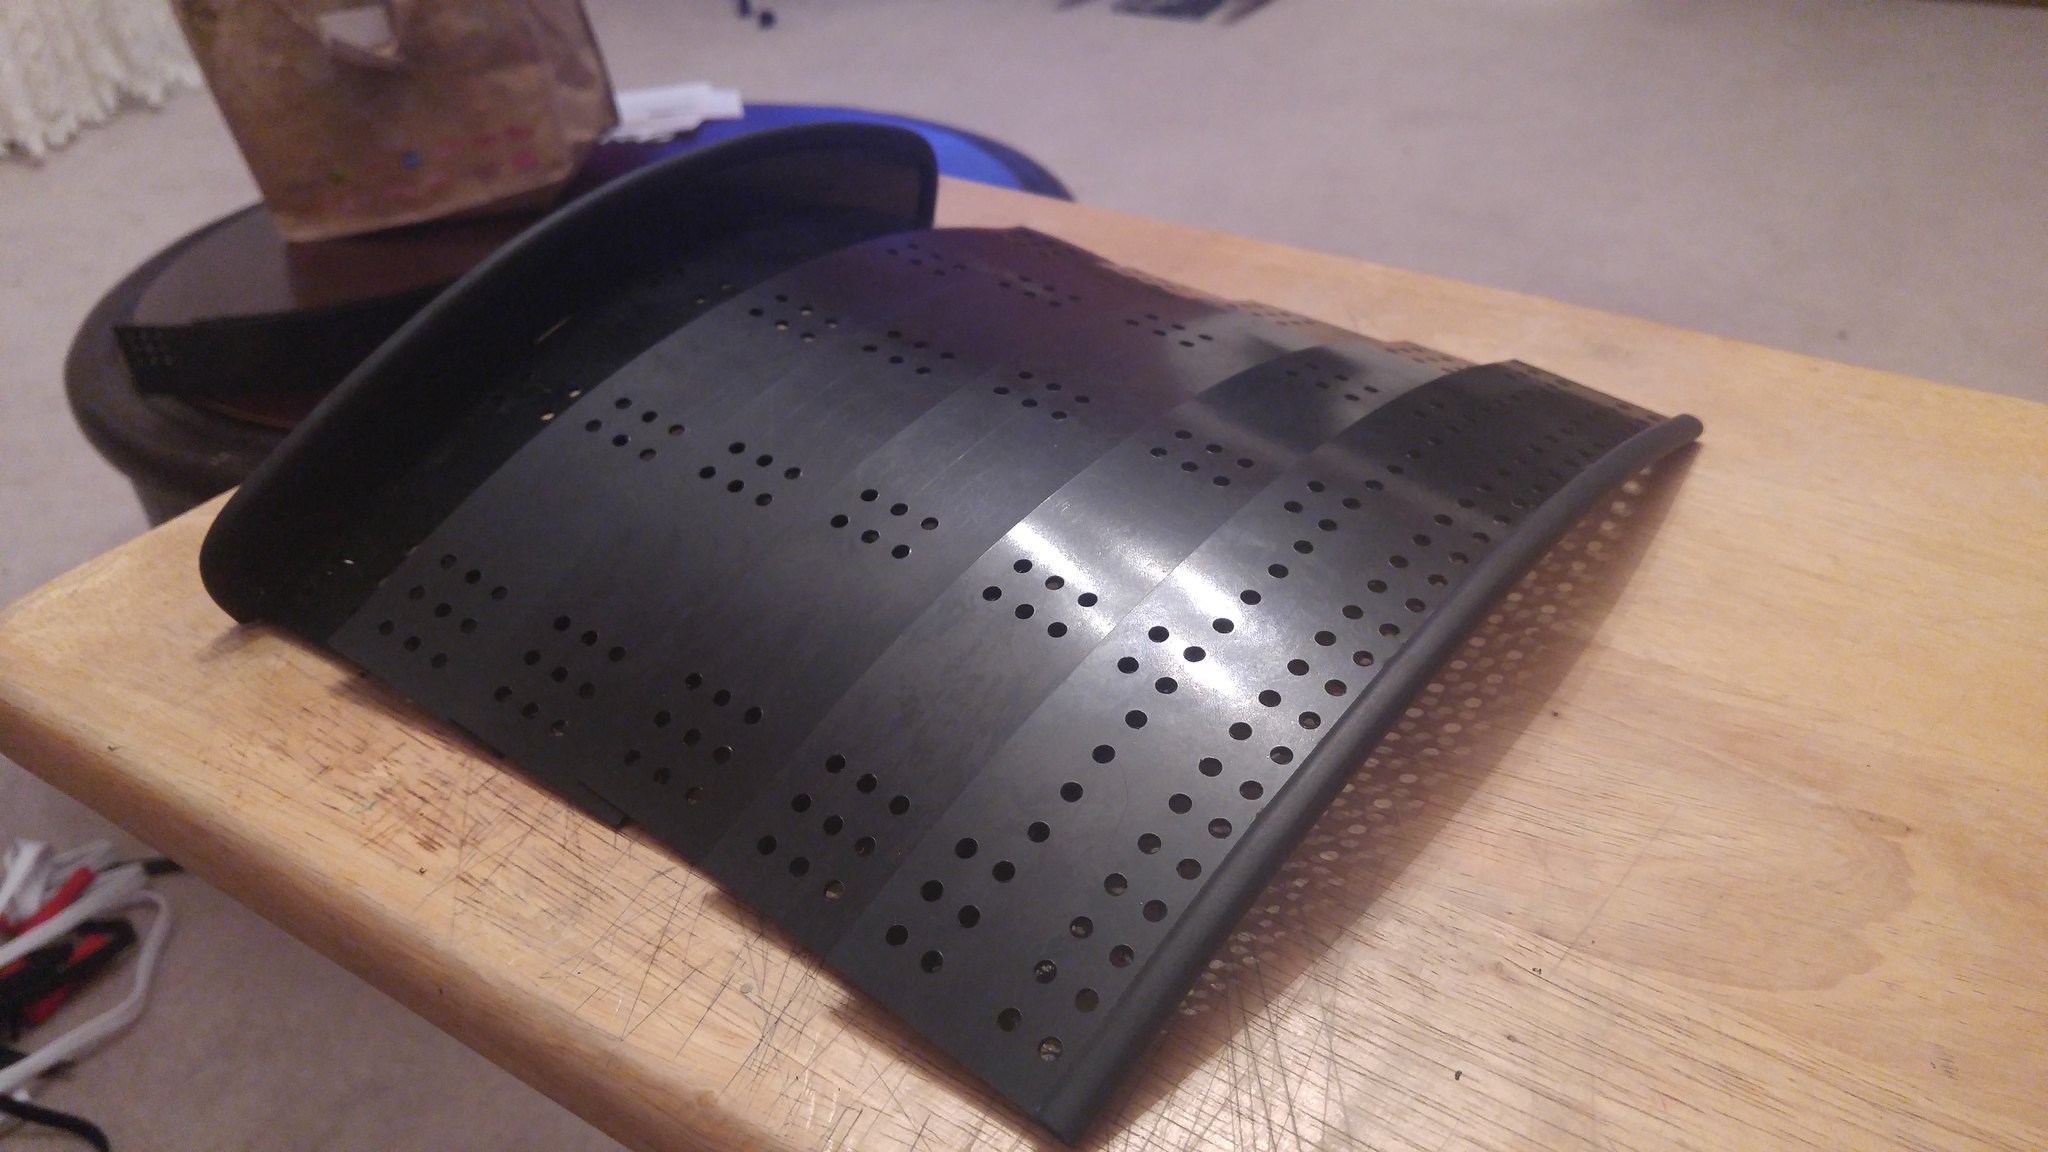
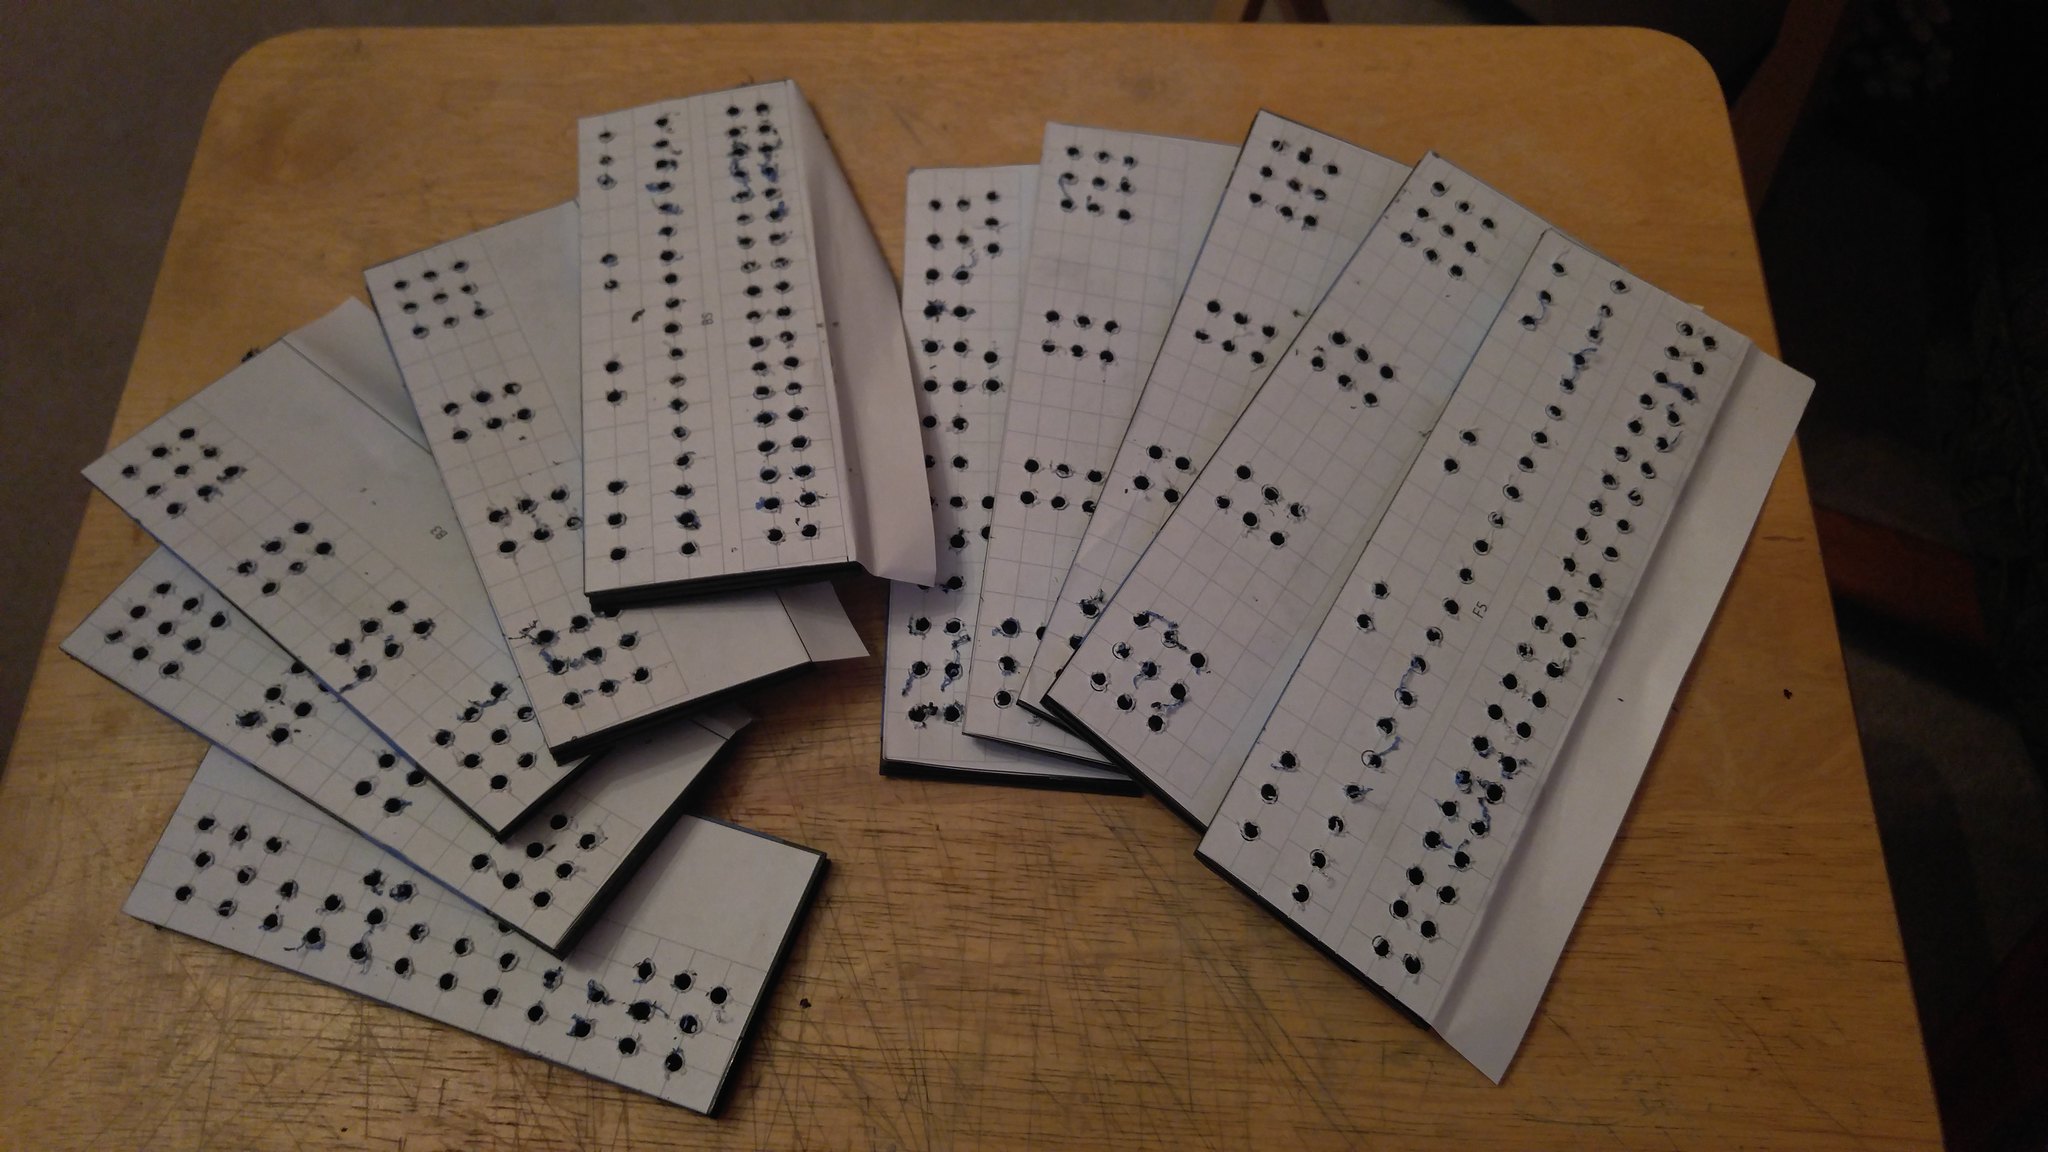
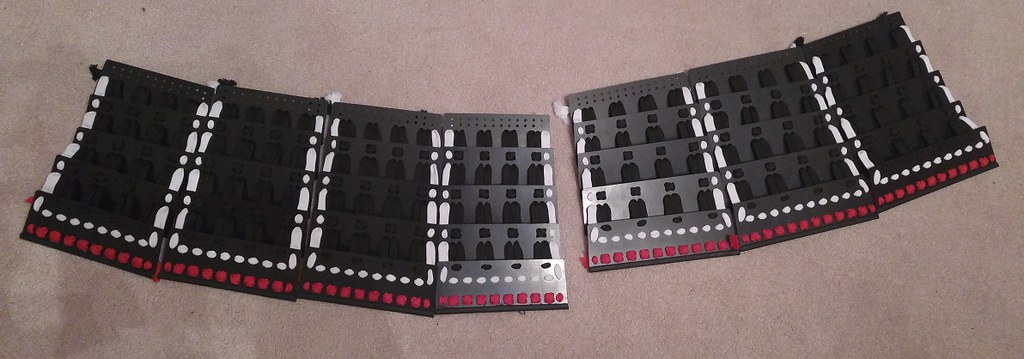
I got all the pattern pieces cut out (except for the pieces that will have to be patterned to attach to anything that has to be heat curved first like the watagami.) It always amazes me how much square footage can be compressed into a few short stacks of cut parts. :)

https://farm5.staticflickr.com/4662/26683753138_a0d824655e_b.jpg

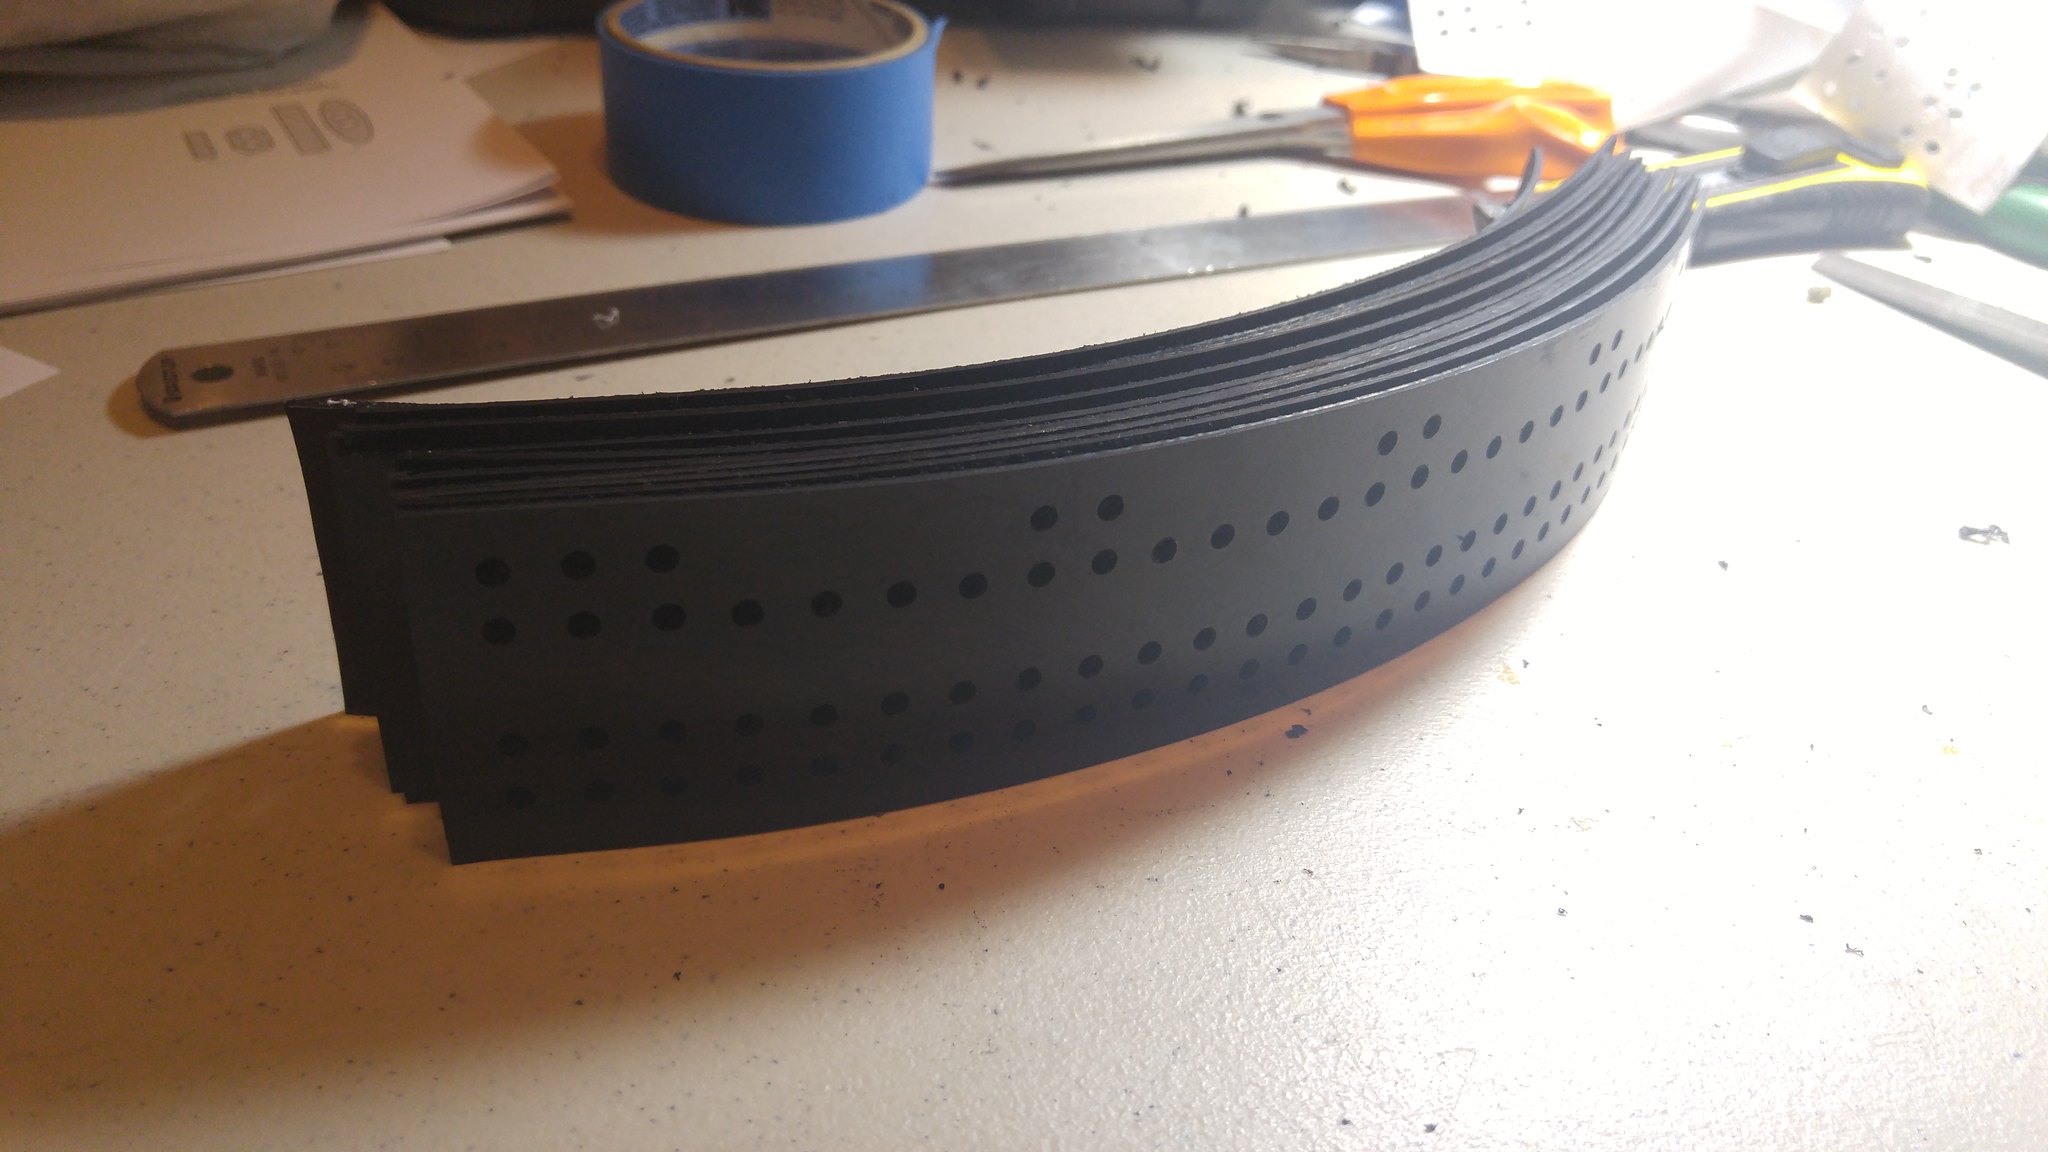
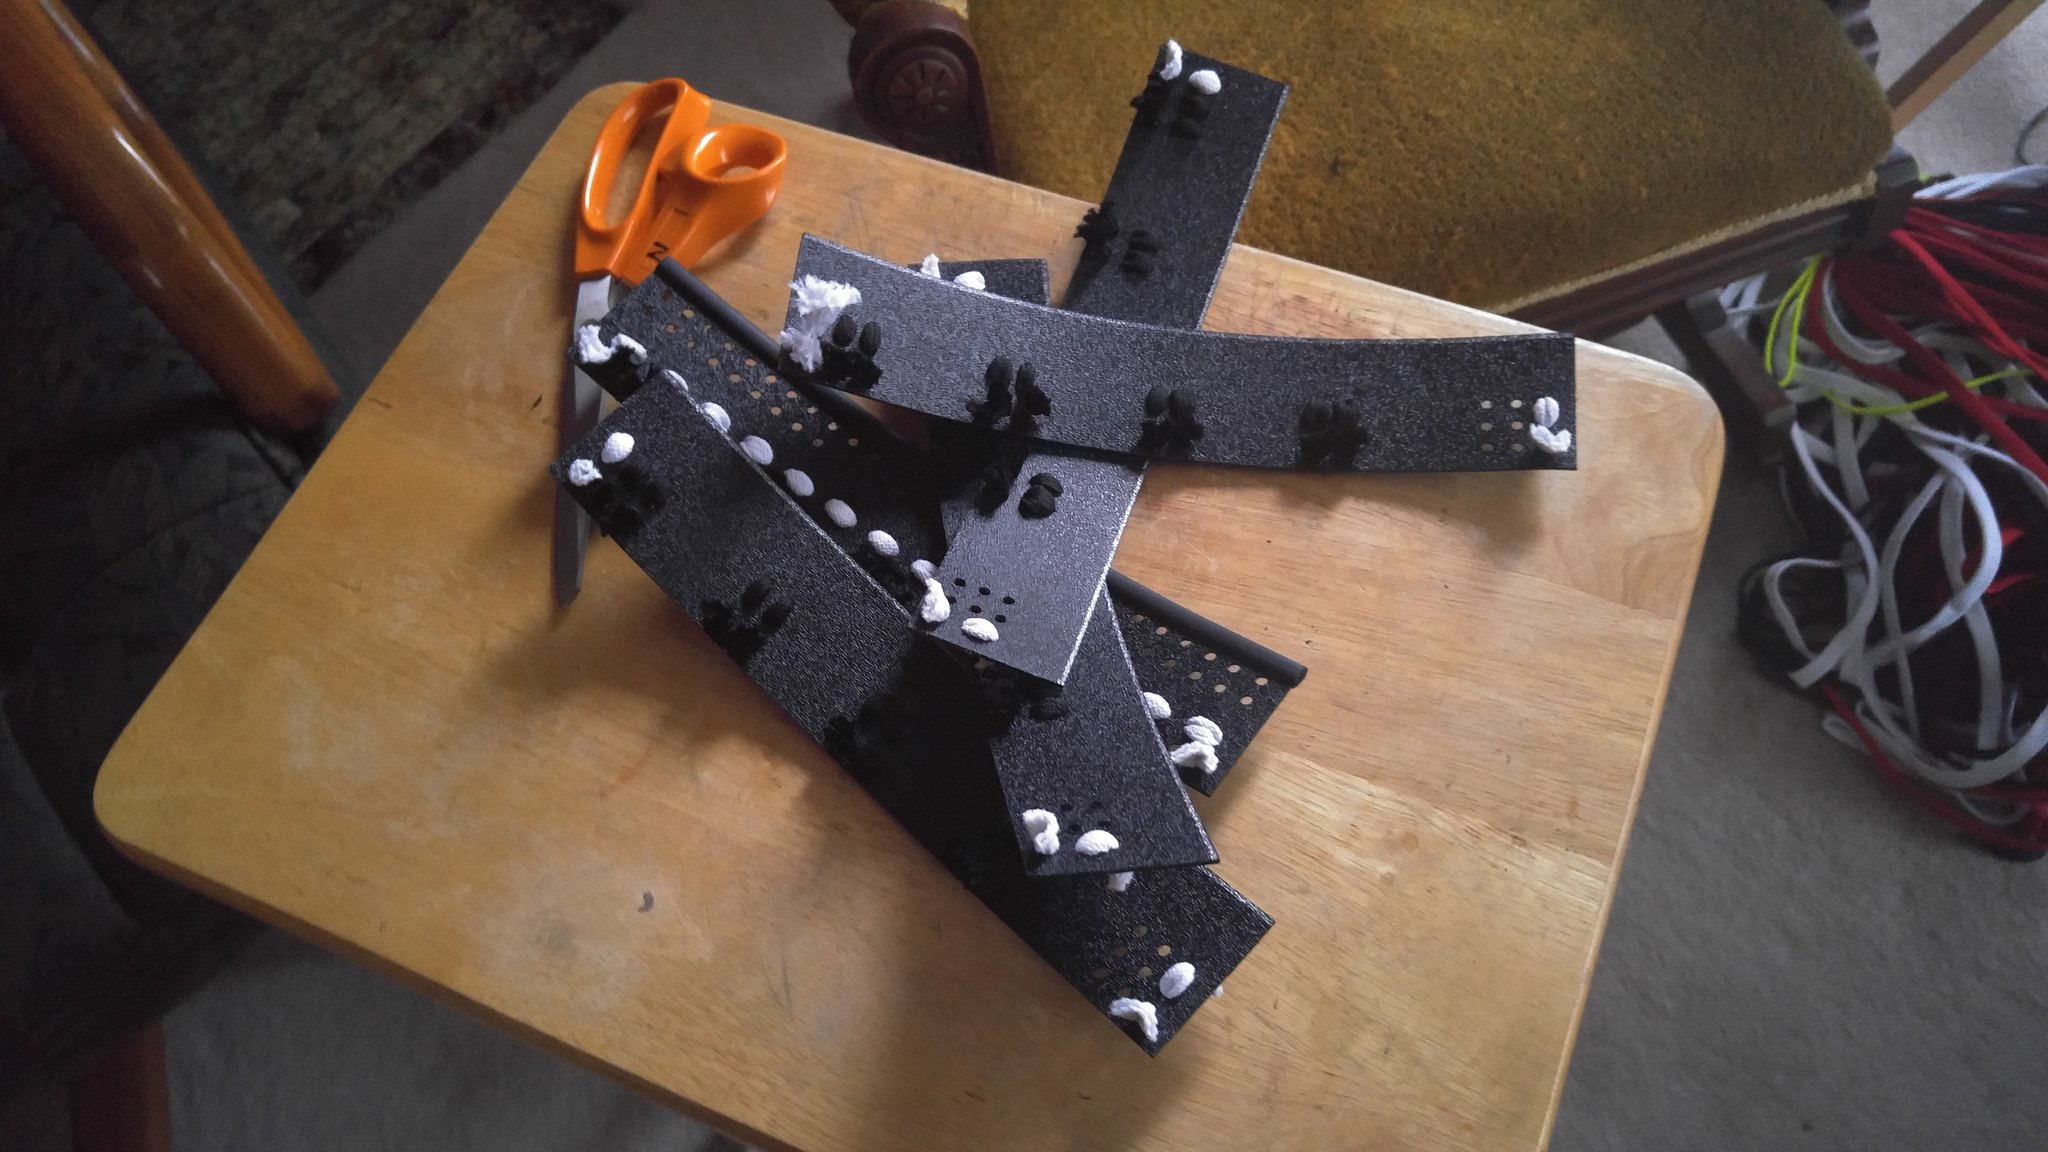
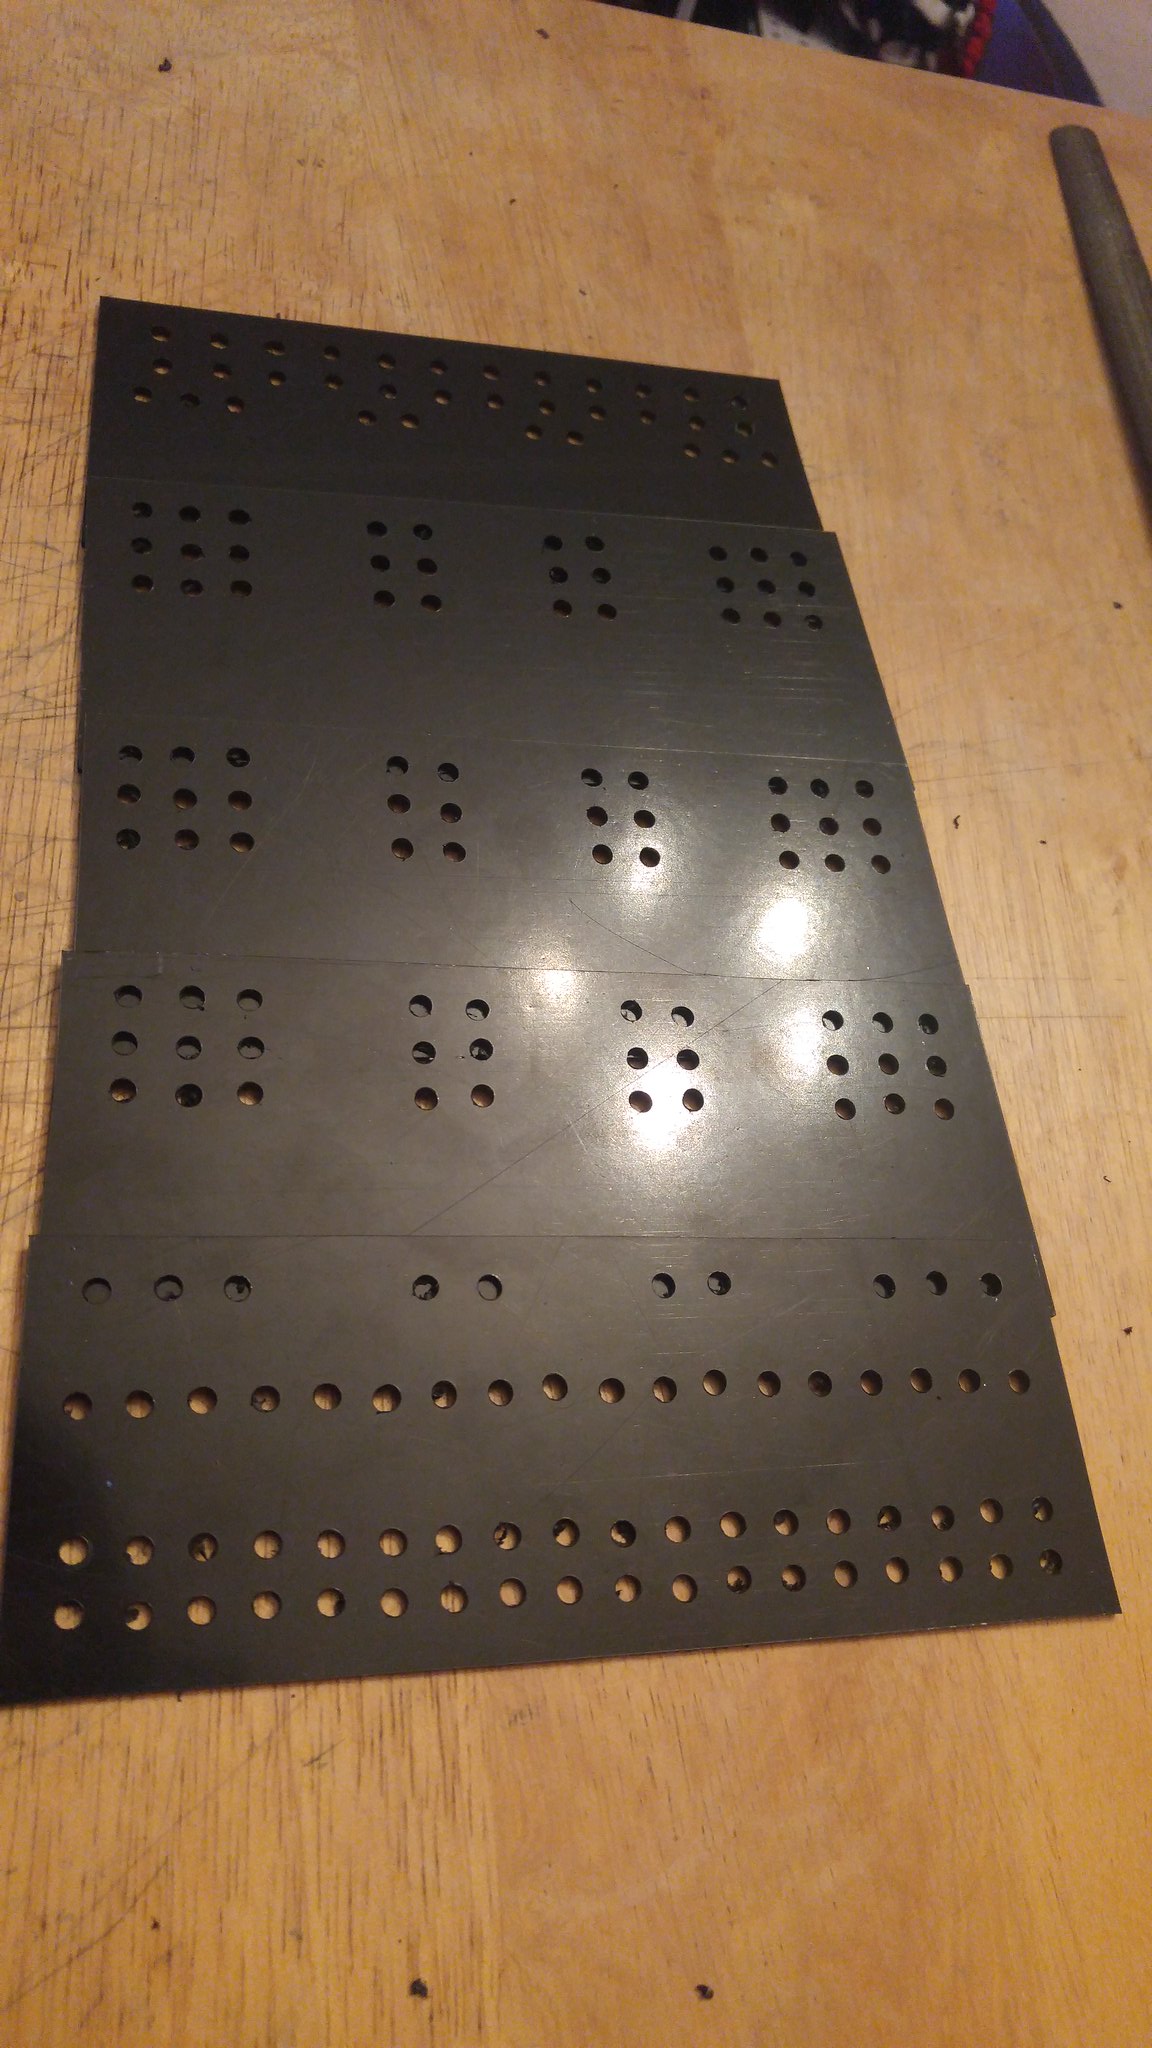
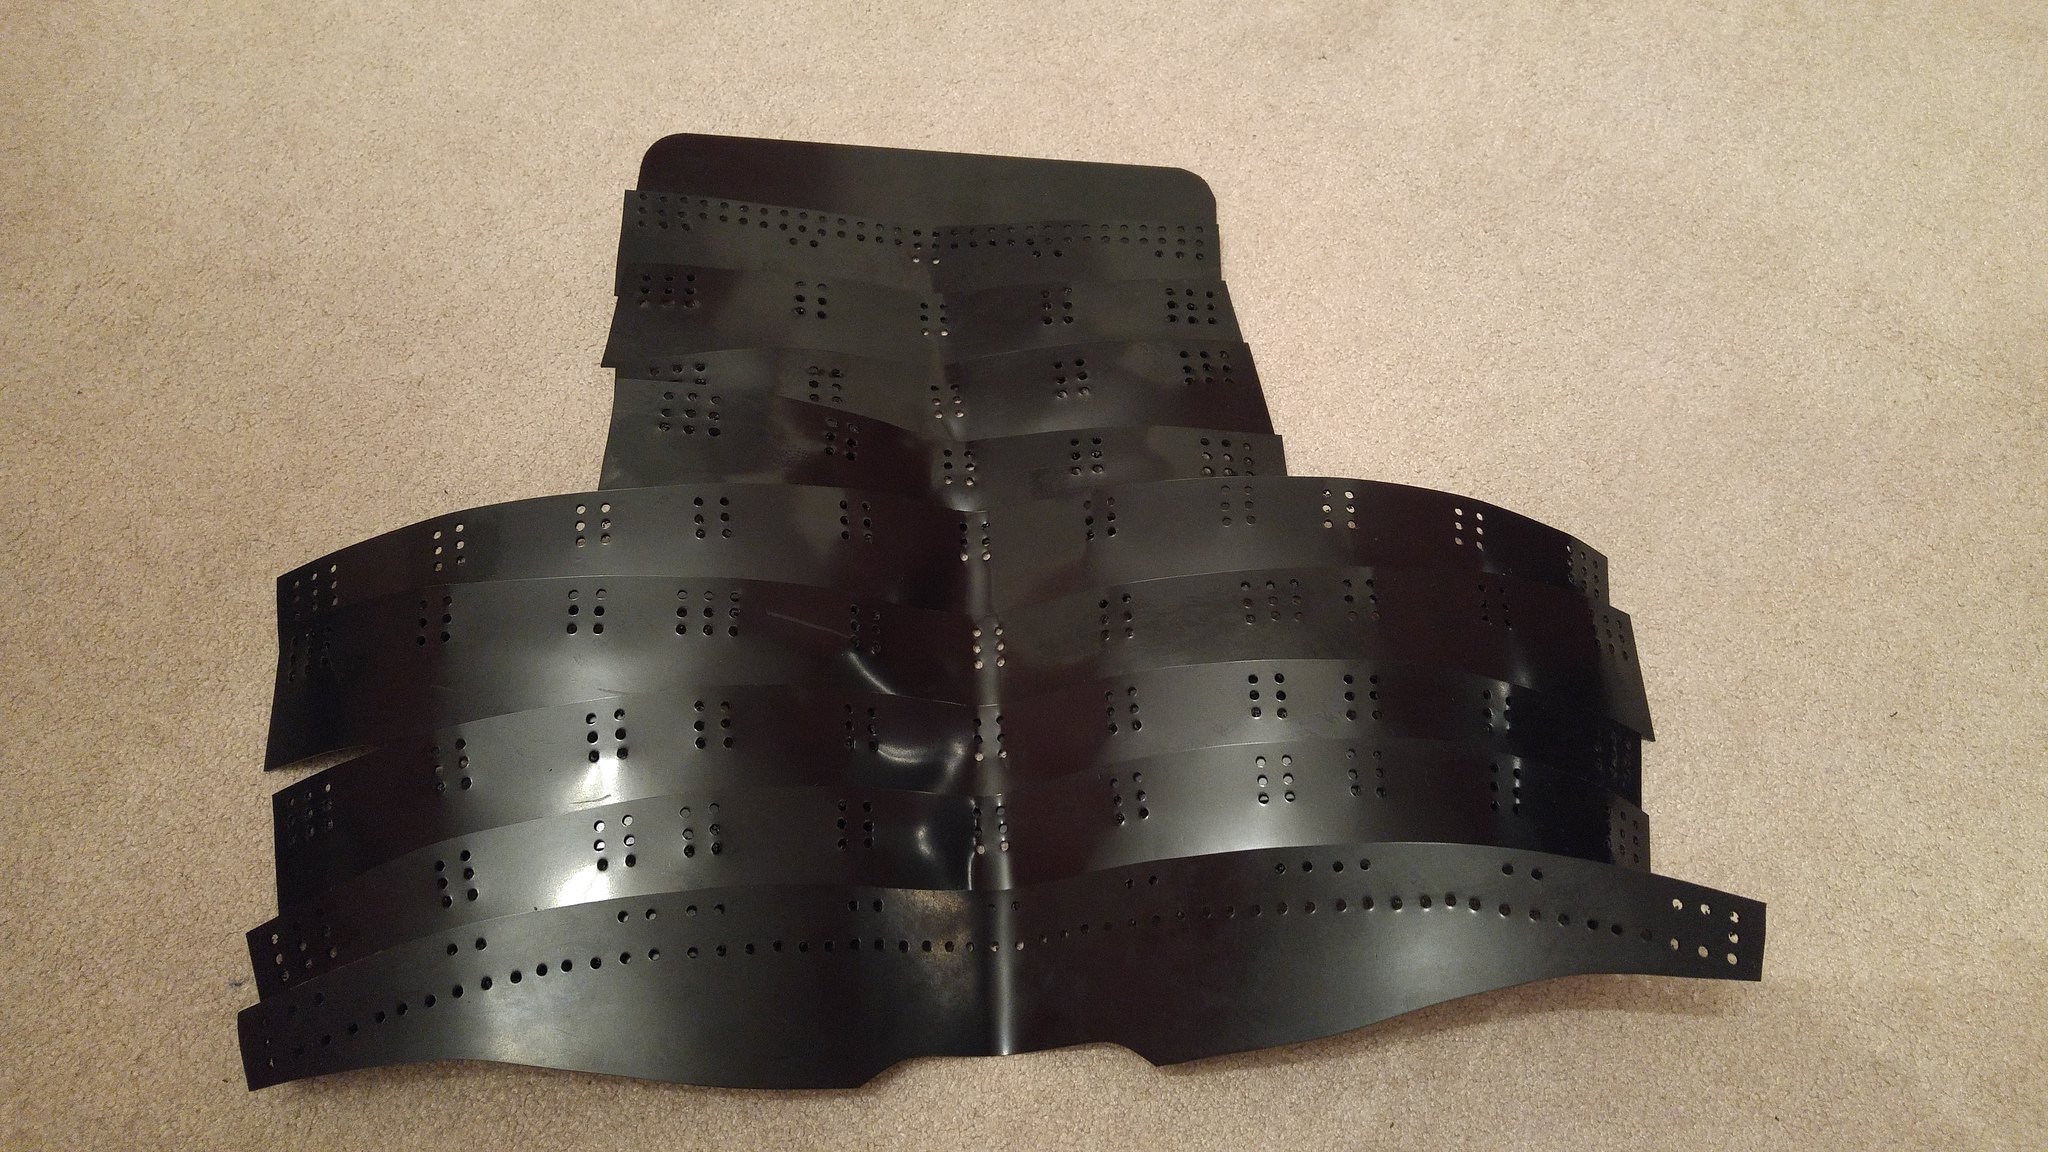
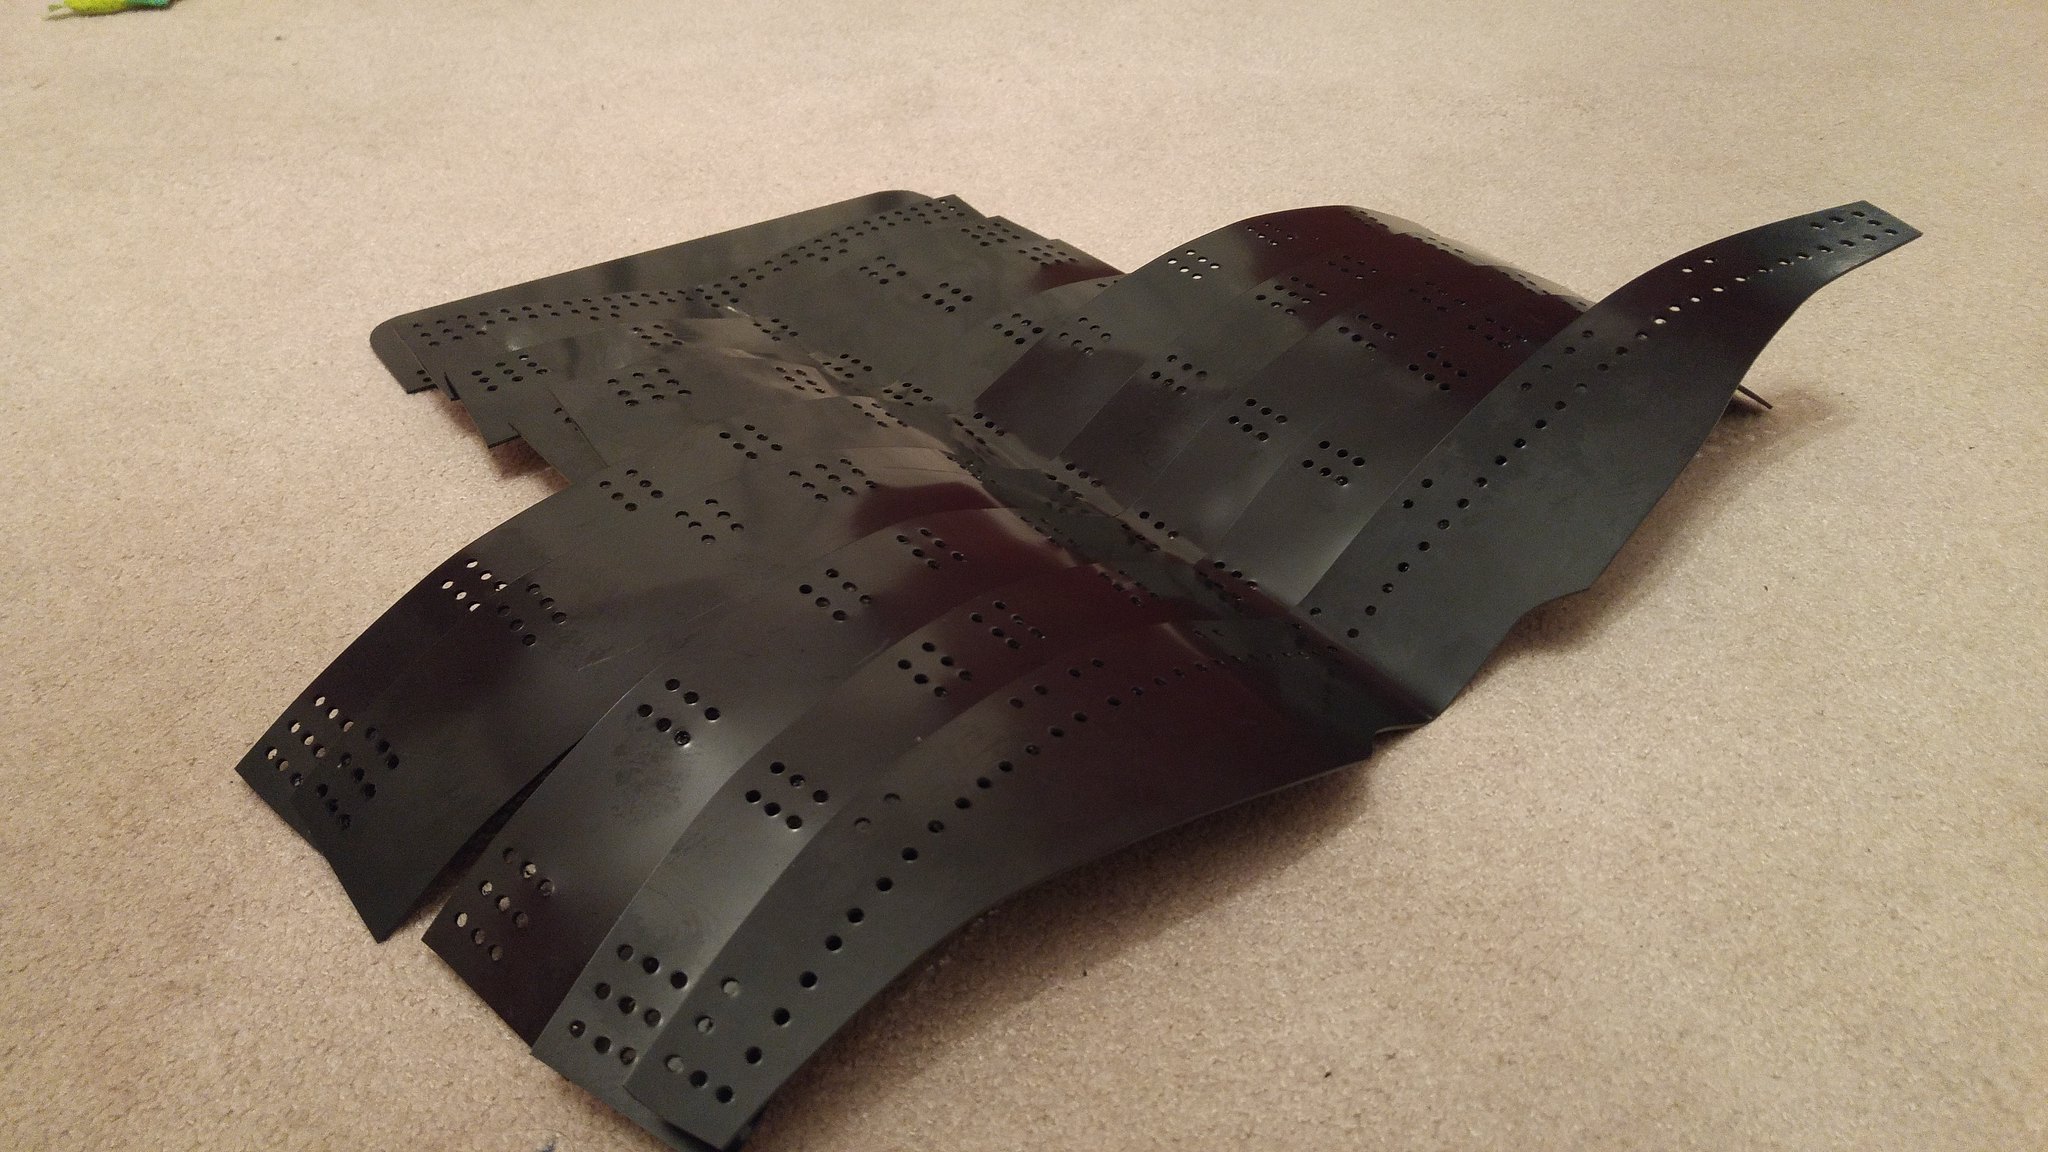
I experimented with using heat to curve the plastic plates using scraps in my oven. The 300° test worked best, but I got too much pliability at the ends. I may experiment with moving the parts further from the element, or tweaking the temp or time a little bit.

https://farm5.staticflickr.com/4715/39844380374_cf02b1c0eb_b.jpg

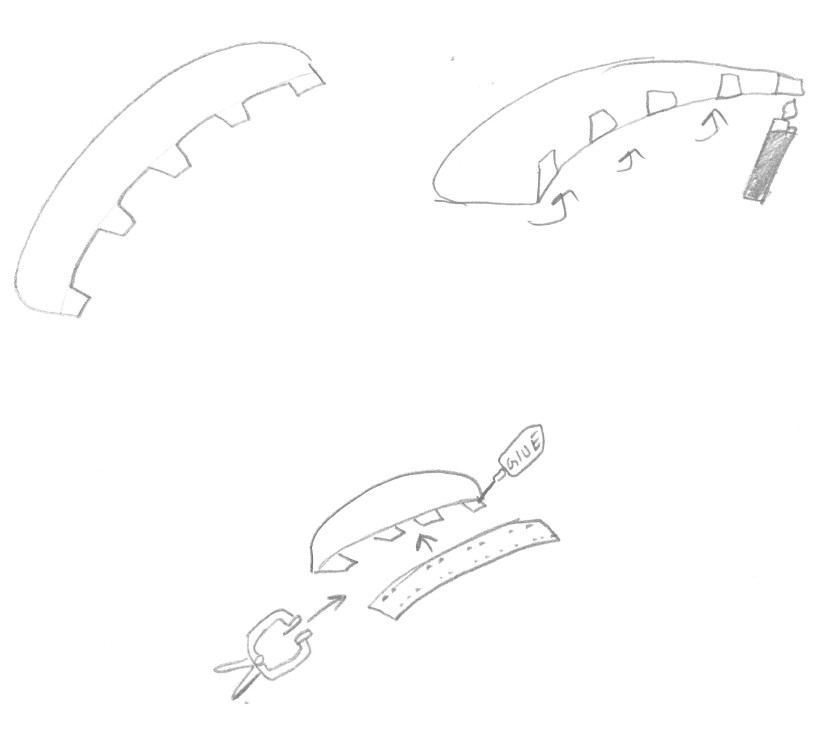
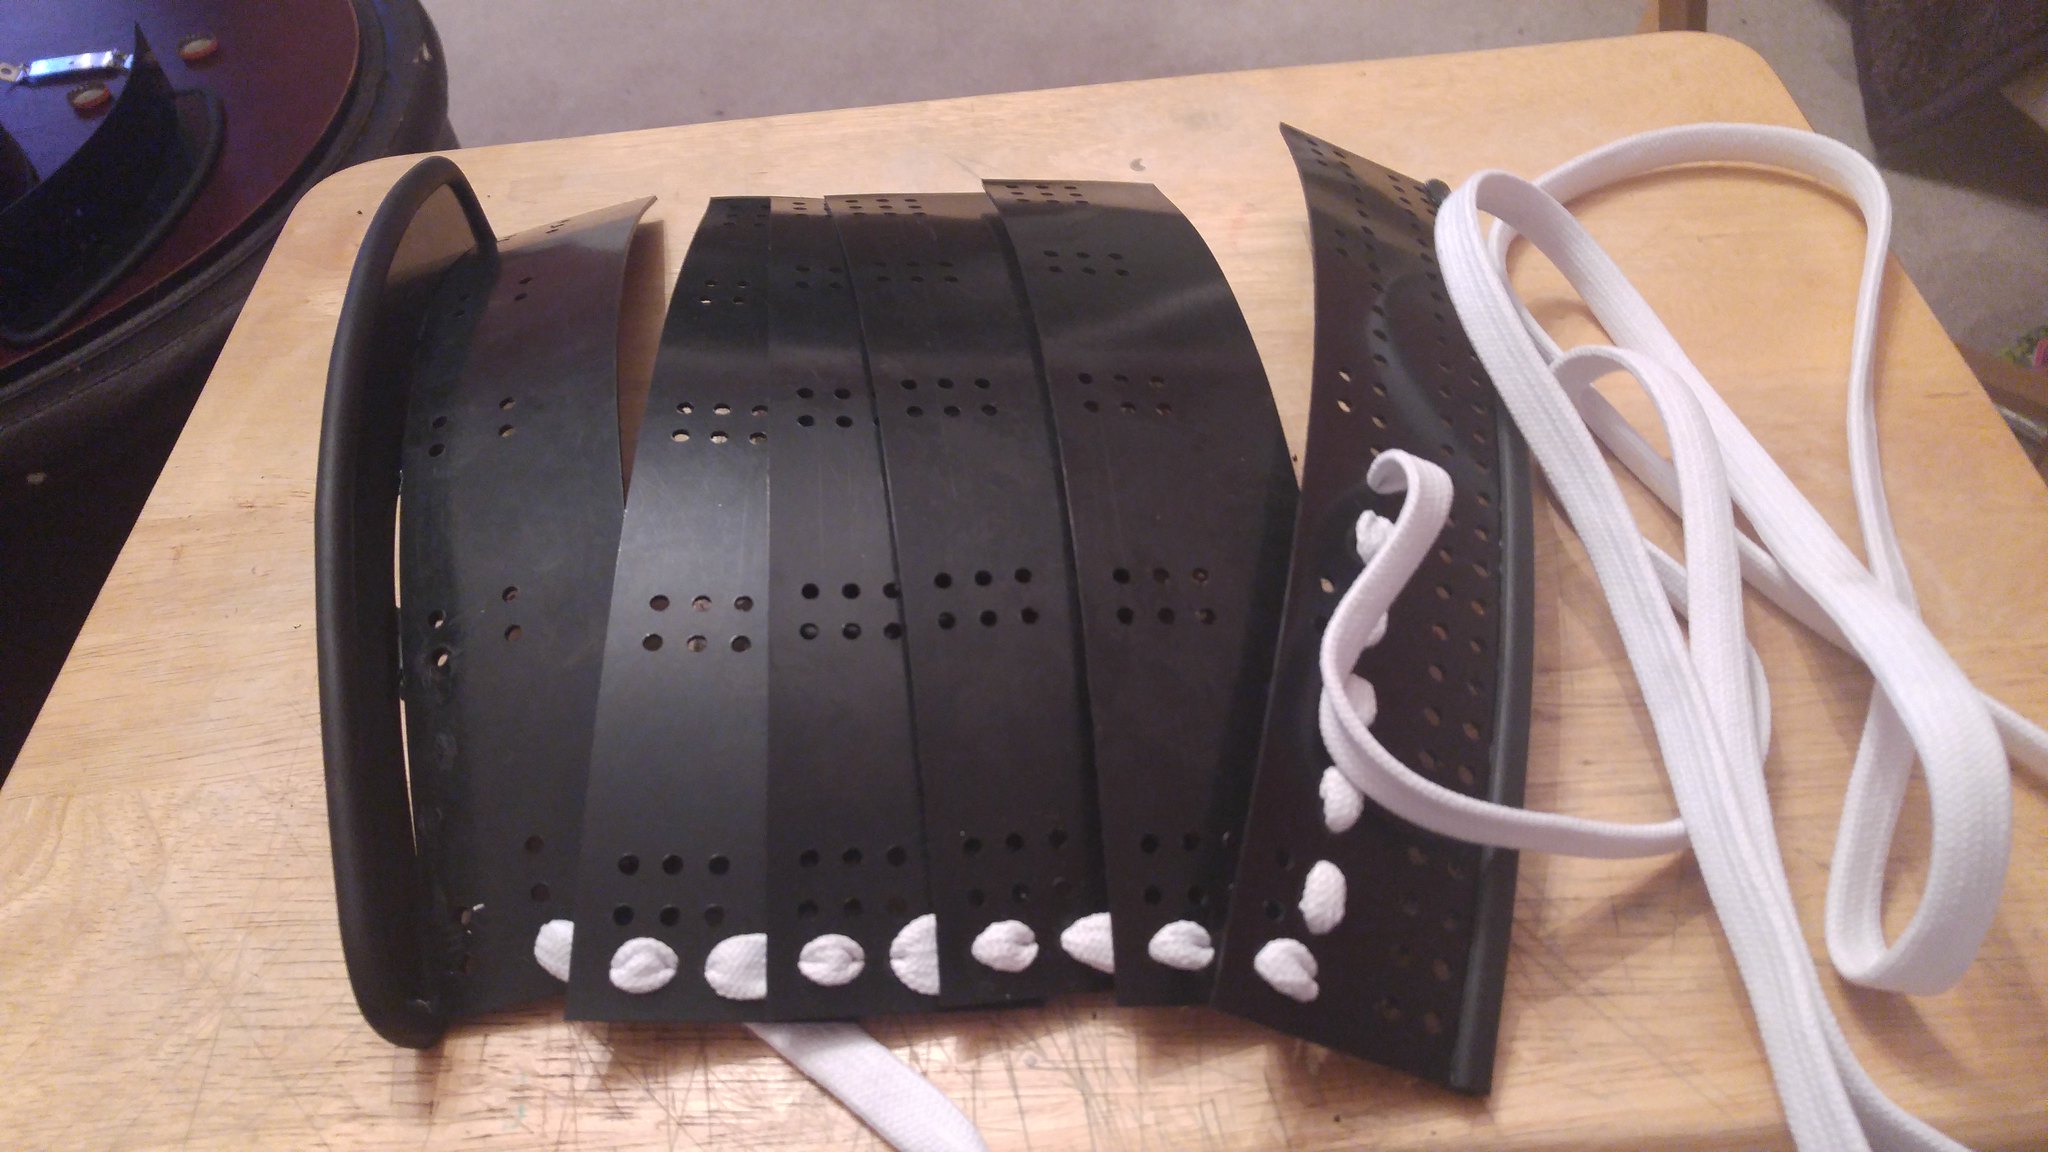
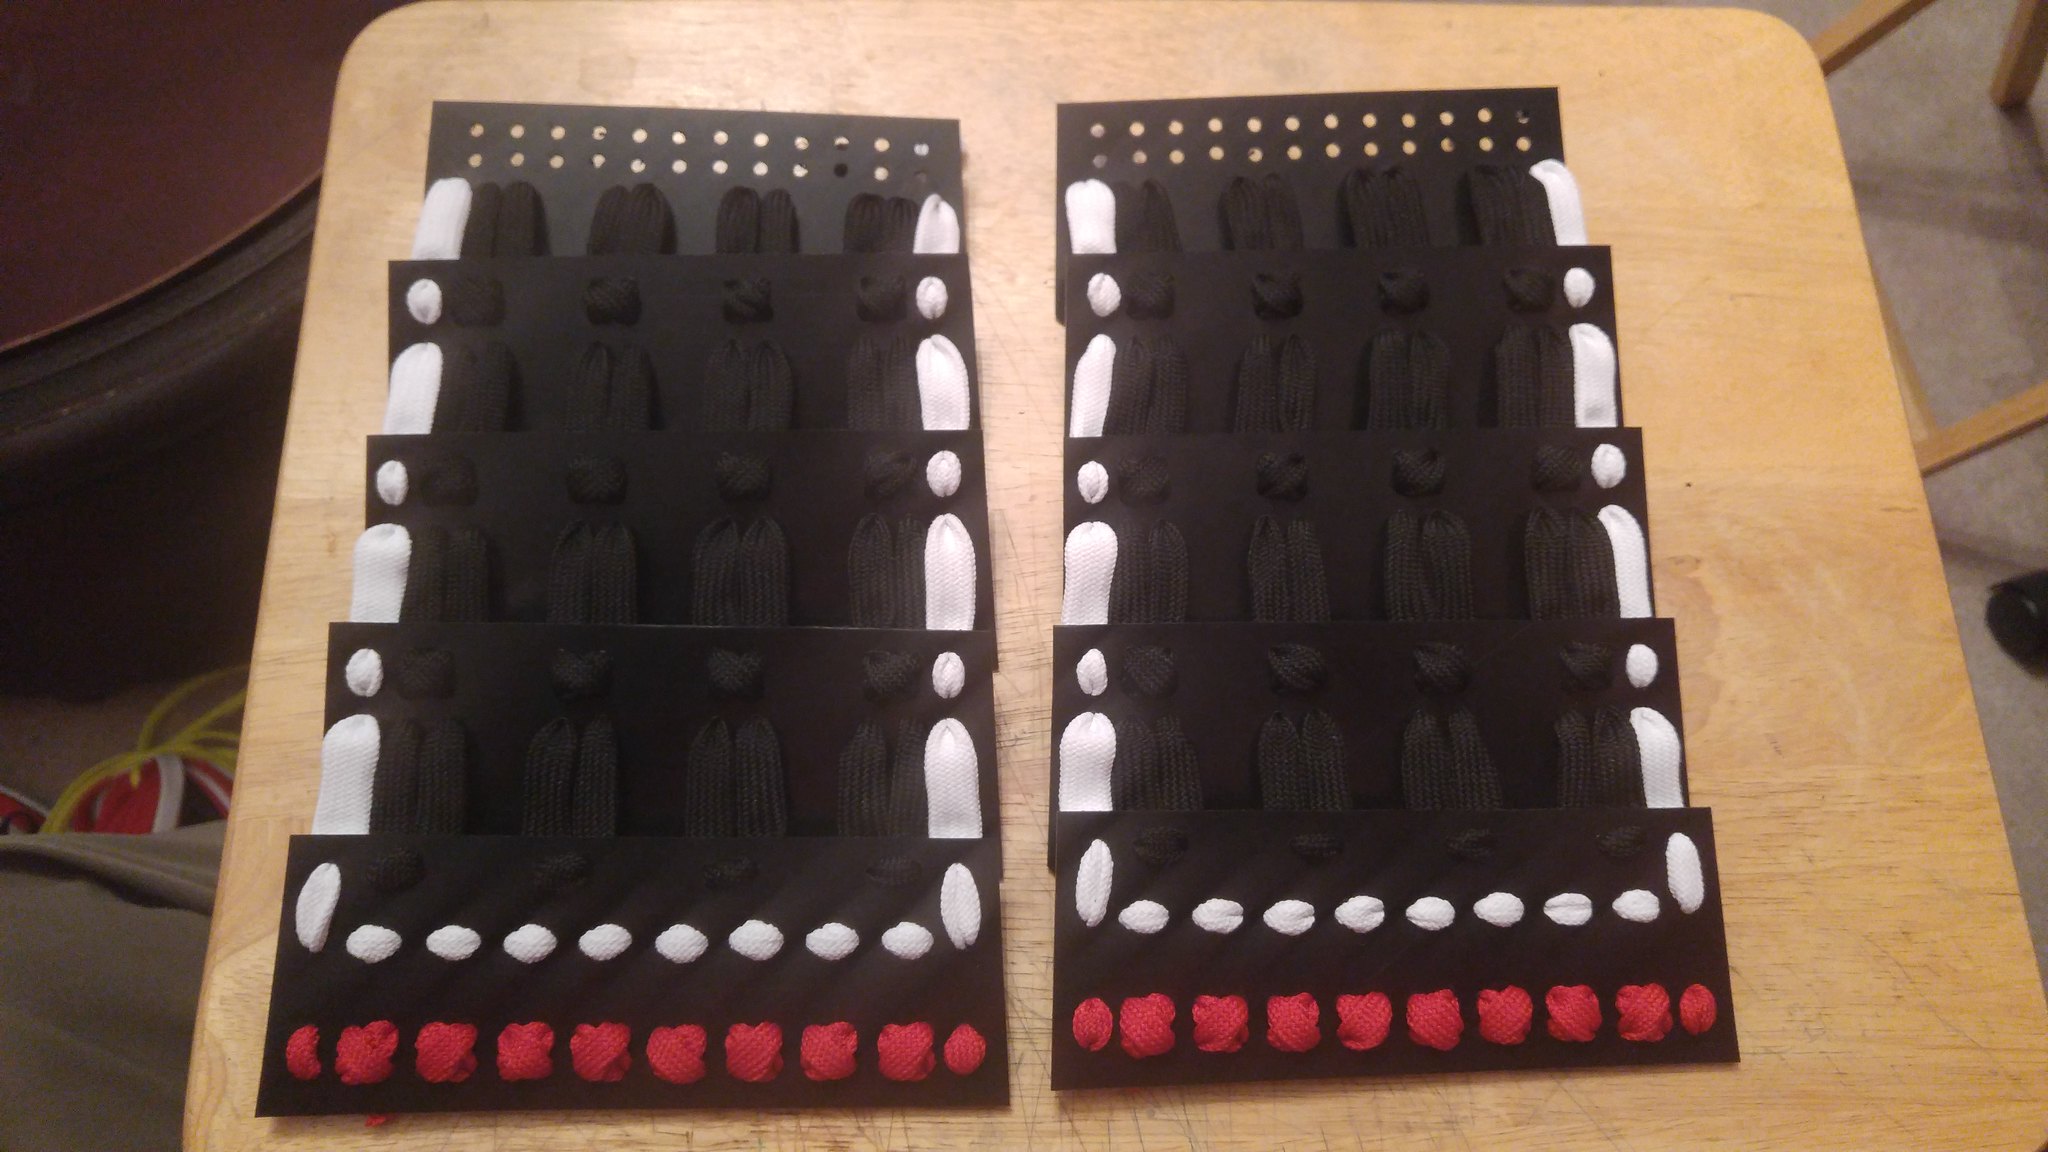
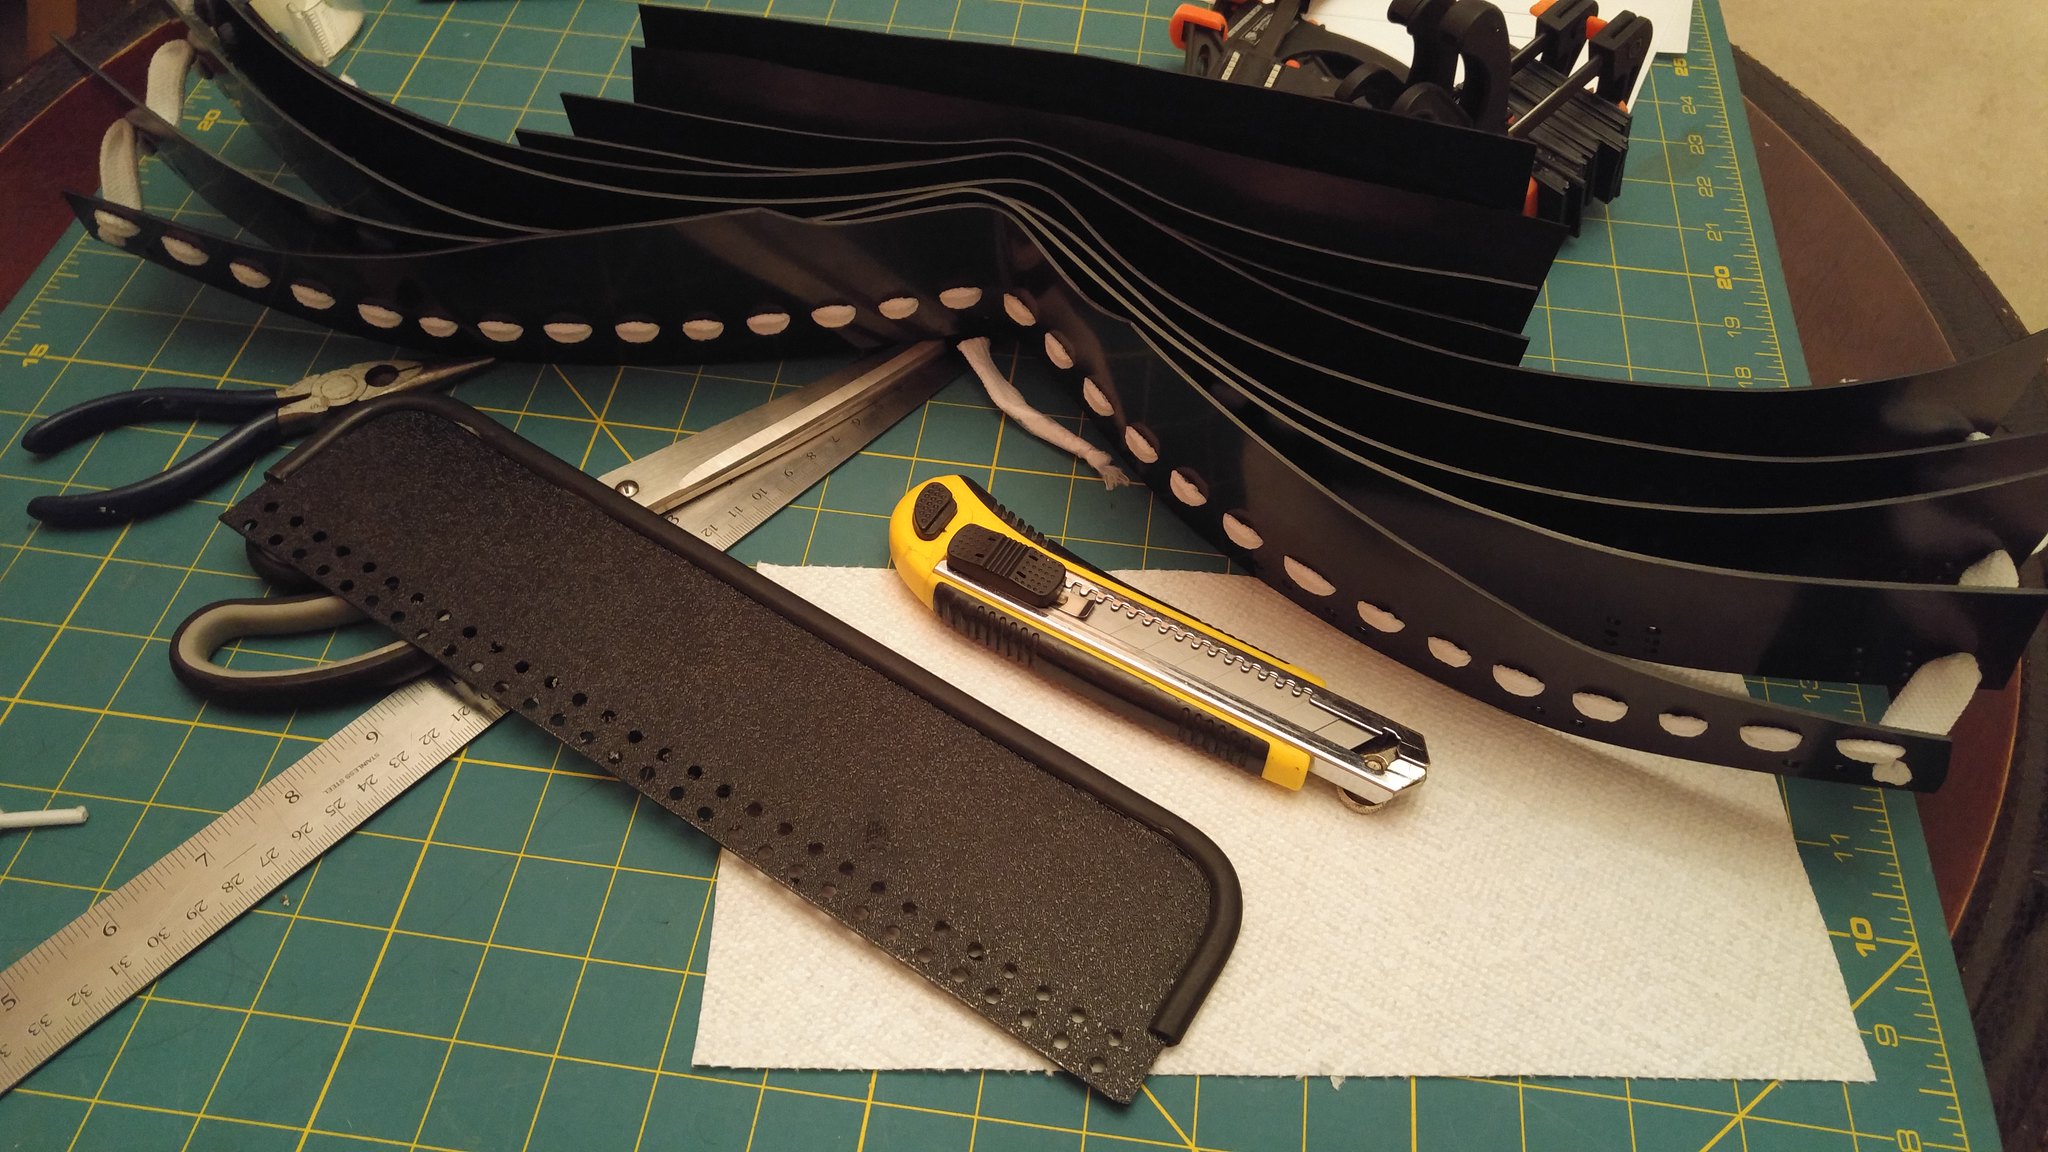
I also experiented with various adhesives to attach the rubber trim edging to the ABS. I found that good old cyanoacrylate works best. The glue and rubber worked fine over strait edges, gentle and tight curves, and even around a sharp corner when notched. And the rubber flexes with the pieces after being glued on.

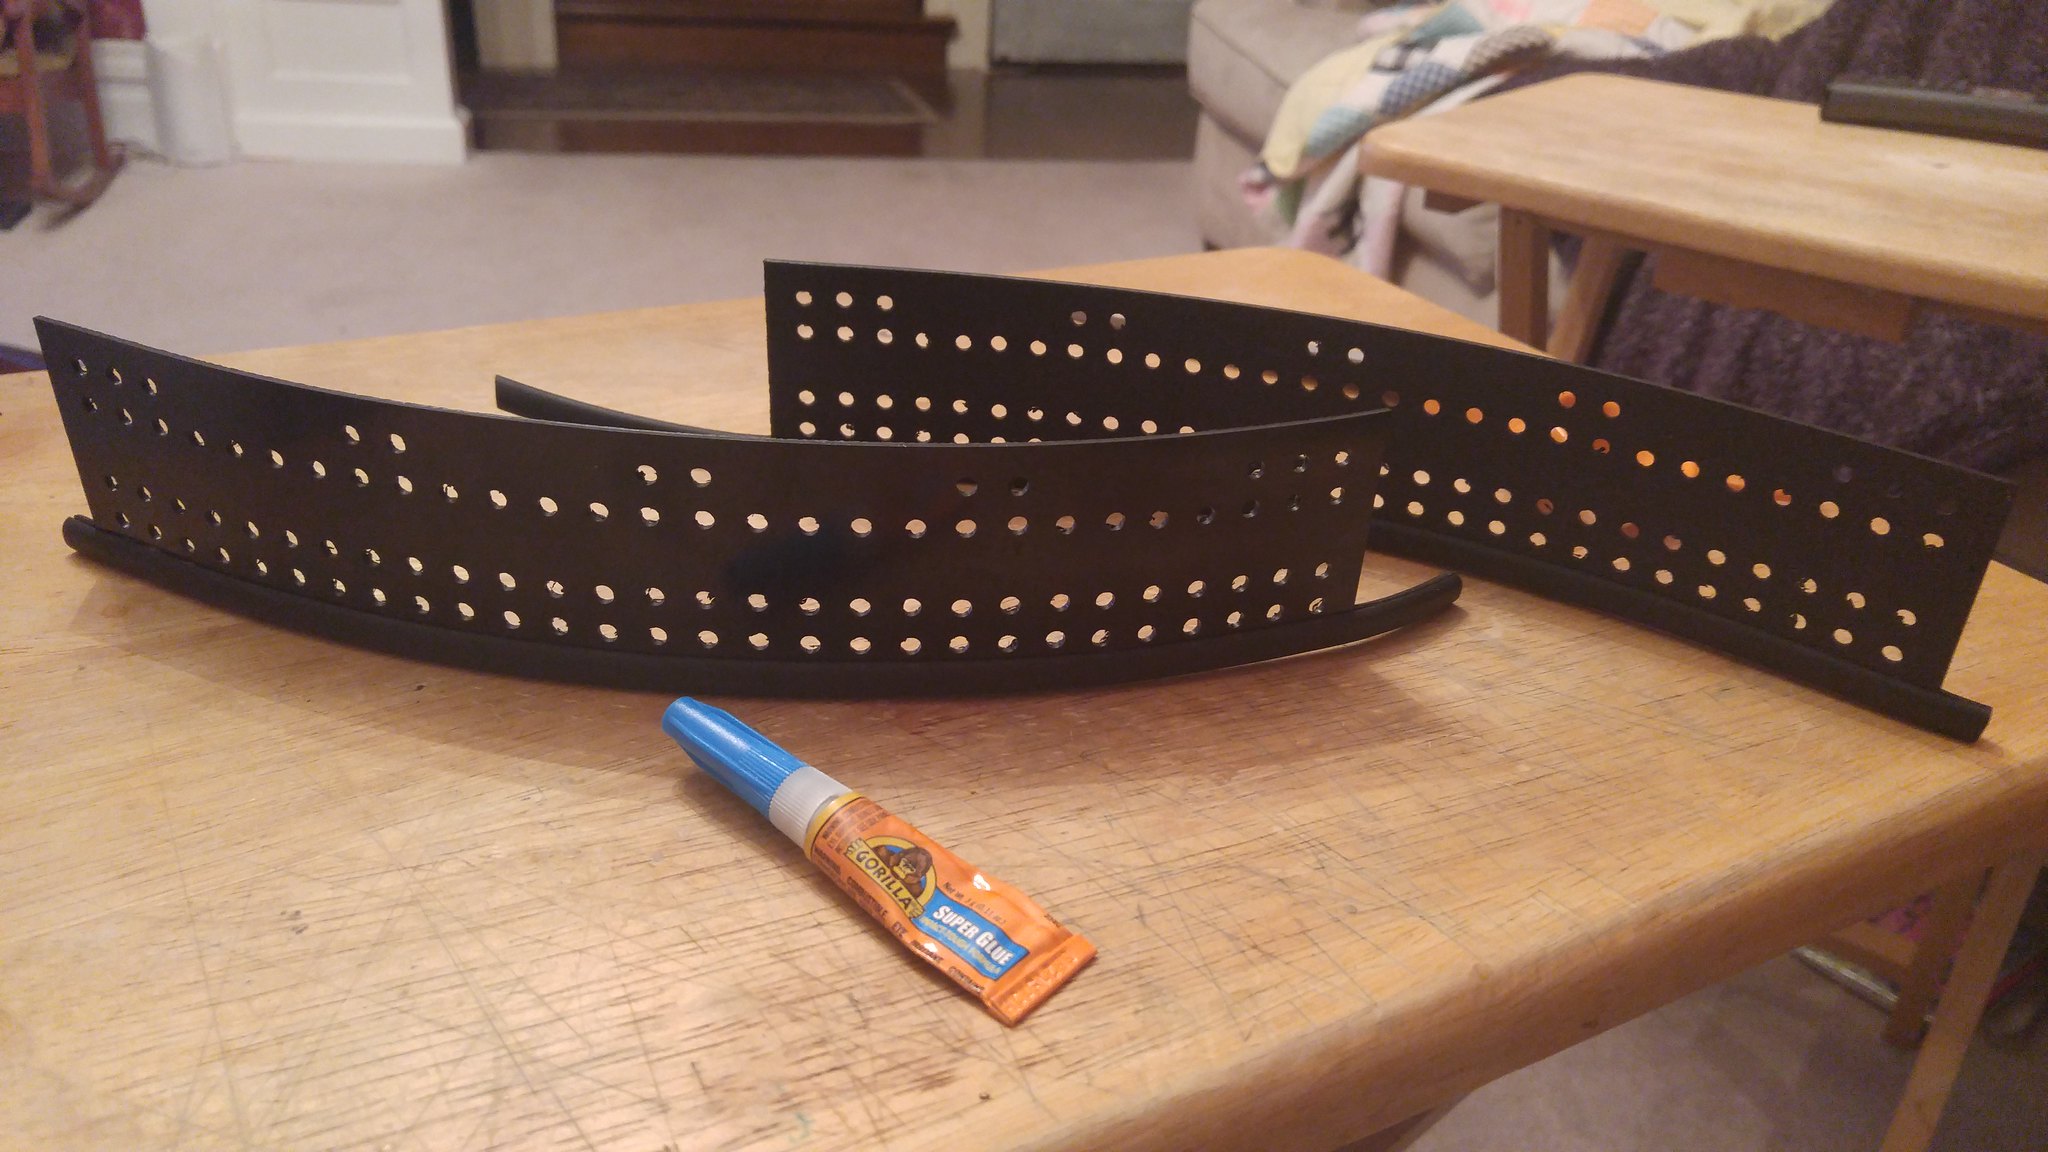
I used Gold Rub'b'buff on the rubber and found a method that worked pretty well.

https://farm5.staticflickr.com/4752/26683753068_22c0855c0e_h.jpg


For the ends when tyring the 300 deg. method, might try making foil caps to place over them. That might reduce the warping there. Looking great so far!
 
For the ends when tyring the 300 deg. method, might try making foil caps to place over them. That might reduce the warping there. Looking great so far!

Funny you should mention that. When I did this experiment I wondered if foil might work. After all, it's how I keep pie crust from burning. :)

Thanks for the advice!
 
I would think 250 to 270 would be the temp you want. You may need more time. The ends curling is a sign of too high a temp. Those areas will heat faster, as they do not have neighboring material to draw the heat away. Are you letting the oven come to full temp, before putting the material in?
Five minutes seems like enough time, but not if the oven is cooling down rapidly by opening the door, or it hasn't come up to full heat.
The idea is to get the plastic to a stiff leather belt feel. If it is too hot, then it will want to take a compound curve, (like the ends of your 300 test) which you don't want unless you have some type of tooling to drape it on. You could make poster-board tools to drape the pieces on if you are looking for consistency.

The edge trim looks good. If it turns out to be to big for the plate, McMaster Carr sells many different widths and profiles.
We used a black cyno glue that is a bit gummy to hold trim on things. The advantage, is it does not "grab" by drying too quickly, allowing you to move the rubber trim into position easier.
 
Imgill, Thanks once again for the helpful advice.

I was letting the oven come to full temp each time, putting the plastic on a flat aluminum cooking sheet (at room temperature). The element is in the bottom of the oven, and the sheet was about 8" above it on all the tests except the 300°. During the 300° test the aluminum cooking sheet was about 5" above the element.

I was forming it around a firm bolster pillow for the test. I will be using some gentle curved forms for the finished pieces.
 
Not a ton of progress. But I have been working on the hole patterns for the sode and kusazuri. I got a few plastic sheet specific drill bits too. I hope to have a bajillion holes drilled by the end of this coming weekend and to start forming and assembling the sode.

38845806600_ab1e324a5c_k.jpg
 
Not a ton of progress. But I have been working on the hole patterns for the sode and kusazuri. I got a few plastic sheet specific drill bits too. I hope to have a bajillion holes drilled by the end of this coming weekend and to start forming and assembling the sode.

https://farm5.staticflickr.com/4786/38845806600_ab1e324a5c_k.jpg

Wow! That is going to be fun! :eek I built a kit Shelby Cobra replica and drilled and riveted over 3000 holes...having bad flash-backs, lol.
 
So I got a little progress done. I decided to start with the sode as they have a variety of construction elements that will be reflected on the rest of the armor while keeping a uniform repetitive shape (which is not the norm on the rest of the armor.) In other words, a good practice piece.

I started by taping the like pieces together and using rubber cement to attach my drilling templates.

39871419665_d7da86bf34_k.jpg


I used a plastic-specific drill bit in a drill press at a low speed and took my time as suggested by Imgill. With the pattern attached the drilling went very quickly though.

26895988398_2b4cb85812_k.jpg

26895971008_c916308629_k.jpg

26895982288_0d40a3bb96_k.jpg


Then I put the pieces in the oven at 270° for about 5 minutes. I used 2 cookie sheets alternating one in the fridge while one was in the oven to keep them cool enough to reuse every time. I formed the plates around the outside edge of a large strait walled skillet. No special tools here, just using what we had around.

40724335042_63cf094444_k.jpg


Not pictured: I cut the fin for the kanmuri ita shaped kind of like you see below, bent the tabs using a simple lighter, glued it to the top lame of the sode using Weld-on #3 and some clamps. Then I used a hand drill and the plastic-specific drill bit to drill the lacing holes from the top lame through the kanmuri ita tabs.

26896979378_c5cc893b5f_b.jpg


Then I glued on the rubber edging. I put a strip of it on the lower edge of the last lame and around the fin of the top lame. I decided not to use the gold rub'n'buff on it for now. Maybe later.

26895965958_9552602ecf_k.jpg

40766214451_e1f8bb2537_k.jpg


Then I laced it too tight and had to take it apart. :(

25895468337_5f2e4bde15_k.jpg


Then I laced it again being more careful and it worked out OK. I left the top most holes in the top lame empty. Two sets of these holes will eventually be used for the kohaze fasteners. The second sode got about half way laced.

40056537964_19748d43da_k.jpg


I forgot to get a picture of the finished sode! I will post it up when I get home tonight.
 
oh nice, I'm really following that with interest, it always has been a dream of mine too, doing an armor like that.
keep up the nice work :thumbsup
 
I was able to get all the kusazuri plates drilled last night, though I only got two of them laced together. Based on my size, I have 3 in the front and 4 in the back, each with 5 plates. That's a lot of lacing to do! :) Each kusazuri uses most of a 109" black lace!

The kusazuri are a lot like the sode, except they are flat and trapezoidal where the sode are curved and square edged. The kusazuri are also a little smaller and have more suspension holes for connecting them to the Do.

Once I get them all laced together, I will likely round the corners a bit and add rubber edging to the bottom edge of lowest lame.

39909735805_0ad81fc5ba_k.jpg

26934883888_0e736fbe2e_k.jpg

40762821532_0cc3359275_k.jpg
 
Looking good. You may consider rounding the corners of your plates a tiny bit. They will be rather "pokey" when you wear it.
 
Work continues. I got the back of the Do all drilled out and shaped. Instead of using the oven, this time I used my heat gun clamped still and moved the lames across the heat (wearing proper safety gloves, etc.) and shaped each piece to the last. I started lacing it up but ran out of lace. I have ordered more and am waiting on it to arrive.

39240825910_12abea86fc_k.jpg

41049386571_f043a7ad27_k.jpg

39240824800_22968b426e_k.jpg


In the mean time I have started the process of drilling out the front of the Do and shaping them up. Also I have begun putting together the Waraji sandals.

41049386341_7477289c07_k.jpg

41049386791_5f4f135cf5_k.jpg
 

Your message may be considered spam for the following reasons:

If you wish to reply despite these issues, check the box below before replying.
Be aware that malicious compliance may result in more severe penalties.
Back
Top