So the filler was added and then sanded to get as smooth a finish as possible. I did a couple coats of filler so I had more there to sand at to get a good finish.
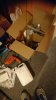
At this point I organised all my spray paint, pencils, rubber, compass certain colours of marker pens for detailing lines,small paint brushes, small tins of paint, tape for covering up areas when spray painting and bin bags I also used to save on taping everywhere.I put it all into a cardboard box and wrote bb8 on it kept all I'd need in it so was organised a half decent sized box.
bb8 then got his coats of white paint and was allowed to dry a day or 2 before I added his first big circle shapes to his body I penciled them in first of all. I got dimensions from the bb8 sphero toy and made calculations and upsized them to life size.
- - - Updated - - -
I like this angle he was coming along now by this point ☺
I then began adding the detailing to bb8 inner circles also in pencil to begin with this took longer than anything again getting measurements taken form the sphero toy and multiplying them to fit into my sizes. I did these one circle at a time over the space of a number of days.
OK so u get the idea now I completed all 6 large circles and there inner detailing. Nxt was going to be prepping for spray painting the orange and grey onto the different bits of the circle details ��
U can see I've shaded in the pencil designs that's for effect to get idea of how could look and so I know for certain they r meant to be grey when time came
This marker pen was ideal for marking the link lines and edging lines of all the designs inside the circles and out its close to the outline colours on the sphero toy which is why I picked it was delighted with it actually.
I went over all the pencil lines and edgings I'd done previously with this ☺.
I used this blue film smooth material which has a sticky back to it once it's removed and I put a big enough bit over the first circle I did and marked where certain details is on the circle at 4 different points. I used this shape I'd created then for all of the 6 circles to get the orange sections done. I covered the rest with bin bags and used tape to keep them in place lol.
I’m honestly really surprised you haven’t had any comments on this yet. Paper mache is such a massively understated medium when it comes to prop building - but the results here speak for themselves!
I think you’re doing great, Markas1976, and I’ll be watching the remainder of this thread with great interest!
This thread has had a faded logo beside it until now it's normal bold colour again I don't know if there was a fault or if someone did something to the thread or if simply nobody is interested in it
I'm enjoying this build though and it's nice to share it with people that share the same interests.
I appreciate ur comment glad u like what I've done here
Couple of sections get there colour it's not as easy as seems cause uve to remove bit covering circle except where u want the orange and then recover rest of the ball again which will go against circles uve mabye just done so u have to be patient between circles leaving plenty drying time. Either that or u cover every circle all at once which would take a lot longer at that time and I felt getting going was best way for me to see the paint going on sooner plus I saved on using all my sticky backed artists taping.
My personal marked bb8 boxes full of various tape, paints, brushes, marker pens, pencils, sharpener, measuring tape all the things I needed thru this build one box for earlier stages and smaller one with stuff for detailing and painting pencil work and measuring shapes etc
So here we have bb8 with some of the grey sections done on him it was enjoyable seeing it all come together and it's great this build as it was blood sweat and tears some late ngts. No use of any 3d printer or any help from anyone. All done with cheap easy materials like a beachball, styrofoam ball,paper mache, filler, paints. Plus a couple little plastic things for eyes and a keyring light for the headlight. The antennas was a wifi rooter ariel and the end of a fishing rod for the longer antenna ��. it's been tough in stages but so rewarding a proud feeling which is nice to get.


")