Studio 49
Sr Member
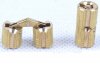
Anyone able to identify what this piece might be made from?
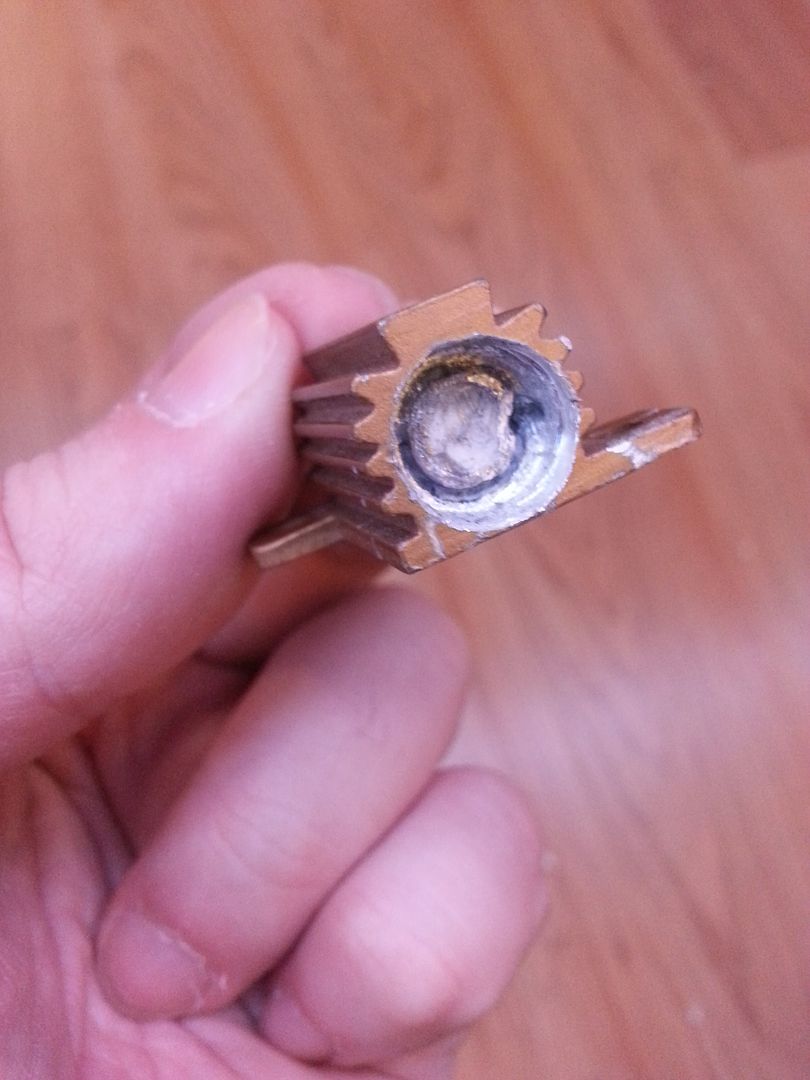
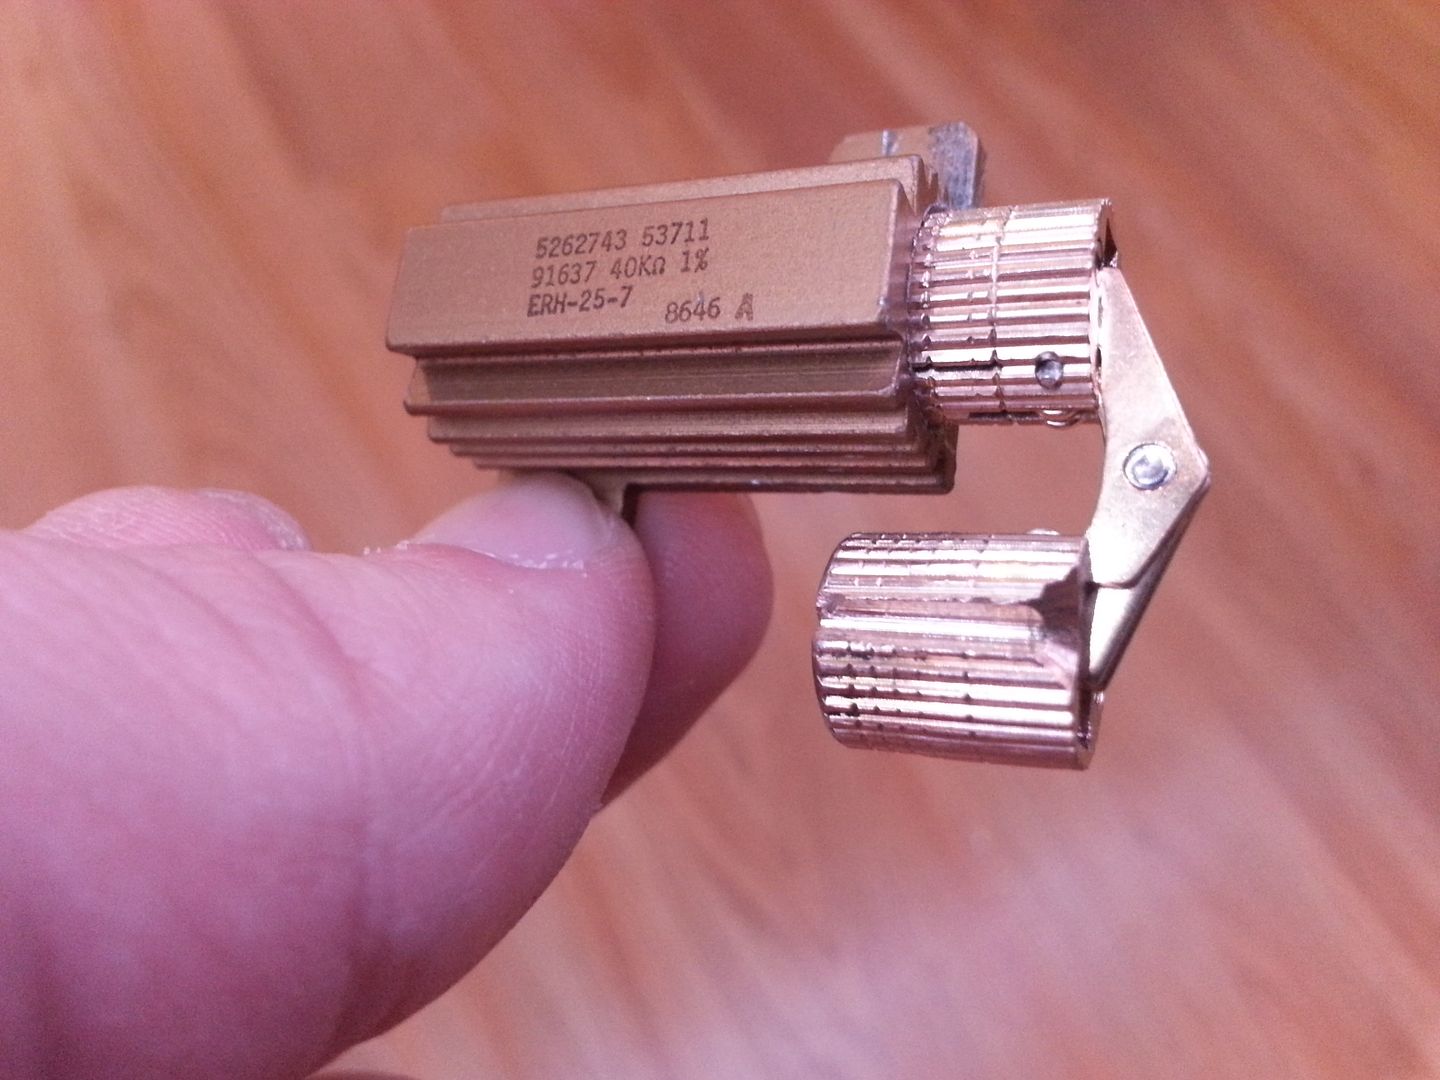
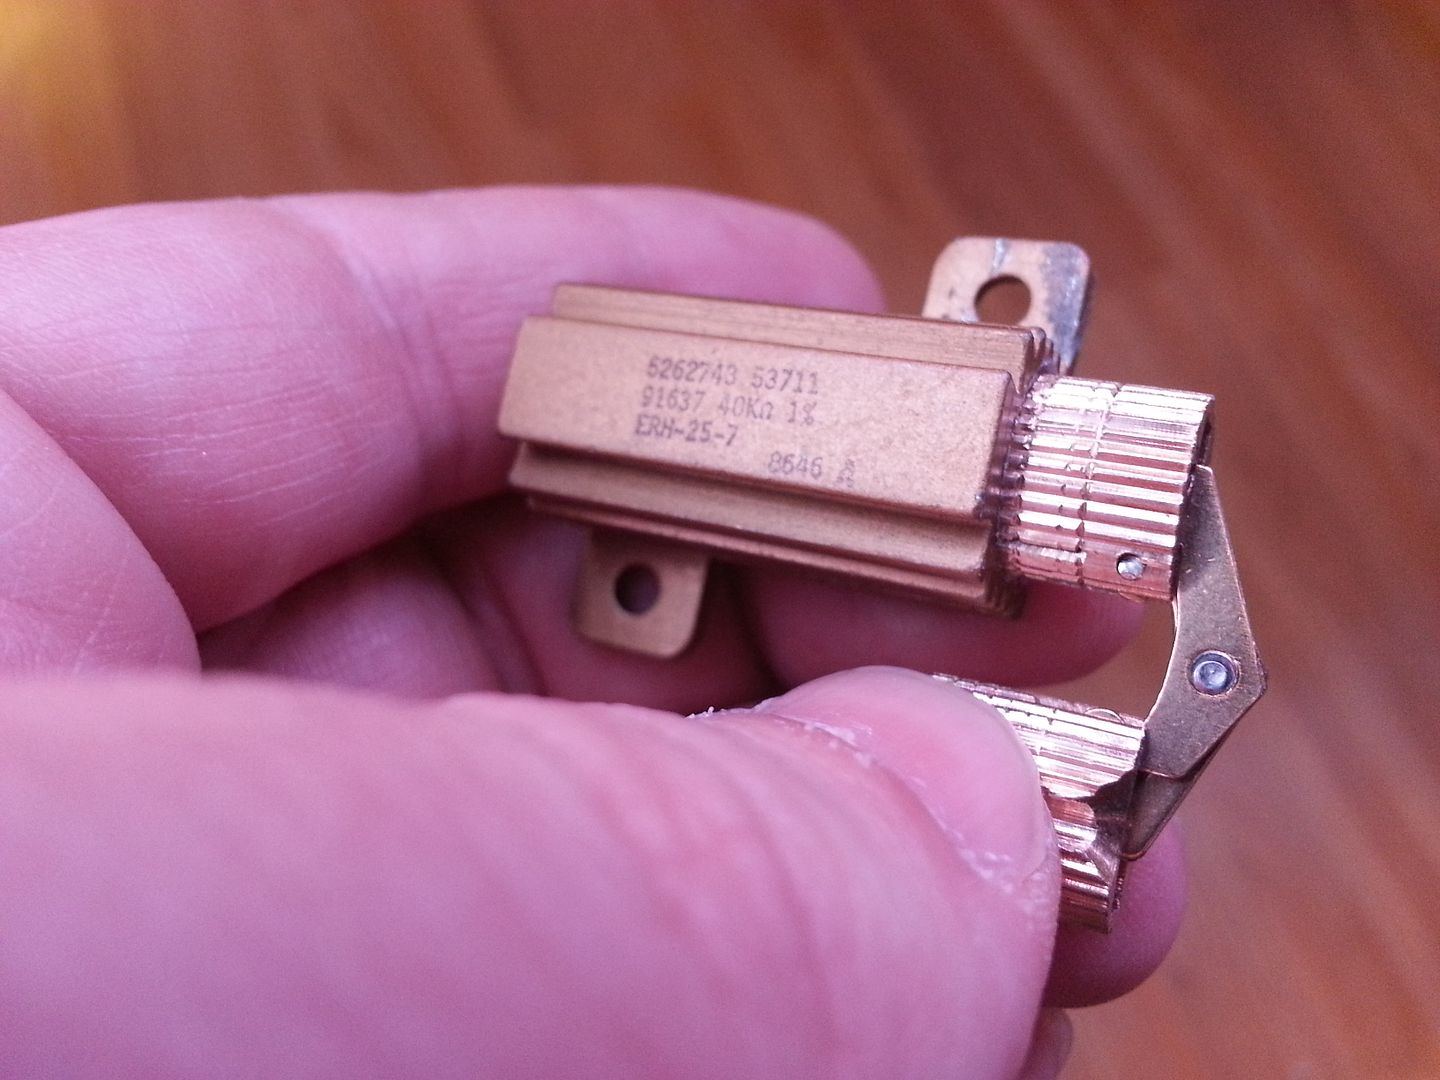
No idea if this question has been answered yet, but that looks a identical to a barrel hinge in the folded out position if you ask me

Last edited:
Anyone able to identify what this piece might be made from?

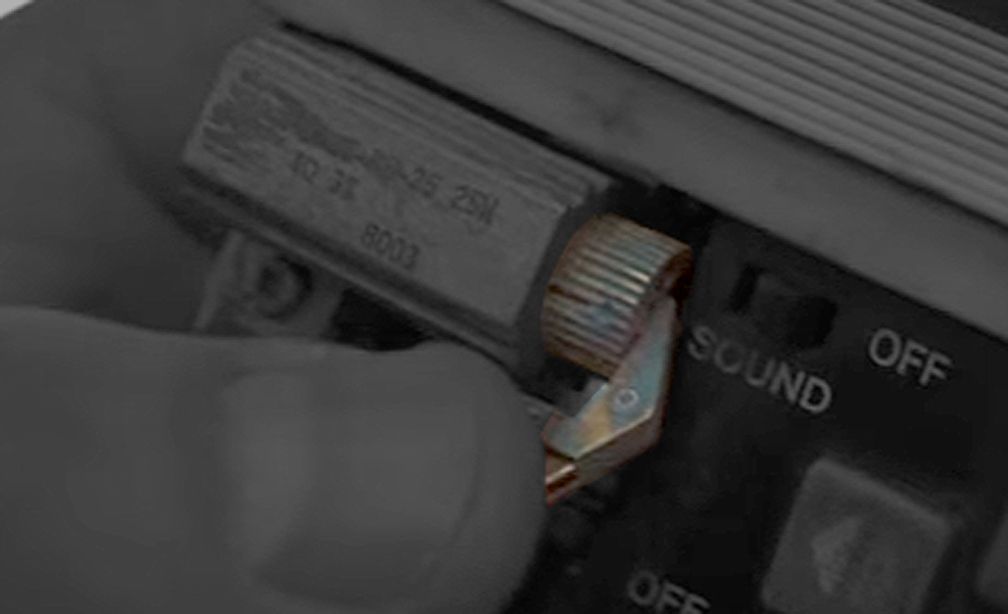
I've acquired a few more myself:
http://i44.photobucket.com/albums/f33/GirlsofComicCon08/New uploads/20170310_092059.jpg
No idea if this question has been answered yet, but that looks a identical to a barrel hinge in the folded out position if you ask me
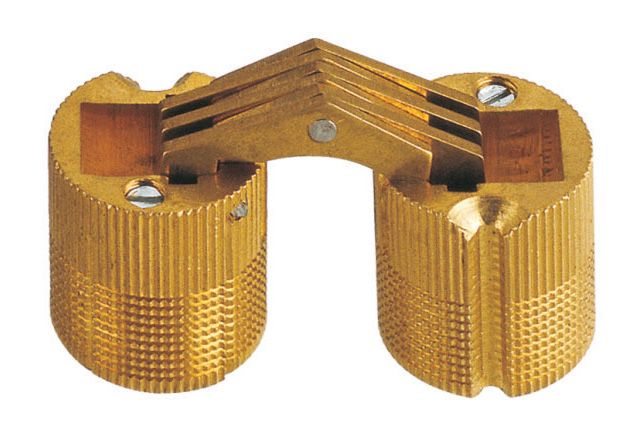
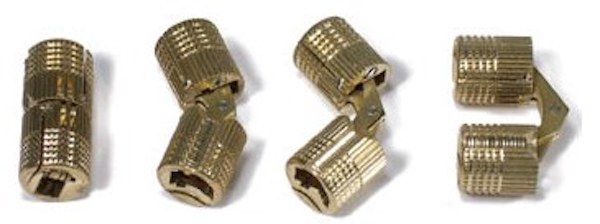
http://i1057.photobucket.com/albums...d-brass-soss-size-16mm-1942-p_zpsyzqk2n9k.jpg
http://i1057.photobucket.com/albums/t391/Studio_49/Misc/barrel-hinge-detail-2_zpshwmopzfm.jpg
I've acquired a few more myself:
http://i44.photobucket.com/albums/f33/GirlsofComicCon08/New uploads/20170310_092059.jpg


Making a bit more progress over here as well . . .
http://i44.photobucket.com/albums/f33/GirlsofComicCon08/New uploads/20170315_014544.jpg
proper stickers and initial cuts
http://i44.photobucket.com/albums/f33/GirlsofComicCon08/New uploads/20170315_020450.jpg
spent about an hr drilling and routing this out
http://i44.photobucket.com/albums/f33/GirlsofComicCon08/New uploads/20170315_020602.jpg
I think I need to drill it down just a little bit more
http://i44.photobucket.com/albums/f33/GirlsofComicCon08/New uploads/20170315_020629.jpg
http://i44.photobucket.com/albums/f33/GirlsofComicCon08/New uploads/20170315_022810.jpg
almost there
http://i44.photobucket.com/albums/f33/GirlsofComicCon08/New uploads/20170315_022822.jpg
http://i44.photobucket.com/albums/f33/GirlsofComicCon08/New uploads/20170315_0229350.jpg


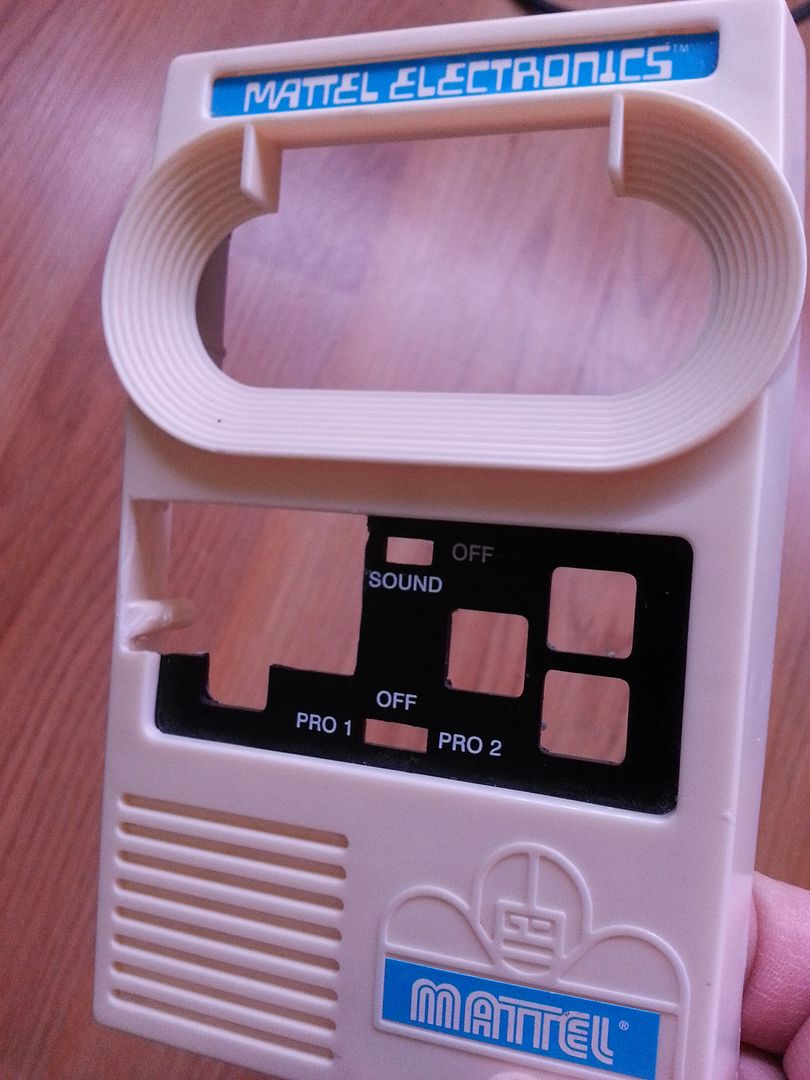
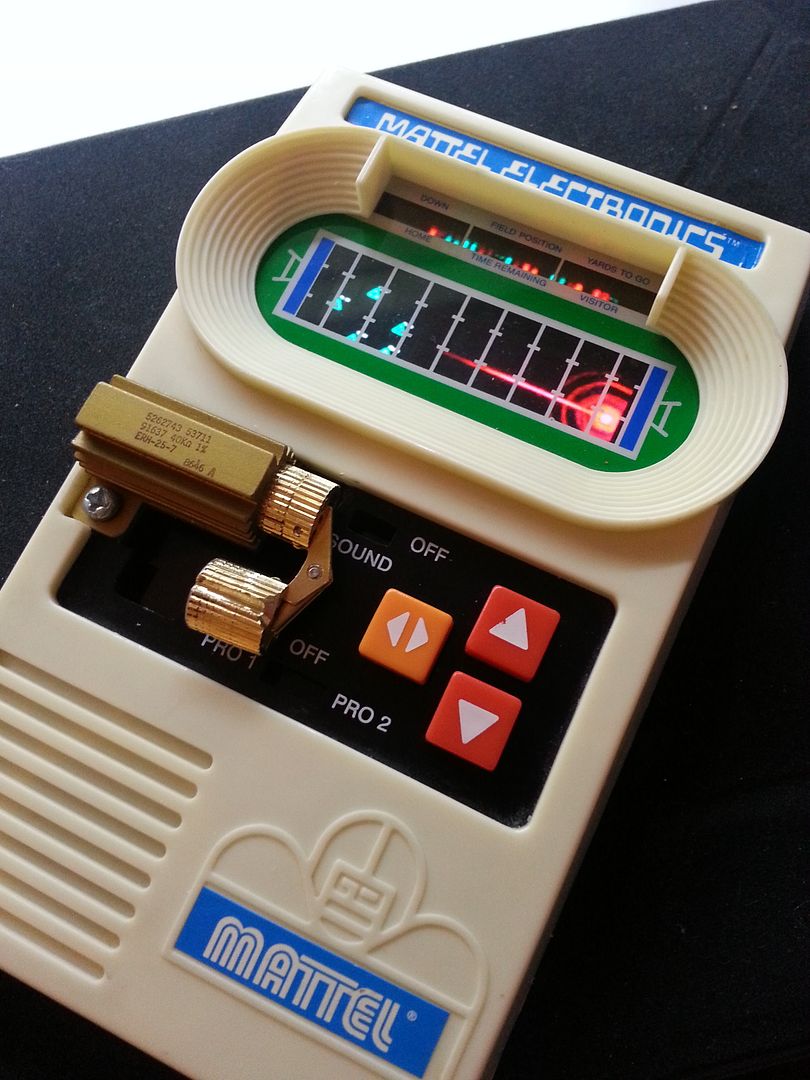
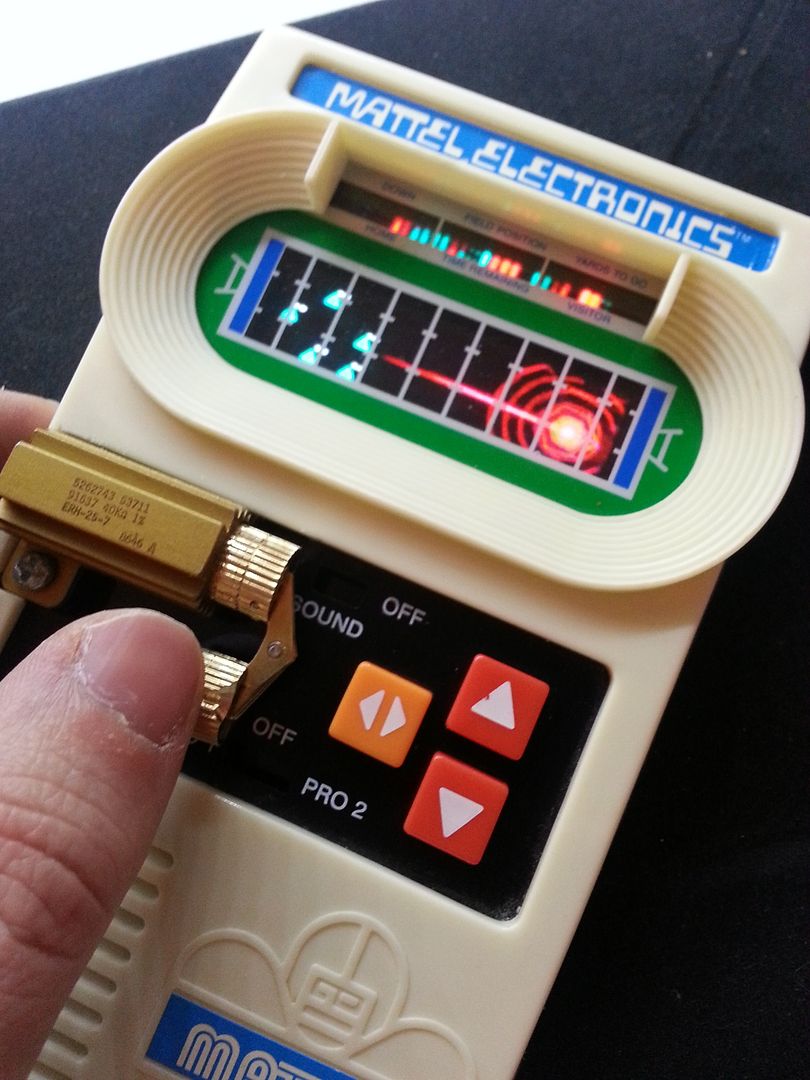
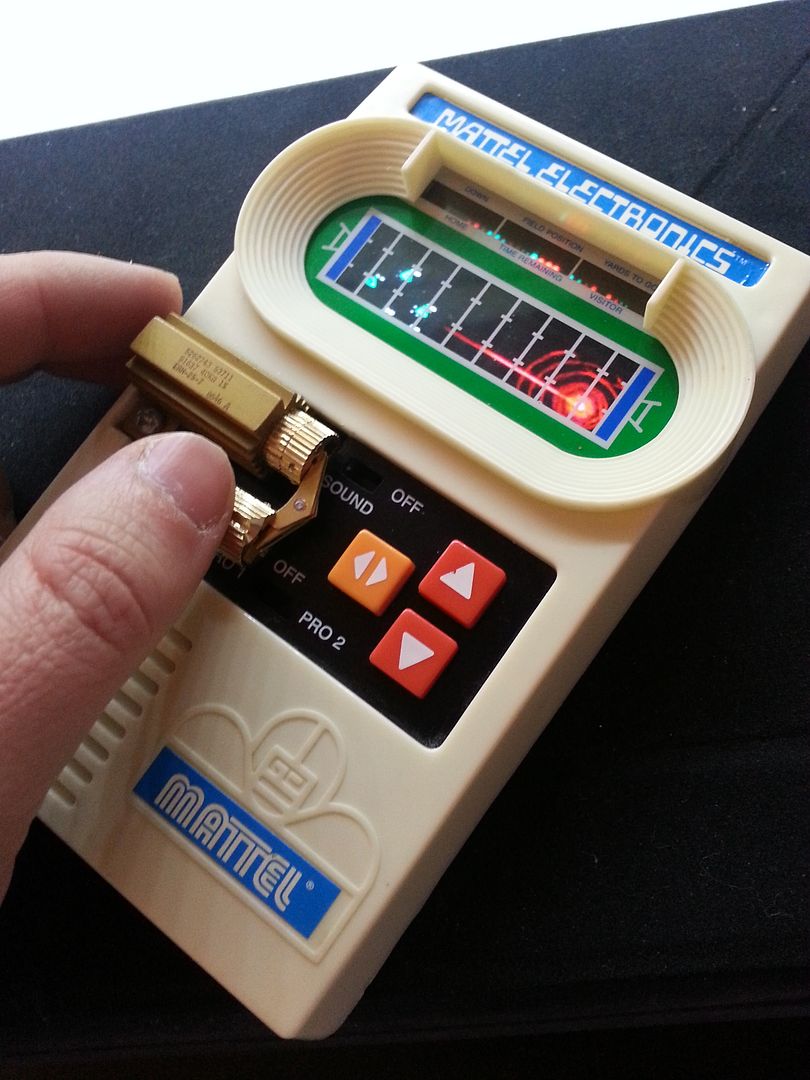
Ok, tried again last night (I may have bought multiple games). This time I cut the hinge and glued it to the resistor. I also adjusted how I cut the game box face. After that I gave the whole game a light sanding to knock the shiny surface down and then weathered it with a mix of blacks and brown acrylic paints and sprayed it with a matte clear coat. Last step is the replacement decal and a solution to make the screen graphic.
View attachment 714717View attachment 714718View attachment 714719View attachment 714720

Printed and die cut decals. Just a light touch with some sand paper to give them some wear and tear, and they fit right in. I'd like to figure out a good solution for the screen, but otherwise this is about done. Anybody interested in a kit for their own game? Or a complete modified game?
View attachment 714868