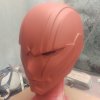
Need help smoothing up 3D printed iron man forearm

Frid4y

Member
Hi guys I 3D printed the whole forearm, hand included. the print is ok, now I'm into the smoothing up process, I sanded a lot the forearm, I used also 2 cans of bondo filler spray to remove the lines on the surface, then sanded it again but I'm still struggling to get a clean surface, do you have any idea or products I may use? thank you!


WhatsApp Image 2018-06-10 at 10.32.37.jpegWhatsApp Image 2018-06-10 at 10.32.37(1).jpeg
 
You could use smooth-on xtc-3d basically its an epoxy that you brush on thinly and it will fill in the lines never used it myself but alot of people do. Some people use fiberglass resin as its cheaper but pretty much get the same results theres a guy on youtube called nikko industries that talks about those 2 methods https://youtu.be/vgBCJaWvbPY

Sent from my SM-G935F using Tapatalk
 
Alternating sandable spray filler and wood putty for the bigger gaps works great. It can take 3-4 rounds to get smooth. What layer height were you using? It looks a bit rough.
 
Alternating sandable spray filler and wood putty for the bigger gaps works great. It can take 3-4 rounds to get smooth. What layer height were you using? It looks a bit rough.
0.2mm on stock Anet A8.

Anyway thank you all guys, I'd like to use something that can be sprayed or brushed on the surface instead of using wood putty or standard bondo, I'm afraid to ruin the armor lines and details with them. I think I'll go for XTC or fiberglass resin, they look easier to apply :)
 
You could use smooth-on xtc-3d basically its an epoxy that you brush on thinly and it will fill in the lines never used it myself but alot of people do. Some people use fiberglass resin as its cheaper but pretty much get the same results theres a guy on youtube called nikko industries that talks about those 2 methods https://youtu.be/vgBCJaWvbPY

Sent from my SM-G935F using Tapatalk

Do you know a good fiberglass resin brand? I watched the video you suggested and I think fiberglass resin can pretty much do the job :) plus, as the guy in the vid says, I will still have to sand it :)
 
Last edited:
The layer lines look a little deep for spay filler. You might lost your detail with too much spray.
I have had some luck lately using spot putty. Apply a little at a time. As far as covering the detail lines, let the putty dry for just a couple minutes and then go over the lines with a toothpick and "carve" the putty out of the lines. Then let the putty finish drying and sand.
 
0.2mm on stock Anet A8.

Anyway thank you all guys, I'd like to use something that can be sprayed or brushed on the surface instead of using wood putty or standard bondo, I'm afraid to ruin the armor lines and details with them. I think I'll go for XTC or fiberglass resin, they look easier to apply :)

I usually print at 0.1mm to capture more detail and have less sanding. It takes more time to print but can save hours of annoying sanding. I cannot say many good things about coating with XTC or resin. I have tried both and they wash out and blunt detail lines and are a PITA to sand. The spray and putty are very easy to sand and detail lines and edges can be found and sanded or carved back out with an xacto or pick. But please, try both methods on some test prints first before you commit to coating an entire gauntlet. Good Luck!
 
Hi guys I 3D printed the whole forearm, hand included. the print is ok, now I'm into the smoothing up process, I sanded a lot the forearm, I used also 2 cans of bondo filler spray to remove the lines on the surface, then sanded it again but I'm still struggling to get a clean surface, do you have any idea or products I may use? thank you!


View attachment 823019View attachment 823020

Considering how deep those layer lines are, even after you've put two cans of filler. I would say you need to tune your 3D printer and probably add a lot of bracing.

The ANET A8 is cheap for a reason. It has an acrylic frame that is prone to bending and warping. It needs a lot of work done to it before it starts giving good prints. You can find multiple tutorials on the internet on how to tune them up.

Do that first. Try some test prints. Then when you've gotten it tuned up try this again. Better prints make for less finishing work.
 
Hi i dont know a good brand i just get generic stuff if you are in the states then I think bondo have a brand of resin that is commonly used.
Do you know a good fiberglass resin brand? I watched the video you suggested and I think fiberglass resin can pretty much do the job :) plus, as the guy in the vid says, I will still have to sand it :)

Sent from my SM-G935F using Tapatalk
 
The ONLY way to get that smooth is to sand the hell out of it, or use body filler very carefully. Filler primer and XTC are just not enough to bridge the gap between the high and low spots.

If that came off my print bed, it would have been discarded as a failed print. Some fine tuning of your printer and settings as definitely needed.
 
What type of filament did you use? You could use a heat gun to melt the outer layer but this takes practice and a good heat gun. Or there is the chemical melt method... acetone works for ABS.. but PLA requires a harsher less available solvent.... so back to heat gun.

These techniques will gloss the top layer though its not going to give 100% cast-like smoothness in all cases.
 
Instead of spending the time fixing that print, you should spend the time dialing in your printer. For what might be an equal investment in time, you will end up with a printer that makes all your future parts much easier to finish.

Oh, and then spend the time fixing that print anyways, so you will also gain that experience. :D

-GG
 
The ONLY way to get that smooth is to sand the hell out of it, or use body filler very carefully. Filler primer and XTC are just not enough to bridge the gap between the high and low spots.

If that came off my print bed, it would have been discarded as a failed print. Some fine tuning of your printer and settings as definitely needed.

filler primer no, but a high build primer will. my helmet here was coated in high build primer and sanded back.
28783468_10216039755011315_5704452451604627456_n.jpg
 
Like others have pointed out, your first priority should be to dial in the printer.

As for fixing your existing print, I don't really see any option besides Bondo body filler at this point. Your fear is losing your detail lines, but you will find that spraying anymore will just exacerbate your surface conditions.

I would either scrap the print at this point and take it as a lesson learned, or sand the problem areas down to the bare material and apply Bondo body filler over it. The more layers you cake on, the higher the chance of it chipping off due to prior surface conditions.

Body filler is cheap and fast. Cake on more than you need, scrap off the excess with a razor blade and then sand smooth with water and 120grit. All can be done within 30 minutes.
 
filler primer no, but a high build primer will. my helmet here was coated in high build primer and sanded back.
View attachment 823199

Look at the OPs pictures. No amount of primer will be able to fix the surface. By the time you did get it to a point that looks reasonable? Well you probably would have wasted a LOT of material and covered up all the “detail.”

There is no easy way here. If you want it clean, it either needs to be restarted from a better calibrated printer or sanded.. a LOT.

I’ve made the mistake of finishing prints as bad or worse than this in the past, and while it’s savable.. you’ve got to think, am I putting more in materials to try to fix this thing than it’s worth? That primer sure adds up quick.
 
Last edited:
This thread is more than 5 years old.

Your message may be considered spam for the following reasons:

  1. This thread hasn't been active in some time. A new post in this thread might not contribute constructively to this discussion after so long.
If you wish to reply despite these issues, check the box below before replying.
Be aware that malicious compliance may result in more severe penalties.
Back
Top