You are using an out of date browser. It may not display this or other websites correctly.
You should upgrade or use an alternative browser.
You should upgrade or use an alternative browser.
First Ever Official RPF Group Build - IT HAS BEGUN...
- Thread starter Art Andrews
- Start date

jockdeboer
Well-Known Member
Pretty good for being on vacation!
LizardJedi
Sr Member
Hey Fred, are you doing yours with the landing gear + cart? Or scratch-building the skids?
I think I'm going to do mine with gear up, as it would fly. It comes with one of those chintzy display lugs, but I kinda like the way it looks like that.
Since this piece is practice though, I'll still put the nose gear and the cart together and paint... maybe I can figure out a way to flip out the nose gear...
Gigatron
Sr Member
Thanks Jock - vacation kicks all kinds of ass :lol. I should do it more it often.
I spent a good part of yesterday, trying to deal with the fuselage seam. This dang bird has 4' of seam to try and eliminate :cry. Slow and steady, I guess.
Hey Liz, this kit is probably the only kit that doesn't have the cart or the fuel tanks. But, it does have a pretty decent representation of the landing skids. So, I might spruce them up a bit and then look into maybe scratching the jack-cart-thing.
In between fighting with the fuselage seam and going over reference material, I started playing with the wings - man, are they a bad fit. Takes some shaving AND some shimming to get them to match the reference material.
-Fred

Gigatron
Sr Member
Time for another update
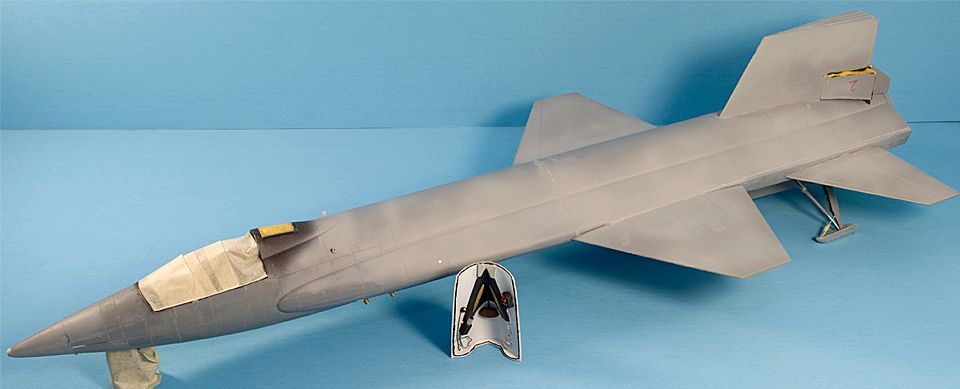
First up, the wings have been installed. These were a huge hassle. The left wings fit fine. The right side wings, had a huge gap. Noting I shaved down, let me push them any closer. So I had to fill the gap with styrene in order to maintain the proper spacing between the leading and trailing edges of the wing. You can also see the two long longitudinal seams that needed to be filled, going from the rear of the front wings, all the way to the end.
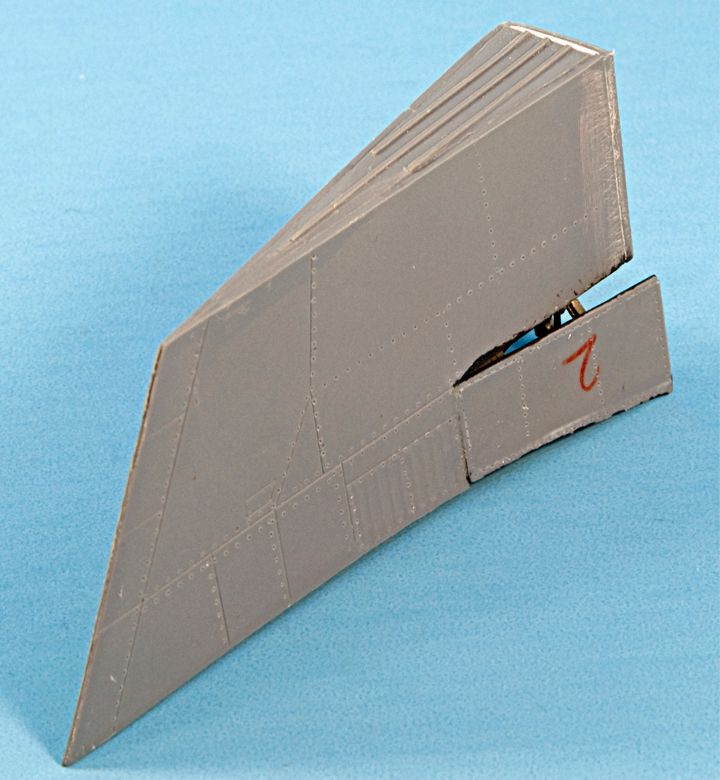
Next, the vertical stabilizer. I had to build and paint it prior to installation. Once it's on, there's no way to finish it. This will probably be the final piece installed before painting. As you can see, I used a pounce wheel to add rivet detail.
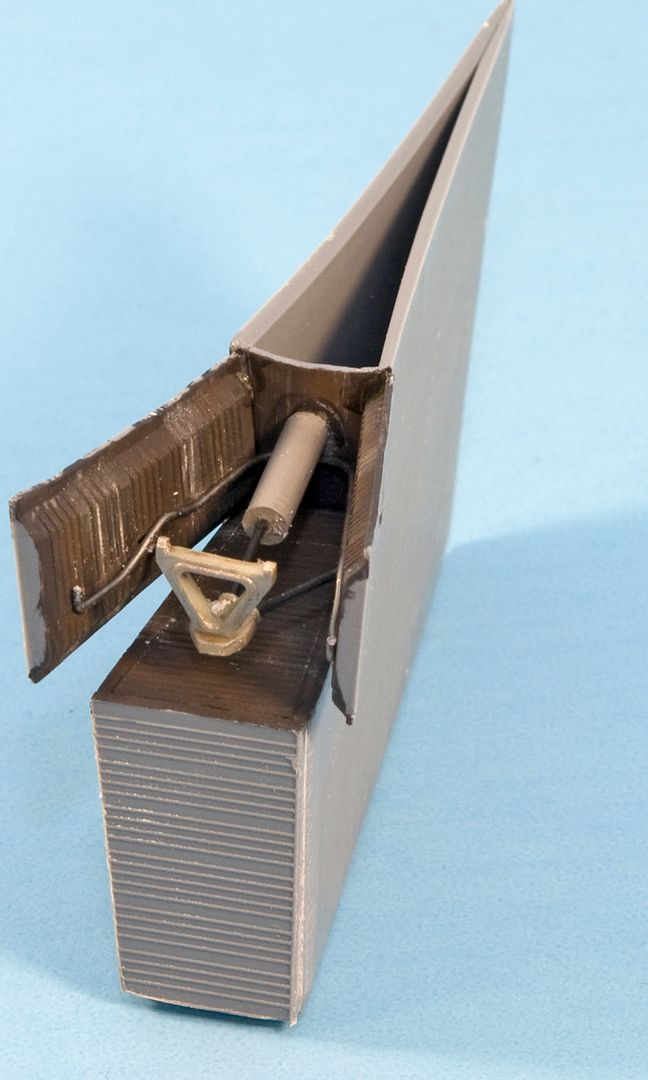
And finally, the dive brakes (the underside of the vertical stabilizer). This area would be unreachable once it's on the plane. All of the pistons have been replaced with metal rod stock for stability. The hydraulic lines are solder.
Enjoy,
Fred
First up, the wings have been installed. These were a huge hassle. The left wings fit fine. The right side wings, had a huge gap. Noting I shaved down, let me push them any closer. So I had to fill the gap with styrene in order to maintain the proper spacing between the leading and trailing edges of the wing. You can also see the two long longitudinal seams that needed to be filled, going from the rear of the front wings, all the way to the end.
Next, the vertical stabilizer. I had to build and paint it prior to installation. Once it's on, there's no way to finish it. This will probably be the final piece installed before painting. As you can see, I used a pounce wheel to add rivet detail.
And finally, the dive brakes (the underside of the vertical stabilizer). This area would be unreachable once it's on the plane. All of the pistons have been replaced with metal rod stock for stability. The hydraulic lines are solder.
Enjoy,
Fred
jockdeboer
Well-Known Member
Fred, you need to slow down! I thought we had till August to finish this...
I ordered a revit maker tool and then I am going to get going. Looks like you did the same on the X-15?
I ordered a revit maker tool and then I am going to get going. Looks like you did the same on the X-15?
Gigatron
Sr Member
Fred, you need to slow down! I thought we had till August to finish this...
I ordered a revit maker tool and then I am going to get going. Looks like you did the same on the X-15?
 lol:lol
Well, I AM on vacation this week and I try to make the most of time. Next week, it's back to the grind, which means only getting to work on it on the weekends.
I purchased a 3-pack of pounce wheels from micromark.com. They're used for transfering paper drawings to wood. But they also make great rivet tools.
And before I forget, I also had to scratch a new ball-nose as the one in the kit is entirely too small. This one is made from styrene round stock, sanded to shape.
-Fred
vistaVision
Sr Member
Just starting on the Mercury capsule. Getting familiar with this vehicle and the kit parts. The interior will need a lot of added detail. Here are a few pics, and the obligatory coke can for scale. I'm going to build it with the astronaut figure in place, the hatch open, the escape tower on top, and the complete retro-pack in place.


Gigatron
Sr Member
Hey gang,
Been in the hospital the last couple of days, but I should have some progress pics to post up in a few days.
From what I can figure, all that's left is some clean up work and then she goes in for paint. The paint is going to be the biggest headache. I hate trying to vary a black paint job - never looks right.
I've also got my sights set on a 1/32 Bell X-1. It's an older Revell kit (1986), but I wanted to keep it in scale to the X-15. I'm thinking of doing a display with the X-1, X-15 and a Shuttle. First plane to break the sound barrier, the plane that set both the speed and altitude record (until it was broken by the shuttle) and the culmination of the research.
Now I just need to figure out which is a decent shuttle kit :love.
-Fred
LizardJedi
Sr Member
Hey, if you're looking for a set, might include the SR-71 (highest alt sustained flight)
Actually I want to do a 1/72 shuttle too... probably once I get better at models. Is Revell the only 1/72 out there?
Actually I want to do a 1/72 shuttle too... probably once I get better at models. Is Revell the only 1/72 out there?
jockdeboer
Well-Known Member
Re: First Ever Official RPF Group Build Sign-Up Thread - all experience levels wanted
Sorry, did not see this question way back when. The fuselage has bumped out areas that are not on the plane to allow for pins on the landing gear doors, also the nose cone has a section that is thickened to allow the nose strut (?) to stick in. I am just going to grind those bumps and thickened areas off.
What do you plan on modifying in these areas?
Sorry, did not see this question way back when. The fuselage has bumped out areas that are not on the plane to allow for pins on the landing gear doors, also the nose cone has a section that is thickened to allow the nose strut (?) to stick in. I am just going to grind those bumps and thickened areas off.
Gigatron
Sr Member
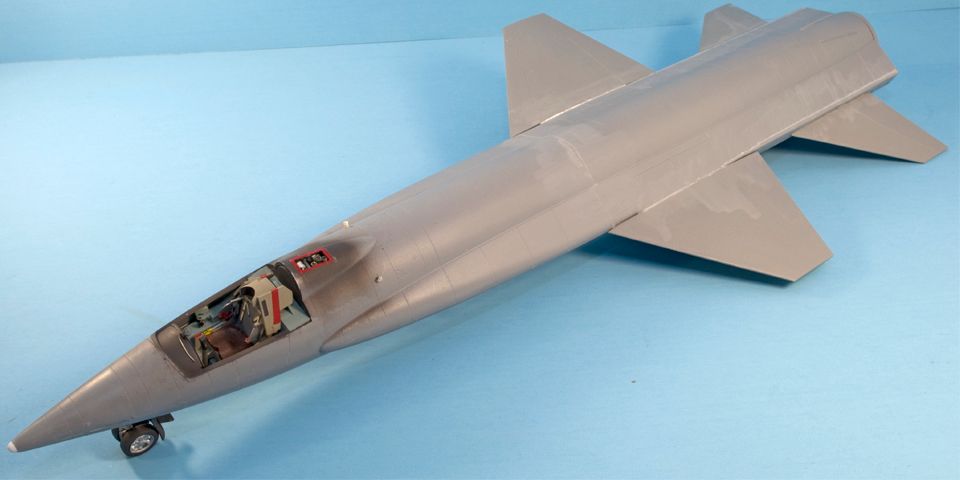
Time for the latest updates.
Far as I can tell, with the exception of the fluid dump pipes that hang off the tail and the two pitot tubes on the nose, she's all together.
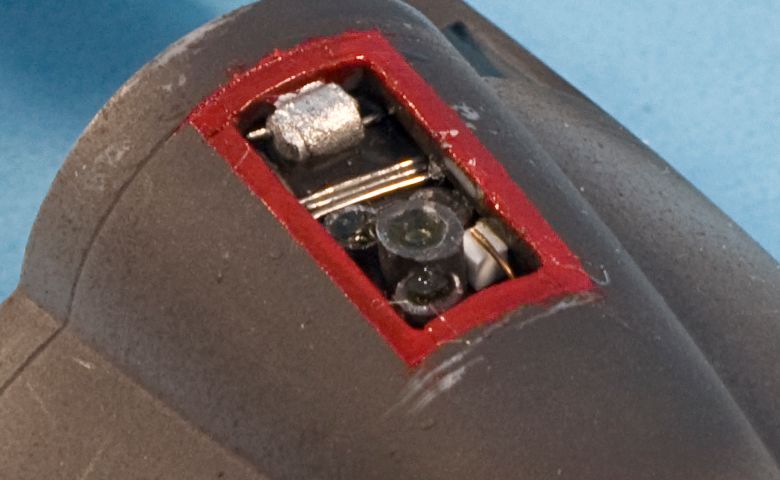
Here's a close-up of the landing gear (sorta)
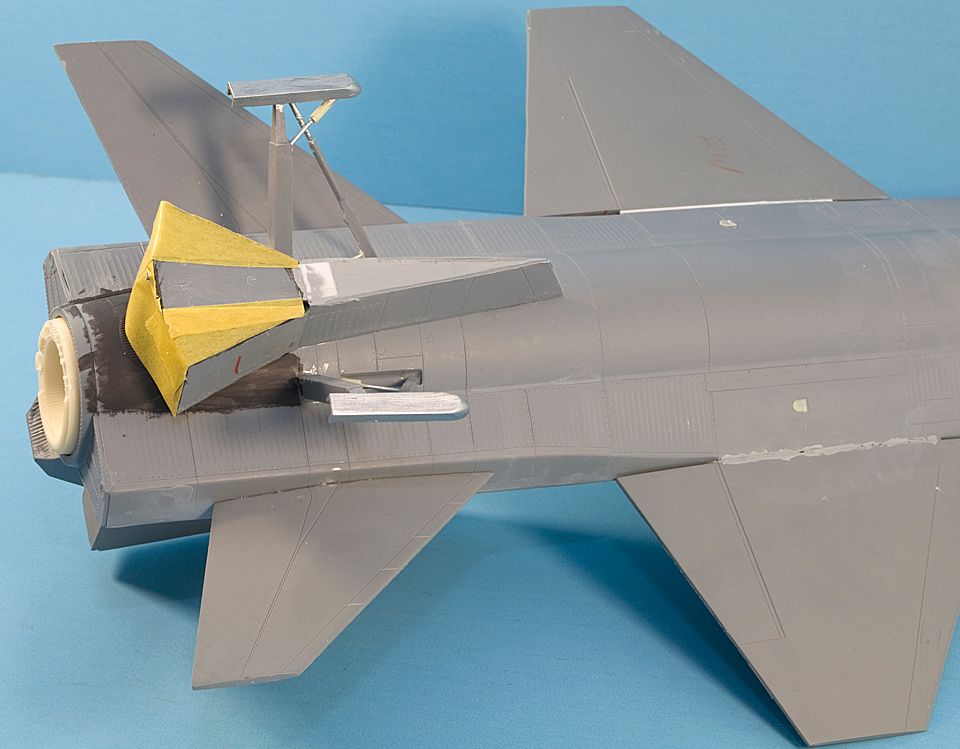
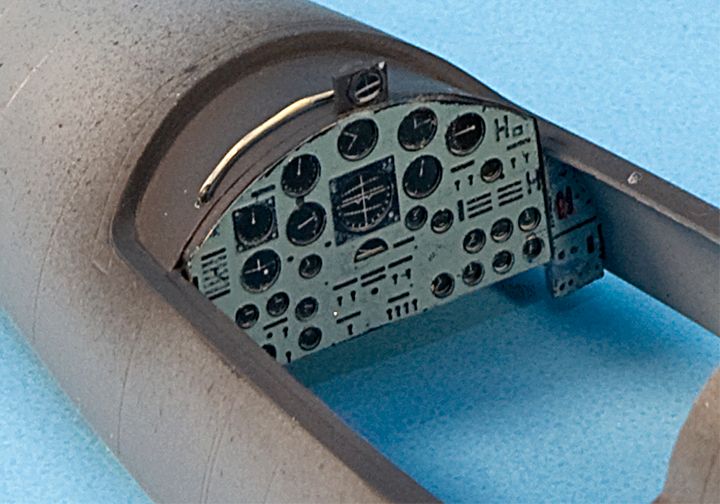
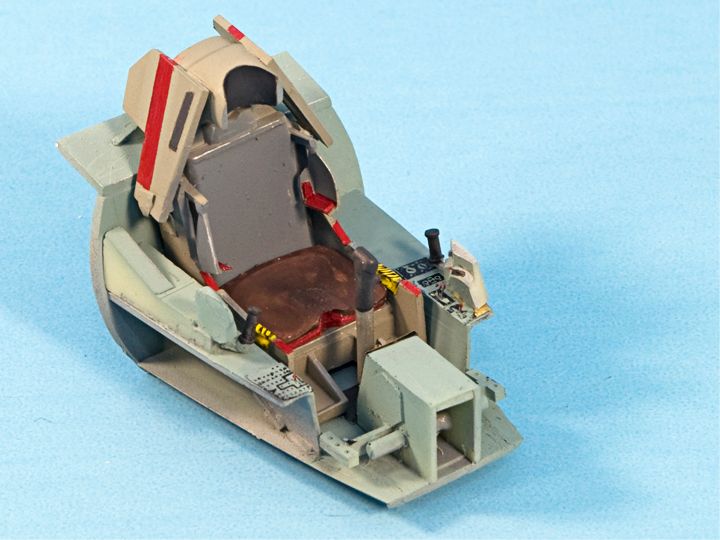
And the inside of the canopy, with scratchbuilt camera, flood lights and control panel
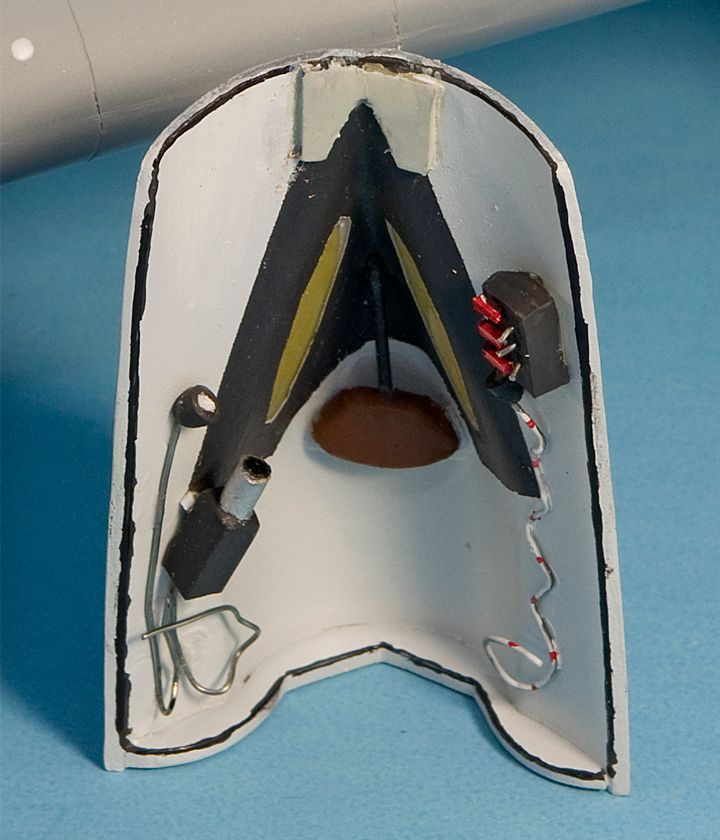
After I attach the pitots, she goes in for paint. But first I need to find a place that sells pipe cleaners so I can clean the funk out of my airbrush.
-Fred
Far as I can tell, with the exception of the fluid dump pipes that hang off the tail and the two pitot tubes on the nose, she's all together.
Here's a close-up of the landing gear (sorta)
And the inside of the canopy, with scratchbuilt camera, flood lights and control panel
After I attach the pitots, she goes in for paint. But first I need to find a place that sells pipe cleaners so I can clean the funk out of my airbrush.
-Fred
Gigatron
Sr Member
Actually I want to do a 1/72 shuttle too... probably once I get better at models. Is Revell the only 1/72 out there?
Hey Liz,
I don't know about any of the 1/72 shuttles, but be warned, it's going to be pretty big. Even in 1/144, the shuttle and booster stand 18" high. When I (hopefully) get around to doing a shuttle, I'm going for the Revell 1/144 Discovery. It's supposed to have the most accurate shape, of the available kits - at least according to the space modelers I've spoken with.
How's that X-15 coming along - any progress?
-Fred
LizardJedi
Sr Member
Yeah I remember hearing that the 1/72 is like, 24" long or something like that/ I'm fine with that, its just something that size I'd like to have an airbrush for, to make sure the large white and black areas are covered well.
As for my kit... I've been really busy building an airplane that actually flys (school project), and its a little insane at the moment. :wacko
Spring Break is next week though, so hopefully there will be some progress
As for my kit... I've been really busy building an airplane that actually flys (school project), and its a little insane at the moment. :wacko
Spring Break is next week though, so hopefully there will be some progress
LizardJedi
Sr Member
Somewhat on-topic: http://www.latimes.com/news/obituaries/la-me-robert-white24-2010mar24,0,1367170.story
RIP, sir.
RIP, sir.
Gigatron
Sr Member
Well, went back to the drawing board on the nose. After looking at dozens of pictures, I couldn't get the profile to look right. Finally, I ended up cutting off what I had, shortened the nose by almost 1mm, thinned it a bit and used a metal BB. It now resembles the ball nose on the real deal.
I also went and hollowed out the vectoring thrusters, so those look a ton better than before.
And she finally went in for paint, today. What a nightmare black paint can be. First, I painted it a really dark grey (poly Scale Tarnished Black). Then I masked of a few panels, not really following any particular pictures of the real bird. Then over sprayed with Tamiya Flat Black (XF-1). I tried to do that in a sorta blotchy manner, to look like random paint fading. Then removed the masking and sprayed over that to tone down the contrast. Then I made a lightened version of the black by adding a few drops of white and did some random spraying. Not a total cover coat, more like zig-zagging, just to break up the color. Now, she's got her first coat of Future, so I'm just waiting for that to dry. Then I'll do a second coat and when that's dry, she goes for decals and weathering.
-Fred
Similar threads
- Replies
- 6
- Views
- 632
- Replies
- 6
- Views
- 1,011