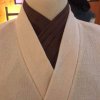
Obi-Wan Kenobi - Revenge of the Sith - Costume Build Collaboration
This costume is the collaboration of the wickedly talented @SMP Designs. We've worked on many projects in the past, you can see a lot of our work on his websites portfolio at: http://smpdesigns.com/portfolio/
This will be the second time I've done Obi-Wan's costume from Episode 3, you can see my first iteration here.

Flash-forward 5 years to my newest build with @SMP Designs.
Sean will be building all the soft-parts of the costume. Inner tunic, outer tunic, tabards, and obi.
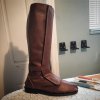
I'll be responsible for the boots (scratch made), belt and it's accessories (scratch made).
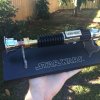
I've already purchased a Romans Props Inception Elite lightsaber, and did the install myself. It features a Prizm v5.1 board, NeCree RGB led, recharge port, 18650 battery, 28mm Railmaster speaker, kill key, Goth Padawan Chassis. I've got a few fonts installed, and can cycle through all the colors of the rainbow, etc.
Both Sean (SMP Designs) and I will be adding to this thread as progression is made.
Here are a few photos of the work in progress thusly.
Various WIP photos of the inner and outer tunics, obi, and fabric which we've custom dyed.
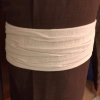


Boots, WIP
Belt, WIP
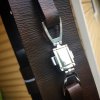
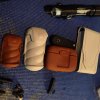
I 3D modeled, printed, and have cleaned up my own functioning pouches for the belt, WIP
Lightsaber, I've upgraded the clamp card to a Slothfurnace one since this photo was taken.
This costume is the collaboration of the wickedly talented @SMP Designs. We've worked on many projects in the past, you can see a lot of our work on his websites portfolio at: http://smpdesigns.com/portfolio/
This will be the second time I've done Obi-Wan's costume from Episode 3, you can see my first iteration here.

Flash-forward 5 years to my newest build with @SMP Designs.
Sean will be building all the soft-parts of the costume. Inner tunic, outer tunic, tabards, and obi.
I'll be responsible for the boots (scratch made), belt and it's accessories (scratch made).
I've already purchased a Romans Props Inception Elite lightsaber, and did the install myself. It features a Prizm v5.1 board, NeCree RGB led, recharge port, 18650 battery, 28mm Railmaster speaker, kill key, Goth Padawan Chassis. I've got a few fonts installed, and can cycle through all the colors of the rainbow, etc.
Both Sean (SMP Designs) and I will be adding to this thread as progression is made.
Here are a few photos of the work in progress thusly.
Various WIP photos of the inner and outer tunics, obi, and fabric which we've custom dyed.


Boots, WIP

Belt, WIP

I 3D modeled, printed, and have cleaned up my own functioning pouches for the belt, WIP

Lightsaber, I've upgraded the clamp card to a Slothfurnace one since this photo was taken.

Last edited:


