1:1 Millennium Falcon Cockpit Replica - Group Build

whoa that is super weird. Hard to tell but I think it's maybe an optical illusion, maybe lens distortion? Check out the clip

https://youtu.be/PxDqEojPK6Q?t=45s

and the chair slides over as Chewie leans in.

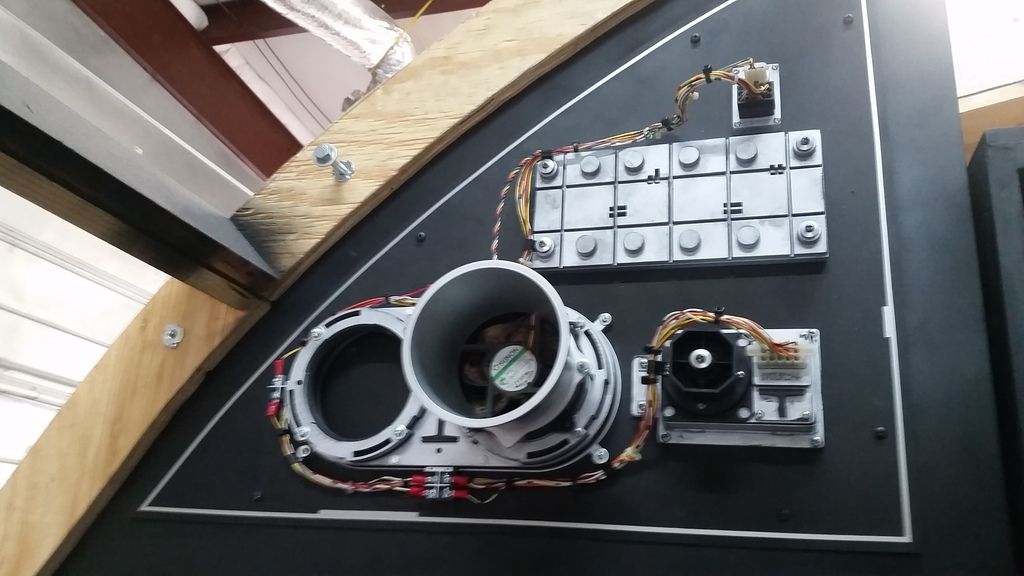
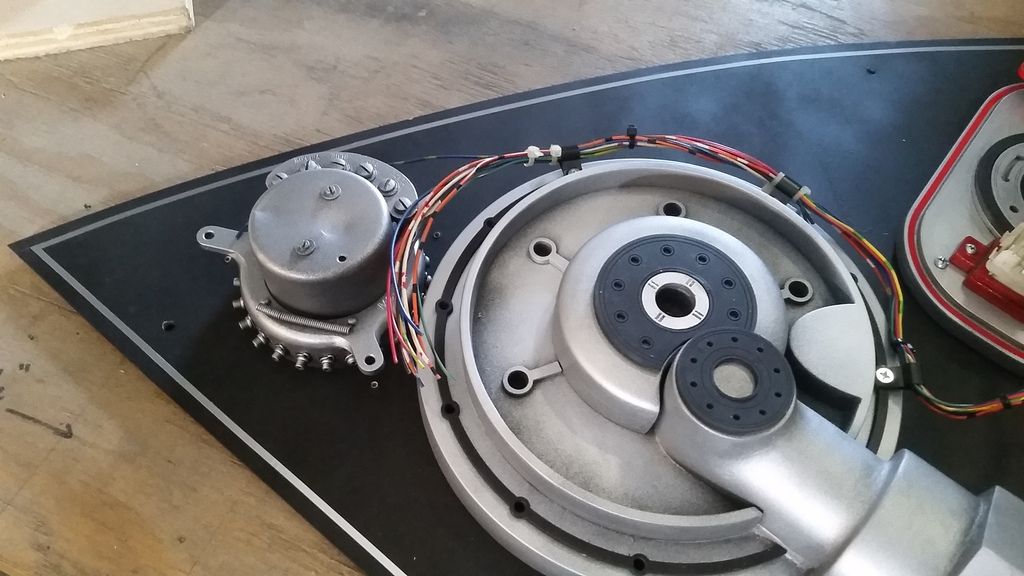
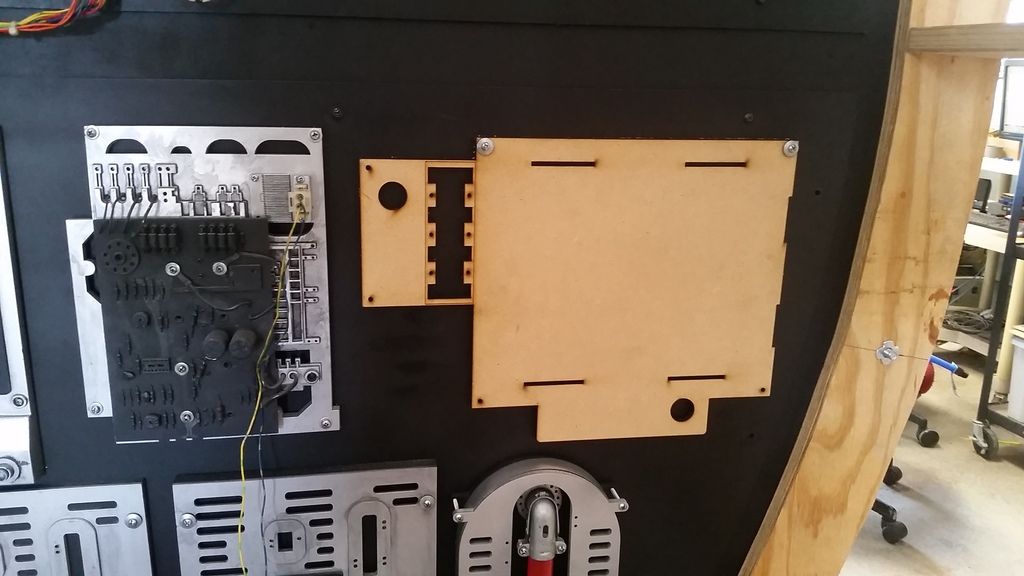
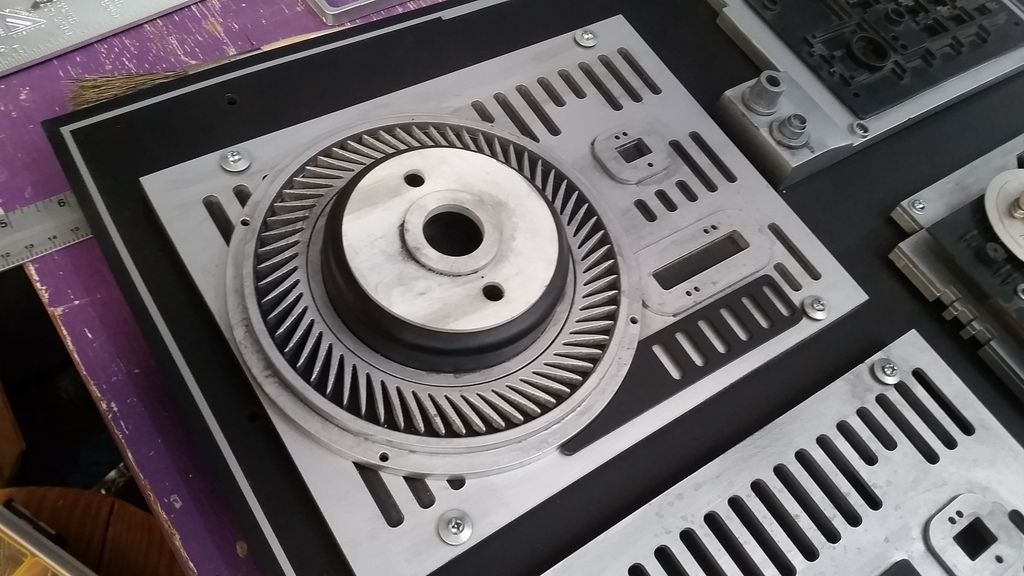
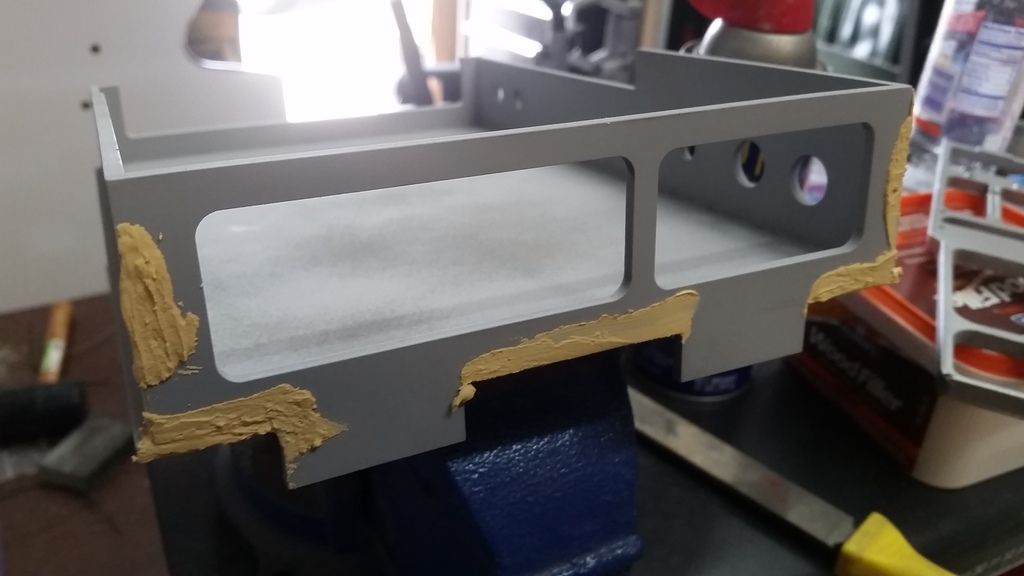
I really wish there was a clear shot of the chair pedestal they used in the OT. As you said, camera angles, distortions, etc... Frustrating!

- - - Updated - - -

Well, it IS a movie set. They don't live in the same reality as we do. They just need to make things work, like a moving chair that never moved before or an interior that doesn't fit inside the exterior.

We're way nerdier than set builders. We have the luxury of time and space. They only have to meet deadlines and stay within the frame.

Hey K,

I couldn't have said it better myself! :)

- - - Updated - - -

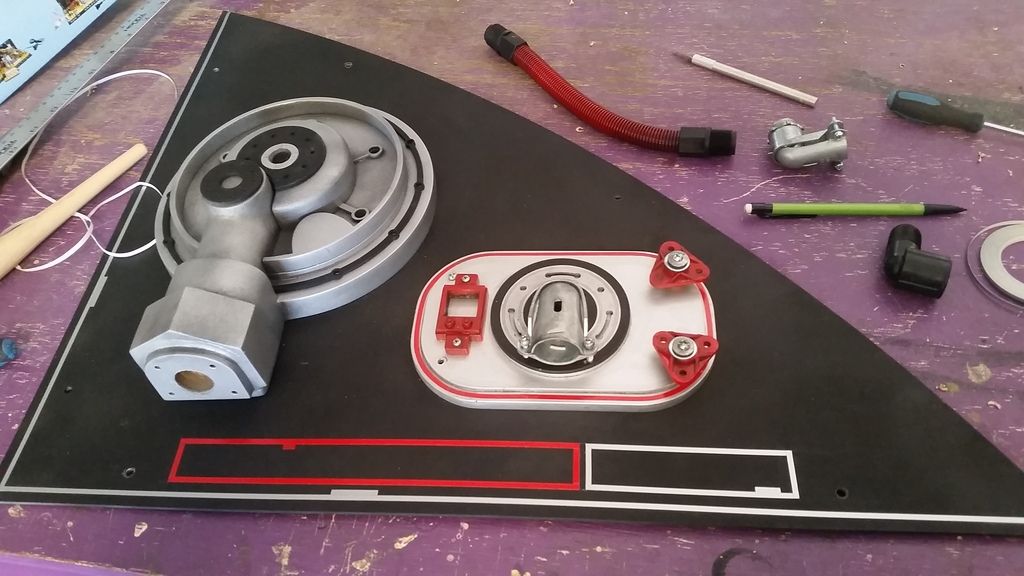
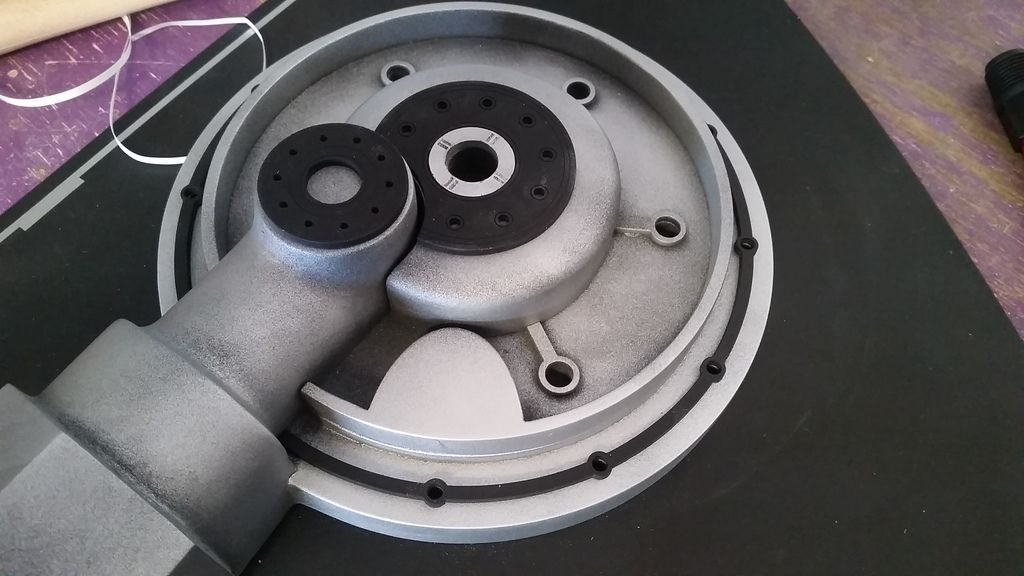
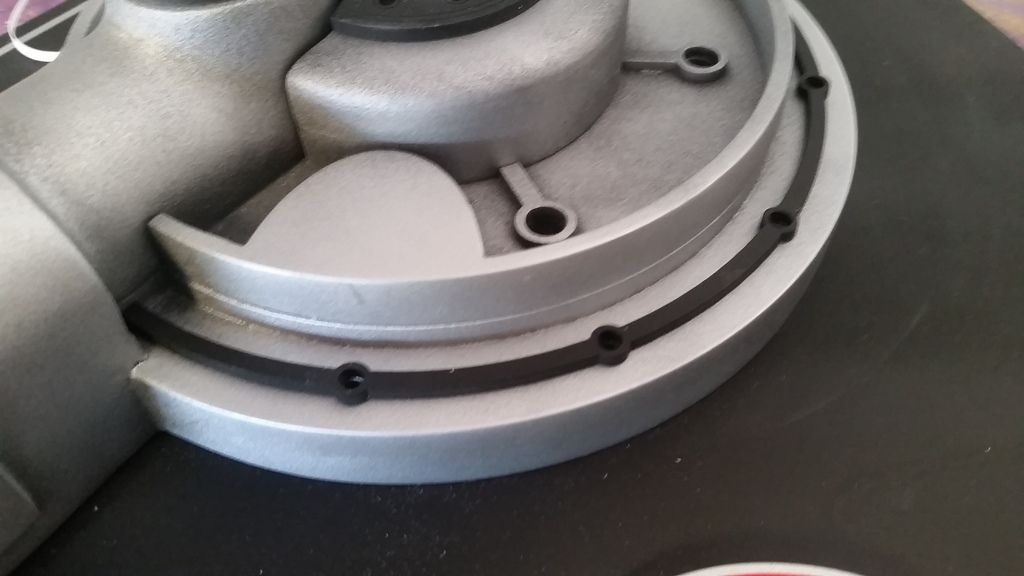
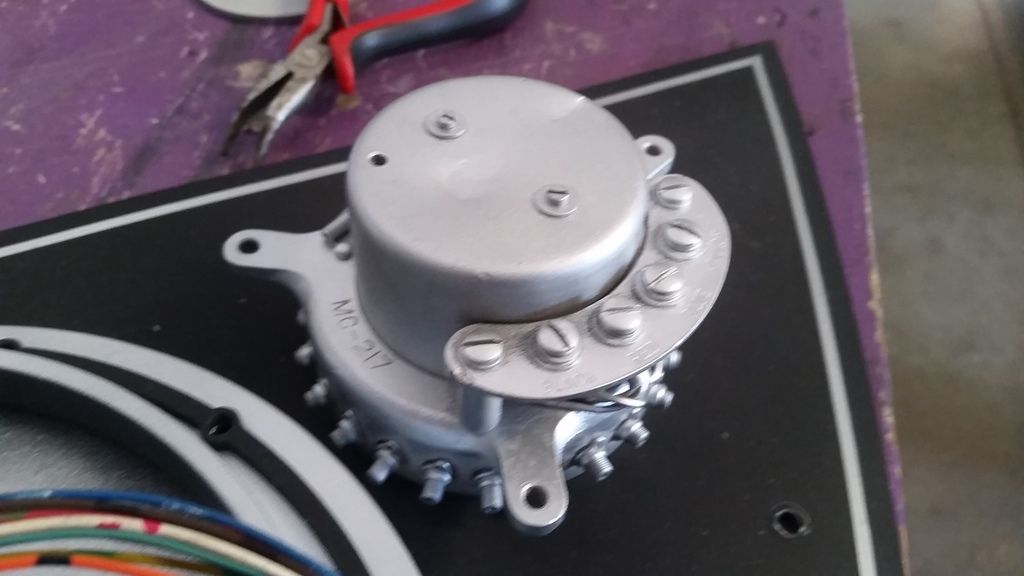
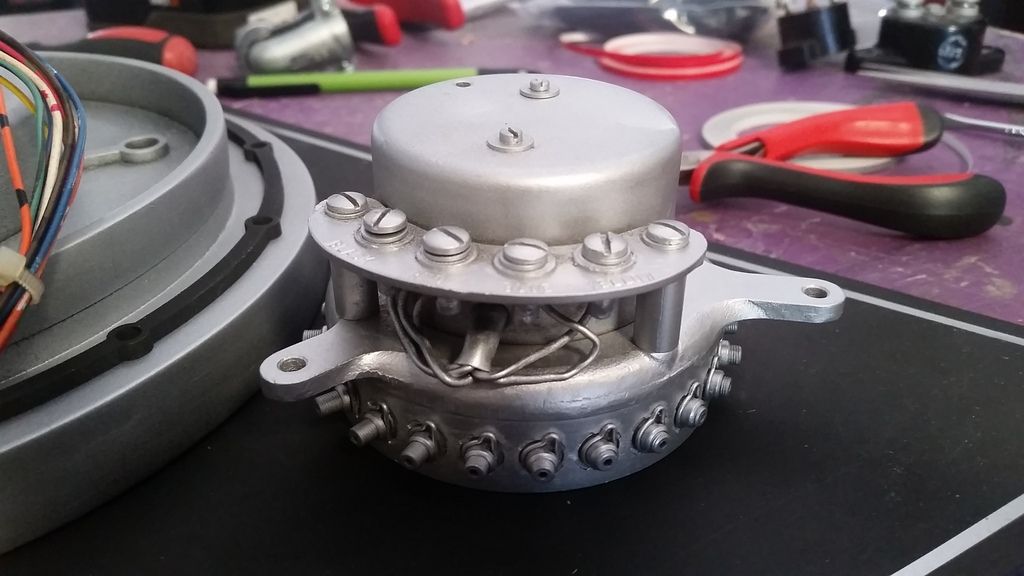
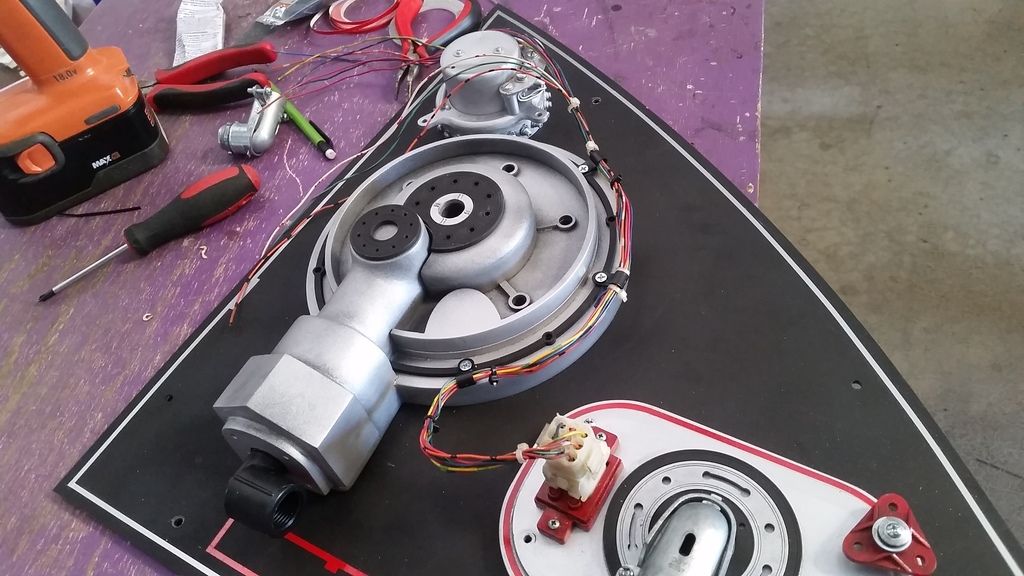
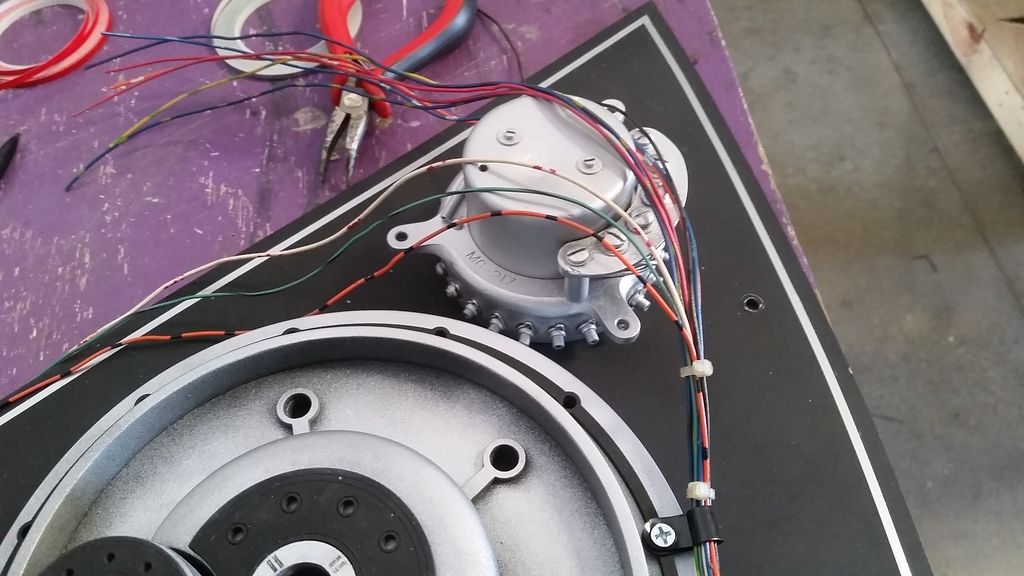
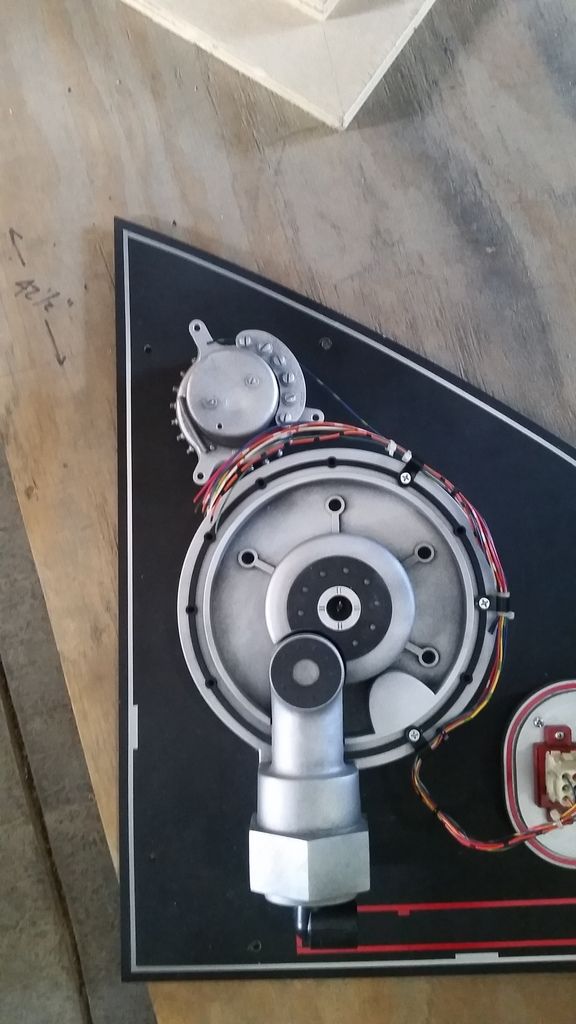
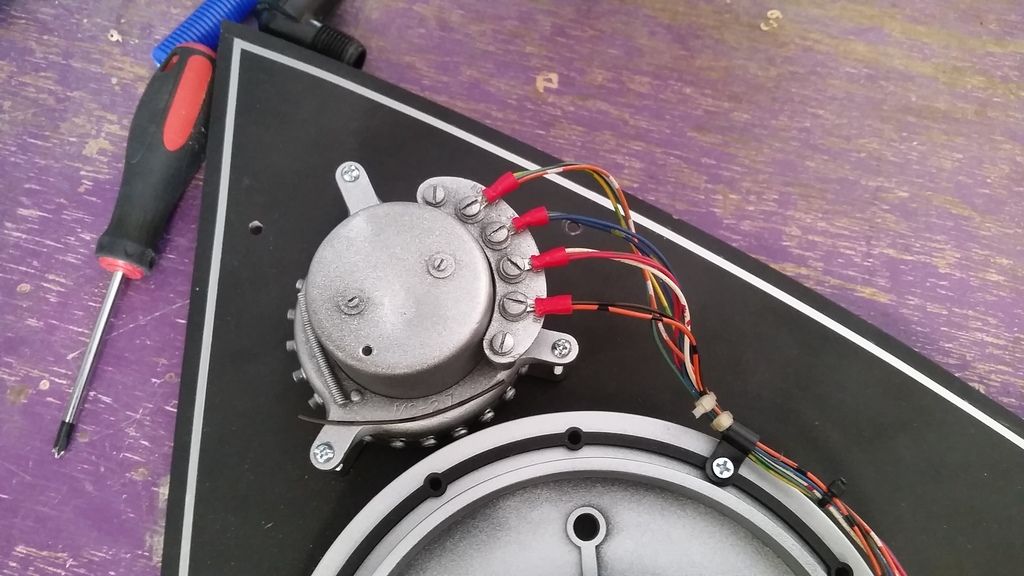
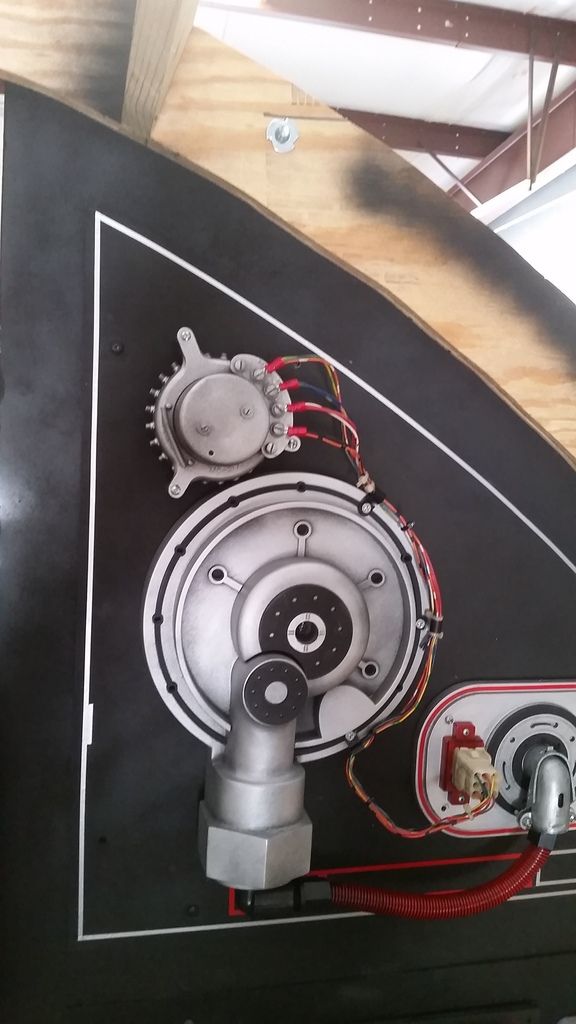
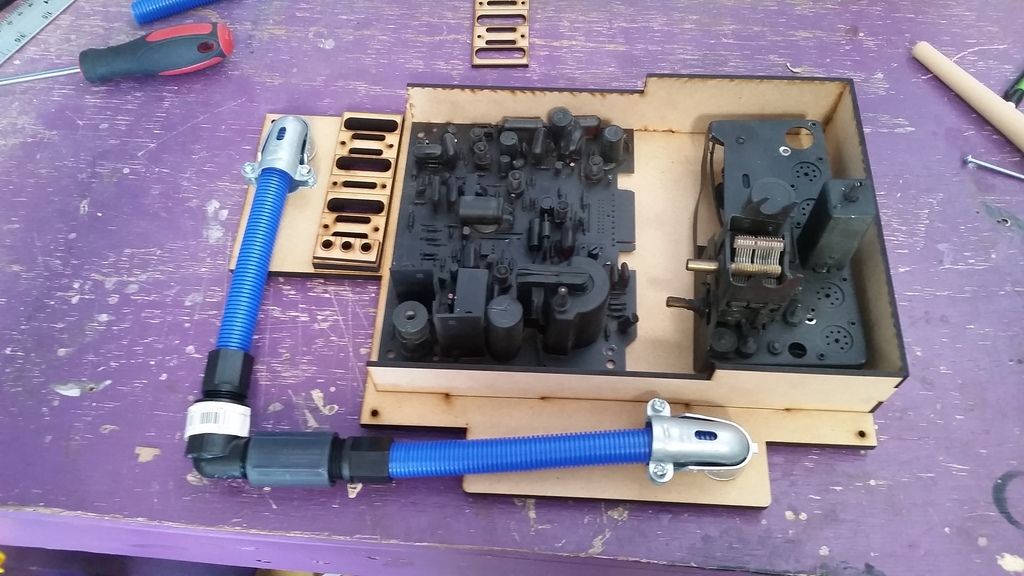
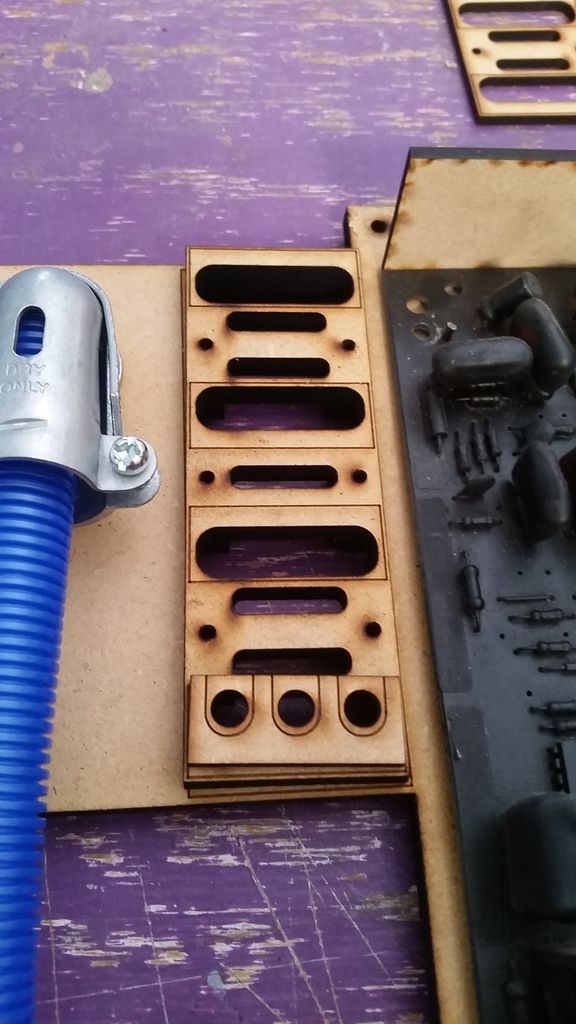
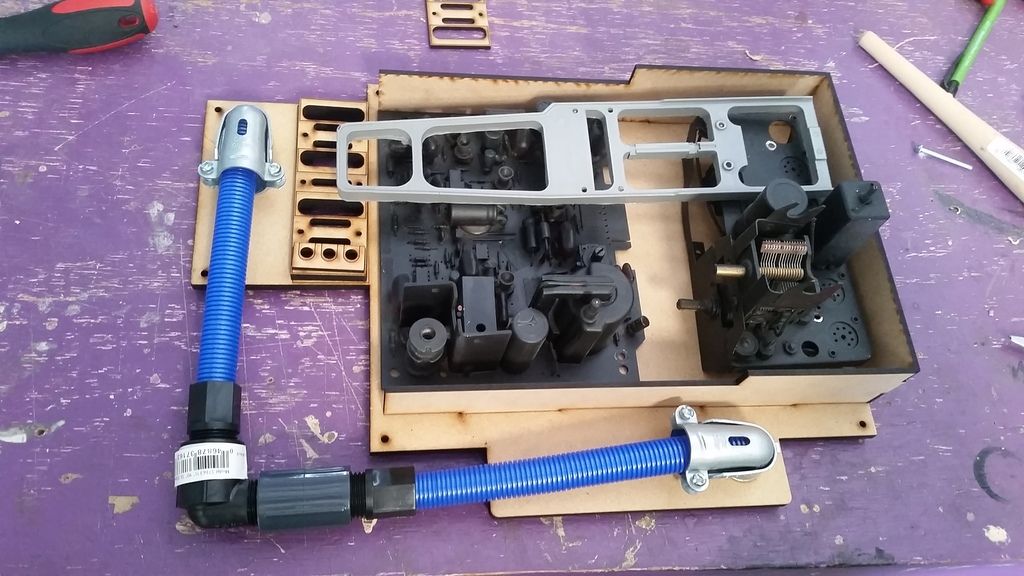
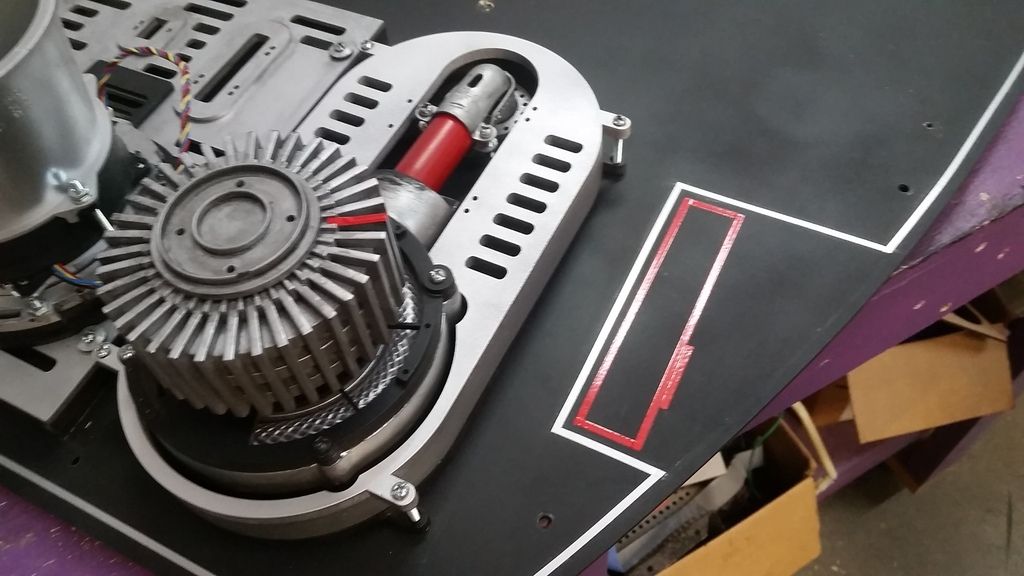
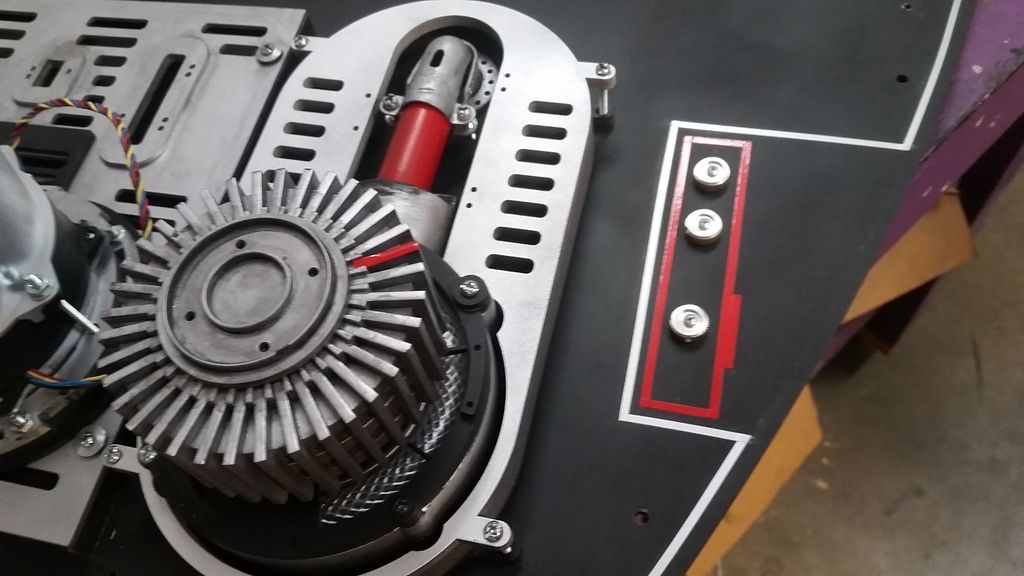
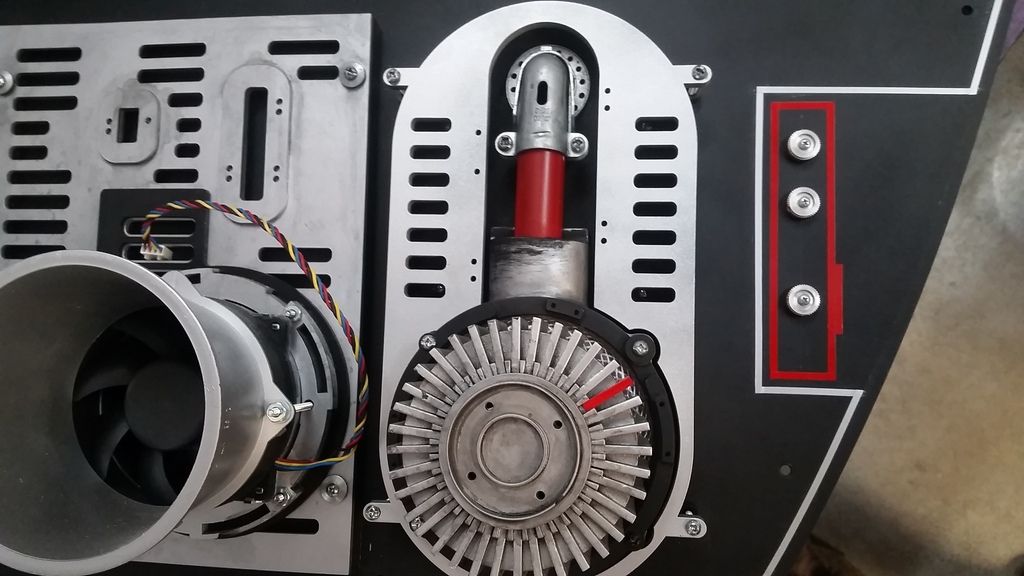
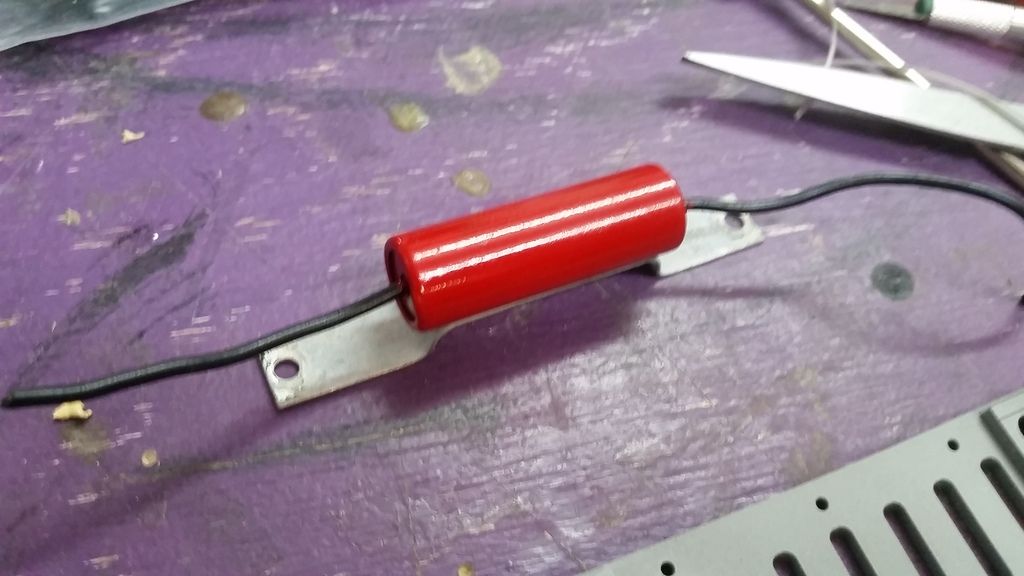
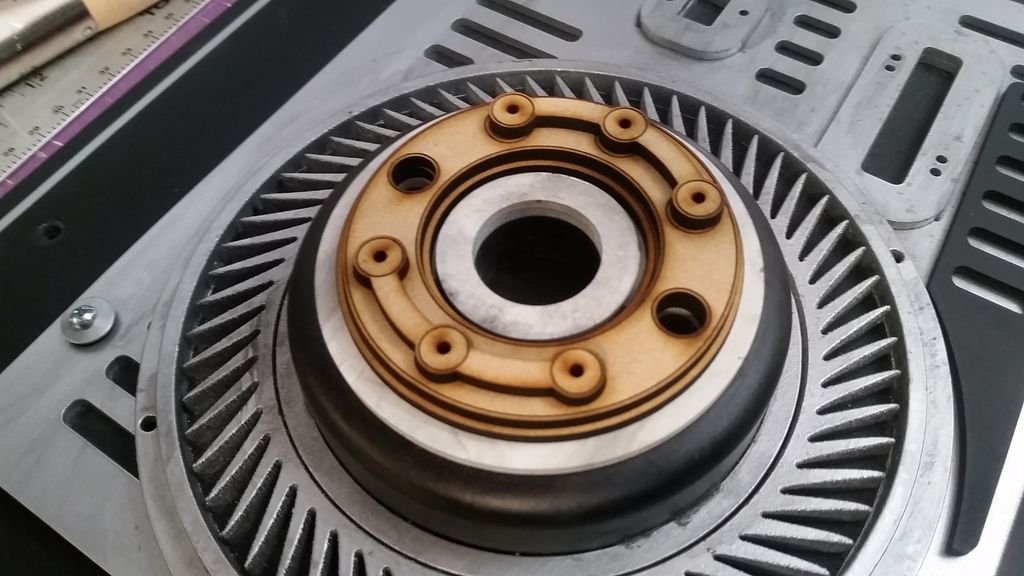
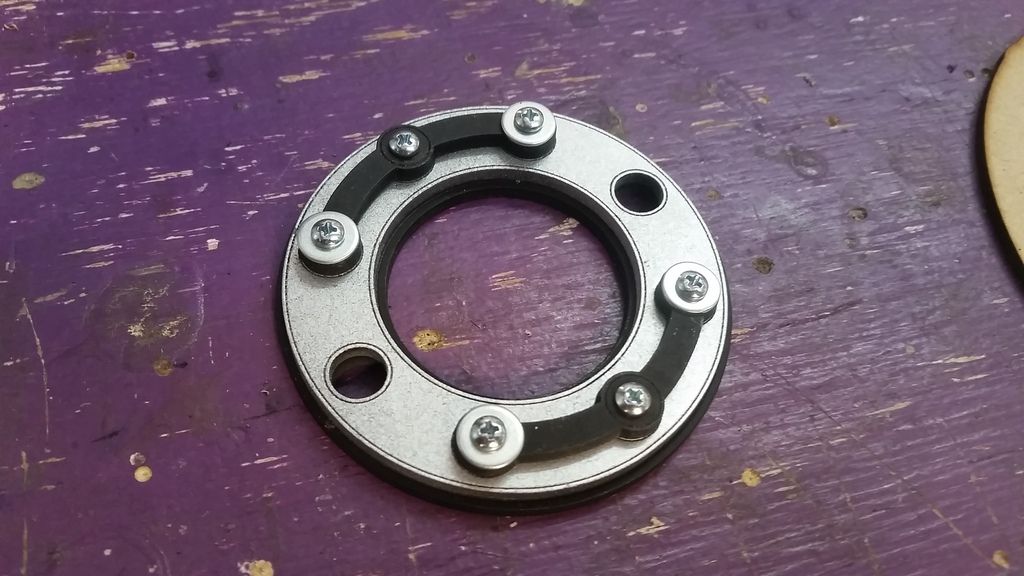
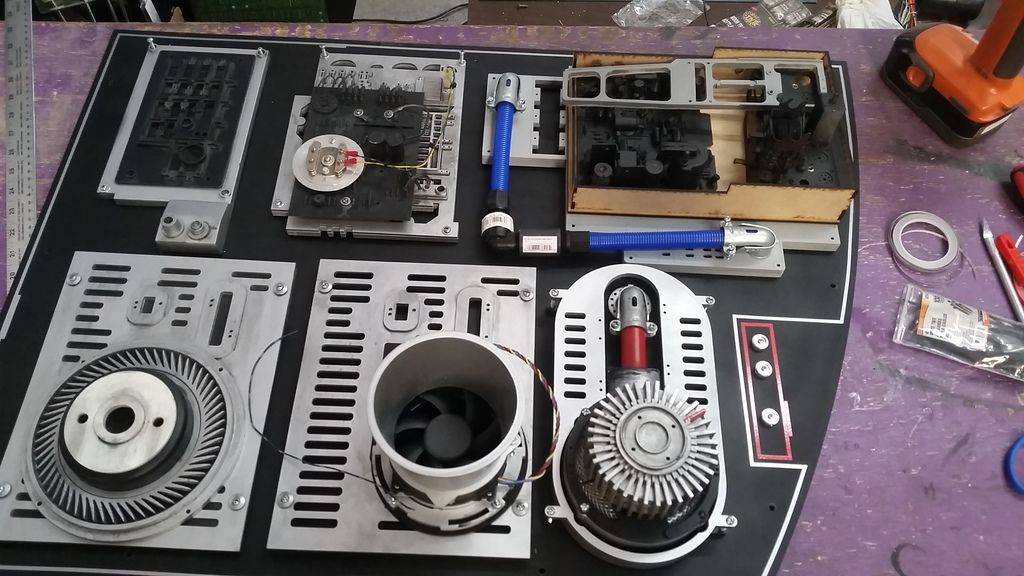
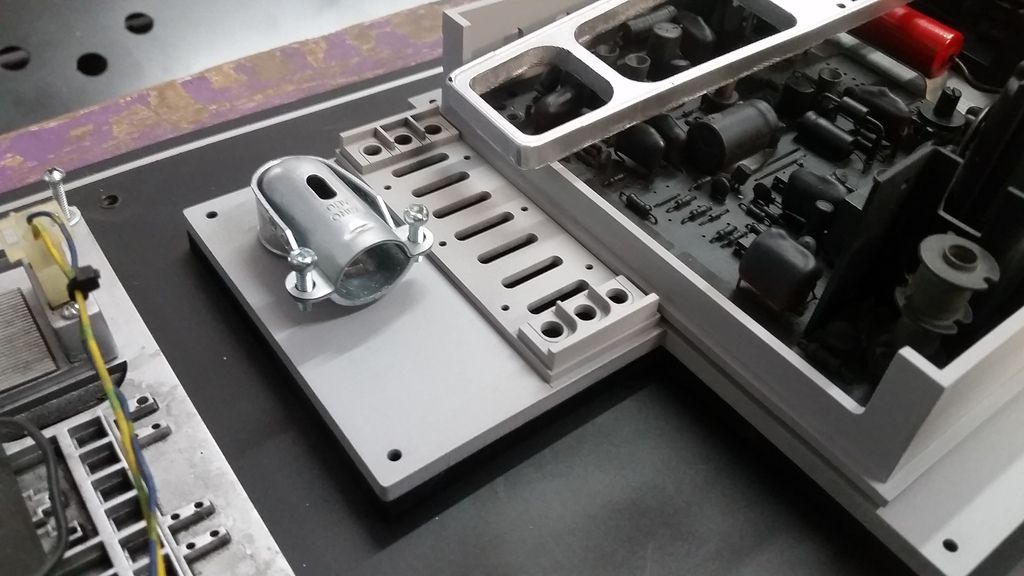
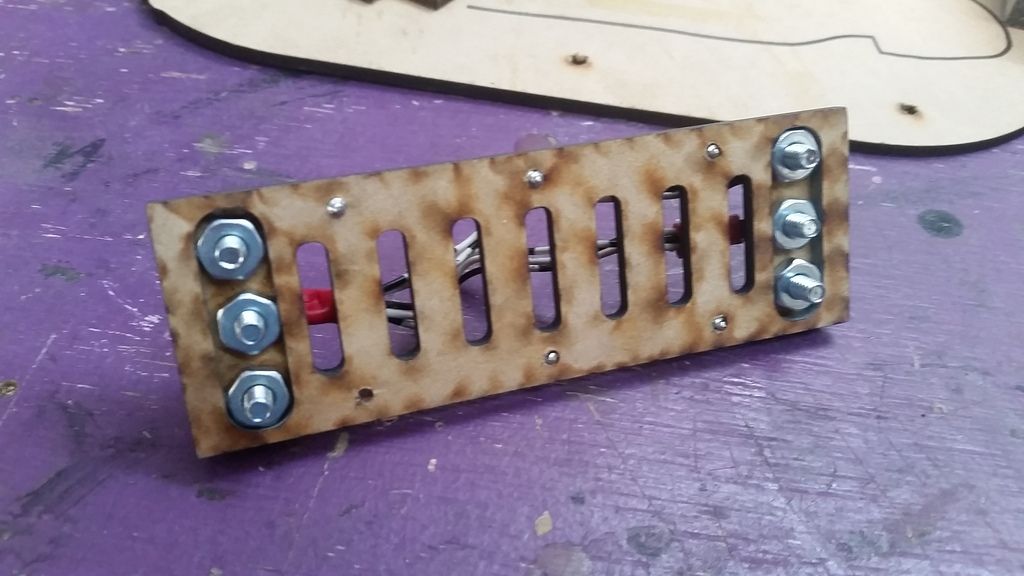
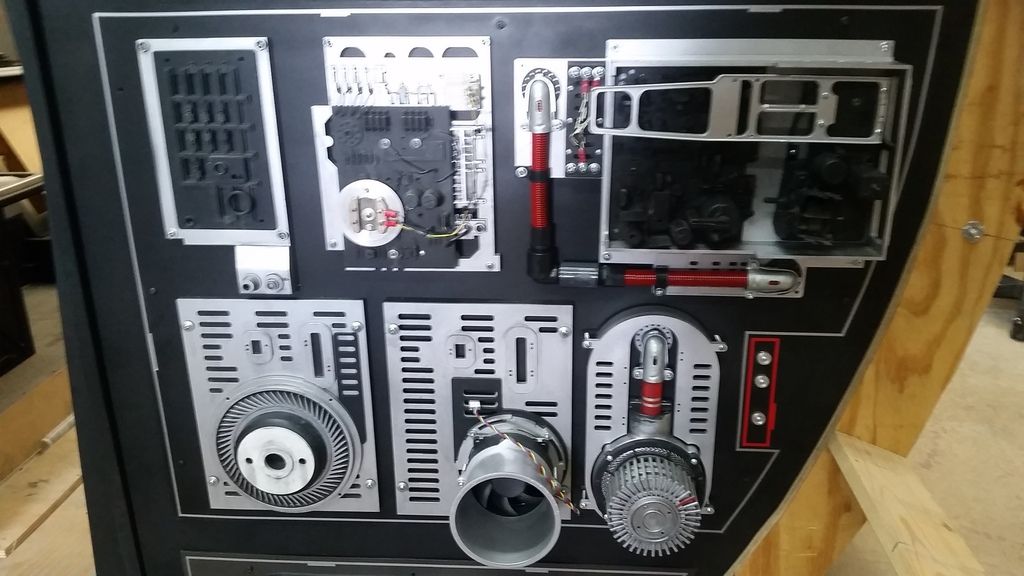
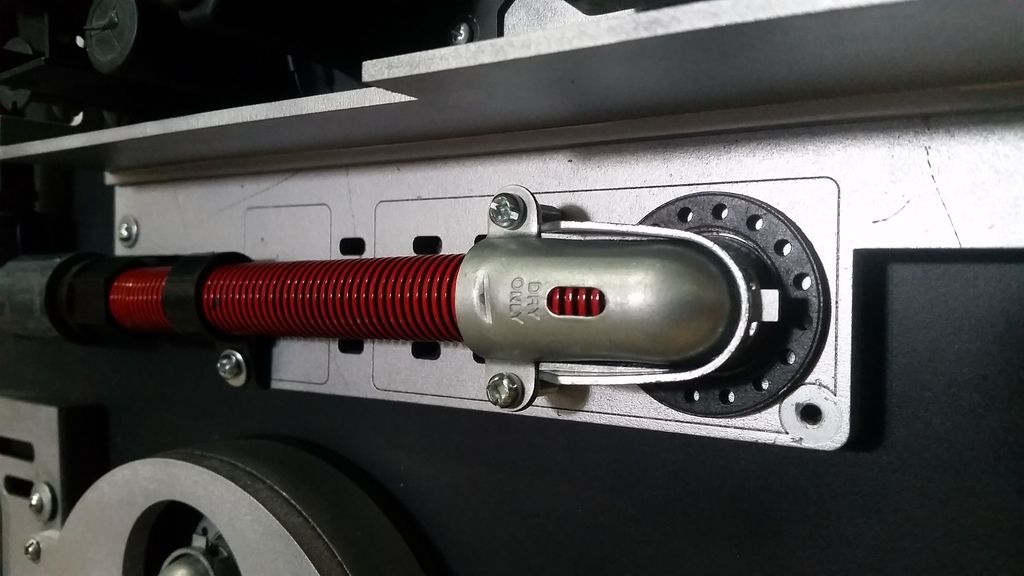
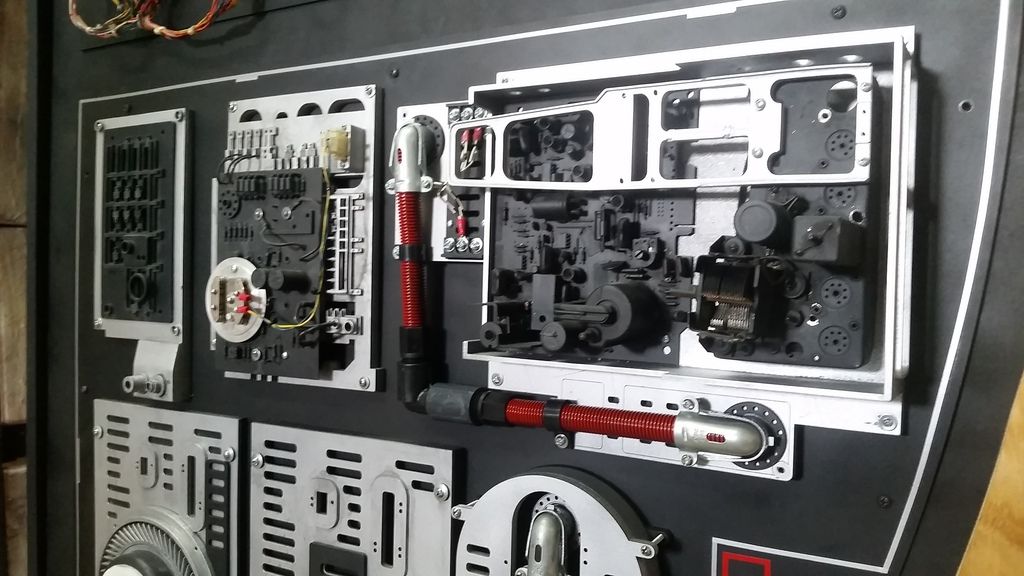
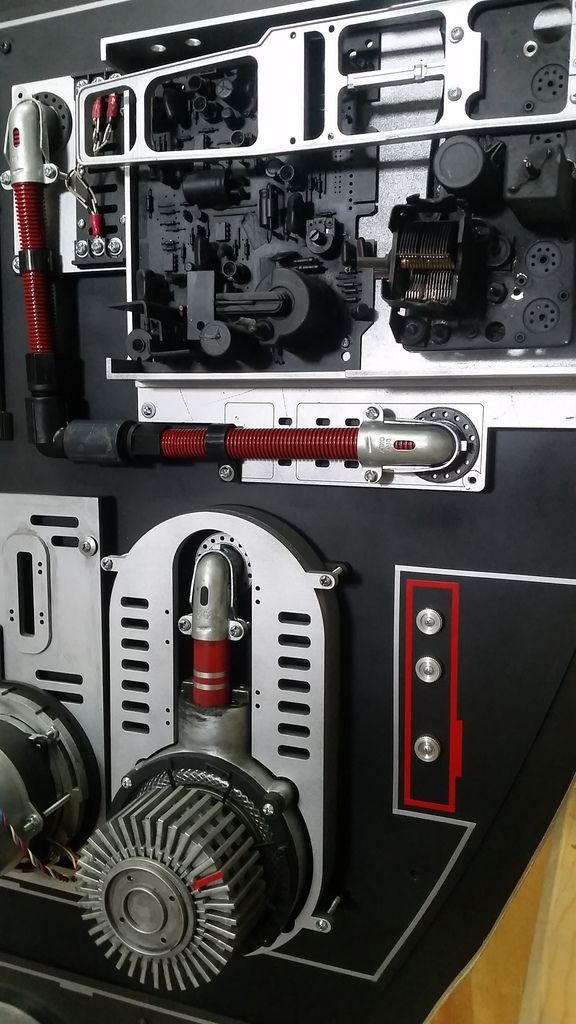
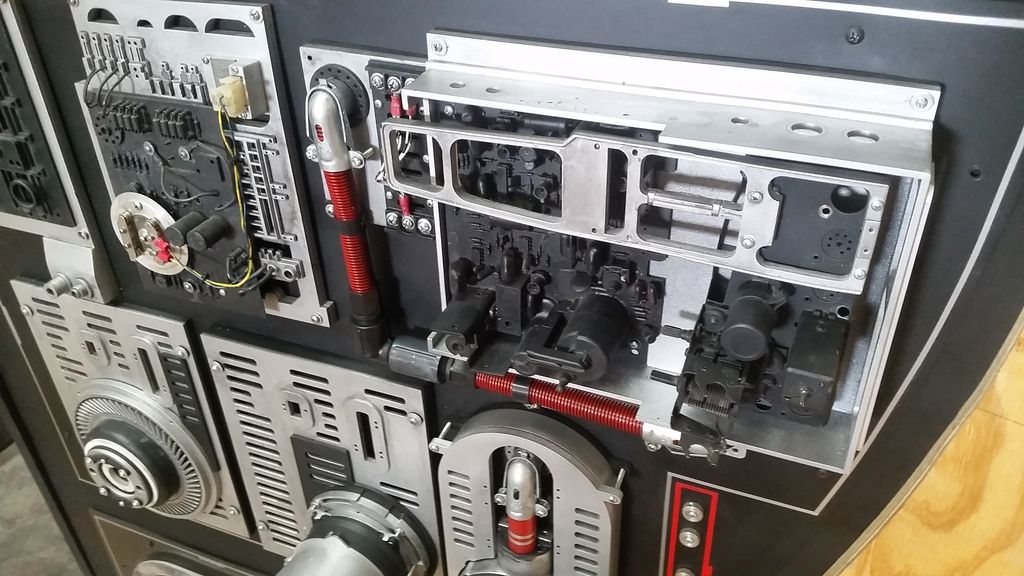
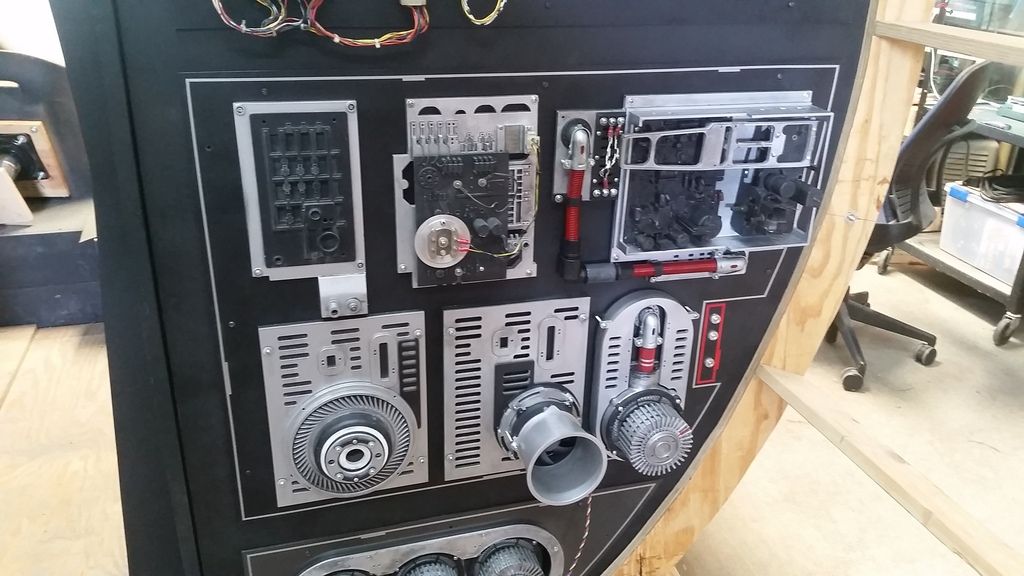
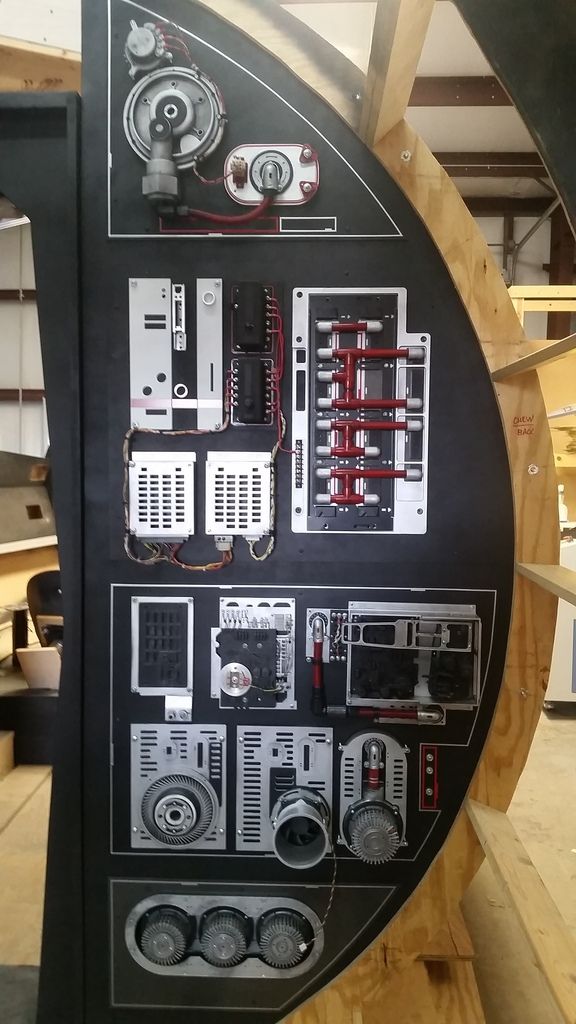
Okay, the soft glow coils sold me :lol Are completely set on a colour for them? I kinda liked the orangey yellow better than the red personally

Hey dDWw,

I really liked the orange glow as well. And what a difference just a tiny amount of illumination can make! Brought the entire coil to life! :)

- - - Updated - - -

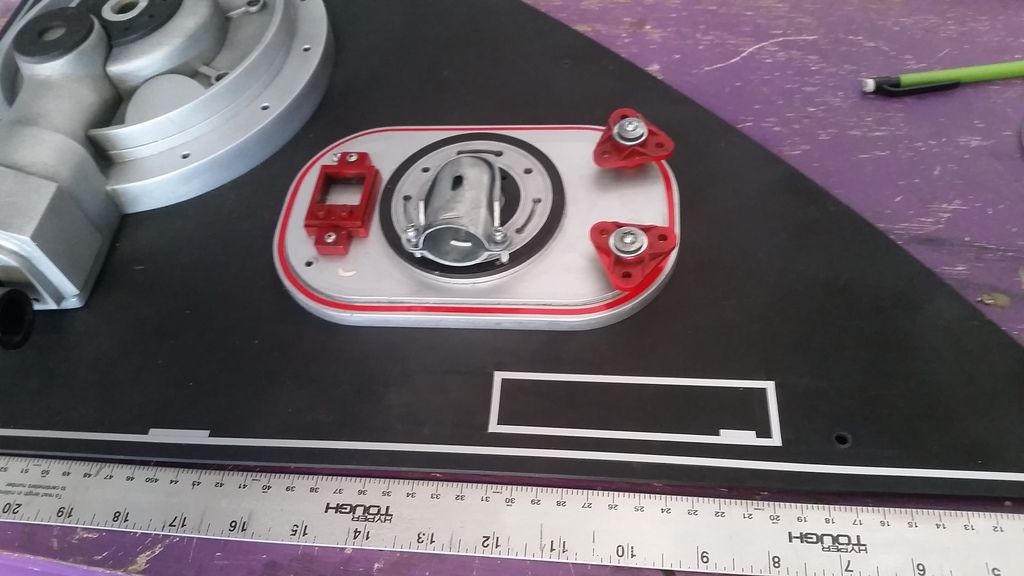
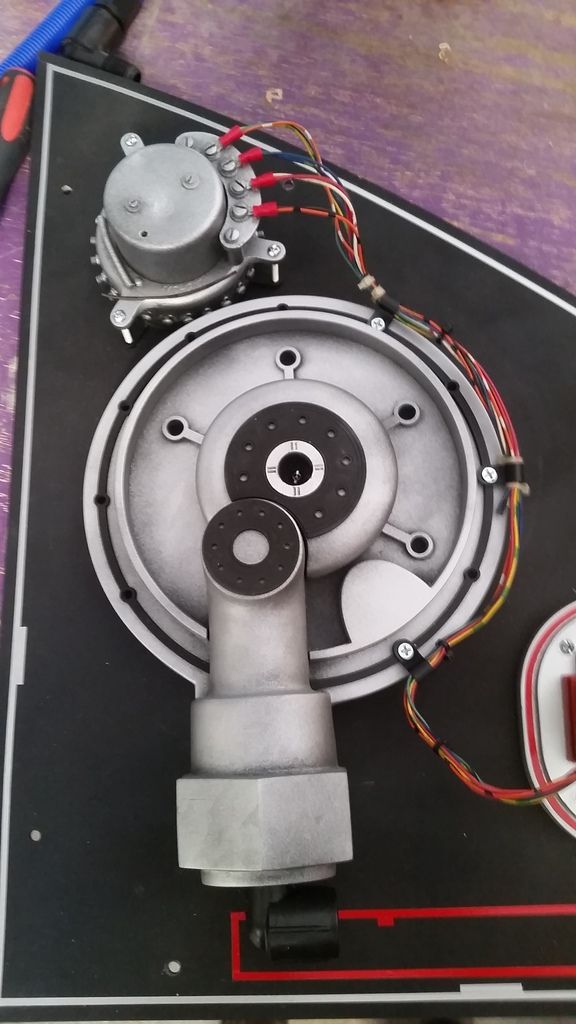
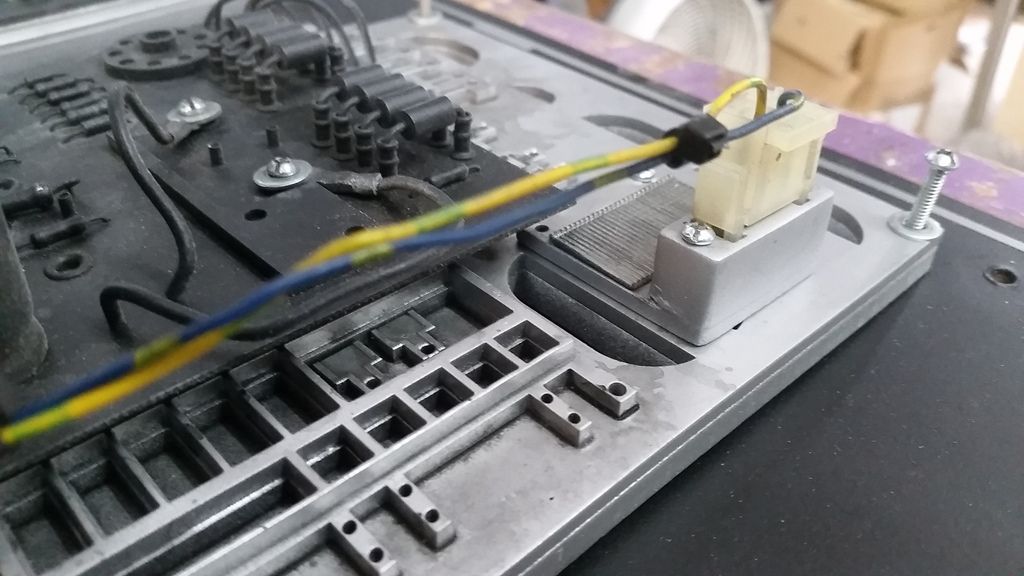
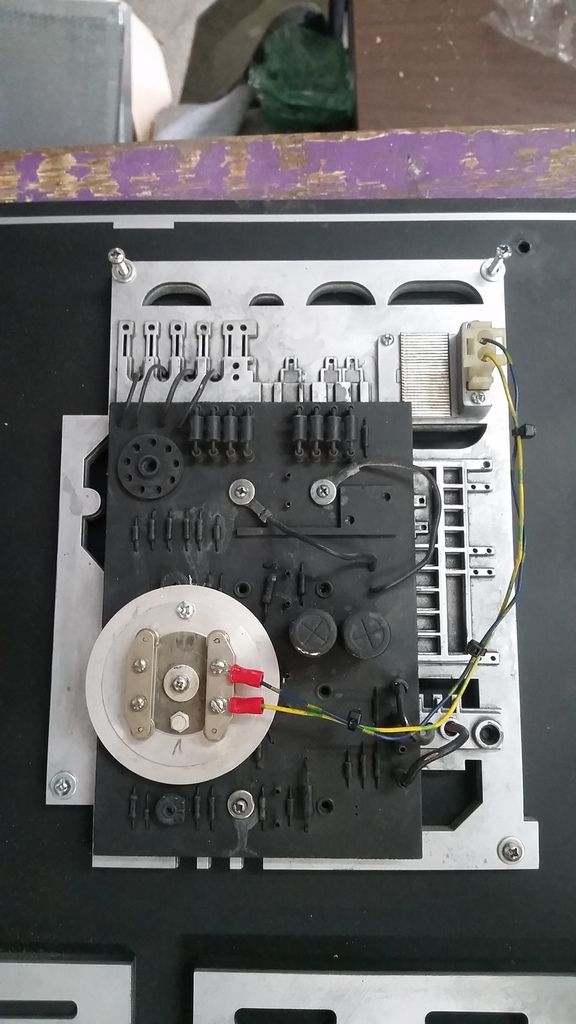
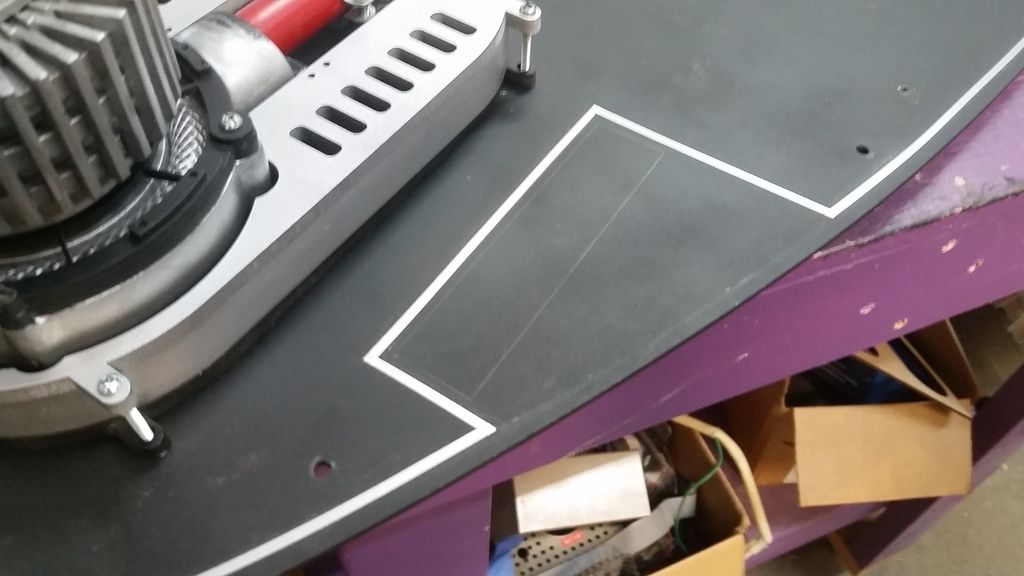
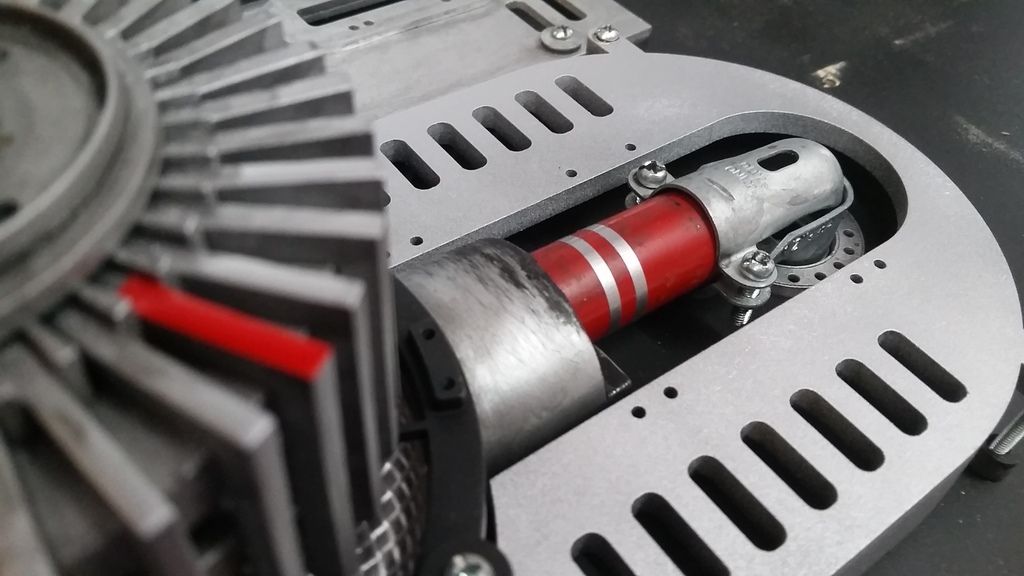
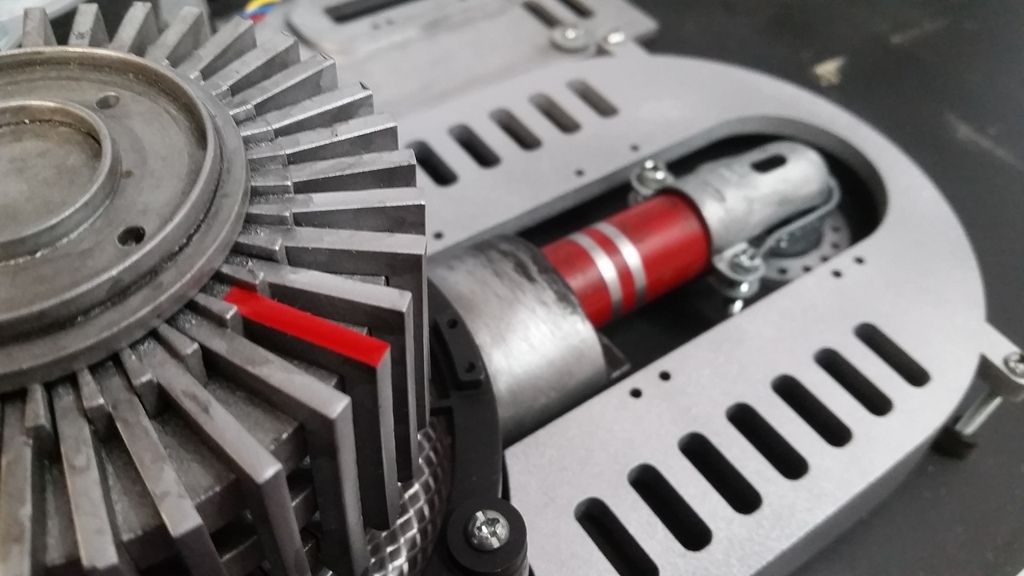
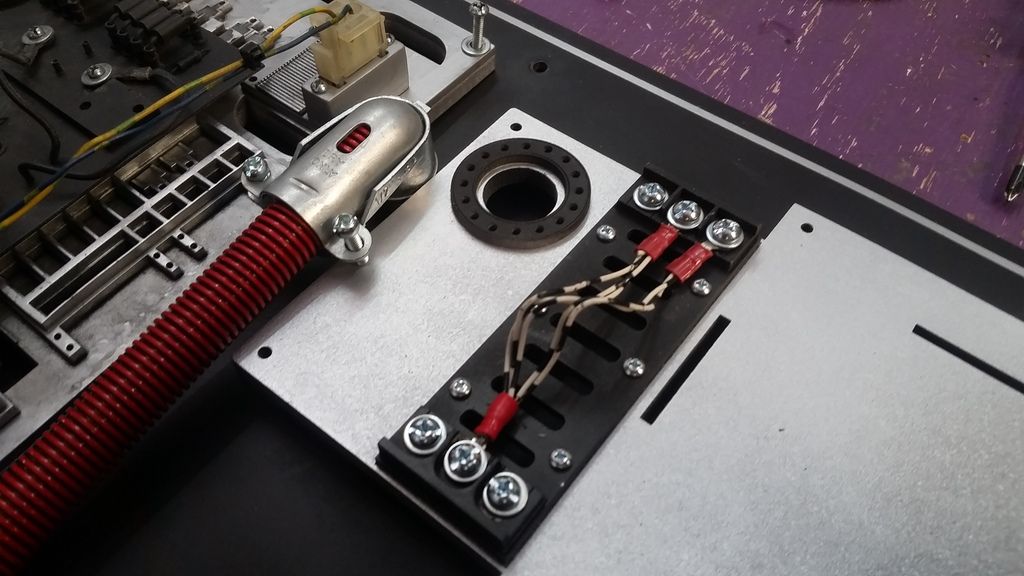
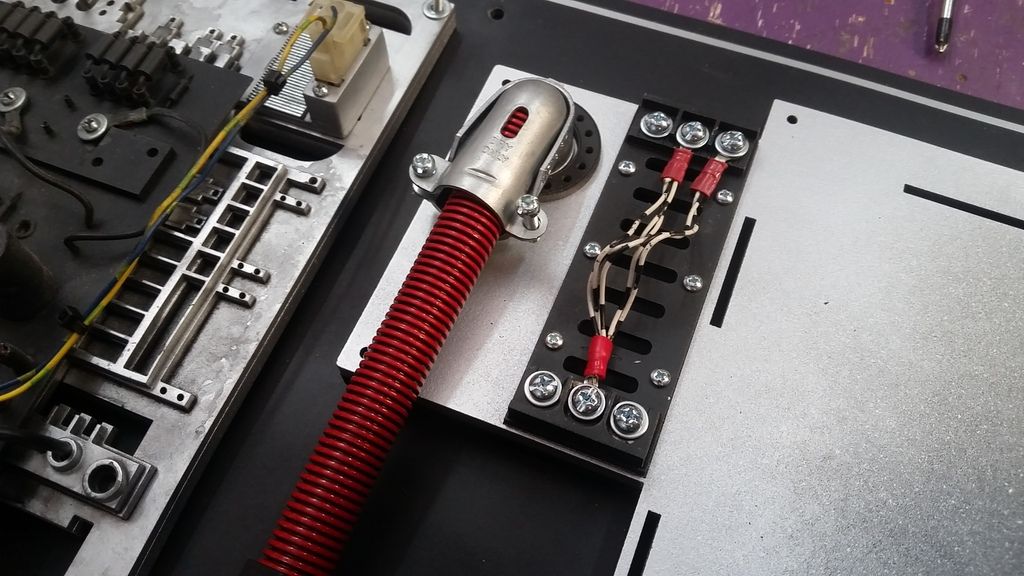
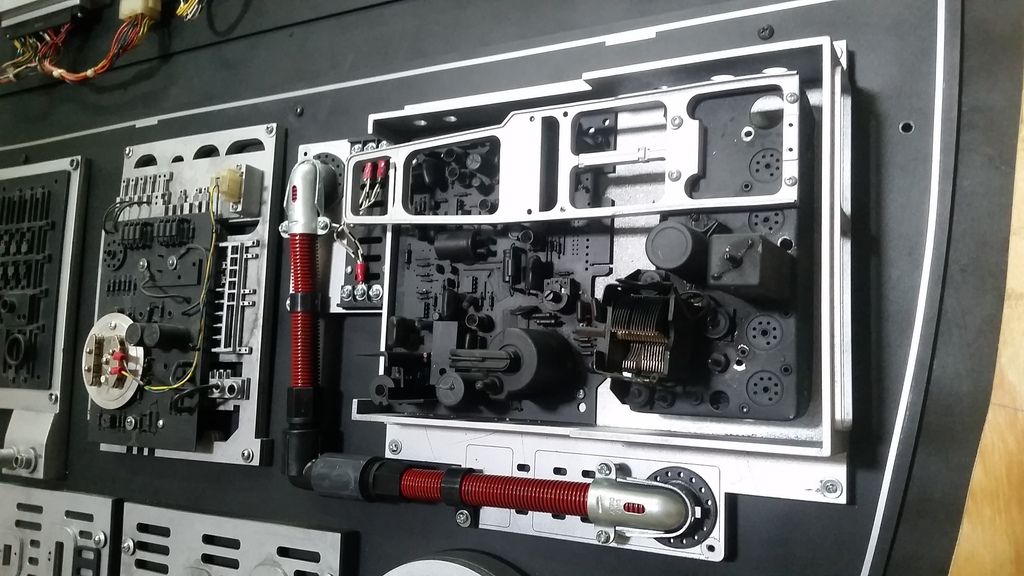
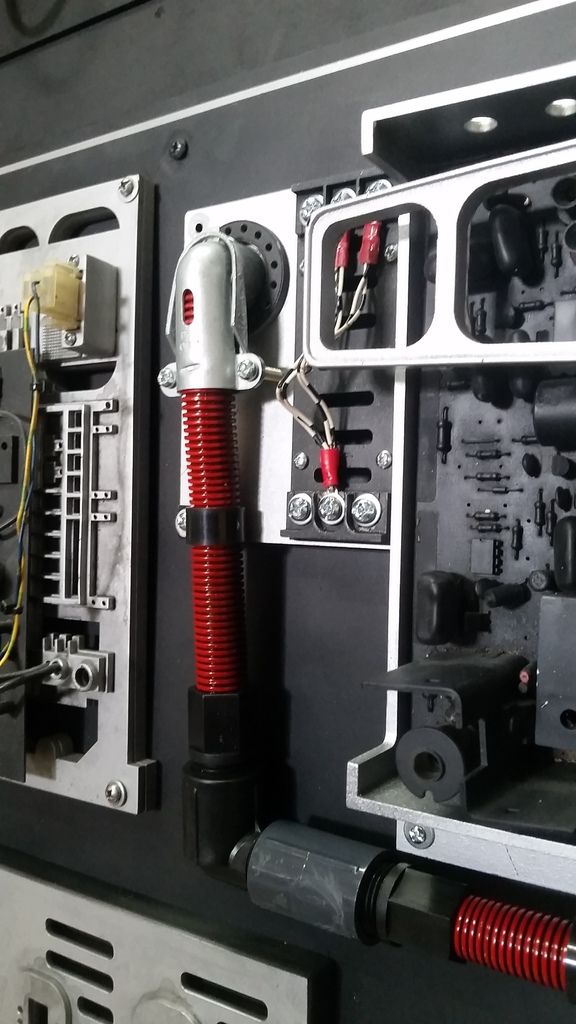
wow, huge update, getting there. Love these touches of red

Hey OC,

Thanks so much! I'm hoping there isn't too much red.

- - - Updated - - -

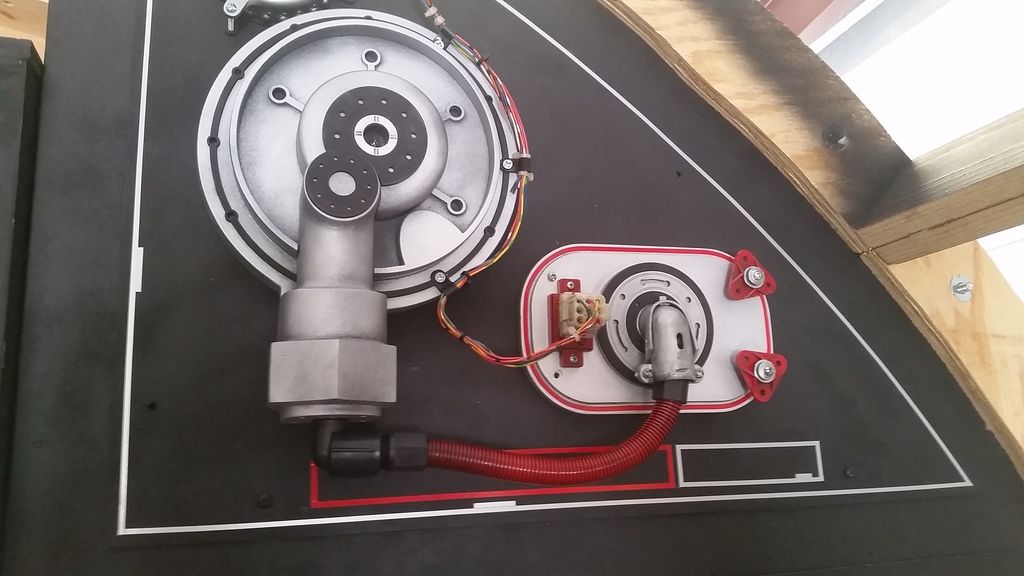
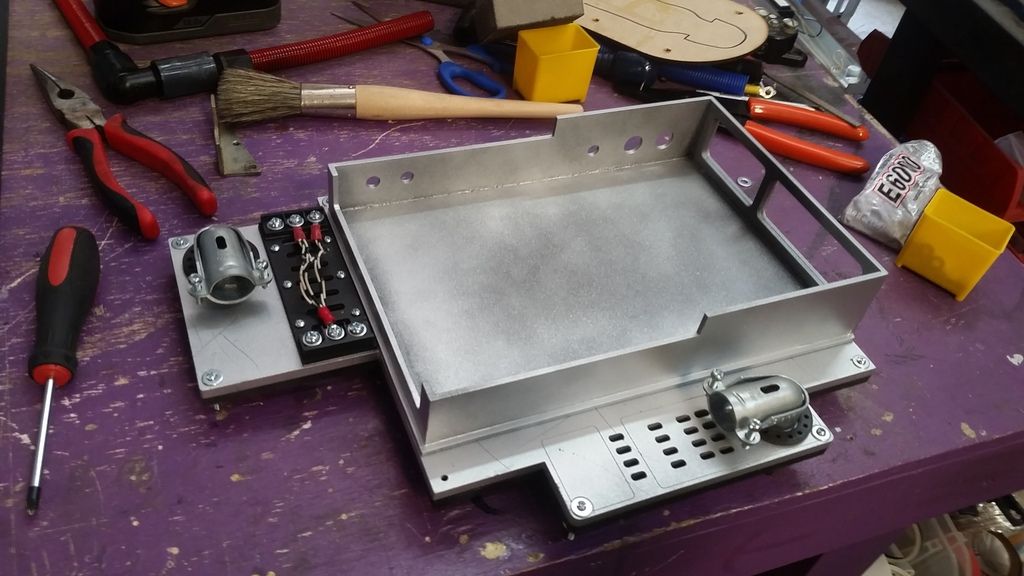
I am still in awe about each and every update!

Is this a FULLTIME project? What are you guys doing for a living?

You have to post some comparsion pictures of your and the screenused cockpit at some point...pretty please :)

Hey O,

Thank you very much! I appreciate the continued support. The project is only a part time adventure. A majority of the work you see is being done on the weekends. But things are getting ready to change VERY soon. The goal is to have this finished before EP VIII! I think we can do it!

I'll post some comparo pics of the ESB cockpit and ours. I'll try to get the same angles and color/BW :)
 
Schwing! Best update in months!

I was kind of worried (?) about the PVC panel until you painted it. Was afraid it would look exactly like what it is, PVC fittings glued together. That paint scheme just completely changed it. Looks absolutely awesome!

The lighting on the coils is great. Maybe light them all in a yellow/orange and make one in a flickering red, like there may be a problem. That would make a neat spot for a smoke effect.

I don't know how you keep improving on what was totally bitchin' months ago. You have an incredible eye for detail everything you come up with that isn't canon just keeps plussing the project. I think you need to give your brain a rest and let it cool down for a while. Those Nav seats aren't going to build themselves mister ; )

Hey K,

LOL! Thank for the very kind words! The cockpit entrance was based on the TFA version. Being 30+ years, I decided to break away from the exact look of the TFA version and add my own spin to it. Since we've never seen that area I felt I had artistic license to go in any direction I wanted. I'm always looking on Ebay for used aircraft and automobile parts for inspiration. When I see a part that might fit or visually help a certain area that's when the creativity kicks in. Hope that makes sense?

I was really worried about the PVC pipe as well. Having created the Quad Laser using PVC I felt somewhat confident but still had that sliver of doubt. The red is actually too glossy for my tastes so another coat of the black wash is coming.

I'm DEF going to have one coil flicker as if there is a problem. Still not sure on what color(s) to do just yet. I really liked the orange look and I like your idea about using red for a faulty coil. Great idea!

I know I know I know... I've been slacking on the Nav Chairs. I HAVE to change focus from time to time. Believe it or not, bouncing from task to task helps me stay fresh... mostly.
 
I hear you on bouncing around. I've been building a hot rod for my father-in-law for the last 4+ years. It is a ground up project and it seems like it's one step forward and 3 steps back at each turn. I have to focus elsewhere on the car when I hit something that bogs me down. You just bounce back to something you burned out on in the past and it seems like voila! Something you couldn't get past before is done in no time. Had that experience this past weekend.

It helps when you can keep it a hobby and not let it turn into a job. That's when the weight of it drags you down. That's how I came across the DeAgostini Falcon. Just looking for a mental break.

Soldier on, good man. You've got 3-1/2 months left. Yikes!
 
That's some far-out, over the farm, way past the prairie level of greeblification - and it works!

If it were 1935, you'd be designing for the Ministry and the up-coming main event, lol!!
 
Sofa!!! These latest rounds of updates are just amazing! You truly are the GreebleMaster!

One thing that keeps nagging at me is how well you have tucked and routed the wiring for all the parts outside the cockpit. It is the Falcon after all. It seems like it needs a few sections left hanging in disorder with scorch marks from an overload. Maybe a piece that had blown out and then taped together with the scoring and damage visible around the hasty repair. It just seems too "perfect" if you catch my drift. Every time they peek inside a hatch or behind a panel it always reminded me of the chaos caused by someone who repaired on the fly without the foggiest clue what they were doing!!
 
Three items:

1. Wonderful update!
2. I like the black pinstripe -to me it looks like Han replaced the panel with one that was made from a later (or earlier) model -my old stereo system used to look like that when I'd replace a component and they'd changed the facing from metal to black to gold to....
3. Your weathering technique has really become nuanced -your latest pieces are just gorgeous.

That's all, I don't have anything else to add ;)
 
Sorry if this has been brought up before - this is a huge thread and I may have missed it - is there a plan to add smoke or steam coming out of any of these greeblies?


Sent from my iPhone using Tapatalk
 
I hear you on bouncing around. I've been building a hot rod for my father-in-law for the last 4+ years. It is a ground up project and it seems like it's one step forward and 3 steps back at each turn. I have to focus elsewhere on the car when I hit something that bogs me down. You just bounce back to something you burned out on in the past and it seems like voila! Something you couldn't get past before is done in no time. Had that experience this past weekend.

It helps when you can keep it a hobby and not let it turn into a job. That's when the weight of it drags you down. That's how I came across the DeAgostini Falcon. Just looking for a mental break.

Soldier on, good man. You've got 3-1/2 months left. Yikes!

Hey K,

You totally get it! The last thing we want to do when working on any project is burn out. You're at 4 years on a Hot Rod (I'm very jealous) I'm going past the 5 year mark and I can't believe I'm still going strong. The things we do...

- - - Updated - - -

That's some far-out, over the farm, way past the prairie level of greeblification - and it works!

If it were 1935, you'd be designing for the Ministry and the up-coming main event, lol!!

LOL! Thank you, my friend! :)

- - - Updated - - -

Hi, Sofa! Not sure if you've seen this, but....

http://www.matchstickmarvels.com/in-the-works-2015

WOW! Now that's some serious dedication! AWESOME!
 
Sofa!!! These latest rounds of updates are just amazing! You truly are the GreebleMaster!

One thing that keeps nagging at me is how well you have tucked and routed the wiring for all the parts outside the cockpit. It is the Falcon after all. It seems like it needs a few sections left hanging in disorder with scorch marks from an overload. Maybe a piece that had blown out and then taped together with the scoring and damage visible around the hasty repair. It just seems too "perfect" if you catch my drift. Every time they peek inside a hatch or behind a panel it always reminded me of the chaos caused by someone who repaired on the fly without the foggiest clue what they were doing!!

Hey P,

Thanks so much! Funny you mention that. As you may remember, the half corridor panels I created had part of the panel interior cut away showing wires, piping, etc. I wasn't going to have any exposed panels this time around but Daniel convinced me otherwise. I agree with you. She does look a bit too pristine to be Han's ship - no offense to HS ;)

So, we might get a, exposed panel with some blown out parts and scorch marks as you suggested.
 
Three items:

1. Wonderful update!
2. I like the black pinstripe -to me it looks like Han replaced the panel with one that was made from a later (or earlier) model -my old stereo system used to look like that when I'd replace a component and they'd changed the facing from metal to black to gold to....
3. Your weathering technique has really become nuanced -your latest pieces are just gorgeous.

That's all, I don't have anything else to add ;)

Hey SB,

1. Thanks so much!
2. The more I look at the panel with the black PS the more it grows on me. I'll def keep it for now. :)
3. Thank you again. I always appreciate your feedback / opinions. I didn't hold back on the wash this time around and i really like how it turned out. I'm considering washing all of the greeblies using the same technique to age them all a bit more.

Neither do I ;)

- - - Updated - - -

Sorry if this has been brought up before - this is a huge thread and I may have missed it - is there a plan to add smoke or steam coming out of any of these greeblies?


Sent from my iPhone using Tapatalk

Hi S,

I can't remember if this has ever been discussed or even suggested. HMMMMM... I'm not the electronics expert so I don't know how feasible this is. Daniel knows all about this stuff. I think it's a GREAT idea and DEF something we should explore!

Keep those great ideas coming! But only the great ones. ;)
 
Hi Gang!

Just a quick update... I forgot to mention that all the fans will have a blue back light shining through the cone very similar to the Nav Computer!
20170812_065716_zps4vdzgwyq.jpg


More to Follow!

EDIT: These Foxconn cooling fans with the cone are TOUGH to find! If anybody has any leads PLEASE let me know. :)
 
Last edited:
Amazing work.

In addition to the smoke, I wonder if the electronics wizards could make it so some of the lights glitch out until you trigger a hidden accelerometer by banging on a panel like Han did?

JC47w.gif

Han Solo used [percussive maintenance] to fix a sputtering Millennium Falcon, in The Empire Strikes Back. Given the general state of the ship and Han's personality, it's a minor miracle that he only does this once.
In the Expanded Universe, he does it often enough that he and Lando (the Falcon's previous owner and one of Han's best friends) refer to it as "Emergency Repair Procedure Number One".
- TV Tropes
 
Last edited by a moderator:
Better late than never. The Pacific Scientific sticker from the middle is long gone and mine have a bronze finish to match the rest of the hardware.......but same buckle as yours. If you take one of the male ends, you will find it will fit in one of the side slots or both of the top slots. When you press the lever forward (by my thumb), it will release the two top slots. We are belted in with all 5 points for take off and landing, but after 10,000ft, we hit the lever to release the shoulder straps.

 
Amazing work.

In addition to the smoke, I wonder if the electronics wizards could make it so some of the lights glitch out until you trigger a hidden accelerometer by banging on a panel like Han did?

https://i.stack.imgur.com/JC47w.gif
Han Solo used [percussive maintenance] to fix a sputtering Millennium Falcon, in The Empire Strikes Back. Given the general state of the ship and Han's personality, it's a minor miracle that he only does this once.
In the Expanded Universe, he does it often enough that he and Lando (the Falcon's previous owner and one of Han's best friends) refer to it as "Emergency Repair Procedure Number One".
- TV Tropes

Hey T,

Thank you so much! We're WAY ahead of ya! We've already planned to add a pressure switch in the exact place behind the door pad. We really want to give everybody the full MF experience! :)

- - - Updated - - -

Better late than never. The Pacific Scientific sticker from the middle is long gone and mine have a bronze finish to match the rest of the hardware.......but same buckle as yours. If you take one of the male ends, you will find it will fit in one of the side slots or both of the top slots. When you press the lever forward (by my thumb), it will release the two top slots. We are belted in with all 5 points for take off and landing, but after 10,000ft, we hit the lever to release the shoulder straps.

http://i.imgur.com/EJaVUKXl.jpg

Hey L,

Great photo! I'm assuming that was taken above 10K feet? ;)

Shame on me though. I still have yet to dig the new buckle out from under all the other greeblies I've been collecting. I am really looking forward to seeing them in place on the nav chairs!
 
Last edited by a moderator:
is there a plan to add smoke or steam coming out of any of these greeblies?

I'm not the electronics expert so I don't know how feasible this is.

Just a thought; I've seen the cosplay guys doing some pretty cool stuff with e-cigarette 'smoke' generators. You might want to give these a look for some ideas:

https://www.therpf.com/showthread.php?t=279556

https://www.therpf.com/showthread.php?t=268158&highlight=E-cig+smoke+machine

https://youtu.be/6vnBdmssuEY?t=12m3s


A lot of Ghostbuster fans who make their own proton packs have been using e-cig as a vent mechanism. Really cool stuff. I have one in my pack and it's simply beautiful.

Here's a link to a video example (not me or my pack)

https://www.youtube.com/watch?v=EXkIaewQ1oA
 
Hi Gang,

Its that time again! :)

I didn't get much done on Saturday but I did play catch up and managed to knock out a few things. Interesting bit of info... Since the project started I've documented over 17,000 photos! That's crazy!

Time to finish up a few panels! Went through my many boxes of greeblies and found these to possibly add to the entrance panels
20170819_100902_zpsppz3spbm.jpg


Broke out the pin stripes
20170819_110939_zpsyaebjg8v.jpg


20170819_111811_zpsc2lmppyj.jpg


Added the black outer ring
20170819_111815_zpspk7cbsql.jpg


20170819_111822_zpsf5chqadk.jpg


I picked up this greeblie a few years back and really like the look of it. It was time to find her a home
20170819_115305_zpsjin7cdaa.jpg


I think she'll work right here!
20170819_115309_zpszmk4cjng.jpg


I could finally use the wiring harness
20170819_115335_zpsvl5chyxp.jpg


20170819_115324_zpsqhkwplzj.jpg


20170819_133654_zpstglzkjgi.jpg


Drilled mounting holes
20170819_133658_zpsoan0lyq9.jpg


Added the wire connections
20170819_143938_zpsjbaicxls.jpg


20170819_144028_zpsbpfqokcg.jpg


She's too clean... needs to be weathered
20170819_145225_zpsxdtyzo1l.jpg


20170819_145233_zpsekutczpw.jpg


This is a new one... I've never seen MDF split before! This was part of a bad batch!
20170820_110644_zpspvtdspks.jpg


I found a use for this harness
20170820_111755_zpsr23uueby.jpg


Connected to this guy (this was the bottom of the greeblie I just added)
20170820_111800_zpsjyox81wh.jpg


20170820_111810_zps2wdanrgz.jpg


I then had this idea. Maybe... maybe not. I like the idea of the throttle greeblie because it ties other areas of the ship to the entrance panels
20170820_111827_zps1xamaizw.jpg


This was the bad piece of MDF... BUT we're improving upon this greeblie
20170819_113731_zpsdda5s2rt.jpg


New box, mounting base and some hoses
20170819_130042_zpsc0lhrowt.jpg


Basic layout
20170819_130048_zpsq1gz2qe0.jpg


Details
20170819_130053_zpsyovdzsnz.jpg


Added the throttle greeblie
20170819_130131_zpsotc9adns.jpg


Did more pin striping
20170820_083836_zpssjrwzogo.jpg


20170820_084344_zps63moumqb.jpg


Added a few details
20170820_084832_zpsd2ofvyzc.jpg


20170820_084845_zpscw8qrtop.jpg


More pin striping
20170820_112312_zpsw886r8yu.jpg


I have NO IDEA how the red pin stripe got there! I think it fell when I was trimming a piece
20170820_112321_zpswb1s6efr.jpg


Another painted detail
20170820_113838_zps2vg5tv9b.jpg


Added a black trim piece to the other fan panel
20170820_123035_zpssq7vnvr7.jpg


20170820_123040_zpssdniei6p.jpg


I designed and laser cut this to add to the "above "Fan" panel but held off screwing into position
20170820_124309_zpsaez74b7d.jpg


20170820_124349_zpsepfg45mw.jpg


20170820_124359_zpstmc6r19z.jpg


20170820_124420_zps9iwccfxt.jpg


Painted
20170820_145025_zpsdzmrdsdm.jpg


Designed and cut a new box with more detail(s)
20170820_095833_zps4s2h6brl.jpg


Adding primer and dry fitting
20170820_100006_zpspbzkppy3.jpg


20170820_100012_zpstivsiz7j.jpg


Changed a few of the smaller details
20170820_100654_zpsv0iillym.jpg


20170820_110305_zpsptlqkek4.jpg


Box getting primed and sanded - hard to believe I used to build all these greeblies and panel bases in acrylic. MDF is much cheaper ;)
20170820_110313_zpsgvoxdvf3.jpg


Can't forget the filler
20170820_111840_zpsyvdtdusx.jpg


Sanded and in place
20170820_120505_zpsjhnsnegd.jpg


20170820_120509_zpsdhoesota.jpg


20170820_120516_zps1s4wlf9n.jpg


20170820_120520_zpsveah4uag.jpg


It all in the details
20170820_123718_zpse8ibhdxa.jpg


20170820_123725_zpsb8vm1qmp.jpg


Adding paint and wires
20170820_131732_zpsd4ibm8bk.jpg


20170820_131738_zps1u0js2cb.jpg


Mounted along with a few painted red hoses
20170820_132128_zps5p09qdiw.jpg


20170820_132140_zpspivijl87.jpg


Silver paint
20170820_134756_zpsyamke0cu.jpg


Mounted!
20170820_143202_zpskpm9mcse.jpg


20170820_143213_zps6ix4ndri.jpg


20170820_143218_zpshhi4644n.jpg


20170820_143226_zpsvymbsijg.jpg


20170820_143237_zpsoqbrvfjc.jpg


20170820_143251_zpsarb9gzjo.jpg


20170820_153727_zpsjy6hepve.jpg


After some light weathering. Still needs a few more coats of heavy wash
20170820_153850_zpscuvqhyni.jpg


And this is...
20170820_153901_zpsmwigdgub.jpg


Where we are...
20170820_153833_zpsssam8ehz.jpg


More to Follow! :)
 
Last edited:

Your message may be considered spam for the following reasons:

If you wish to reply despite these issues, check the box below before replying.
Be aware that malicious compliance may result in more severe penalties.
Back
Top