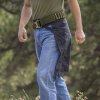
Saw Gerrera Partisan build (WIP)

3DImpact

Sr Member
RPF PREMIUM MEMBER
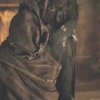
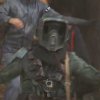
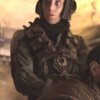
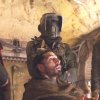
In addition to the two Biker Scout costumes I'm working on, this member of Saw Gerrera's Partisans caught my eye in Rogue One:
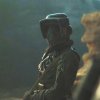
ROGUE_03a_small.jpg

I spotted the Biker Scout helmet immediately and fairly rapidly decided that I needed to build this costume as well.

Being fairly new to this sort of thing I'm posting here to elicit help/comments through my process of trying to identify the various parts of the costume to see how close I can get to replicating this guy. Clearly, he scavenged a lot of stuff from various sources! I'll try to make separate posts for various bits so it doesn't get all mish-mashed together. It's going to take a while so I'm sure this thread will go stagnant for long periods in between short bursts of progress...

Thanks in advance for any help and advice from all of you who are far more adept at this sort of thing than I am!

Dan
 
Last edited:
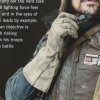
So, first up, let's see what progress I can make on the gloves.

ROGUE_04a_small.jpg

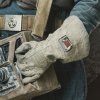
These look to be identical to other gloves used throughout Rogue One by the rebels (in various shades of colors - e.g., black for the pilots):

5D3_2155_01_small.jpg5D3_2157_01_small.jpg5D3_2158_01_small.jpg

A Google search for "leather welding gloves" comes up with a lot of similar-looking gloves, most particularly these:

http://www.superiorglove.com/precision-arc-maximum-dexterity-tig-gloves

Clearly, the gloves used on screen were at least customized from something like this, if not made from scratch outright.

Has anyone located anything better/closer, perhaps for a Rogue One X-Wing pilot build?

Dan
 
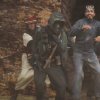
The bandolier of leather pouches is also a fairly prominent feature:

ROGUE_08a_small.jpgROGUE_09a_small.jpgROGUE_10a_small.jpgROGUE_11a_small.jpg

Again, a quick Google search comes up with something like this:

https://www.amazon.com/British-P-19...462426&sr=8-1&keywords=british+1903+bandolier

which apparently a lot of folks are using for their Sandpeople and Jawa builds. The two bandoliers on our Partisan friend have only three pouches on a side and look to be linked at the front and center by the multi-button belt buckle greeblie (that'll be a whole other posting eventually). I can't quite tell what's going on on his back, whether they continue as two separate wide leather straps to his belt line or whether they join up to a single strap down his back...

Dan
 
His blaster is some sort of DH-17 variant, identical to Bistan's minus the tactical light attached near the muzzle:

5D3_2160_small.jpgBistan-SW_Card_Trader.jpg

I'm probably going to have to model and 3D print this one, unless someone knows of a source for one...

Dan
 
I'm going to assume that the kama he is wearing is the same as that for the shoretrooper squad leaders. His pants/trousers may be the same as the shoretroopers' as well, but in the one scene showing them most clearly (when he is running out of the cave past Bodhi during the destruction of Jedha) I don't much evidence of the fly nor much of the baggy sides of the Jodhpur-style trousers worn by the shoretroopers. Also, during Bodhi's meeting with Saw where he is seen behind Bodhi there appears to be a bit of green tint to the pants - not as green as his top, but more green than I would expect for shoretrooper trousers.

Shoretrooper_Squad_Leader_small.jpg

The detective work continues...

Dan
 
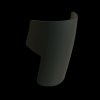
One of the items I'm going to have to model out and 3D print is the shoulder bell on his right shoulder/sleeve. I did the modeling this evening, now it's time to print...

shoulder_bell_01comp.jpgshoulder_bell_02.JPGshoulder_bell_03.JPG

Dan
 
The two bandoliers on our Partisan friend have only three pouches on a side and look to be linked at the front and center by the multi-button belt buckle greeblie (that'll be a whole other posting eventually).

Until someone discovers a version of this on display somewhere blurry frame grabs are going to have to suffice for reference on this thing. Here's 3D modeled version 1.0 along with a couple reference images for comparison:

buckle_comp_01.jpg

I'm going to hold off on actually printing this for a bit, just in case some better reference shows up and to allow myself some time to stare at it and decide if I want to make any modifications.

Dan
 
One of the items I'm going to have to model out and 3D print is the shoulder bell on his right shoulder/sleeve. I did the modeling this evening, now it's time to print...

View attachment 742978View attachment 742979View attachment 742980


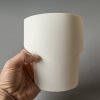
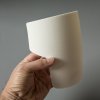
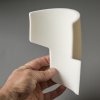
And, here is the physical item off the 3D printer:

5D3_2265_small.jpg5D3_2266_small.jpg5D3_2267_small.jpg5D3_2268_small.jpg

It came out great and fits my shoulder/upper arm perfectly. I was thinking that I would just use the 3D print for the costume build, but now I'm wondering if I ought to make a cast copy. It'd be a whole new skill to learn, but I can see that it'd come in handy...

Dan
 
Last edited:
His blaster is some sort of DH-17 variant, identical to Bistan's minus the tactical light attached near the muzzle:

View attachment 742182View attachment 742183

I'm probably going to have to model and 3D print this one, unless someone knows of a source for one...

So, I've been modeling away the last several days with the intention of being able to 3D print most of this blaster. I stared at the reference images for a few days trying to scope out a strategy for the physical assembly - do I 3D print the entire thing or just component parts to be added to as many other found parts as I can muster? In the end I decided on a hybrid of these two end members - I'll use a central main tube (the standard 38.1mm diameter PVC for Sterling-based blasters), a cast Sterling end cap, and some PVC for the smaller tube over the muzzle and then 3d print three main sections to attach to the central main tube (the grip and receiver, the rail and scope, and the muzzle).

blaster_00_small.jpg5D3_2160_small.jpgblaster_comp_01.jpgblaster_comp_02.jpg

It may not be 100% accurate, but most of the details are there and the relative dimensions are about right (I used the plan view here as a template backdrop image within my modeling app (modo). Now I just hope the meshes I've modeled out will actually print...

Dan
 
The first of the three 3D-printed subassemblies for the blaster arrived today from Shapeways. I wanted to wait until the first subassembly came in to double check that my scaling and real-world dimensions were getting handed off correctly. Everything is a PRECISE match to the planned size - perfect fit to the other 'found' parts that it'll attach to. So, it's off to print for the other two subassemblies and I'll be able to start assembly in about two weeks.

It's amazingly fun to see something go from photo reference to 3D model to physical part...

blaster_rail_progress.jpg

Dan
 
Will be keeping a close eye on this build! Great work so far.
That scope, looks like it could possibly be a crossbow scope? Cheers
 
Will be keeping a close eye on this build! Great work so far.
That scope, looks like it could possibly be a crossbow scope? Cheers

Thanks!

Yes, that scope has a very close ressemblance to the Trijicon family of ACOG scopes. I wouldn't be surprised at all if there is some model of off-the-shelf scope out there on the market somewhere that is the exact found part they used to make this blaster, but I also wouldn't be surprised if it was just 3D modeled from scratch.

Dan
 
The two remaining 3D-printed sub-assemblies have arrived from Shapeways. To check that everything fits together properly and because I was just impatient to see how it's all going to look I did a 'soft' assembly, lightly tacking everything together in place with tape. Indeed, all the pieces fit together precisely and I've verified that the assembly plan I had in mind is going to work just fine.

Not wanting to 3D print every component of this, just to save a bit of expense and to try to add a bit of structural integrity to the whole assembly, I had a few 'found' parts to throw into the mix. Central to the whole assembly is the 38.1-mm (1-1/2 inch) central tube onto which the cast Sterling end cap will fit (and set my absolute scale for the whole thing). I built the grip and receiver sub-assembly to slide over that. For that central tube I happened to find a plastic kitchen sink tailpiece insert at the local hardware store that turned out to be the exact right size. It even had a bit of a flange at one end that was just right to merge into the muzzle assembly. To add some longitudinal strength to the whole assembly I'm going to have a 1/2-inch aluminum tube run the length of the interior, from the muzzle to the end cap. The tube is very stiff and I'm hoping will help prevent the receiver-muzzle bond from flexing and cracking over time.

5D3_2293_small.jpg5D3_2290_small.jpg5D3_2289_small.jpg

Here it is all 'soft' assembled and in comparison with its standard DH-17 cousin:

5D3_2296_small.jpg5D3_2299_small.jpg

Again, what a fun process to model this out, print it, and turn a piece of reference image into a physical build!

Next up I will start coating the 3D-printed parts with filler primer to smooth out a bit of the printing texture. Then it'll be on to final 'hard' assembly, painting, and weathering...

Dan
 
Having a cold over the holiday weekend had the benefit that I wasn't up in the mountains hiking like I would normally have been - I stayed inside and worked on the blaster!

Here are more progress pics stepping through the final hard assembly and painting. I tried to think things through carefully before moving on to any one step so I wouldn't screw anything up - things like strategic painting so save masking issues later. The one item I had to fix in that regard is shown in the second image here and it's a remnant from my original modeling - I should have built into the attachment end of the muzzle a small pass-through for the central aluminum tube. Without it I discovered during the soft assembly that there probably wouldn't be enough structural stability against bending failure at the attach point. So I patched that prior to the hard assembly by packing that area with some JB PlasticWeld. I left a few final little details like some screws for the physical assembly - I didn't want to model those in at the beginning as I felt those small-scale details would get lost in the printing process and their addition at the end as actual screws would make the whole thing 'pop'. I think that ended up being so.

5D3_3831_small.jpg5D3_3828_small.jpg5D3_3837_small.jpg5D3_3838_small.jpg5D3_3842_small.jpg5D3_3845_small.jpg5D3_3847_small.jpg5D3_3869_small.jpg5D3_3878_small.jpg

Here's a pic with the standard DH-17 for reference.

5D3_3882_small.jpg

The only step left is to weather it. I'll go light on that (the reference imagery doesn't show it as being too terribly beat up), mostly adding some grease grunge to the recesses of the silver bits and adding a little bit of metallic edge wear and scratches to the black areas. I'll also add the red lens into the eye side of the scope and screw in the muzzle attach point for the sling...

All I can say is - woo hoo, that was fun! It's so satisfying to go from nothing but a reference photo to a final model from complete scratch all by myself with no one else's kit parts. I think that's a first for me here on the RPF, so I guess this is my graduation posting. :)

I do feel as though there's something missing though... Oh yeah - there's that whole costume build thing! This was just the "build within the build"...

Dan
 
Weathered up the blaster:

bistan_blaster_compare_small.jpg

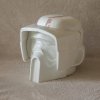
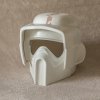
And, now that that's out of the way, I'm finally able to get back to other parts of the costume build and make some progress. I purchased one of the RS Prop Masters Biker Scout helmet kits with the aim of having a good, production copy version of this helmet. I'm going to buy another one to build up as a proper Biker Scout now that I sort of know what I'm doing with it (this is my first helmet kit build up).

5D3_3907_small.jpg5D3_3909_small.jpg5D3_3911_small.jpg5D3_3914_small.jpg

I still have to cut out the ear holes and this is just a 'soft' assembly to fit check everything. Time to get on to the hard assembly...

Dan
 
From Post #5 above I have the kama, commissioned from a fellow TB over on bikerscout.net:

5D3_3920_small.jpg7D2_6508_small.jpg

I'm wearing it a bit high here for the fit check; I think when I wear it lowered down about 2 inches or so the bottom corners will fall about where they should relative to by knees/calves.

I've also finished his ammo belt. There aren't any really clear views of this particular character's belt, but there are just enough views to see that it's the same as those worn by other Partisans and by many of the rebel troops and pilots. Here is General Merrick's as seen in The Ultimate Visual Guide:

5D3_3935_small.jpg

The belt is a British military belt:

http://www.nicks-kit.co.uk/plce-roll-pin-belt---olive-green-1960-p.asp

The belt as worn by the various Rogue One characters is 'inside out' compared to its actual intended wear (I think because the inside is more visually 'interesting' than the outside) and that coupled with my waist size required me to modify/trim some length off the ends that loop through the buckle. The "compressed eleton blaster gas ampules" (according to the Ultimate Guide :) ) took me a while to figure out, but it was clear that they were some sort of hose connectors. But various views besides the detail here from General Merrick's belt suggested that they were not simply symmetric hose connectors. I eventually settled on a combination quick disconnect/hose barb:

http://hosewarehouse.com/DCP2144B-D...MIkcqBnJKy1QIVWAOGCh2tag2jEAkYAiABEgJF6_D_BwE

I'll probably weather the brass color down with a bit of a silvery patina. I then just had to add the loops to hold them onto the belt, made from 1-inch nylon belting. The olive drab belting I purchased was a bit too deep and dark a green for my taste so I bleached the color back a bit. Also, the ampules are worn in various ways by various characters, sometimes with the loops running low on the belt as in Merrick's case, sometimes inverted with the loops running high. As best I can tell in the fleeting views for this character's belt they are inverted with loops high, so that's what I went with.

5D3_3933_small.jpg5D3_3923_small.jpg5D3_3925_small.jpg5D3_3928_small.jpg7D2_6574_small.jpg

I'll have to weather all this, of course, but I'm going to wait until I have everything put together so the style and level of weathering is consistent across all the various elements.

Dan
 
Last edited:
You have just become my hero sir! I would also like to make this costume and your detective work will make that much easier. Thank you so much. I am very excited to watch this progress.
 
Thanks much! I'll be posting some new progress in about two weeks and will certainly post all the details I can. That's the point and the fun of these forums - sharing the fun little details we all stumble across with the hopes that it might be of help and interest to someone else in return for all the help we receive...

Dan
ice started to research this as well, the ammo belts look like the same as another person I saw while getting screen grabs
901c2d8f5bfa6723c8513b9fc9693522.jpg
5e79eb8a8ce97cc97703107f4826f655.jpg
cee9576eeb24fe38dca2d55d4e308128.jpg


Sent from my SM-G955F using Tapatalk
 

Your message may be considered spam for the following reasons:
If you wish to reply despite these issues, check the box below before replying.
Be aware that malicious compliance may result in more severe penalties.
Back
Top